When you click on links to various merchants on this site and make a purchase, this can result in this site earning a commission. Affiliate programs and affiliations include, but are not limited to, the eBay Partner Network.
Have more miles on it, with some tight parking lot turns on purpose, running the pump and system at peak pressure. So far so good. See photos below.
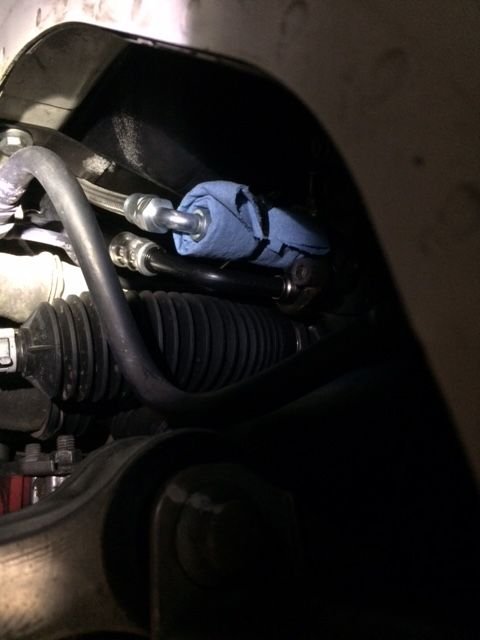
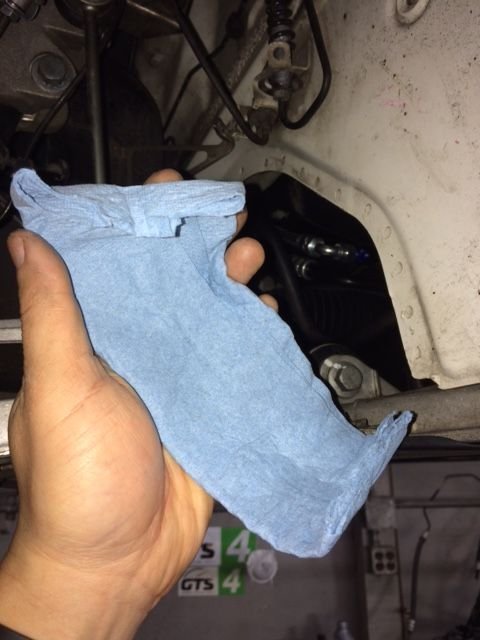
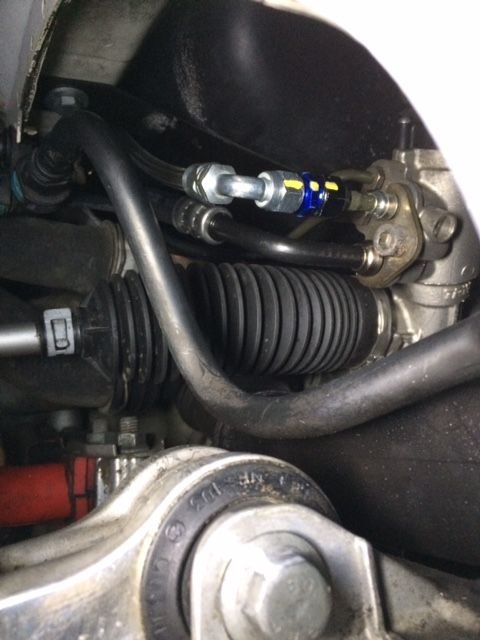
From my previous post, I had to tighten the factory Motorsport compression fitting a few times to stop high pressure steering fluid leak. I feel that this is the system's weakest link so I wrap a paper towel around the fitting to monitor for any fluid spots.
I was anxious to remove the paper towel and was relieved that it was completely dry.
My paint mark of proud! Yes!
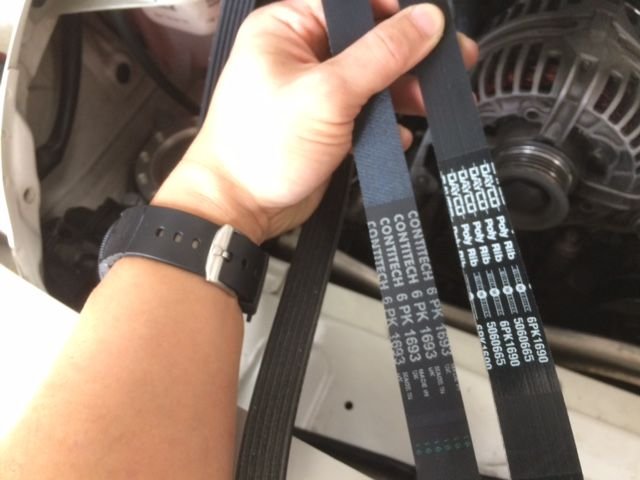
Gonna try another belt, an "advertised 3mm" shorter belt. That's the thing about these projects, just have to keep pushing the limit for improvement.
To celebrate our 3 years together and 10 years of age, I spent my tax refund and then some(a lot more some) on the following goodies. Sorry just snippet for now. Been completely up to my eye ***** busy with work. More later. PS- I gladly spend all my disposable income back in the industry supported by my motorsports brothers and sister in keeping the circle of speed going!
To celebrate our 3 years together and 10 years of age, I spent my tax refund and then some(a lot more some) on the following goodies. Sorry just snippet for now. Been completely up to my eye ***** busy with work. More later. PS- I gladly spend all my disposable income back in the industry supported by my motorsports brothers and sister in keeping the circle of speed going!
You've got my attention with the Motec really looking forward to the install documentary - your write ups are too good to simple call updates!
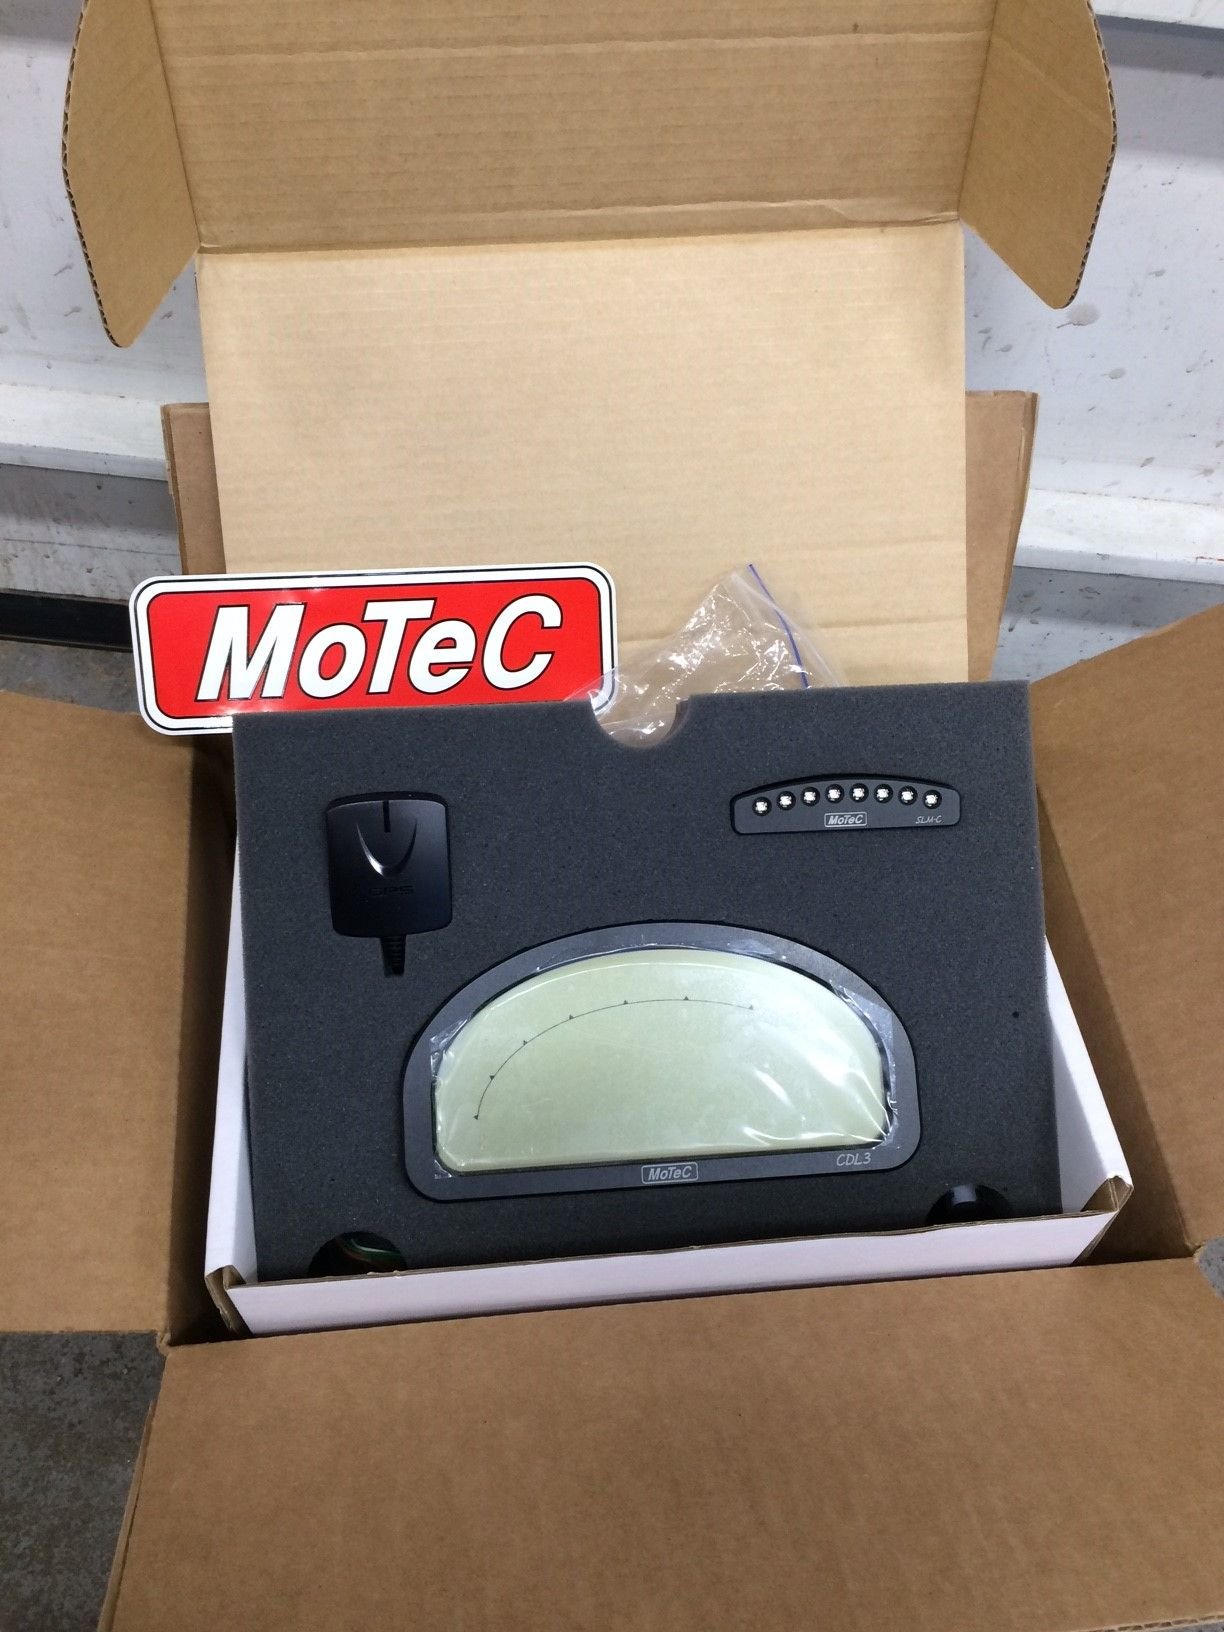
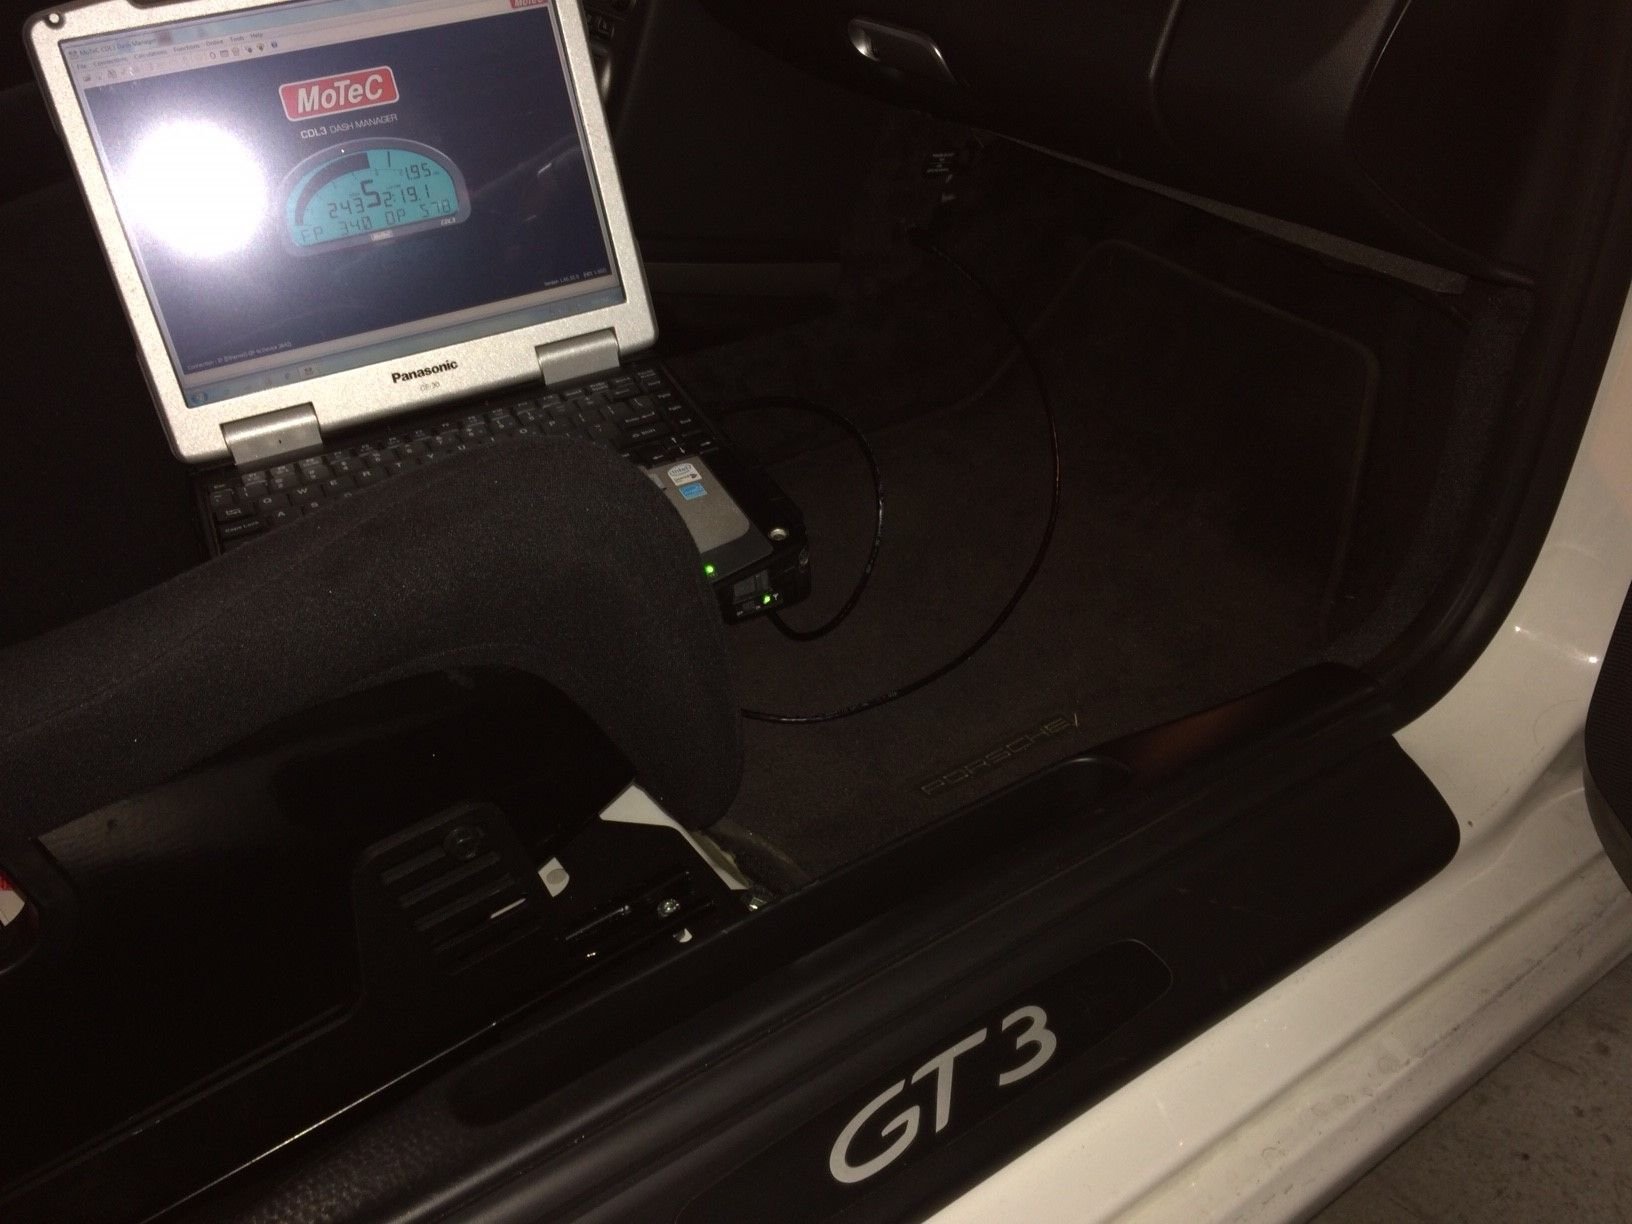
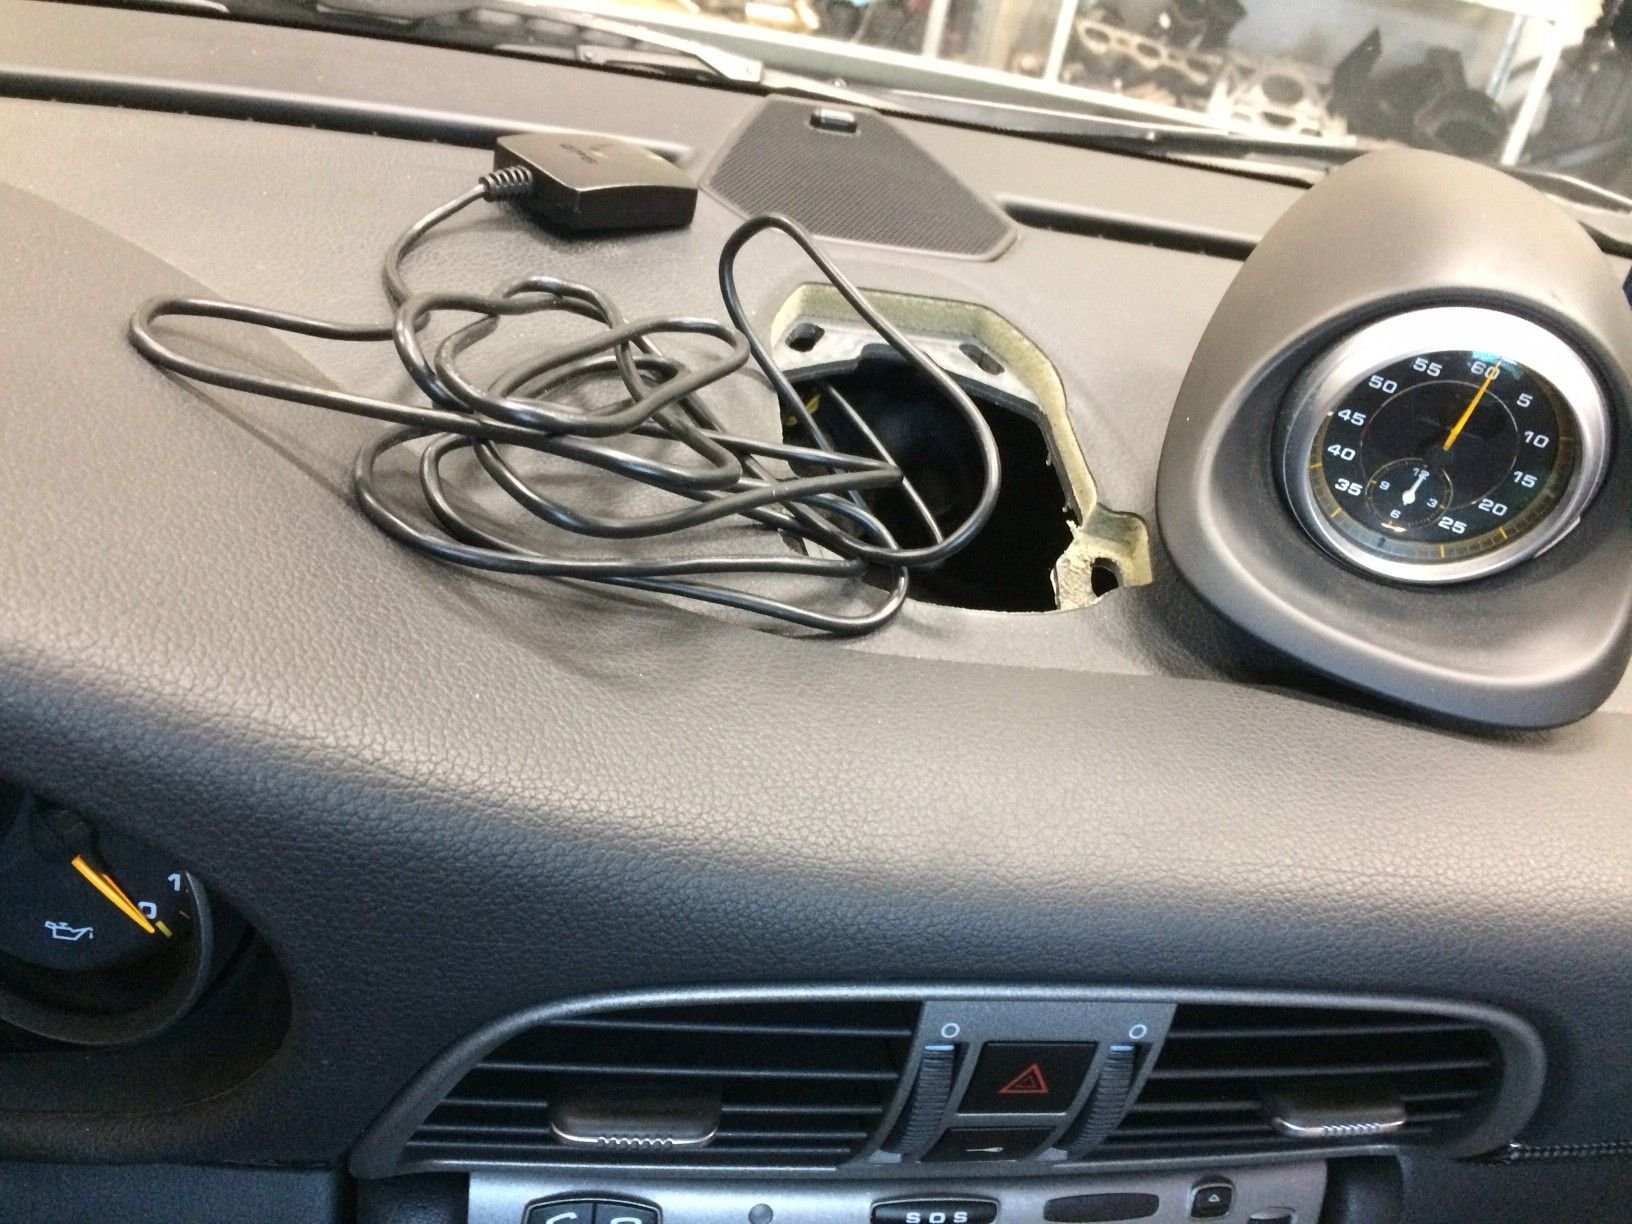
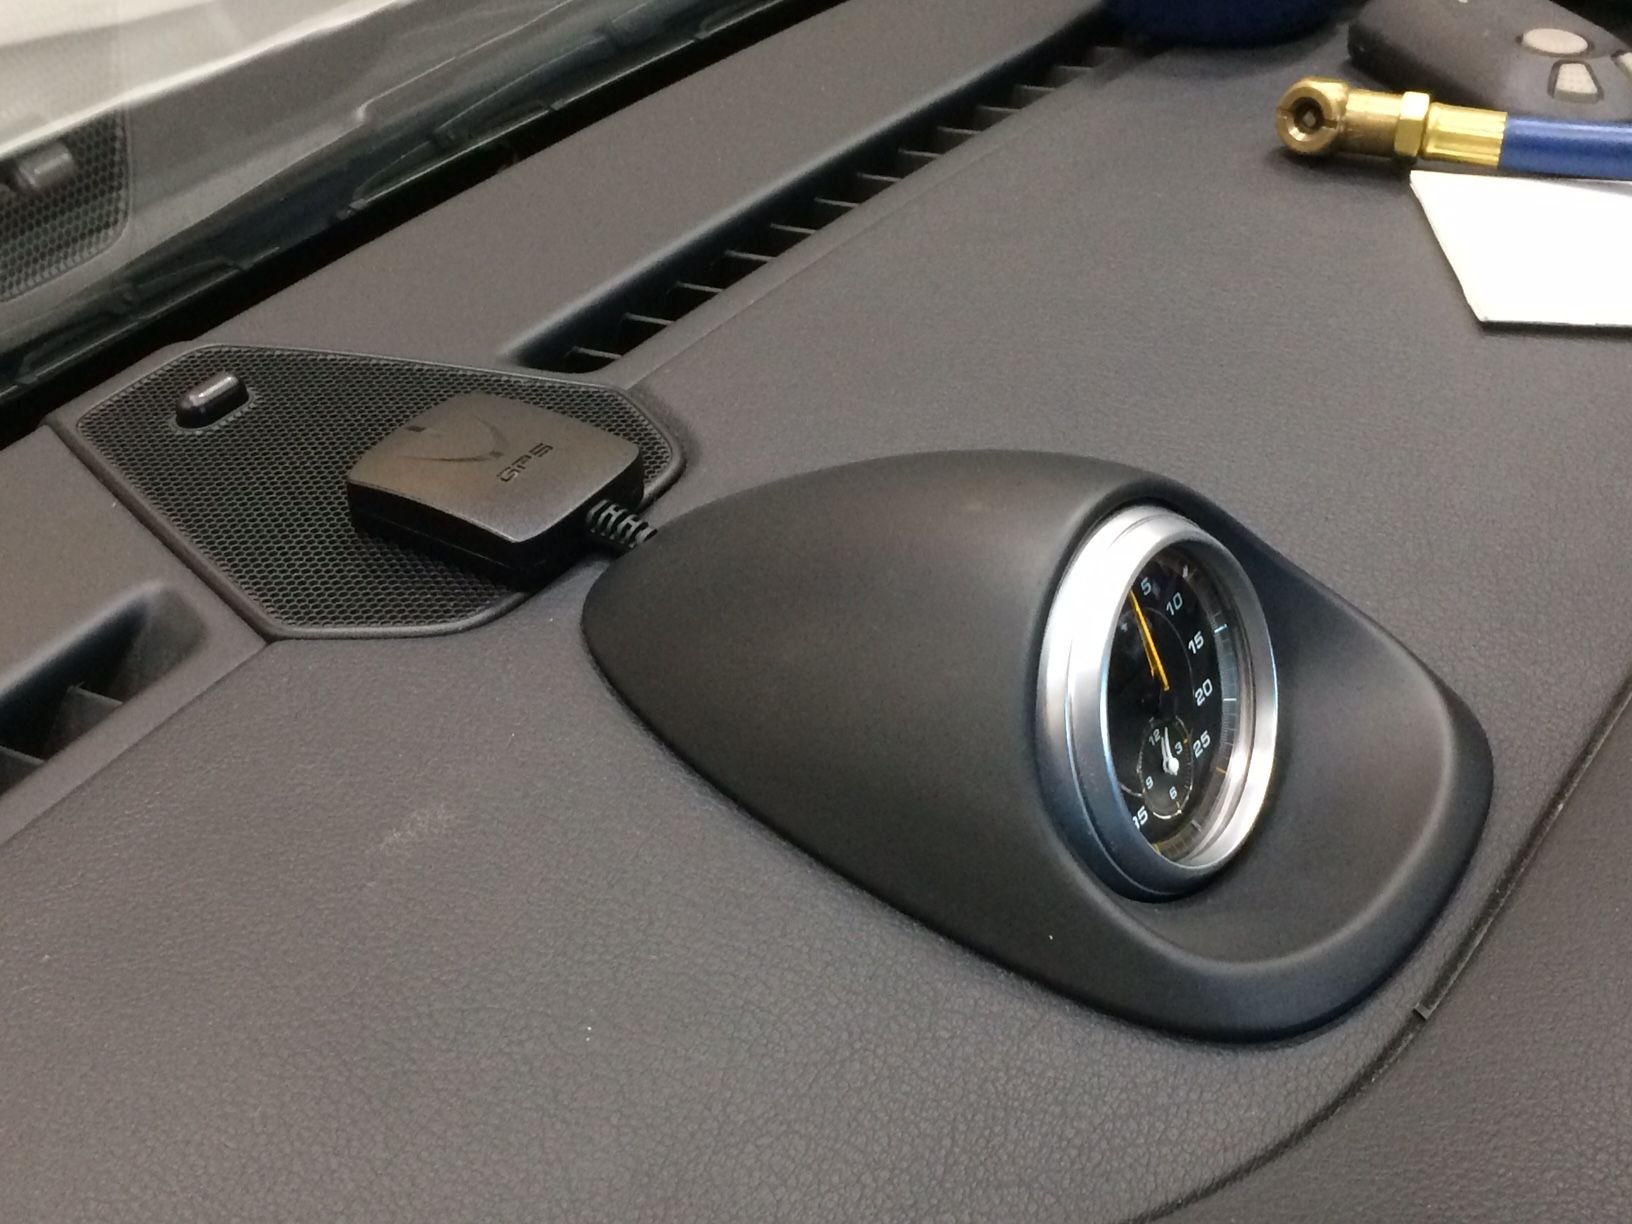
Of the three items that my car is getting for its 10th birthday, I believe the Motec kit to be the most time consuming item to install(that is for the level of installation that I want) so I started with Motec first. Actually, for those who are okay with the suction cup mount to the windshield, using cigarette lighter adapter for power and OBD port for basic ECU date, the Motec CDL3 Logging Kit can be installed in just a few minutes. Here's a youtube video by Motec demonstrating the simplicity of the "easy" method-
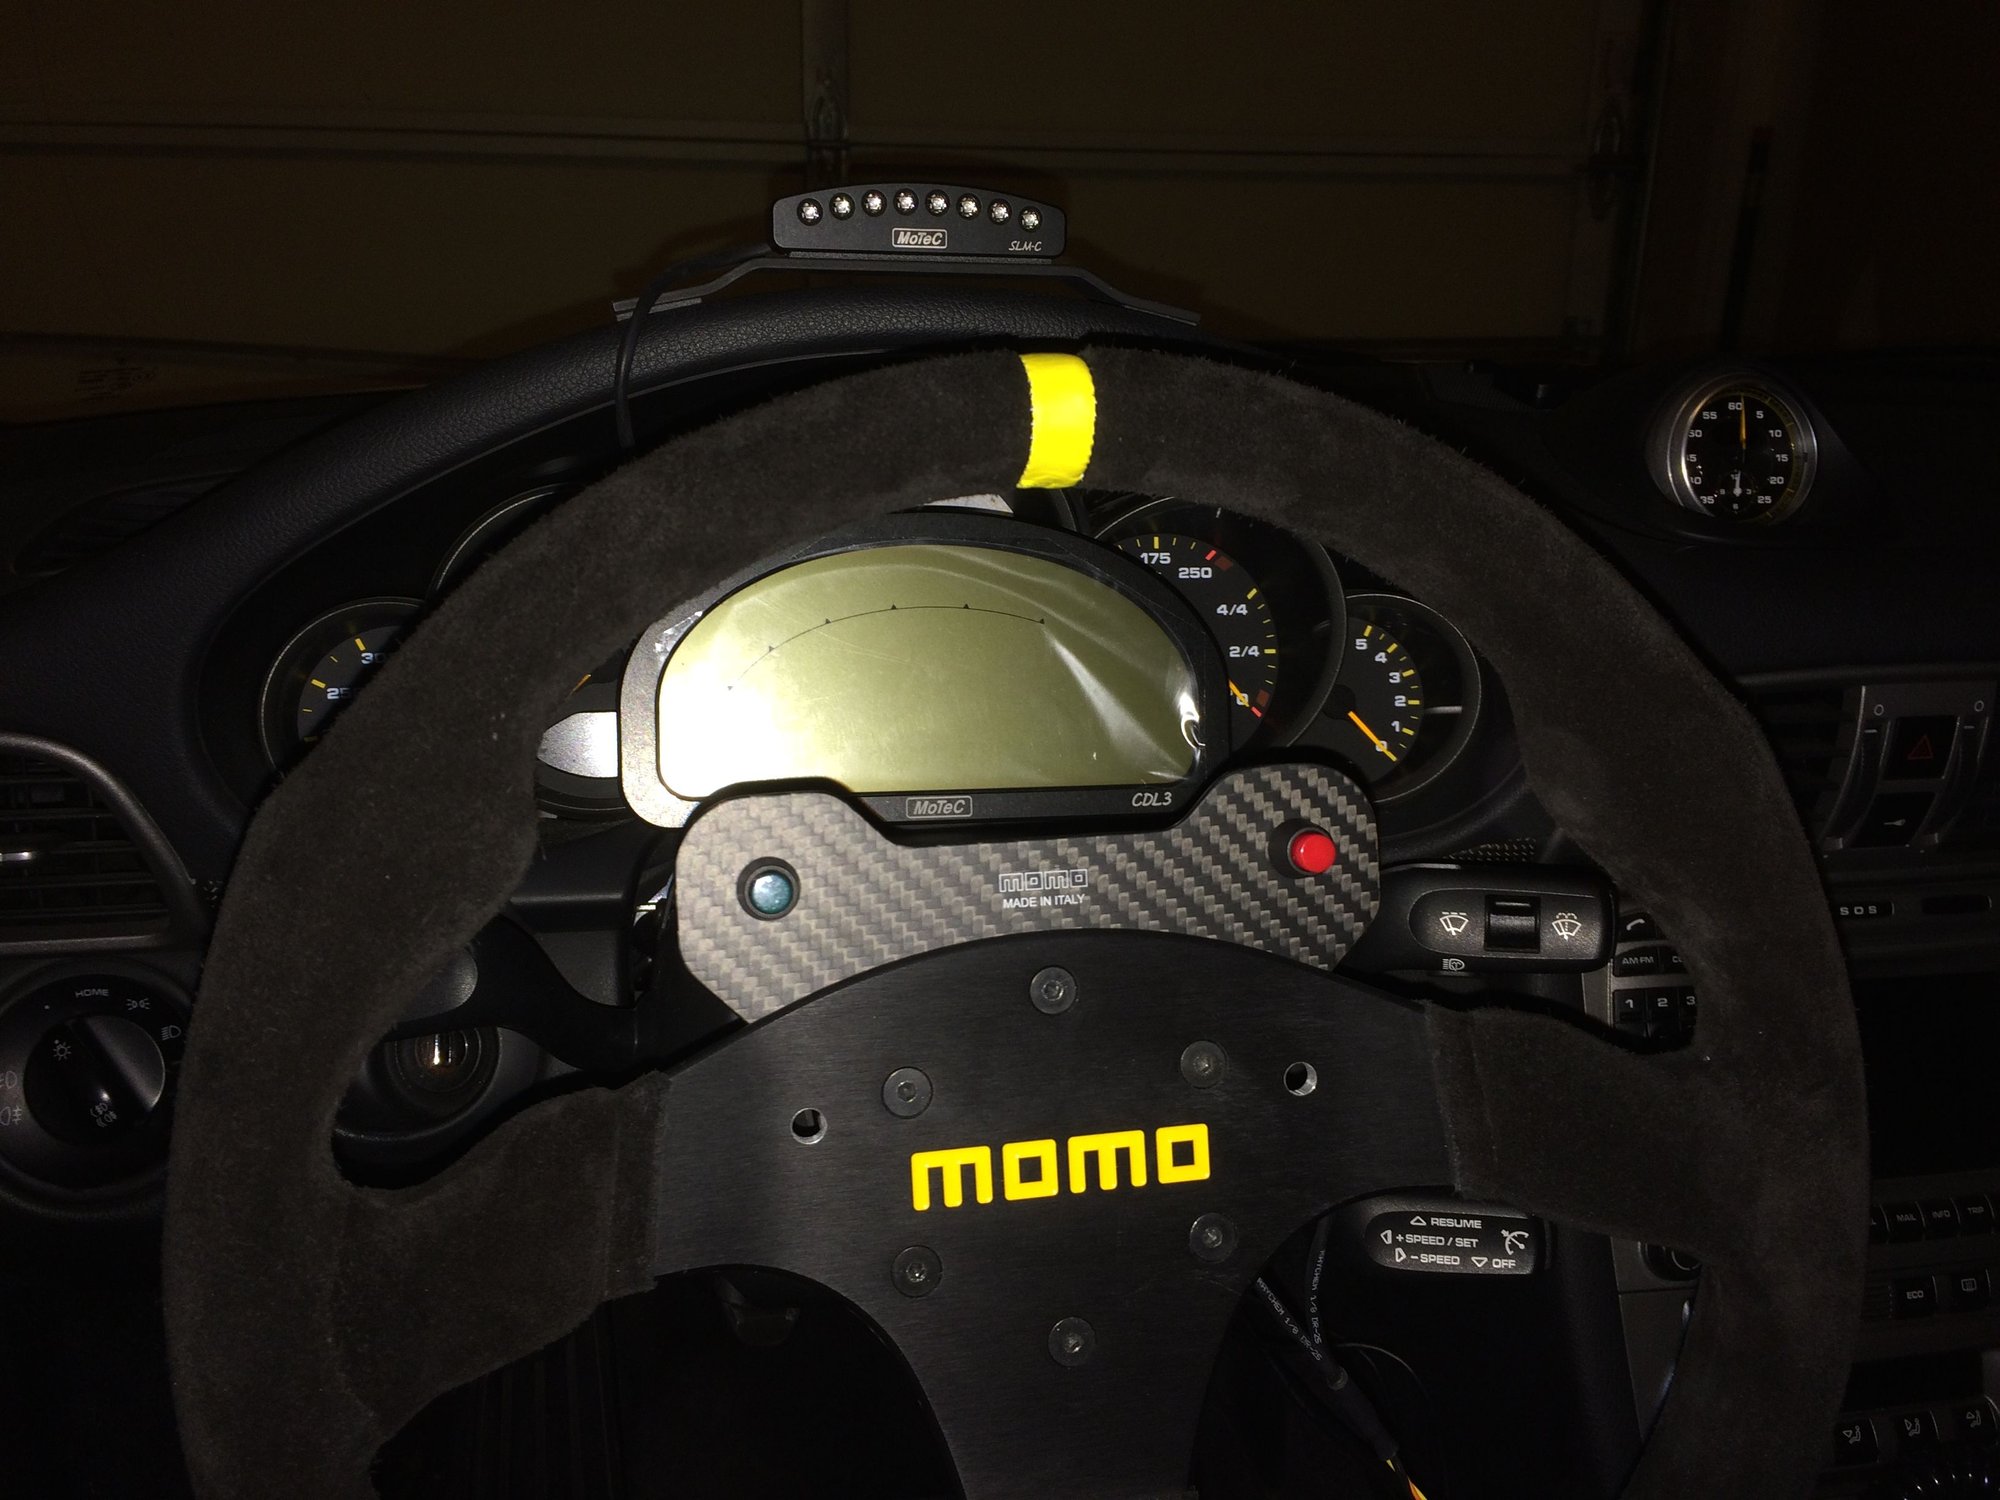
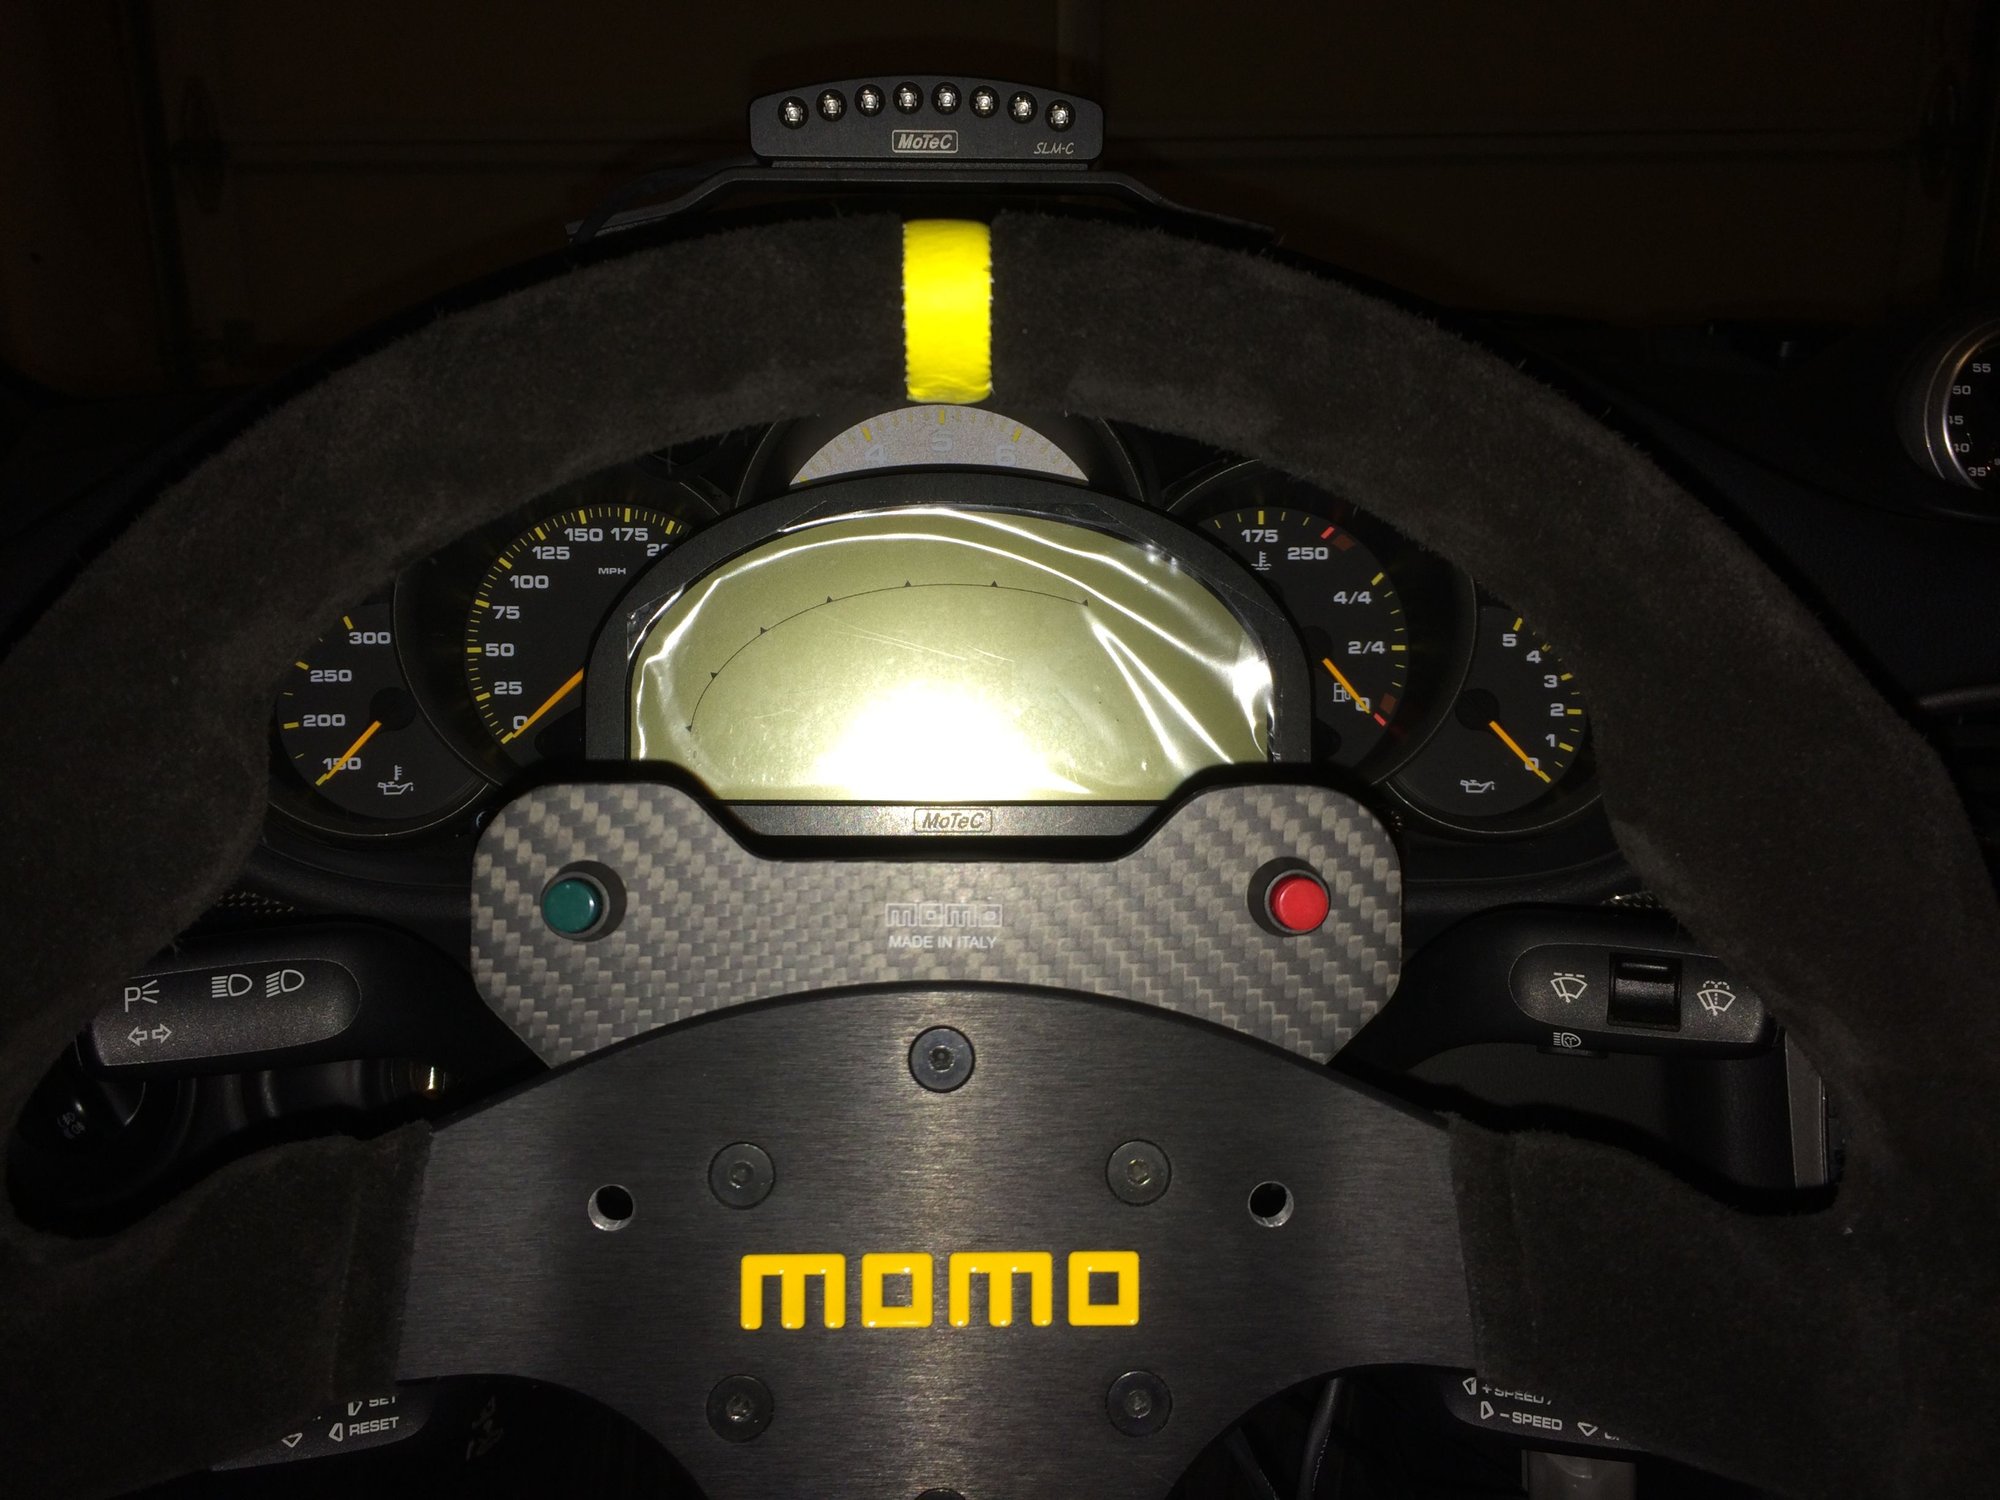
For me though, its never the easy method. I choose the more permanent way, the way how the factory race cars are done with ECU data from CAN-Bus, solid power and ground, and of course a nice mounting bracket. Before we get started with the photos, I just wanted to say that I've been using the AIM Solo DL suction cup mounted to the windshield for 2 years to display lap times and predictive lap times, it worked perfectly. The reason for upgrading to the Motec CDL3, well, is to have more Cup car elements to my street car. In this life time I will likely not own a Cup car so I do what I can to add elements such as the dash, electric power steering, aero, and lightweight flywheel that sounds like a box of rocks to remind me that I'm driving something very special.
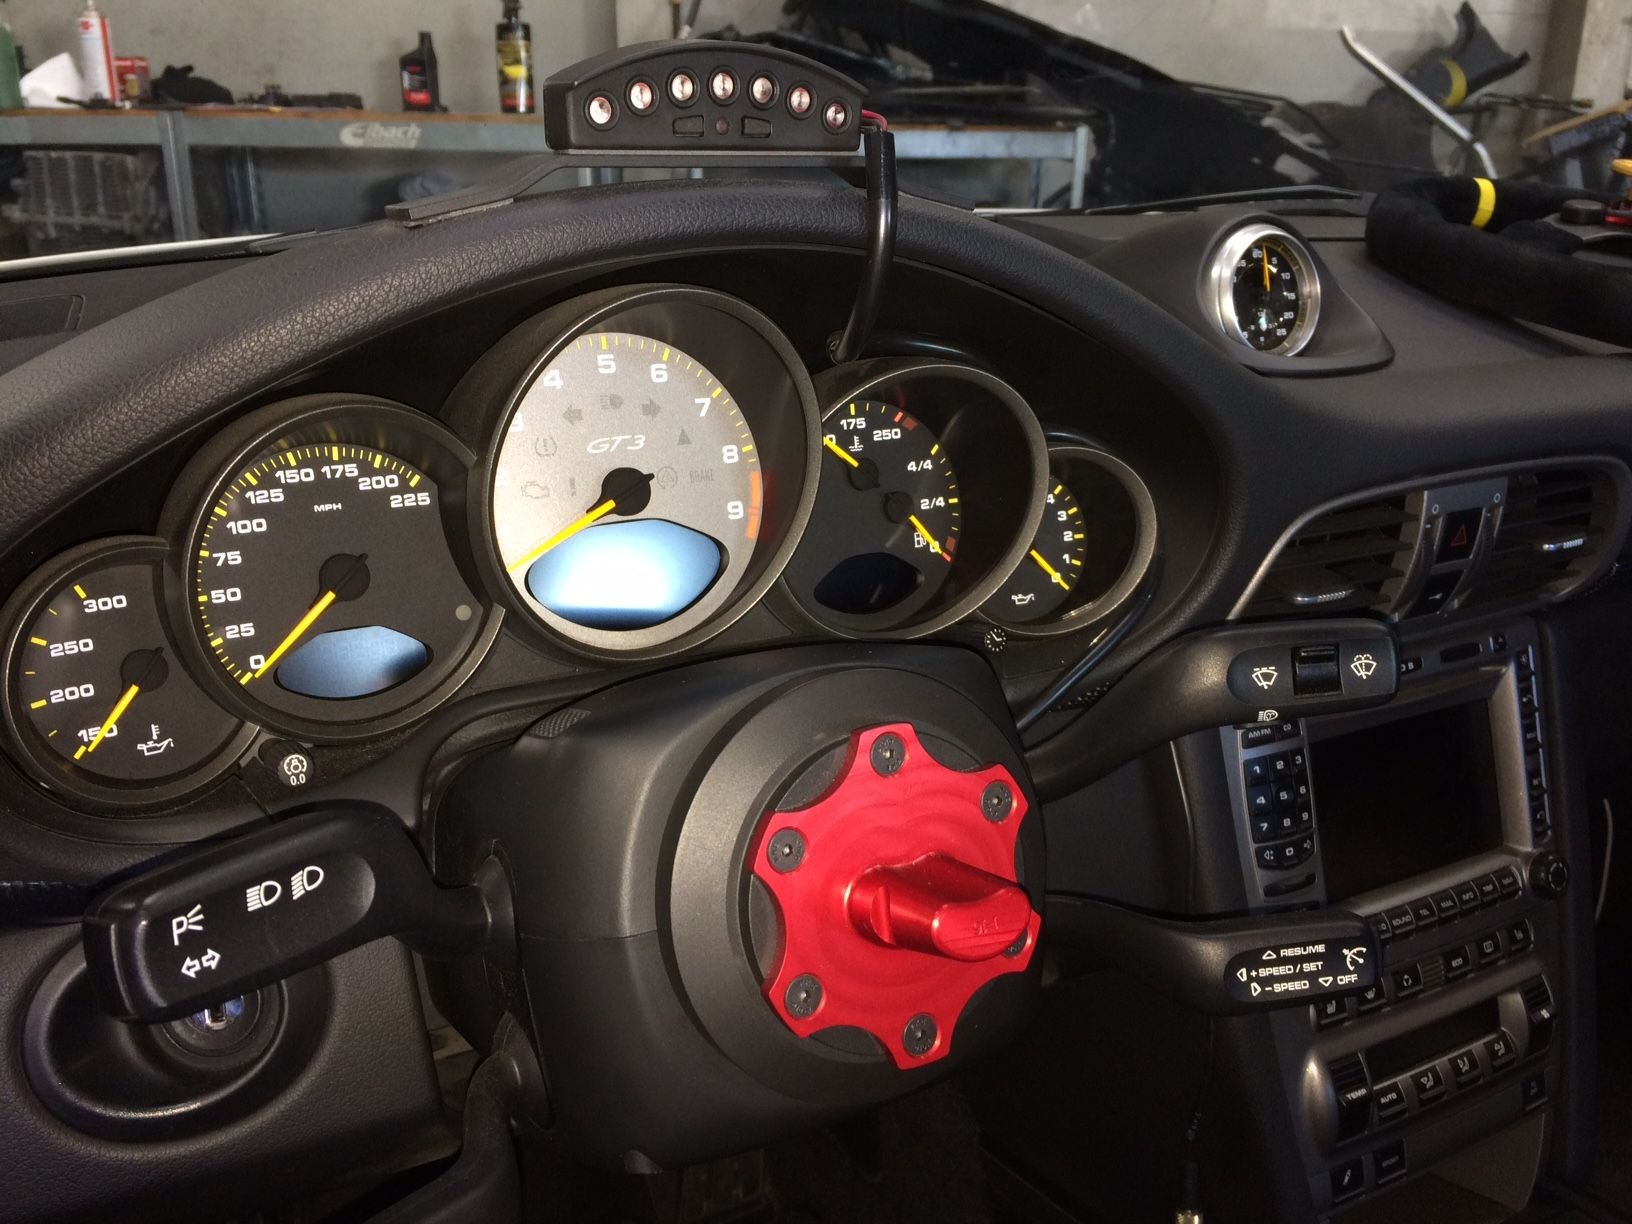
Here's the before photos, not too shabby...
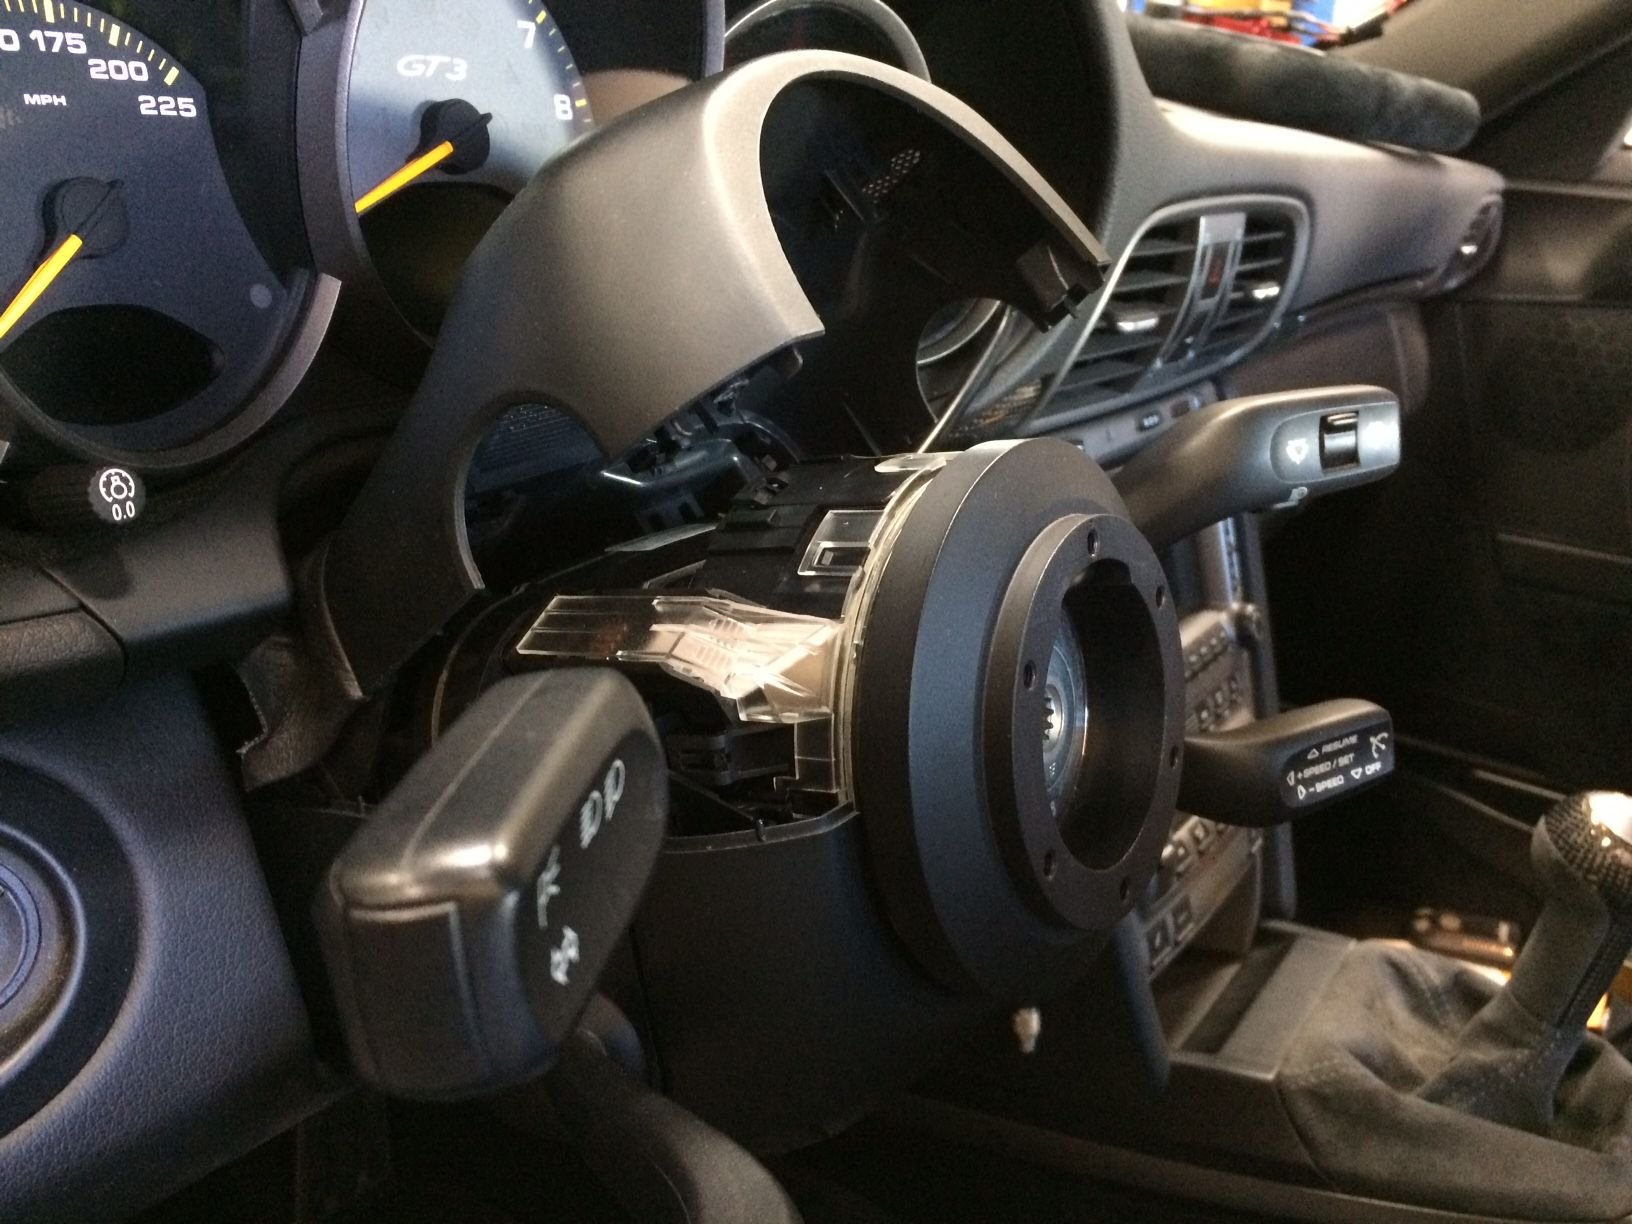
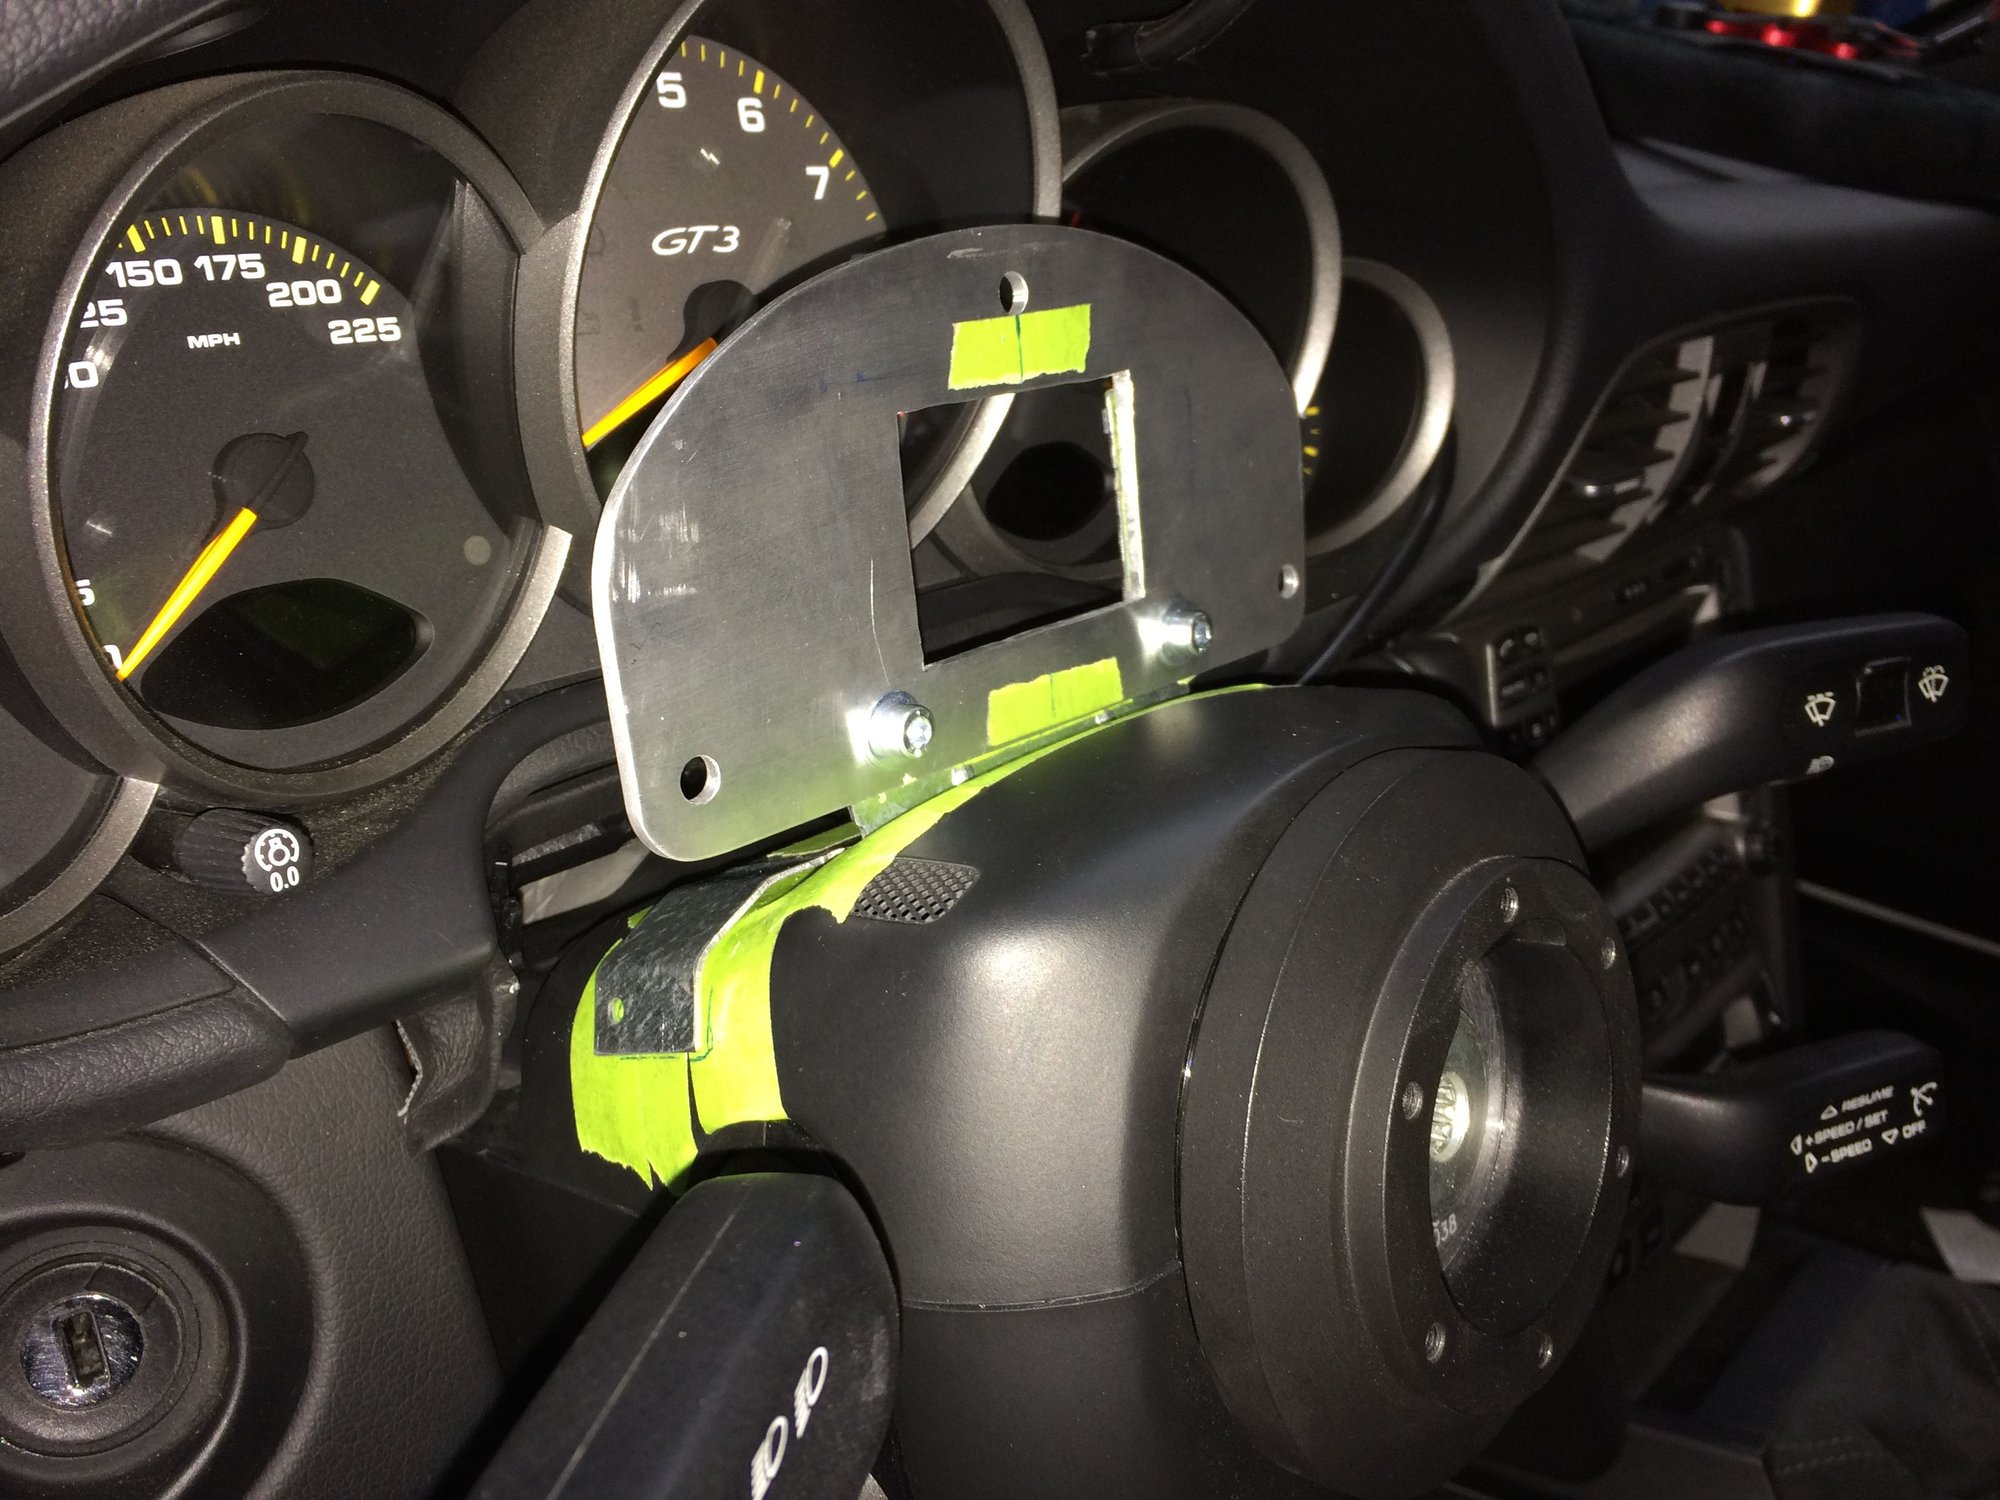
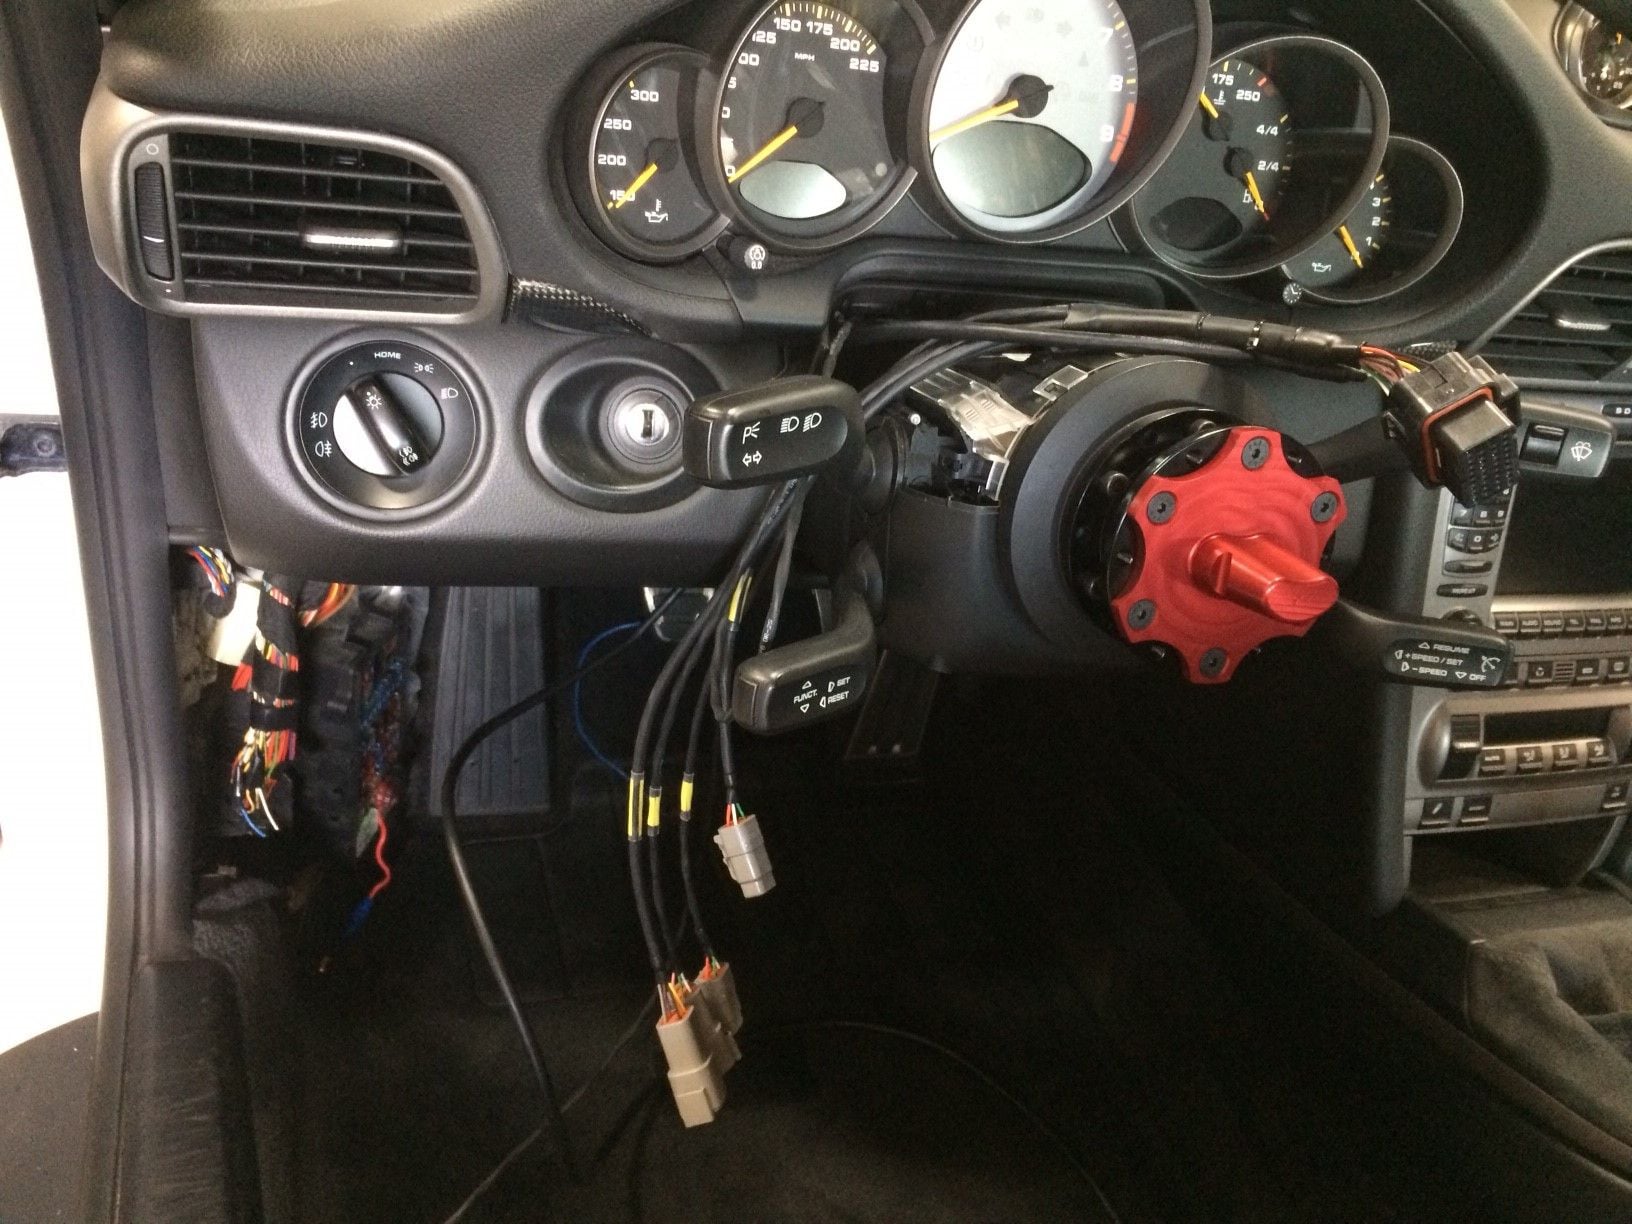
Removing the upper plastic steering column cover to expose to steering angle sensor assembly.
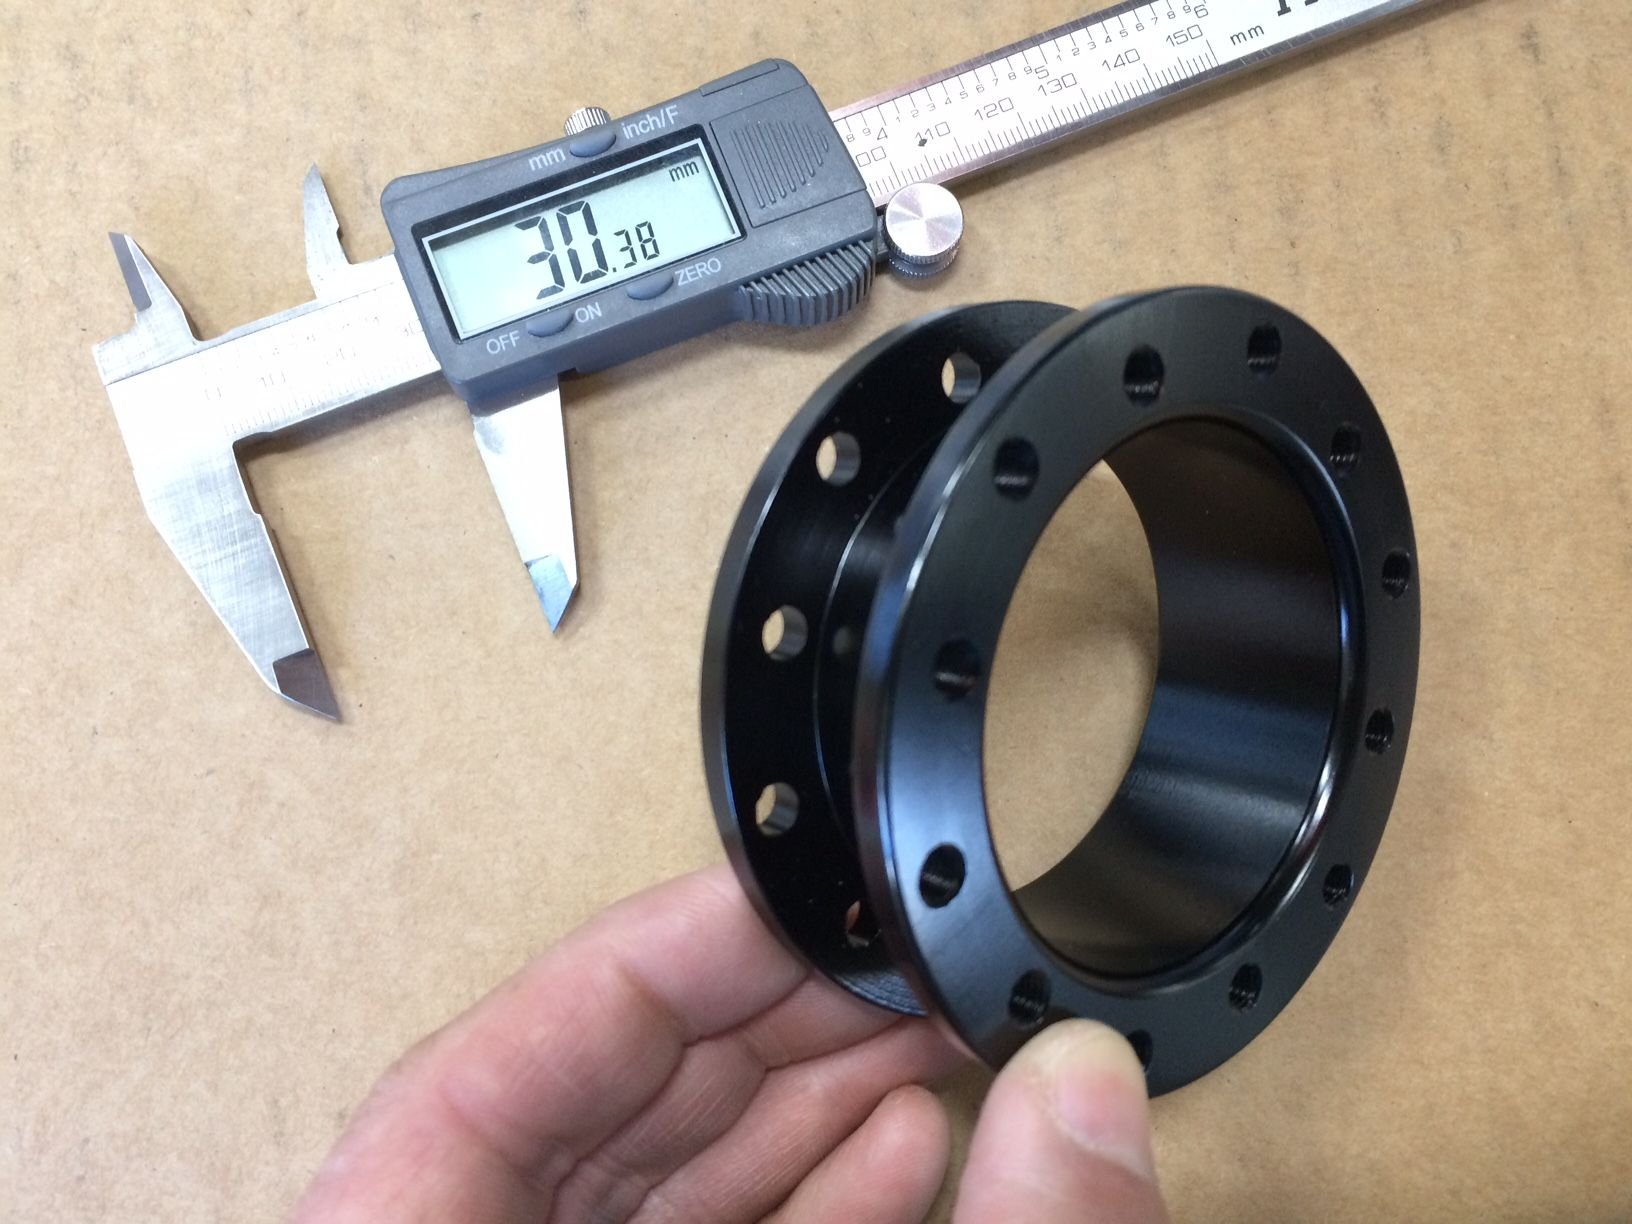
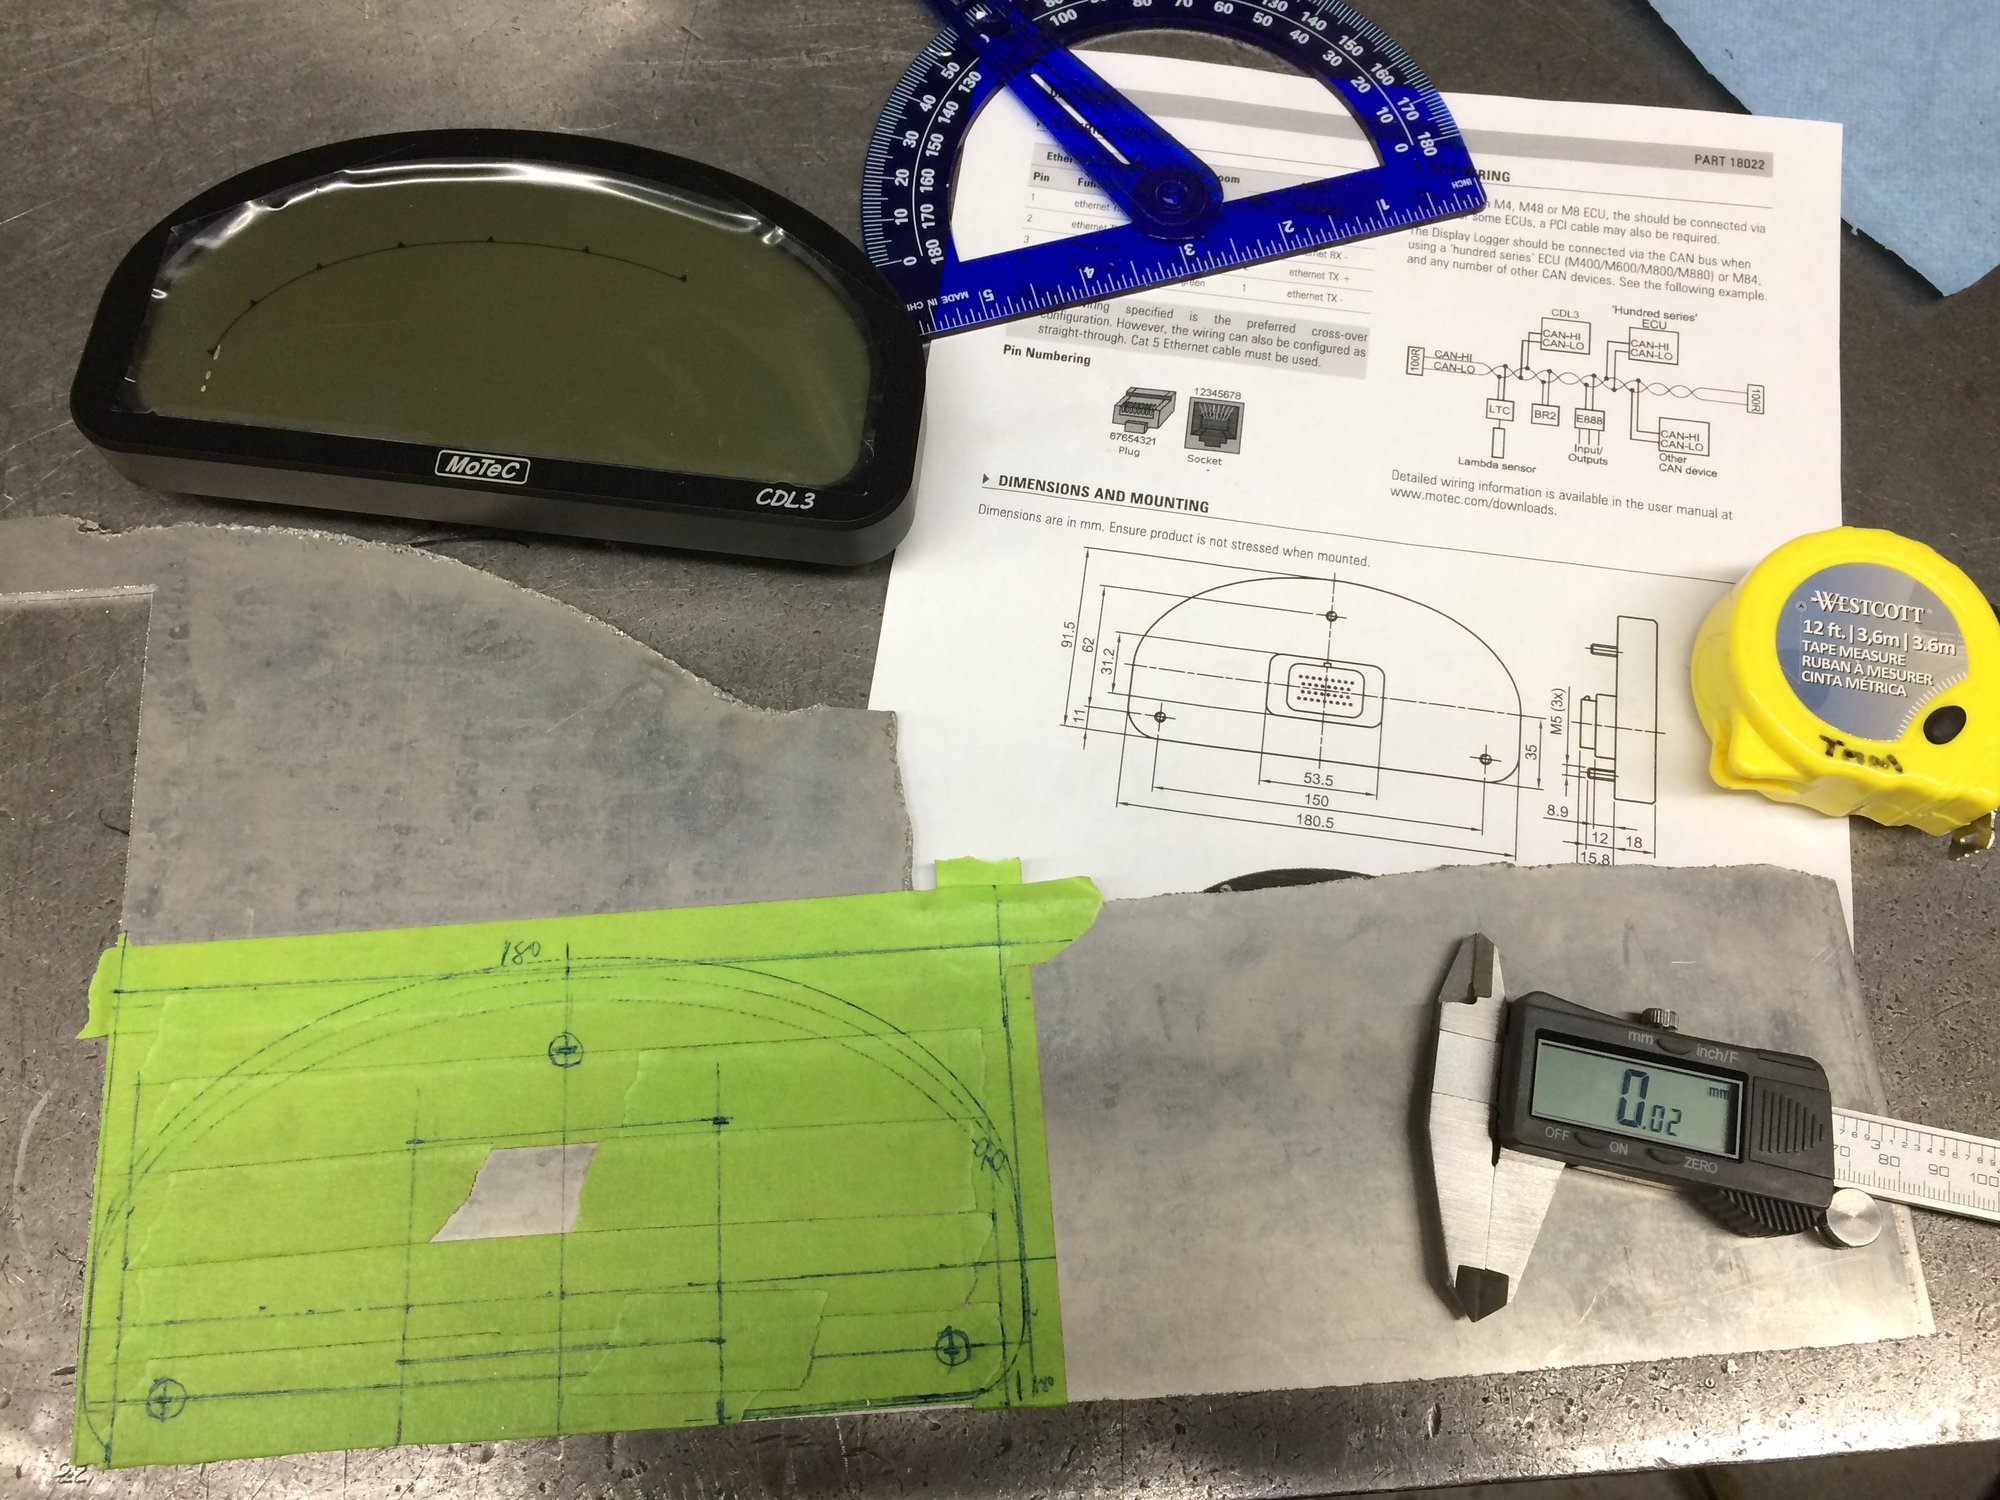
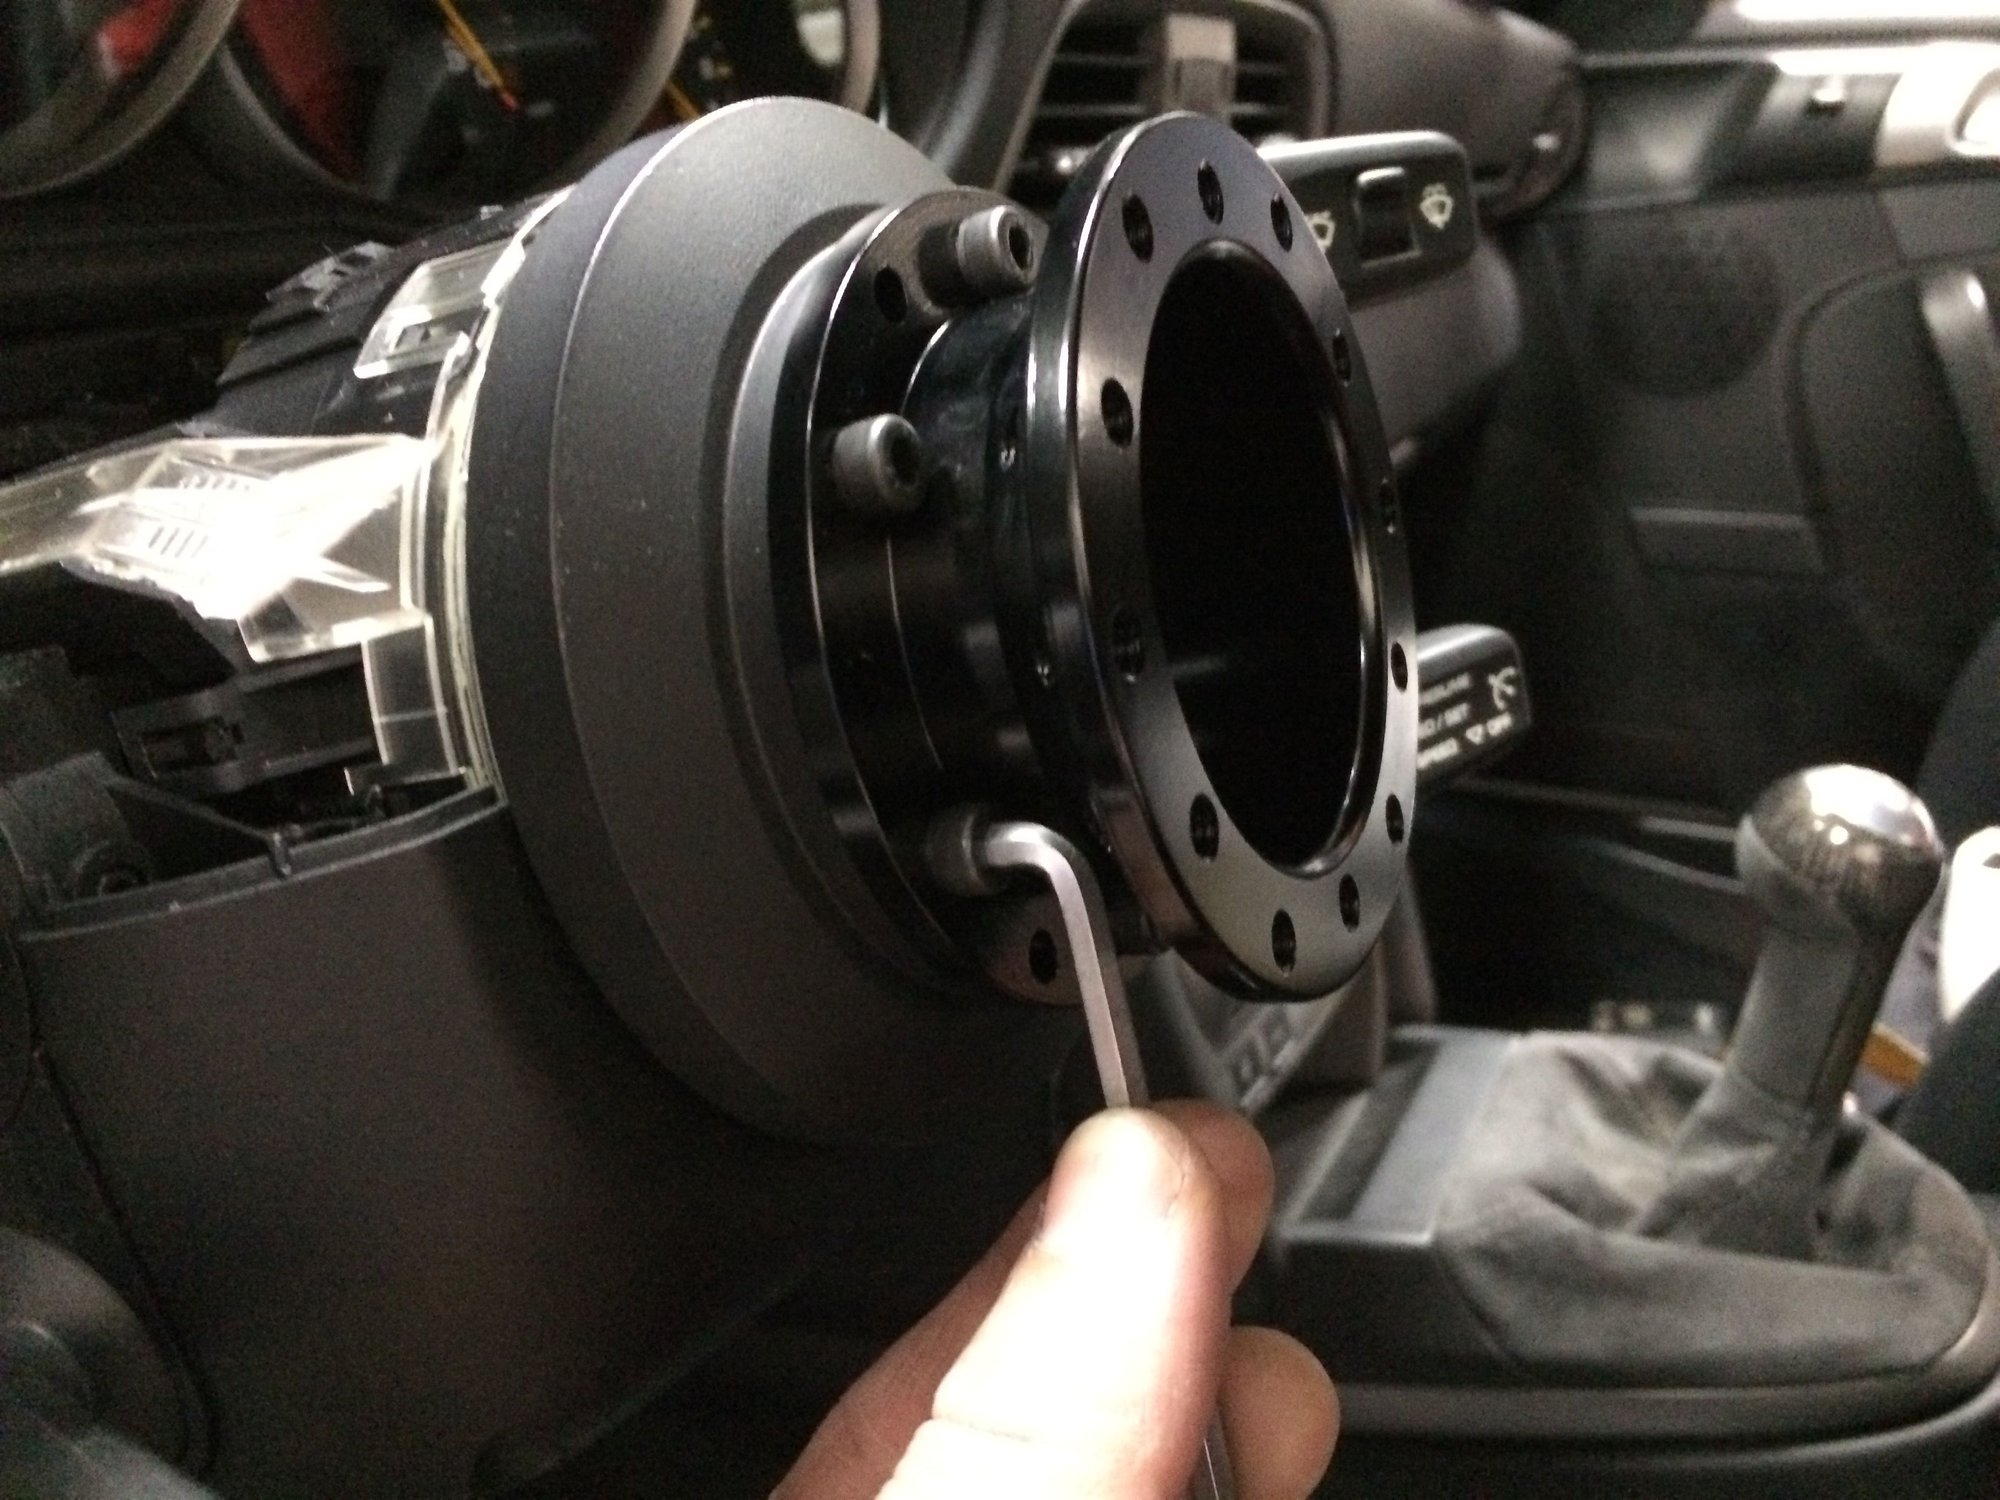
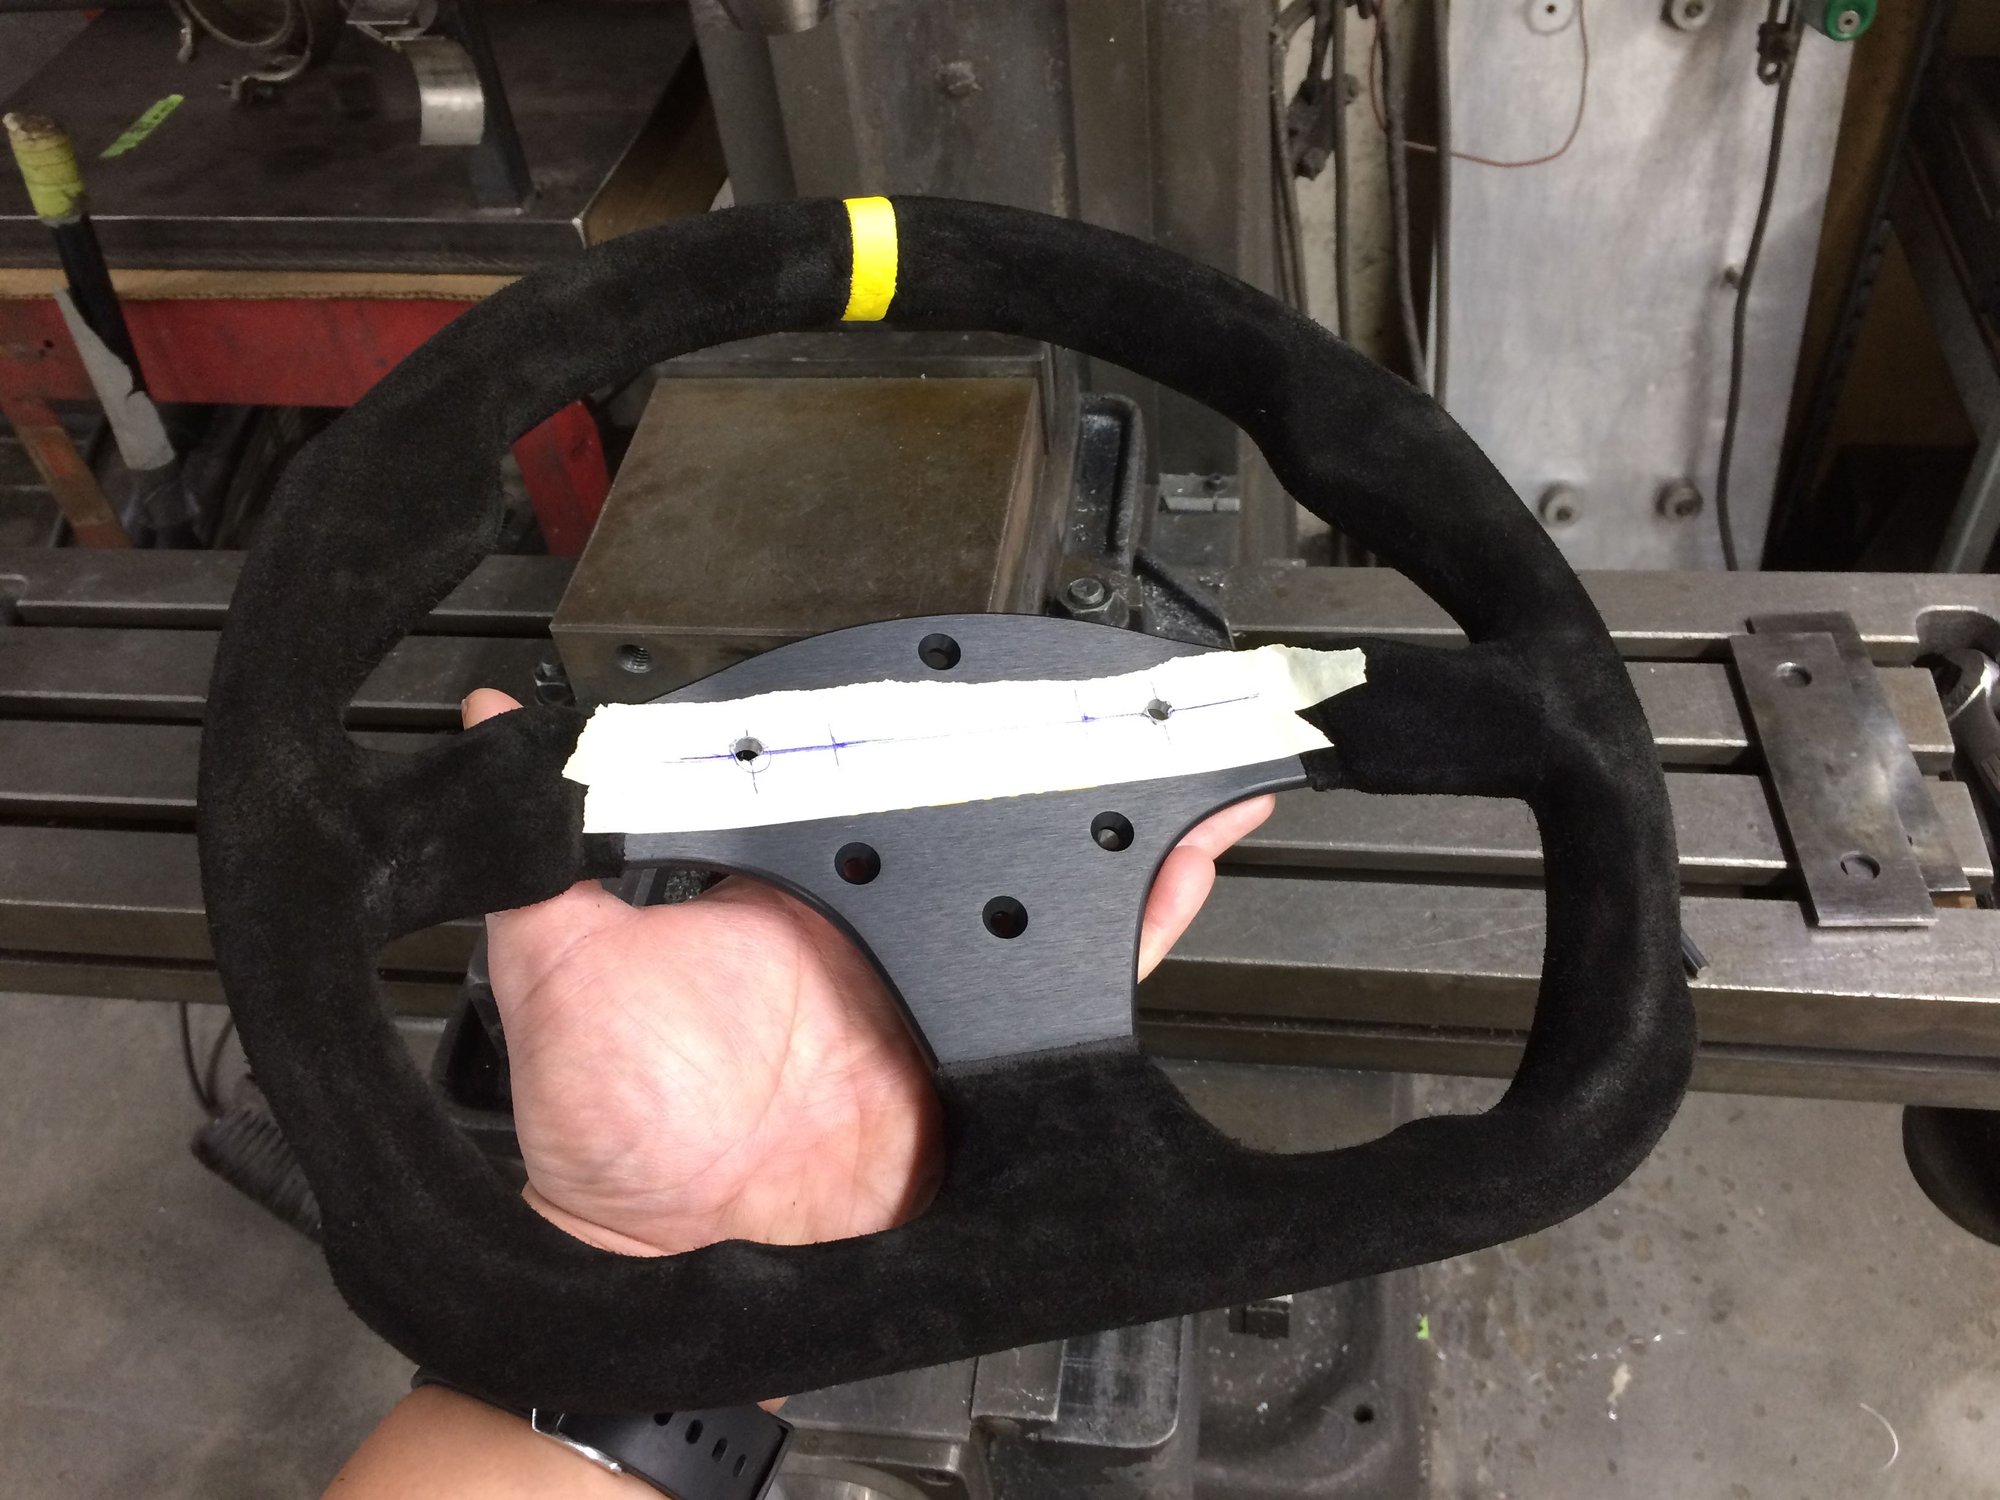
During the Motec dash installation I've decide to add a 30mm steering wheel spacer to allow for more telescopic adjustment range for my arm length.
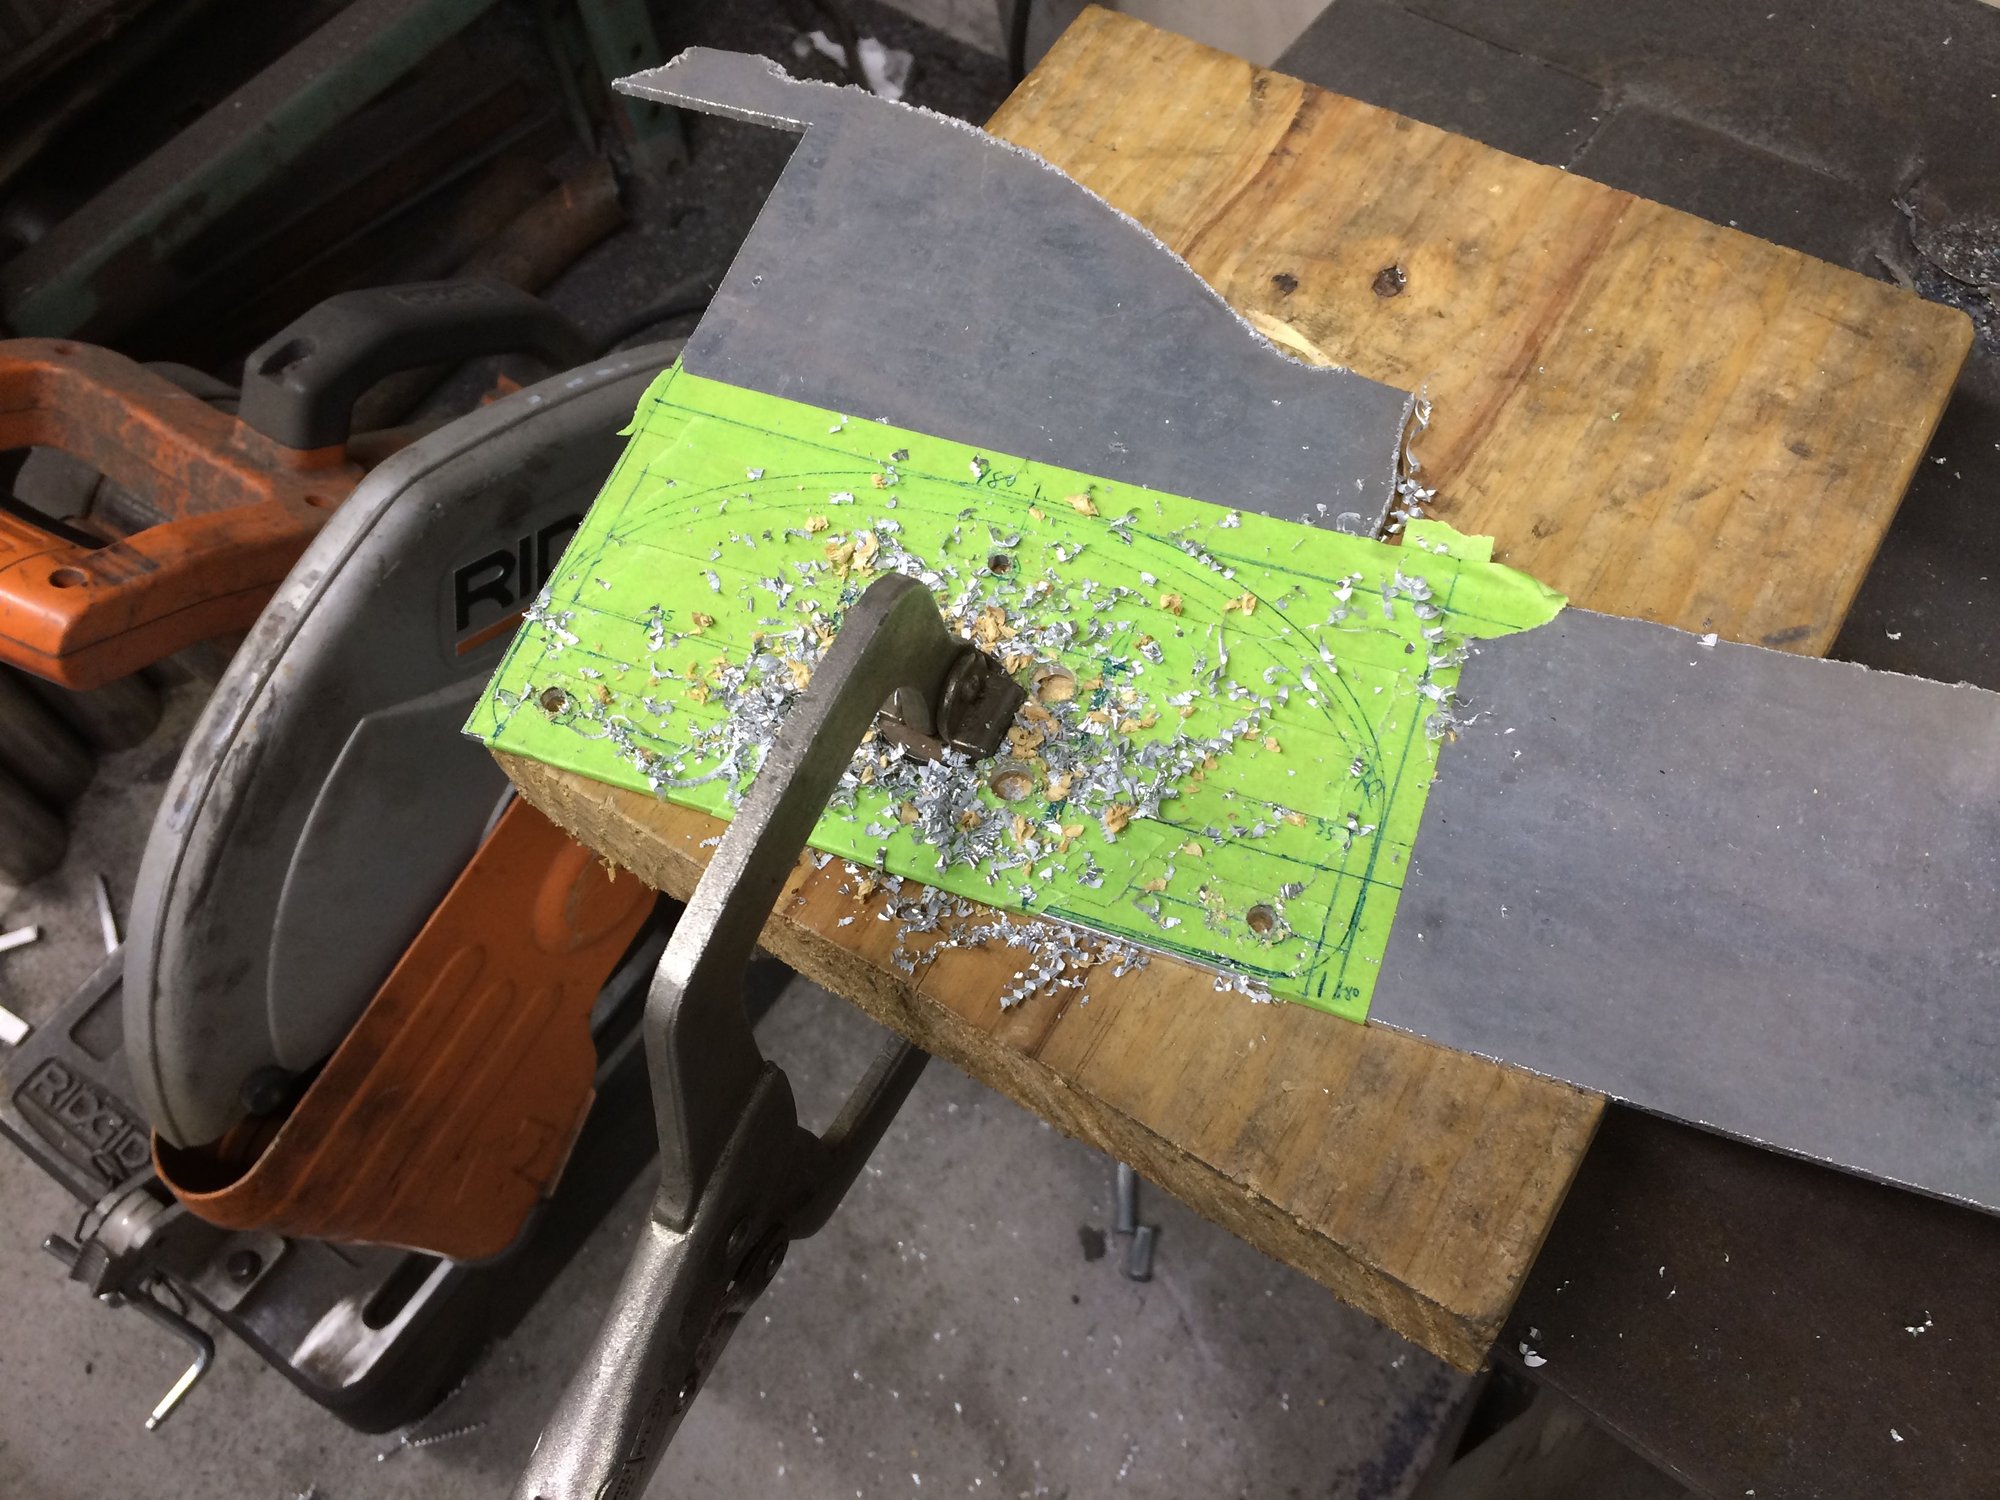
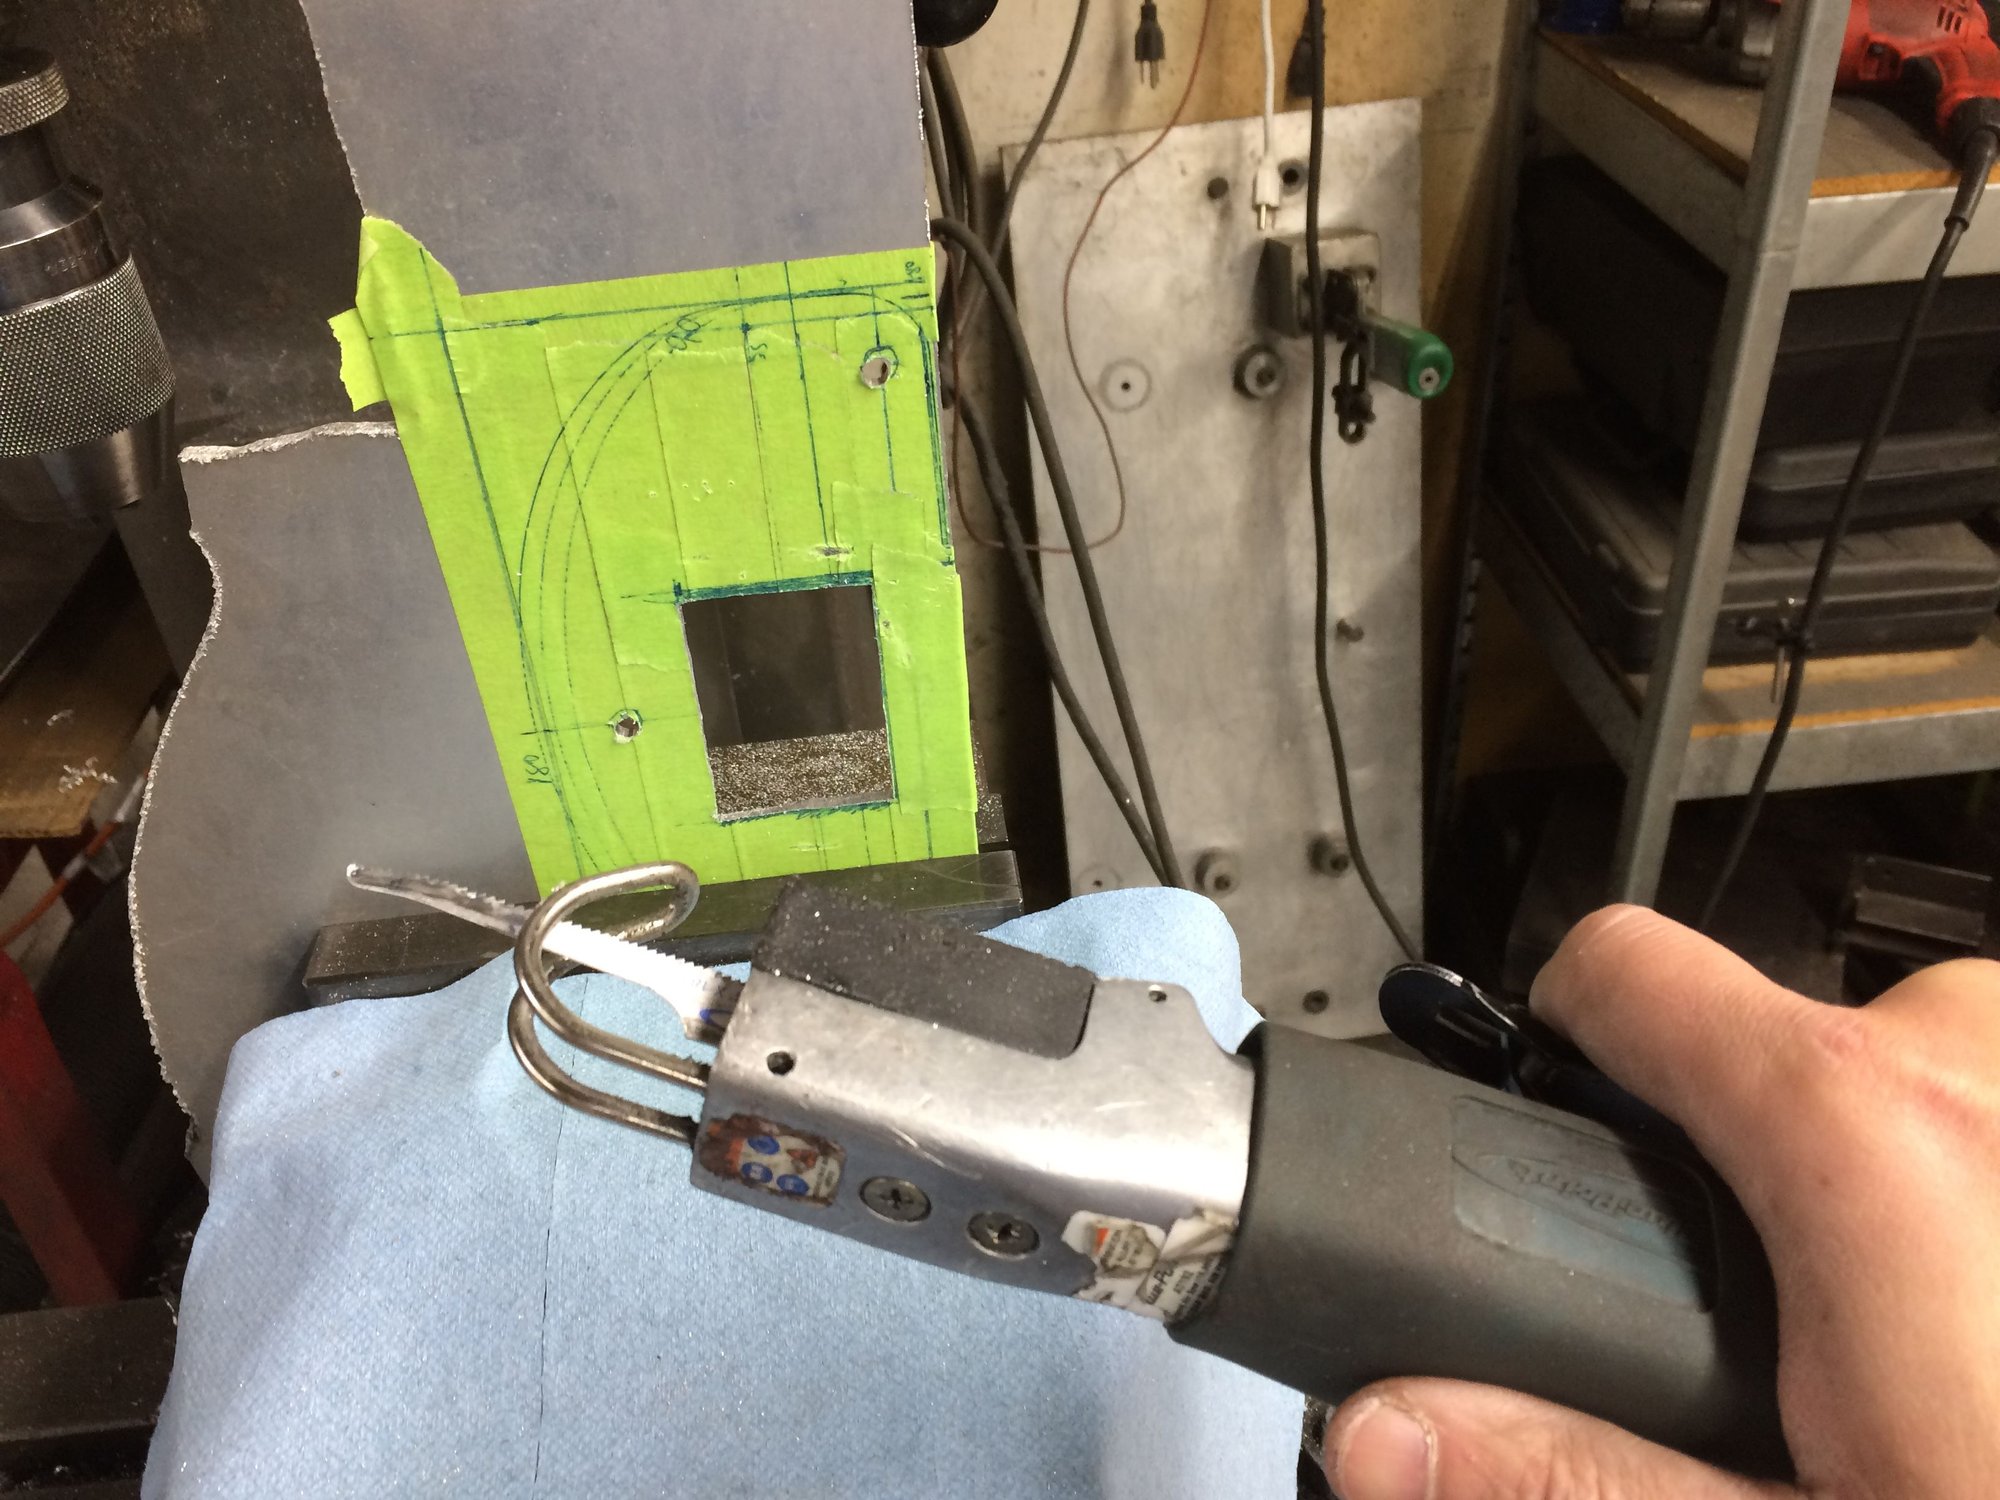
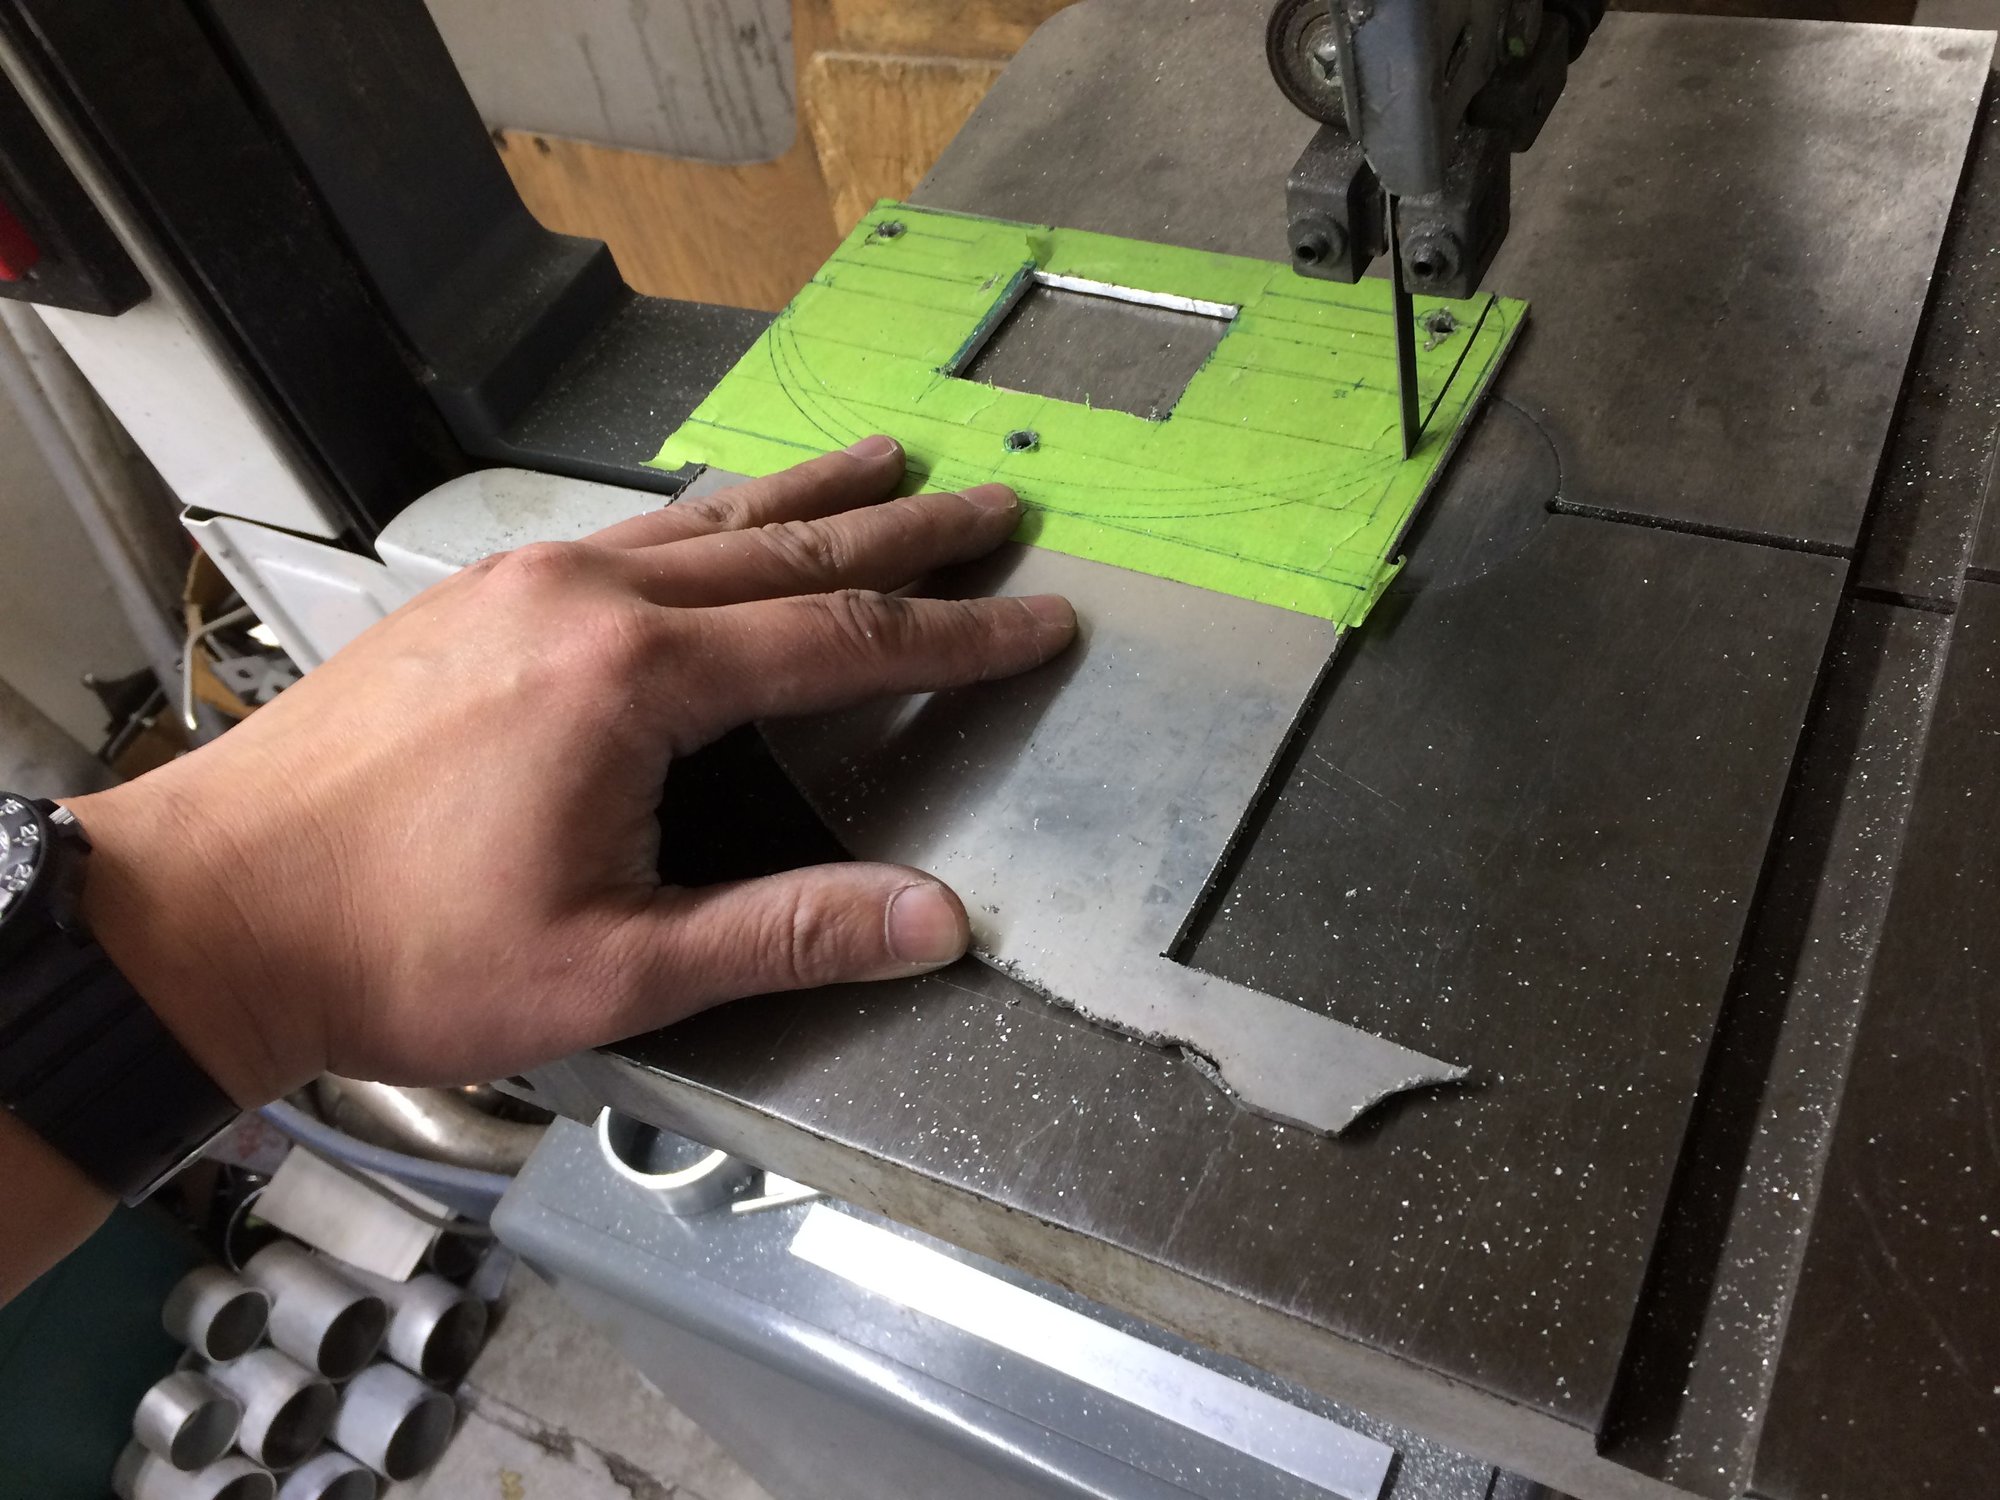
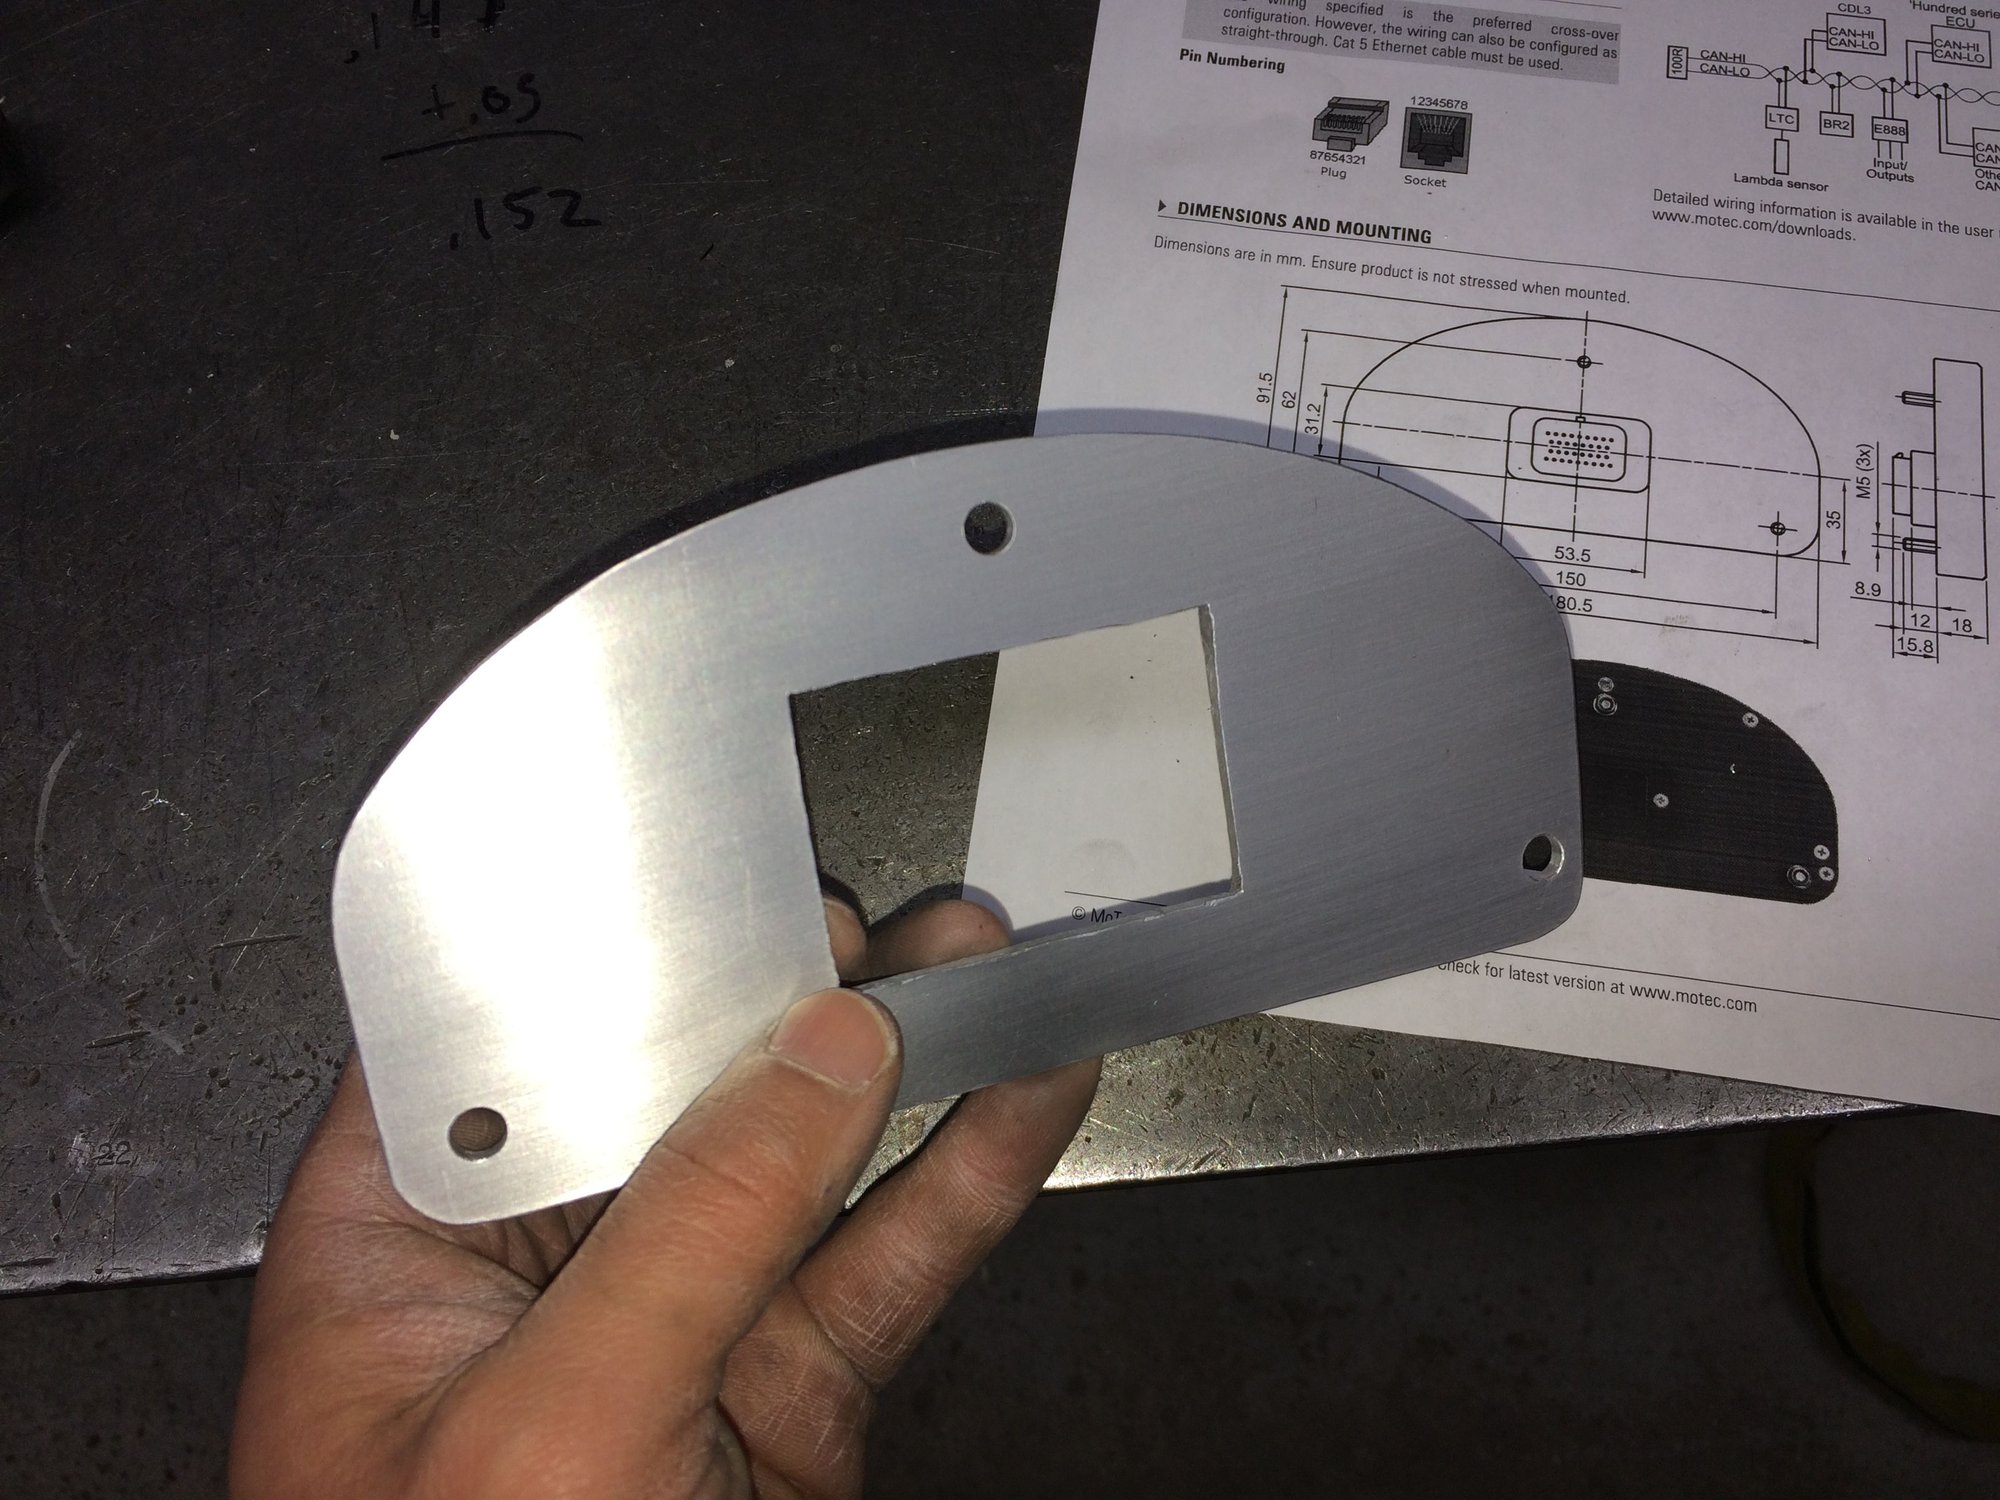
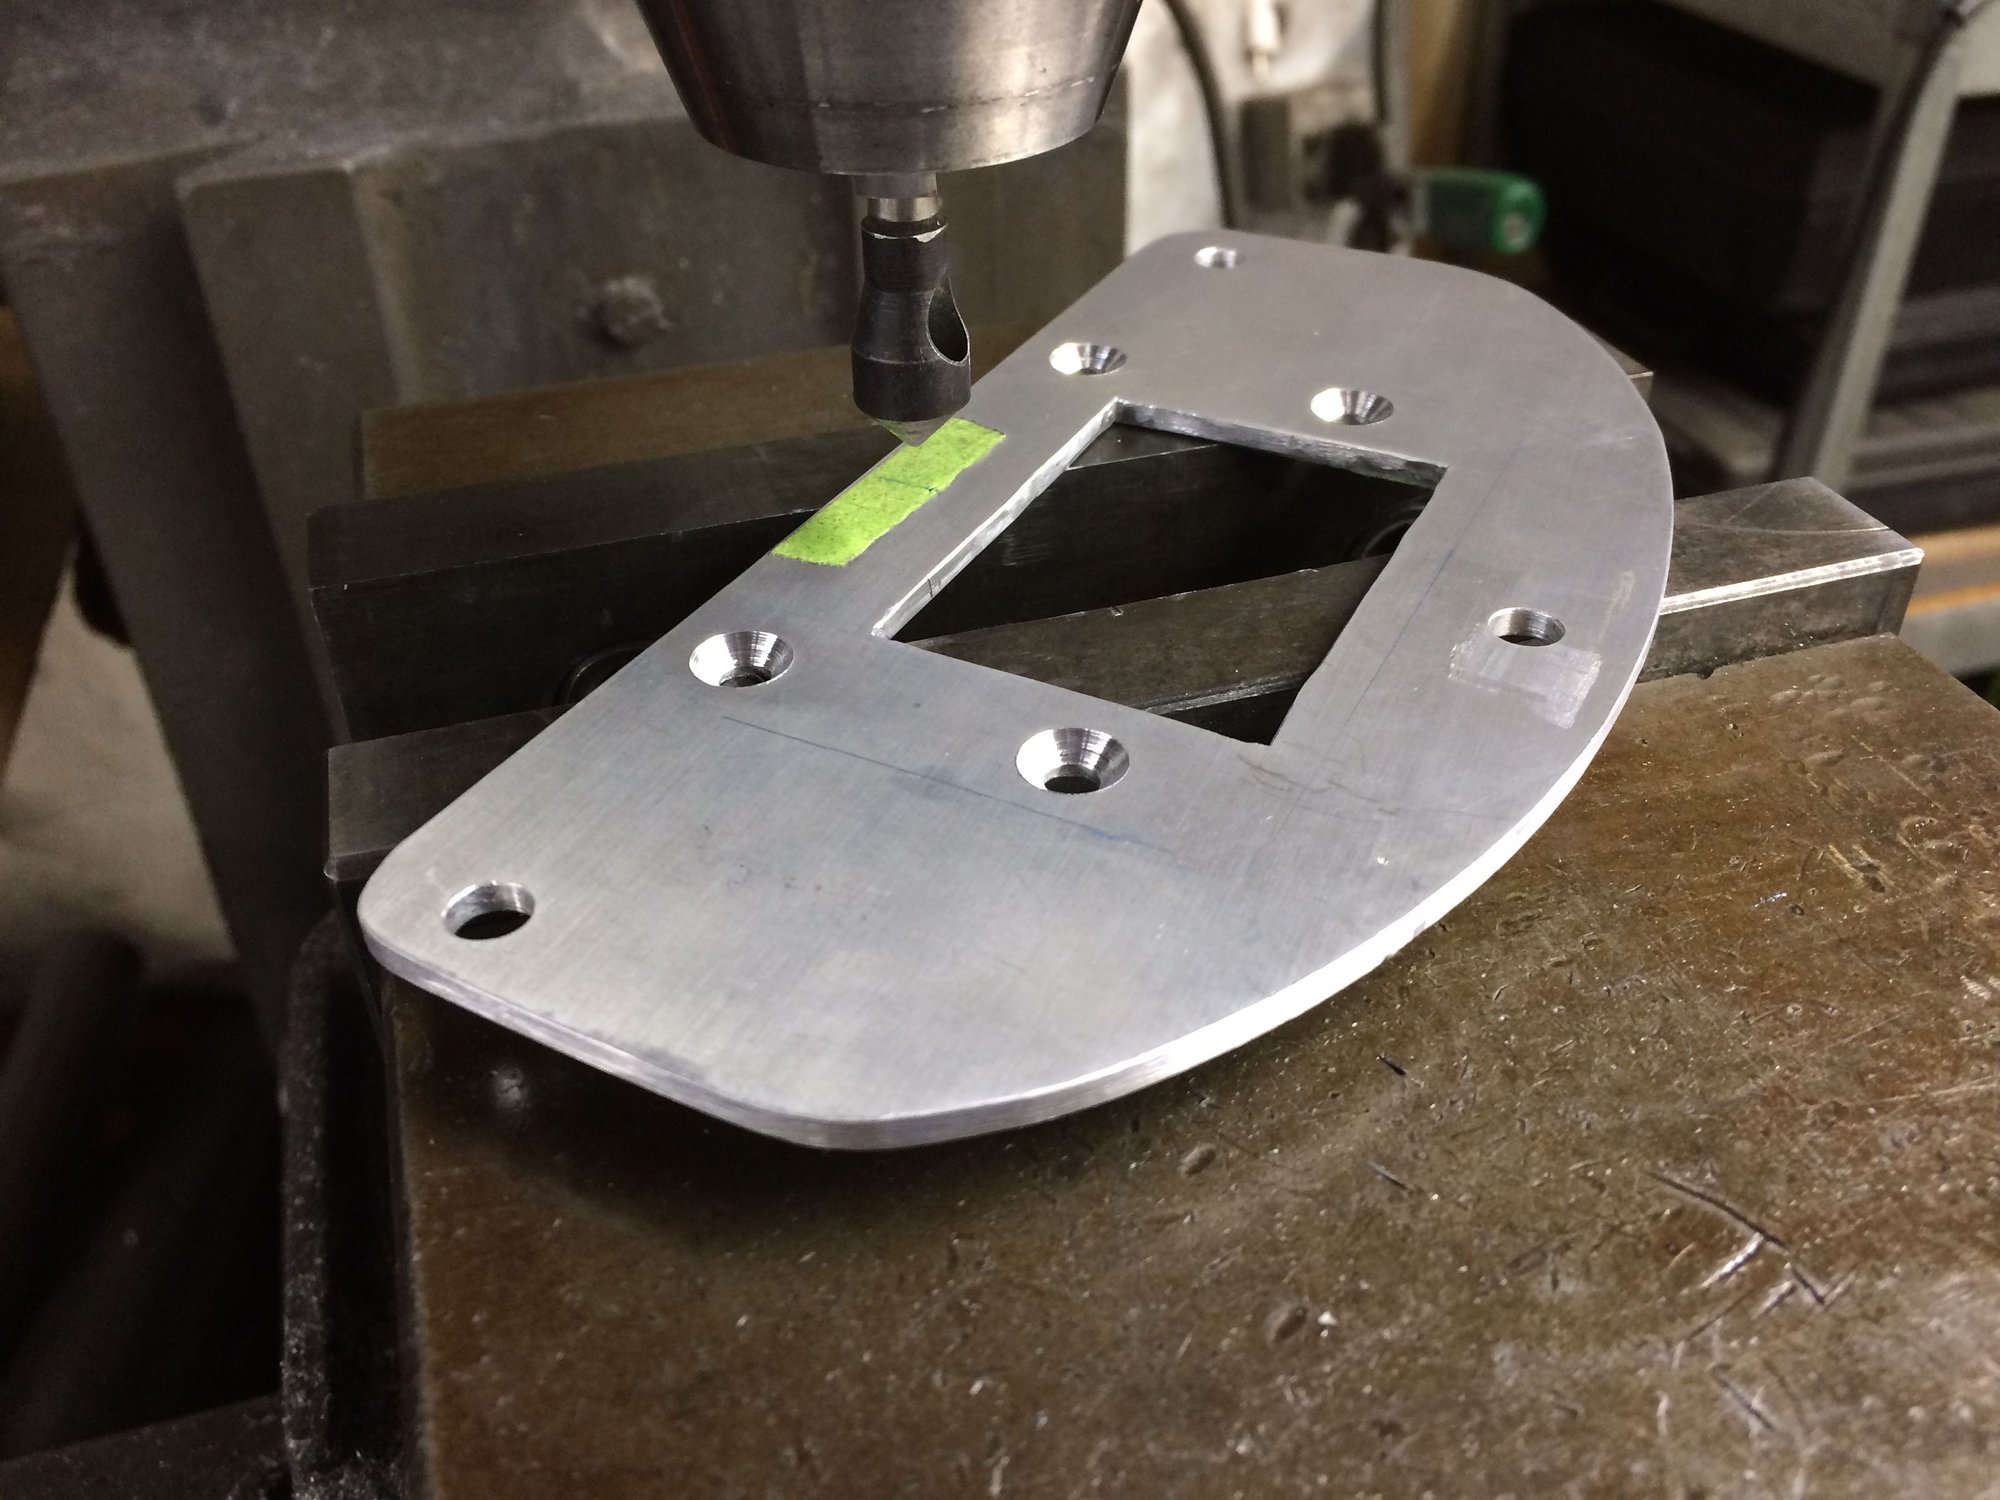
Measure 3x, cut and drill once. Extreme care was used to measure to avoid fasteners interfering the steering angle sensor.
Found a piece of scrap 6061 aluminum so let's get this party started!
While hand fitting/manual machining a metal bracket is very time consuming I am happy to report there were no surprises(unlike other projects I've done).
Test fit with bolts just finger tight.
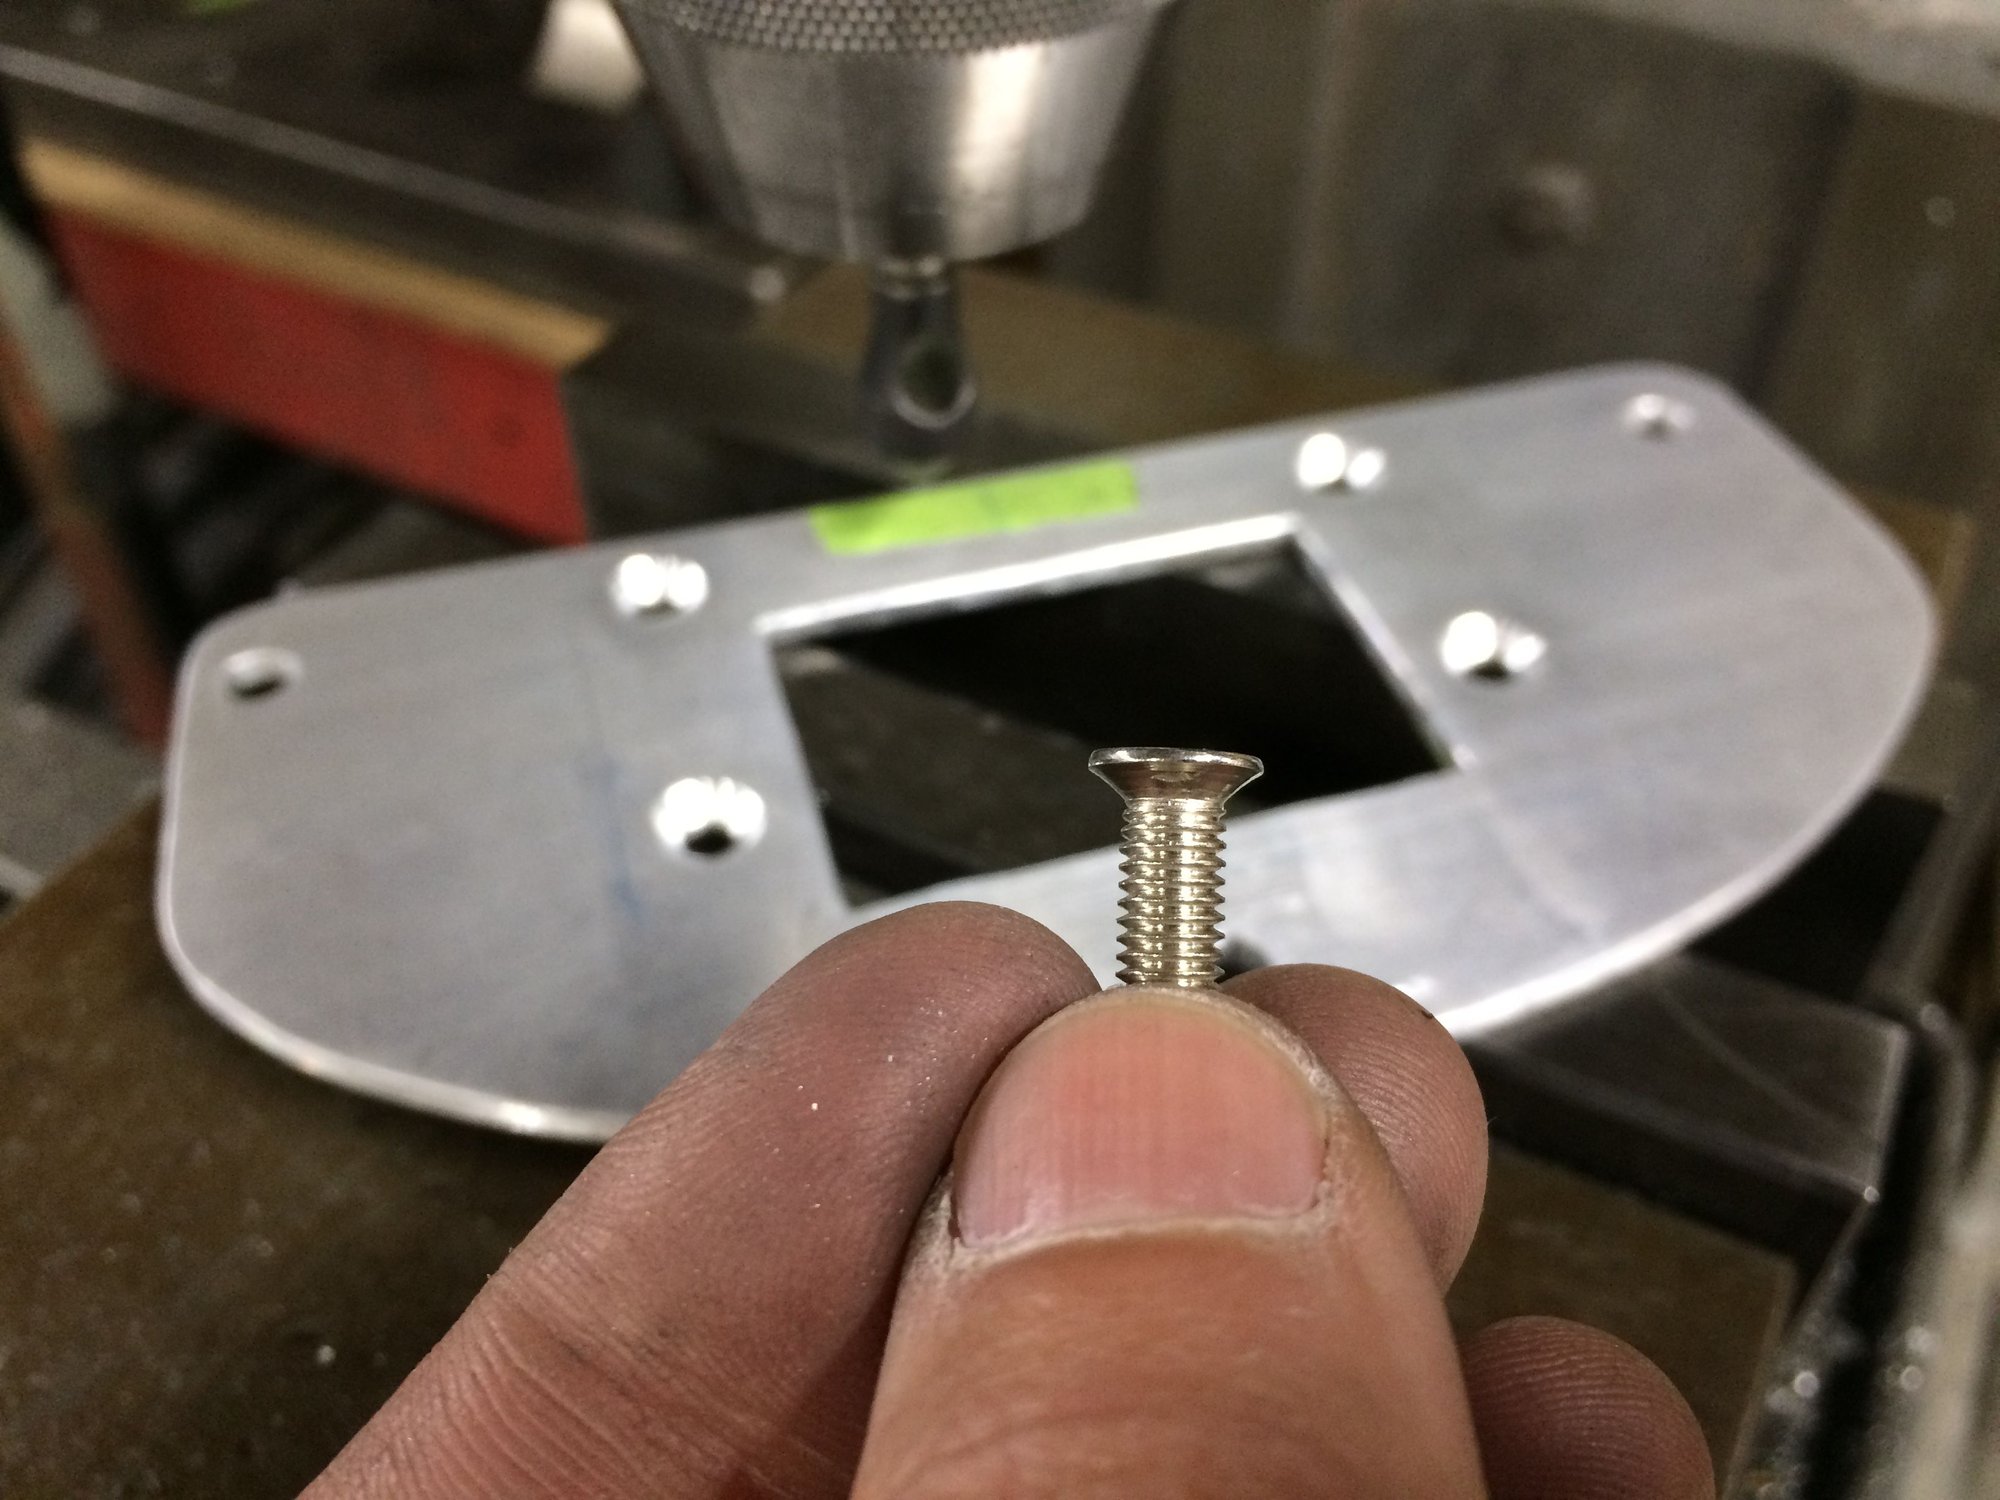
Countersunk operation for flush fit to the back of the dash.
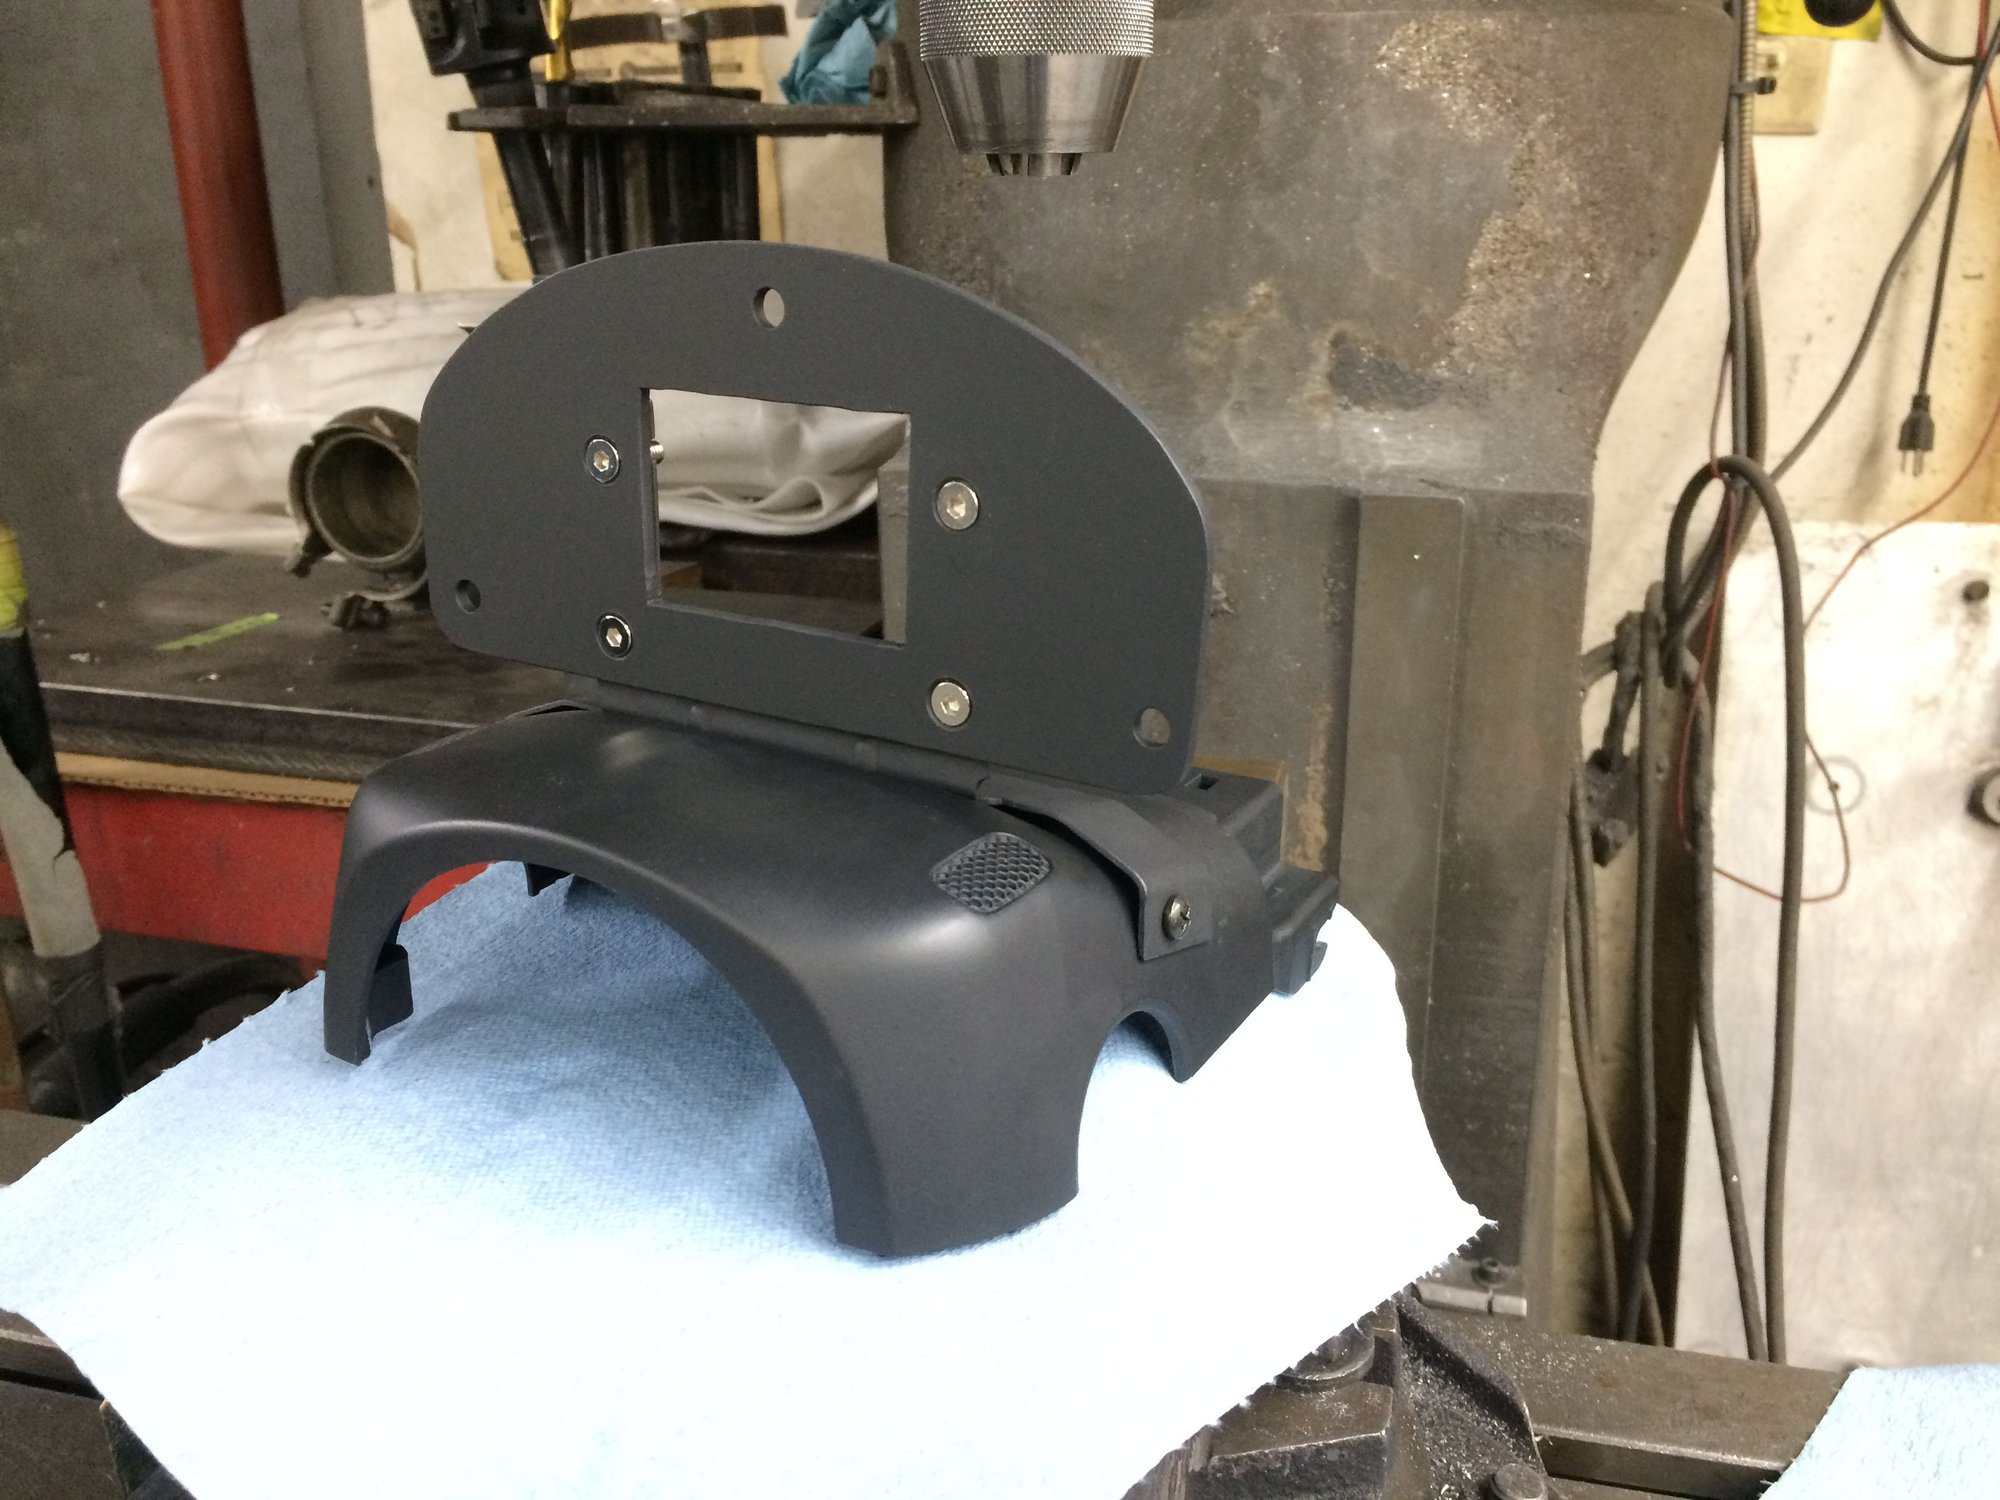
And 6-some hours later...
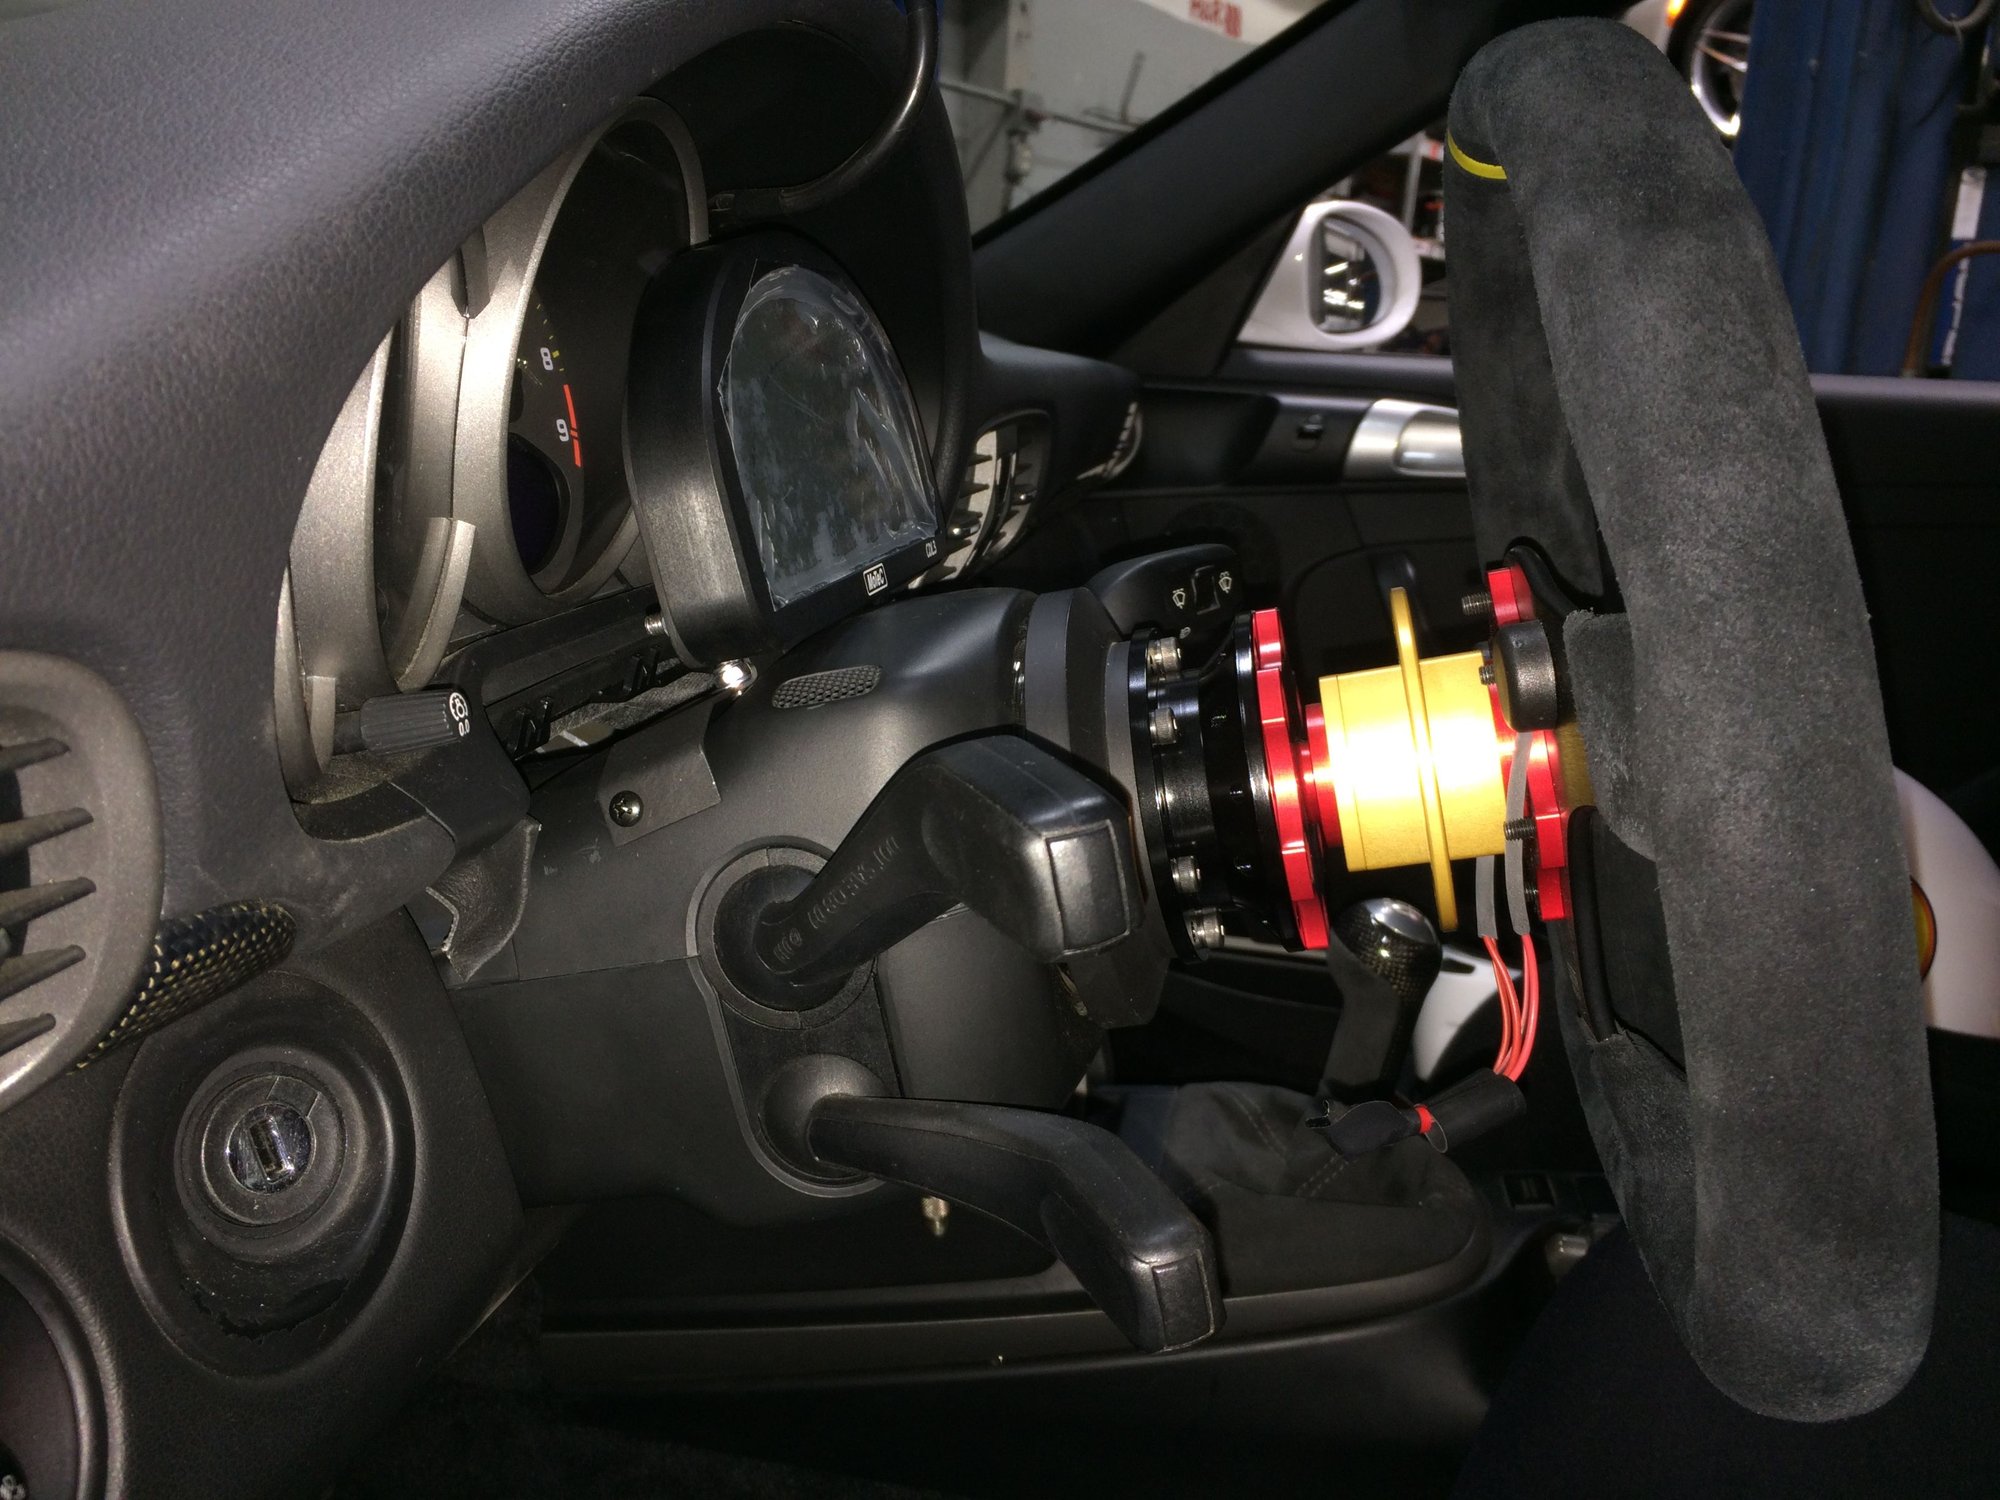
Installing the 30mm spacer.
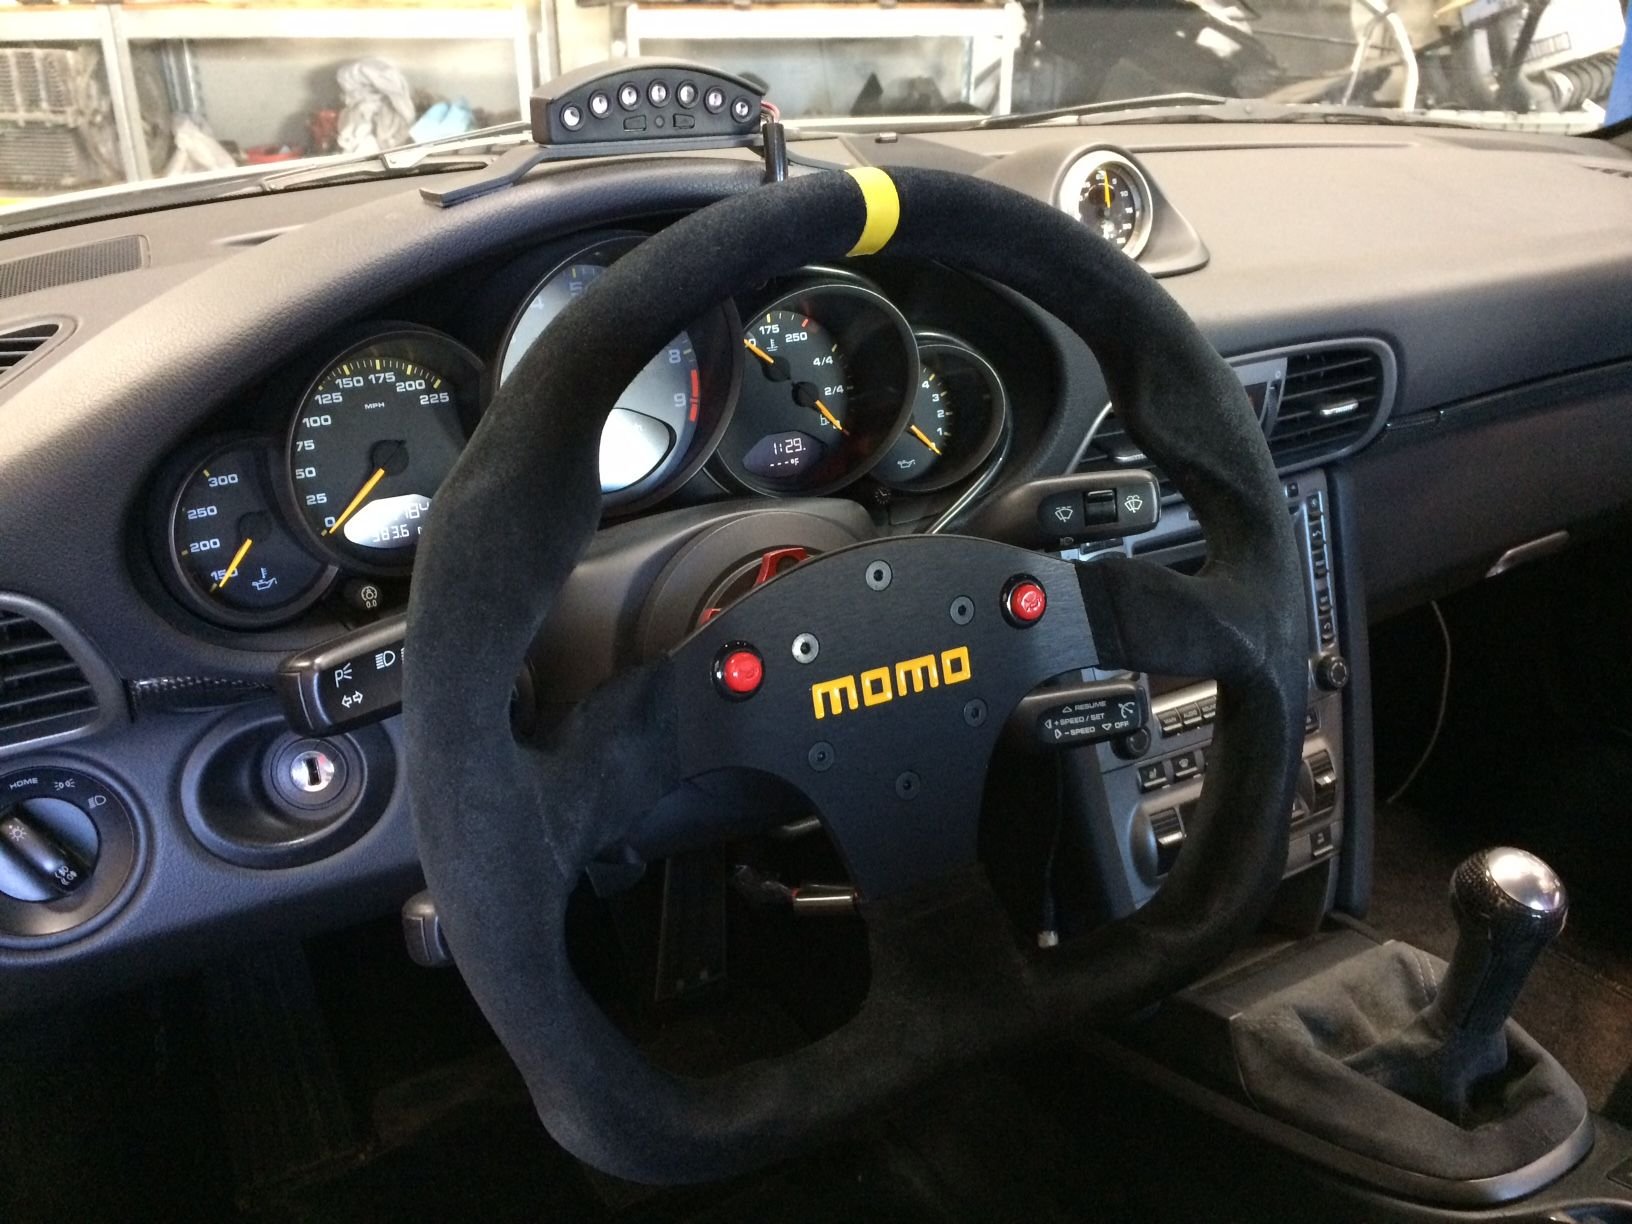
Boom. All I have left to do is install the buttons to operate the dash.
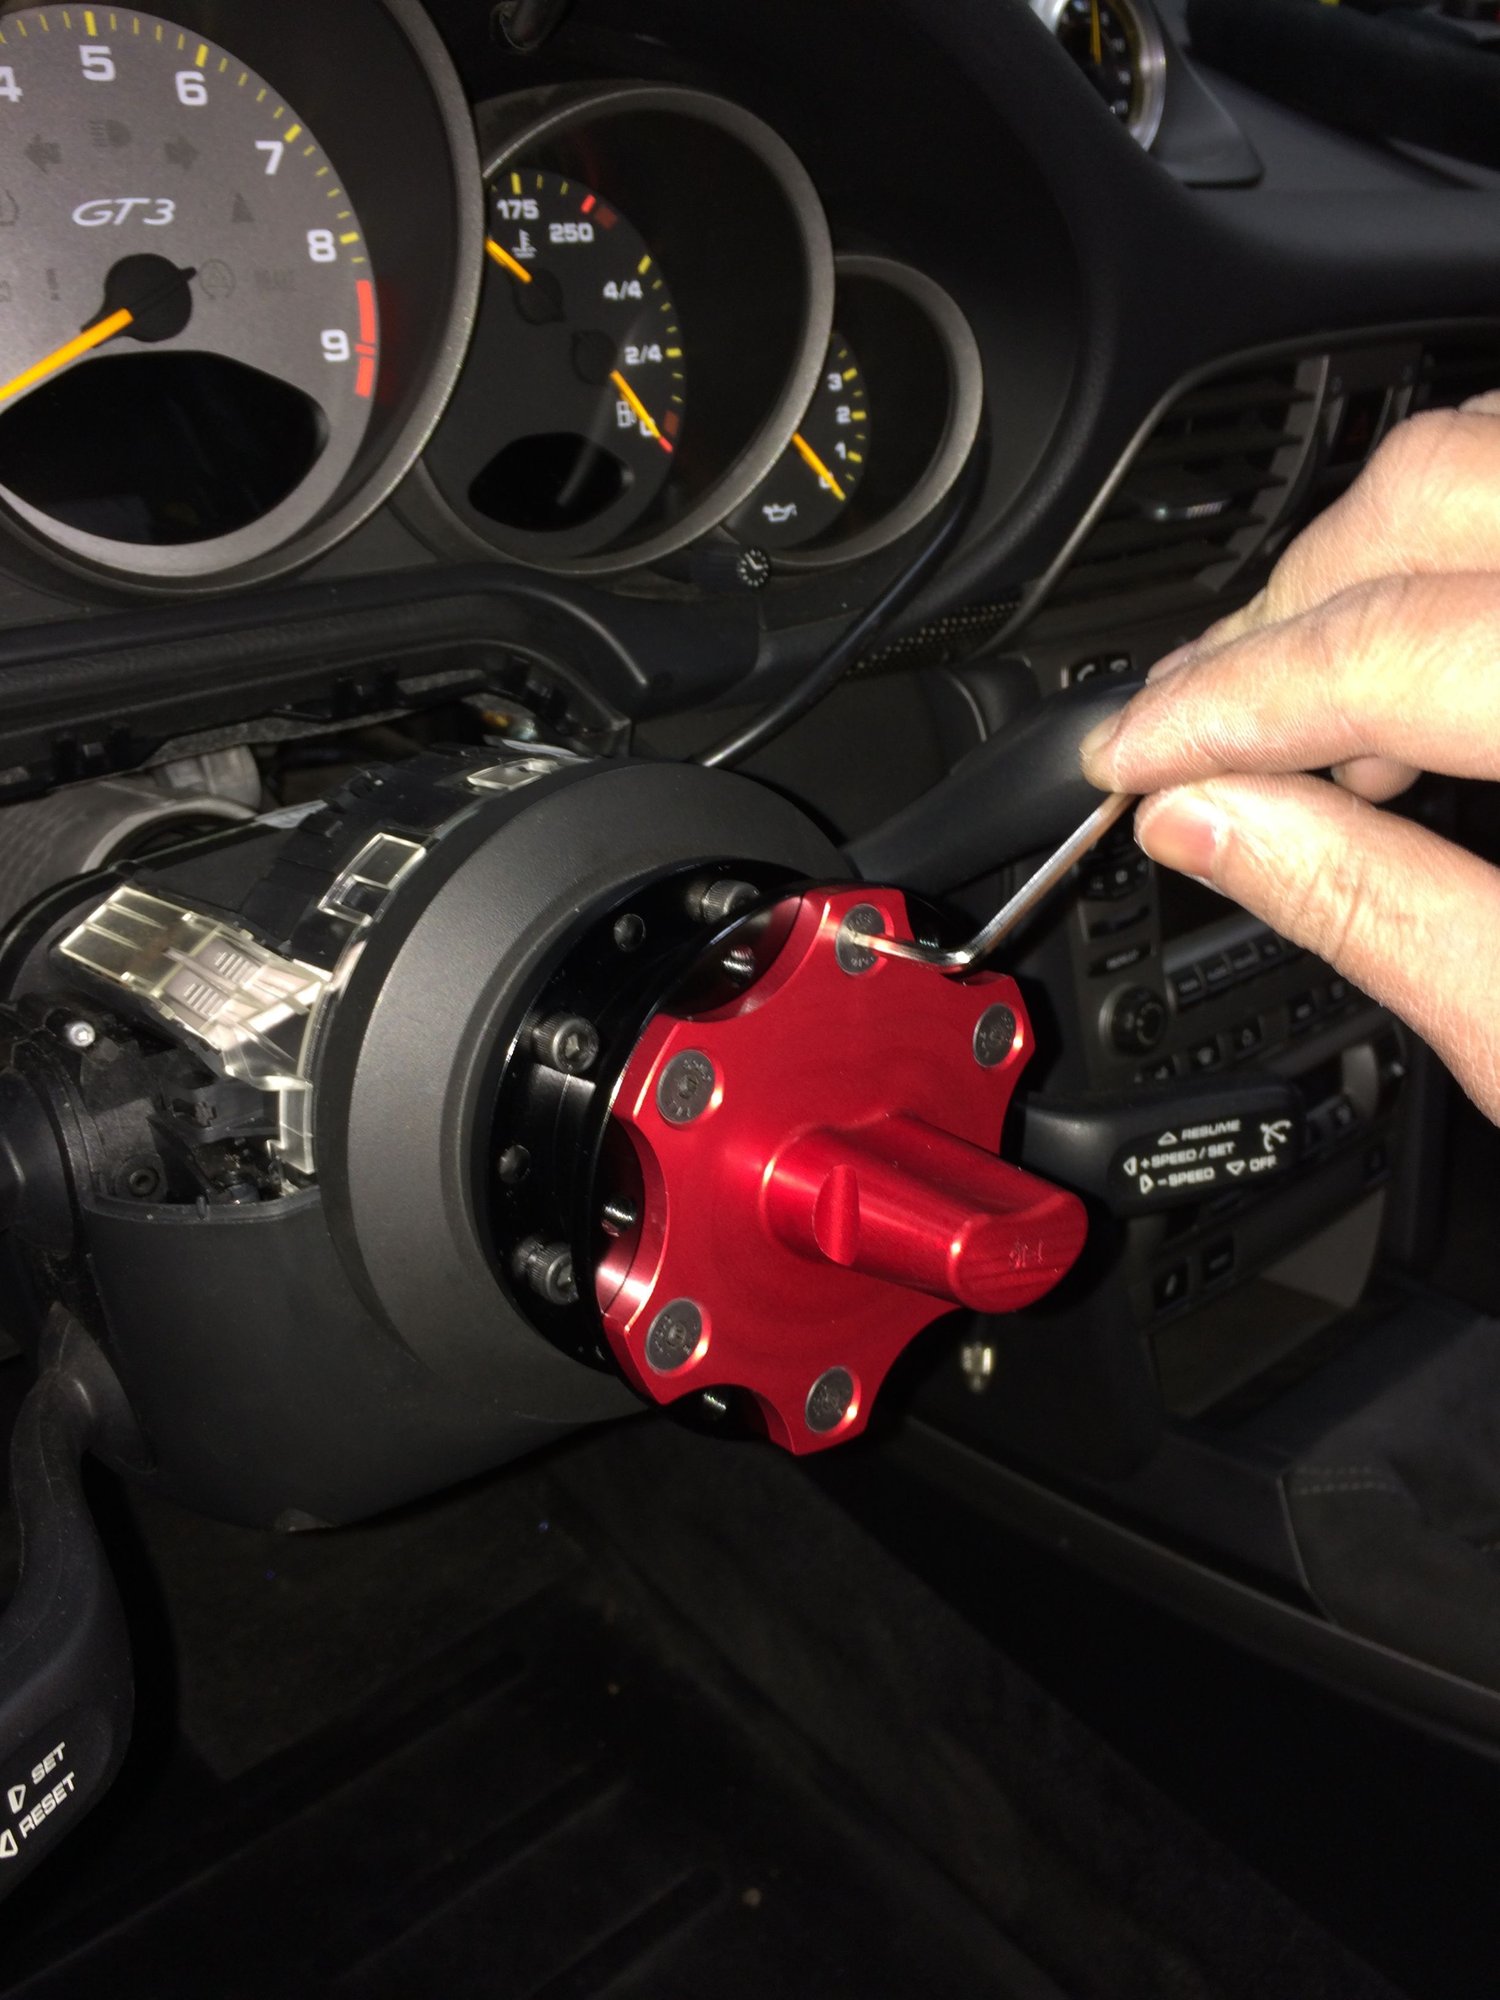
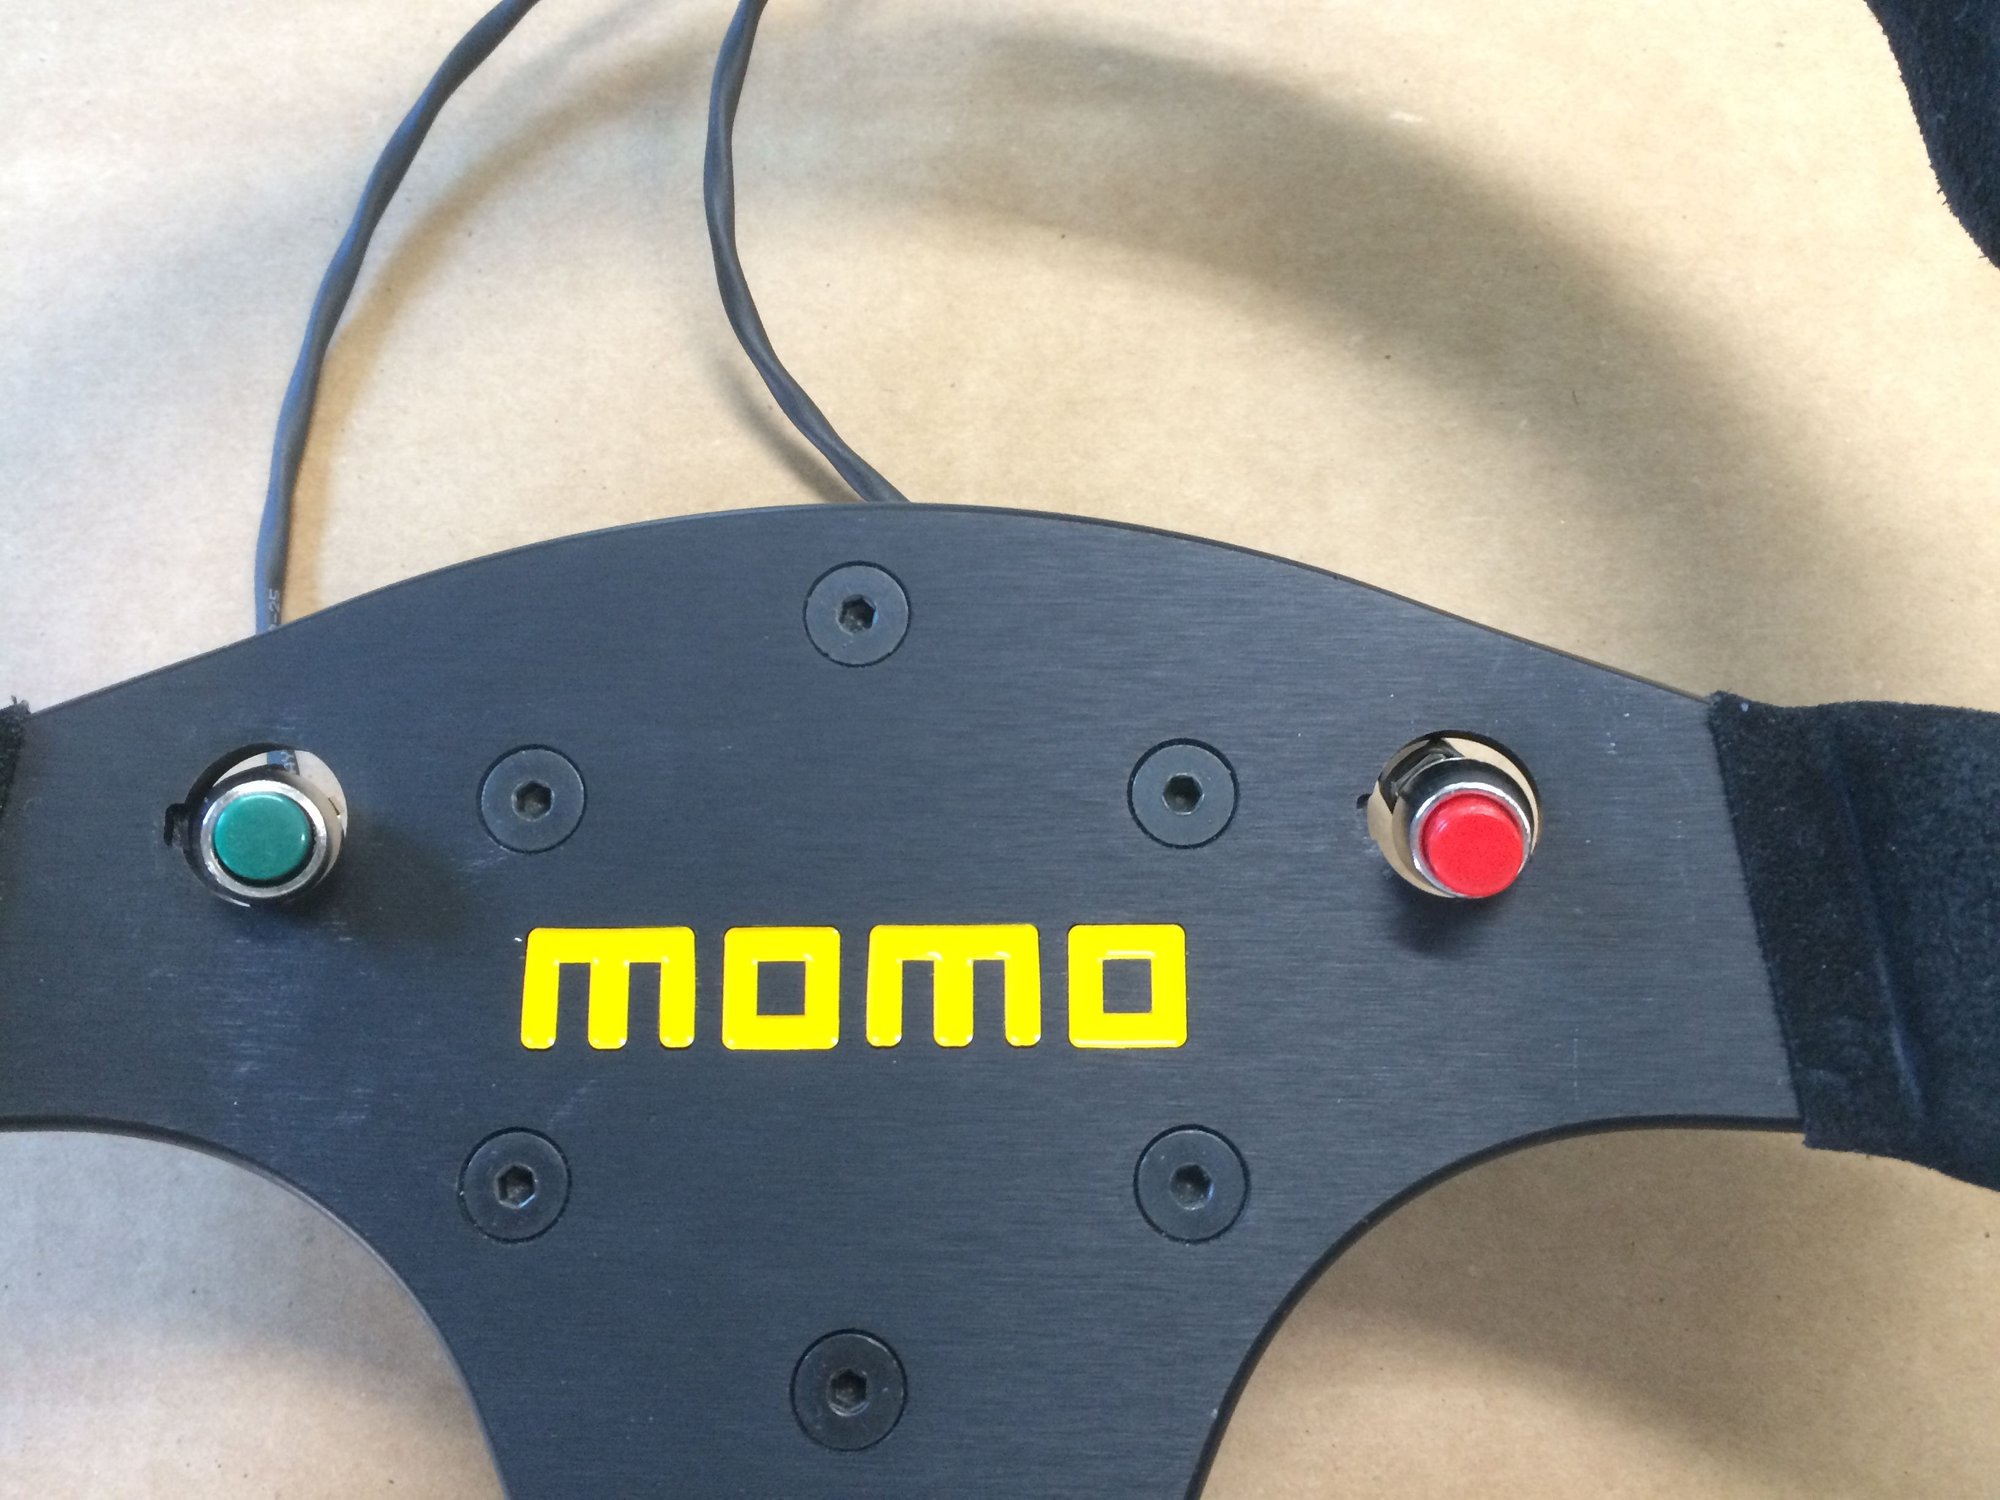
I already have a nice MOMO steering wheel with buttons. So I figured since I already did the hard part of making the dash bracket the buttons will simply just fit.
Unfortunately, not quite. The Motec buttons are only 6.5mm diameter, the steering wheel holes are much bigger.
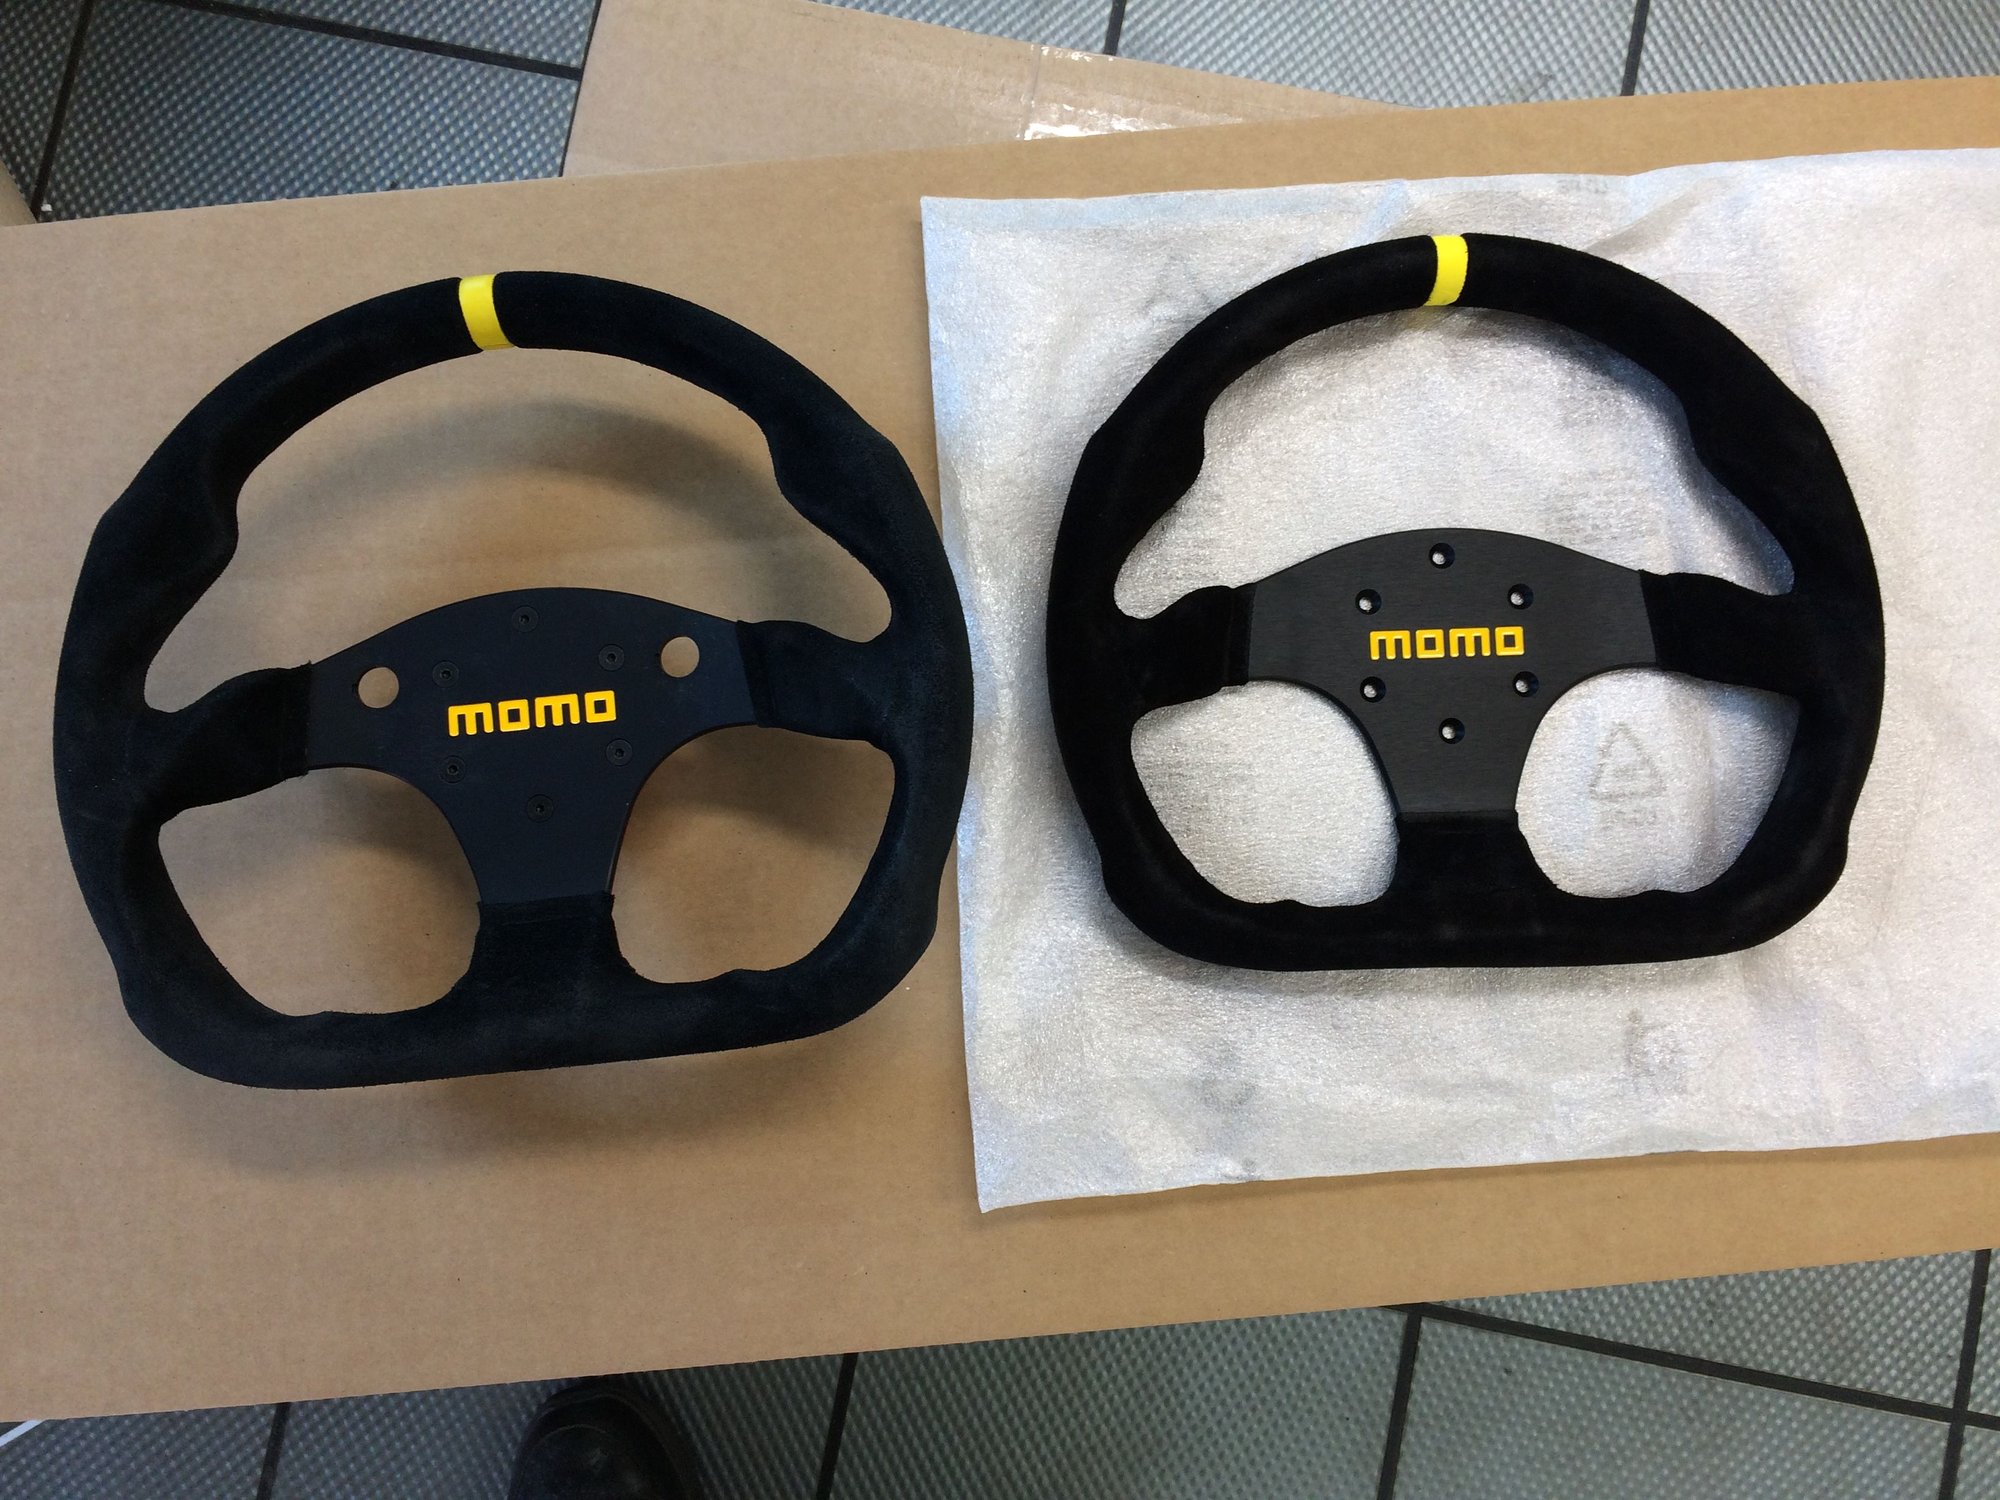
Not to worry, just buy another steering wheel. They are ultra high quality and reasonably priced, plus I love the feel of new alcantara.
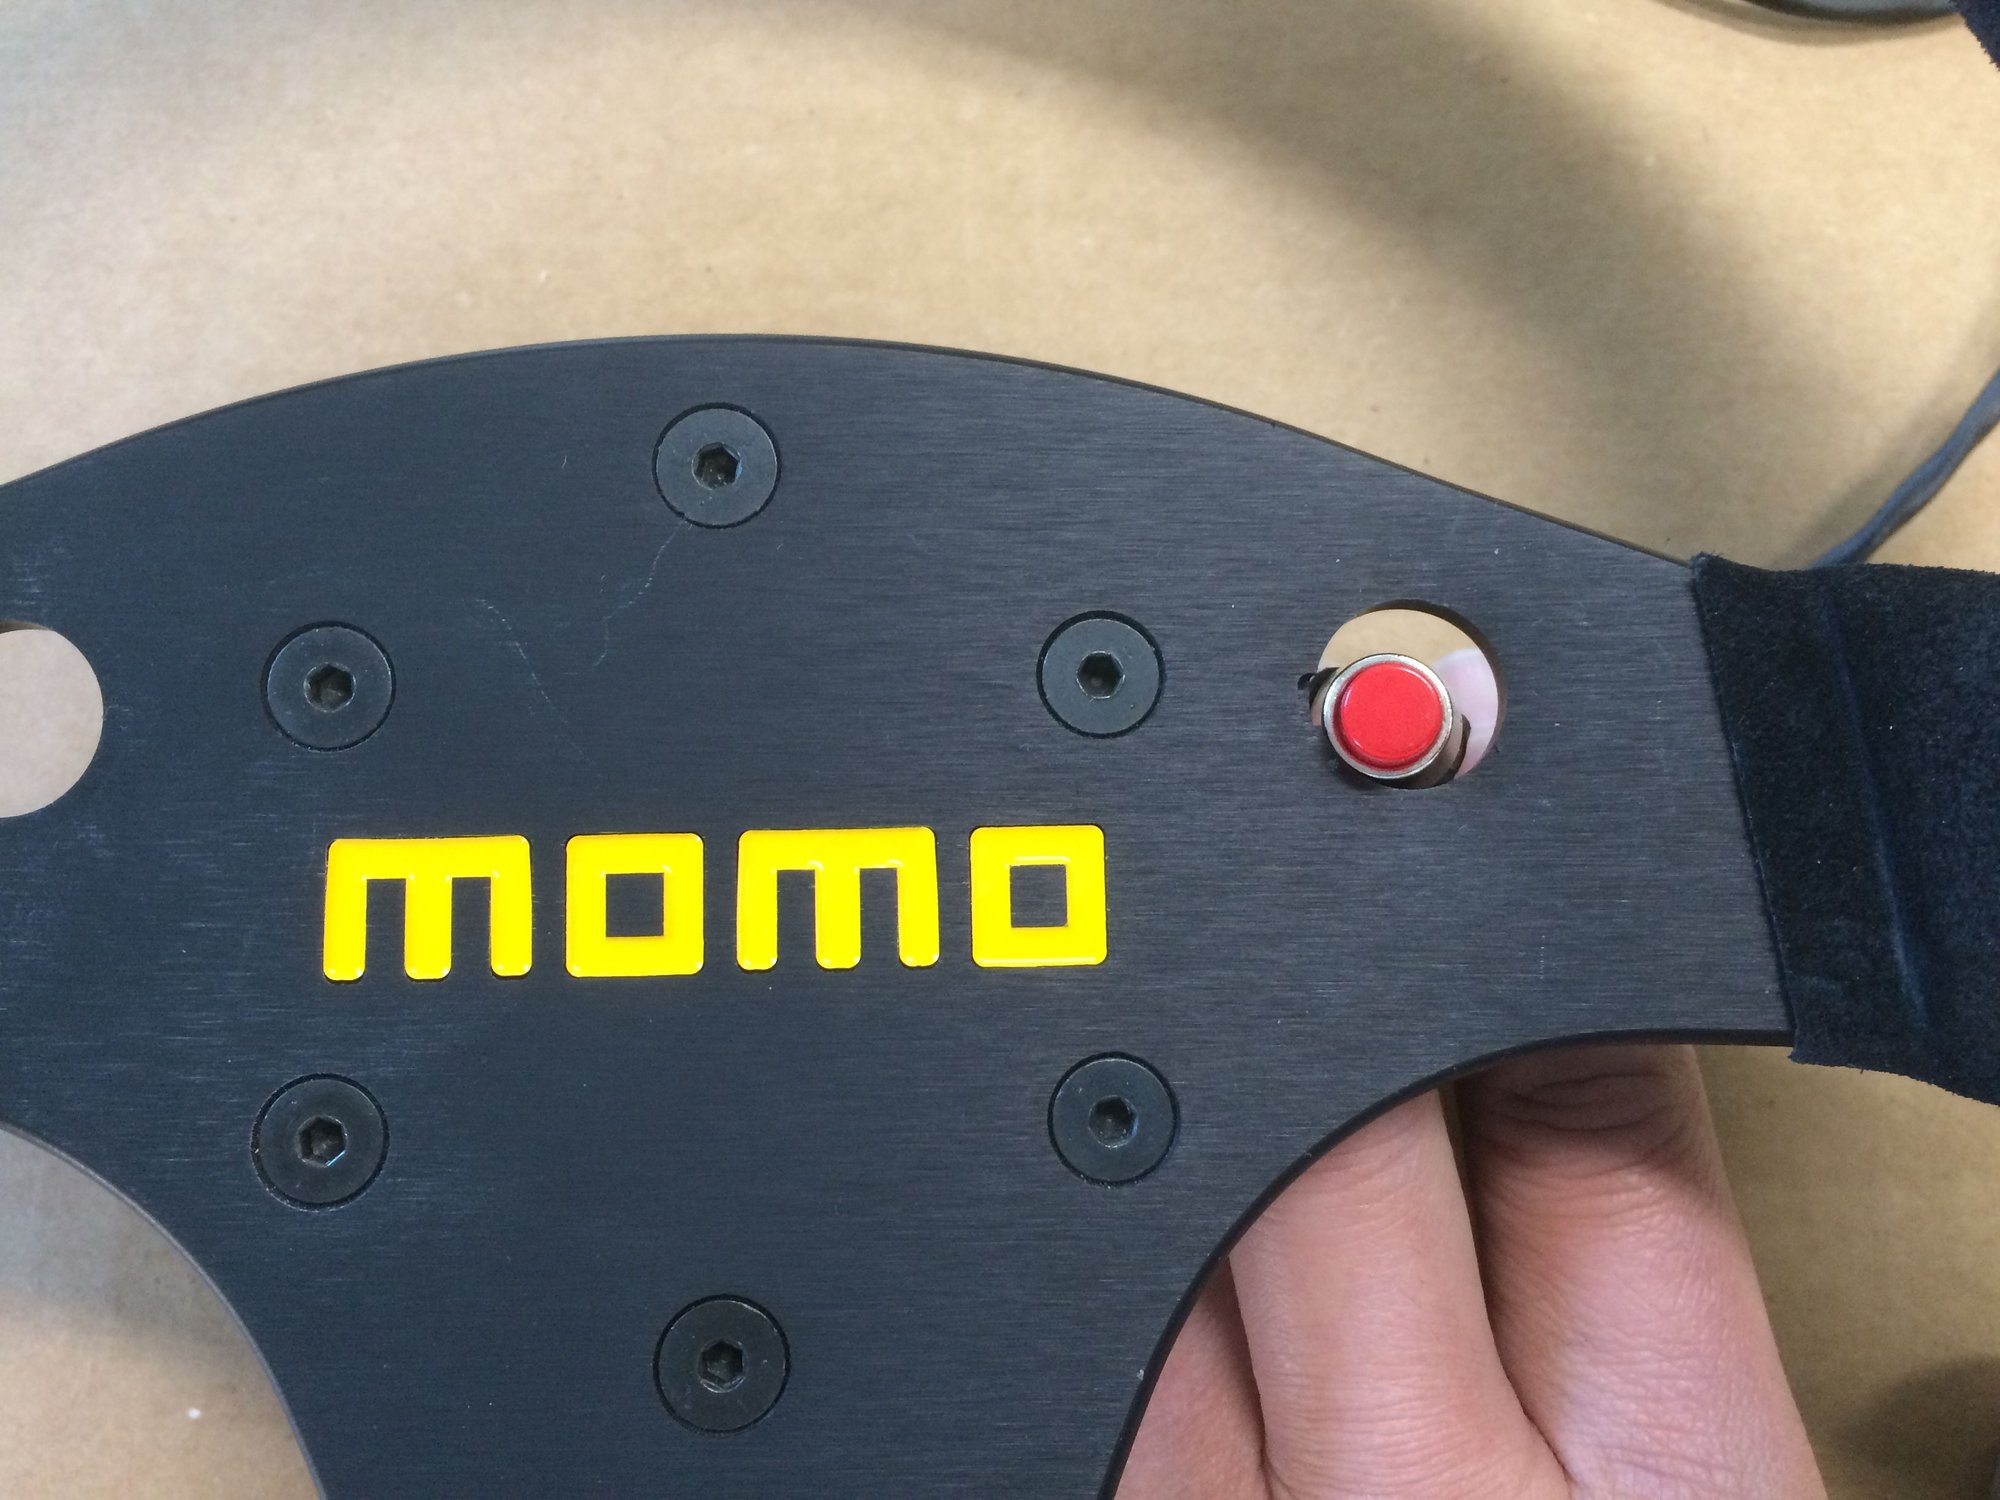
Drill baby drill!
After drilling a new wheel...emmm, here is the oopsy part...my selective mind didn't think of measuring the thickness of wheel spoke and the thickness of the button before drilling. As luck would have it the steering wheel spoke is thicker than the threaded area of the button.
So I needed a button plate.
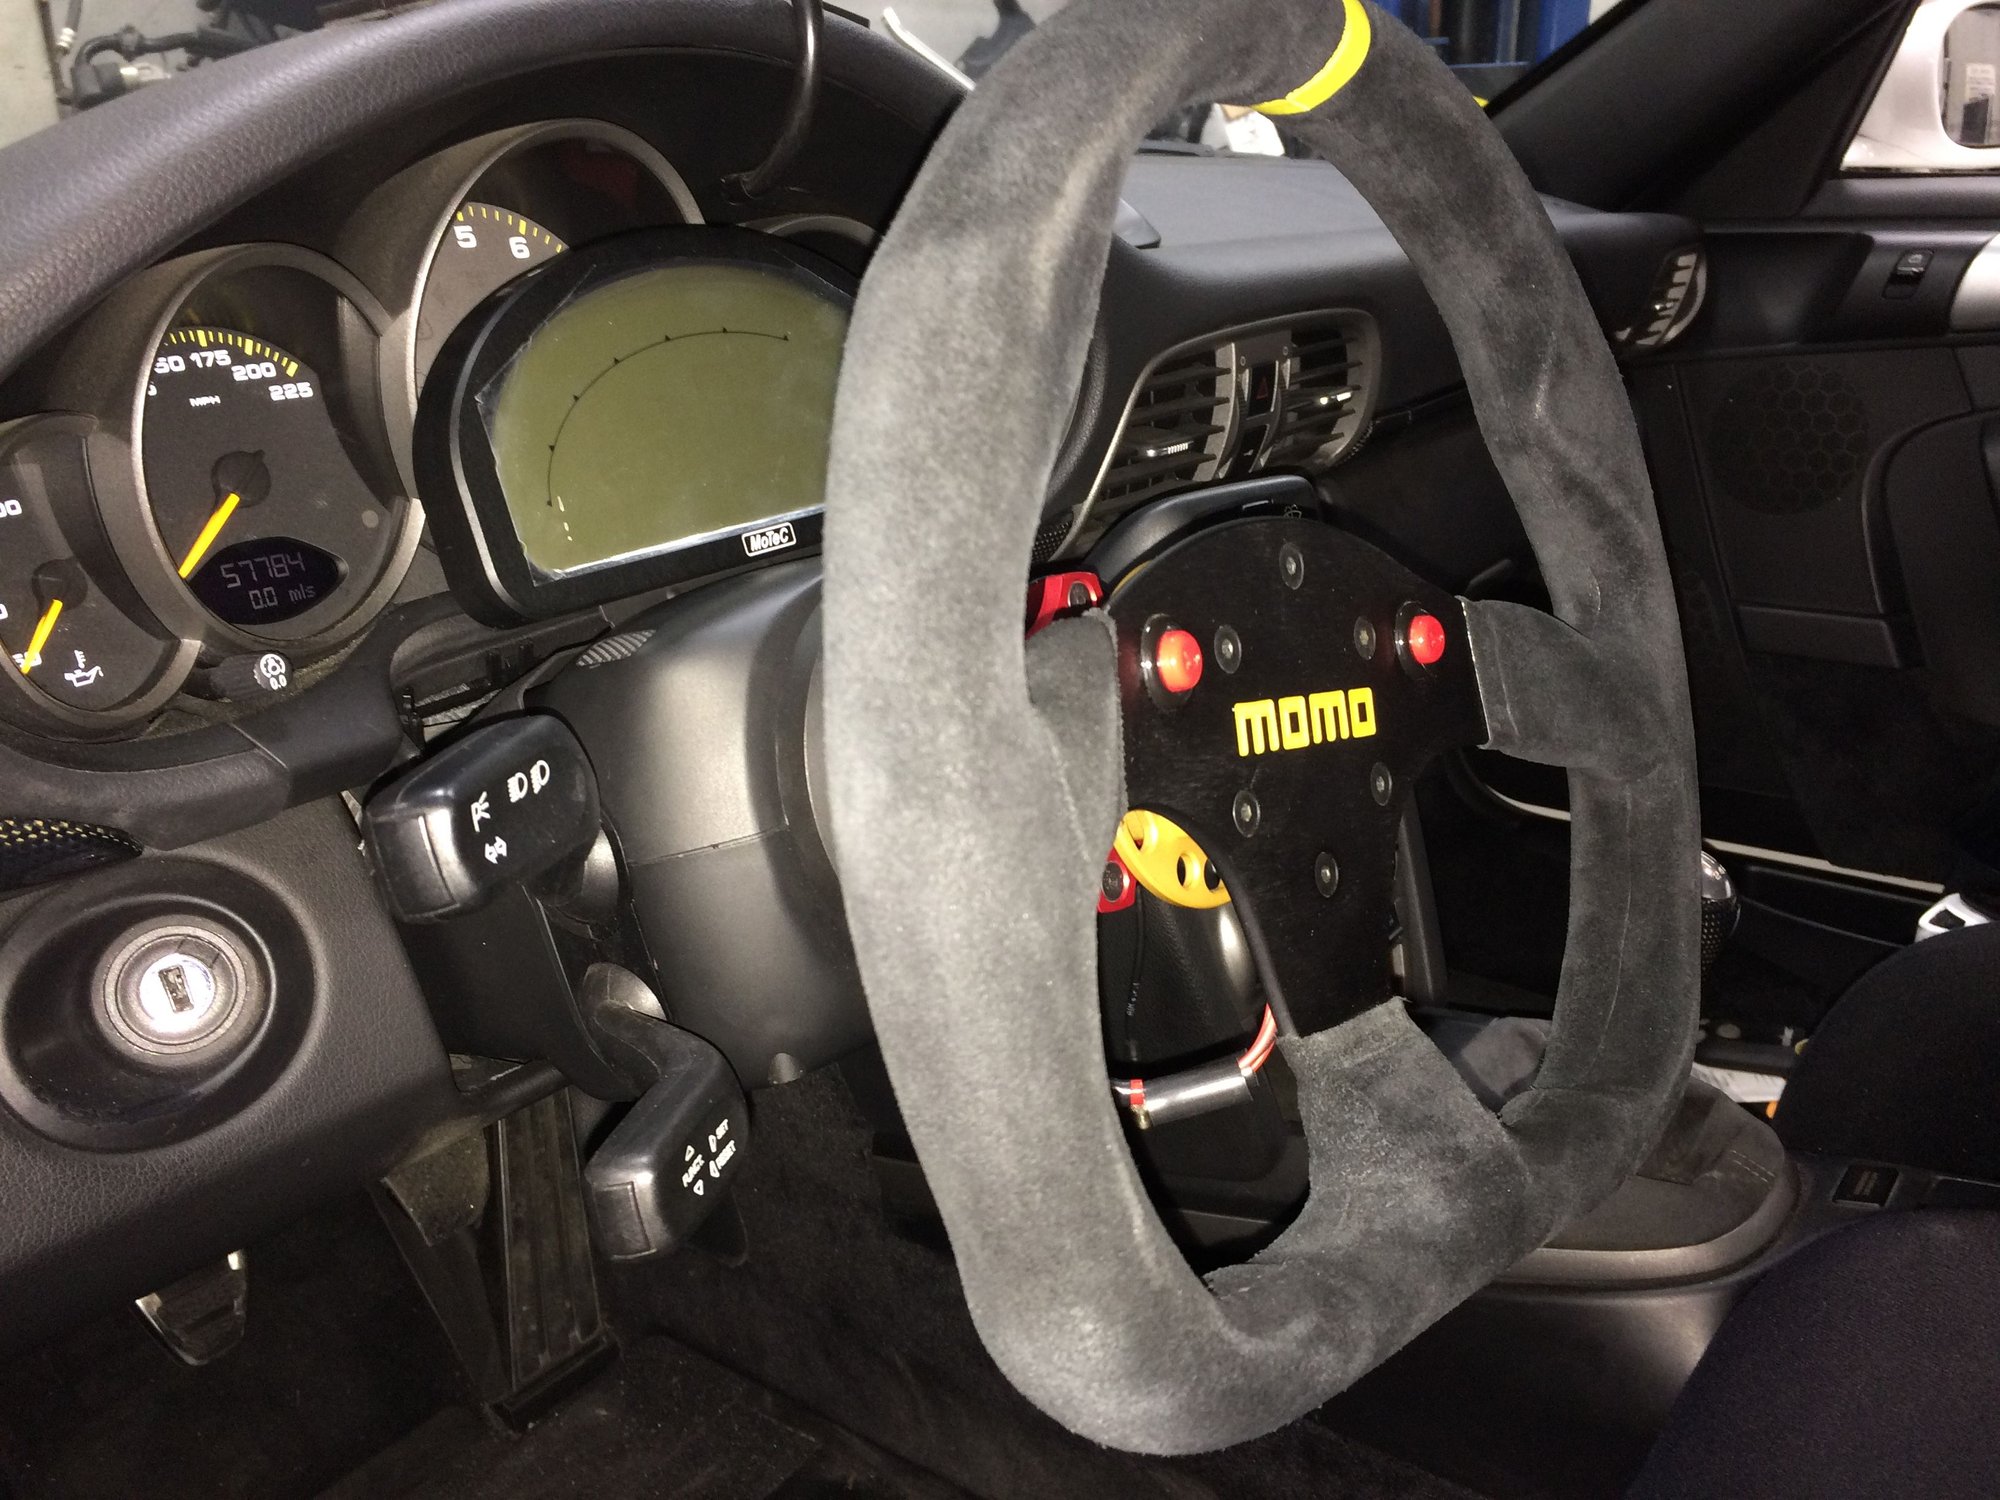
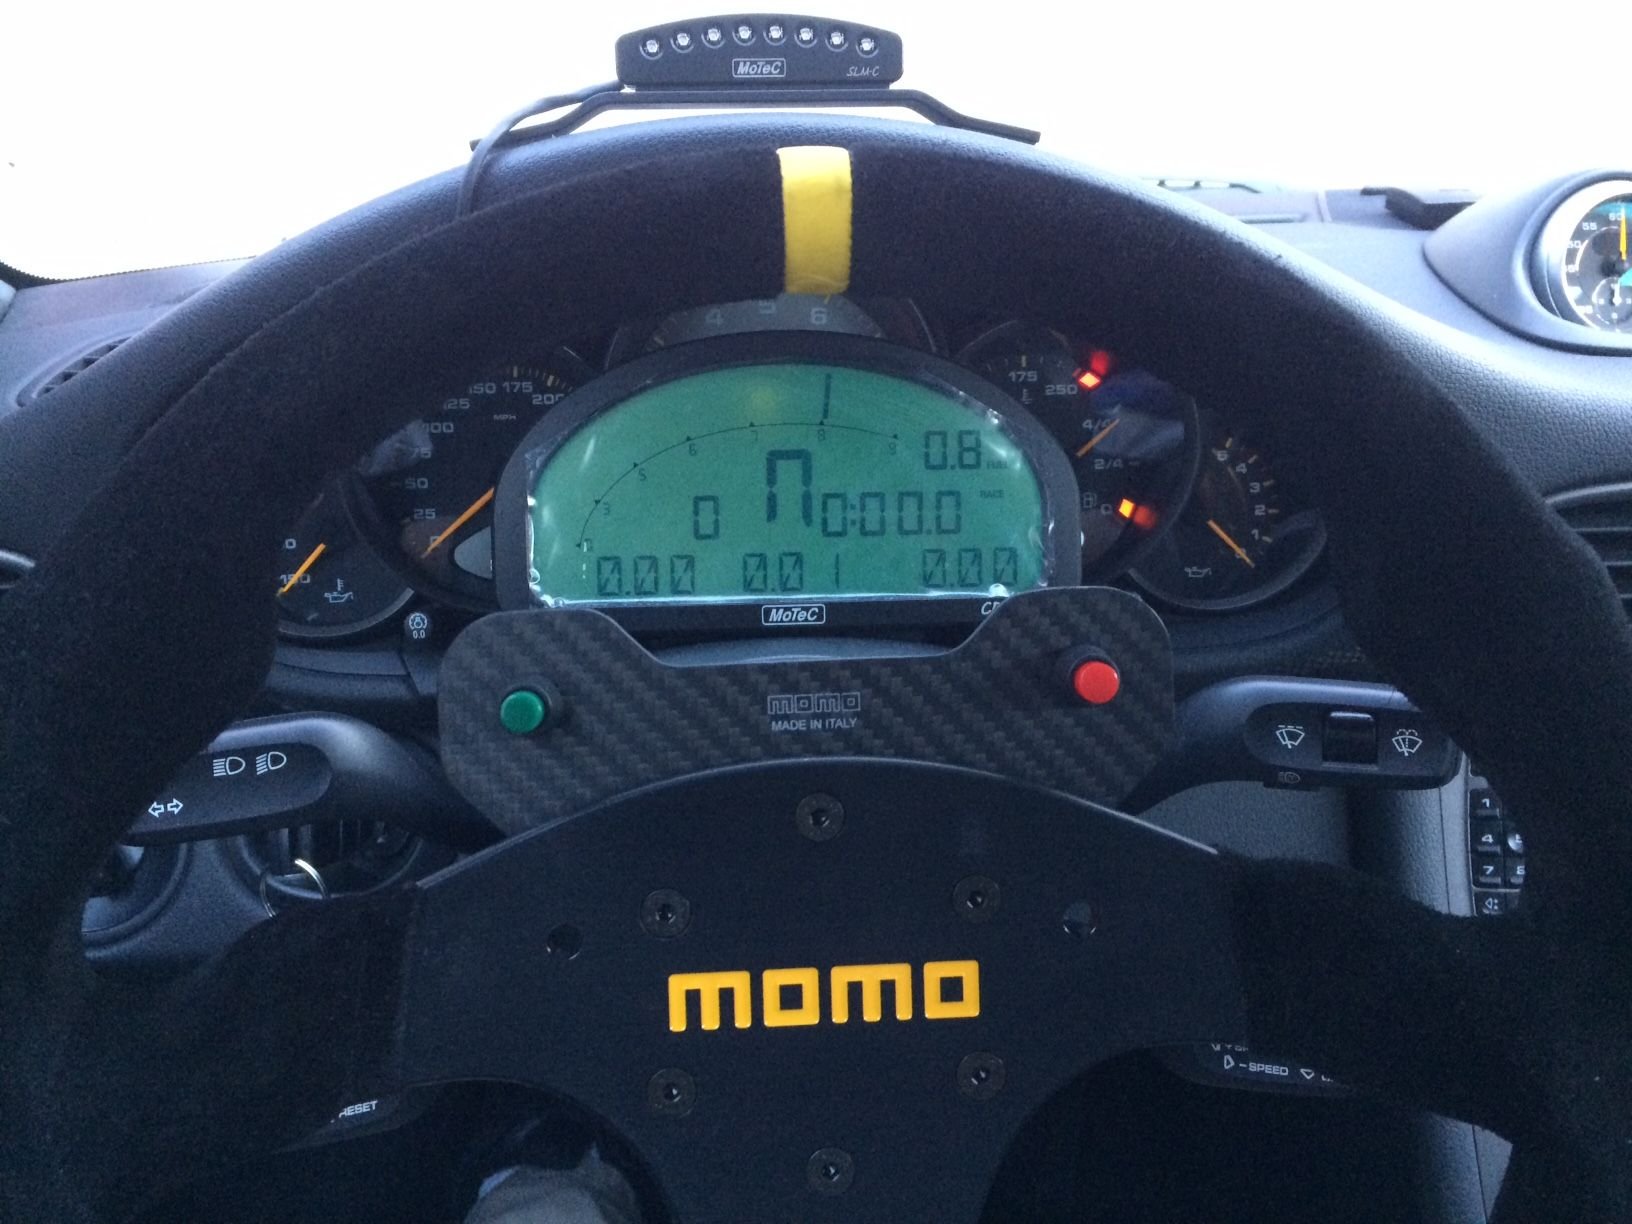
Now we have a fully functioning Motec dash...and extra holes in the steering wheel for weight reduction.
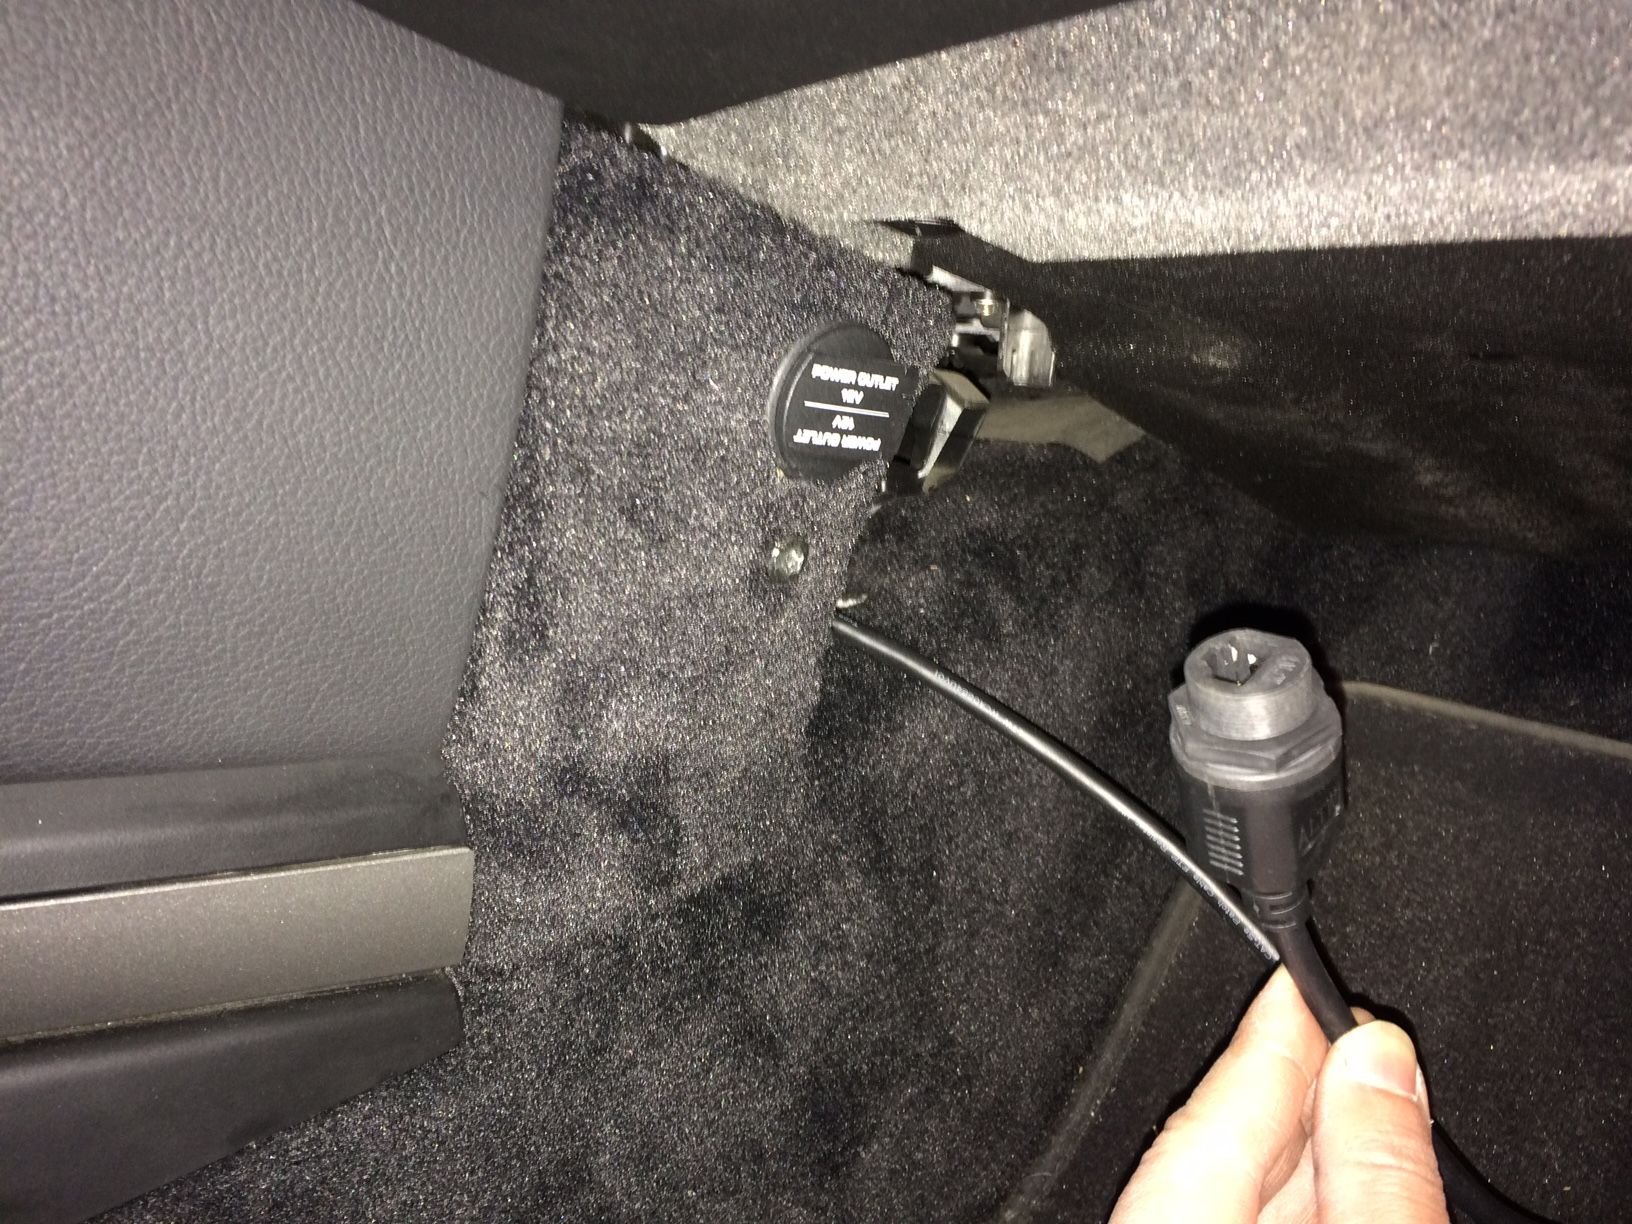
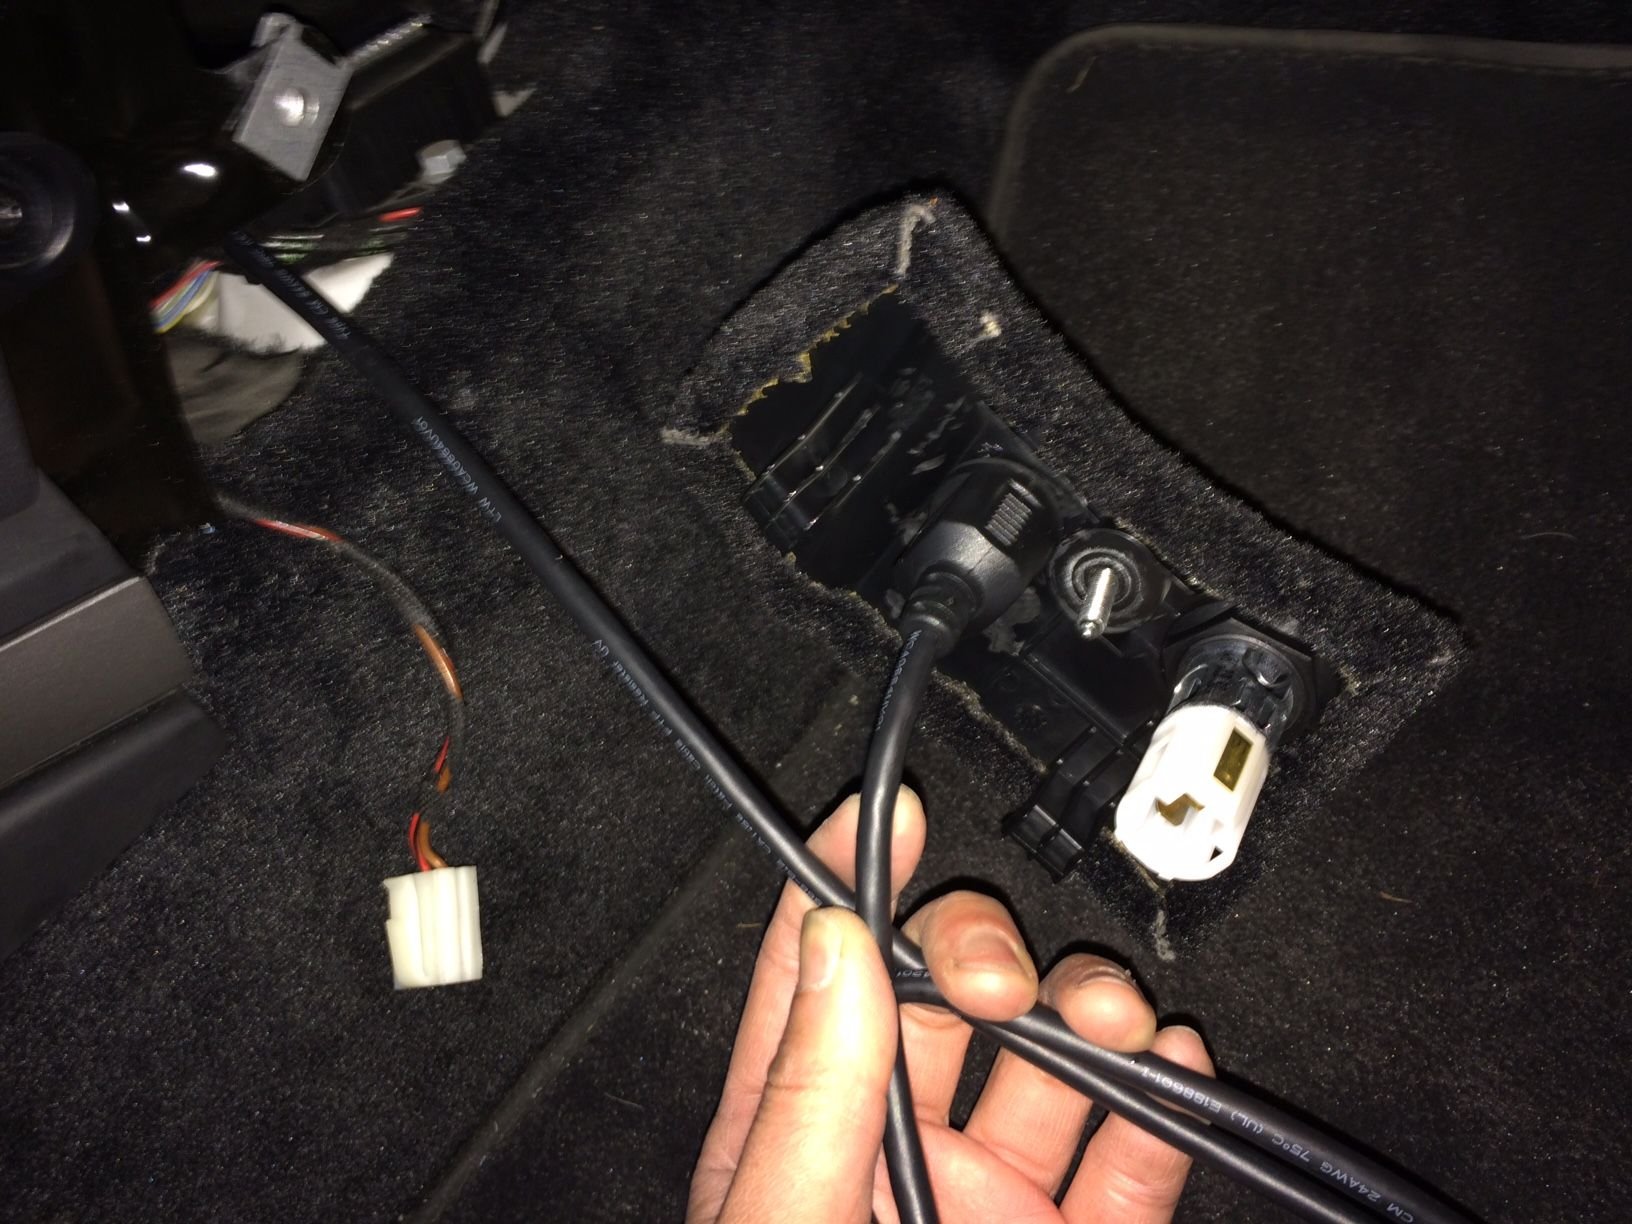
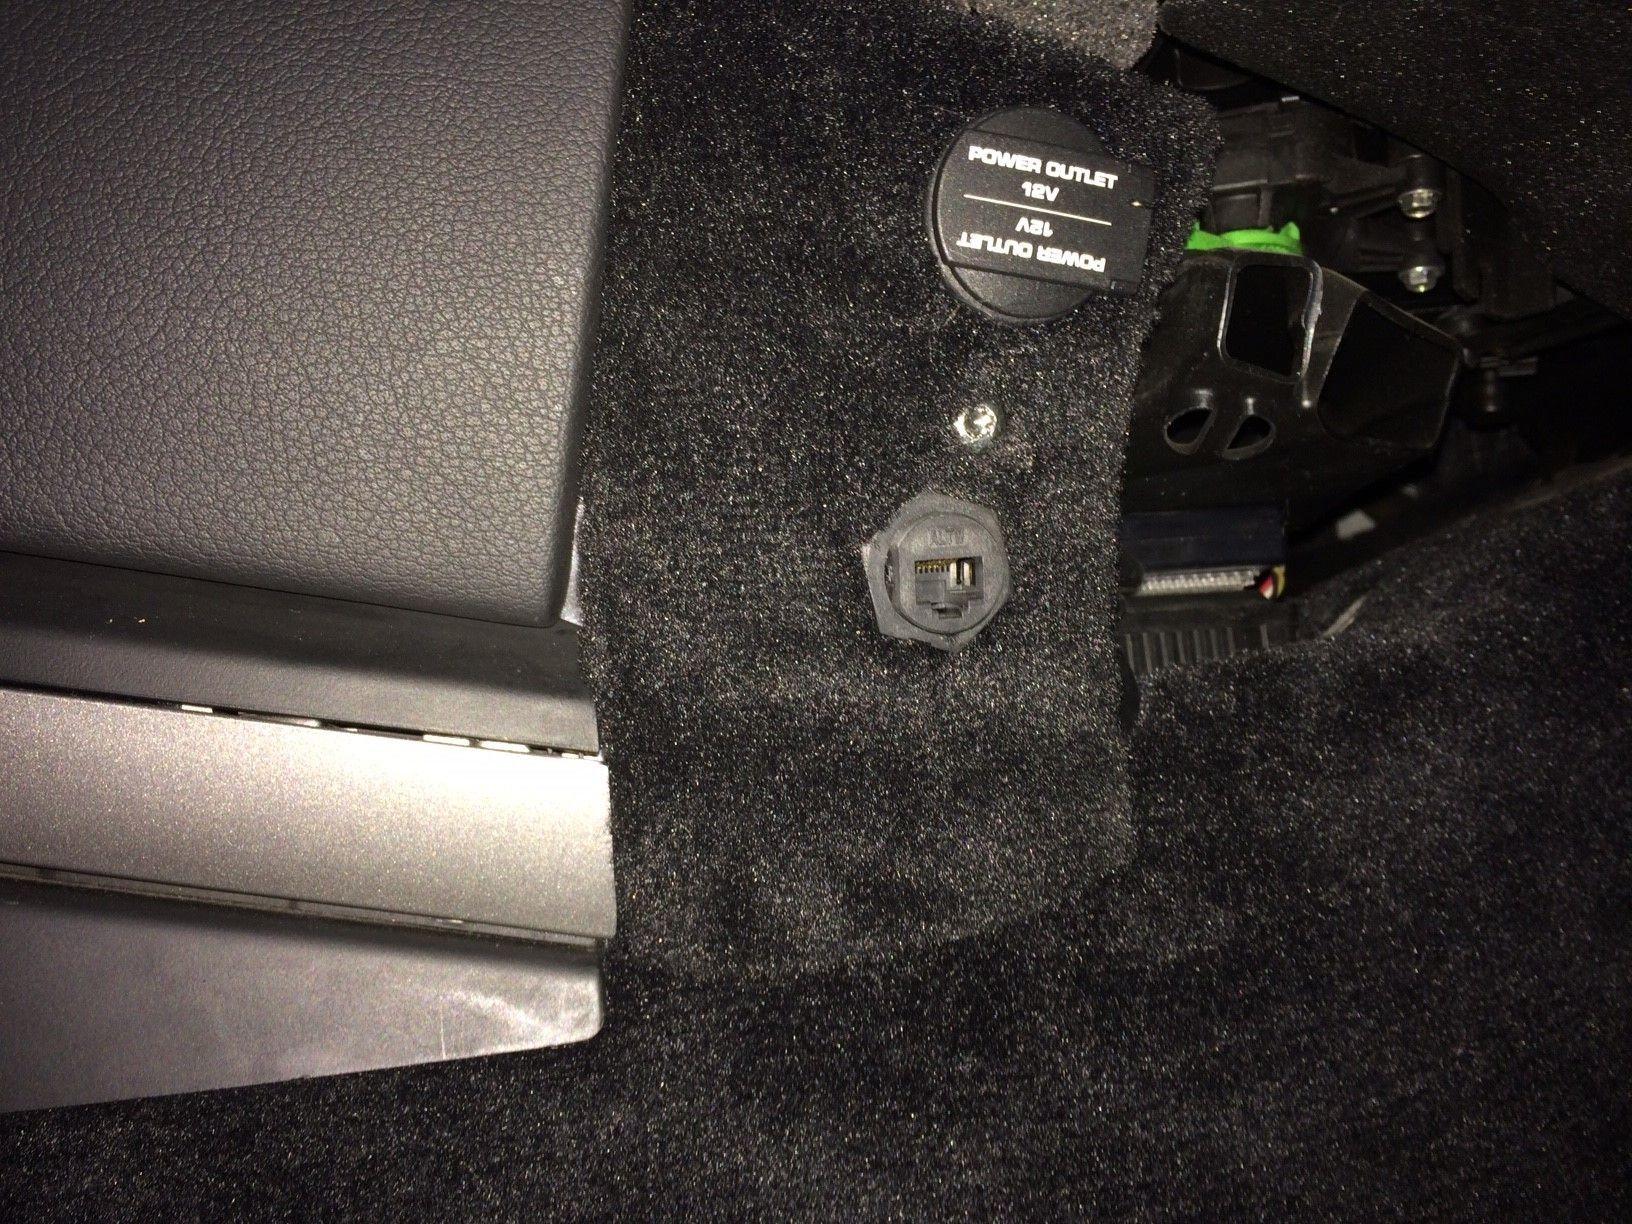
For the comm cable port I drilled through the carpeted trim piece on the passenger side for a factory-like installation.
I am loving this thing! I have different data on display via the Green button. Here the bottom row displays Lateral, Longitudinal, and Vertcal G force, along the big single-digit number in the middle as the gear indicator.


 02-17-2017, 10:51 AM