

Cf 4.0 plenum and cup airbox insert
 03-29-2014, 02:29 PM
#106

I am a little late to this party. It's Colin and I am the builder of the Plenum and other associated parts for PJS. PJS made his choice to commission my services to build the parts for him based on my reputation and experience in the composite field. For most the composite field is relatively new.
My experience is based on working with designers and builders that have opened up the upper limits of sailing. I have been very fortunate to be able to be around open-minded people, PJS and Michael Mount in my life. They fuel and encourage outside thinking and stick around until the end, working as a team to get the challenge met.
This a technical forum so le'ts get technical.
The plenums are built in sections that are sub assembled. The 3 sub pieces are bonded together to become one unit. This includes 2 outer runners and the center section.
The buyer's first concern is that on the website and forum post the runners have an orange protective coating and the second run do not have this.
The reason is the first plenums are infused with vynal ester resin and the orange is gel coat sprayed into the mold. I made the change in the next run and switched to a resin infused system with even higher cure temp which has it's own epoxy coating sprayed into the mold which is clear. The clear is actually a bonus as it doesn't hide any voids in the laminate. The texture of the inside surface of the runners is a mirror of the rough finish from the casting from the aluminum OEM part. In the past with the 996 GT3 plenums, I have taken the extra time to smooth the surface but there is argument as to which surface actually flows air best.
Each runner is built in two halves joined together and reinforced with carbon fiber seam tape from the outside. When the two halves are joined thickened epoxy squeezes out of inside of the seam. The outside is taped with a carbon fiber reinforcing seam. The inside seam is sanded to fair the inside joint and squeeze out of thickened resin. This may give the buyer reason to believe a dremel tool was taken to the part.
The center section of the plenum is a very complicated build. Not counting any related parts associated with the throttles o rhardware, there are (10) pieces that get laminated or bonded together one section at a time to make the part. With this process of secondary bonding and laminating the laminate has to be void of any surface finish. This is where most people get loss. Quality composite parts don't need to have the bling factor that gets associated with what most people think of as carbon fiber parts. To get a good secondary bond in laminating and bonding, the part must be free of any gloss and have a roughened surface that will aid in bond strength. The center section is built like a puzzle from the inside out with the lid going on last trapping the part. When the sections are laminated together a product called peelply is used to blend in the seam lines and most important allows the ammamine blush to leave the surface of the laminate. This allows secondary bonding. When epoxy cures there is a waxy blush that occurs. The surface will be sort of waxy and until the surface is broken down with ammonia and rescuffed the surface will not accept more secondary bonding. The concern that loose threads are dangling could be from a stray strand of the peel ply that has become epoxied into the laminate. I can assure that there are no loose carbon fiber threads in the plenum. The center section is sanded down to illiminate any squeeze out and smooth out any joined surfaces. The surface of the center section is sanded out smooth and does not need to be sealed or coated any further.
The concerns are the lack of colored gelcoat on the outside runners. (Covered)
Loose threads on the inside (Covered)
Unfinished inside surface of center section. (Covered)
30 day late? I have a limited amount of talented people to take care of all the demand. There is more likely a reason that delay occurs in a specialty business.
Last edited by autosea; 03-29-2014 at 05:26 PM.
 03-29-2014, 02:48 PM
#107
Rennlist Member
Thread Starter
Parts on my car and about 15 dyno pulls and 20 miles of street driving so far - no issues
So not a lot of use yet but the track season for me begins end of April
So not a lot of use yet but the track season for me begins end of April
03-29-2014, 03:32 PM
#109
Rennlist Member
Thread Starter
See post 60 in this thread for pre tune dyno tests with the only addition being the plenum and intake
Car has since been tuned on a Dynapak dyno - 444 whp
Extrapolated to the local dyno jet - estimate is 470 to 475 whp
I have to pick up the car and bring it back to town at which point the dyno jet estimate will be verified
All in all a 3.6 to 4.0 bore only build with Dundon exhaust, Dundon headers, autosea plenum, blitzkrieg Autowerks tune, autosea intake and a little BBI head work is about 90-100 whp in our experience
Stock crank, stock cams, stock rods - truly just a big bore kit from wrightwood racing (mahle ms pistons)
03-29-2014, 07:20 PM
#110
Burning Brakes

those are some really impressive numbers. what is the rough total cost if you don't mind me asking?
 03-29-2014, 07:45 PM
#112
Rennlist Member
Thread Starter
Priceless :-)
Dare I add it all up...
30ish i would guess if you are starting with bone stock
I already had headers and exhaust etc
Labor, plenum, intake, tune, head work, machining, pistons, cyls, misc parts, etc
Not inexpensive but my engine had to be torn down to repair cylinder base gaskets that were leaking so this became a "while you are in there" project
03-29-2014, 08:05 PM
#113
Rennlist Member
Thread Starter
03-29-2014, 09:29 PM
#114
Rennlist Member
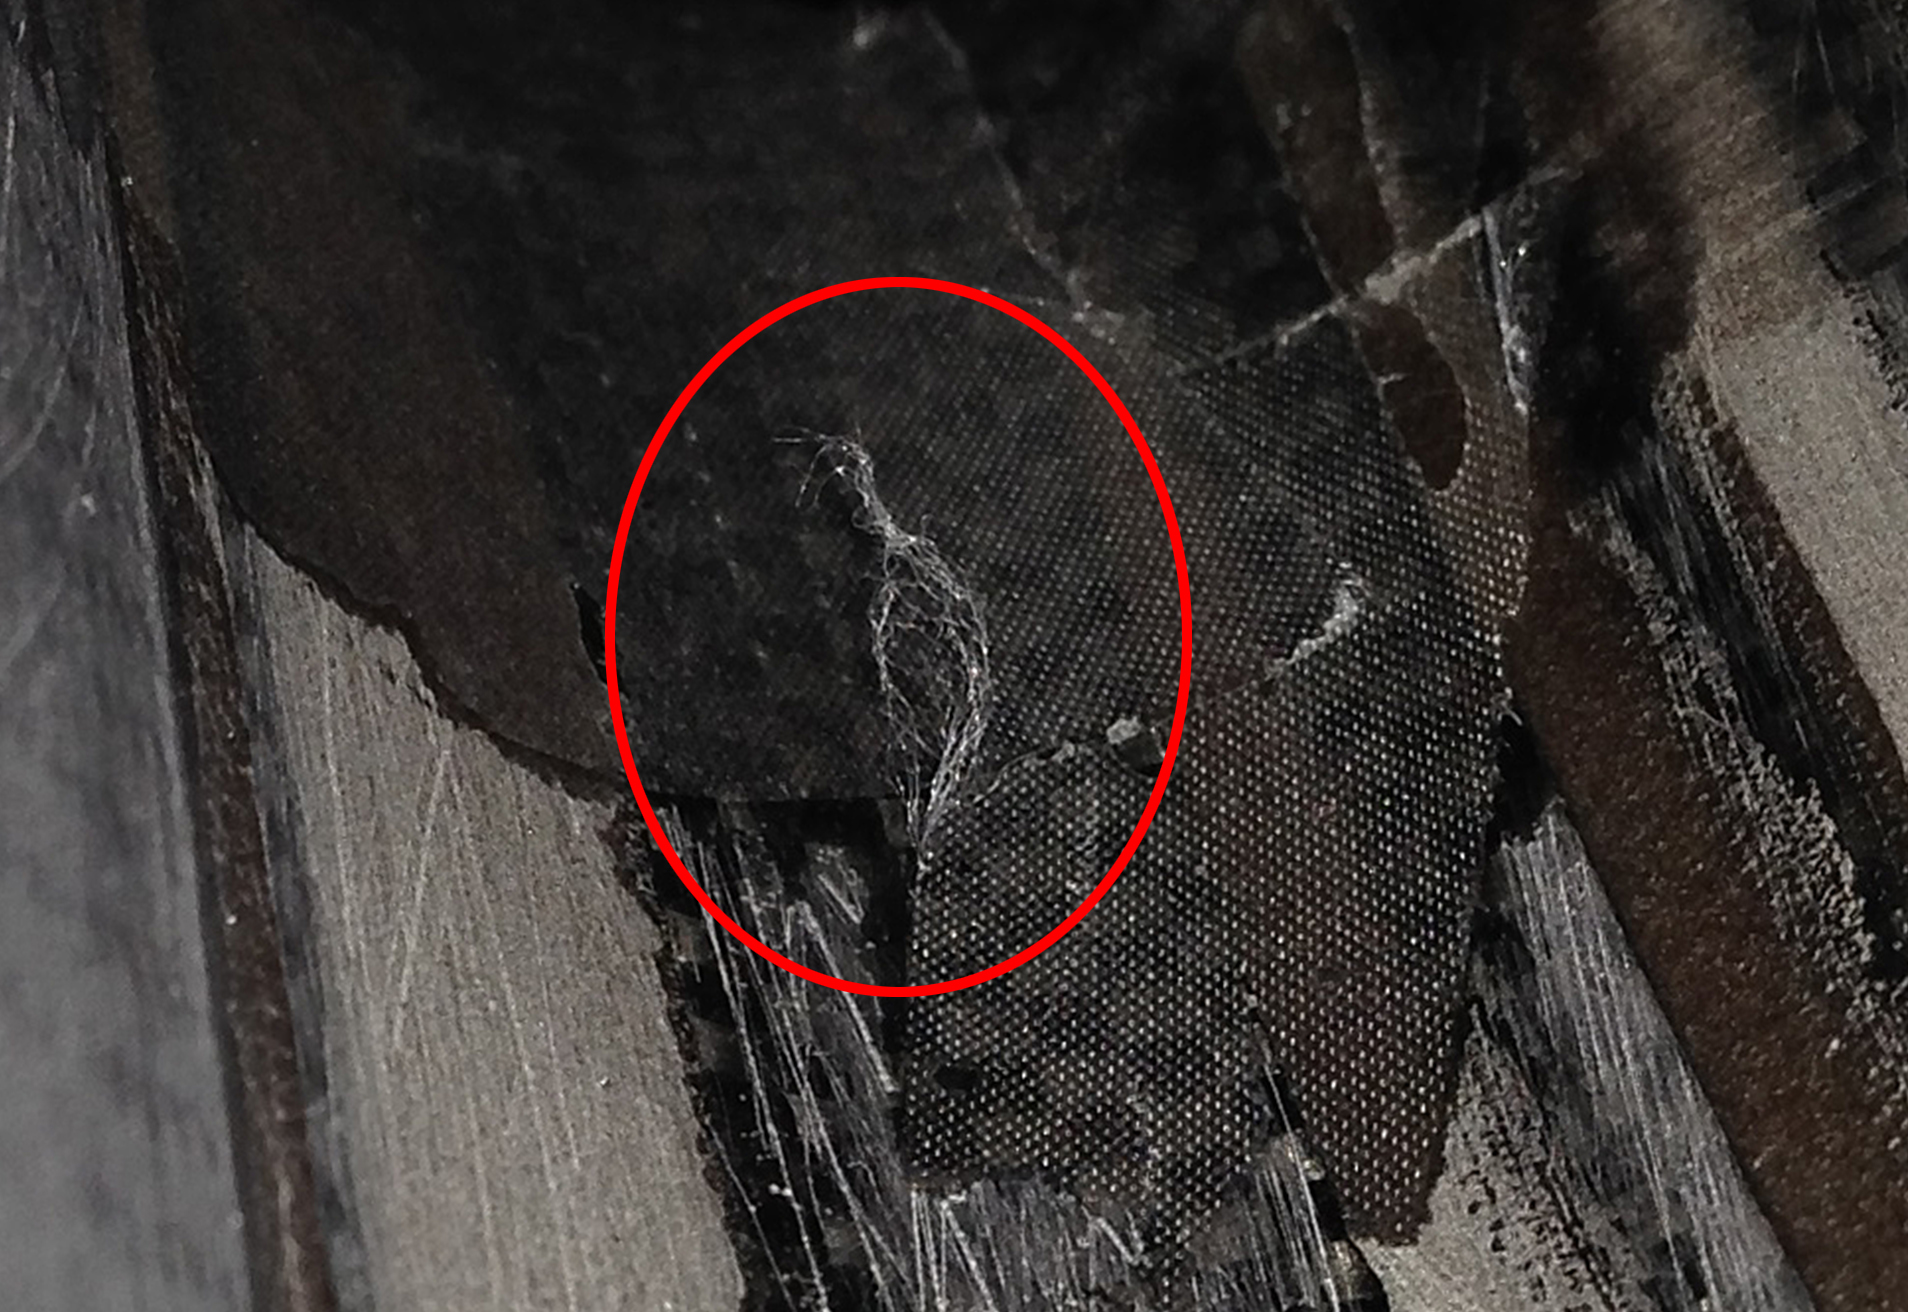
I was ready to state my apologies to the vendor (whom I'll credit as a very dedicated guy; we must've spoken on a dozen phone calls lasting hours in total) and thought I must've been crazy to level accusations against him in the first place. I questioned my own observations after seeing the outpouring of support on this forum and via multiple PMs from other customers. Then I looked at the plenum again just now. Can you please state what is in the red circle? I can pluck this (and another couple I can see) and send it back in an envelope. Like I stated in my email to Colin before, I've plucked 4-5 other similar "***** of fiber" from inside the center section before, and this one is no different from the others.
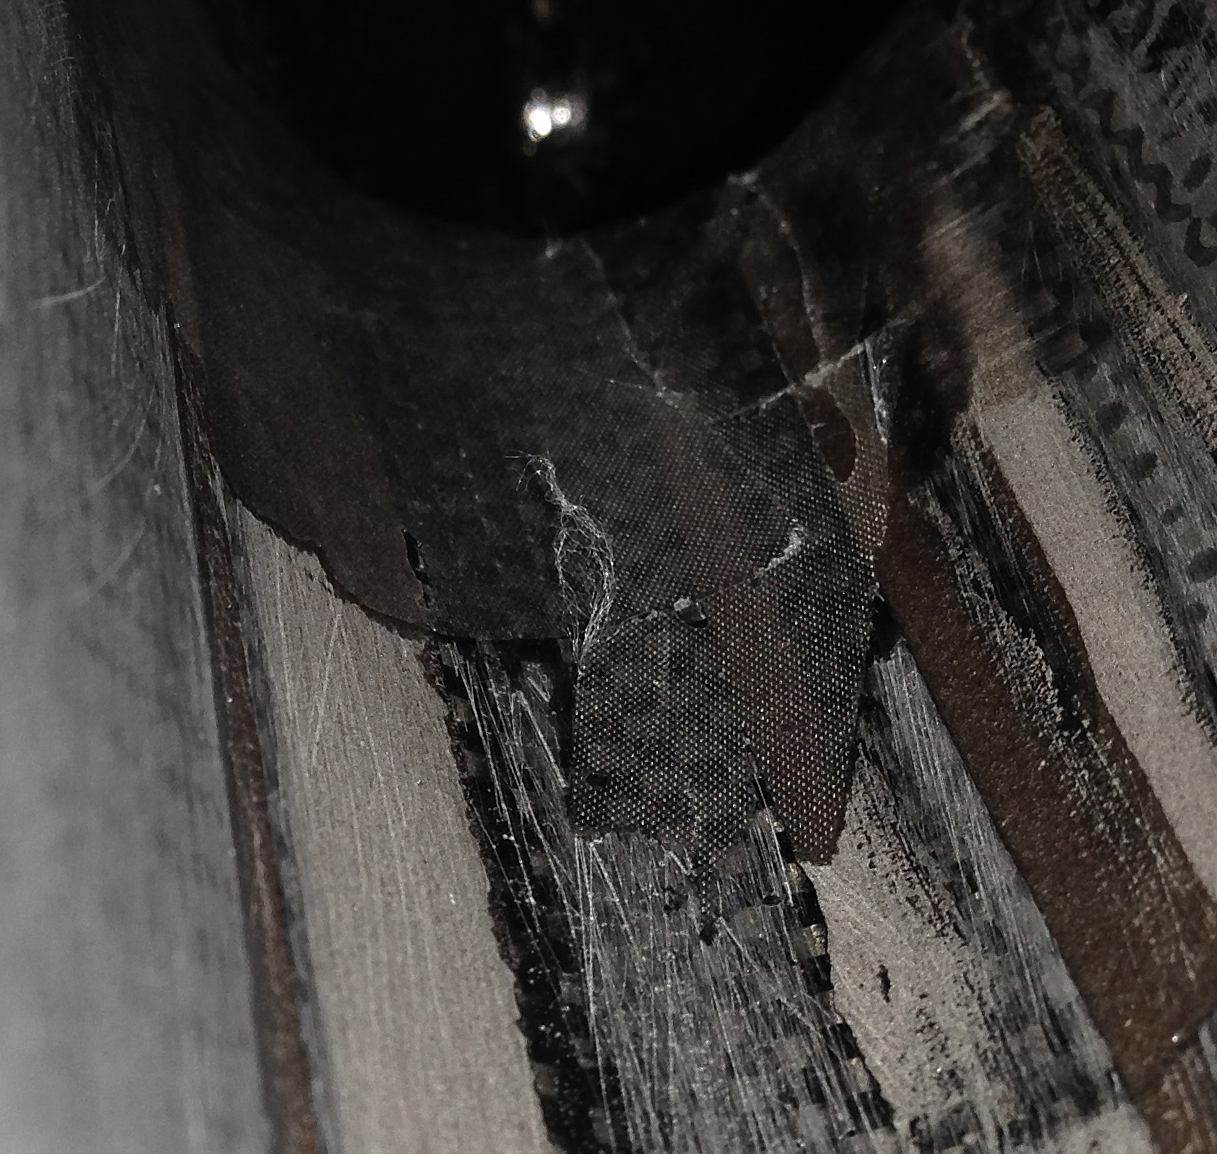
The height of this strand is about the size of a nickel. Same as the others I've come across:
Part of me wishes you'd tell me that these things are trivial and are the CF equivalent of tire injection studs, and that they'd burn up like nothing in the combustion chambers. But I don't know and my engine mechanics won't venture to make that statement. All I know is I've plucked a few of them in areas I can see before I reached out to the vendor then this forum. And these are just the places I can see...
Last edited by CRex; 03-29-2014 at 10:03 PM.
03-30-2014, 12:05 AM
#115
Hi guys. I am Colin's "best assistant" ...  .... Crista. I have worked with him on carbon fiber projects for 17+ years. I have been following this post. This is interesting. The area in this photo seems very magnified because I don't see the carbon fiber print in this photo. I am trying to figure out where exactly it was taken inside the plenum and what kind of camera can get in there like that... just curious. Amazing. Back to the main topic. Since I am not there I will guess that this area in the photo is an area of epoxy that had peelply on it. Peelply is a nylon fabric we apply on top of wet epoxy to prevent the epoxy from blushing. The threads are very small and in this case would have a blueish tint (or appear white in color becasue small). What happens is the peelply must lay down completely so the resin saturated area is completely covered. It is a time consuming process in the lamination ... as are all the processes in these.. in my opinion. What happenes is we often have to cut the peelply into small pieces to get the entire surface covered especially with complicated shapes with curves, etc. The peelply actually gets completely saturated with epoxy also for the best effect. What happens is when we pull the peelply off tiny strands from the cut edge stay in the epoxy. We sand everything numerous times to get them out. We intend and work very hard to remove all the strands. They are usually very small and short so they are hard to get your fingers to pinch them to pull them off. Remember they are stuck in epoxy. The sanding usually removes all. We even have techniques with power tool that help in this process. So I was very surprised to see and hear this with all the sanding that we do. The light used and the magnification of the photo makes them look much bigger in this pictuces. The area with all the dots of light in the photo which some may think is cf.. is... and this is again guessing since I am not there and it is inside the part, etc...the dots of light are the light reflecting in the impression of the peelply makes in the resin... When we pull the peelply to mee it looks very smooth so that is why I am guessing that this image was magnified. The weave of the peelply is so tight that I have never seen the impressions that big.. so.. back to the threadlike strands... the one in the picture looks as if someone tried to pull it off with their finger and frayed it. Again magnified if that is correct.. it looks huge. The ones I have seen are always short and tiny thread like and the peelply we used is bluish. This is all very interesting because if we had ever known those were theree we would have worked very hard before assembling to remove those. I would like to know the exact location of them for the future. Thanks for listening.
I just need to say that we put sooooooo many hours into these parts many which aren't ever reflected in the cost. Honestly they amaze me. I have heard greats results have come from them. I would like to know if the strands are white or light blueish... Peace. Crista.
.... Crista. I have worked with him on carbon fiber projects for 17+ years. I have been following this post. This is interesting. The area in this photo seems very magnified because I don't see the carbon fiber print in this photo. I am trying to figure out where exactly it was taken inside the plenum and what kind of camera can get in there like that... just curious. Amazing. Back to the main topic. Since I am not there I will guess that this area in the photo is an area of epoxy that had peelply on it. Peelply is a nylon fabric we apply on top of wet epoxy to prevent the epoxy from blushing. The threads are very small and in this case would have a blueish tint (or appear white in color becasue small). What happens is the peelply must lay down completely so the resin saturated area is completely covered. It is a time consuming process in the lamination ... as are all the processes in these.. in my opinion. What happenes is we often have to cut the peelply into small pieces to get the entire surface covered especially with complicated shapes with curves, etc. The peelply actually gets completely saturated with epoxy also for the best effect. What happens is when we pull the peelply off tiny strands from the cut edge stay in the epoxy. We sand everything numerous times to get them out. We intend and work very hard to remove all the strands. They are usually very small and short so they are hard to get your fingers to pinch them to pull them off. Remember they are stuck in epoxy. The sanding usually removes all. We even have techniques with power tool that help in this process. So I was very surprised to see and hear this with all the sanding that we do. The light used and the magnification of the photo makes them look much bigger in this pictuces. The area with all the dots of light in the photo which some may think is cf.. is... and this is again guessing since I am not there and it is inside the part, etc...the dots of light are the light reflecting in the impression of the peelply makes in the resin... When we pull the peelply to mee it looks very smooth so that is why I am guessing that this image was magnified. The weave of the peelply is so tight that I have never seen the impressions that big.. so.. back to the threadlike strands... the one in the picture looks as if someone tried to pull it off with their finger and frayed it. Again magnified if that is correct.. it looks huge. The ones I have seen are always short and tiny thread like and the peelply we used is bluish. This is all very interesting because if we had ever known those were theree we would have worked very hard before assembling to remove those. I would like to know the exact location of them for the future. Thanks for listening. I just need to say that we put sooooooo many hours into these parts many which aren't ever reflected in the cost. Honestly they amaze me. I have heard greats results have come from them. I would like to know if the strands are white or light blueish... Peace. Crista.
03-30-2014, 12:23 AM
#116
It is Crista again for one more point.. The picture shows huge sanding scratches... I am meticulous about my sanding. The picture makes the sanding scratches look huge. they were sanded to 180 grit ... the light and size makes all this look way worse than the naked eye. Peace Crista.
Last edited by autosea; 04-06-2014 at 10:35 PM.
03-30-2014, 12:41 AM
#117
Me again... Look closely at the epoxied area. Now I see through the peelply impressioned clear epoxied area with the light reflection in it to the c.f cloth pattern below. It is like a checker board, faint but there. Look closely. Hard to see at first. The size of the weave in this pattern is very big. That verifies to me that it is a tiny peelply thread magnified in the pic. Enuf' from me for now.
03-30-2014, 01:16 AM
#118
Crista,
Just curious..are you saying that since you believe the magnification is high, that the flaws shown in the pictures can be excused? I have no idea what camera the guy used either, but unless it's a microscope, I would assume any naked eye can probably see those flaws.
As a vendor, why not just do the right thing and swap him a good piece? Not all vendors and manufacturers can have a perfect production record.
/2c
03-30-2014, 04:29 AM
#120
Rennlist Member
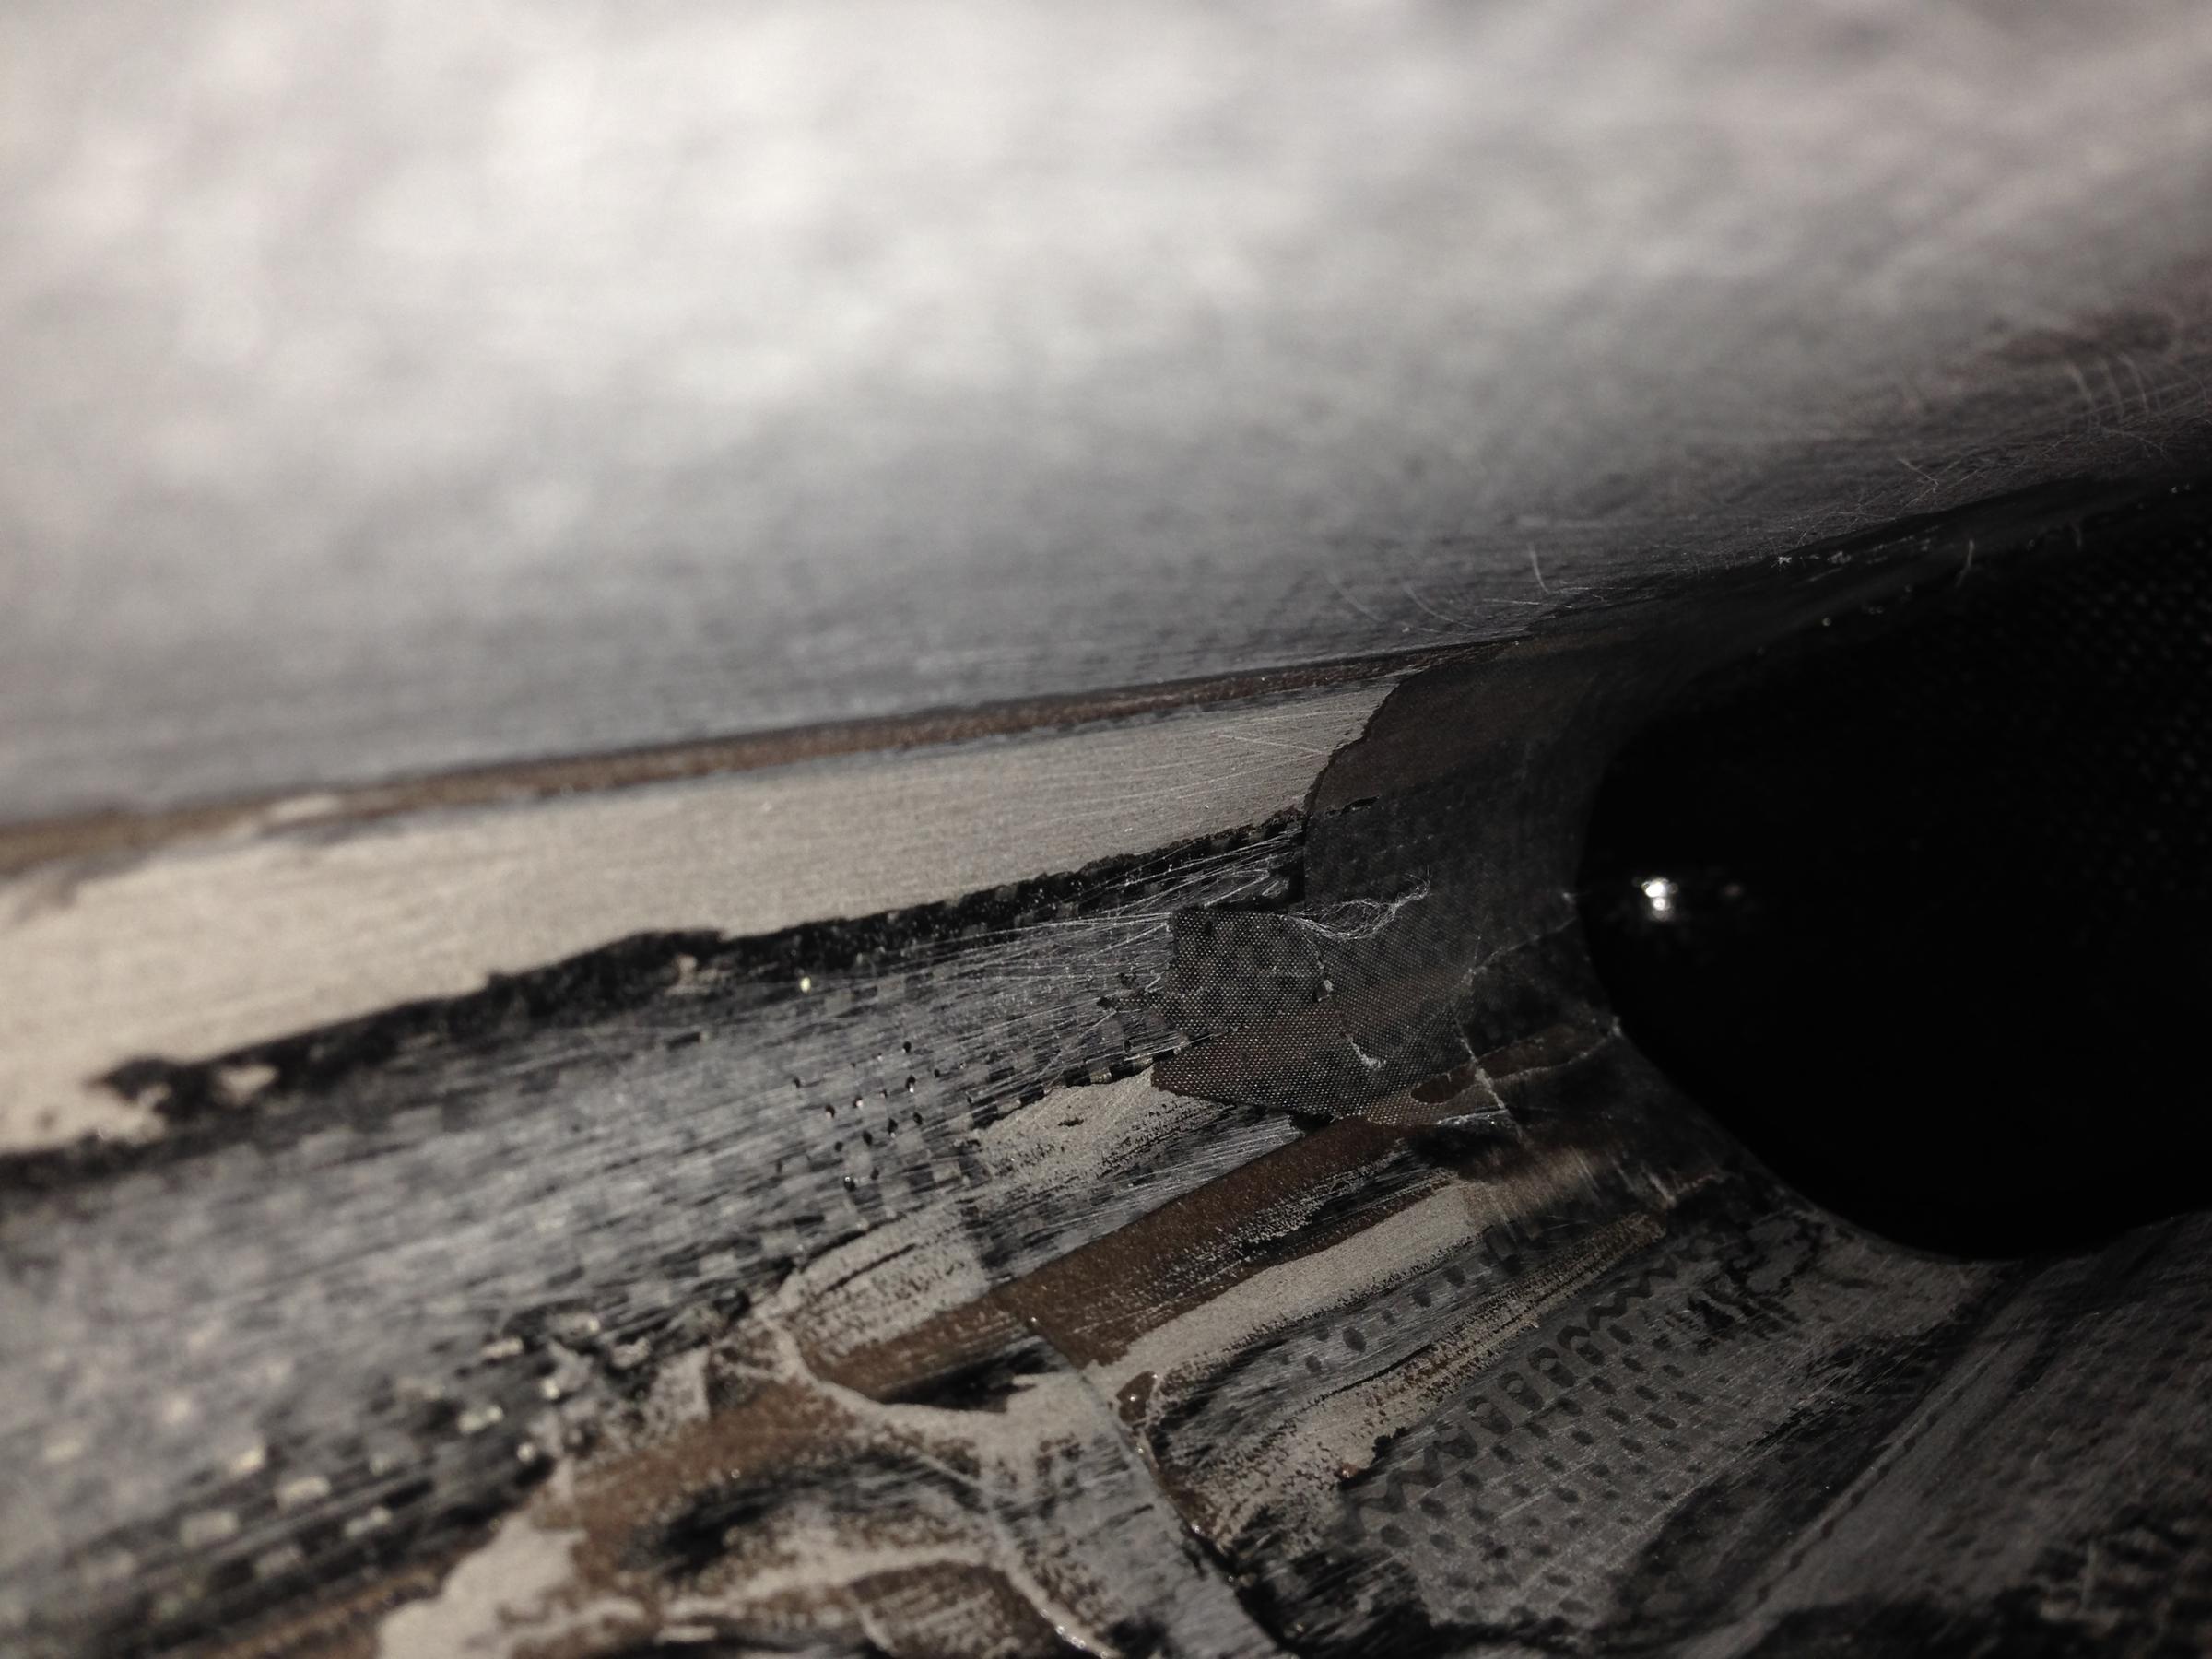
This is starting to really **** me off. Picture is from an iphone. Just like that, stuck lens-first, into the throttle opening. The scratches and sanding and all very naked to the untrained eye. This particular strand happens to be right within inches of the throttle intake.
You really wanna continue defending yourself like that?? Do you want me to put a nickel next to it to prove this in scale? What about my other pictures showing the tattered insides of your plenum (emailed to Colin)? Just tell me how you want the picture and I'll take new ones for you. No special tools required. Nothing but my lil iphone lens and the light that comes with it.
As a vendor you've crossed the line and are really on a different continent. You may have an engine-critical issue right there. Tell me if I'm wrong. Not just one, but MULTIPLE locations with loose fiber (I've plucked 4-5 ***** out before) when the plenum interior needs to be clean-clean. The sanding is very visible all over the inside and there's no need for debate--simple iphone pictures tell the facts. I haven't even begun to question whether your sanding has left any rough particles that can be ingested into the cylinders--that's an ugly thought nobody needs right now.
Don't EVER try to discredit a customer unless you have a ton of facts to back your claim. This is infuriating and always backfires. If you wanna play this out like a public trainwreck just say it. I really can't believe what I read. State whatever measurement you wanna take and I'll do it. Just make sure you're ready for the public to see what they will.
Lest you try to insult everyone's intelligence any further, this is the original file from the iphone in original format. Check the EXIM.
Your other customers really went out of their way to support you and Colin--tells me there's gotta be something good and you should have the benefit of doubt. That's until you eliminated every shred of doubt with your very own words.
Last edited by CRex; 03-30-2014 at 05:01 AM.