When you click on links to various merchants on this site and make a purchase, this can result in this site earning a commission. Affiliate programs and affiliations include, but are not limited to, the eBay Partner Network.
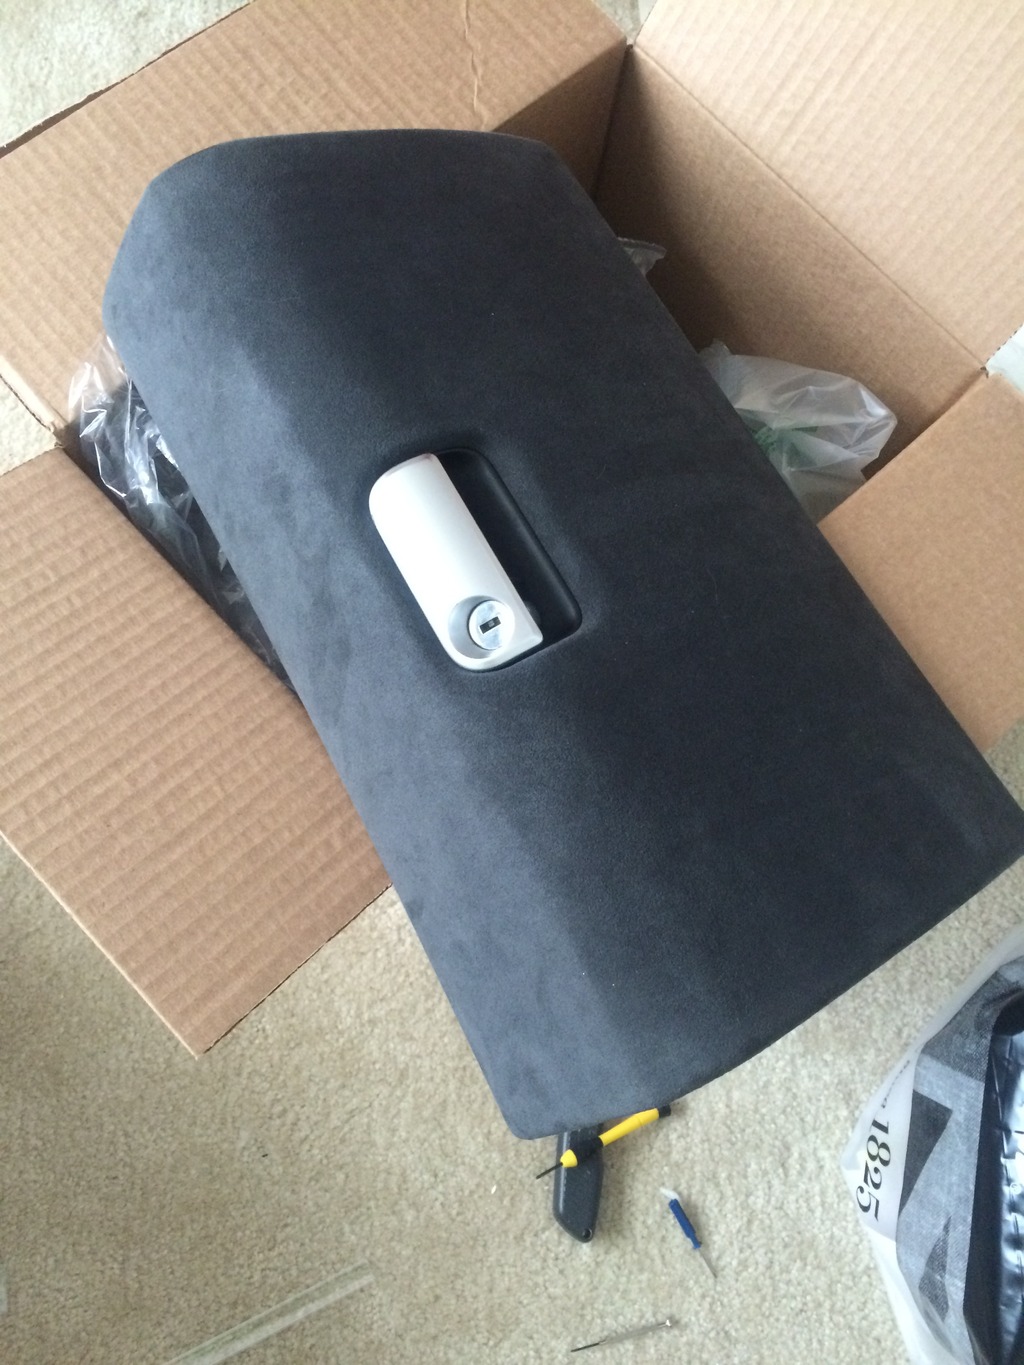
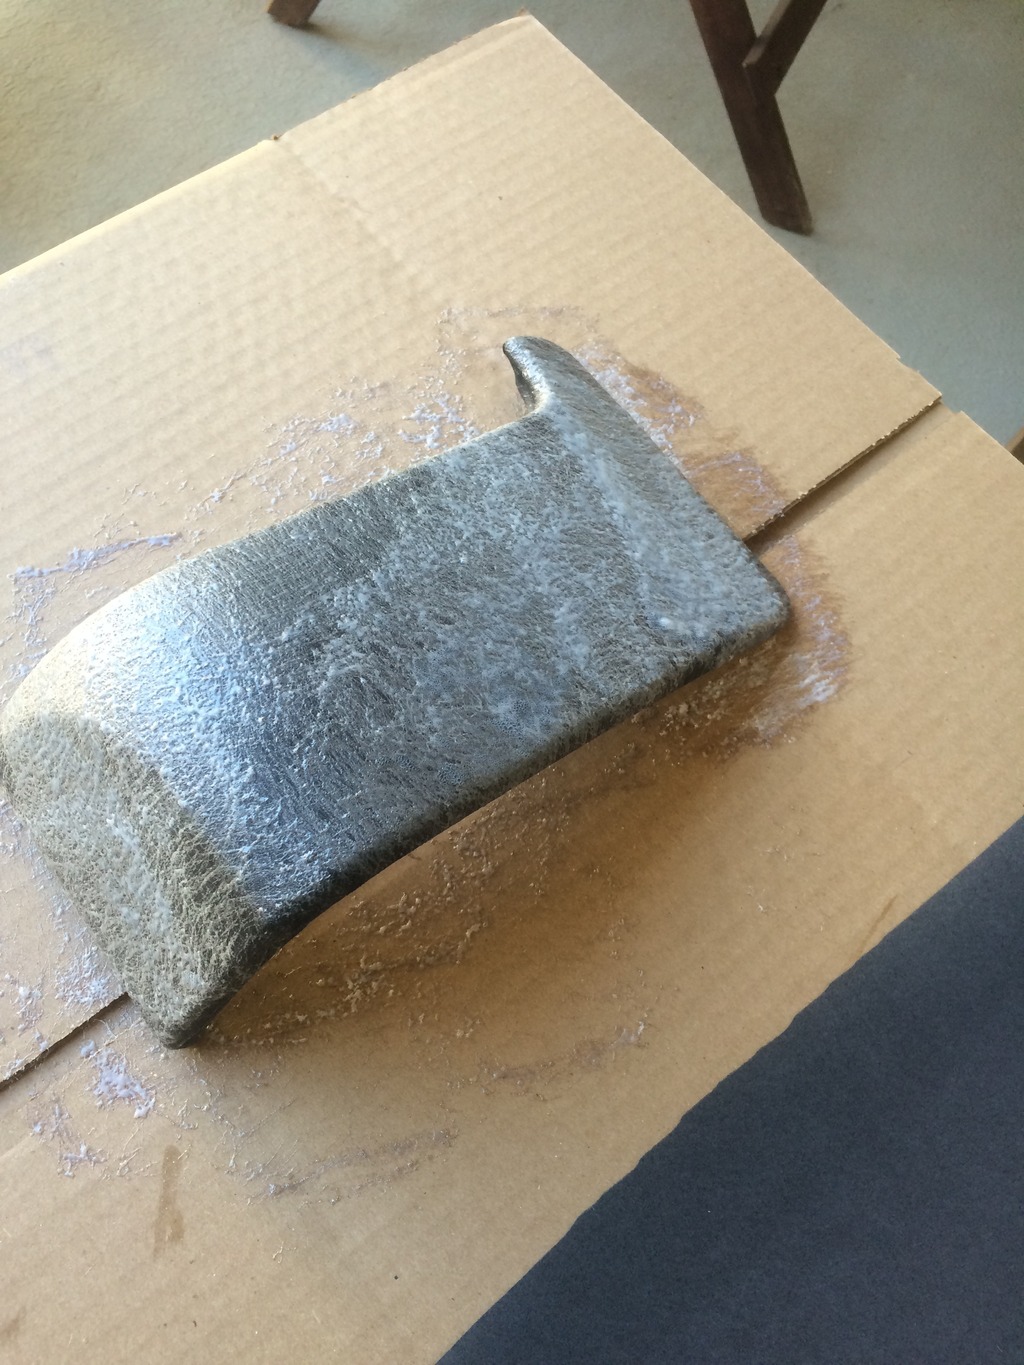
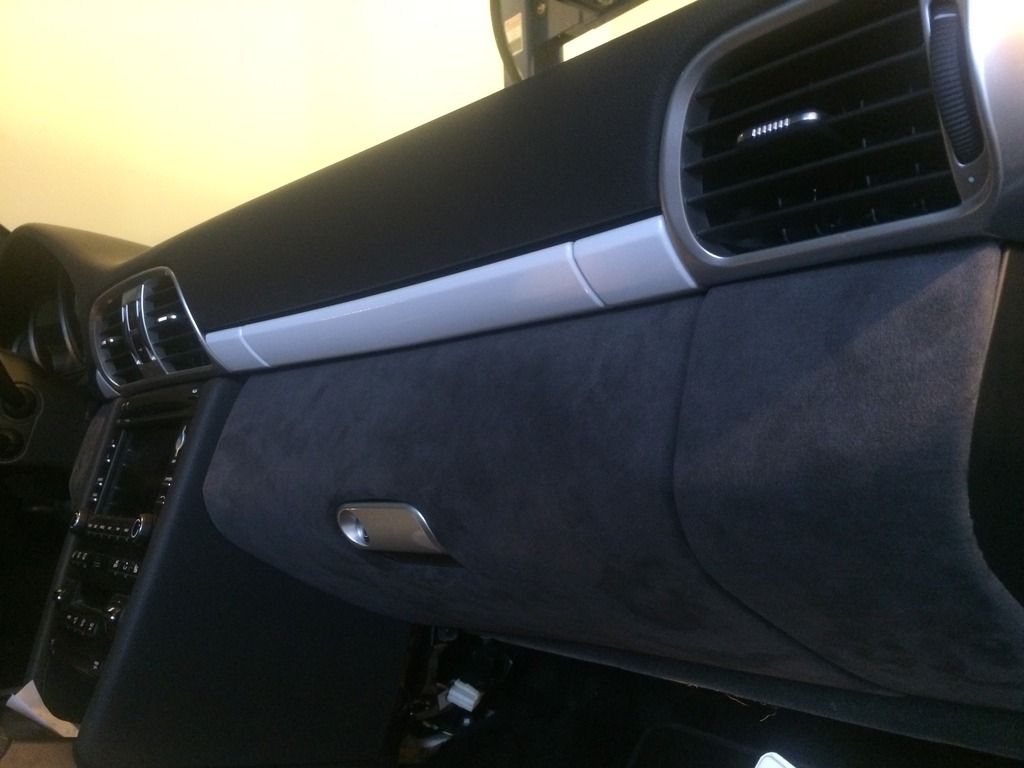
Decided to go ahead and tackle this project this weekend. I actually liked the contact cement much more than the 3M 90 but I suppose for large surfaces the 90 gets you quick even coverage.
Did not like doing the corners. Hard to do without wrinkles and ripples but it can be done by a novice with patience.
Haven't installed them yet but for the lower dash all done.
You can do a lot to dress up the 997.1 triangular wheel and then your multi-function switches can be transferred to the new wheel. I did this with my DCT carbon one. I actually like the triangular airbag wheel as it has much less plastic than the round airbag one, just not the design of the wheel rim itself.
hey pete, how is that floor matt holding up under your heel, is it getting a "bespoke" wear mark? the rest is leather, yes? i really like the look and must be easy to clean, dirt can't hide in the carpet... where from?
Decided to go ahead and tackle this project this weekend. I actually liked the contact cement much more than the 3M 90 but I suppose for large surfaces the 90 gets you quick even coverage.
Did not like doing the corners. Hard to do without wrinkles and ripples but it can be done by a novice with patience.
Haven't installed them yet but for the lower dash all done.
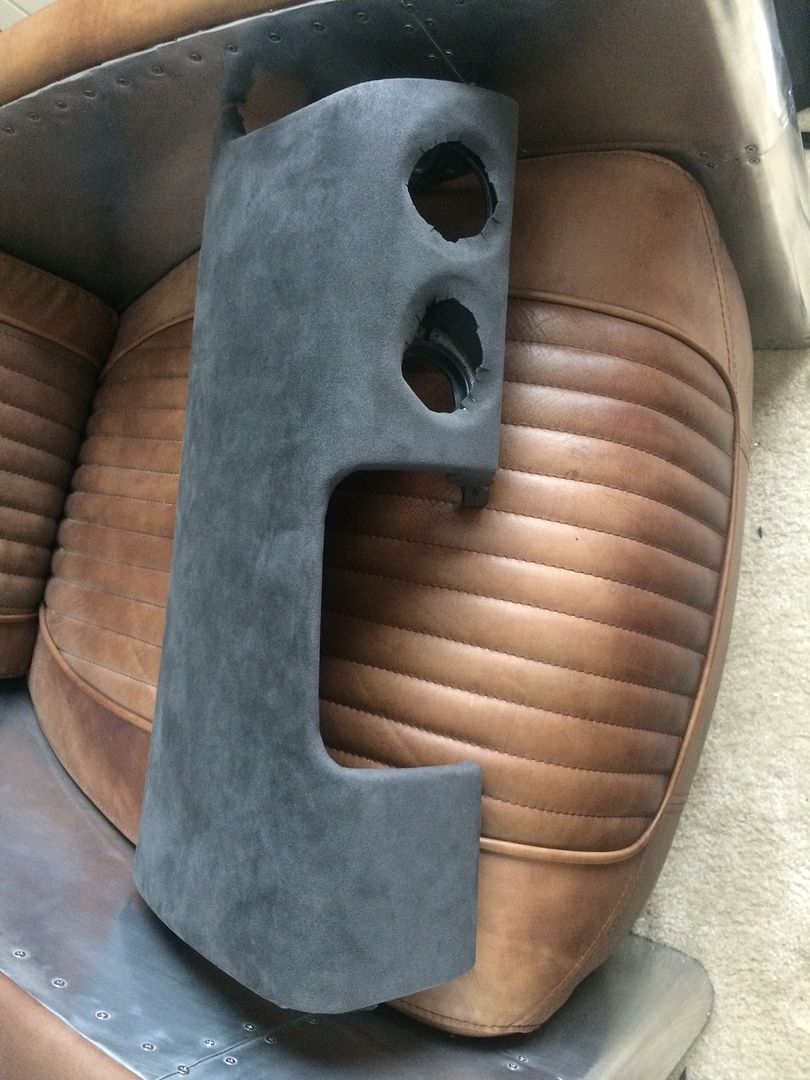
i can't help but notice the chair that your lower dash is sitting on...is that one of those aviator aluminum and leather kind of pieces ... can't remember where but i think i have seen them maybe ebay...? very cool stuff, got a pic of the chair...? sorry for the deraillieurmant of the thread but WTH, variety and all like that there...
Great work, can you PM me where you sourced the alcantara from to match and possible sizes one should order? I too want to try this mod .... please post pics after install! How much time do you have in the wrap itself?
Nice job, eager to see installed pics..
Originally Posted by workhurts
Decided to go ahead and tackle this project this weekend. I actually liked the contact cement much more than the 3M 90 but I suppose for large surfaces the 90 gets you quick even coverage.
Did not like doing the corners. Hard to do without wrinkles and ripples but it can be done by a novice with patience.
Haven't installed them yet but for the lower dash all done.
hey pete, how is that floor matt holding up under your heel, is it getting a "bespoke" wear mark? the rest is leather, yes? i really like the look and must be easy to clean, dirt can't hide in the carpet... where from?
It's all leather including the carbon look heel pad and very easy to clean. I'll have to look at the mats in my 997 and 928 to see if there are heel wear marks and get back to you. Supplier is Inpelle and if you email me (petza914@gmail.com) I can provide their contact info.
i can't help but notice the chair that your lower dash is sitting on...is that one of those aviator aluminum and leather kind of pieces ... can't remember where but i think i have seen them maybe ebay...? very cool stuff, got a pic of the chair...? sorry for the deraillieurmant of the thread but WTH, variety and all like that there...
Great work, can you PM me where you sourced the alcantara from to match and possible sizes one should order? I too want to try this mod .... please post pics after install! How much time do you have in the wrap itself?
Nice job, eager to see installed pics..
Take a look at the post I made on 6sp (sorry for the cross-post!). It lists out what you need to purchase, where, and how to do it.
Just keep in mind that the color match is not 100% (but very close) with Porsche Alcantara (like on the headliner).
i can't help but notice the chair that your lower dash is sitting on...is that one of those aviator aluminum and leather kind of pieces ... can't remember where but i think i have seen them maybe ebay...? very cool stuff, got a pic of the chair...? sorry for the deraillieurmant of the thread but WTH, variety and all like that there...
As the other poster pointed out, it was indeed Restoration Hardware. We have an outlet store very close by and can usually pick up their stuff at around 40-70% off. Otherwise, it's a bit exorbitant price wise ...
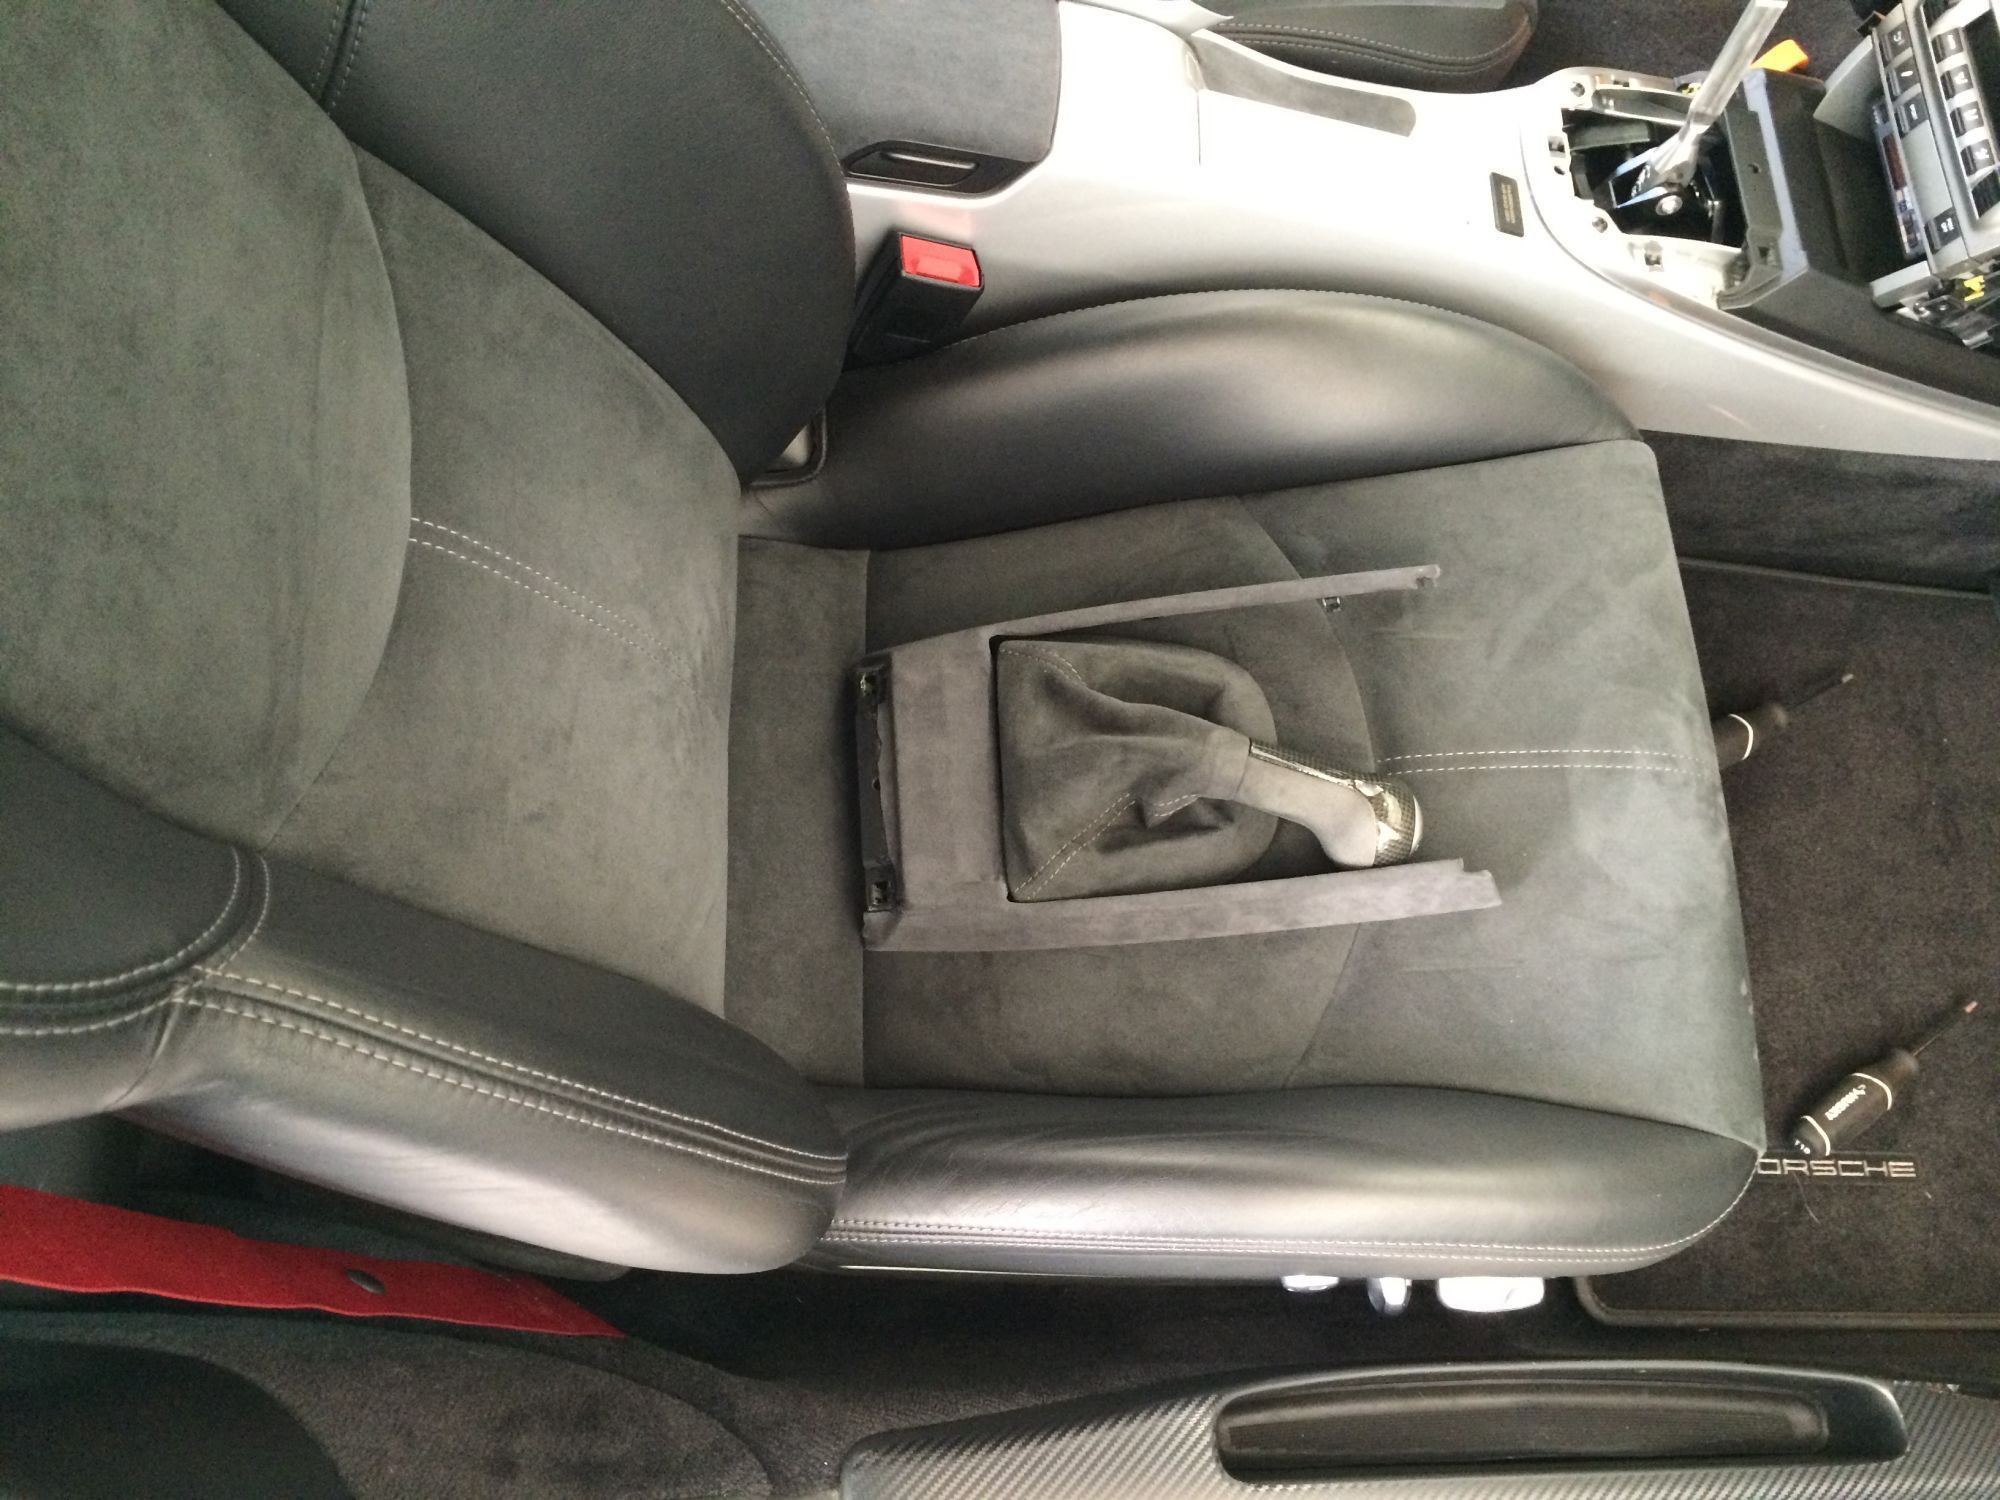
I find the headliner much darker then then gt3 shifter and steering wheel alcantara parts on the 997 cars... are you suggesting this alcantara more matches the head liner then the parts mentioned? (my alcantara shifter looks dark but its the lighting)
Alcantara color. I'm not sure if my headliner is darker but it certainly looks darker. That could be a function of the fact that very little light hits the headliner.
The 9052 Alcantara is a really close match to the seats, shifter and wheel. I'll take a pic of the 9052 laying on the seat so everything is at the same angle/light when I get a chance.
There is a slight difference between 9052 Alcantara and Porsche OEM (on the headliner but also seats and shifter). You have to be in bright light to see the difference -- it is subtle. 9052 is slightly lighter and has an ever so faint blue tinge compared to Porsche OEM. I've looked at all the samples and couldn't find anything closer to OEM than 9052 though, so it is what it is.
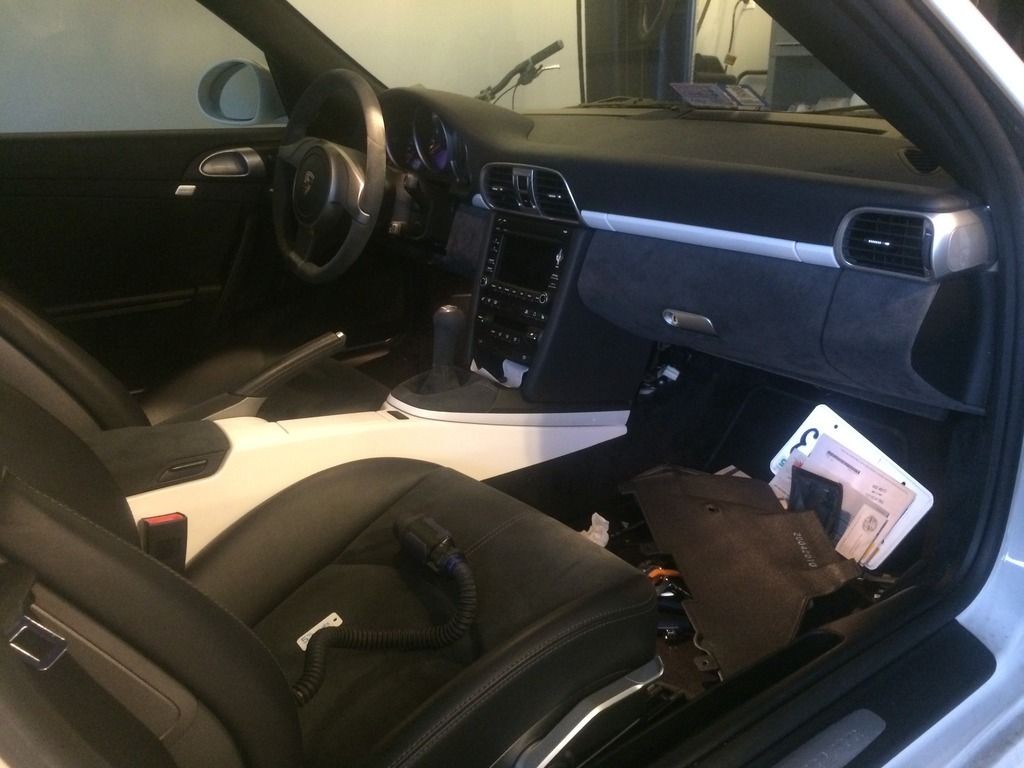
In the image below are OEM seats and shifter boot but I recovered the under-PCM stack plastic piece.
Btw. Just started installing my piece tonight. That little plastic round thing that lets the glovebox door drop is prone to stripping. Mine stripped so I ended up removing the whole glove box. Not really difficult but adds a bit of time to the effort. You are forwarned.
Still trying to decide whether to do the vertical pieces next to the radio or not. I think I'm done tinkering for now. Took a base C2 and upgraded to alcantara GT3 seats, wrapped lower dash/glovebox in alcantara (thanks to the various people that have posted .. especially typerx), added the alcantara steering wheel, shifter, handbrake and arm rest, swapped AC vents (not easy to swap those trim pieces without having to buy a whole new set), painted the cup holder, tabs on either side of the wheel and center console to color match the exterior. Along with the fisterd, ipd plenum and sharkwerks bypass the car now looks and sounds as it should.
TOP notch, looks fantastic! great DIY project... overall how would you rate it as a DIY from removal, install of the alcantara and then back install...?
Nice work and thanks for posting it up here...
Originally Posted by workhurts
Done ...
Still trying to decide whether to do the vertical pieces next to the radio or not. I think I'm done tinkering for now. Took a base C2 and upgraded to alcantara GT3 seats, wrapped lower dash/glovebox in alcantara (thanks to the various people that have posted .. especially typerx), added the alcantara steering wheel, shifter, handbrake and arm rest, swapped AC vents (not easy to swap those trim pieces without having to buy a whole new set), painted the cup holder, tabs on either side of the wheel and center console to color match the exterior. Along with the fisterd, ipd plenum and sharkwerks bypass the car now looks and sounds as it should.


 04-25-2016, 12:54 AM