When you click on links to various merchants on this site and make a purchase, this can result in this site earning a commission. Affiliate programs and affiliations include, but are not limited to, the eBay Partner Network.
I fiddled around with mine last night...reason being I needed some immediate re-assurance before locking my roller bag in there on the way to the airport (never mind that the key fob was reliably opening the frunk).
My switch seems to have failed mechanically. I simply need to pull the switch up and slightly towards the drivers seat to have it activate the release. I will be replacing the switch, but just a heads up to anyone ever in a panic. Just try slightly different directional pressures as you pull the switch up. If I pull my switch straight up or towards the door it does not release the hood...however if I ever so slightly apply some rightward pressure as I pull up it works every time...for now.
My switch seems to have failed mechanically. I simply need to pull the switch up and slightly towards the drivers seat to have it activate the release. I will be replacing the switch, but just a heads up to anyone ever in a panic. Just try slightly different directional pressures as you pull the switch up. If I pull my switch straight up or towards the door it does not release the hood...however if I ever so slightly apply some rightward pressure as I pull up it works every time...for now..
When mine broke, I felt the plastic give, but I found I could still use it in exactly the manner described above. Still, I felt a lot better after I replaced it. I threw the Allen key I modified (by cutting it down to fit between the seat and the sill) in my tool box as I anticipate changing this switch again someday. Of course, if I keep it around, I'll *never* have to replace this switch.
Thanks everyone for the instructions on this repair. I ordered a new switch from Suncoast for $90 and the repair took less than 20 minutes as i going really slow. I had a 5mm allen wrench from an IKEA chair assembly that was short enough to go between seat and the rear hole.
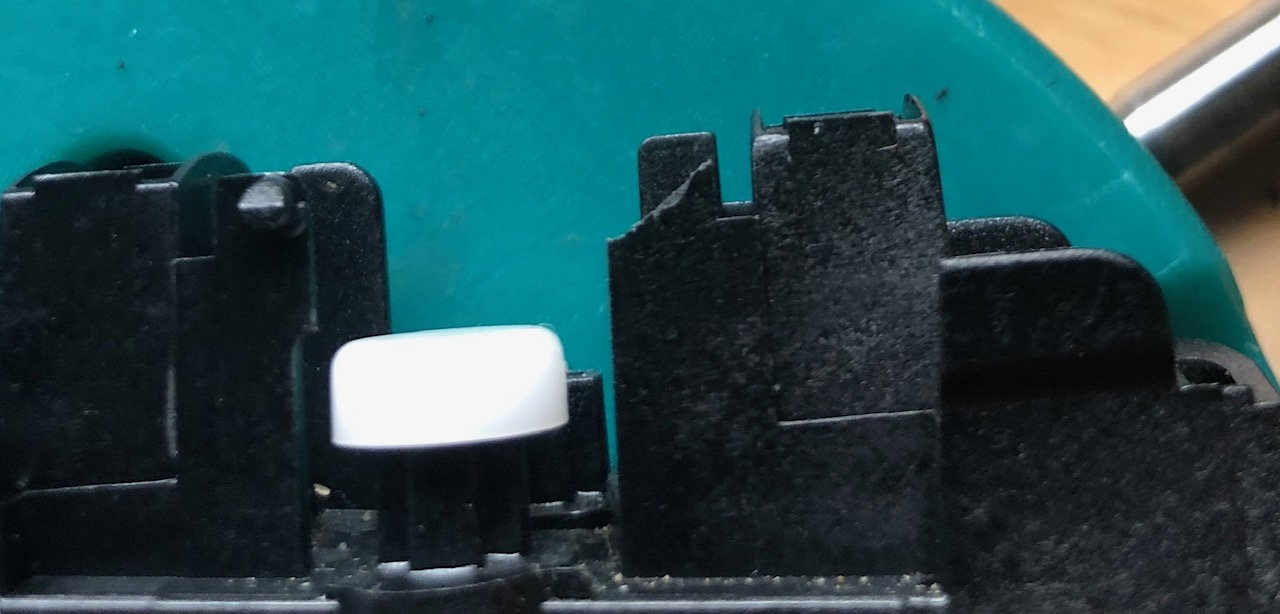
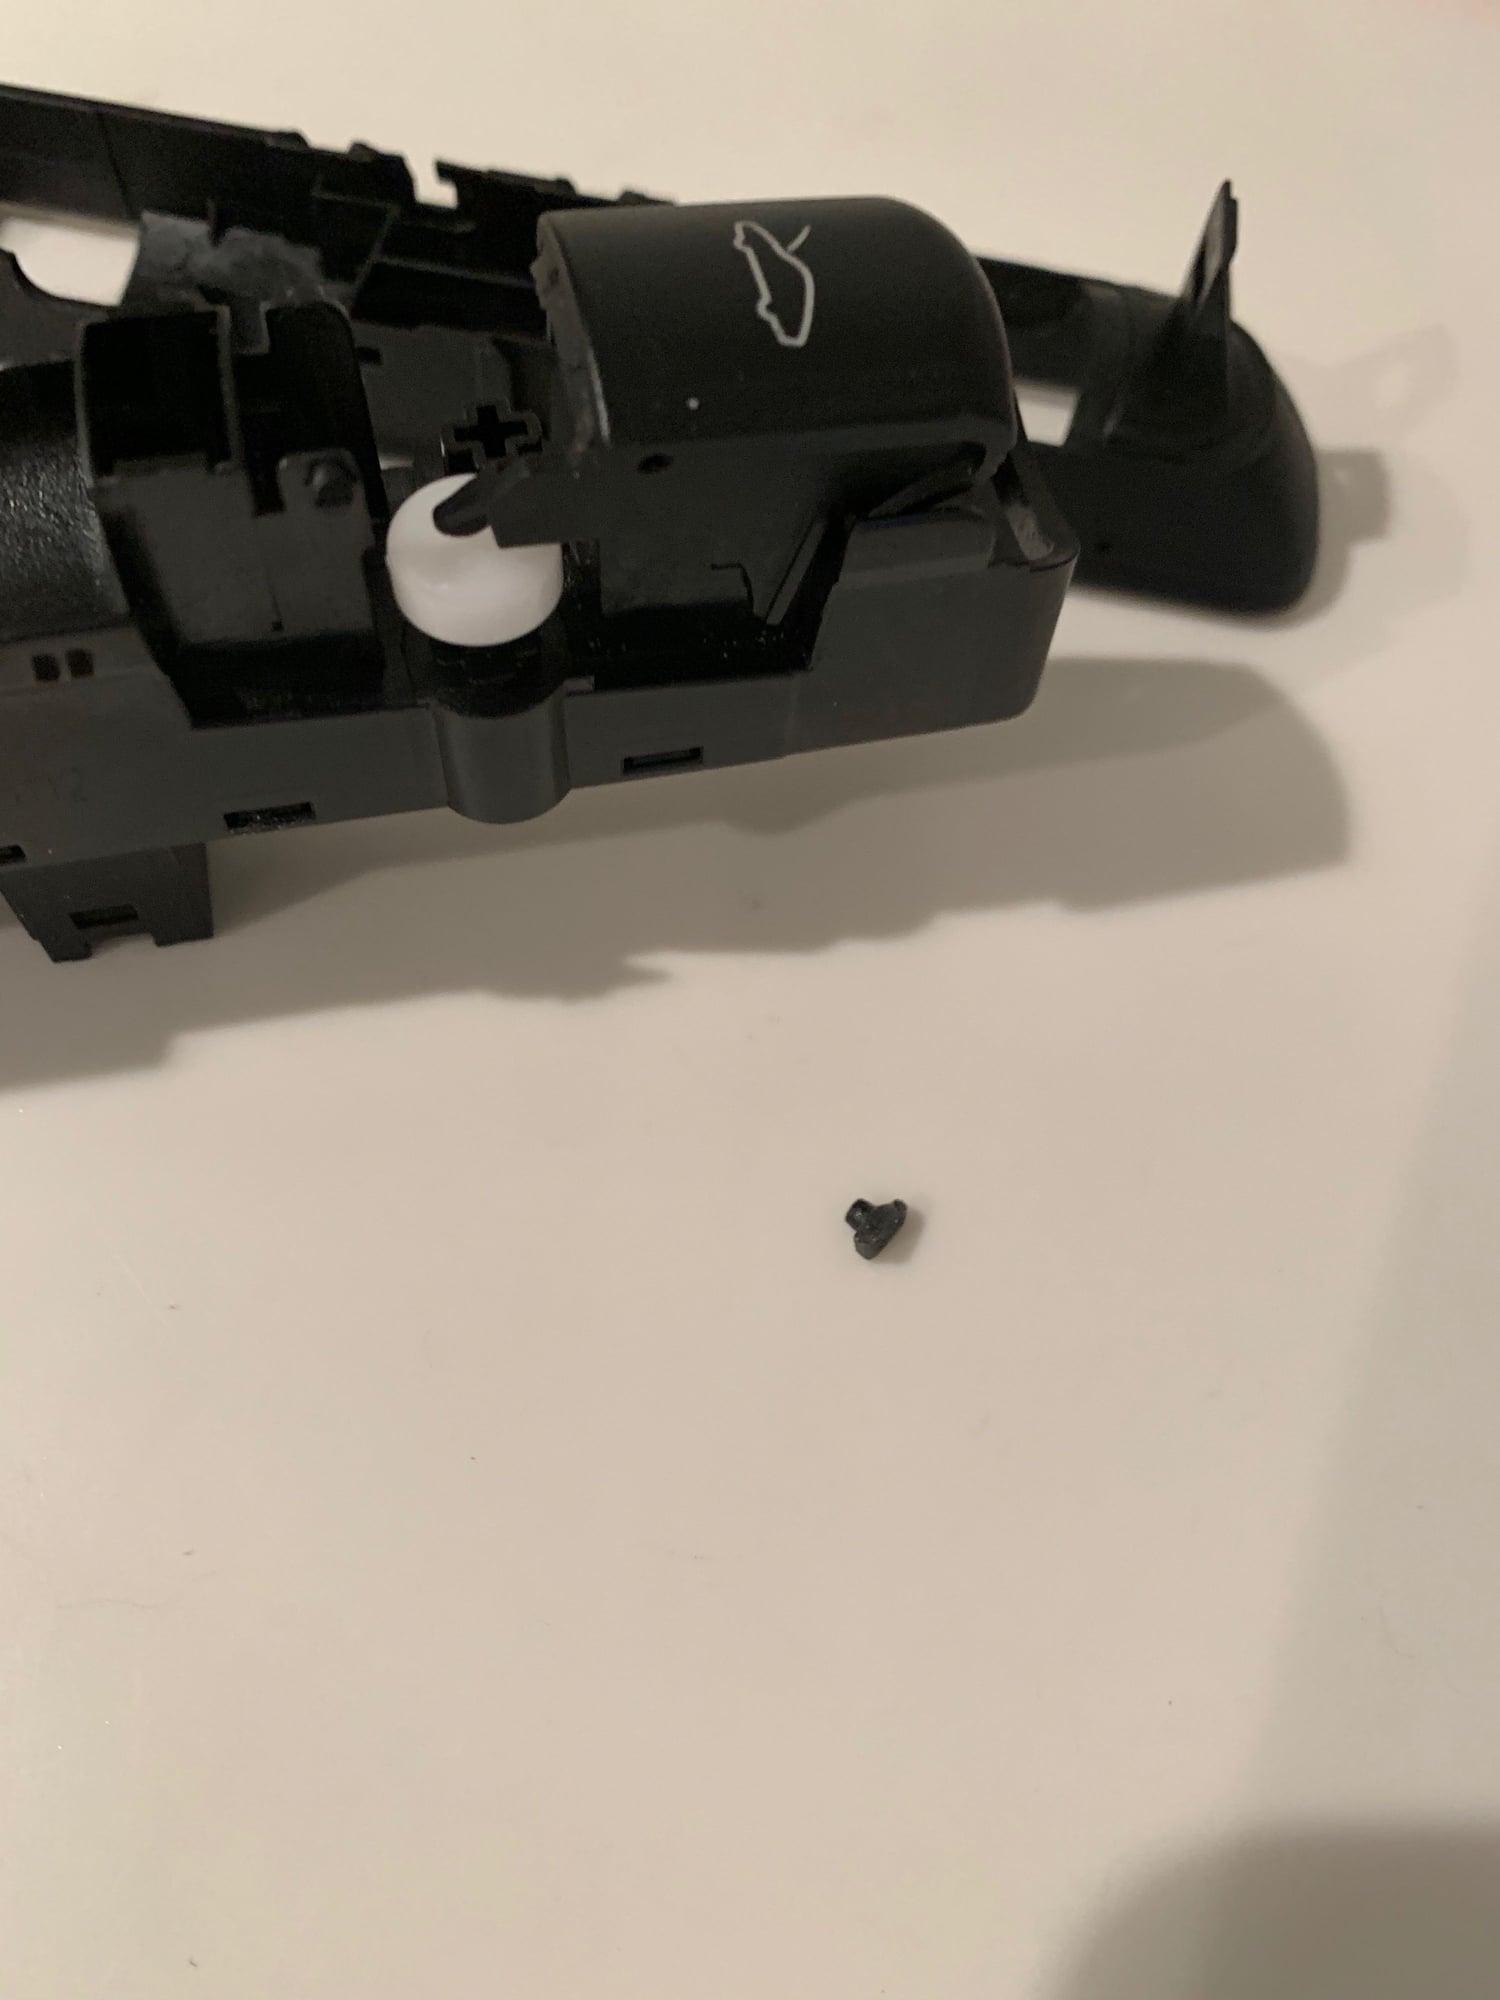
After installing the new switch, i took apart the old one. One of the corners of the "post" that hold the rocker switch is what breaks and cause the inconsistent action. With a broken post, the switch lifting action does not push all the way down on the white plunger. If you lift the switch to the side, then there is enough movement to push down on the plunger and activate the switch.
Broken post.
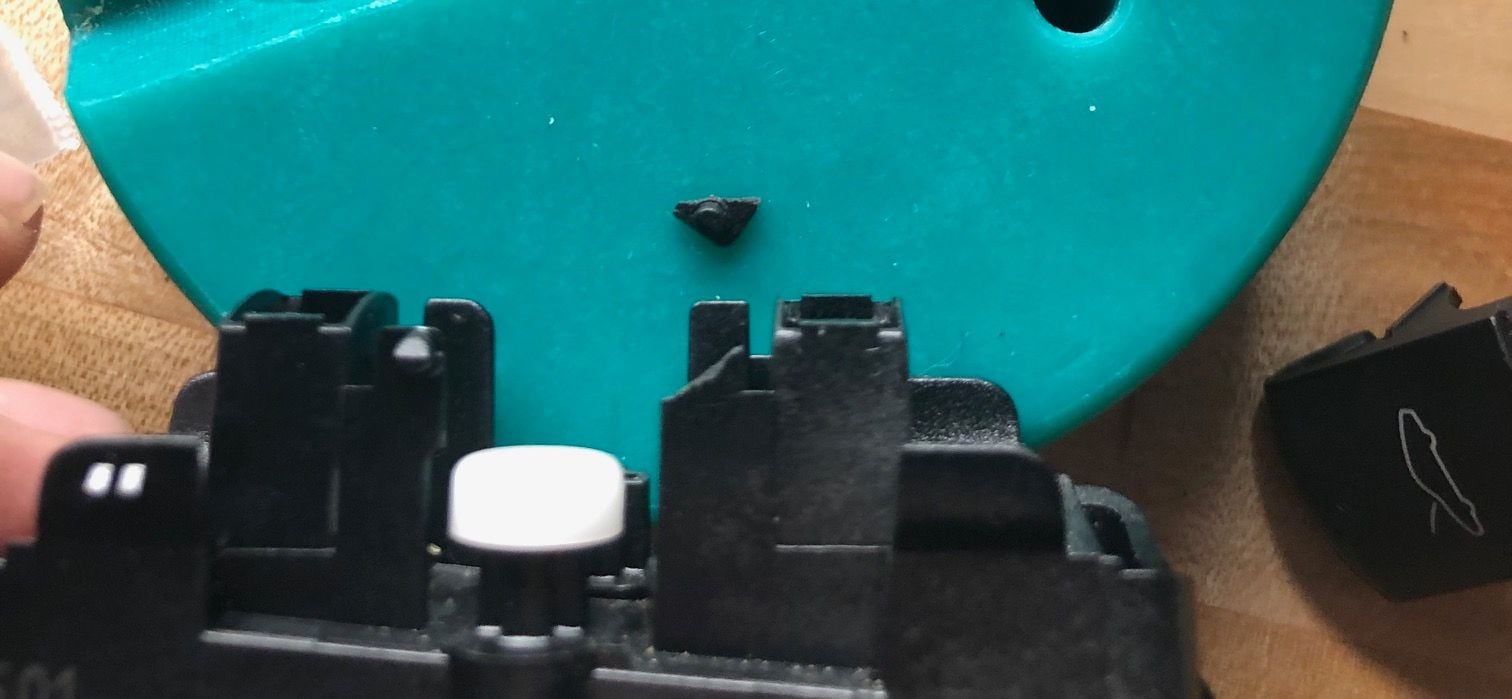
Fortunately, I heard the broken piece rattling around and shook it loose.
Broken corner piece above the switch.
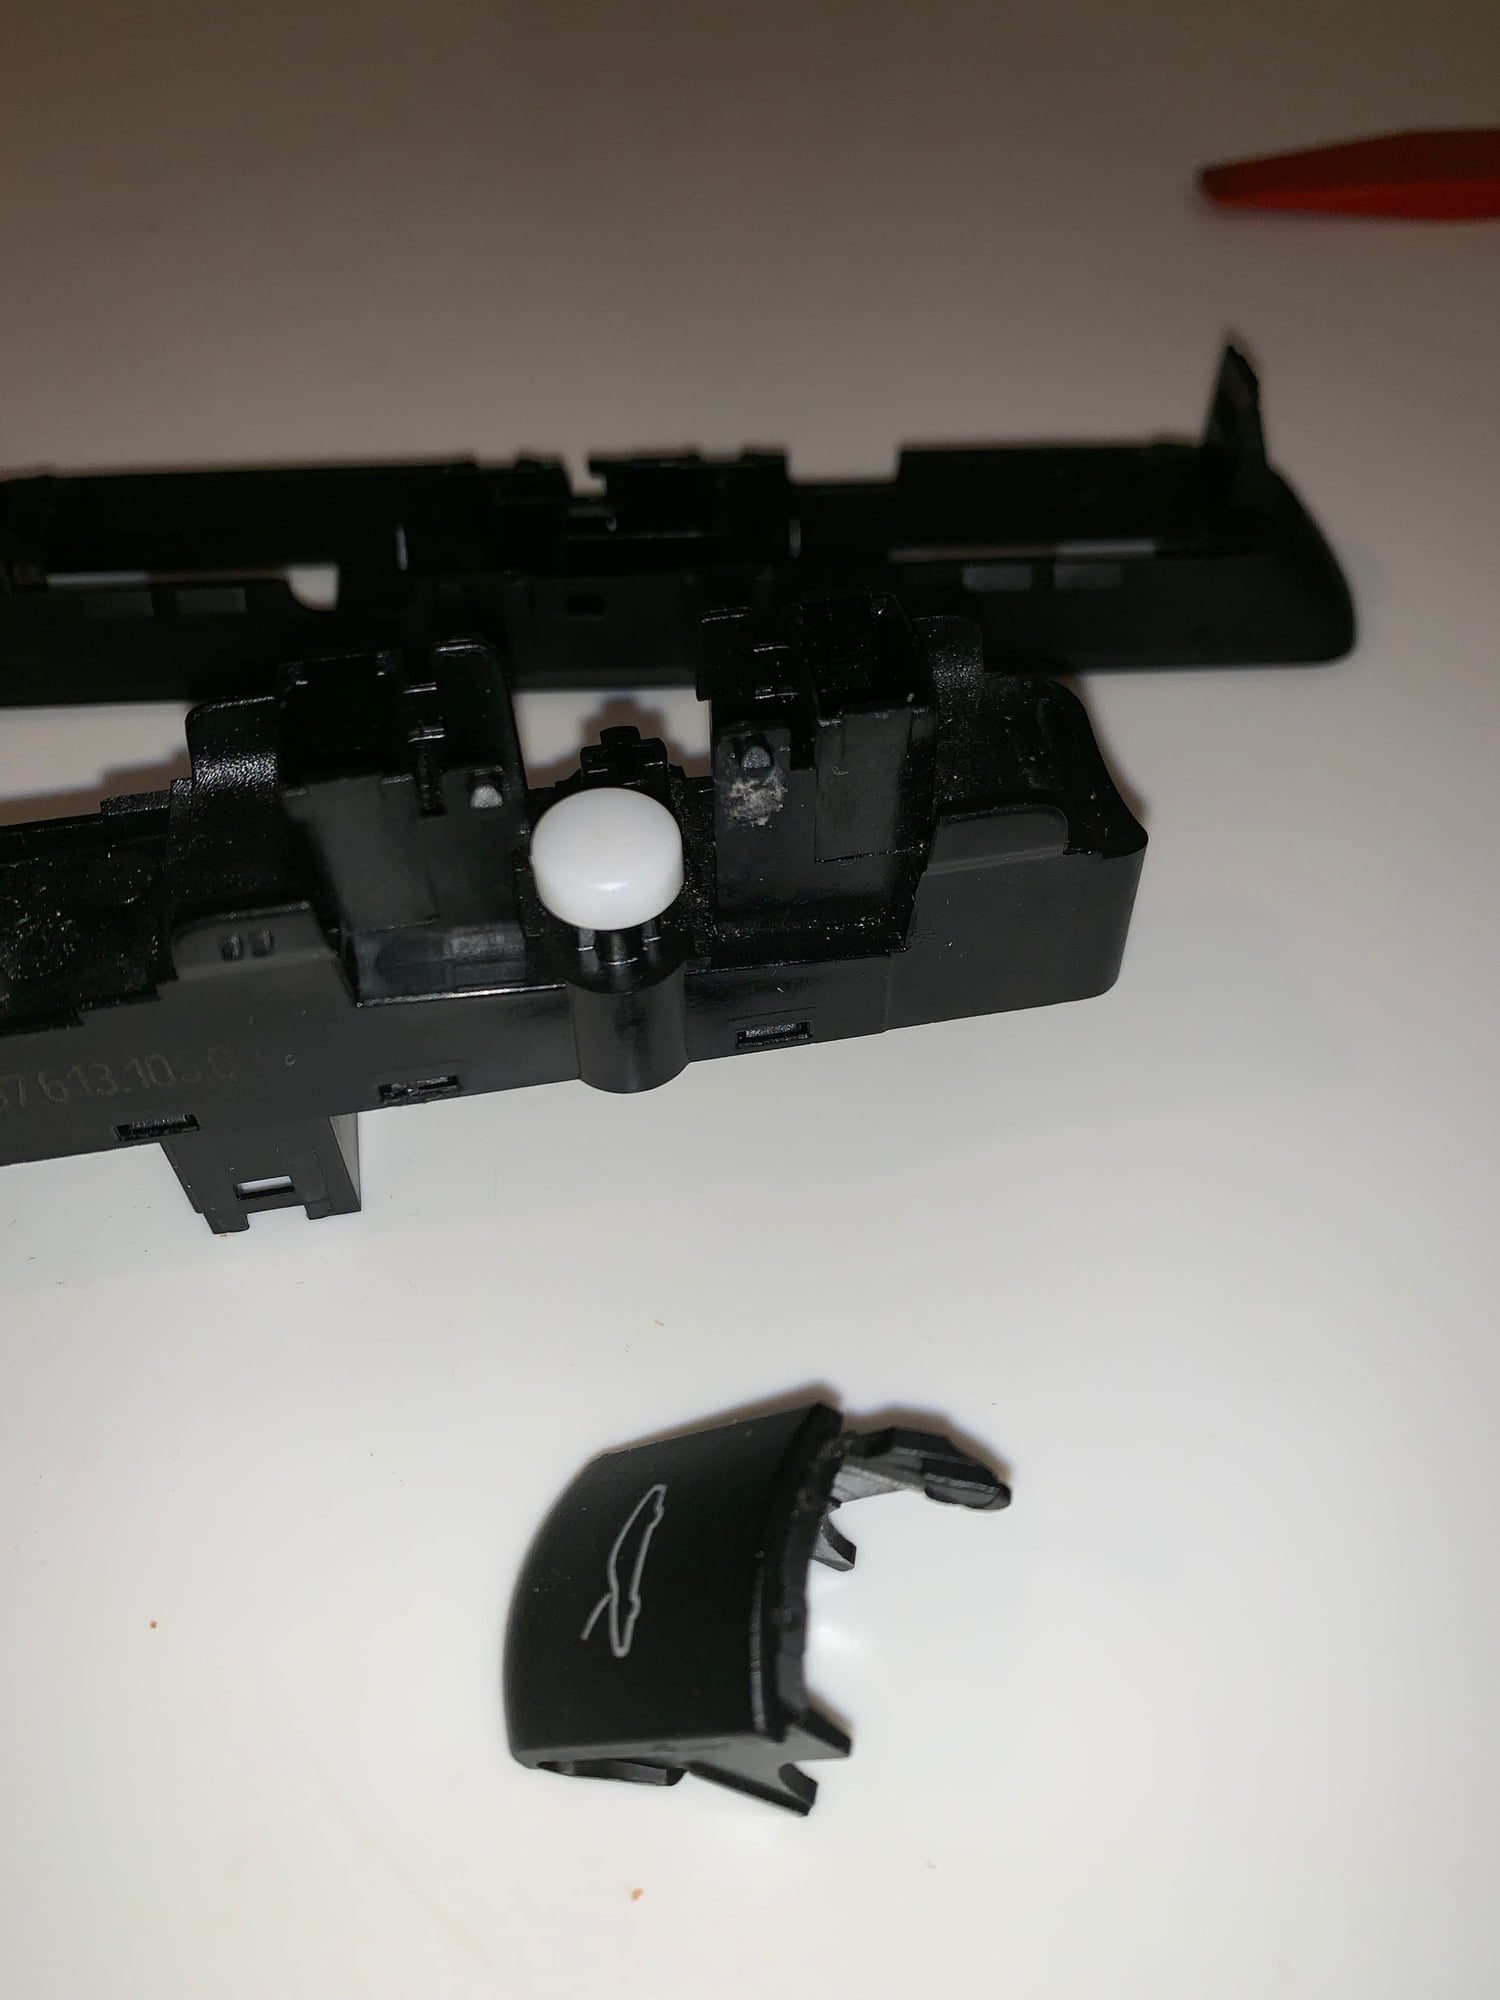
I removed the outer bezel piece by carefully prying the two tabs at the ends and the two smaller tabs in the middle. Gently pry and push.
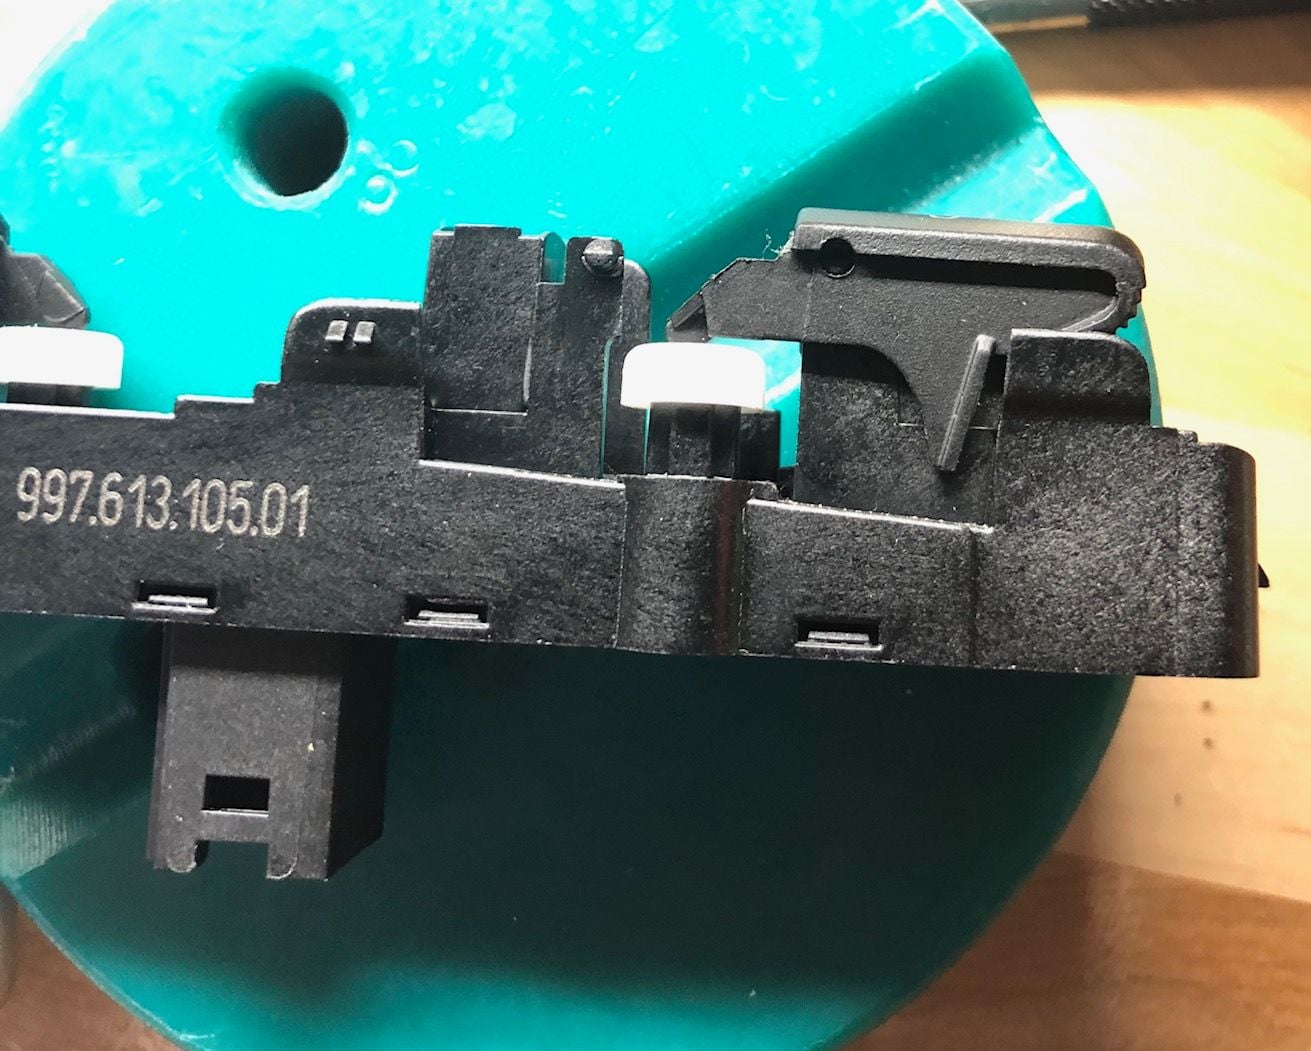
Once the inner switch housing is free of the bezel, i took the switch off, superglued the corner back on, waited for the glue to cure, pop the switch back on, placed the bezel back one and you're done.
Broken corner superglued back on and rocker switch back on the two posts.
For me, getting in a new switch for $90 and 20 minutes of time was worth it. I figure that plastic gets brittle over time so it will eventually break. However, if anyone is interested in trying repair their switch, hope these pictures help.
Last edited by superthinh; 06-08-2019 at 10:05 PM.
Reason: added one more picture
Thanks everyone for the instructions on this repair. I ordered a new switch from Suncoast for $90 and the repair took less than 20 minutes as i going really slow. I had a 5mm allen wrench from an IKEA chair assembly that was short enough to go between seat and the rear hole.
After installing the new switch, i took apart the old one. One of the corners of the "post" that hold the rocker switch is what breaks and cause the inconsistent action. With a broken post, the switch lifting action does not push all the way down on the white plunger. If you lift the switch to the side, then there is enough movement to push down on the plunger and activate the switch.
Broken post.
Fortunately, I heard the broken piece rattling around and shook it loose.
Broken corner piece above the switch.
I removed the outer bezel piece by carefully prying the two tabs at the ends and the two smaller tabs in the middle. Gently pry and push.
Once the inner switch housing is free of the bezel, i took the switch off, superglued the corner back on, waited for the glue to cure, pop the switch back on, placed the bezel back one and you're done.
Broken corner superglued back on and rocker switch back on the two posts.
For me, getting in a new switch for $90 and 20 minutes of time was worth it. I figure that plastic gets brittle over time so it will eventually break. However, if anyone is interested in trying repair their switch, hope these pictures help.
Thanks for the info - mine was exactly the same - I thought while it is off I will try a fix so I used a small piece of metal to support the inside of the tab - works a treat.
The helpful advice on an IKEA allen key was also useful. I did note on another thread some guy was insistent it could not be dome without removing the seat!!!!
Last edited by ferrytrip1; 07-20-2019 at 04:09 PM.
Reason: update text
Am I missing something? The 5mm allen doesn't seem to fit. Ive been hunting around and no joy. I tried to peak into the hole and it almost looks like a bolt in there, but its hard to see anything.
Am I missing something? The 5mm allen doesn't seem to fit. Ive been hunting around and no joy. I tried to peak into the hole and it almost looks like a bolt in there, but its hard to see anything.
Any tips?
The bolt is deeper than the short leg on a typical Allen key, but shorter than the seat clearance allows for the long leg. Therefore, I cut the long leg down to about 2" total, and it was just right. The job went from impossible to easy.
I stuck my camera in the hole and took a picture which showed there was in fact 5mm allen nuts in there. Just needed to to fish around for them. I also found moving the seat forward and raising it up as high as it goes give you a little extra room.
The was easy to pop off but gettin the switch out was a pain. Took a while to figure out how it came out. Push vs pull and how the 4 clips worked.
I was then able to pop the two side clips and pry the center to take the switch itself apart. I found the broken piece of plastic that @superthinh pointed out. Mine wasn't completely broken off, just cracked and bent over, which was lucky. If it completely breaks off it likely falls down in the door frame.
Im now trying to super glue it to see if that will hold up. Will update.
@superthinh I used Gorilla glue, let sit overnight, reassebled the button in the morning and it immediately broke off again. Maybe need different type of glue? (Well as I write this I Googled gorilla glue I found its not good for plastics...argh).
Since Sonnen is closed until tomorrow I will take one more stab at it with a different glue. I may try to pain the door sill while im at it.
I threw in the towel on trying to glue this thing. Tried 3 times with 2 different types of super glue and it broke immediately when trying to put the button back on. Picked up a new one at Sonnen and will put it in soon.
I was thinking about respraying my door sill while I had it off but after cleaning it and putting some 303 on, it cleaned up nicely. (plus I decided one failed project was enough for the week).
Good call. What would be worse is to get the switch working again, put everything back together, then have it give out 2 days later.
With respect to the sill, I saw various posts on RL about using the Magic Eraser (lightly) to polish minor scratches off the soft-touch paint. I tried it, and while the results did not blow me away, there was a real and noticeable improvement in appearance. It is essentially 3000 grit wet-polishing. Maybe try this before the 303 next time you are down there.


 01-15-2019, 03:21 PM