When you click on links to various merchants on this site and make a purchase, this can result in this site earning a commission. Affiliate programs and affiliations include, but are not limited to, the eBay Partner Network.
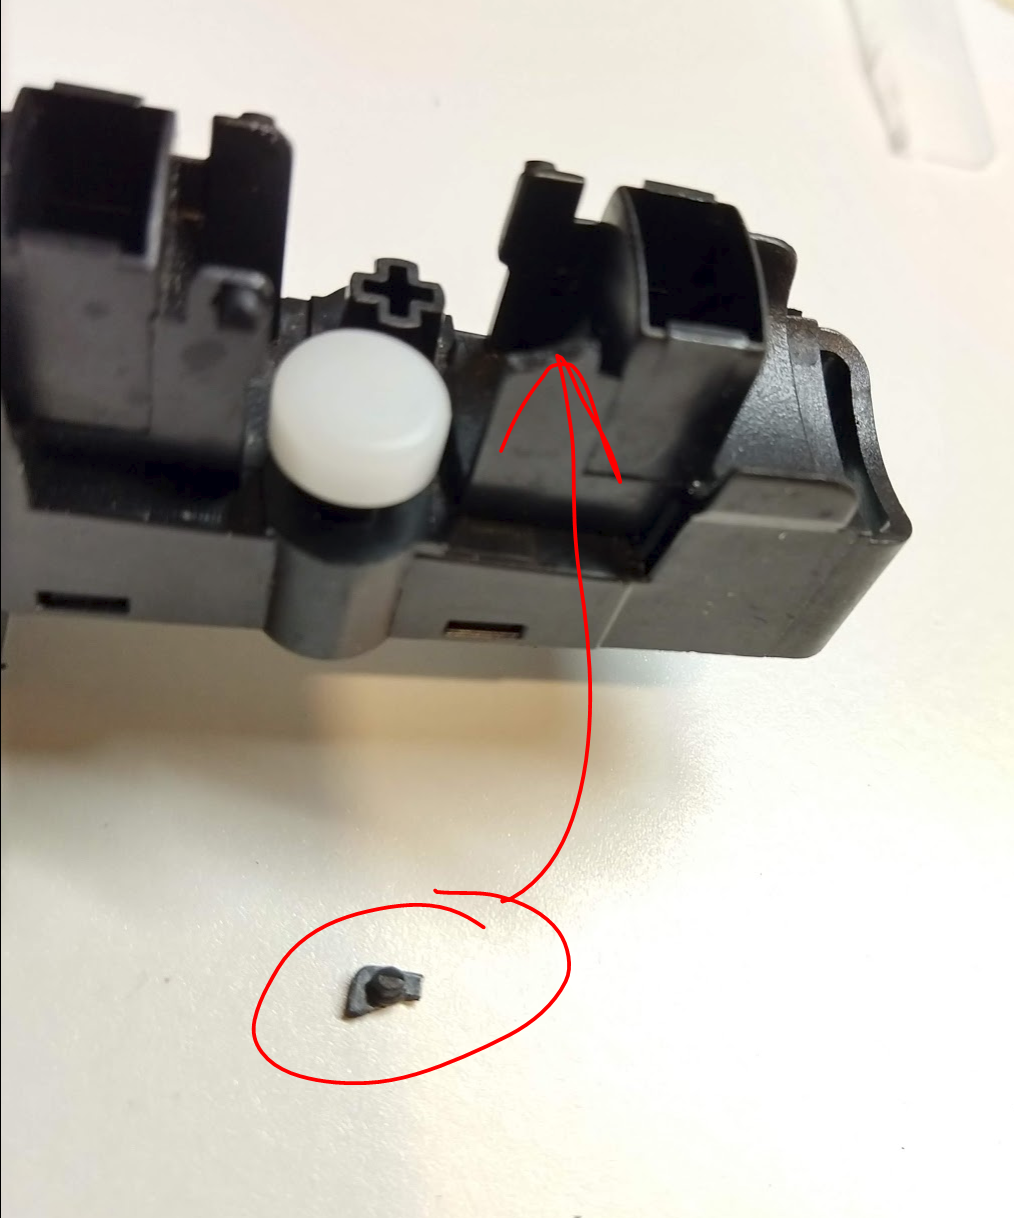
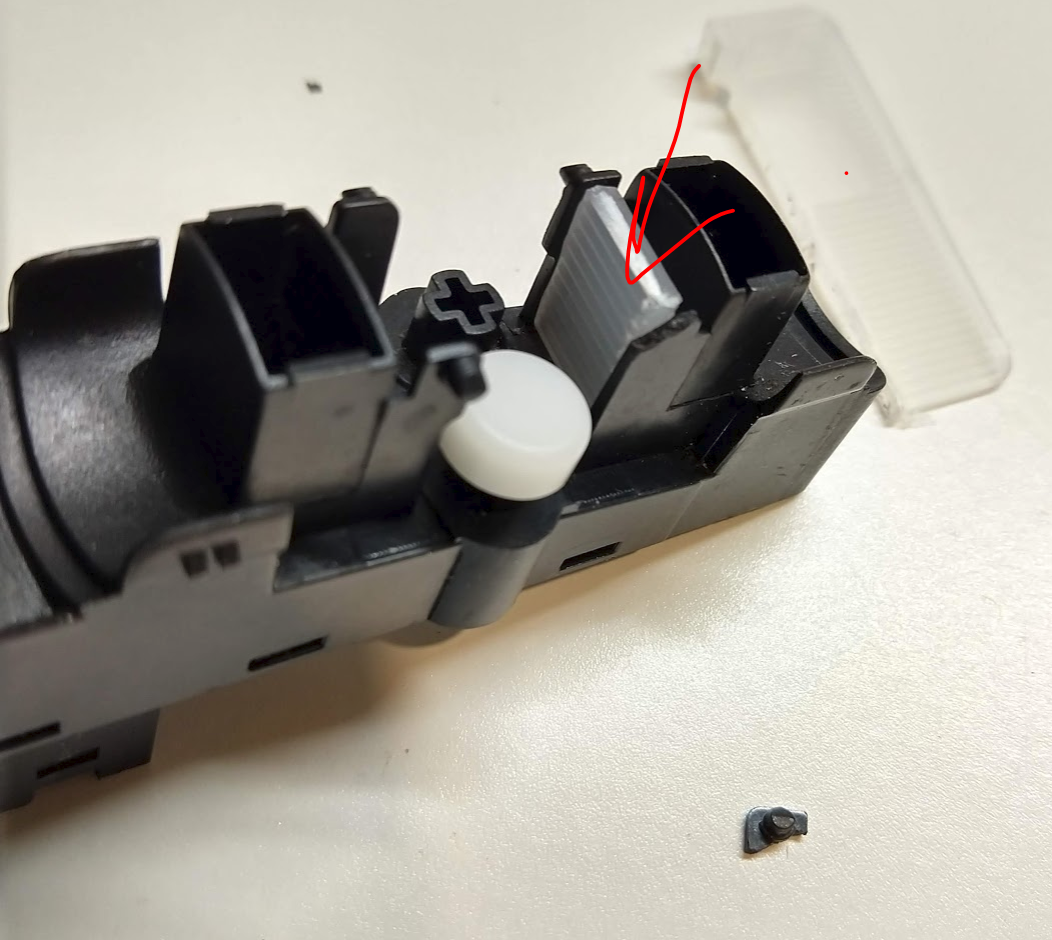
My tab broke in exactly the same point - on the hinge. Thin plastic with no support. I took a plastic shim and cut it to fit; then epoxyed the whole thing - works well.
Parenthetical note - what is it with Germans and their plastics? Rubbery buttons, brittle switches, etc. I love my 997, but if you compare a Lexus interior of the same vintage as our 997s, it is a night and day difference in how they have held up Broken tab Plastic shim cut to fit Shim + tab + marine epoxy
@FlatHat - nice work! Im happy my failure inspired your success :-)
The shim and epoxy was a great idea.
Side note: I would be interested in others putting degreaser on their door sill to see what it picks up. Im still amazed how black the rag was and how much better the door sill looks. Im not sure if was just 14yrs of crud, or the prior owner had the sill painted and what I was seeing was some of the paint come up. If the latter, it must have taken the top layer of scuffed paint off, leaving a new layer under it.
Thanks to all who have posted in this thread. It looked easy and everyone was reassuring so I decided to try. Ordered the part from Suncoast ($102,53 with shipping). Followed the instructions and 30 minutes later, it's in and works perfectly.
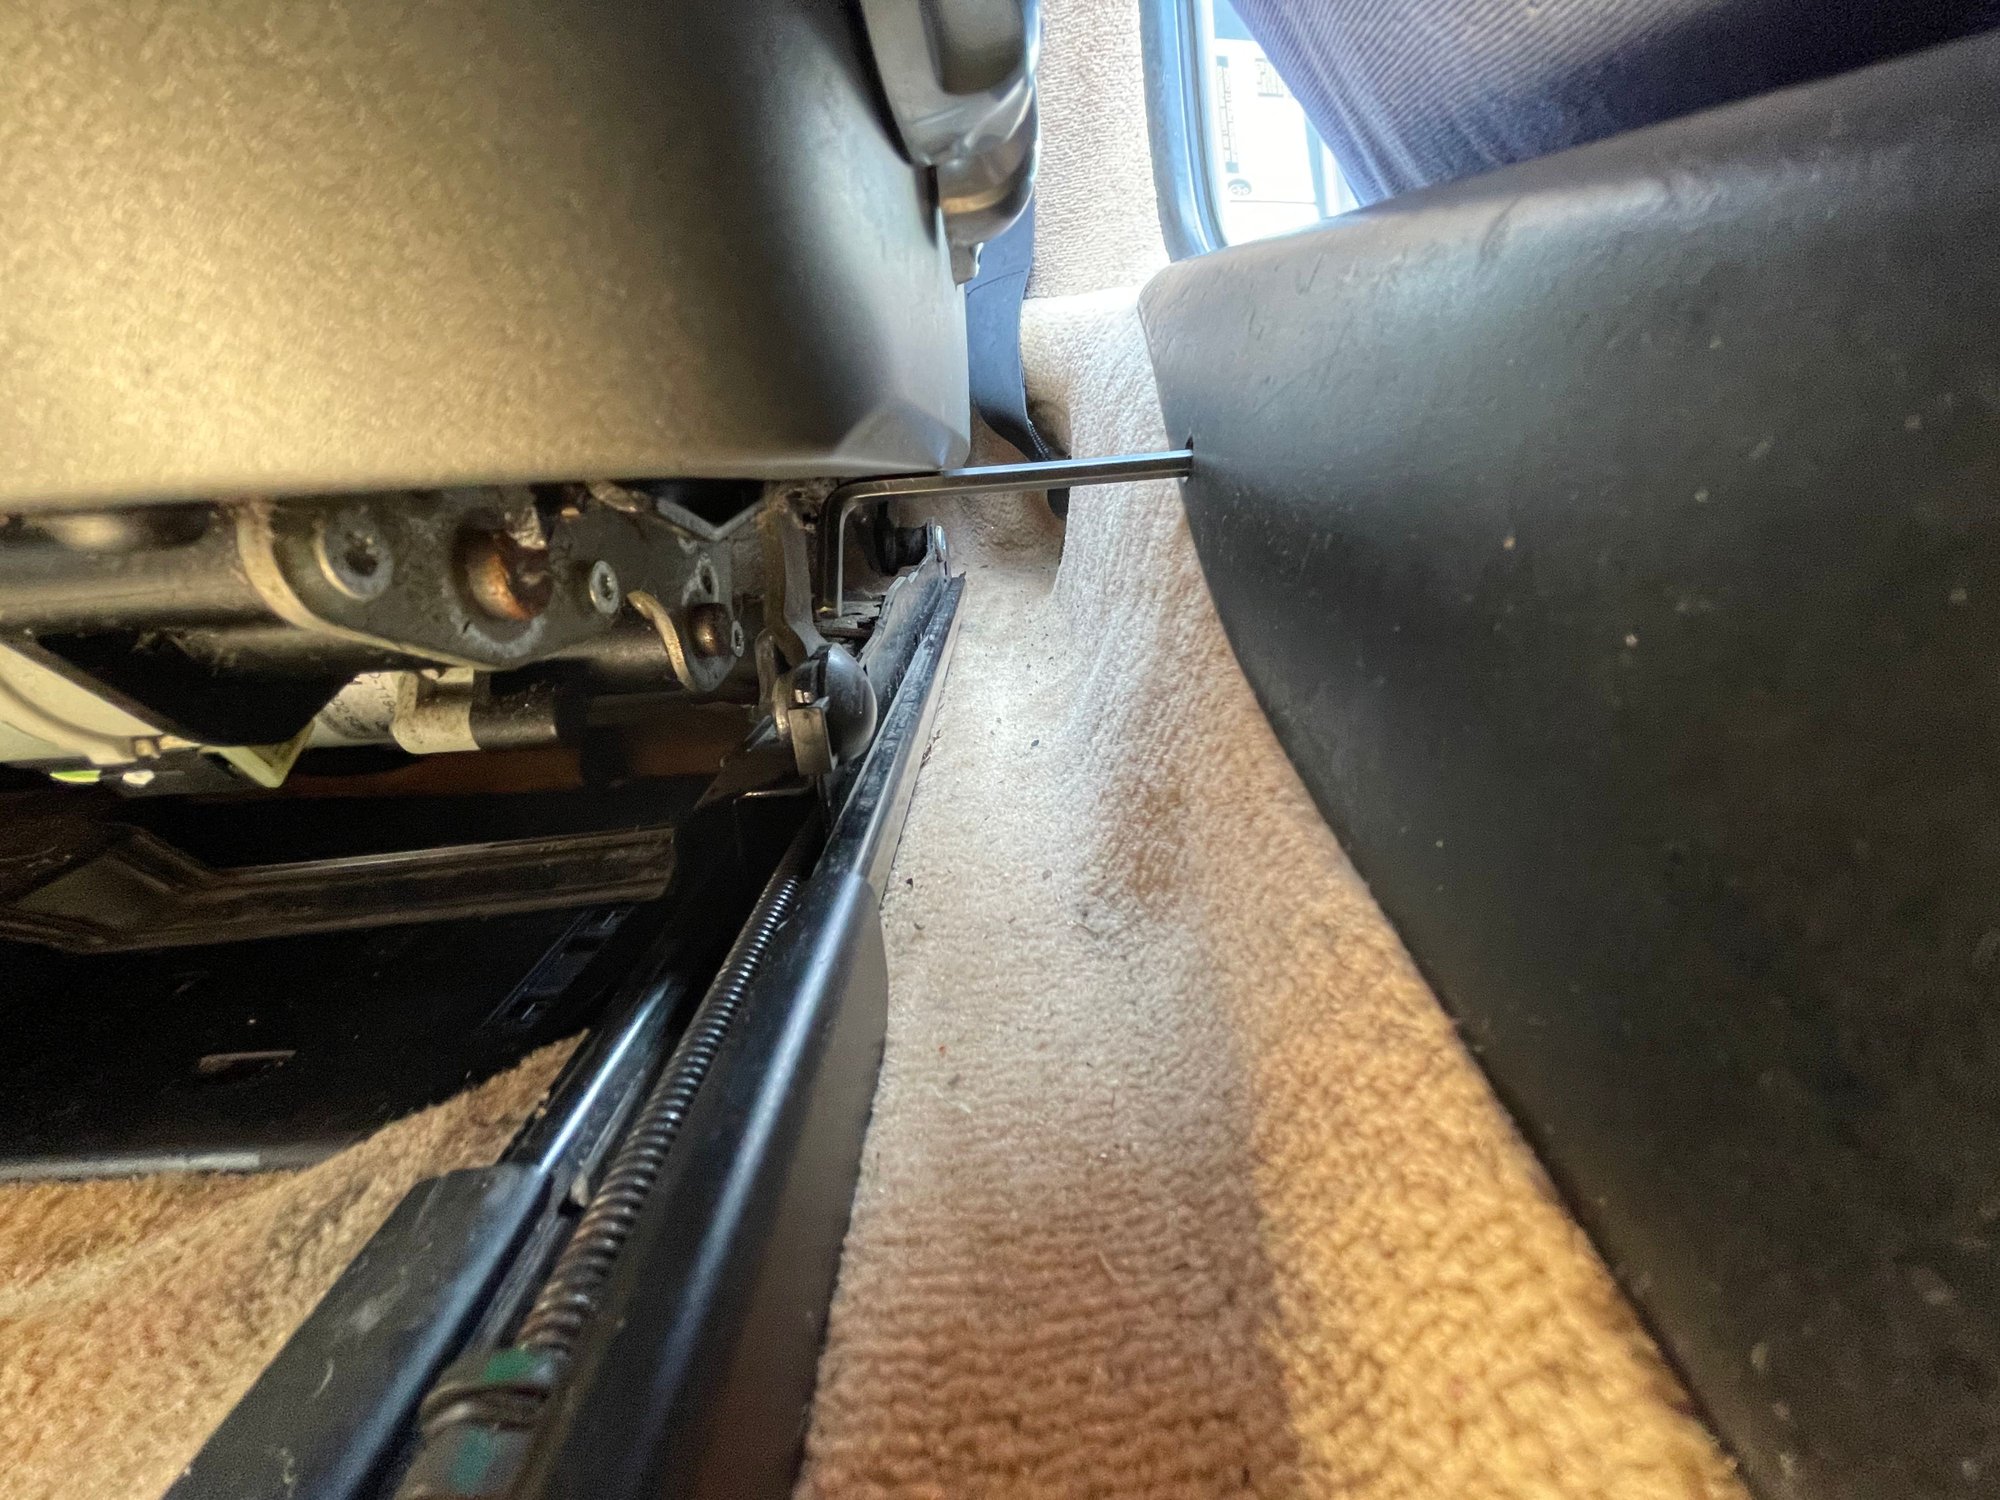
The 5 mm nut is deep and you just have to find it blindly, but it's right there. It's easier to loosen the back one if you pull your seat all the way forward. I took out the old unit in 2 pieces (wasting about 10 minutes), but once I figured it out perfect.
I appreciate the posts. No idea what this would have cost at a dealer, but really glad I didn't have to find out.
Update two months later on my switch glue up - the switch itself broke...probably because that shim I glued behind the broken hinge point no longer allows the hinge point to give when the switch is used. So, I ordered a new switch on Amazon for $45...moral of the story on this one...probably best bet is just to buy a new one when yours breaks!
Update two months later on my switch glue up - the switch itself broke...probably because that shim I glued behind the broken hinge point no longer allows the hinge point to give when the switch is used. So, I ordered a new switch on Amazon for $45...moral of the story on this one...probably best bet is just to buy a new one when yours breaks!
you need to reinforce the repair. Glue the broken hinge back on using thin nosed pliers. Then I used the thick plastic off a yogurt carton cut to an oblong about 4mm wide and 10mm long and super glued it on the back of the hinge support. This gave it enough strength and flexibility to allow the switch to click back on
My tab broke in exactly the same point - on the hinge. Thin plastic with no support. I took a plastic shim and cut it to fit; then epoxyed the whole thing - works well.
Parenthetical note - what is it with Germans and their plastics? Rubbery buttons, brittle switches, etc. I love my 997, but if you compare a Lexus interior of the same vintage as our 997s, it is a night and day difference in how they have held up Shim + tab + marine epoxy
2009 C2S 158k miles
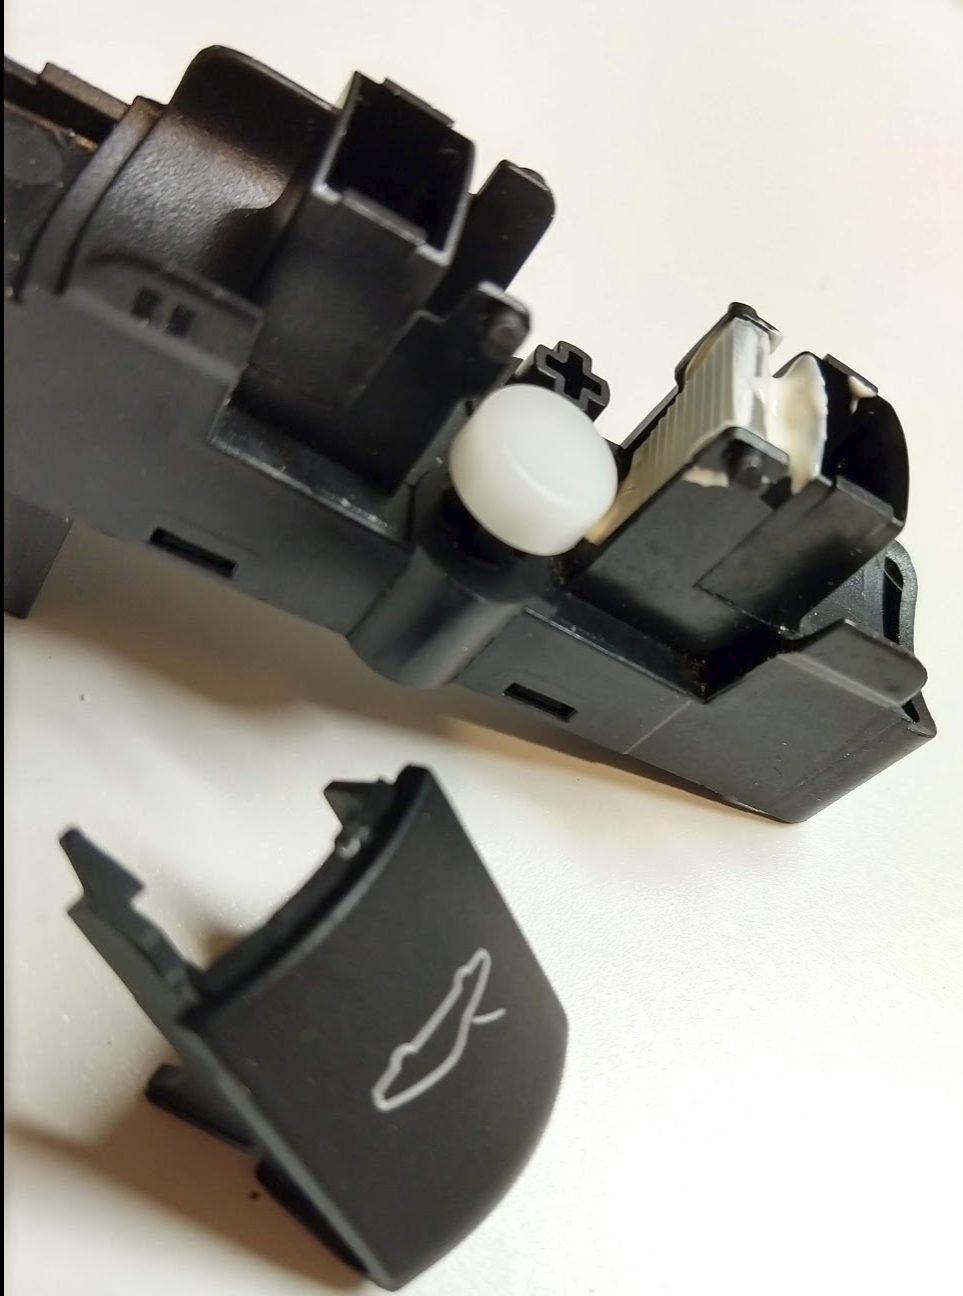
I just had the same break... so inspired by your post, I tried to fix this. I broke both end tabs trying to take it apart ... great. So I ordered another from eBay.. $50 with shipping and supposedly a new OEM part. Chinese, from China, were about $25... Porsche new from a dealers was just over $100. We will see. Darn I could not pull this off.
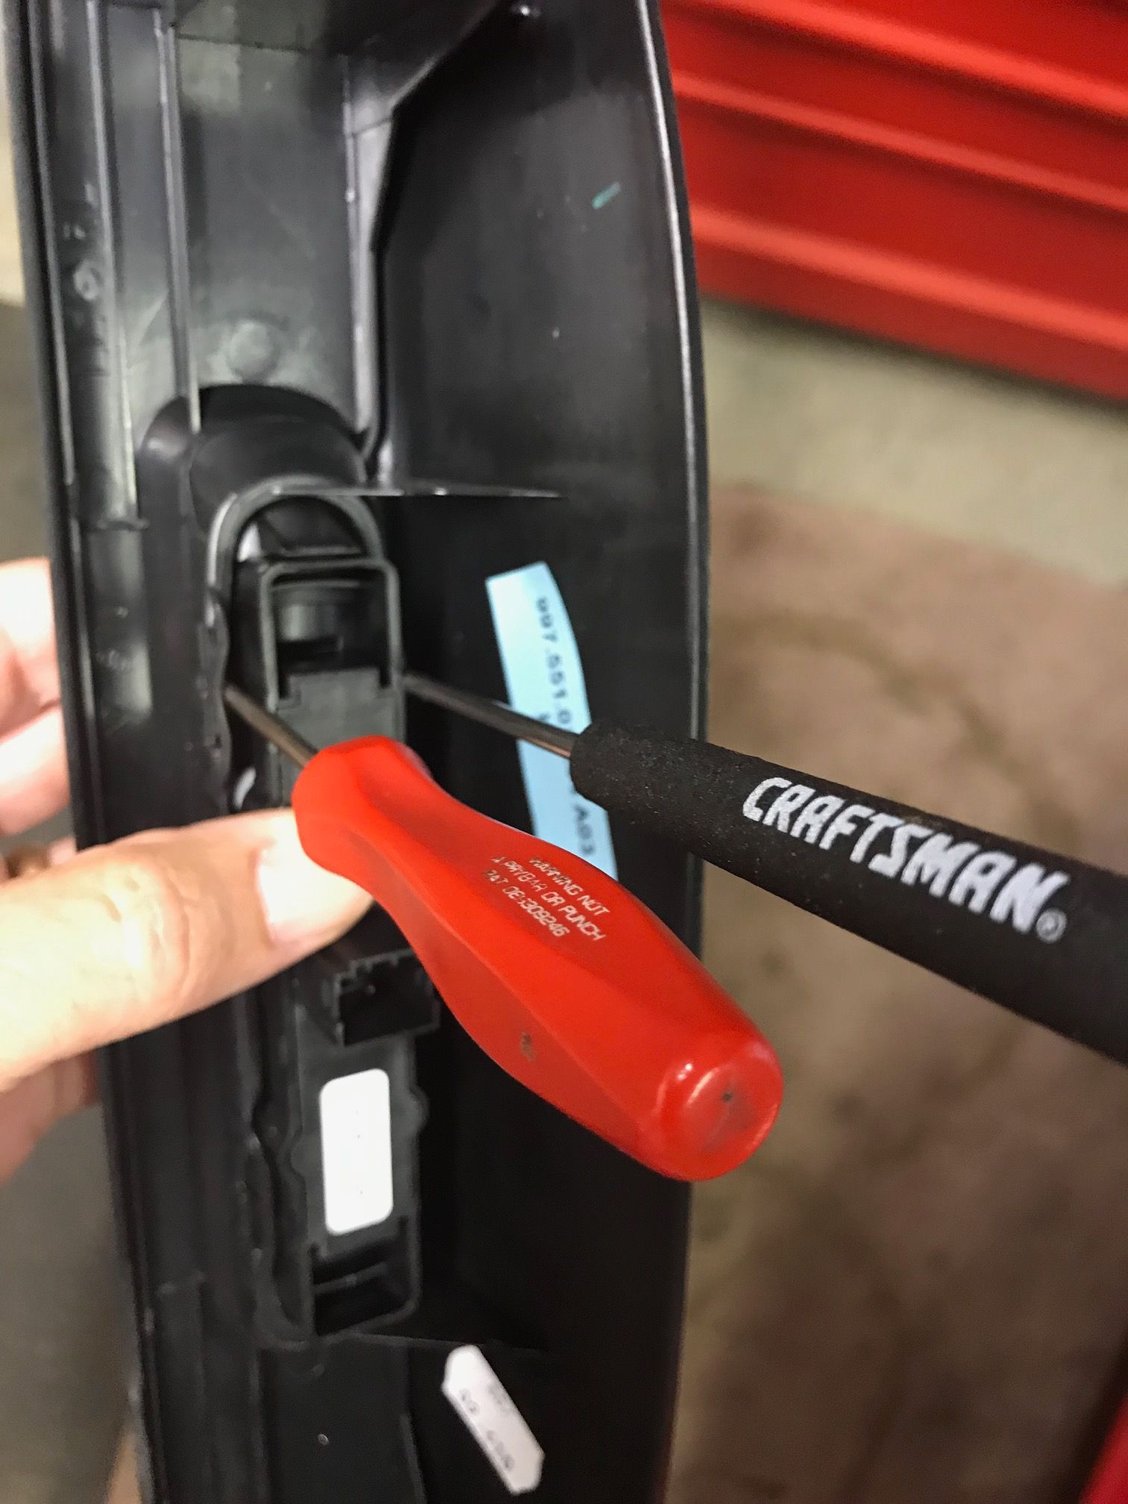
I have the same issues as most in this thread. I bought a new switch assembly (w/out the complete sill plate) from Suncoast, $100-ish. Got the sill plate removed from the car and am now trying to get the old switch assembly from the sill plate.
I can see that the switch assy must be pushed out from the underside of the sill plate, and I can see there are two sets of locking tabs on each side of the switch assy. But I can't see how to release the locking tabs -- without breaking the sill plate. I suspect part of my problem is my reluctance to pry the sh** out of the sill plate to release the locking tabs.
Could someone with some experience with this thing please give me some advice on how to do it. THANKS!!
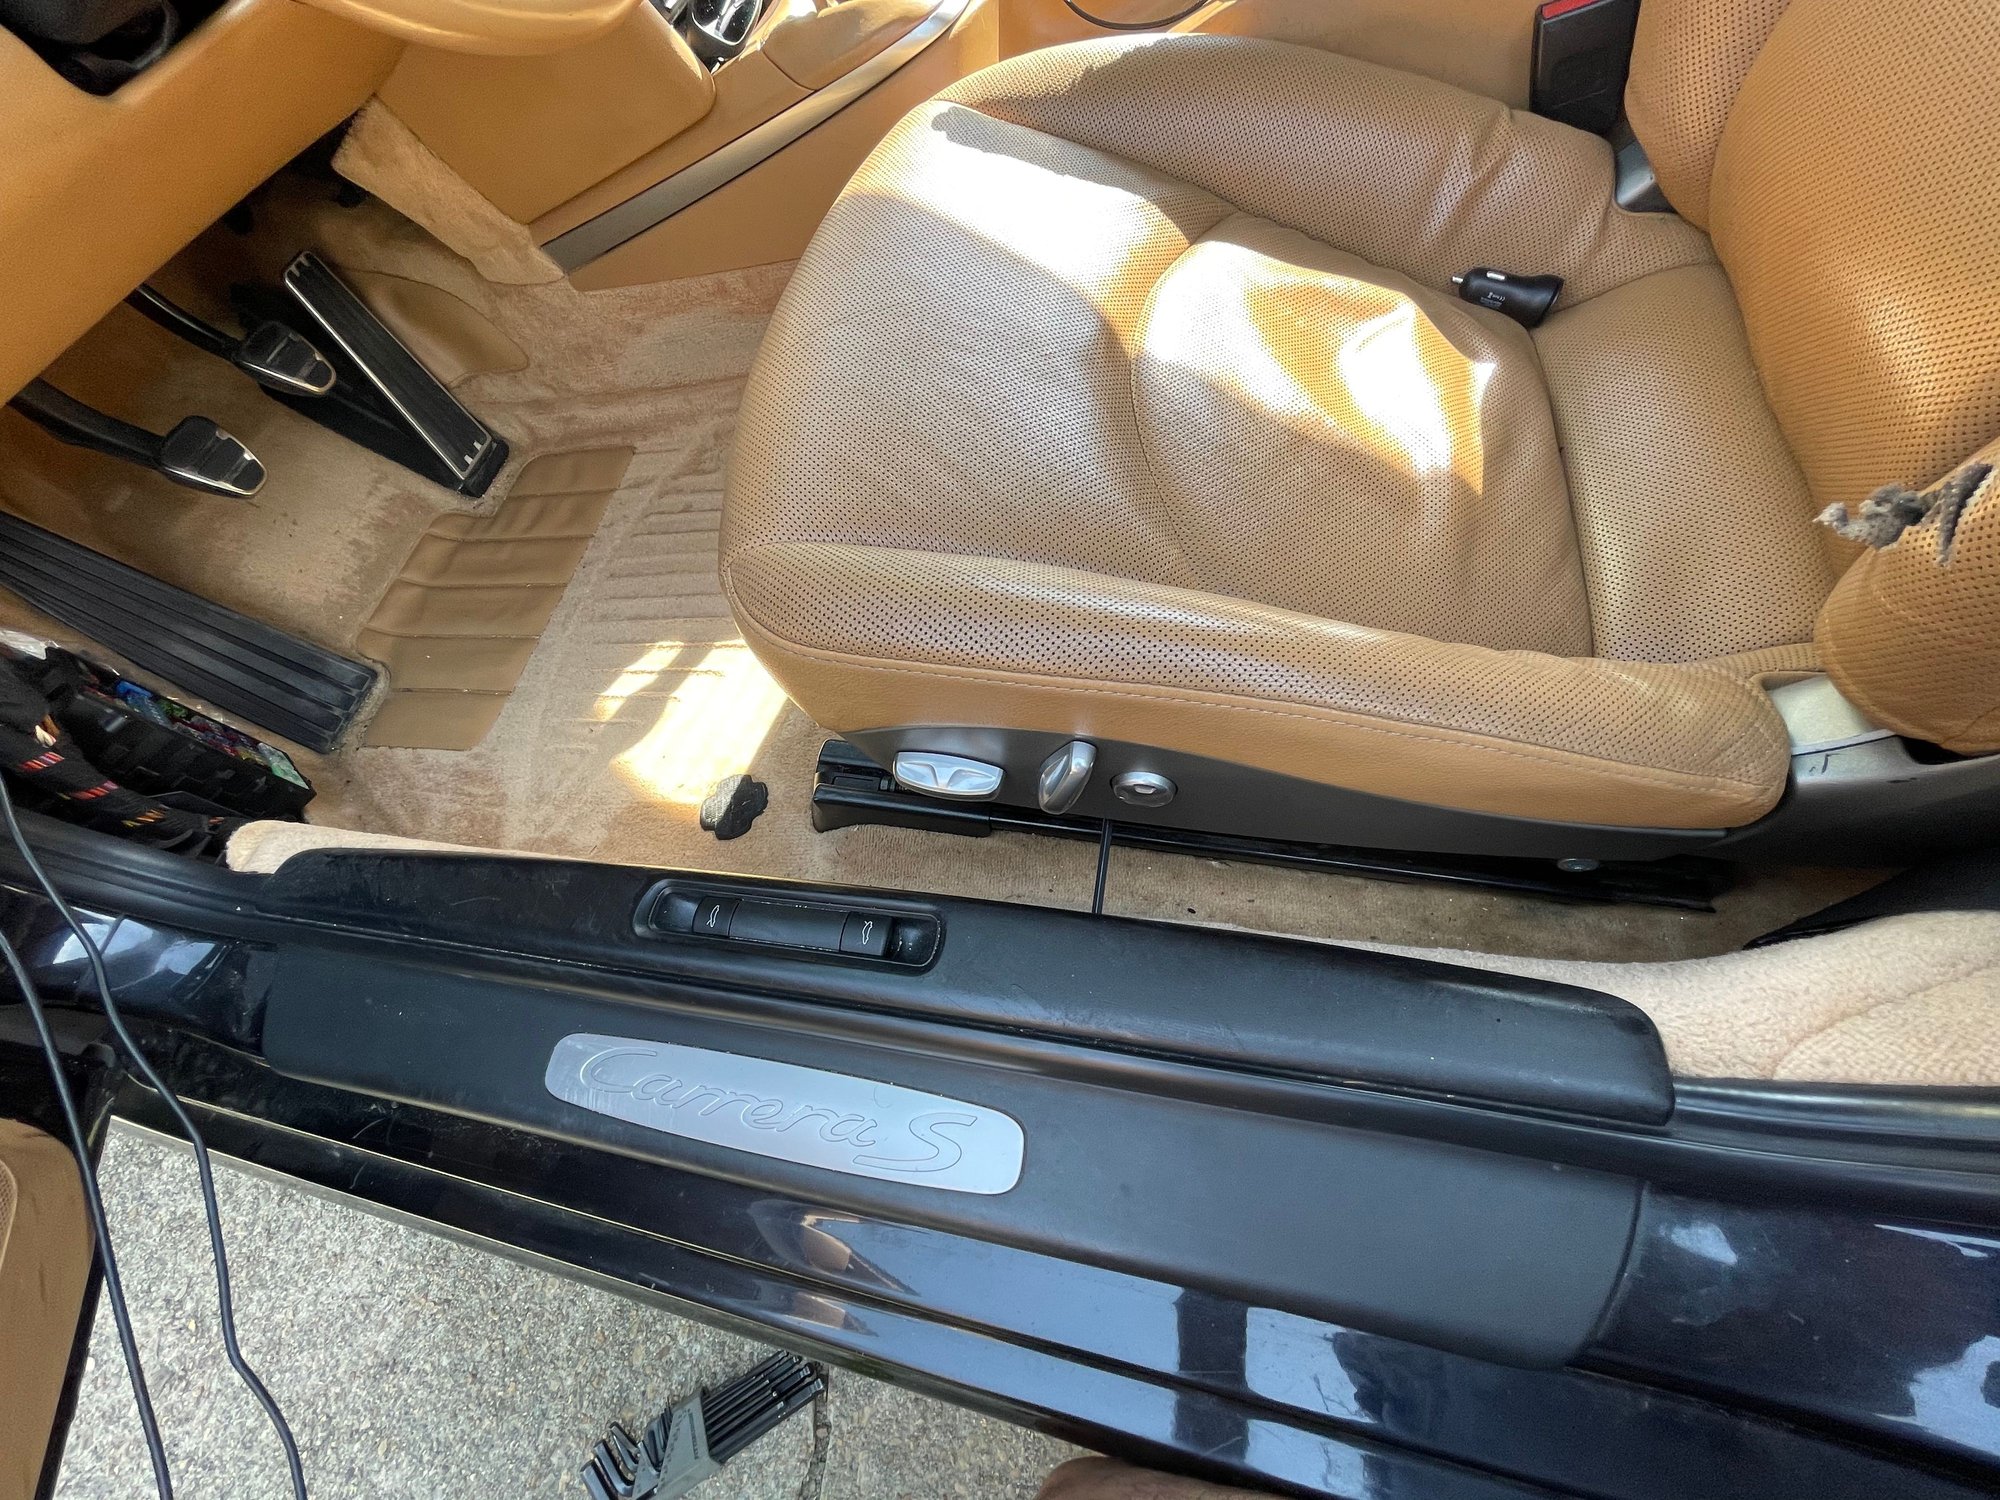
I removed my rear 5mm Allen bolt by moving the front seat all the way backwards, then all the way up in both the front and back. Then my Allen key fit under the seat just enough to loosen the bolt.
I just did this repair. I was able to just pry up the sill plate without doing anything with the plastic plugs and allen wrench. Maybe mine had been removed before - I don't know - BUT, the allen head bolts were not firmly holding the plate in place. It's got plenty of snap connections that were doing that. Also, I found it easiest to use 2 small pry awls/picks - starting at one end of the switch assembly on opposite sides of the part to get it to release and push up and out of the sill plate. Then I went to the other end and repeated.
Update: My $50 eBay switch failed. See my original post just a few posts back in this thread. It worked fine for about 6 months... then started to get wonky... now, 11 months later... it just stopped working. Nothing appears broken... just won't fire.
So..... don't buy the cheapies, pay the $115 (with Shipping) from a Porsche dealer (Suncoast for me).
Genius solution! That instantly worked on mine. Looks like i need a new switch, hopefully the changeout won't be too tricky. Based on this thread, I assume you have to remove the door seal plate to get to the switch, right? Thanks again for the temporary solution!

 08-08-2019, 09:31 AM