When you click on links to various merchants on this site and make a purchase, this can result in this site earning a commission. Affiliate programs and affiliations include, but are not limited to, the eBay Partner Network.
Indy shop - oil change (over a year old oil, 3 week old owner here), spark plug replacement, climate switch replacement (was going to attempt a DIY for those switches but decided to just have a pro do it, next time).
load resistors to prevent the car from thinking the bulb is burned out.
No where on the internet or instructions did I see that this is needed. Morimoto say it is plug and play, there is a video on line and it does not mention this connector.
No where on the internet or instructions did I see that this is needed. Morimoto say it is plug and play, there is a video on line and it does not mention this connector.
When considering buying mine, I saw a video that talked about the required resistors bring magnetic and how to attach them up inside the rear light housing behind the taillight. Without them are you getting errors or the fast flash? With the Depo/Dectane, it seemed like turbo cars had a problem and needed resistors added where Carreras didn't - if yours are working, you may not need them, but keep them just in case
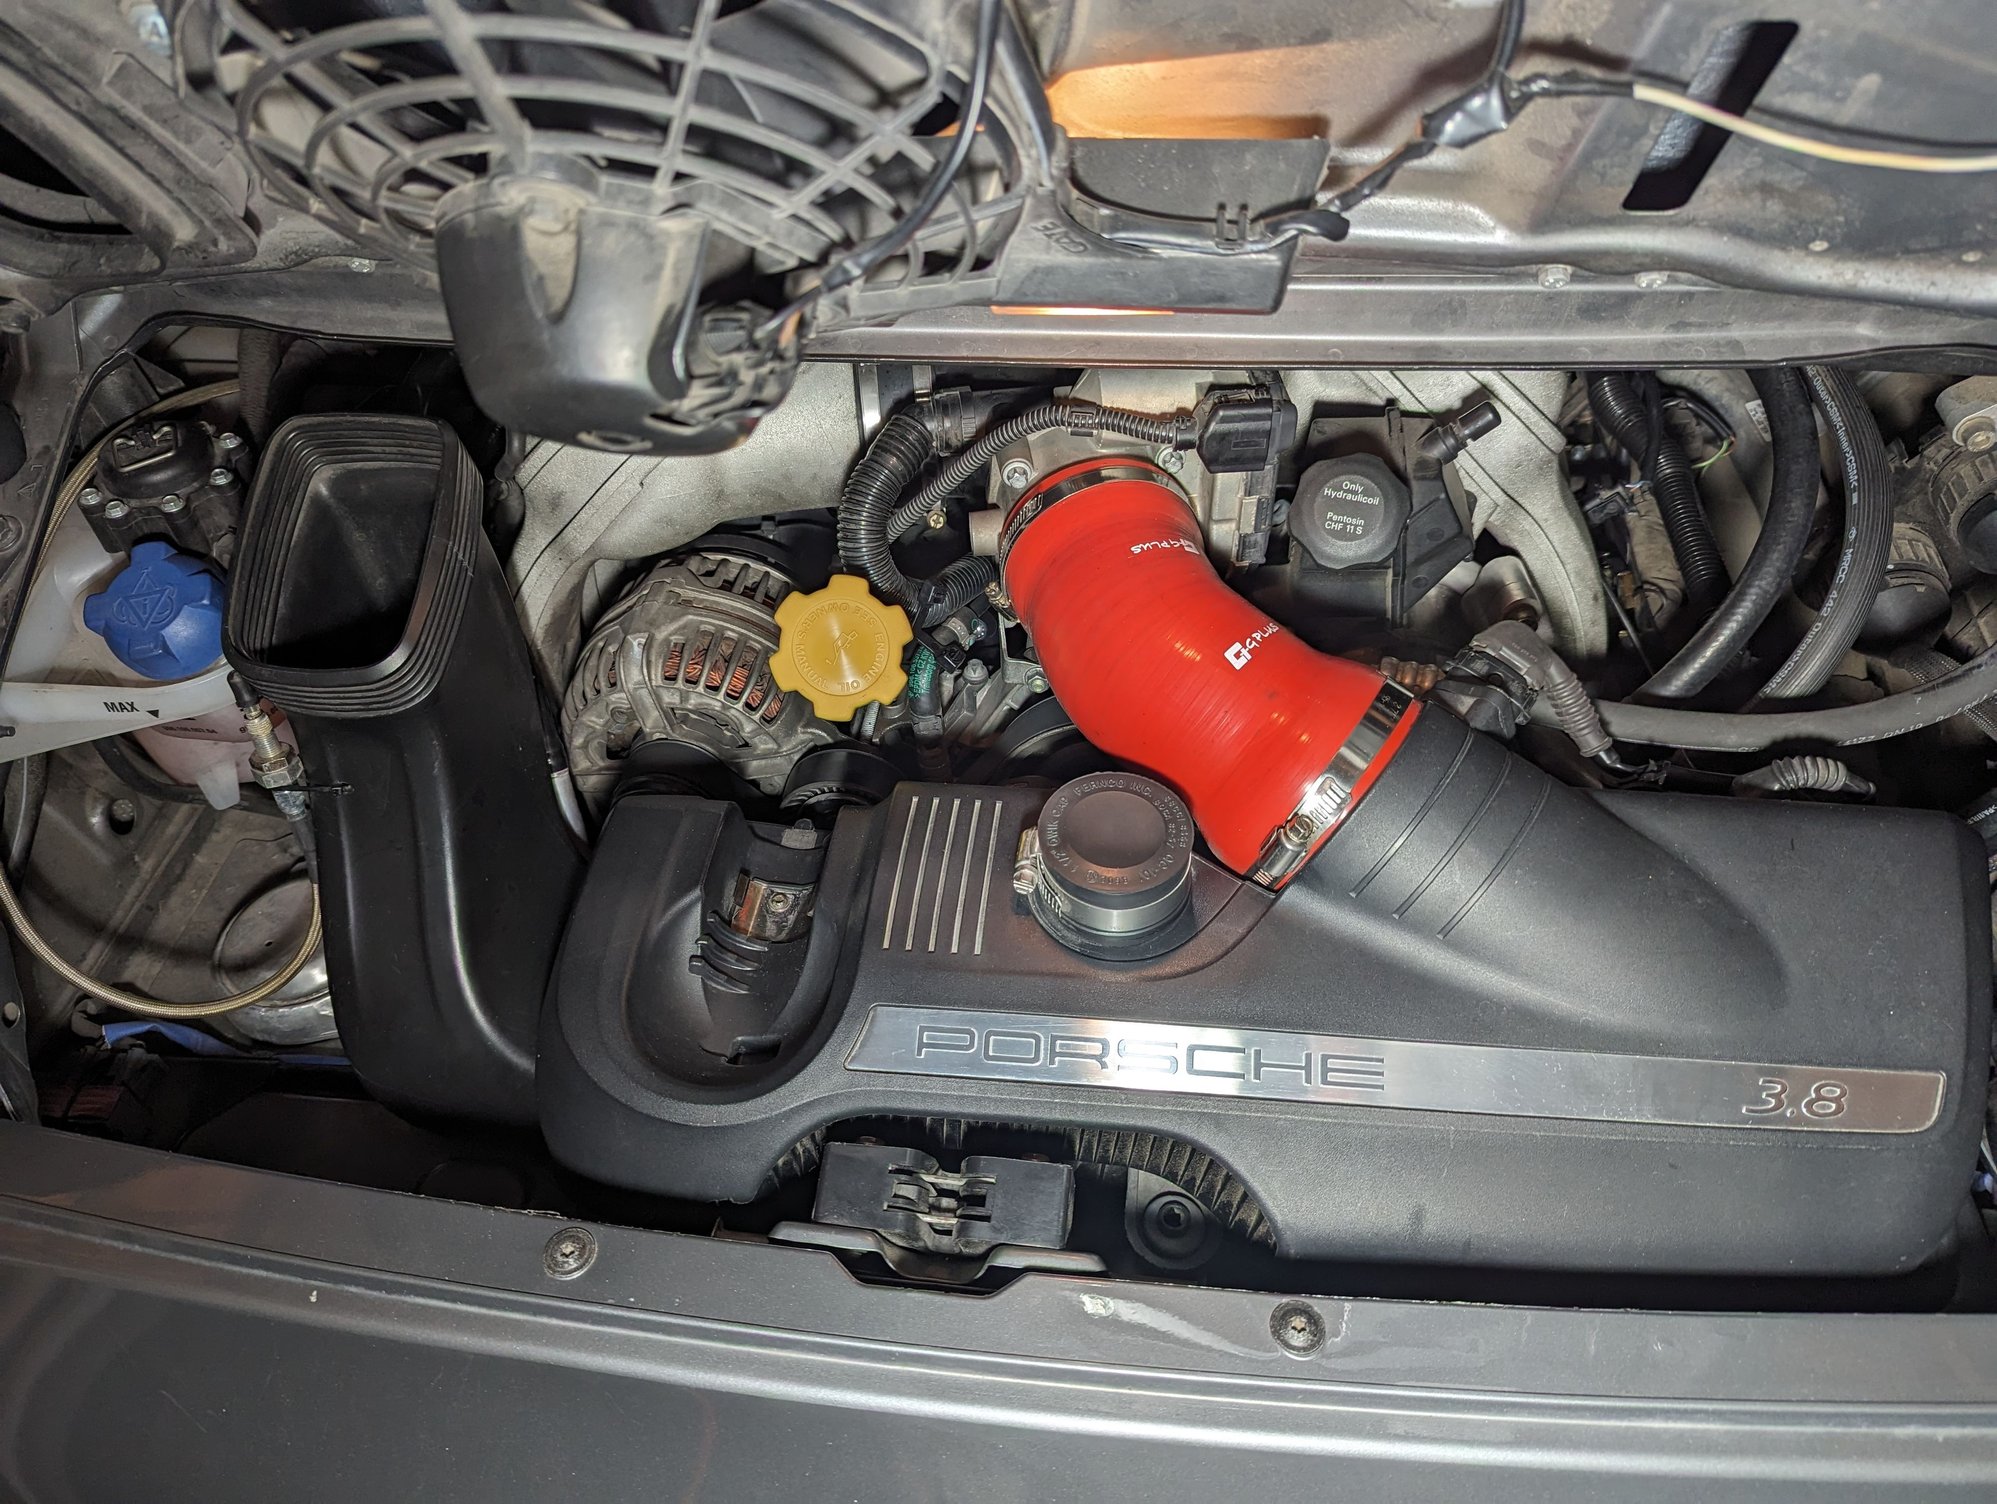
While changing my fuel injectors a couple of days ago, I broke the stock/original oil fill tube/pipe.
Yesterday, I changed it out with a great aftermarket product named the "Antidote Oil Tube" which can be seen at https://9ii.pro/ . @Chris(MA) was very helpful with my questions.
Everything you need for the installation is in the kit. The installation was probably a bit easier than a stock one due to its two-piece design. It's main attributes are the material it's made of and the material thickness/lack of a corrugated section.
It should last longer than the car.
Looks great. I just bought a brand new original one to u stall in my wife's car. Guess I'm sending that one back
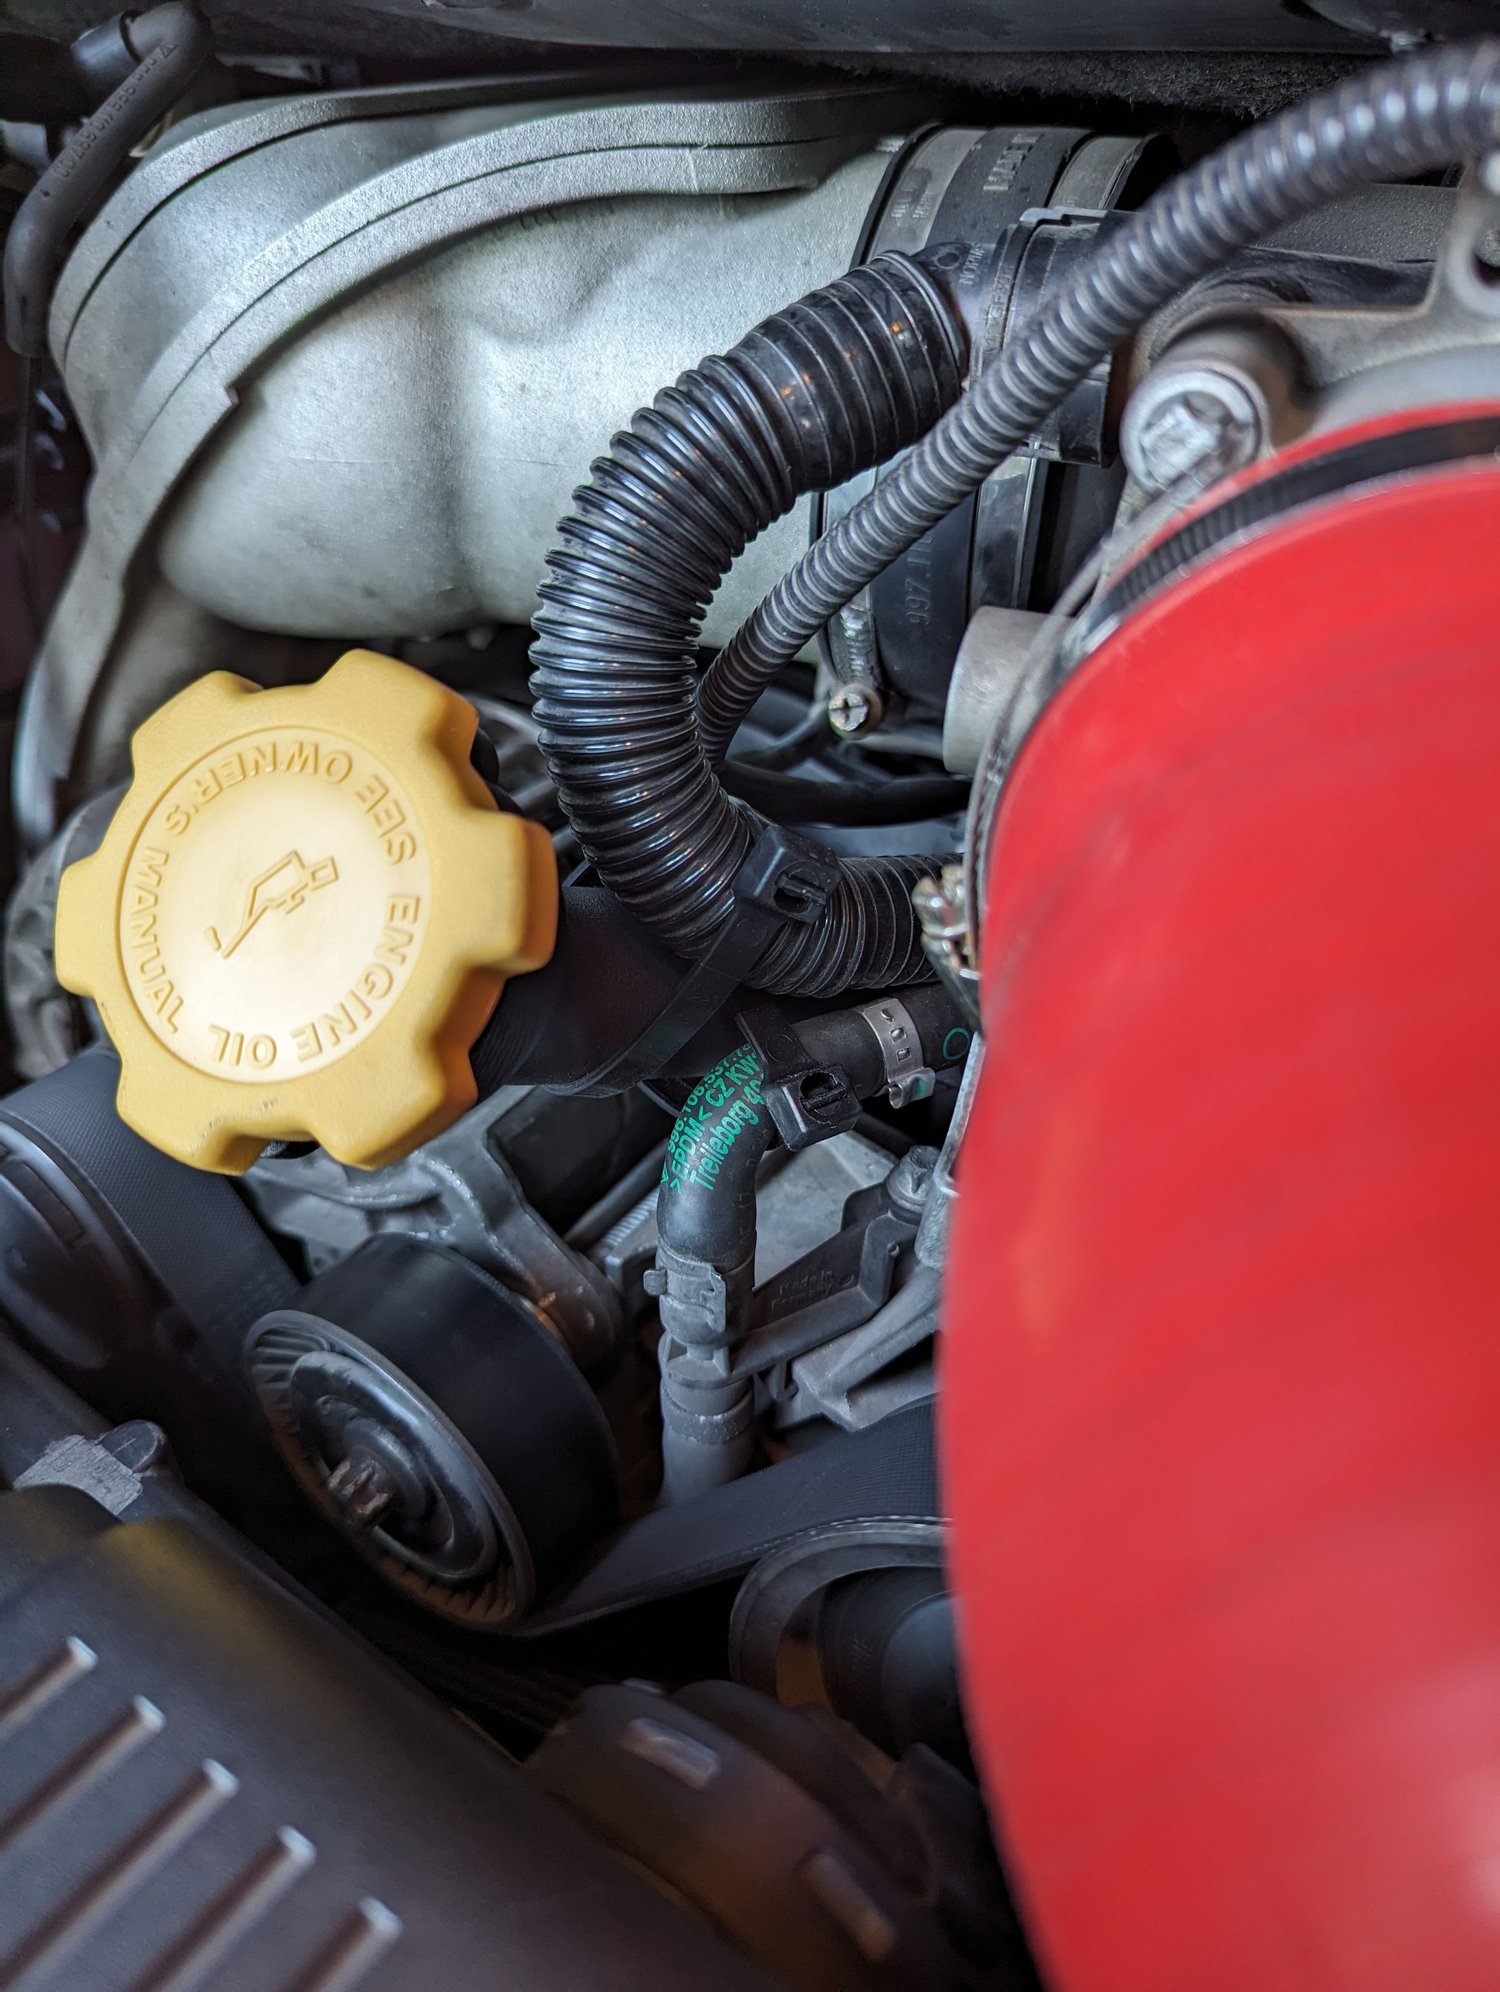
You need to remove the cap and reindex it so when installed the oil can graphic is horizontal, or will it not do that?
I tried to reorient the cap graphic but was unsuccessful (the threads are pretty coarse and the flange shape/thread entry is influencing the situation). (I had already planned to buy a different cap that has no graphics and I was going to use the old yellow cap as my donor to build in a nipple to do the crankcase vacuum measurement.)
I tried to reorient the cap graphic but was unsuccessful (the threads are pretty coarse and the flange shape/thread entry is influencing the situation). (I had already planned to buy a different cap that has no graphics and I was going to use the old yellow cap as my donor to build in a nipple to do the crankcase vacuum measurement.)

 02-02-2024, 06:14 PM