When you click on links to various merchants on this site and make a purchase, this can result in this site earning a commission. Affiliate programs and affiliations include, but are not limited to, the eBay Partner Network.
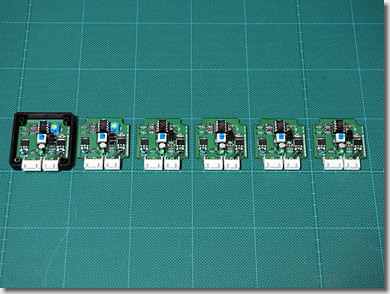
I am making the first a few lot of PSE Control Units.
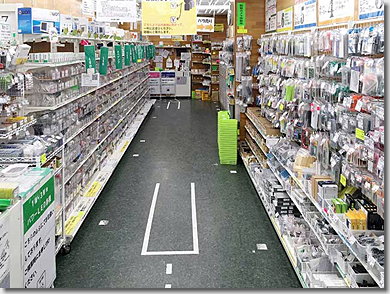
I procured many electronic devices in Akihabara, Tokyo. It looks like the opening scene of "BLADE RUNNER", doesn't it?
This is one of the famous electronic device retailers in Akihabara.
It is in a multi-tenant building with some kind of suggestive store, Anime Otaku / Cosplay. I am one of the serious and hard-working Japanese engineers, so I will not enter such a store.
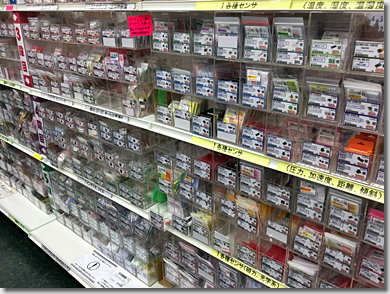
There are so many many devices in it. If you can not find the device there, you will not find it anywhere else.
This is the most important device in the unit, one of the smallest microcomputers in the world.
And now I am procuring a few lot of Porsche (Bosch OEM) connector housing from Germany for the Complete DIY Kit which I will provide you.
Please look forward to my announcement and take a look at this Post to prepare for the operation of PSE.
Hello Soaristo,
How went your Sunday' engineering? I hope well.
Let me know once you are about to release a new set of devises as I would like to be part ofd the happy earner of one unit... This is for my 997.1
Are there install instructions for the kit? How do we purchase in the US and what is the price?
Originally Posted by will007
Great News! I will be happy to be a first test user/buyer and write up the install guide.
Originally Posted by Olivier Lopez
I'll then wait for your next batch of units to buy one and install it!
I am sorry to keep you waiting. Also I am waiting for a package with a Porsche genuine connector housing from Germany.
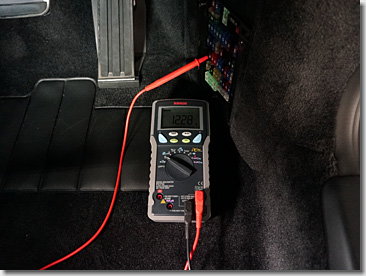
By the way, do you have a "Electric Tester" and a "Connector Crimping Plier" ?
A electric tester is needed for searching where +12V can be taken while running the engine.
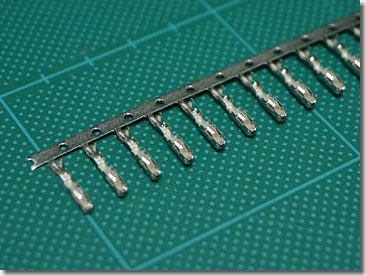
A connector crimping plier is needed for crimping the contact pins on the connector. It has a special shape that matches the contact pins.
In my "Complete DIY Kit", the contact pins are crimped on one side of the wire, but those are not crimped on the other side of the wire in order to adjust the length of the wire harness for your Porsche.
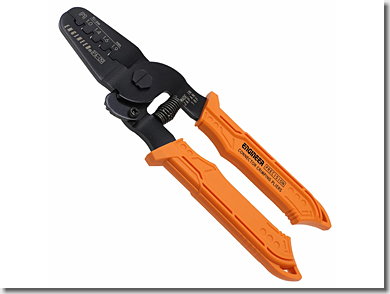
This is the crimping tool I recommend. (PA-20 or PA-21)
And, it is hard to ask, , , do you have enough DIY experience in automobile electrical systems ?
It is not difficult for experienced persons, but it is too difficult for beginners. I will try to support as much as I can, but it is difficult to support a complete beginner for me.
I am sorry to keep you waiting. Also I am waiting for a package with a Porsche genuine connector from Germany.
By the way, do you have a "Electric Tester" and a "Connector Crimping Plier" ?
A electric tester is needed for searching where +12V can be taken while running the engine.
A Connector Crimping plier is needed for crimping the contact pins on the connector. It has a special shape that matches the contact pins.
In my "Complete DIY Kit", the contact pins are crimped on one side of the wire, but those are not crimped on the other side of the wire in order to adjust the length of the wire harness.
This is the crimping tool I recommend. (PA-20 or PA-21)
And, it is hard to ask,,, do you have enough DIY experience in automobile electrical systems ?
It is not difficult for experienced persons, but it is too difficult for beginners. I will try to support as much as I can, but it is difficult to support a complete beginner for me.
Thanks.
Hello Soaristo,
Thanks for the update.
I agree with you, what you are describing can easily be done by any DIY who has some knowledge on car electrical wiring but may be not by anyone.
I guess, for those not confident enough, it can be done by any garage and for little money.
Anyway, I'm more interested then ever and look forward for your coming news!
Thanks for the update. In fact I have both crimpers -- had to redo the radio wiring of my 993 (sold) a while back to bring it back to factory. The wiring was all cut and I had to order the pins (very small as you know) and the special crimpers and Porsche connectors. Not a difficult project, but you need to be patient and take your time. The results were worth it -- looks like it came from the factory! As I mentioned before, happy to be one of the first buyers and then do a DIY step-by-step to help others on the forum.
If you just want to invert the PSE valve signal, you can install a simple relay controlled by the valve signal in the engine compartment and you use a NC contact to control the PSE valve. It's suffisant on the 997.2 & 987.2 because there isn't shut off depending of car speed like on the 997.1. (I have checked on my 997.2 C4S)
With this modification:
light off = valves opened, light on = valves off.
Yes, you can also do it by using such a primitive way.
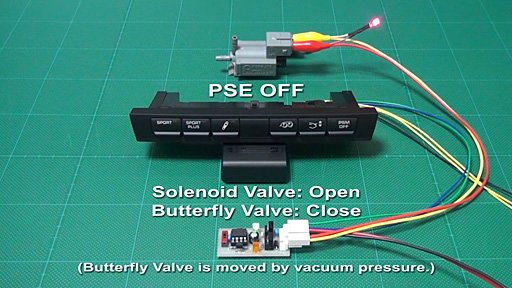
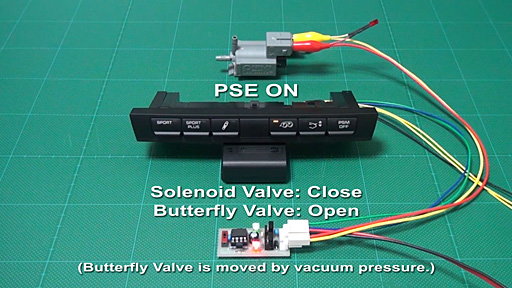
The motion of the solenoid valve and the motion of the butterfly valve are reversed (inverted).
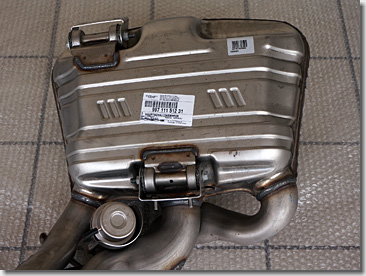
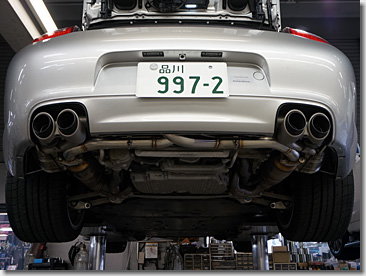
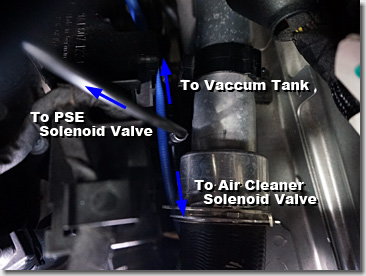
This is the main silencer of PSE and a mechanical actuator that is operated by vacuum pressure.
This is a tiny steam locomotive, , , No!
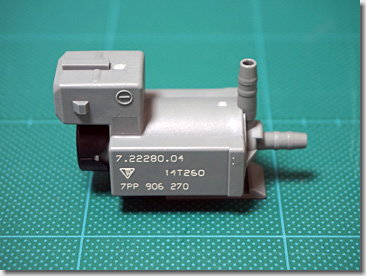
This is a electromagnetic solenoid valve that controls the vacuum pressure applied to the mechanical actuator.
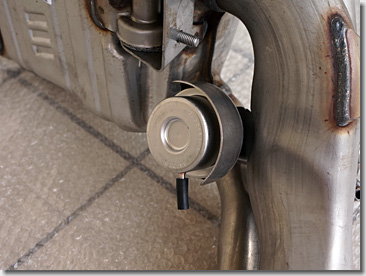
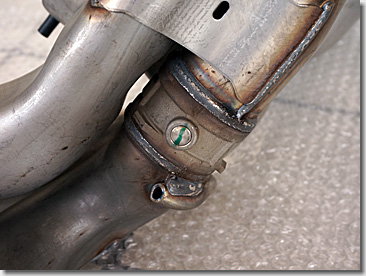
This is a close-up of the main pipe and there is a butterfly valve inside. The green mark in the center indicates the direction of the butterfly valve. (It may has been marked by a Porsche's supplier.)
That is very important. Under atmospheric pressure (when the vacuum pressure is not applied to the mechanical actuator), the butterfly valve is open.
So you will understand why the muffler makes a loud sound when you forcibly disconnect the connector of the solenoid valve.
The valve is open when there is no vacuum pressure on the actuator, the solenoid valve is close (OFF). That is, PSE is ON.
The valve is closed when vacuum pressure is applied to the actuator. the solenoid valve is open (ON). That is, PSE is OFF.
Namely, PSE = ON does not mean the solenoid valve = ON.
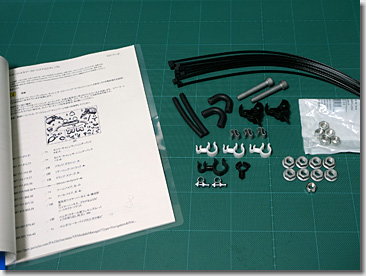
I am sorry to keep you waiting. The "PSE Control Unit Complete DIY Kit" is ready!
The launch customer (test user) is will007 as this thread starter.
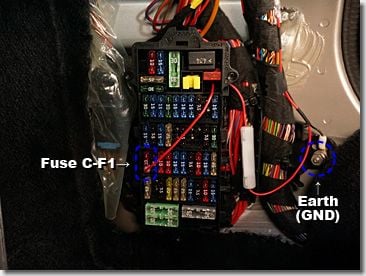
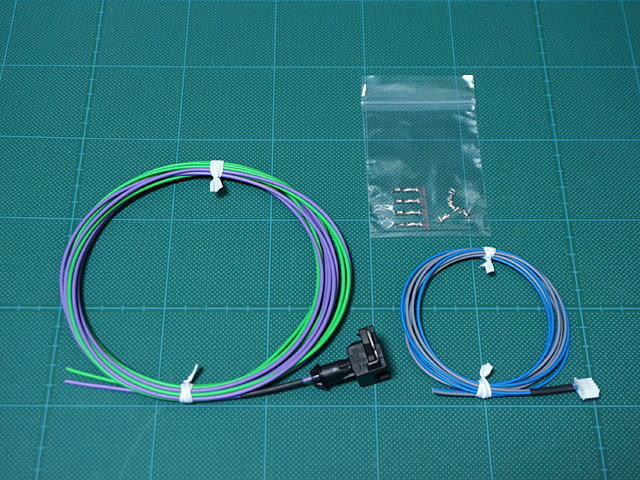
It contains the "Convenient Fuse". By using it, you can easily draw the power supply from the fuse box.
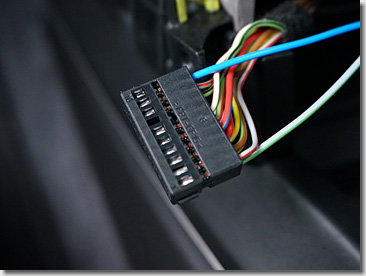
And it contains a waterproof coupler of Porsche genuine parts (Bosch OEM) for the electromagnetic valve.
This kit can be connected in the same way as Porsche genuine parts.
All wiring is made of heat-resistant products for automobiles manufactured by Furukawa Electric Co., Ltd. It is made in Japan, not cheap and shoddy China.
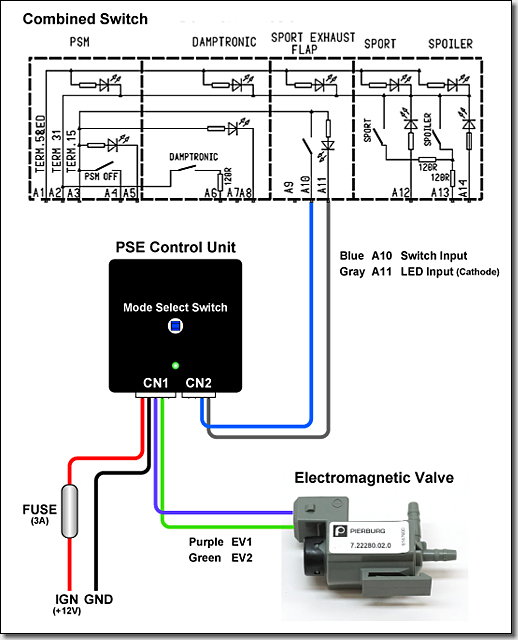
This is its wiring diagram. It is not so difficult or complicated. However, for DIY beginners, installing the wire harness will be a little bit difficult. It needs to pierce the bulkhead of the passenger compartment.
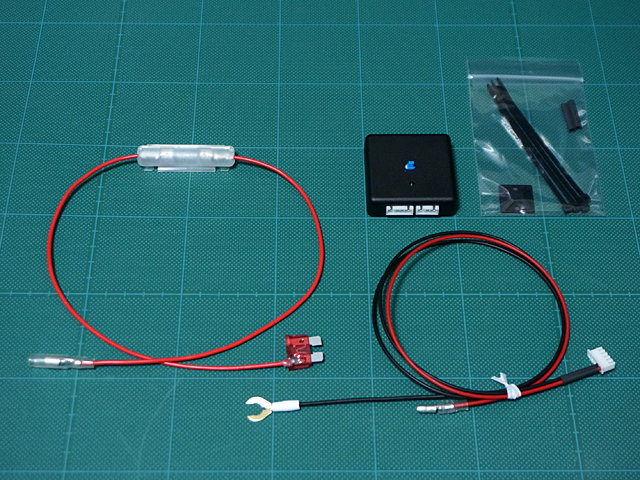
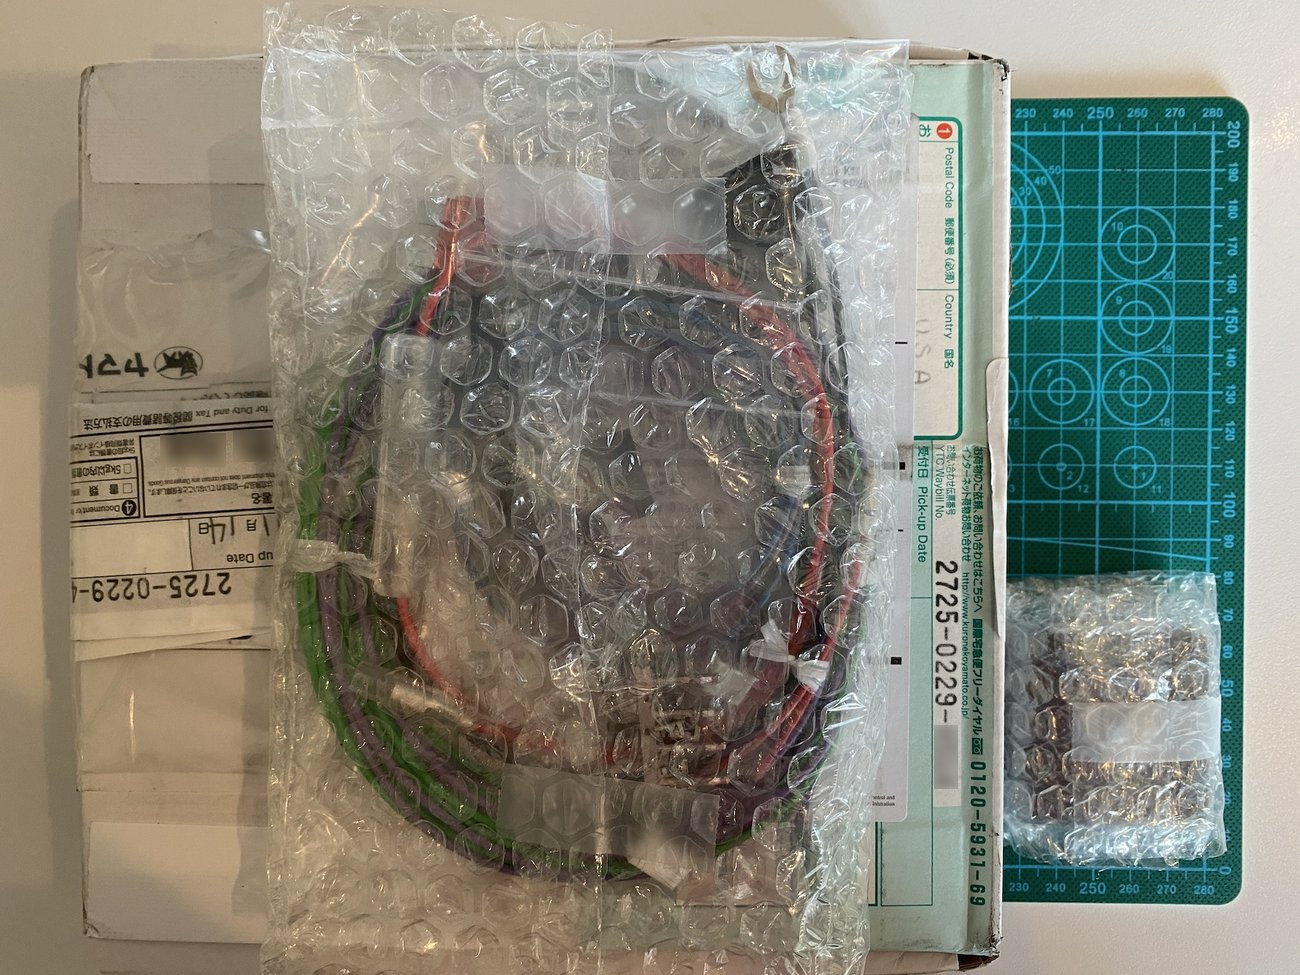
hi Everyone -- package arrived and I will be planning to make the install over the Thanksgiving weekend. The kit arrived in a well padded box. The control box as you can see from the photos is very small 2" (50mm) square by 0.5" (15mm) tall. More to come.
Some things to note about the kit
1. Power wire -- Soaristo did something really nice here by making this in two parts as it will simplify the install. FYI -- the 3A fuse is included and installed! My suggestion for final build is to use a fuse holder to connect the power wire rather than wiring directly to the fuse. The fuse should not fail, but....
2. Connectors -- included are precut heat shrink tubes for the four connections you will be making. Nice!
3. Ground wire -- the shape of the connector allows for easy install.
4. The control box -- has two strips of double stick tap on the back to hold the box in place based on your location.
Everything is top quality.
Last edited by will007; 11-20-2020 at 09:25 PM.
Reason: update

 10-25-2020, 10:50 AM