

Pork2: Back in black - tales of the turbo (DIY heavy)
 05-09-2019 | 09:10 AM
#61
Thread Starter
Three Wheelin'
05-11-2019 | 09:34 PM
#62
Thread Starter
Three Wheelin'
Went down the road to my buddy's shop to utilize his lift (and expertise) to get the flex disc and trans mount installed. Ultimately, I decided I wasn't super comfortable doing this on jack stands in my garage.
Overall, this is a relatively easy DIY. Hopefully the photos are helpful for anyone else wanting to do this.
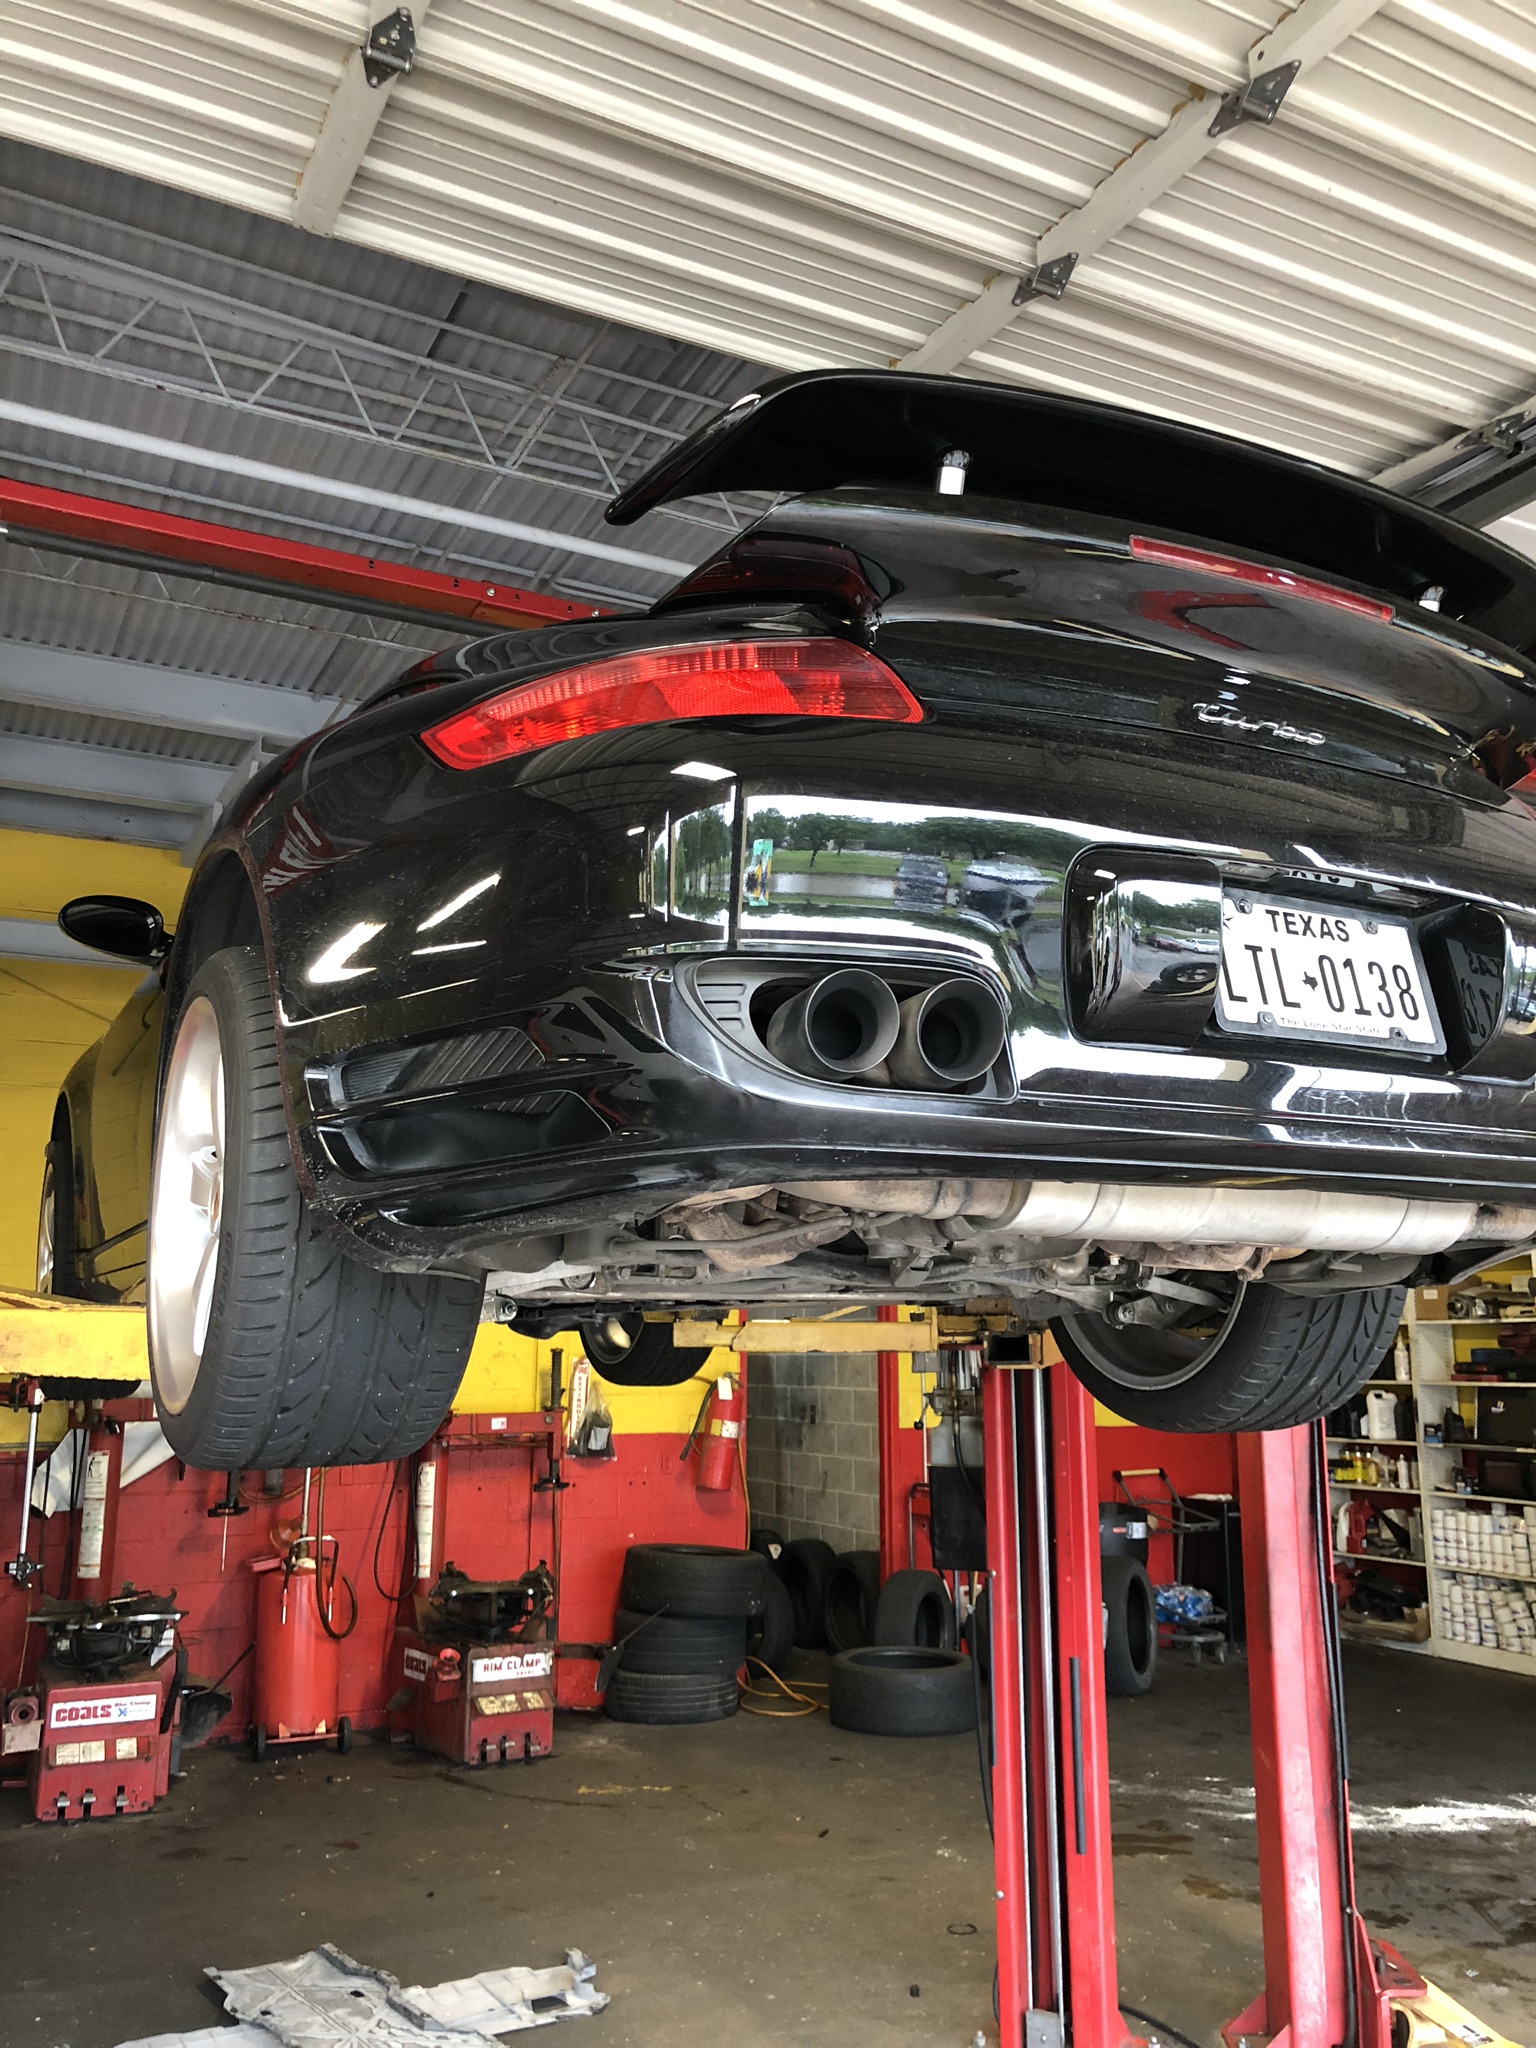
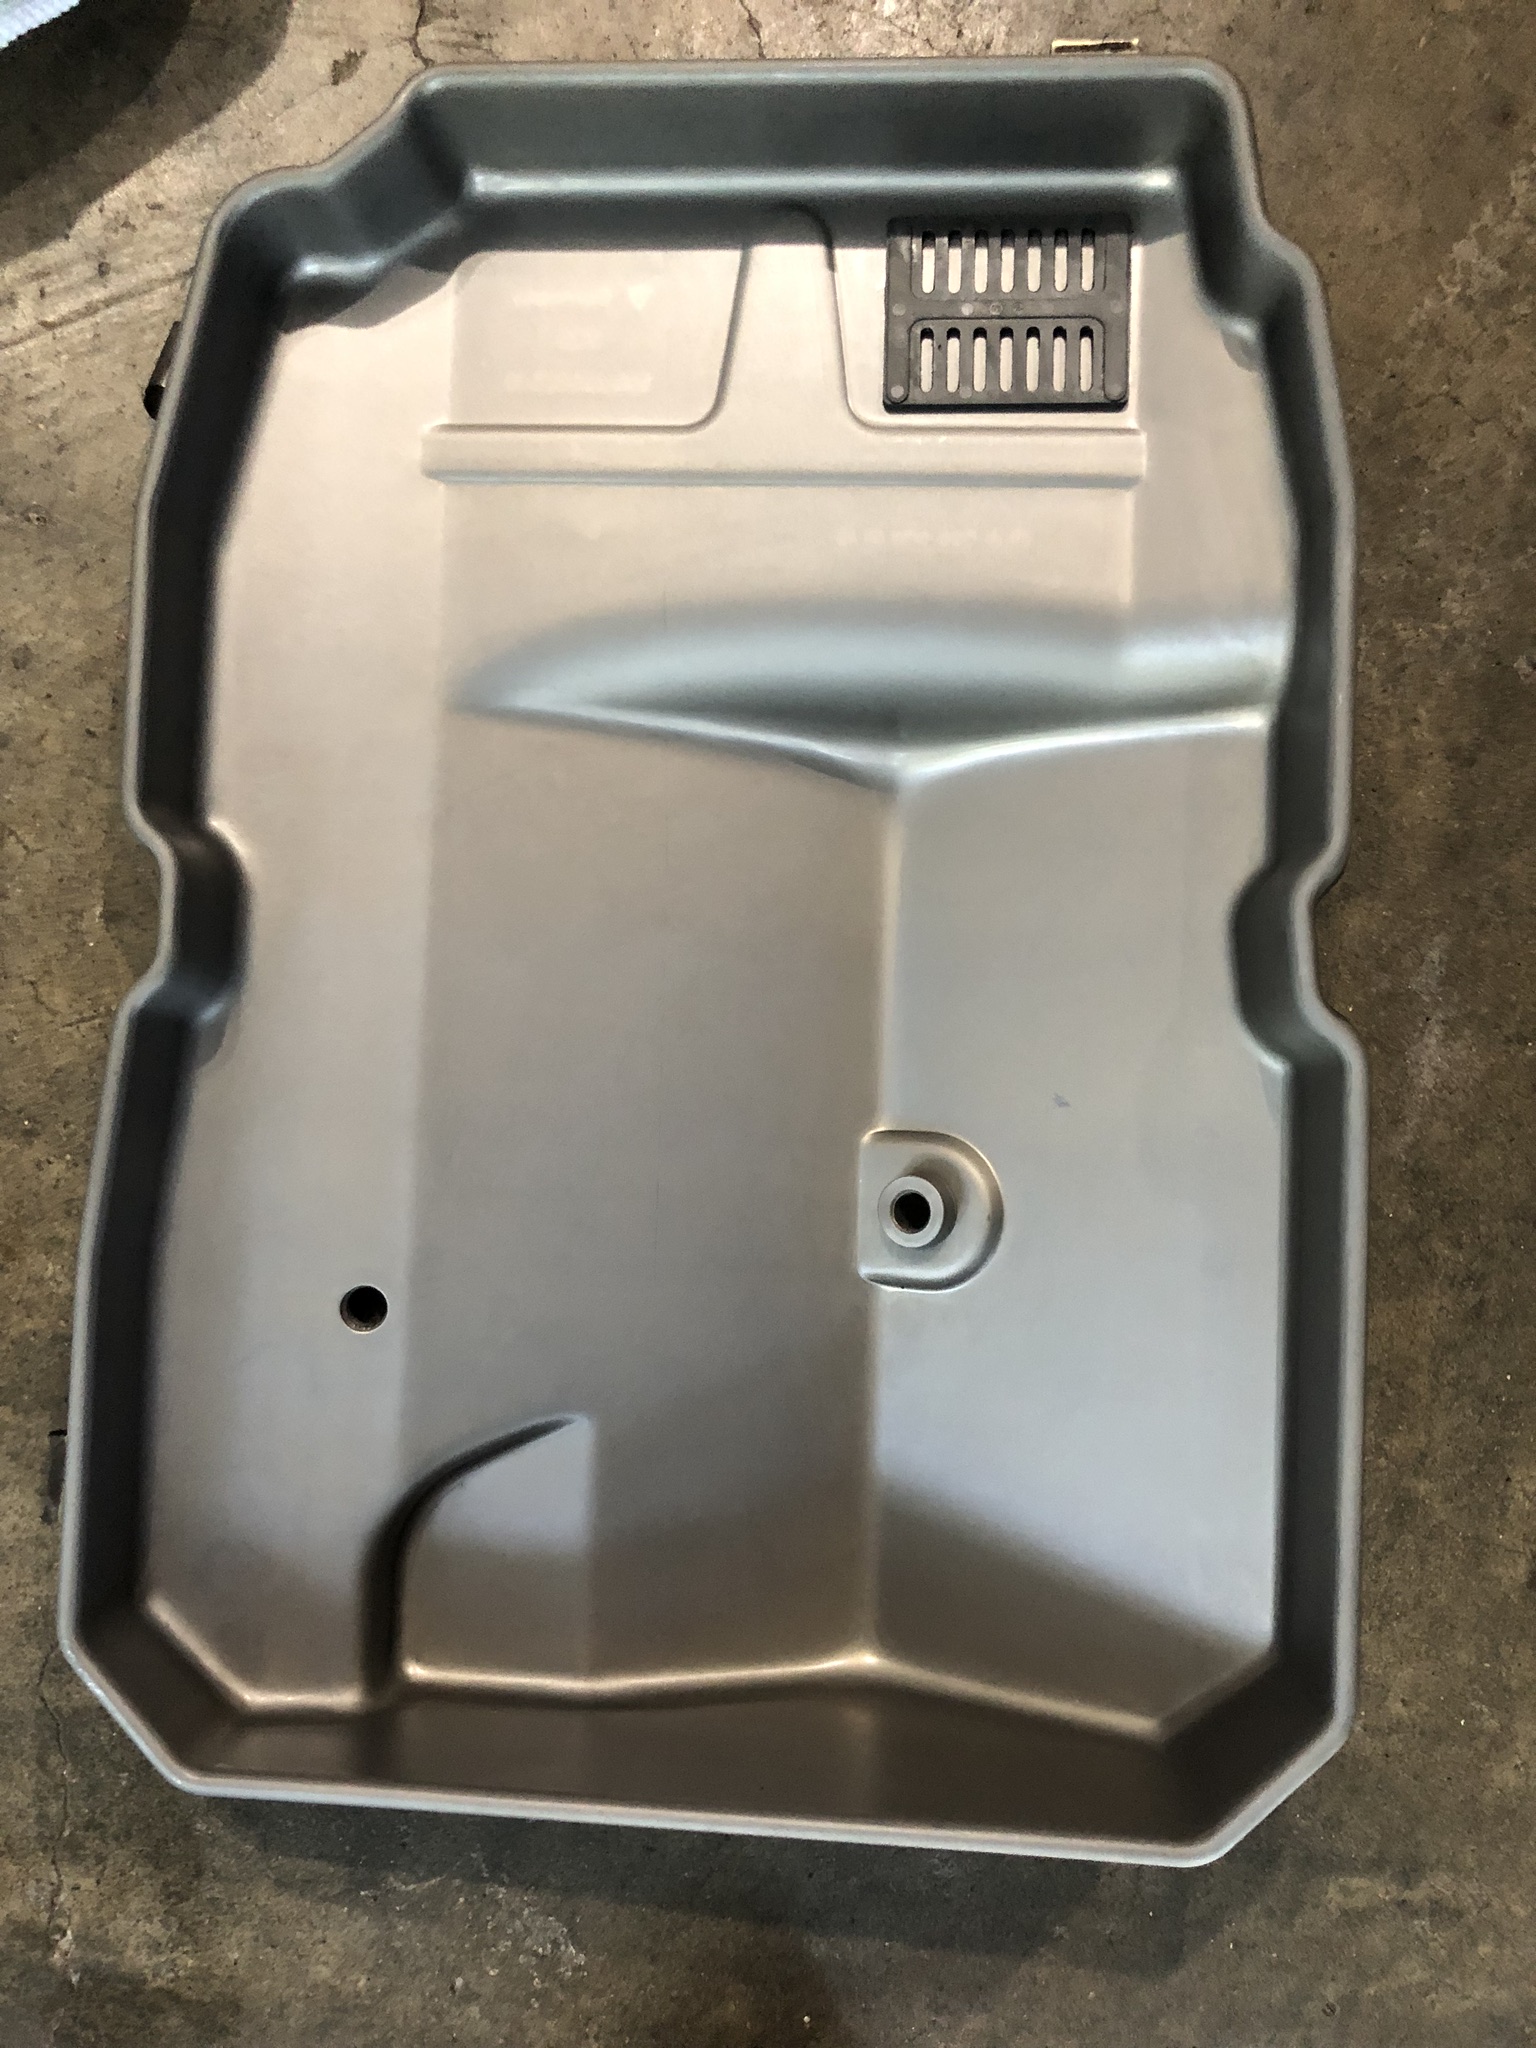
Looking towards the back of the car after removing underbody panels. Underside is pretty clean
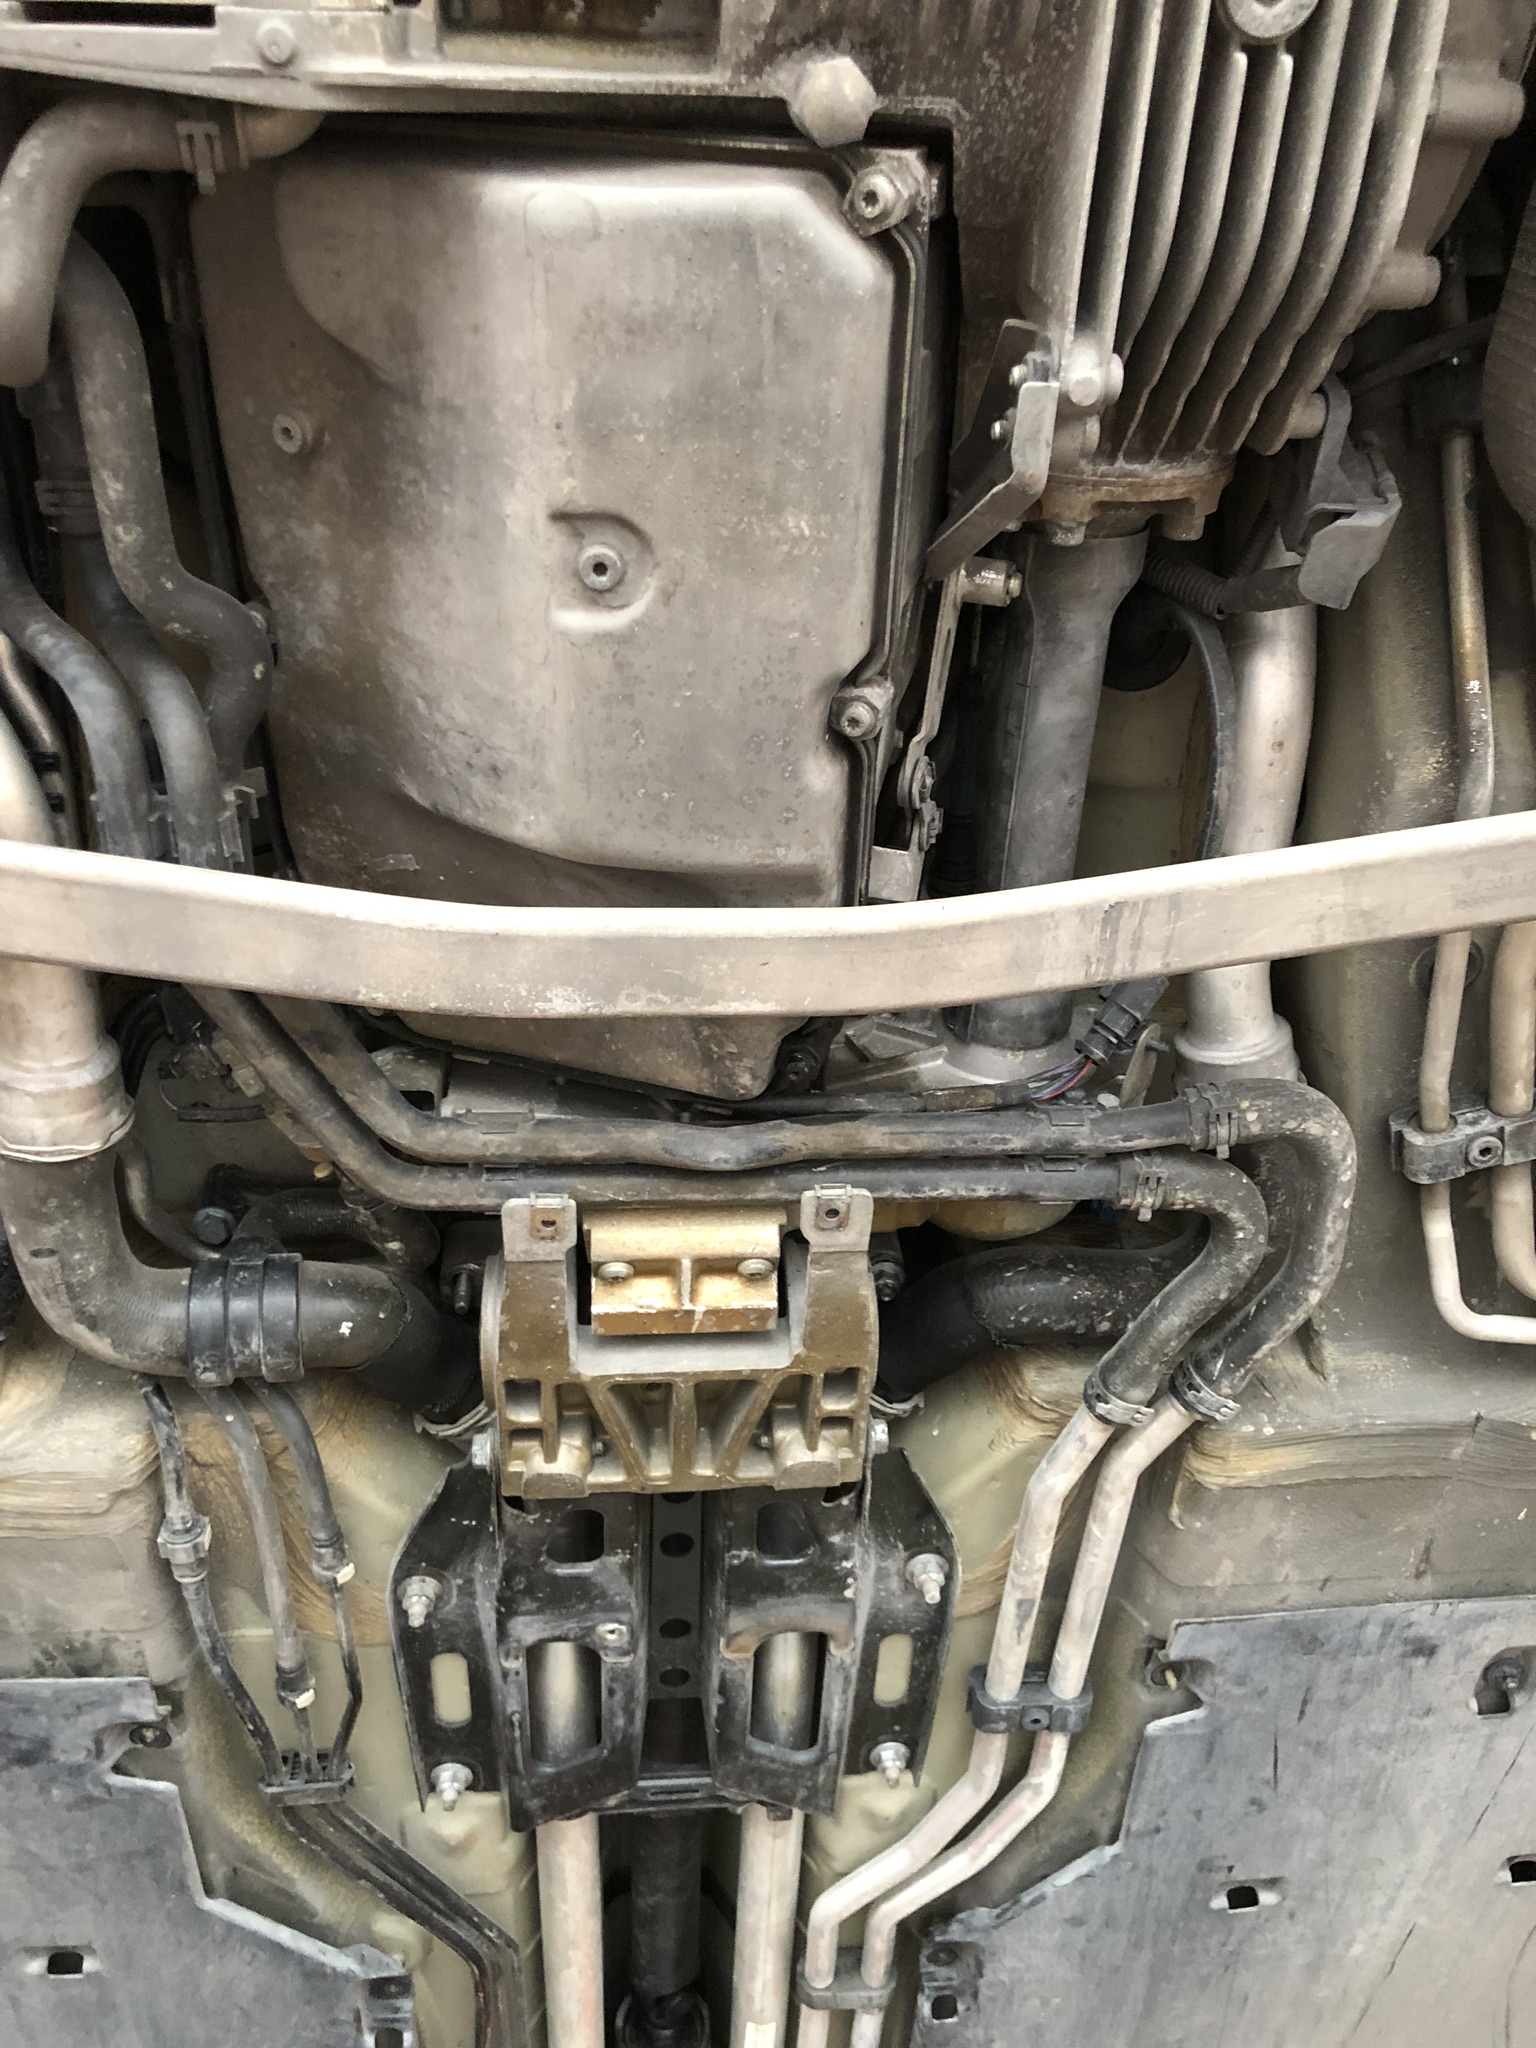
Sweaty transmission pan just in one corner, already have the parts/fluids for this job


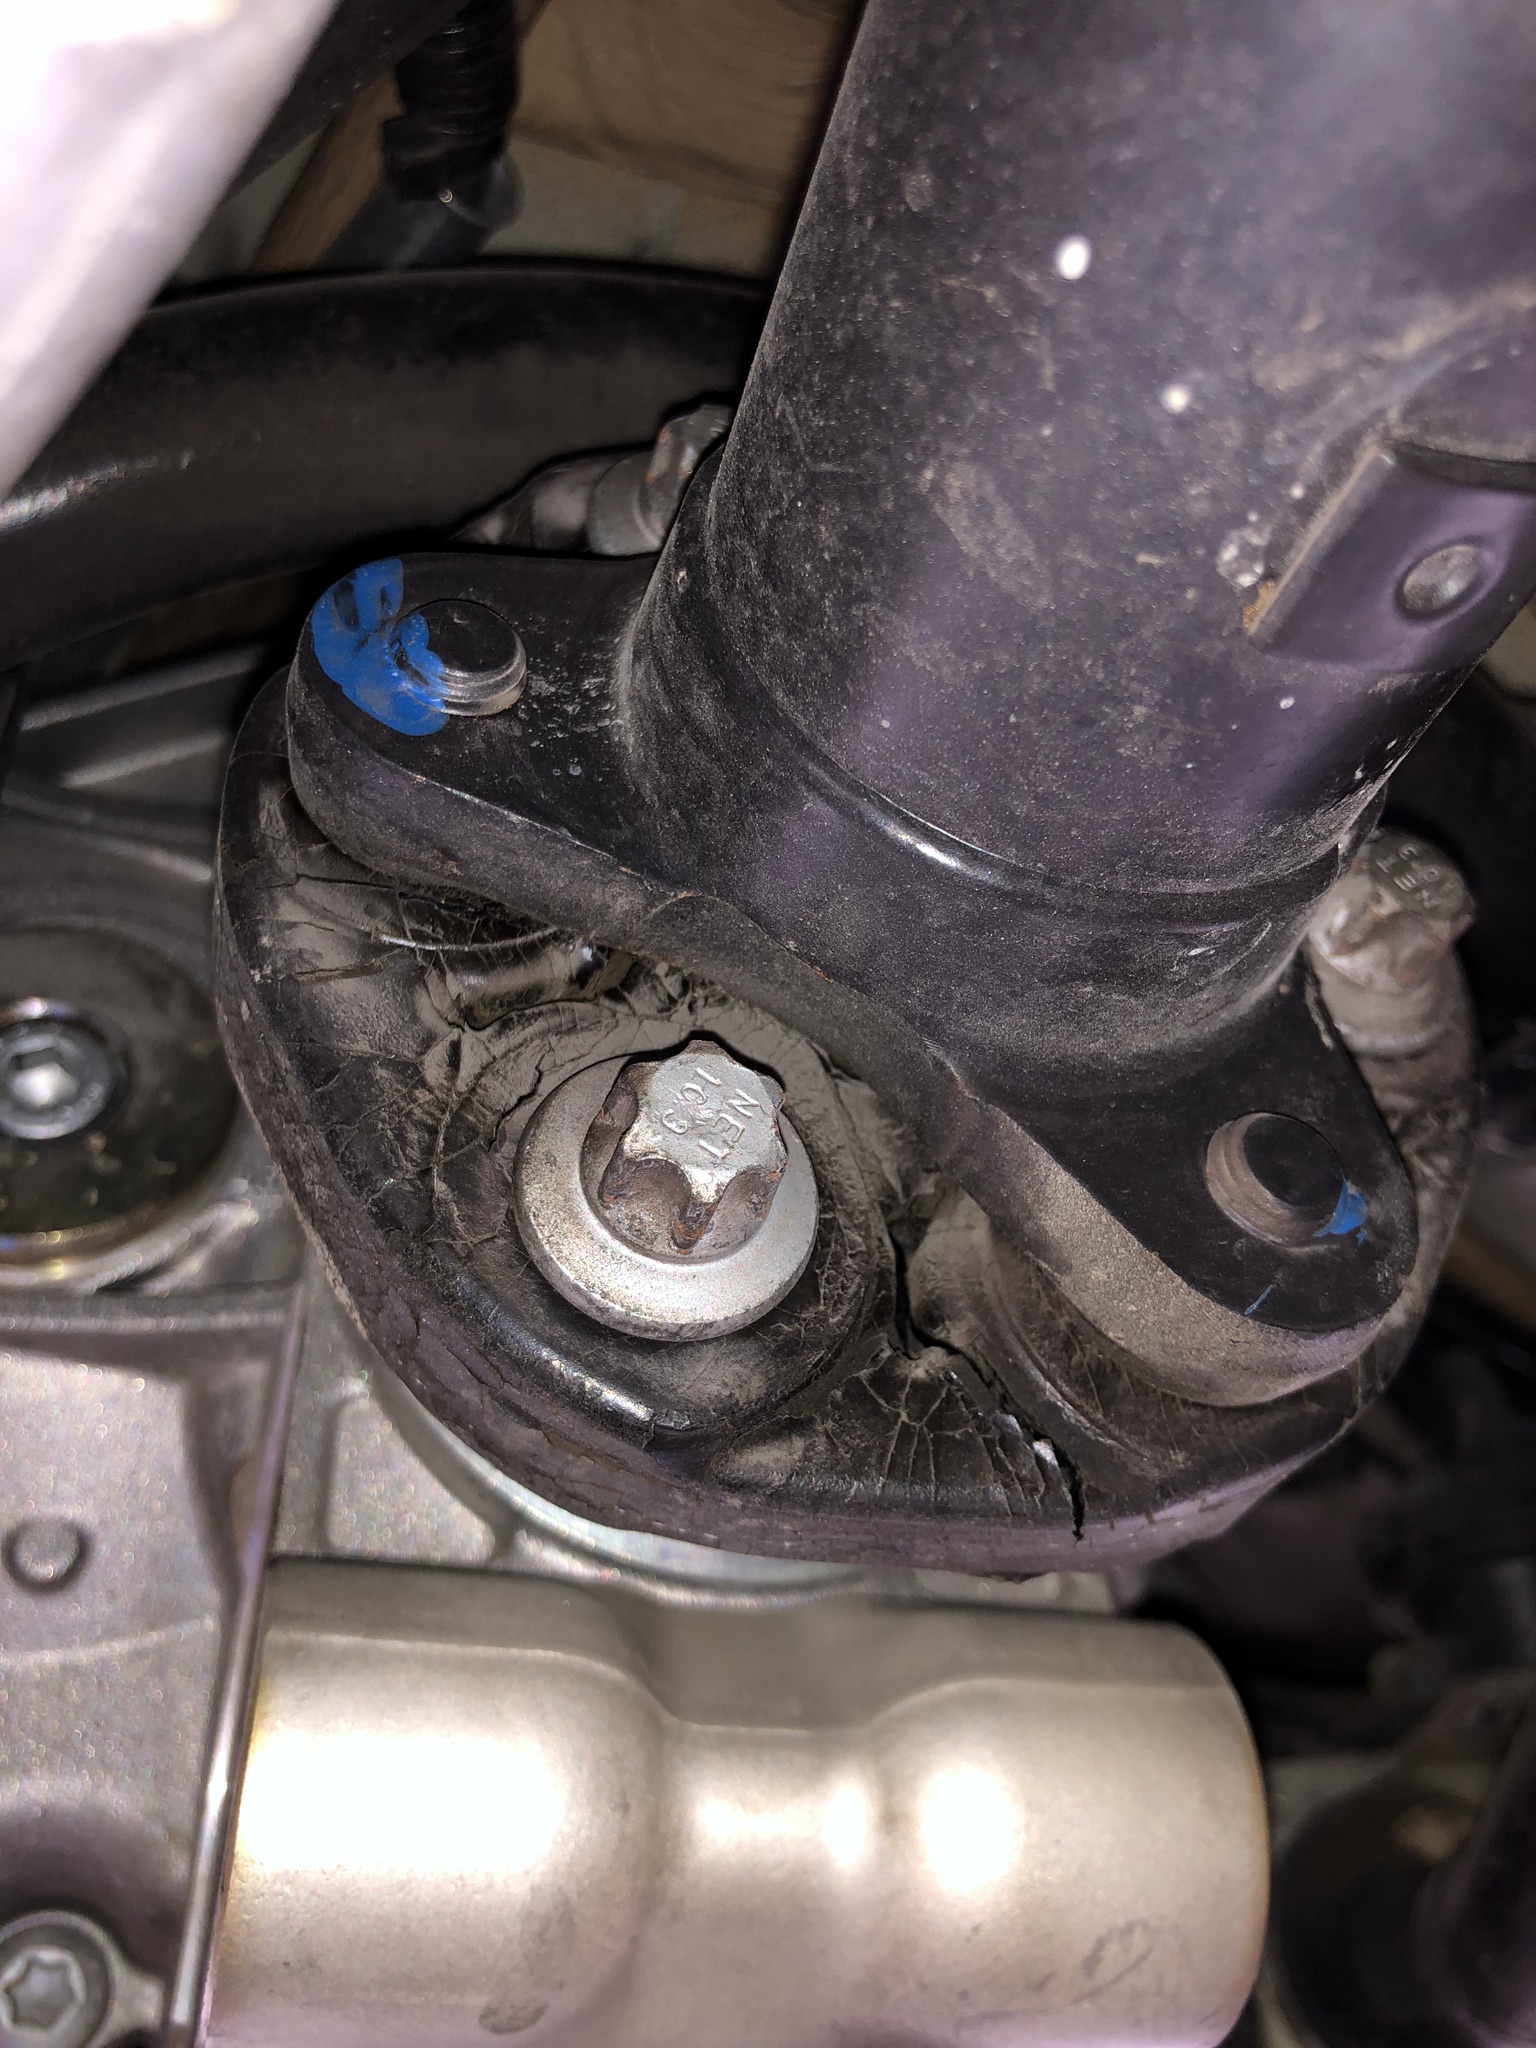
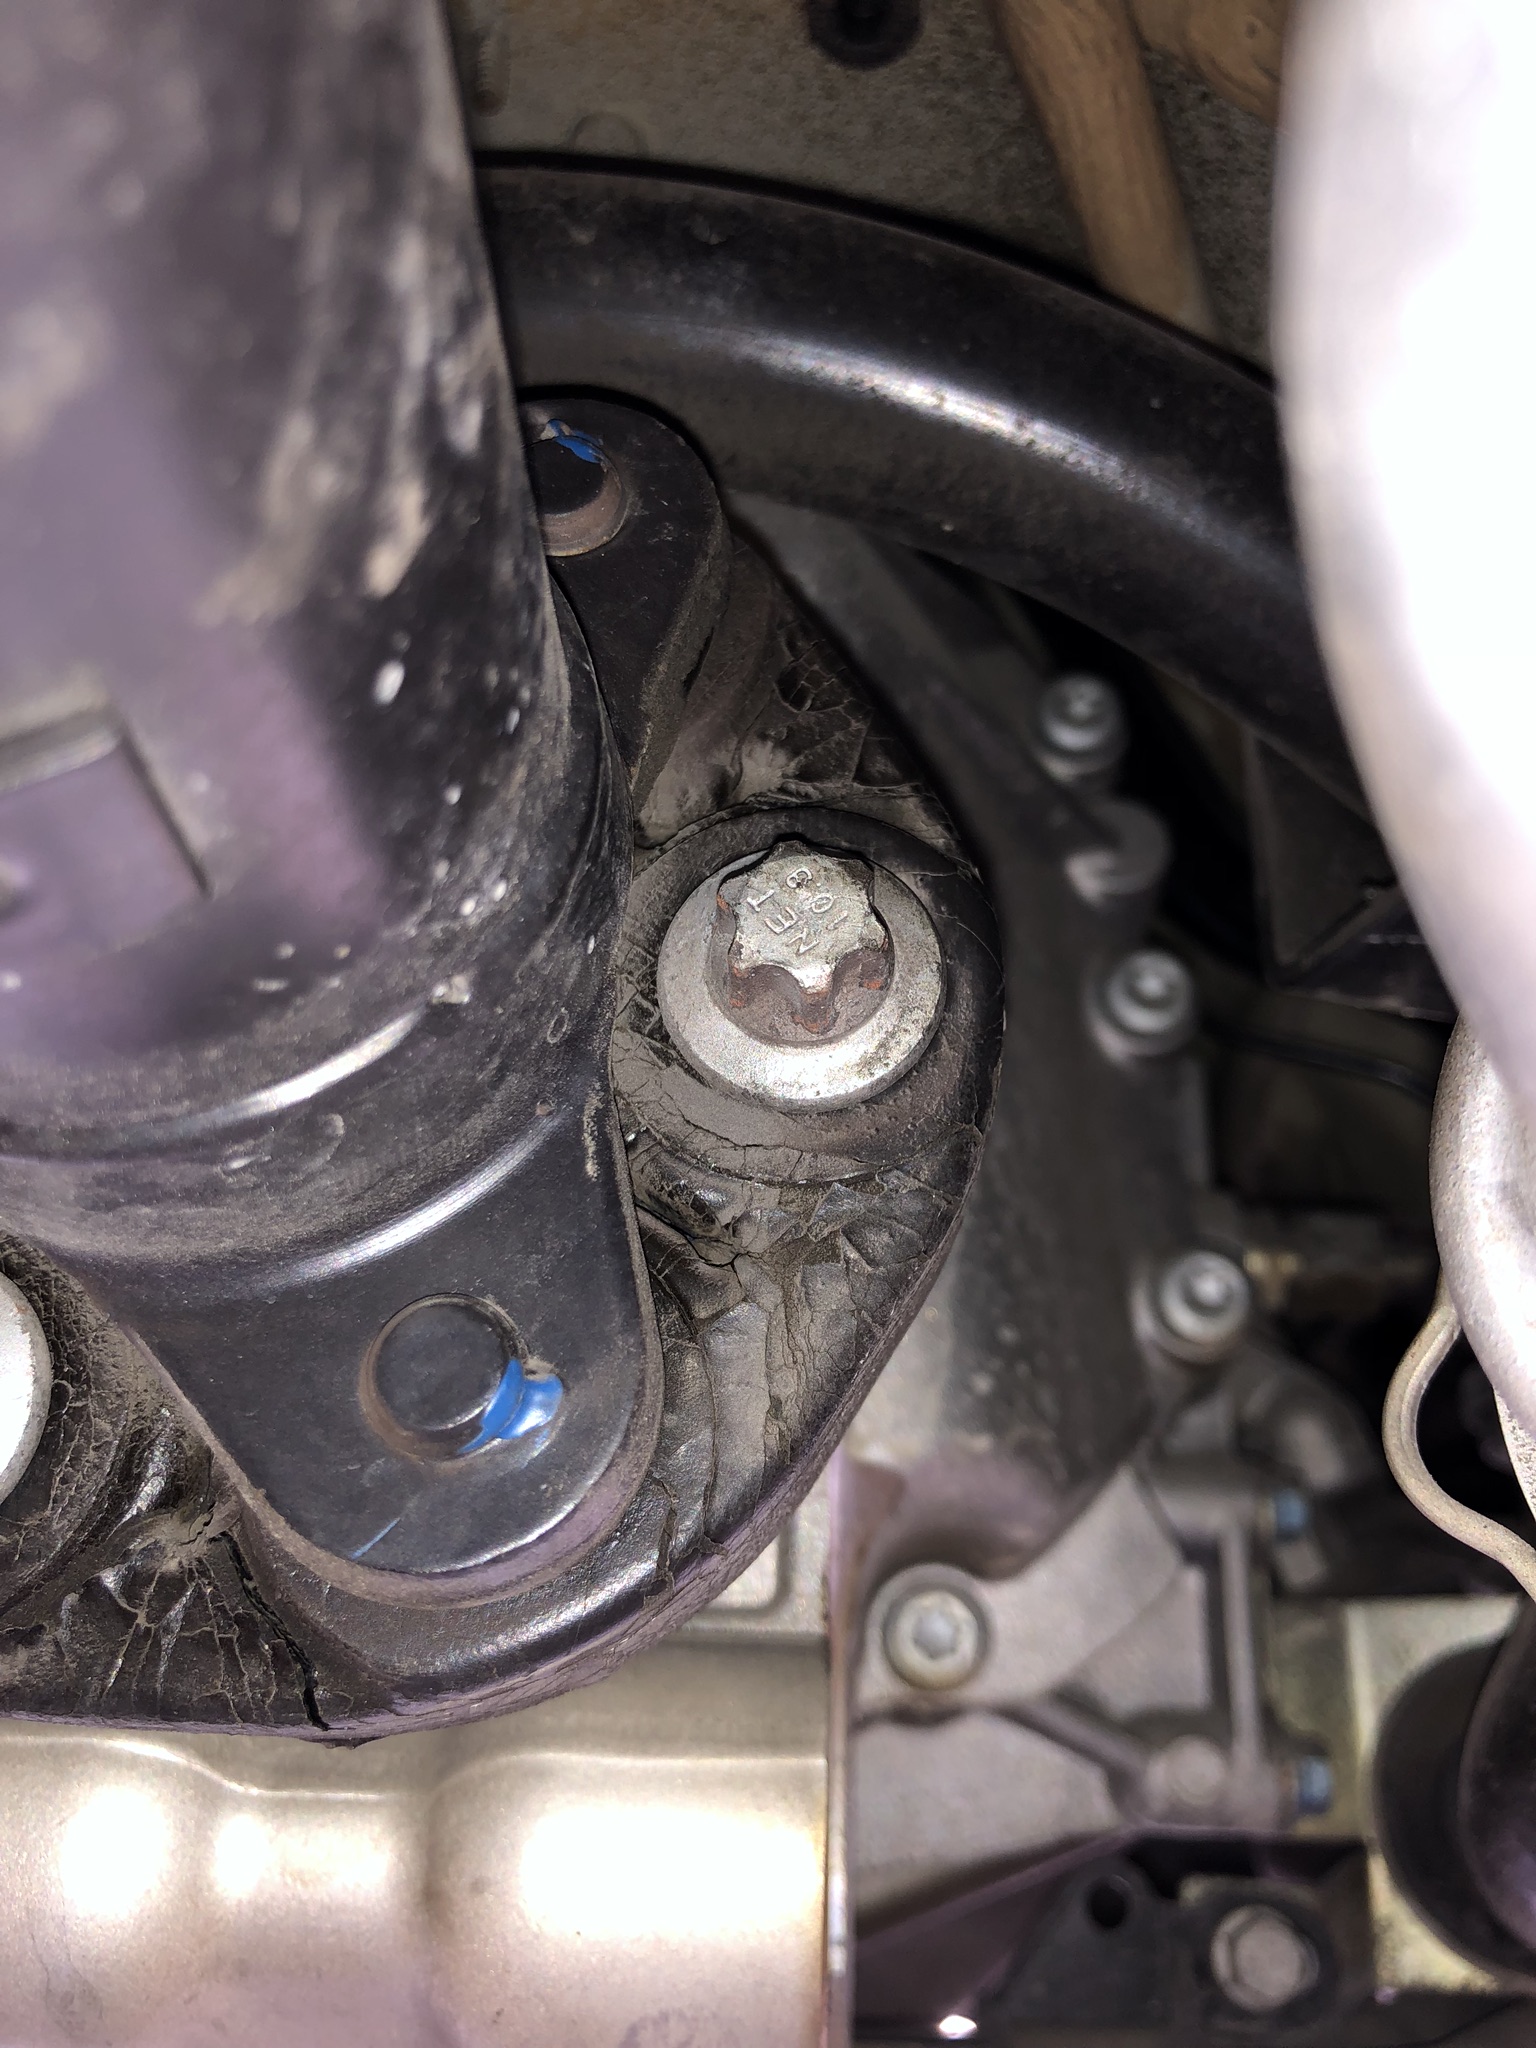
Transmission mount was missing a nut....
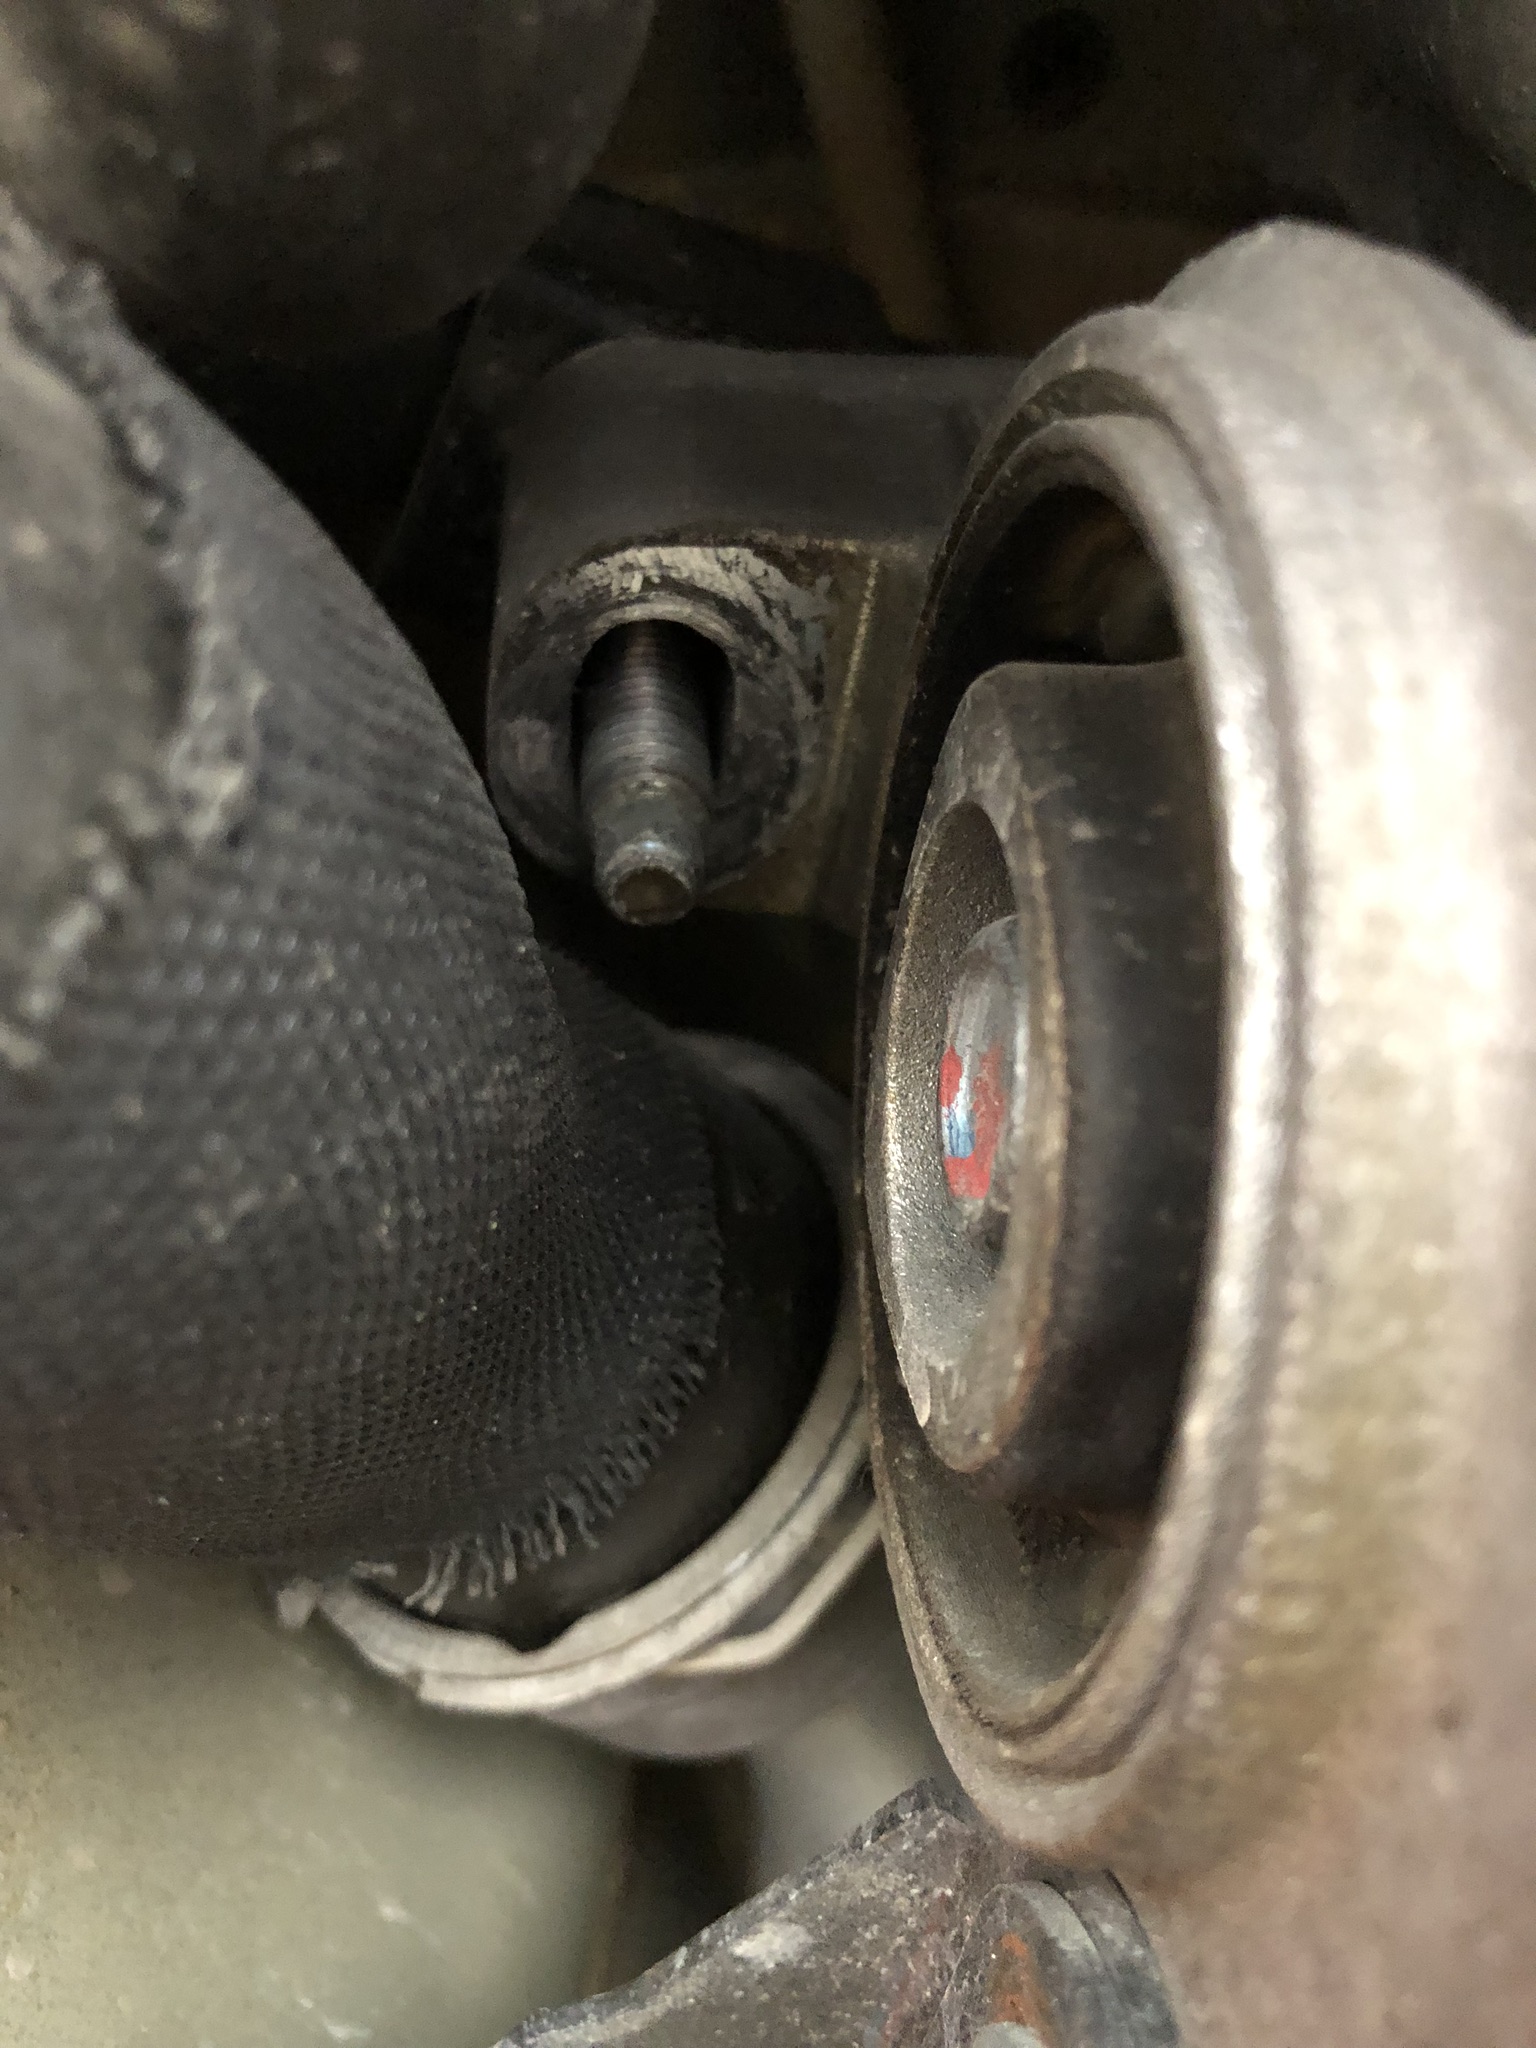
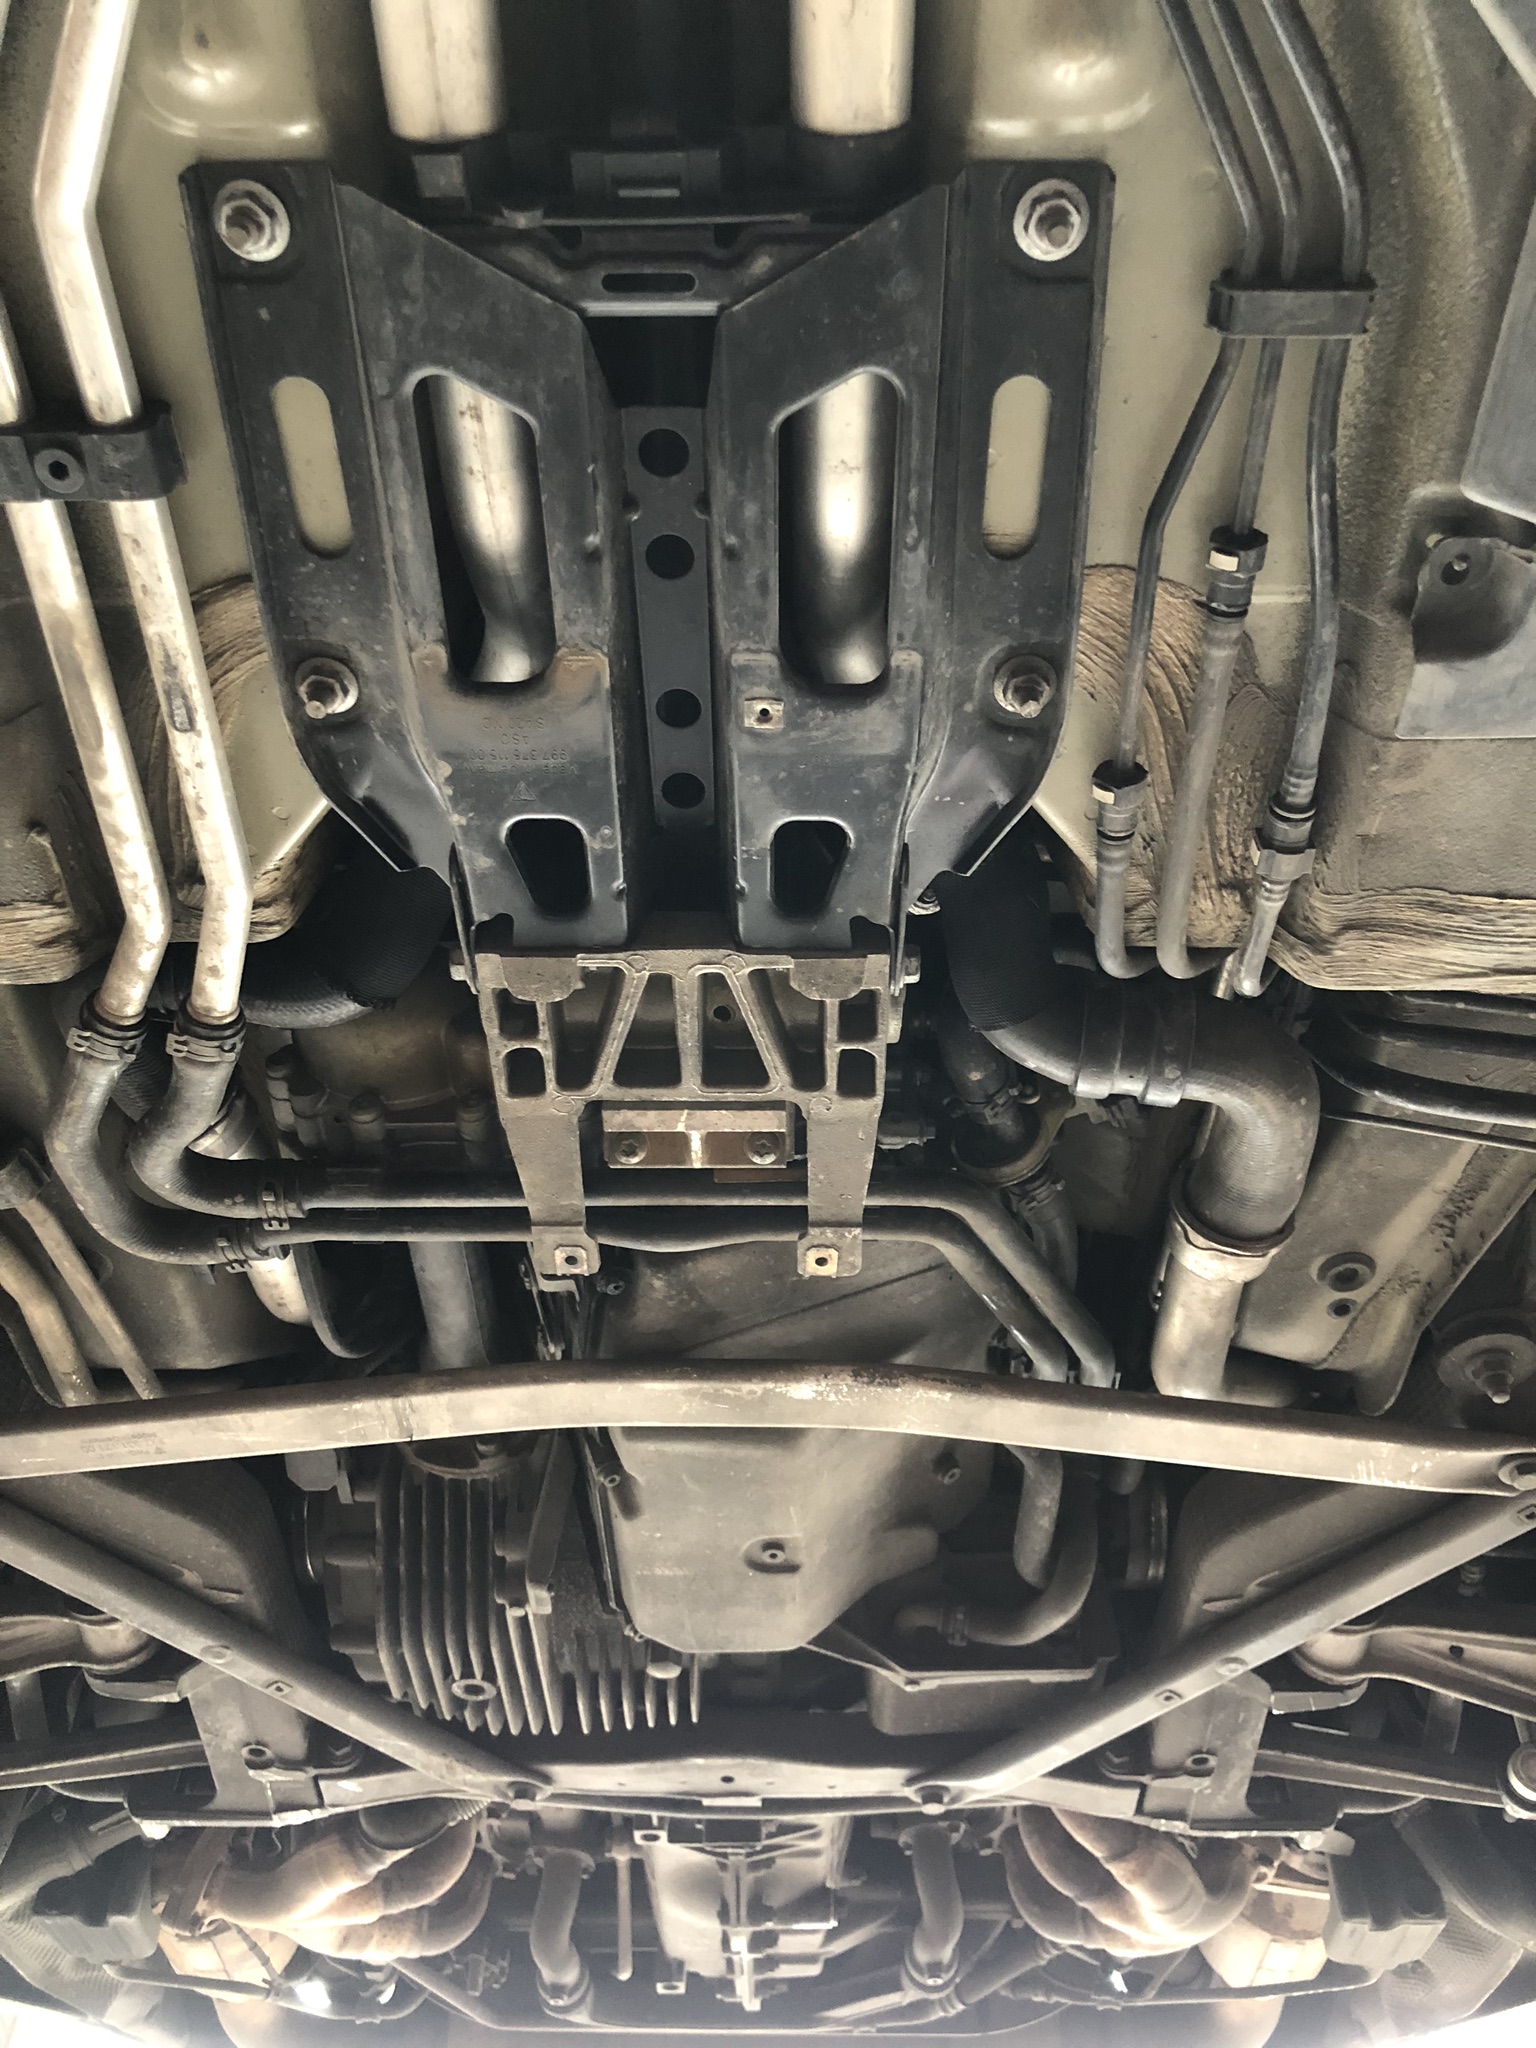
Front drive shaft into the differential housing. Differential bushing looked good, normal play

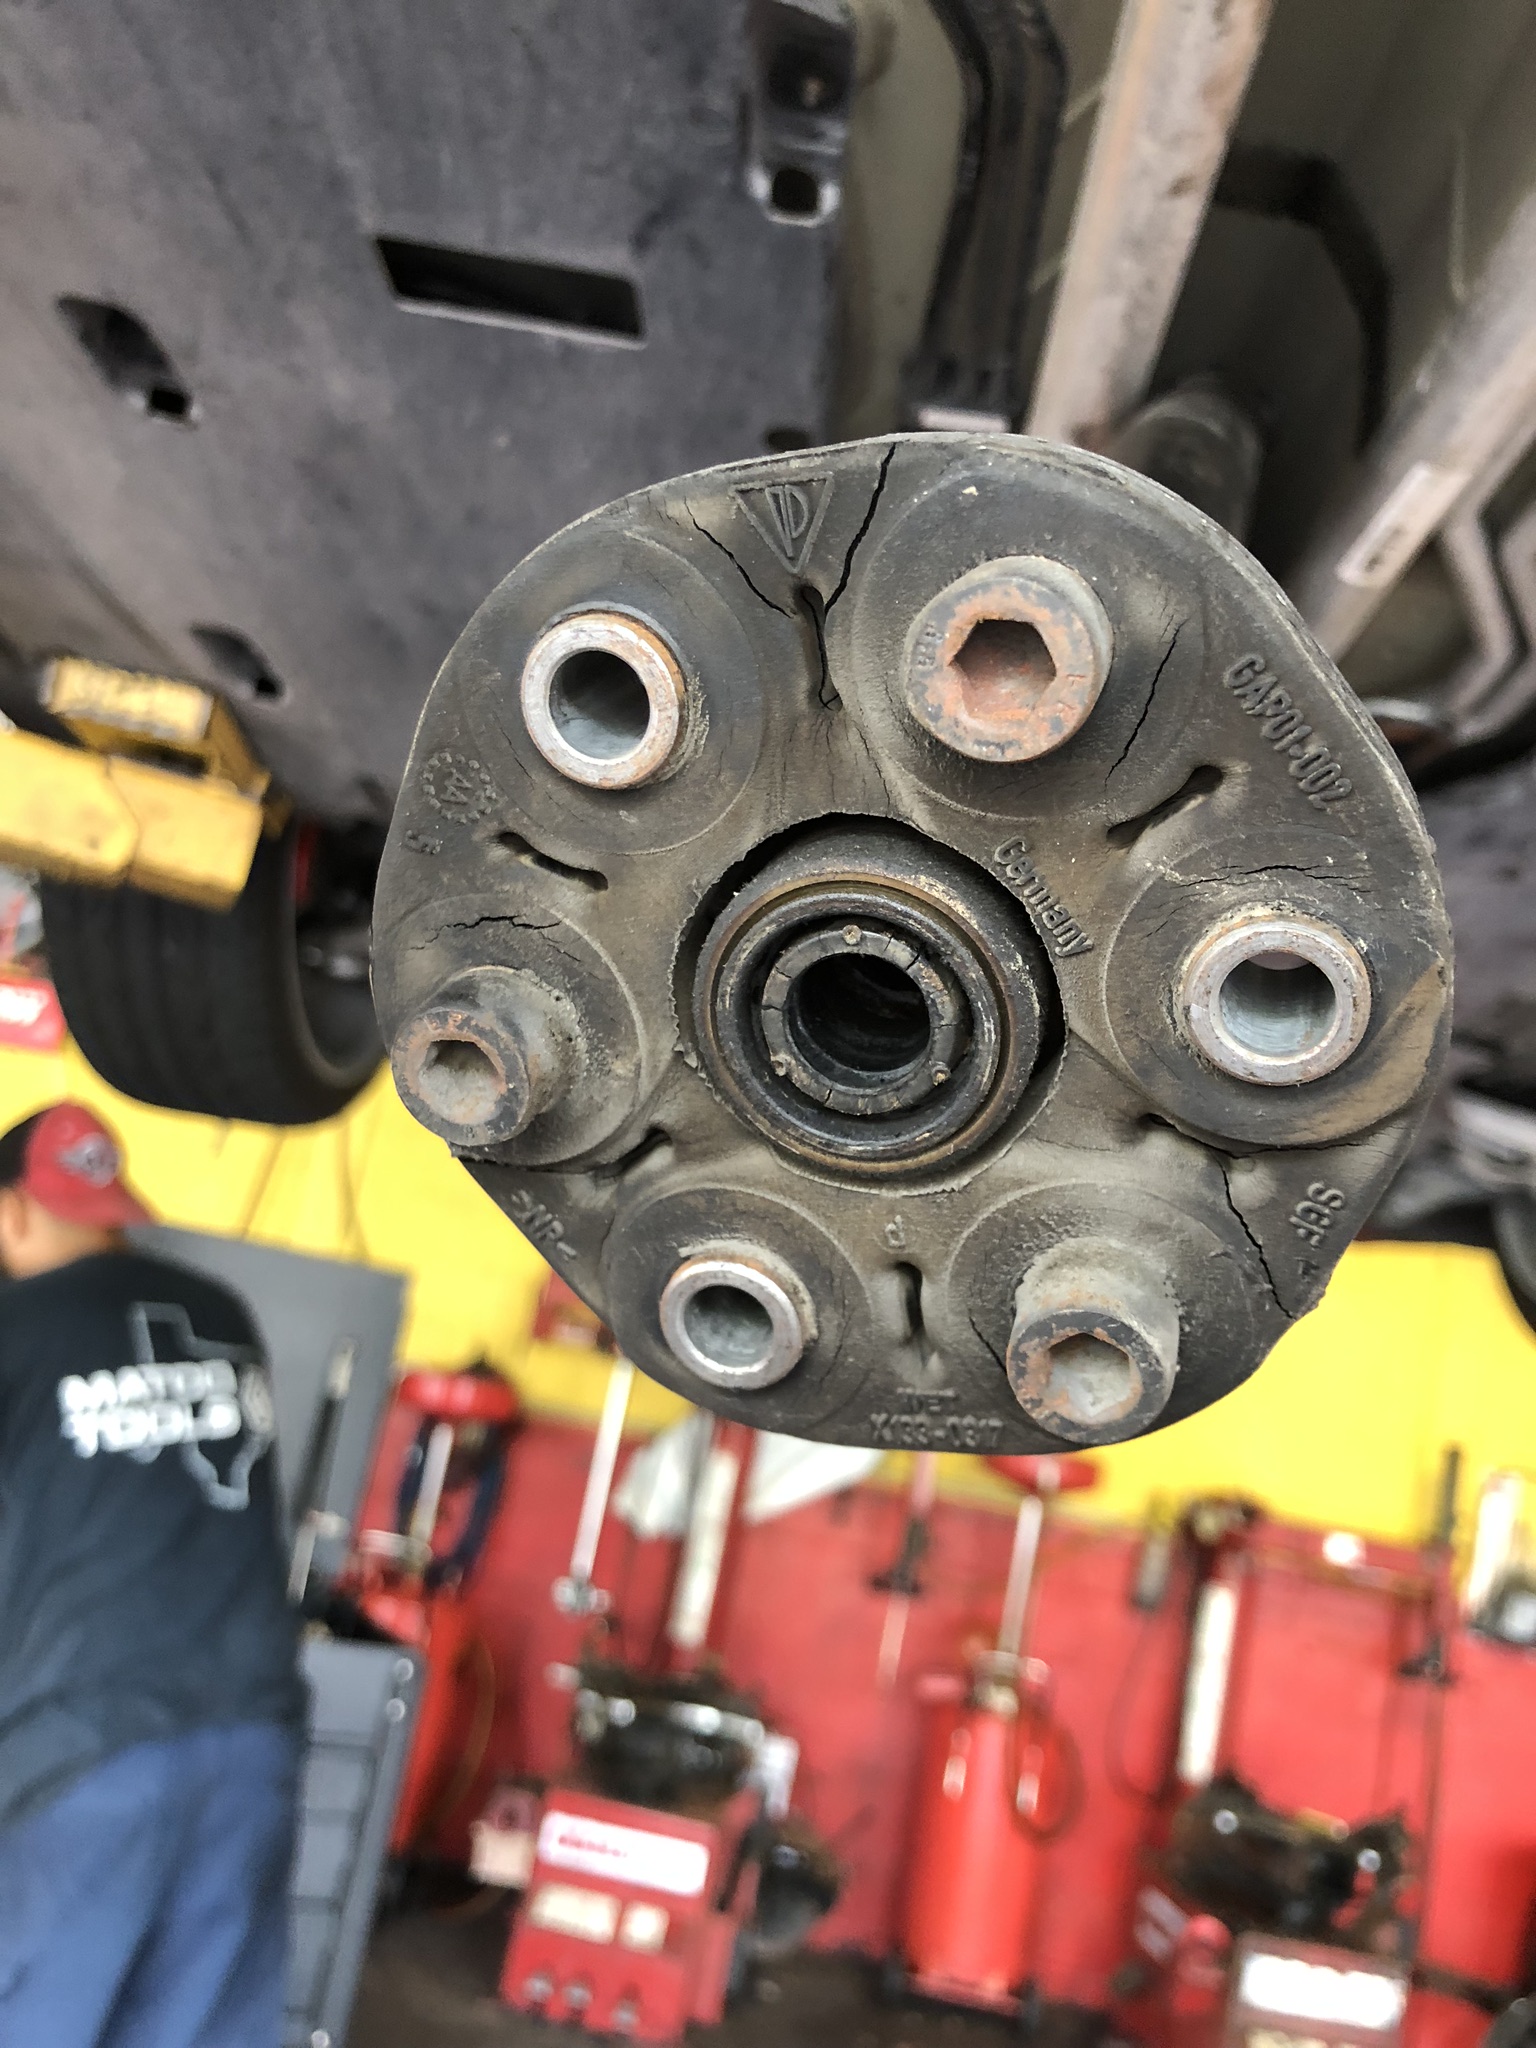
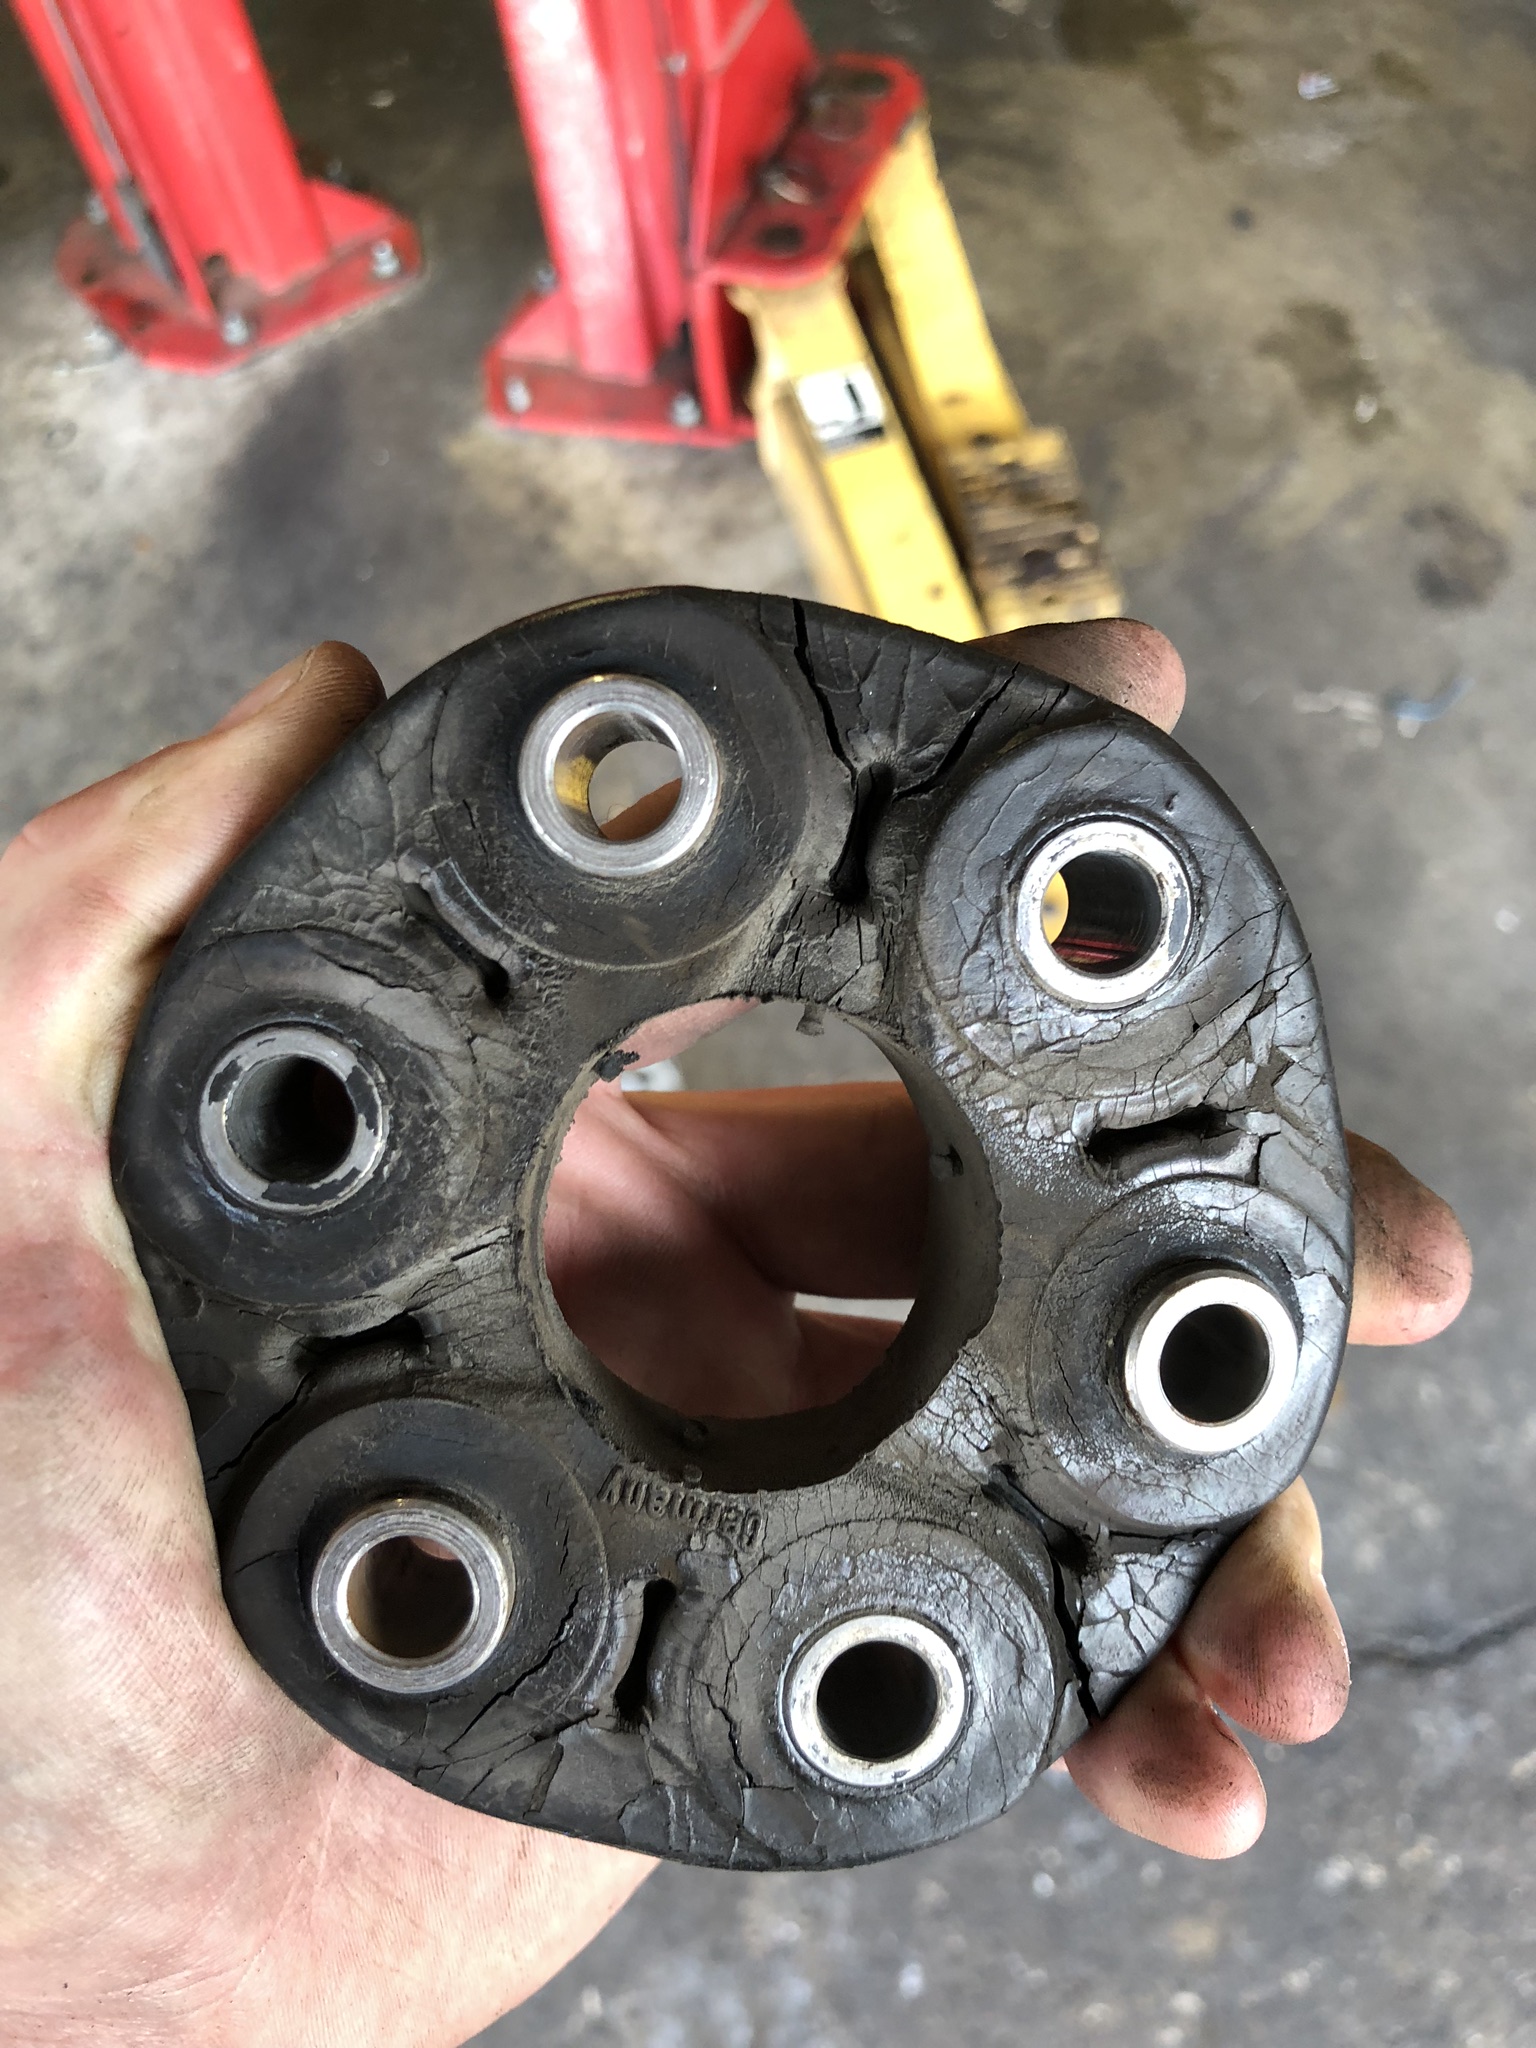
The flex disc, on the other hand, was completely FUBAR
Like COMPLETELY FUBAR
Removed the bolts to the trans housing first, then dropped the drive shaft
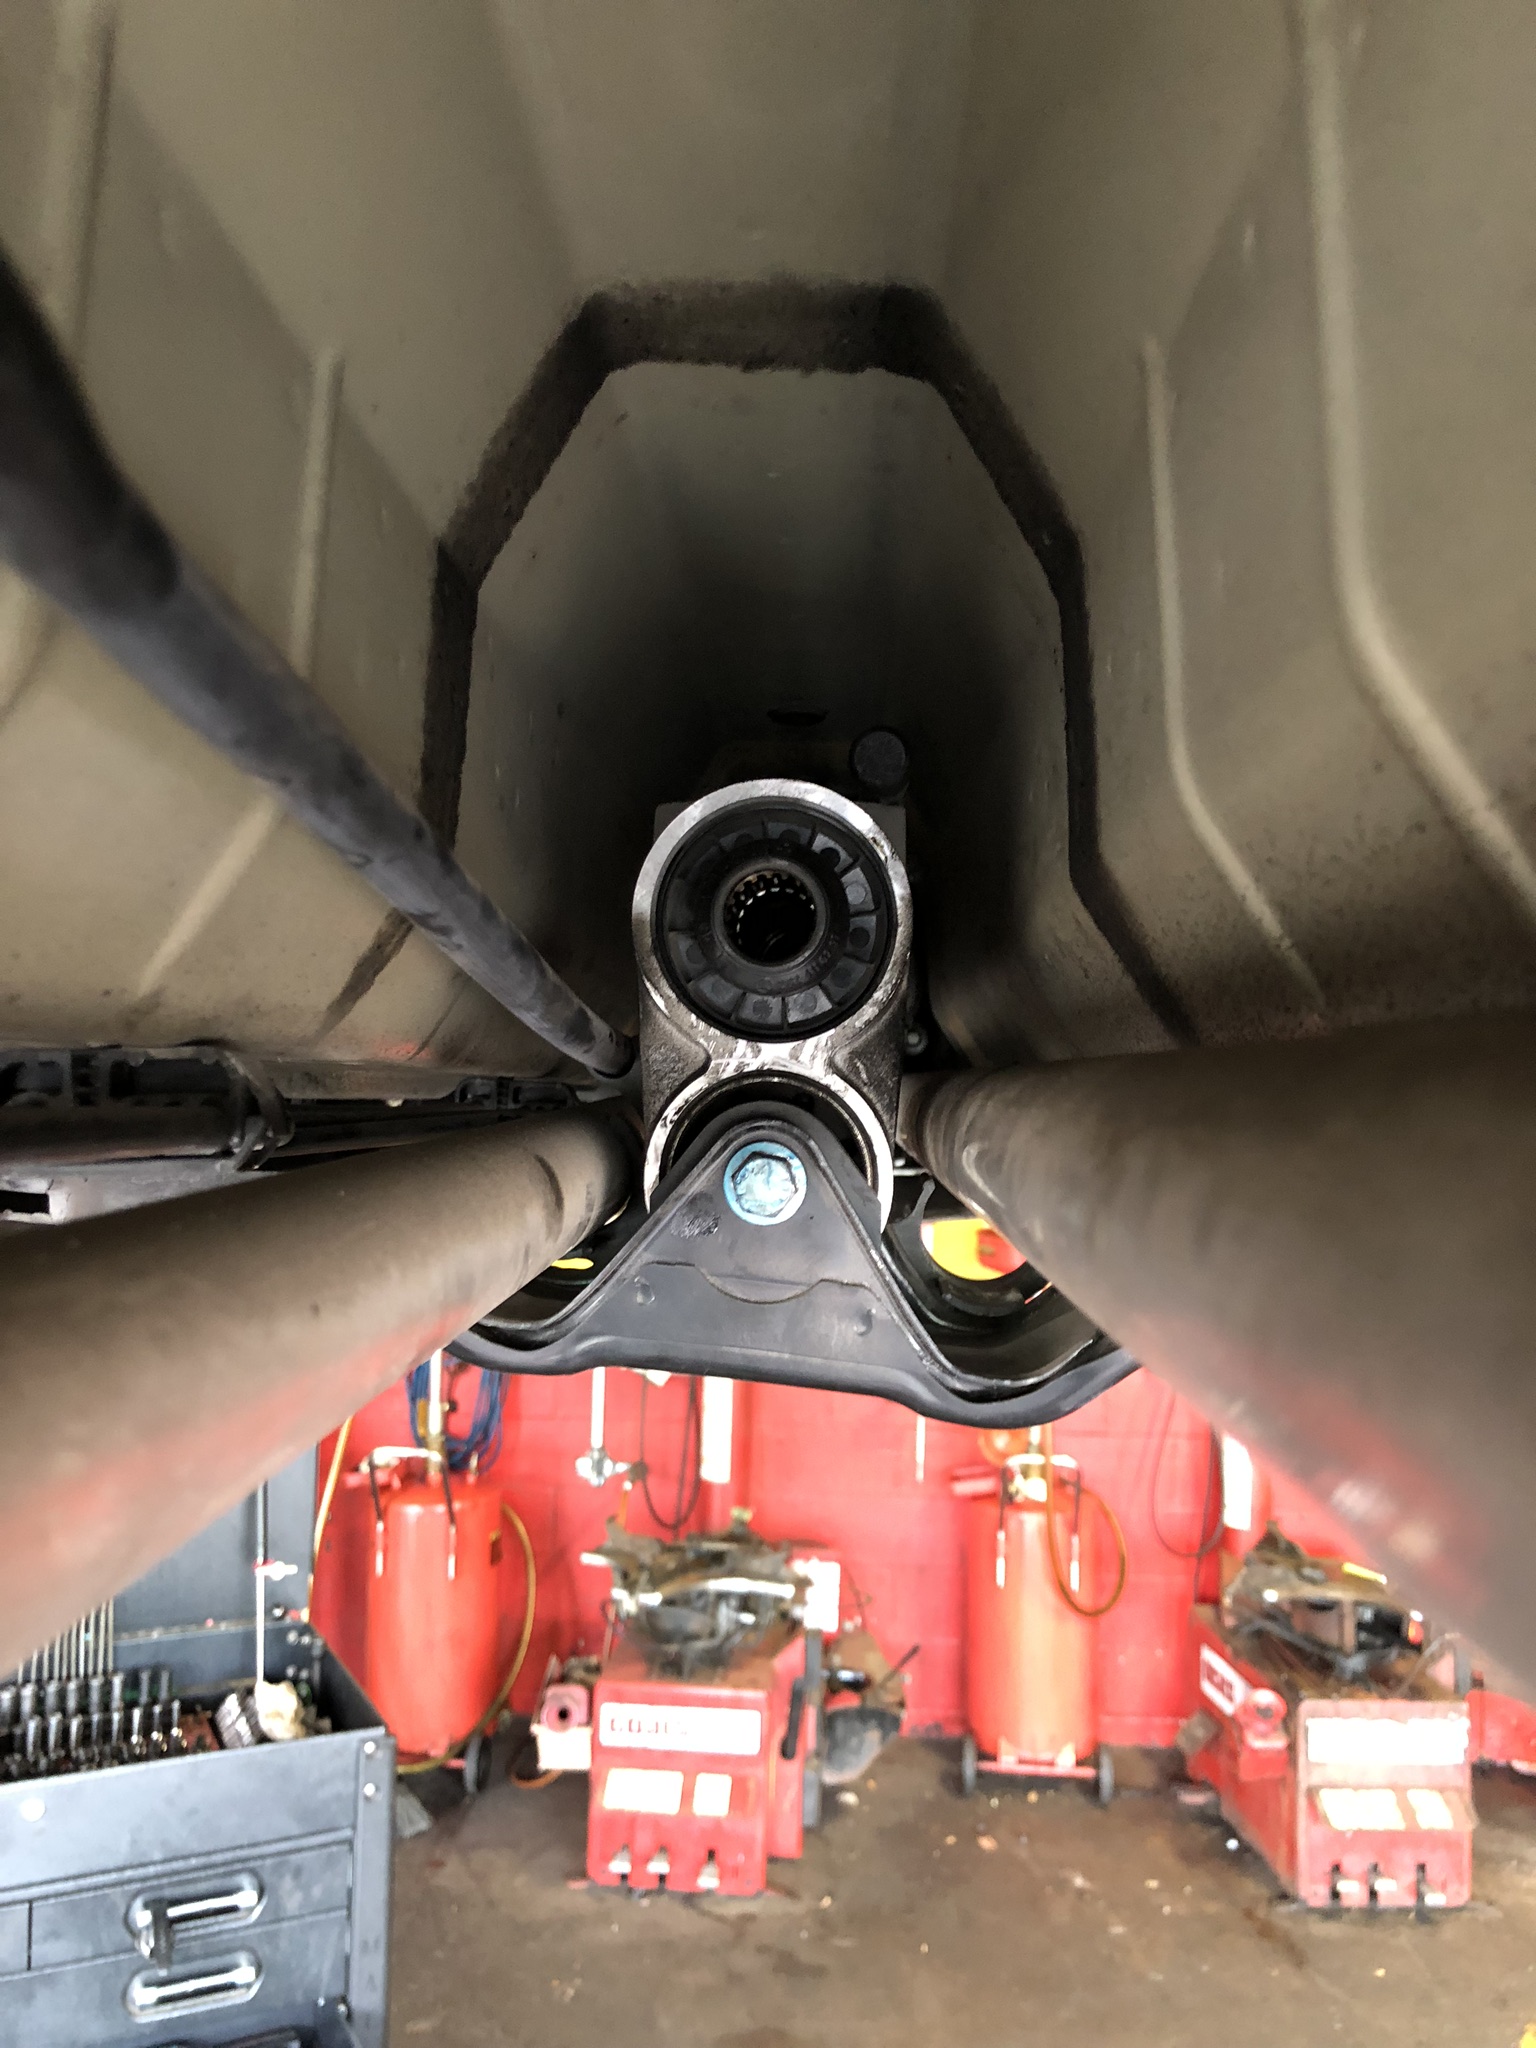
Looking toward the front diff
Flex disc is off
New flex disc installed

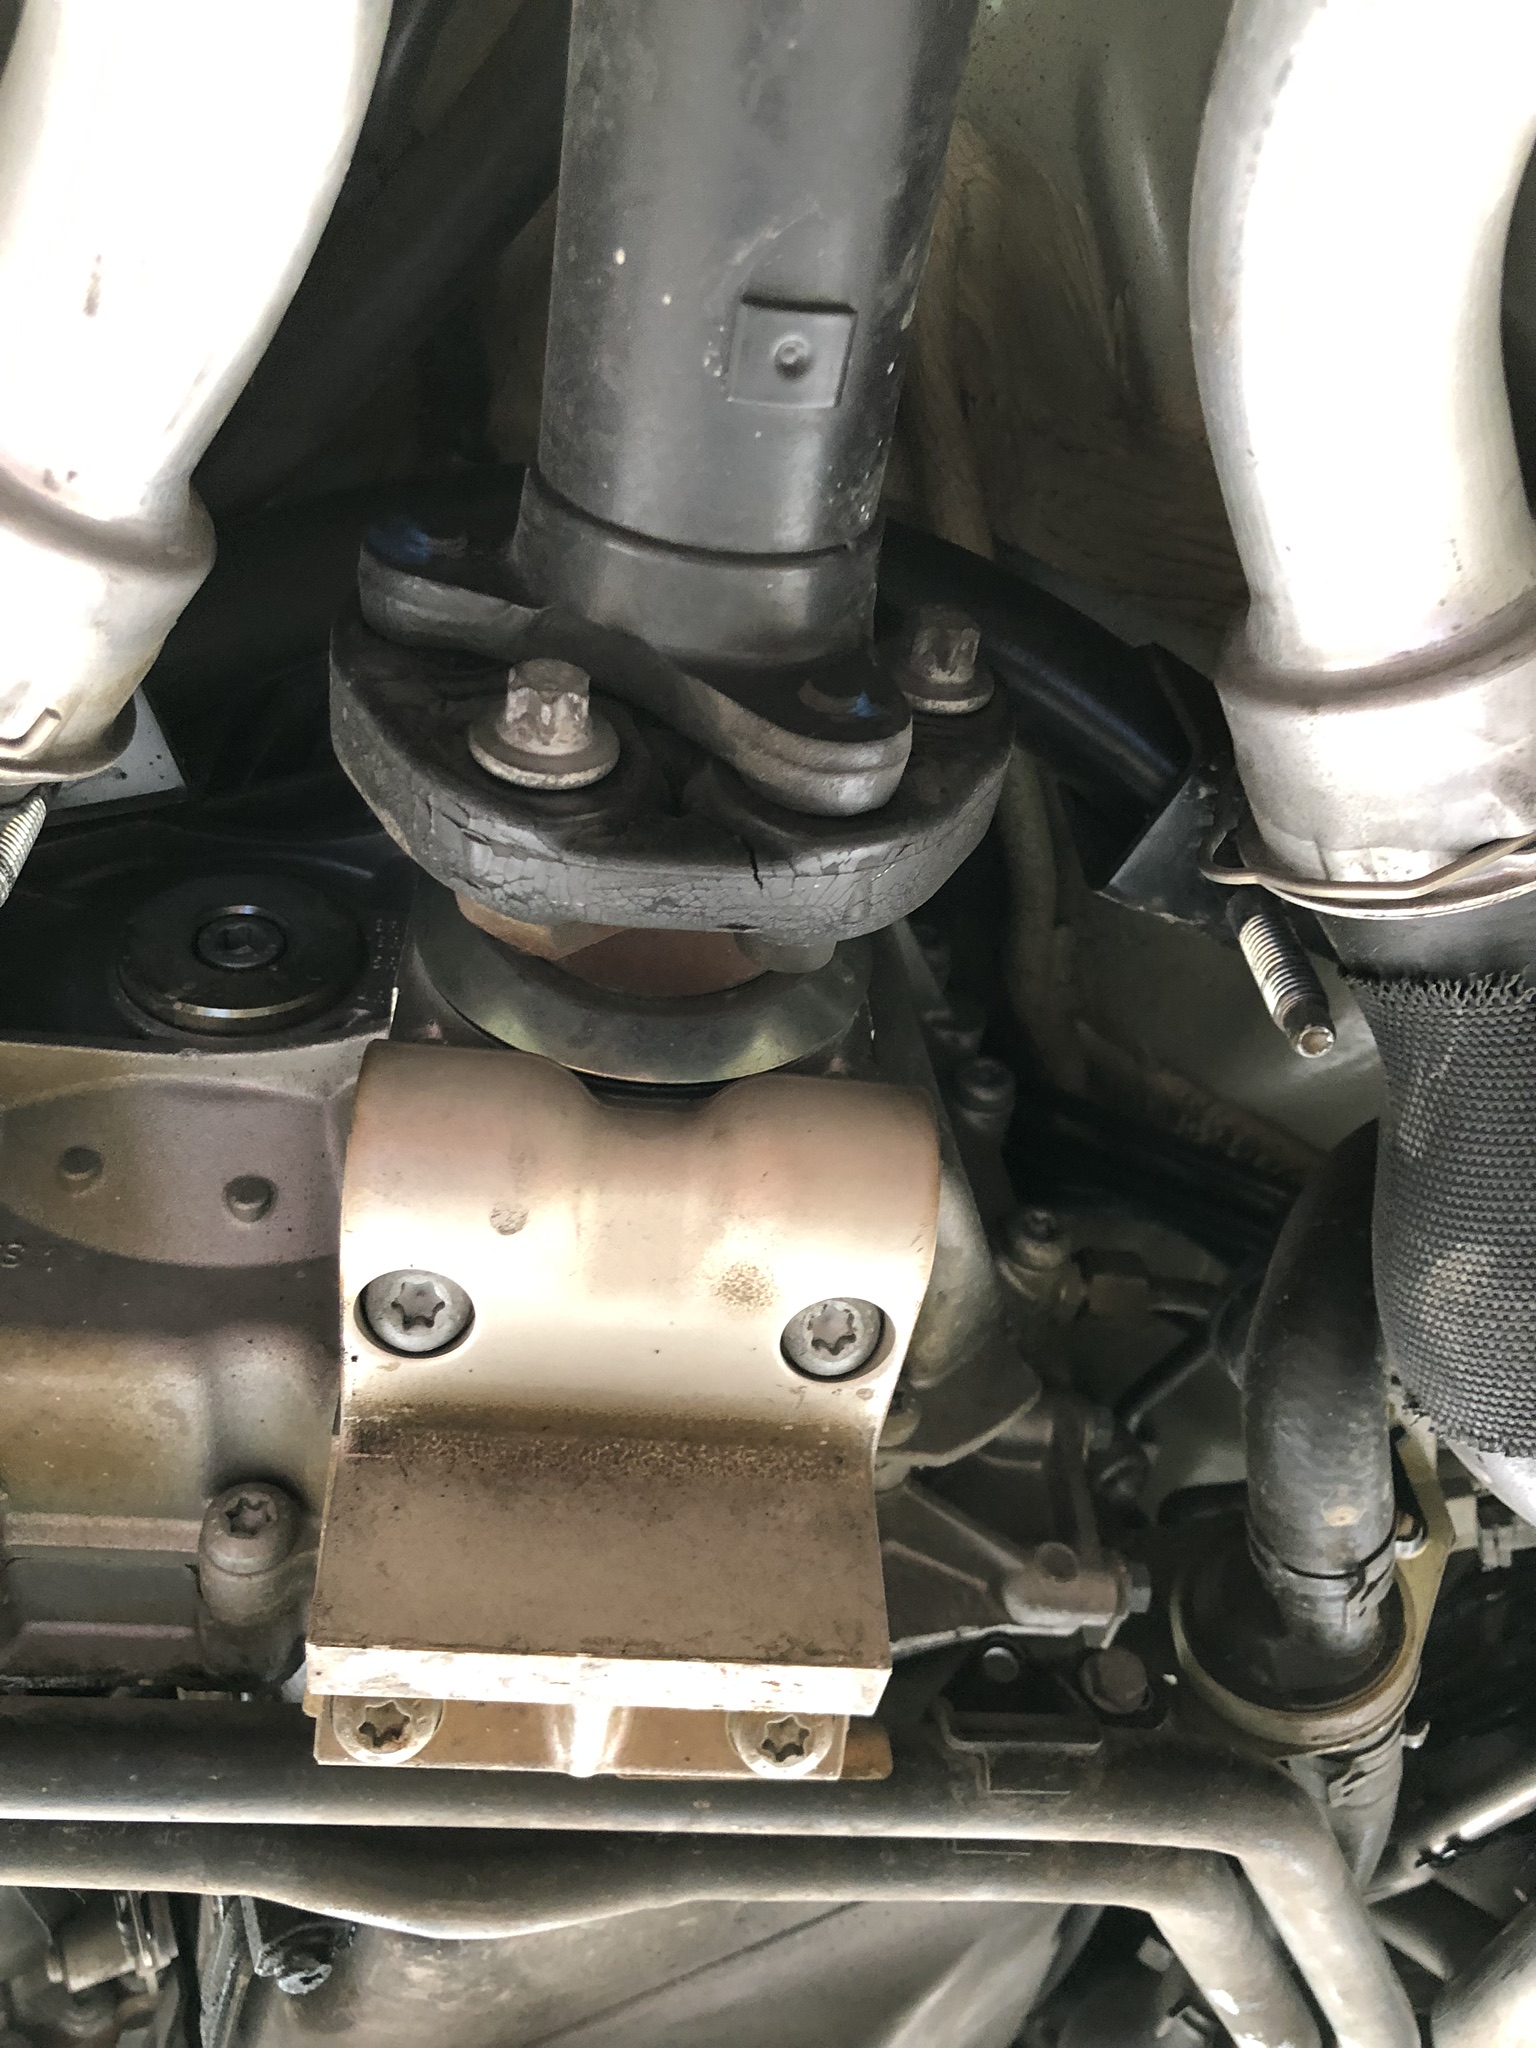
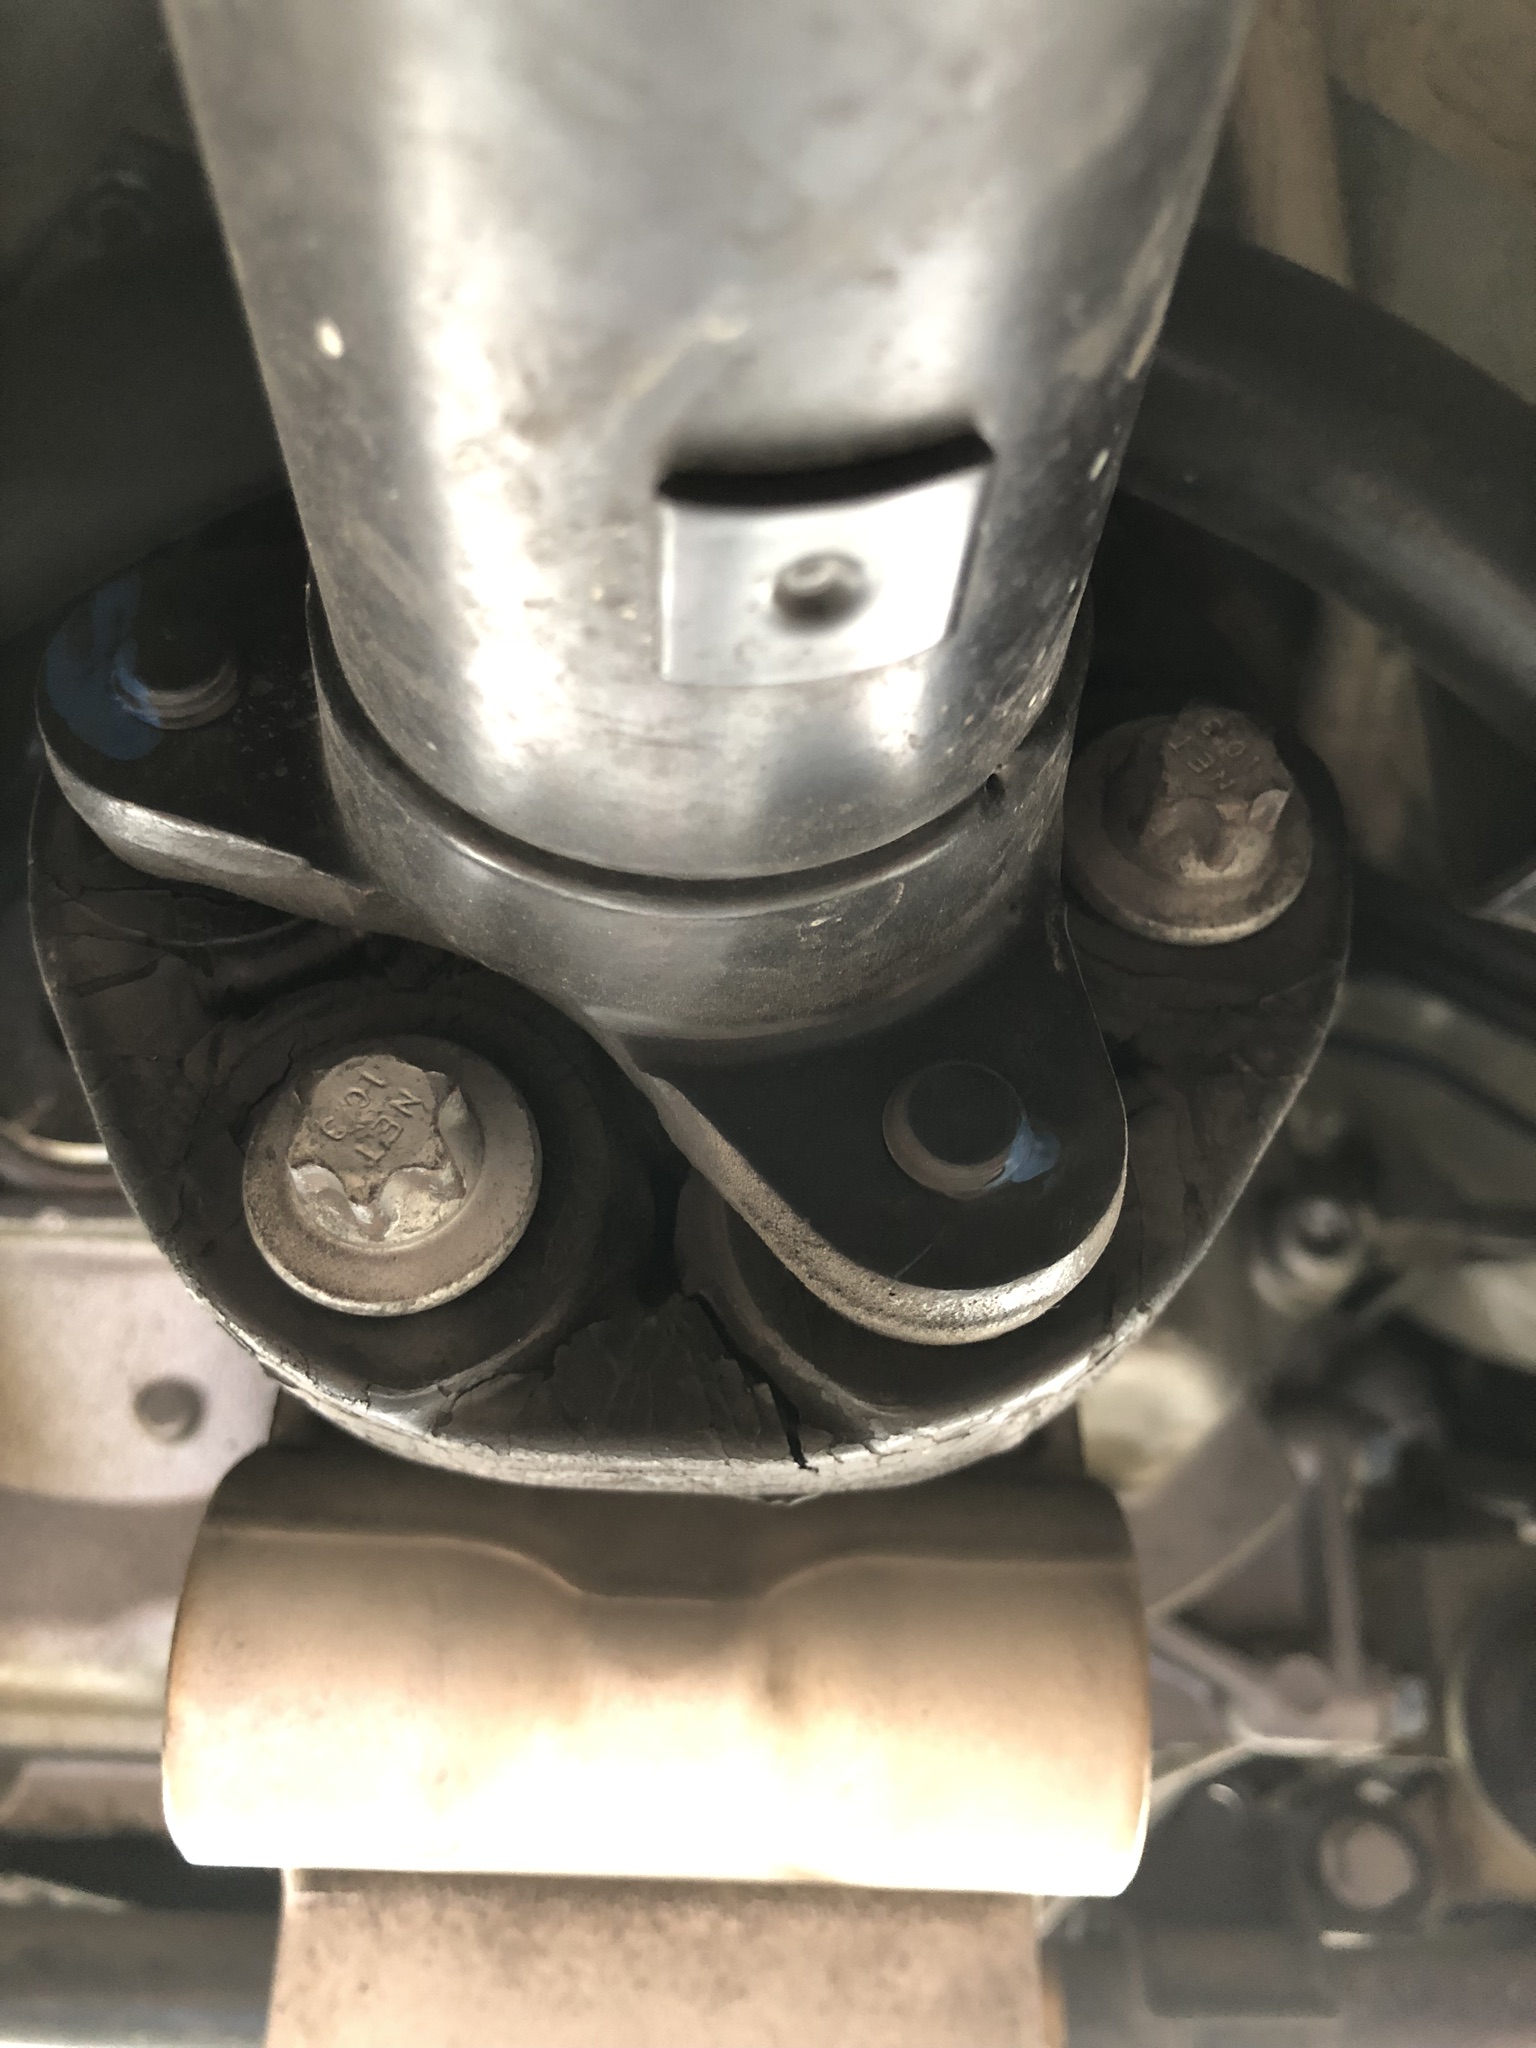
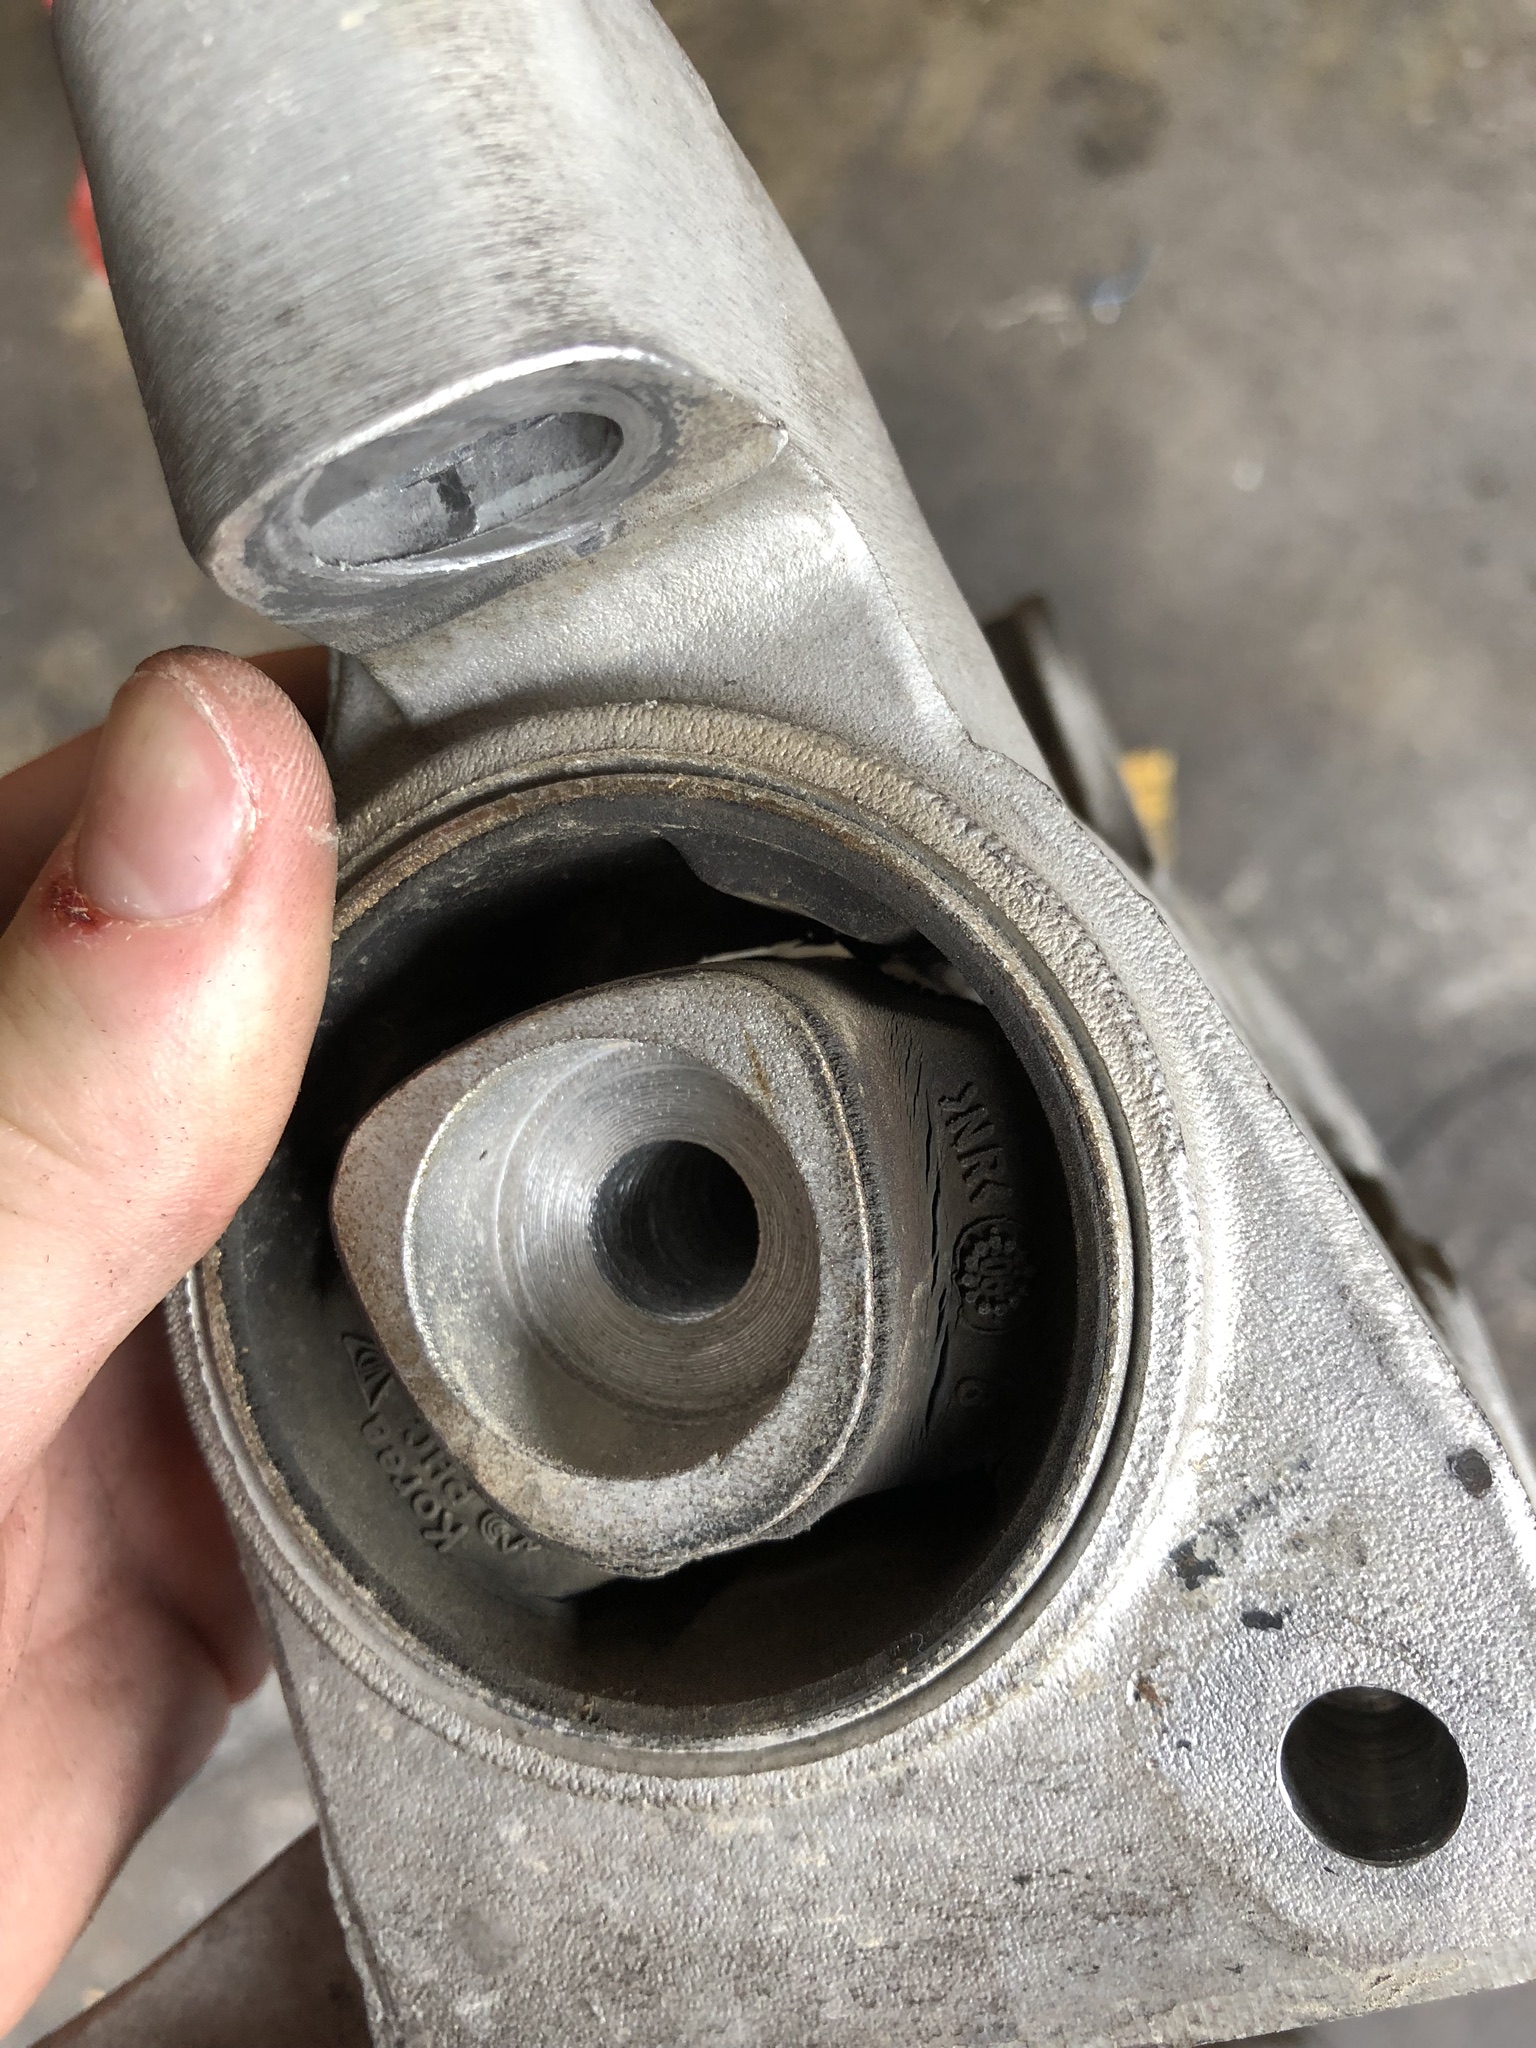
Minor cracking of the old trans mount
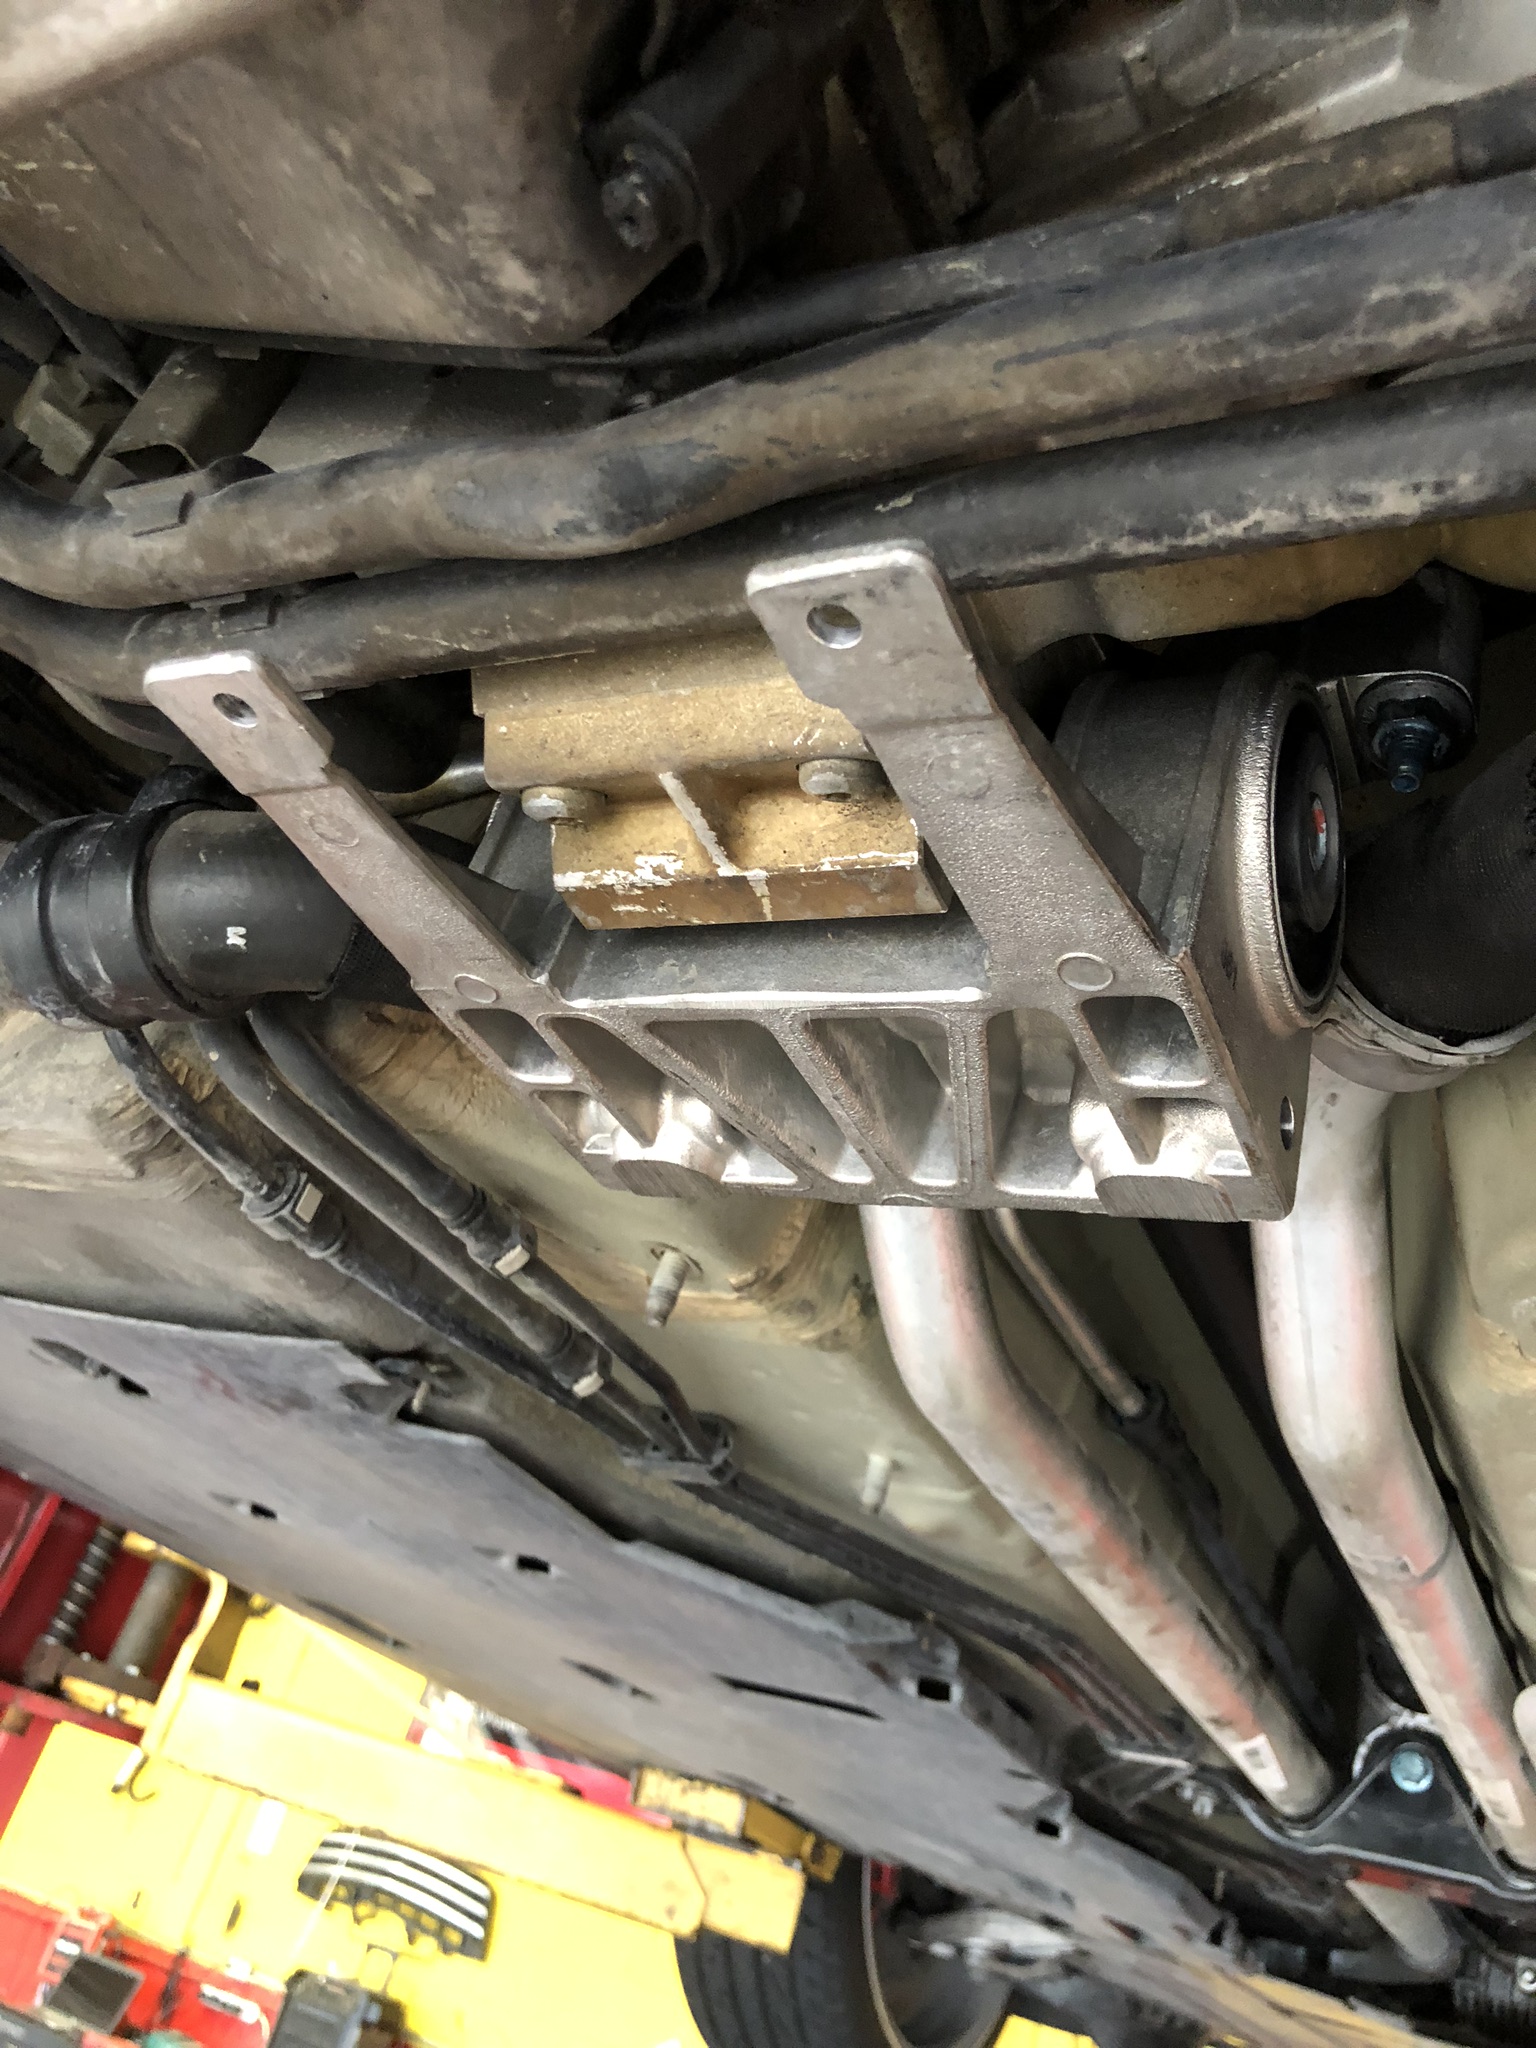
New trans mount in place, along with TWO mounting nuts
By the way, what I previously thought was a transmission noise was definitely driveline clunking, particularly at low speeds/stopping/starting, courtesy of that messed up flex disc. That noise is 100% gone now.
Overall, this is a relatively easy DIY. Hopefully the photos are helpful for anyone else wanting to do this.
Looking towards the back of the car after removing underbody panels. Underside is pretty clean
Sweaty transmission pan just in one corner, already have the parts/fluids for this job
Transmission mount was missing a nut....
Front drive shaft into the differential housing. Differential bushing looked good, normal play
The flex disc, on the other hand, was completely FUBAR
Like COMPLETELY FUBAR
Removed the bolts to the trans housing first, then dropped the drive shaft
Looking toward the front diff
Flex disc is off
New flex disc installed
Minor cracking of the old trans mount
New trans mount in place, along with TWO mounting nuts
By the way, what I previously thought was a transmission noise was definitely driveline clunking, particularly at low speeds/stopping/starting, courtesy of that messed up flex disc. That noise is 100% gone now.
Last edited by jeebus31; 05-11-2019 at 10:17 PM.
05-11-2019 | 11:14 PM
#63
Three Wheelin'
Such a cool project but im so lost looking at the bottom of that turbo. How much re-learning around you having to do?
05-12-2019 | 01:01 AM
#64
Thread Starter
Three Wheelin'
The drivetrain is totally different, going from 6MT/m97 to tip/Mezger. There is a fair learning curve here but luckily I can lean on the knowledge of the 996tt crew as well. I have a long ways to go!
05-12-2019 | 05:31 PM
#65
Rennlist Member
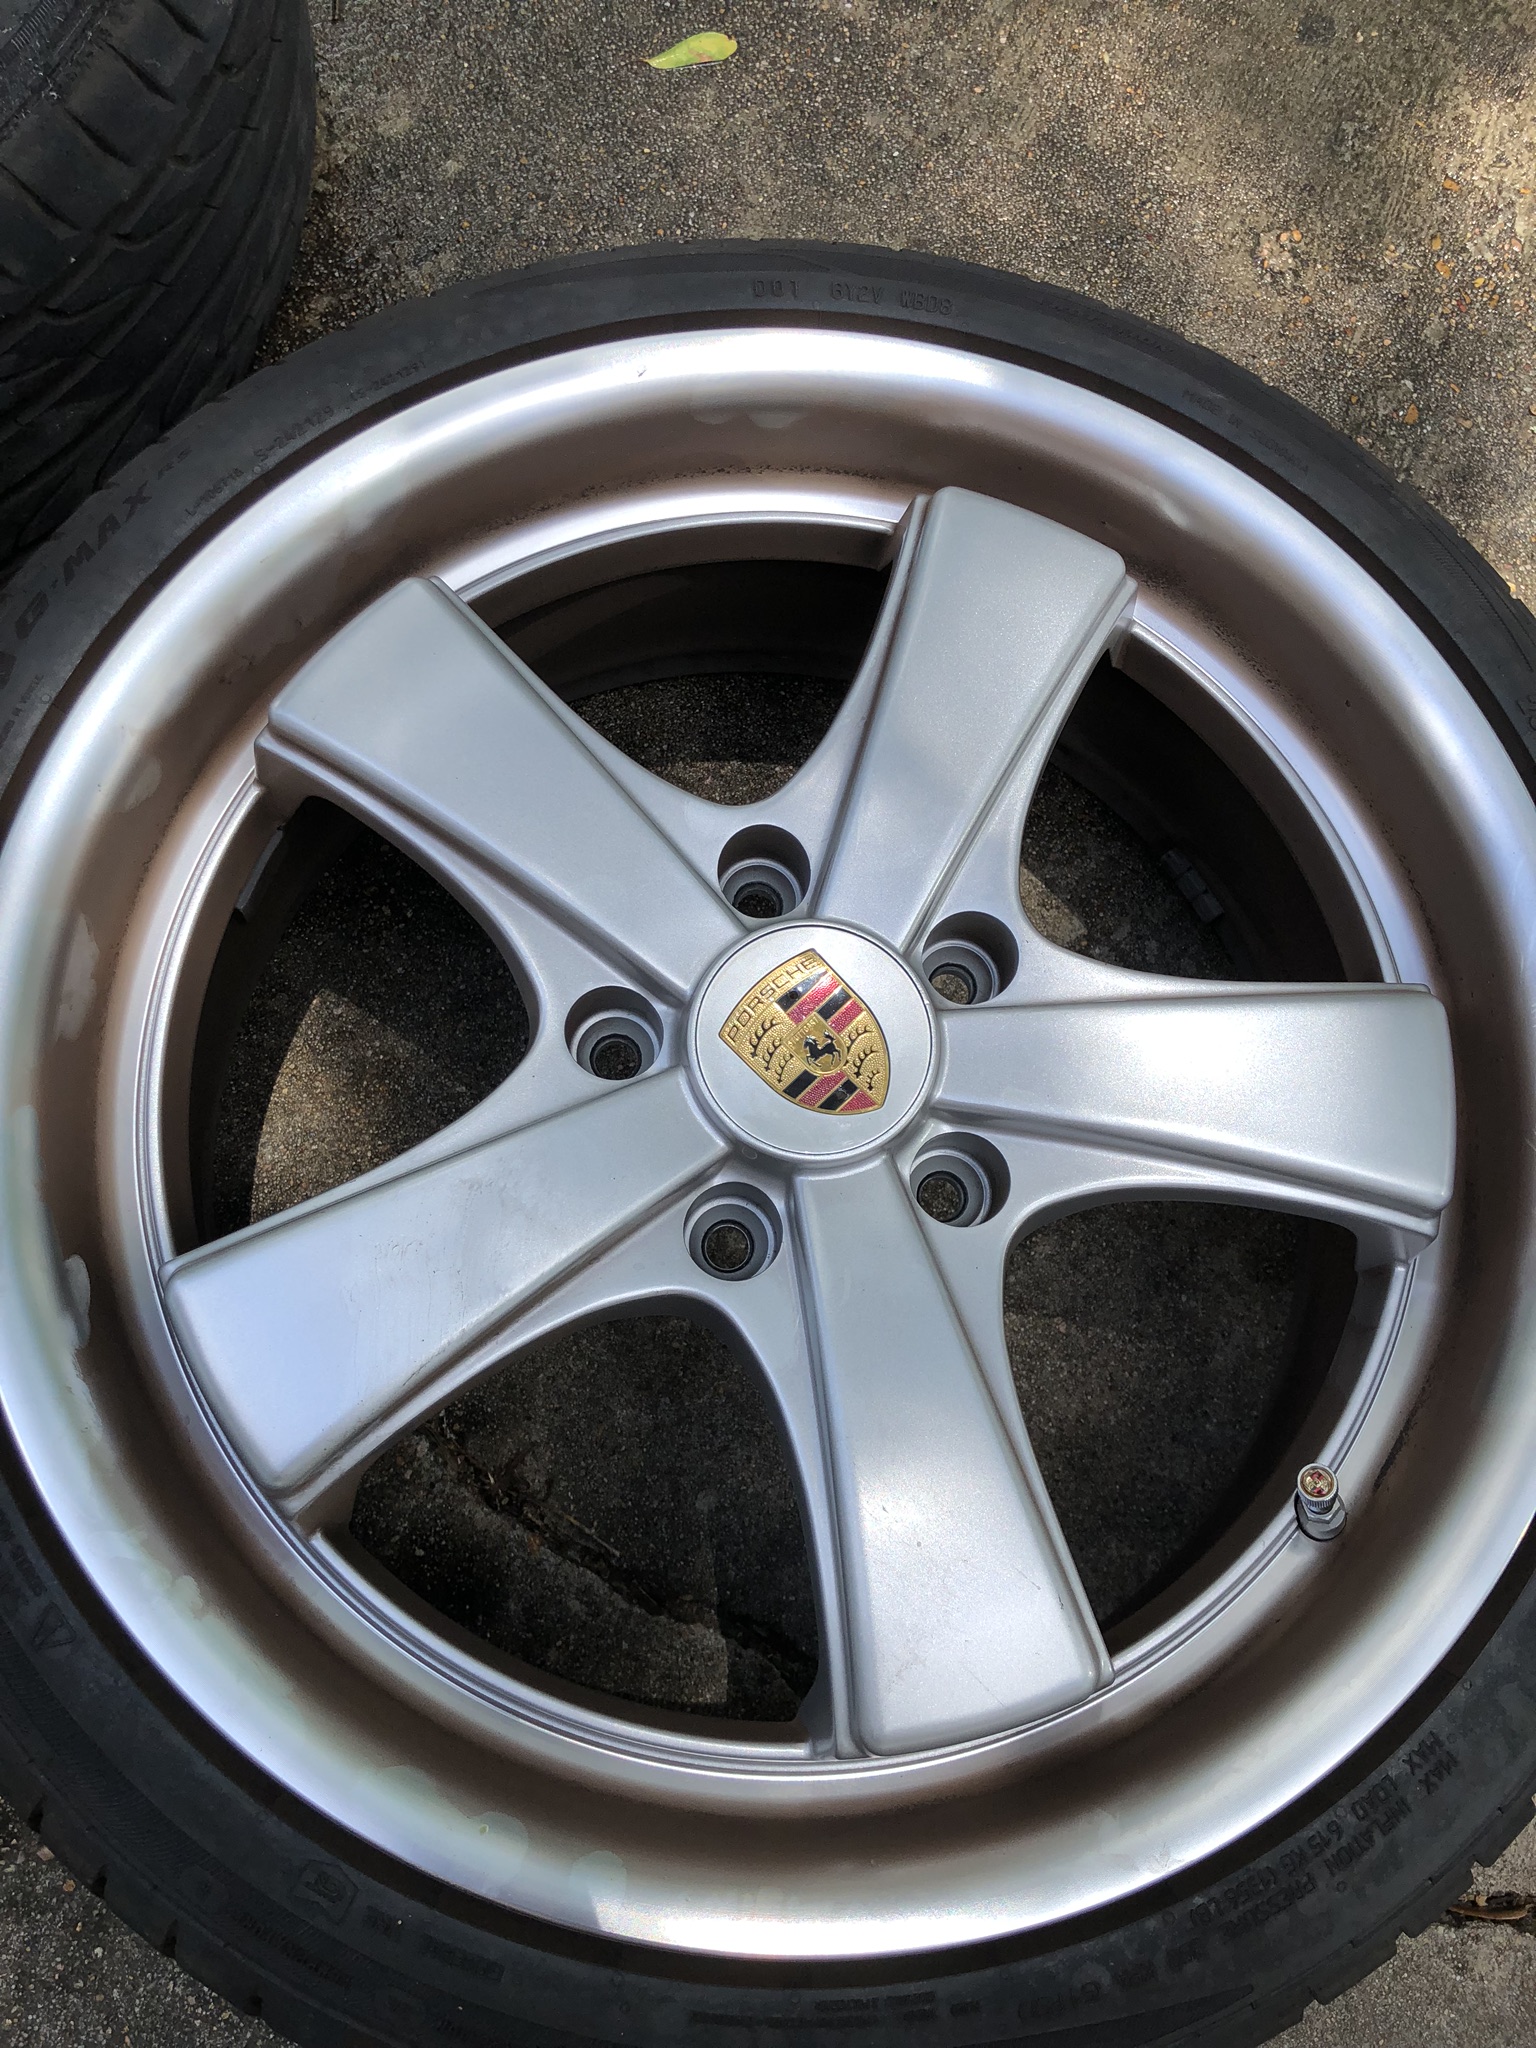
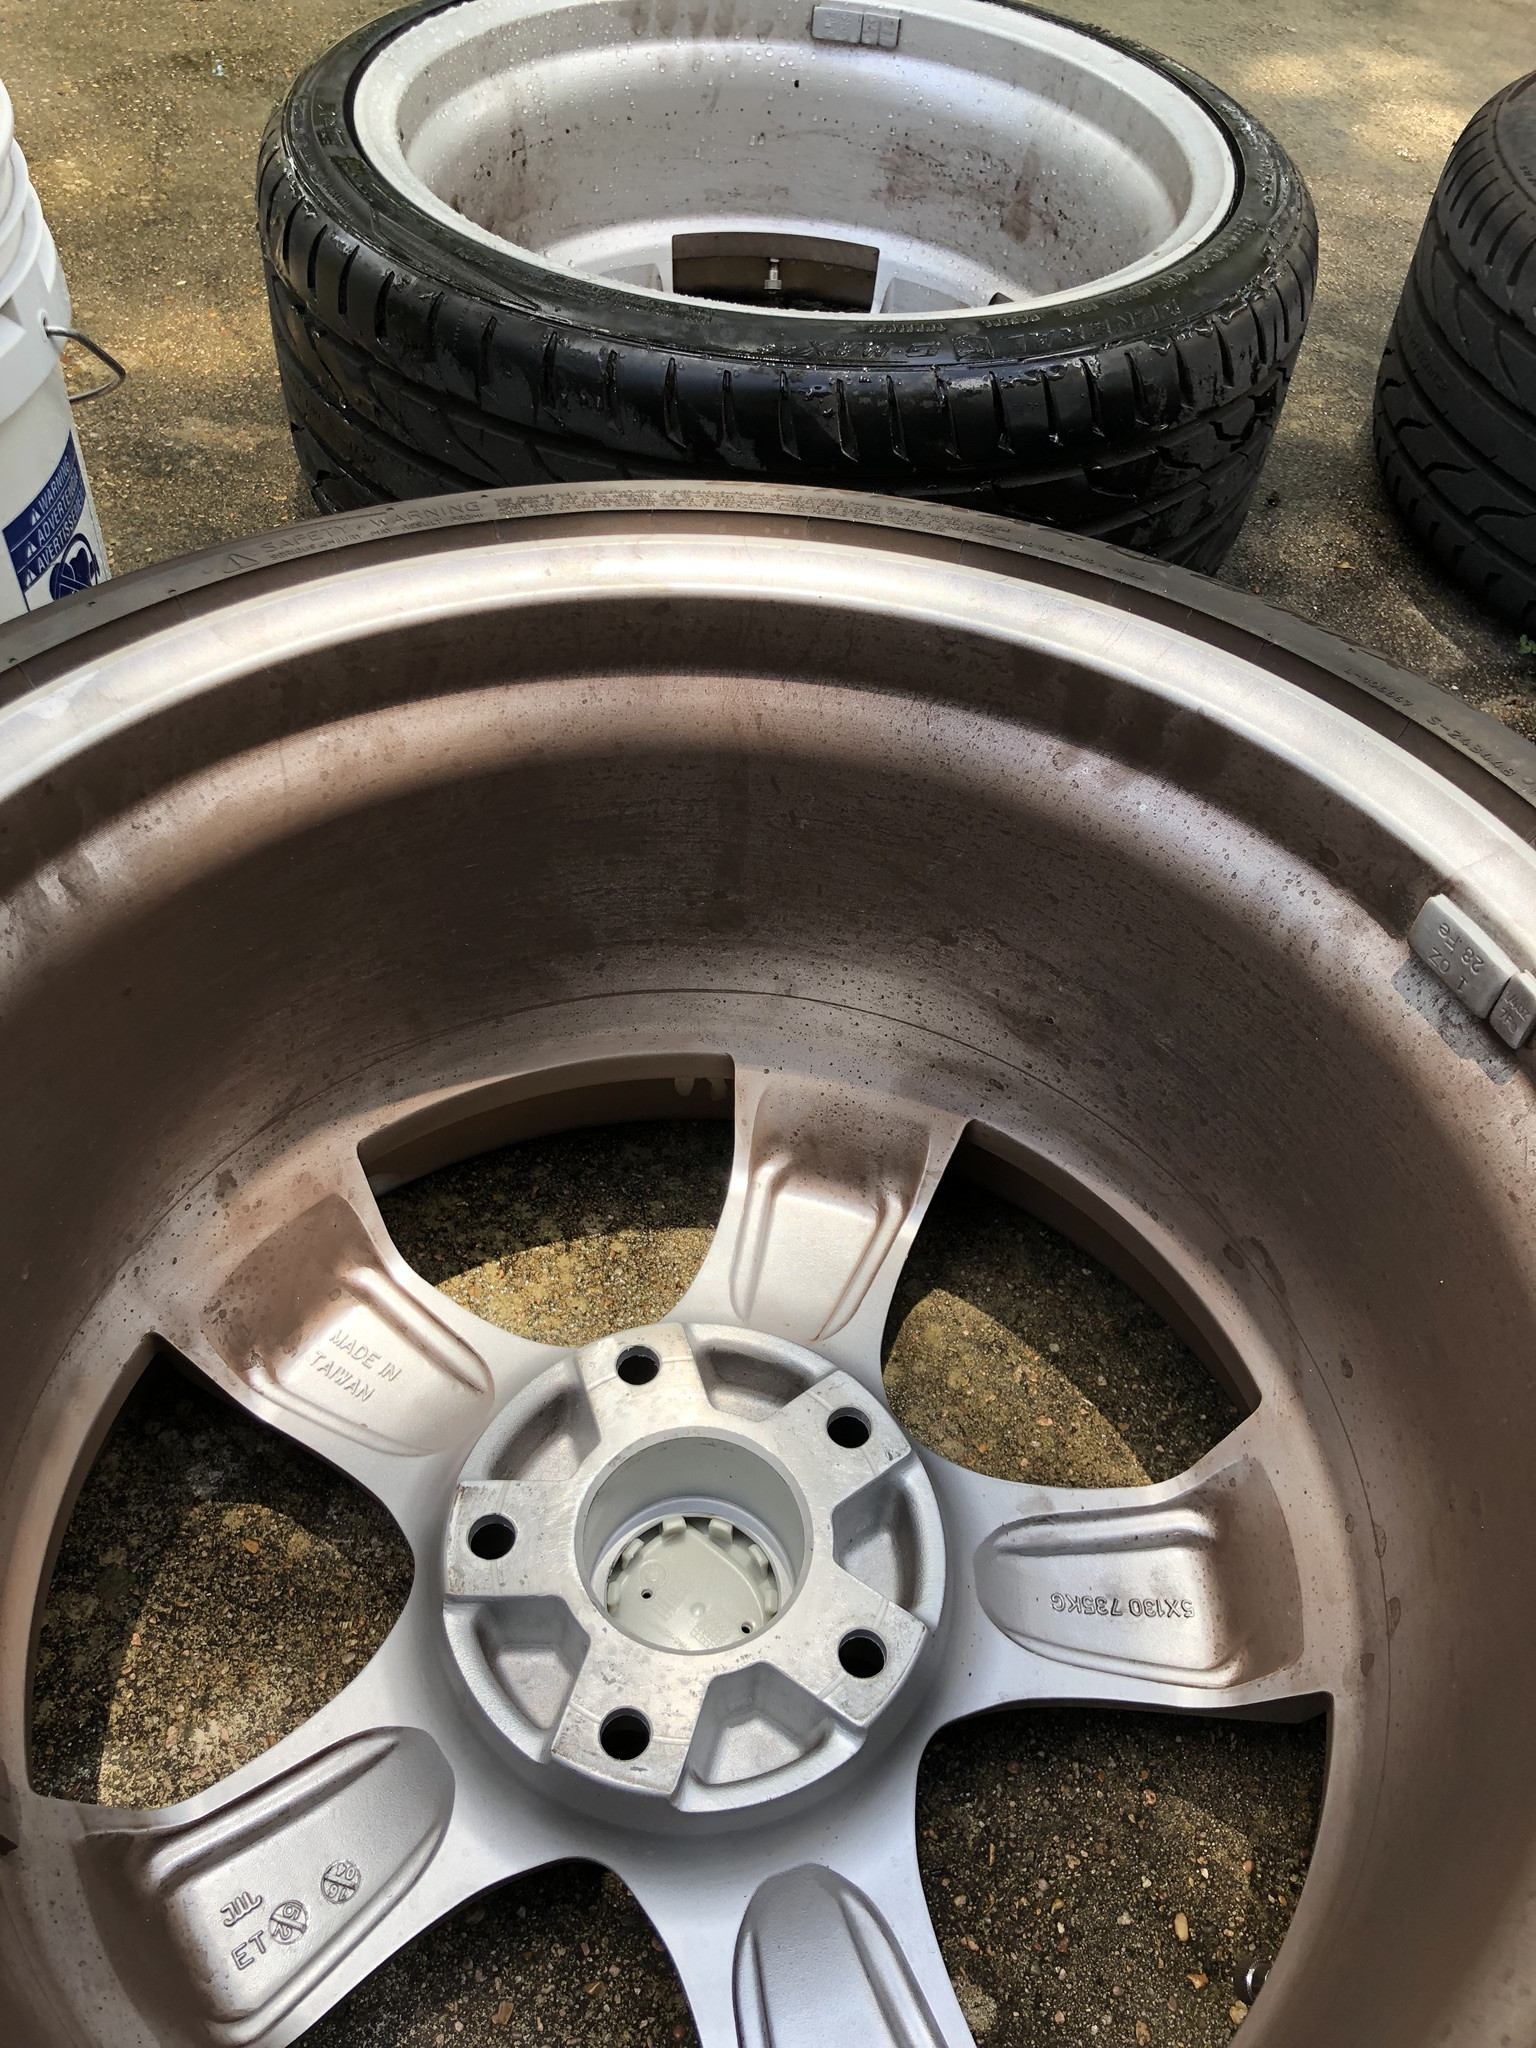
Decided to go with some silver fuchs. I like them more than I expected. Nice contrasted look - it'll do for now!


Next up for project turbo - transmission mount, flex disc, transmission service (oil, filter, gasket), and engine mounts. Too bad it's getting hot out in Houston... DIY weather is quickly passing.
Next up for project turbo - transmission mount, flex disc, transmission service (oil, filter, gasket), and engine mounts. Too bad it's getting hot out in Houston... DIY weather is quickly passing.
The following users liked this post:
jayi836 (03-02-2020)
05-12-2019 | 09:33 PM
#66
Thread Starter
Three Wheelin'
05-13-2019 | 02:05 AM
#67
Rennlist Member
I'm going wait until I do a brake job before installing the wheels. I have new rotors and expecting Hawk pads this week. Planning to do the brakes next weekend.
 05-13-2019 | 10:11 AM
#68
Thread Starter
Three Wheelin'
Coming from the Mercedes world it seems like every Mercedes wheel uses a special lug nut. I'm wondering if my stock lug nuts will work for these wheels? I am not planning to use spacers on S.
I'm going wait until I do a brake job before installing the wheels. I have new rotors and expecting Hawk pads this week. Planning to do the brakes next weekend.
I'm going wait until I do a brake job before installing the wheels. I have new rotors and expecting Hawk pads this week. Planning to do the brakes next weekend.
05-19-2019 | 06:47 PM
#69
Thread Starter
Three Wheelin'
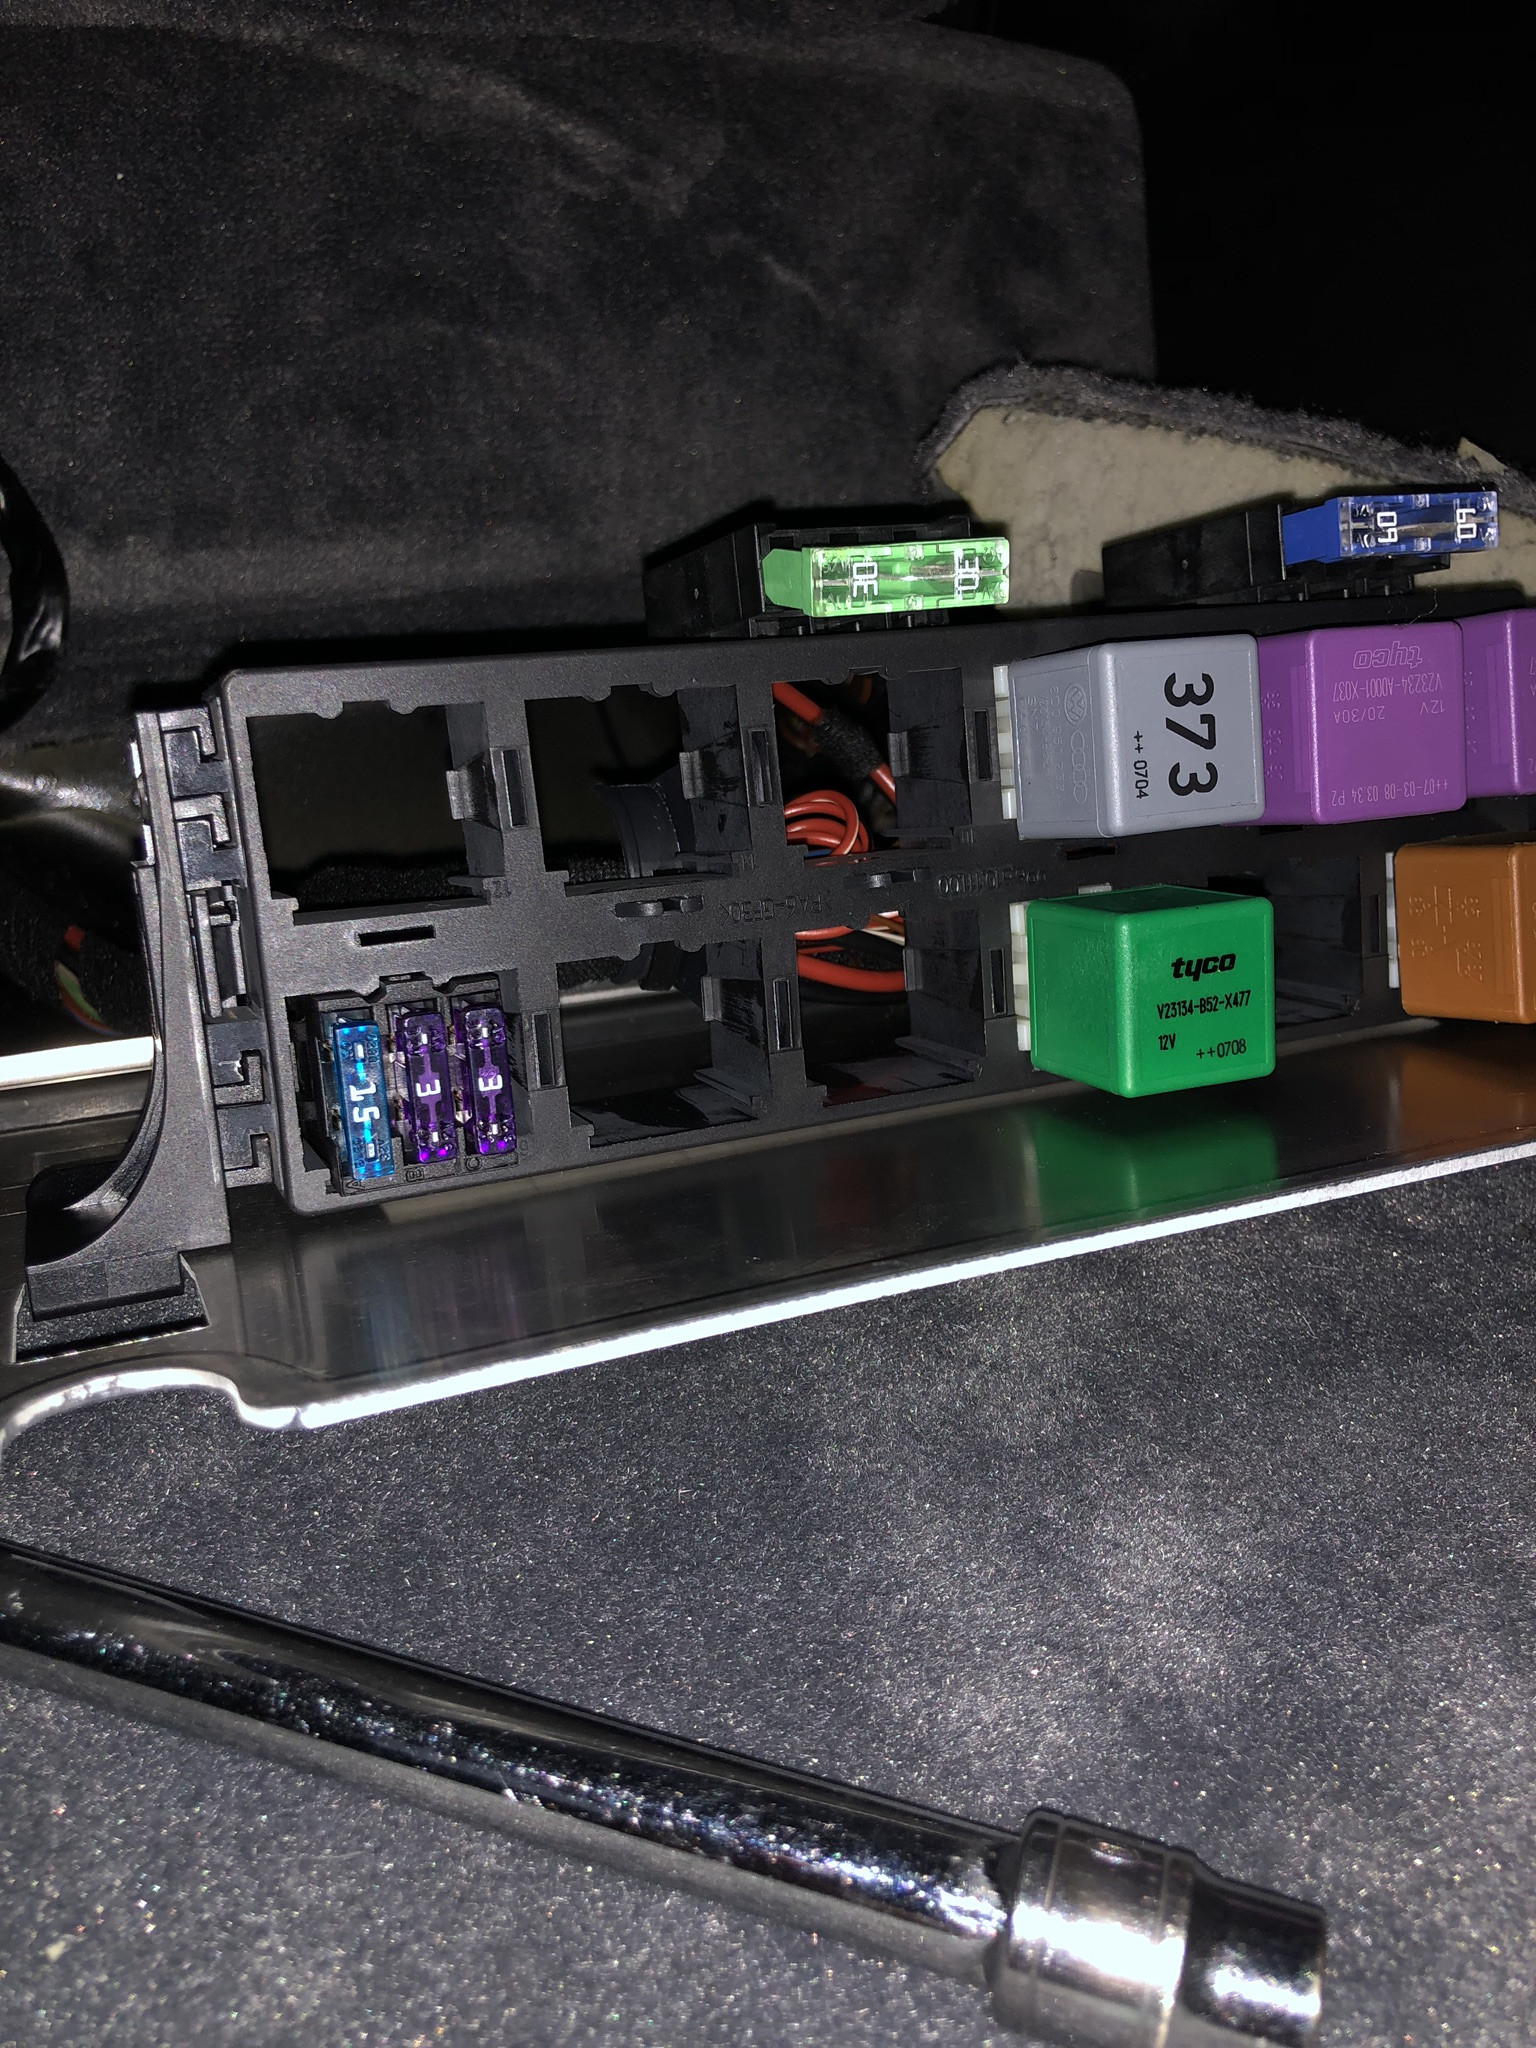
Ok, update on the engine fan fuse issue -
To get to the fuse location, you need to disconnect the battery (negative terminal), then remove the subwoofer in the back, and remove the nuts holding the driver's side ECU bracket. Instructions here: https://www.sharkwerks.com/tech-arti...rera-s-gt2-gt3
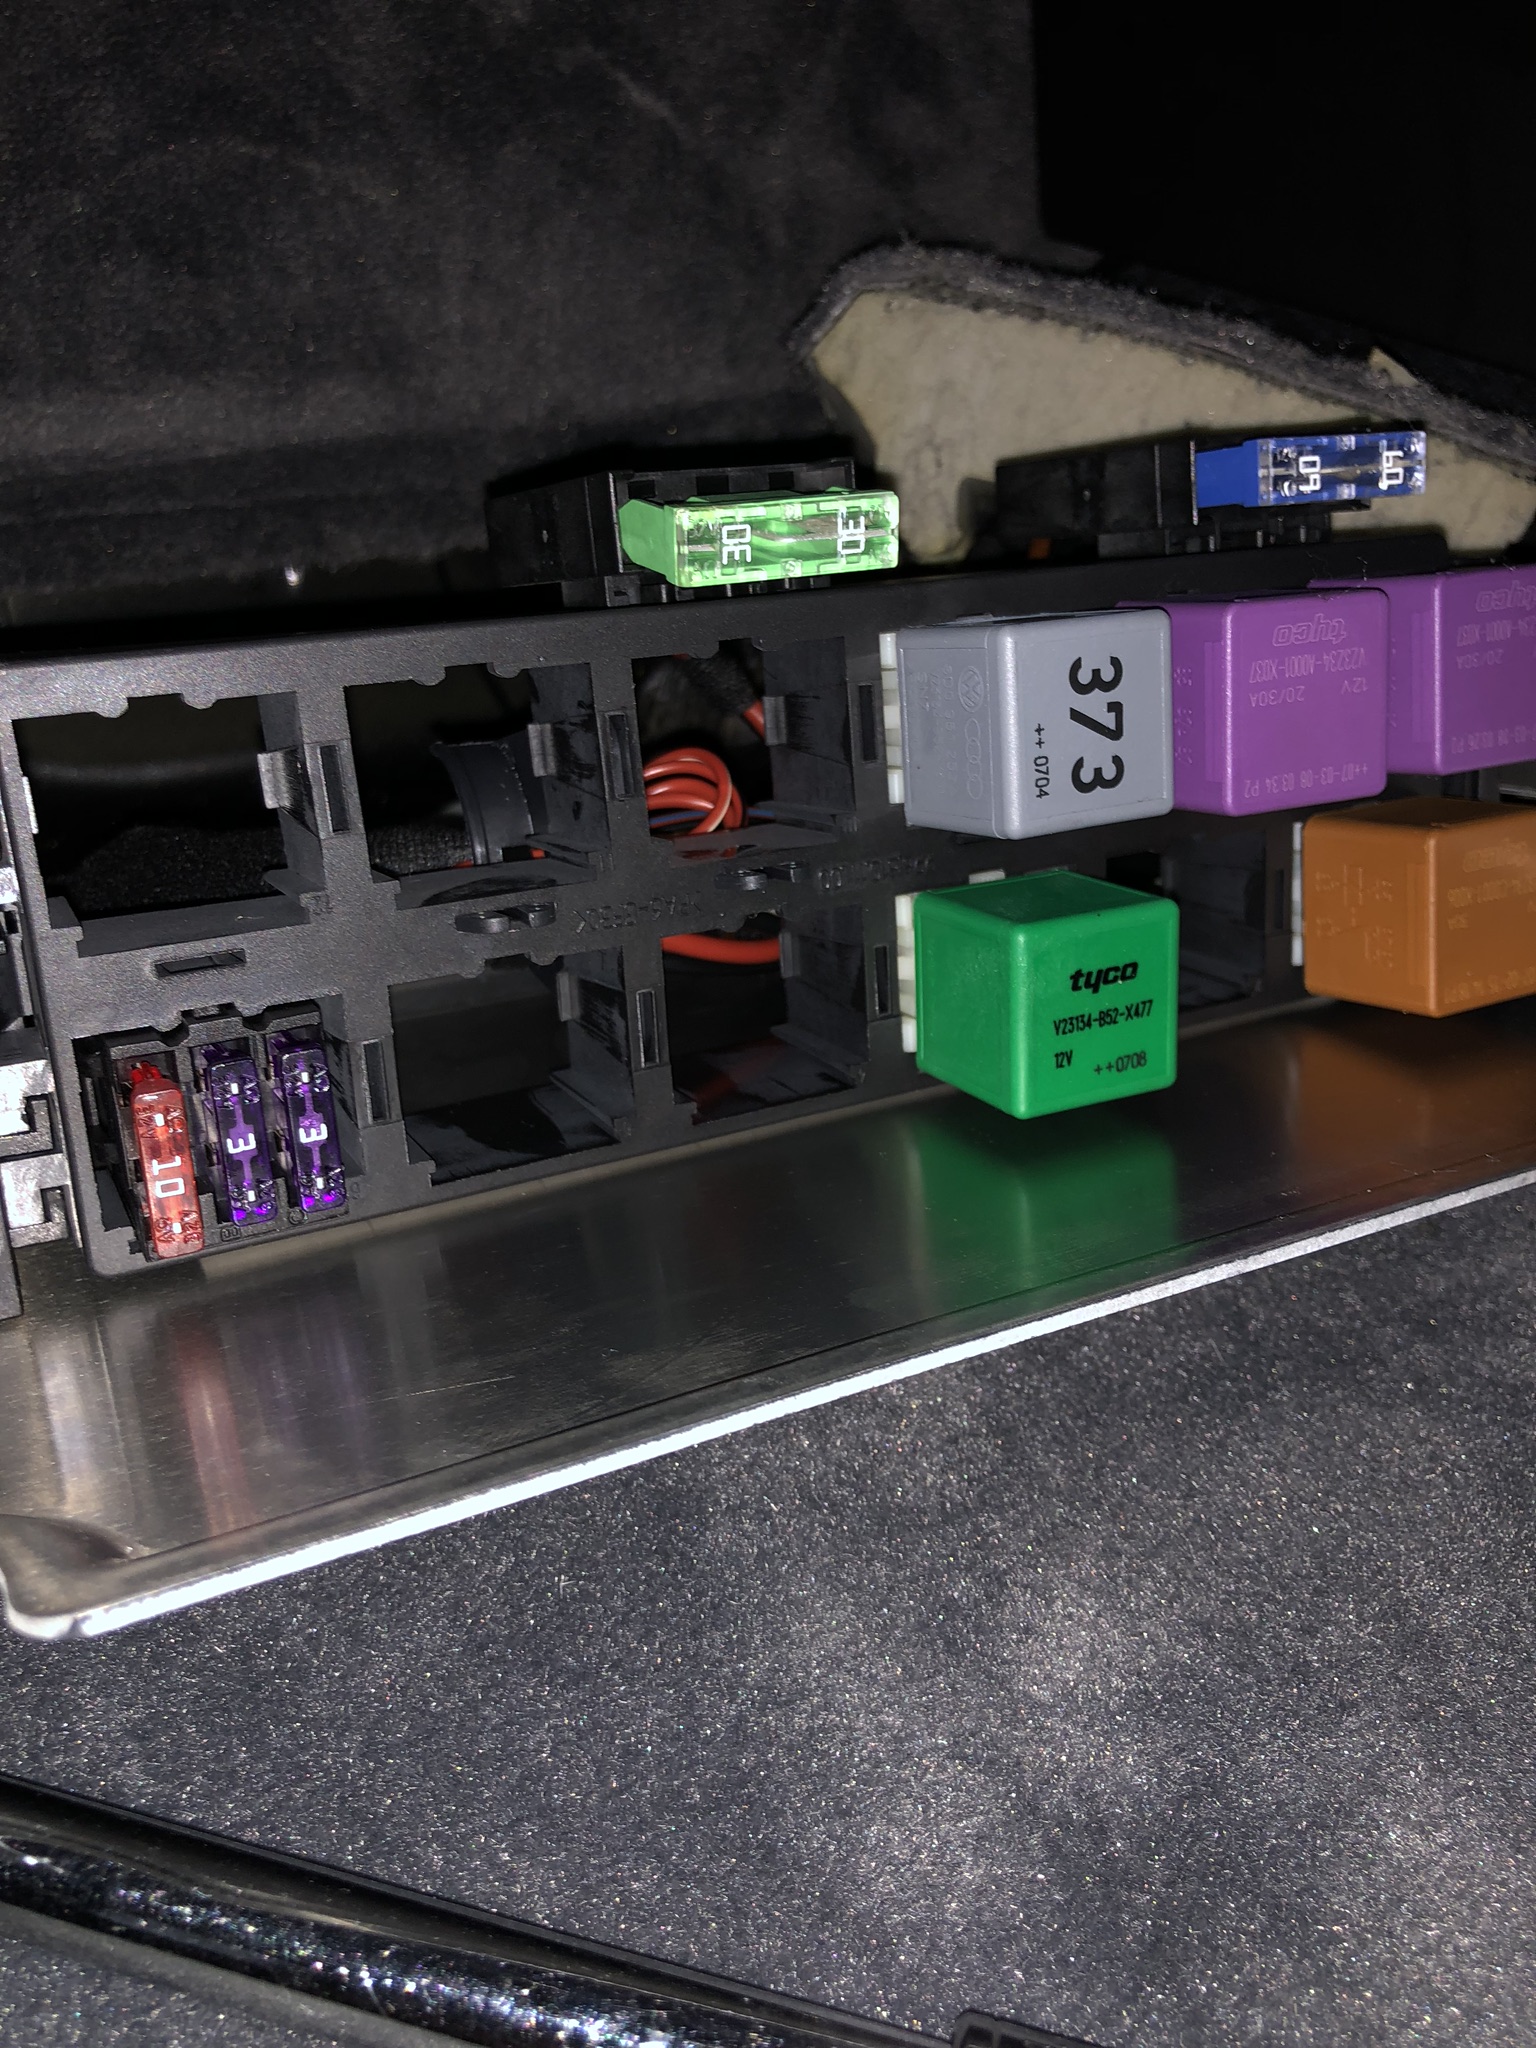
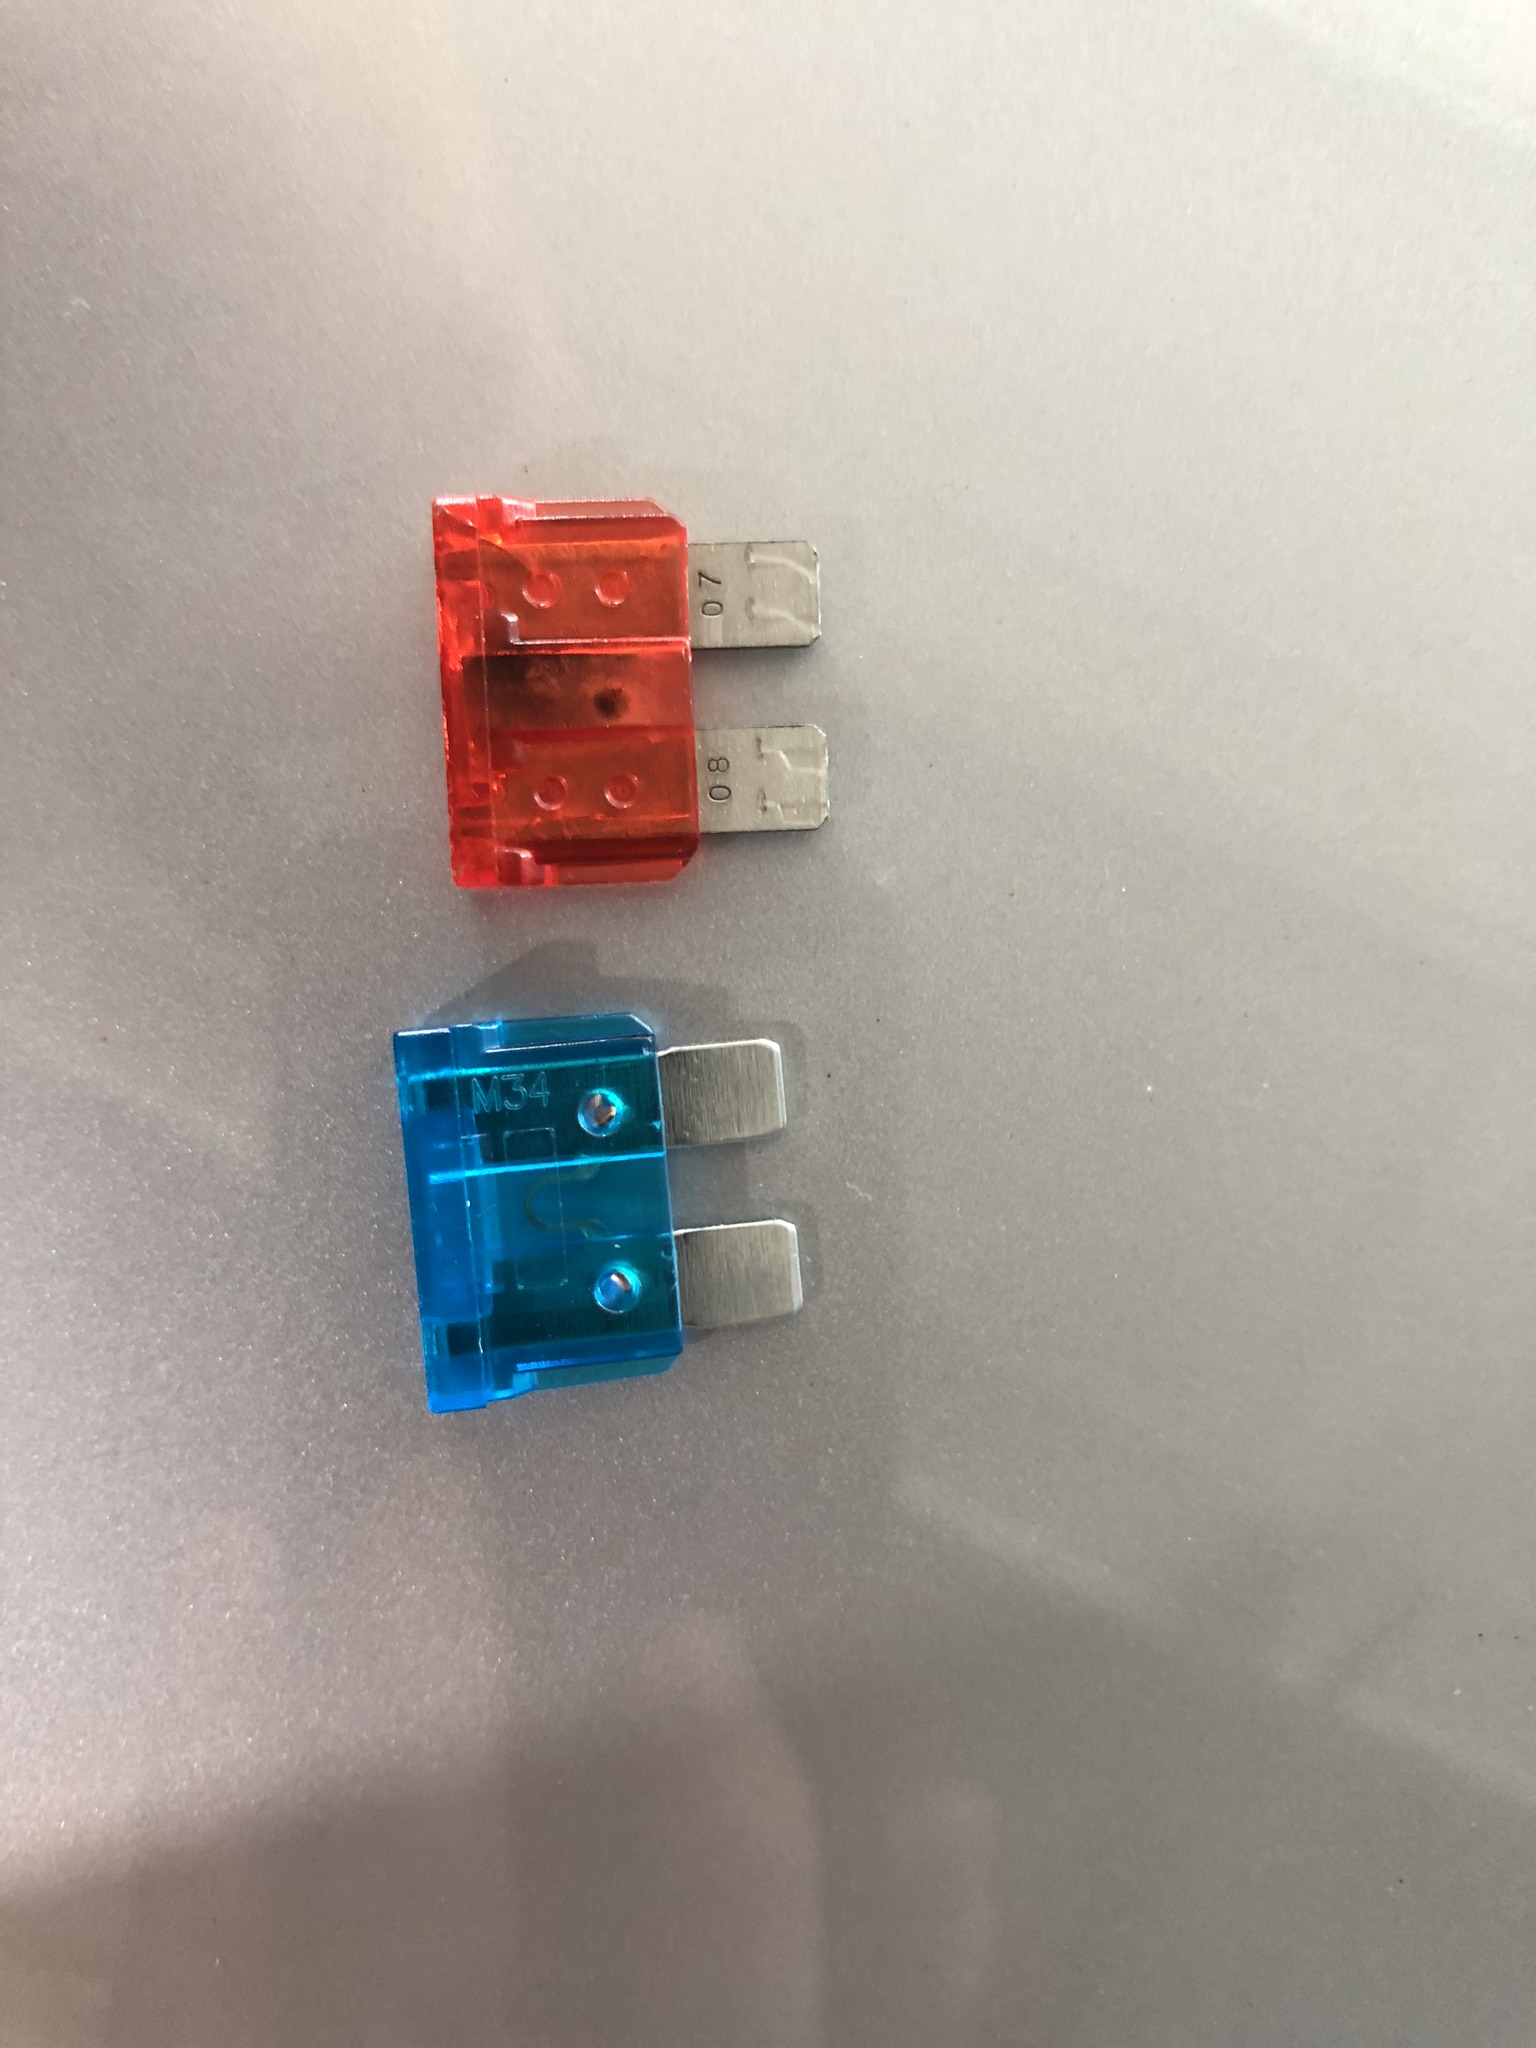
The fuse is located in the most medial slot. Mine was already 10A, and it was blown. I replaced it with another 10A, drove around for a while, and that one also blew in no time. So now I have a 15A in its slot as recommended on the 6speed link I posted above, and we'll see how that goes. Photos below:
I wonder if a more recent version of the Porsche manual indicates a further change from 10A to 15A for this particular fuse.
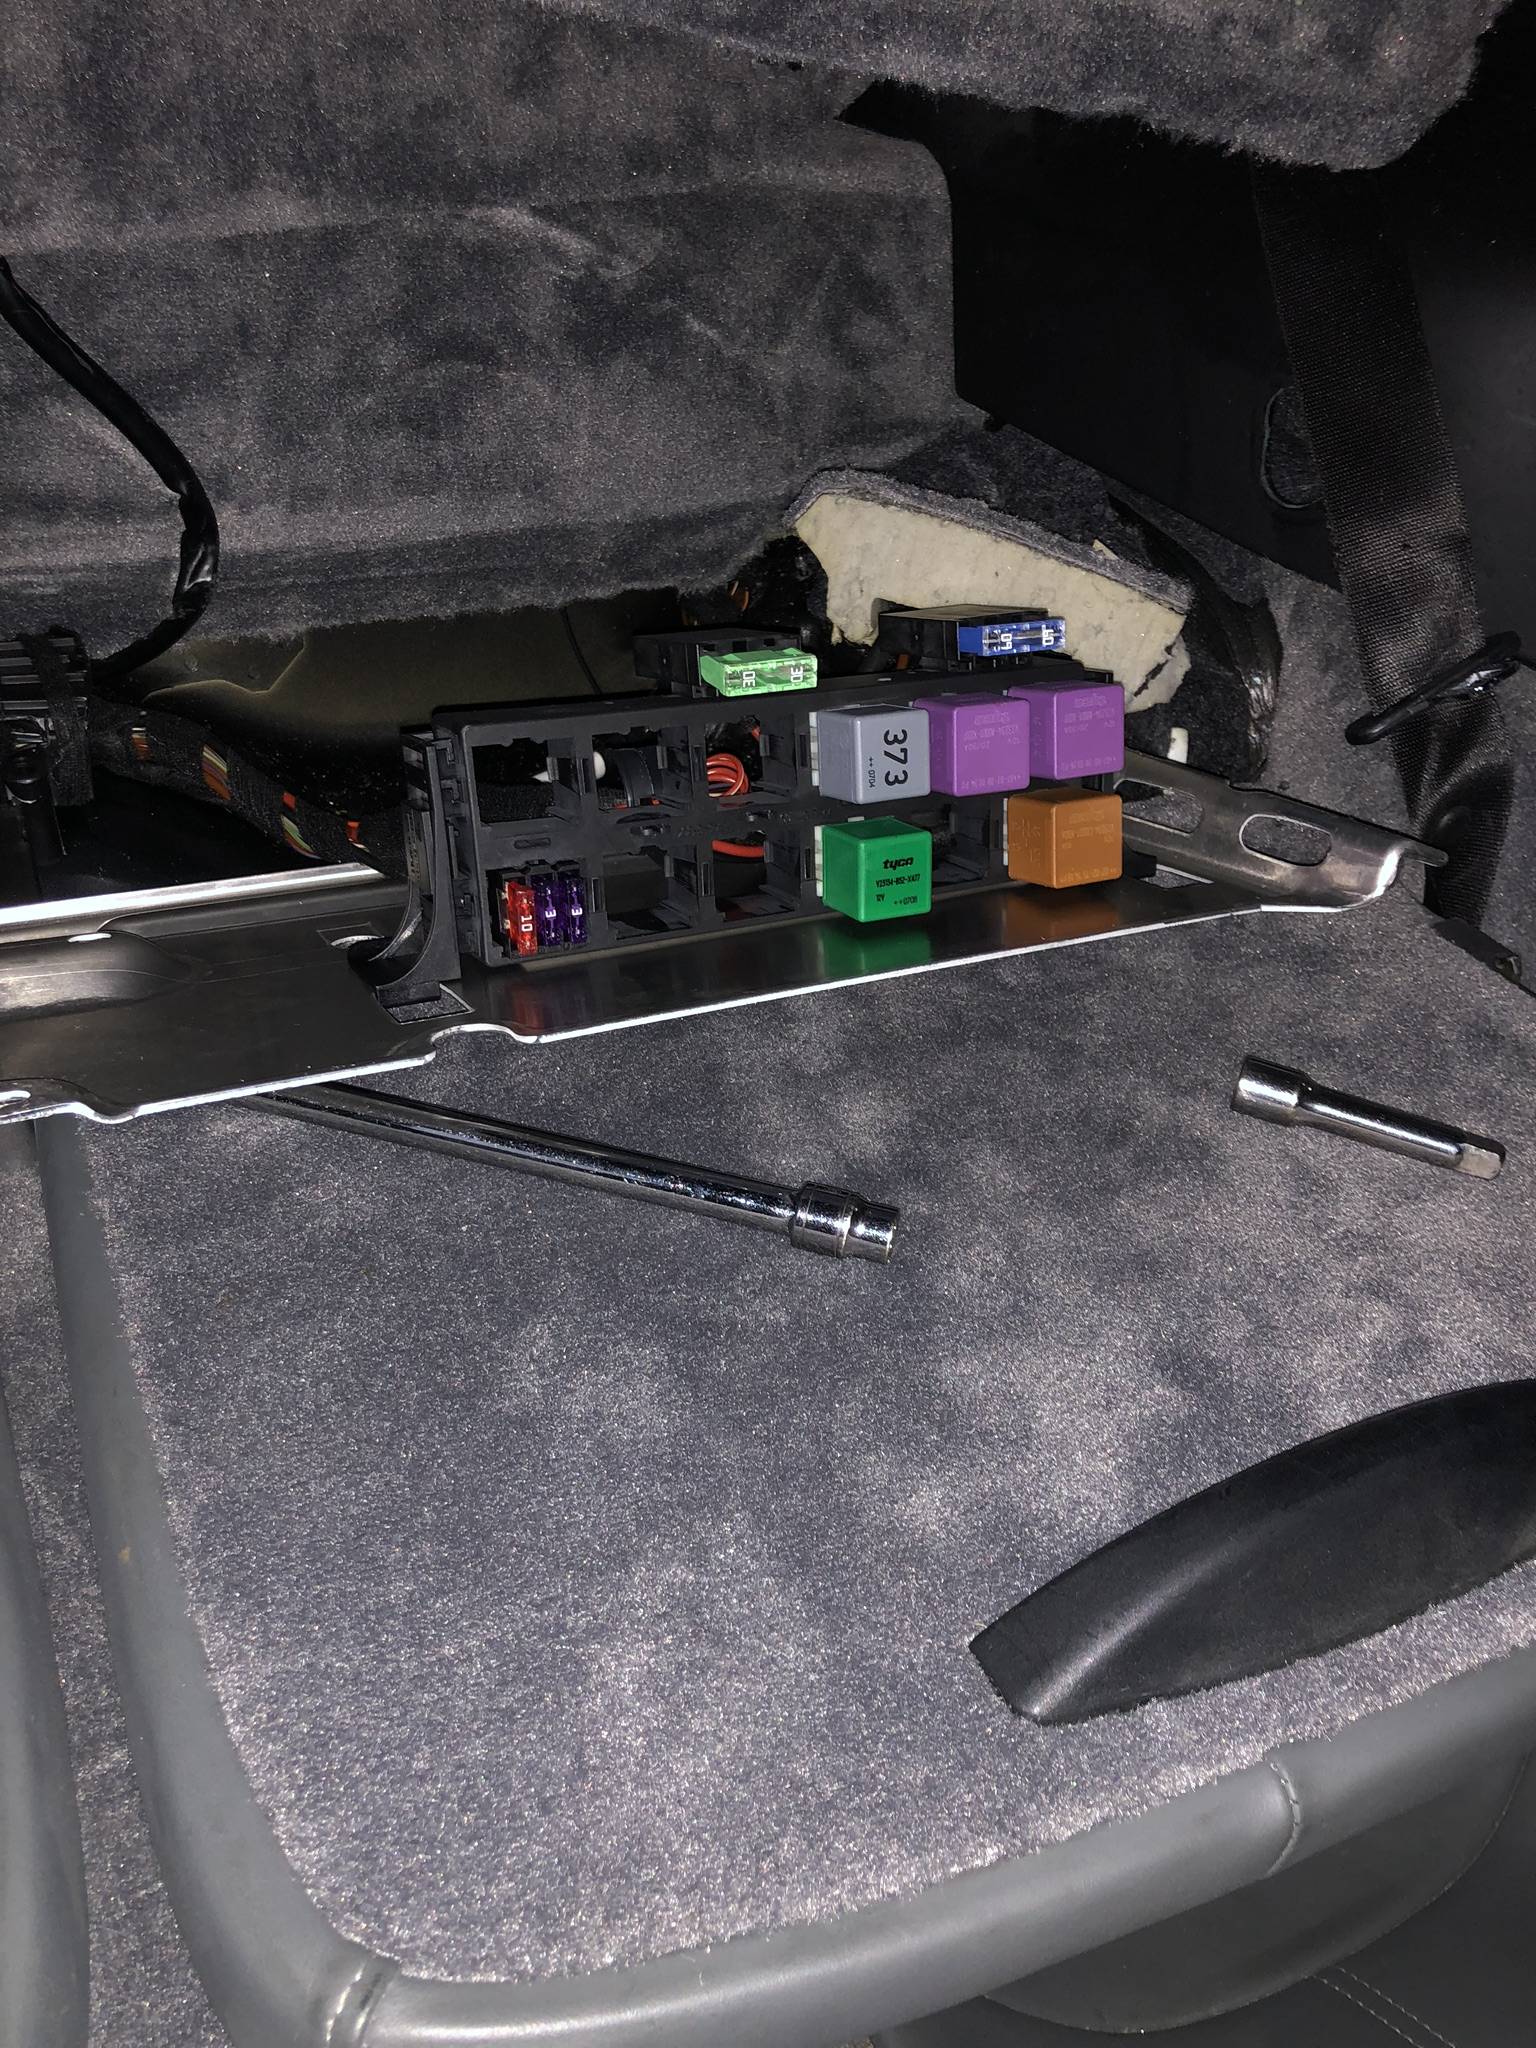
To get to the fuse location, you need to disconnect the battery (negative terminal), then remove the subwoofer in the back, and remove the nuts holding the driver's side ECU bracket. Instructions here: https://www.sharkwerks.com/tech-arti...rera-s-gt2-gt3
The fuse is located in the most medial slot. Mine was already 10A, and it was blown. I replaced it with another 10A, drove around for a while, and that one also blew in no time. So now I have a 15A in its slot as recommended on the 6speed link I posted above, and we'll see how that goes. Photos below:
I wonder if a more recent version of the Porsche manual indicates a further change from 10A to 15A for this particular fuse.
05-26-2019 | 12:10 AM
#71
Thread Starter
Three Wheelin'
Today I replaced the rear differential fluid and started doing the automatic transmission service which consists of a new filter and fluid.
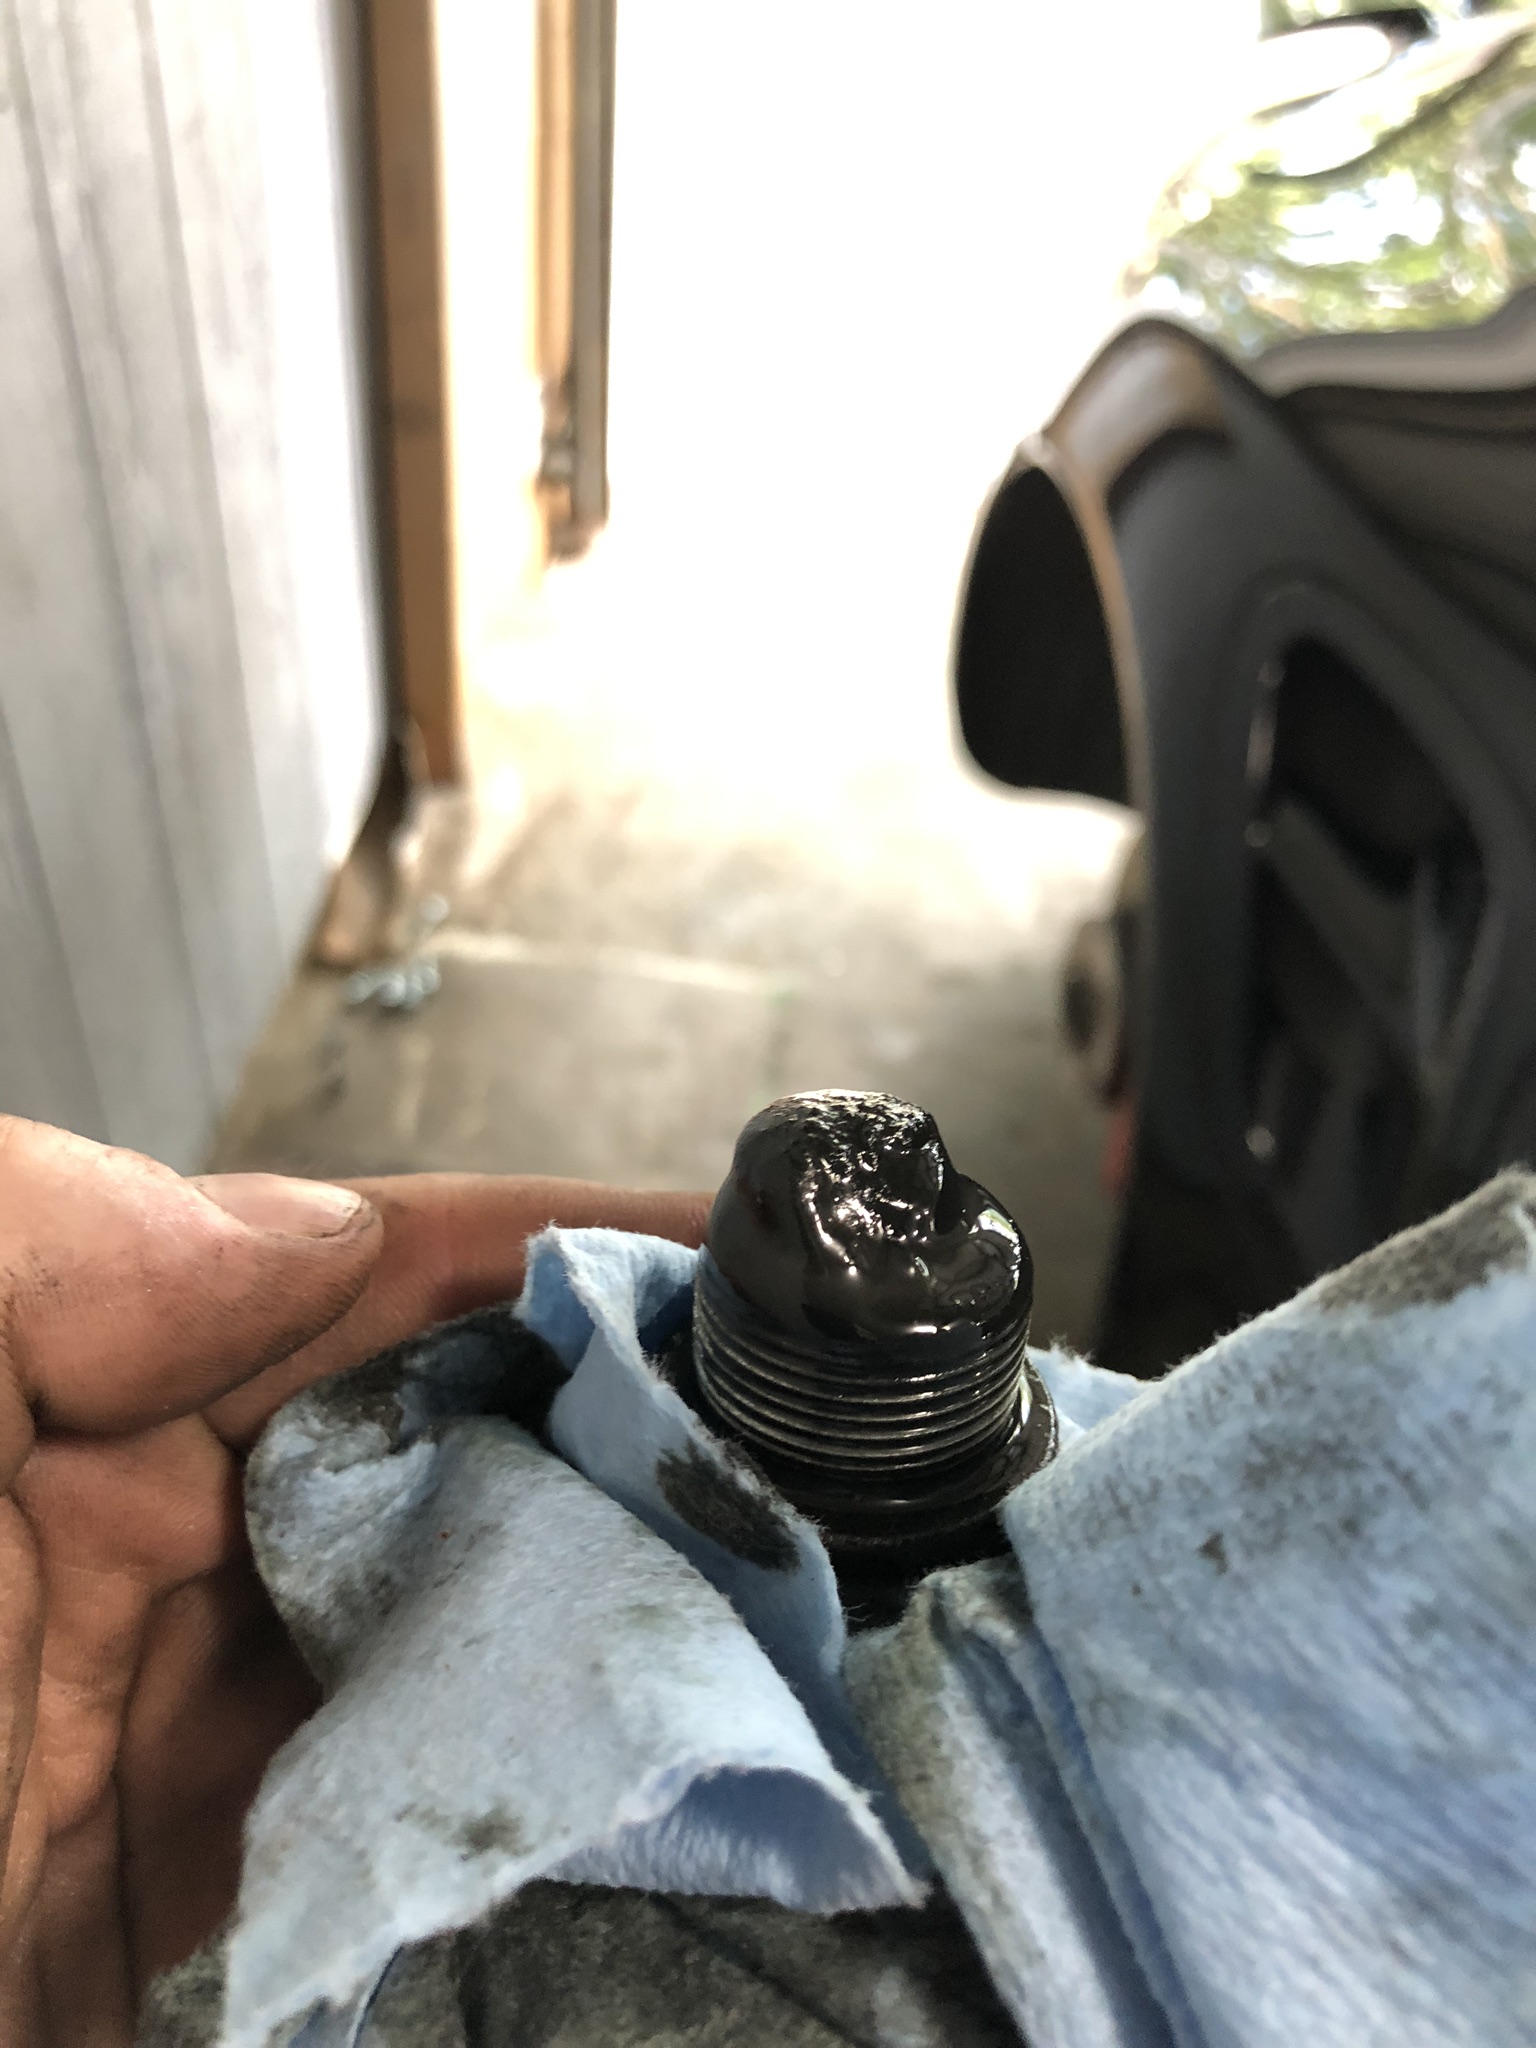
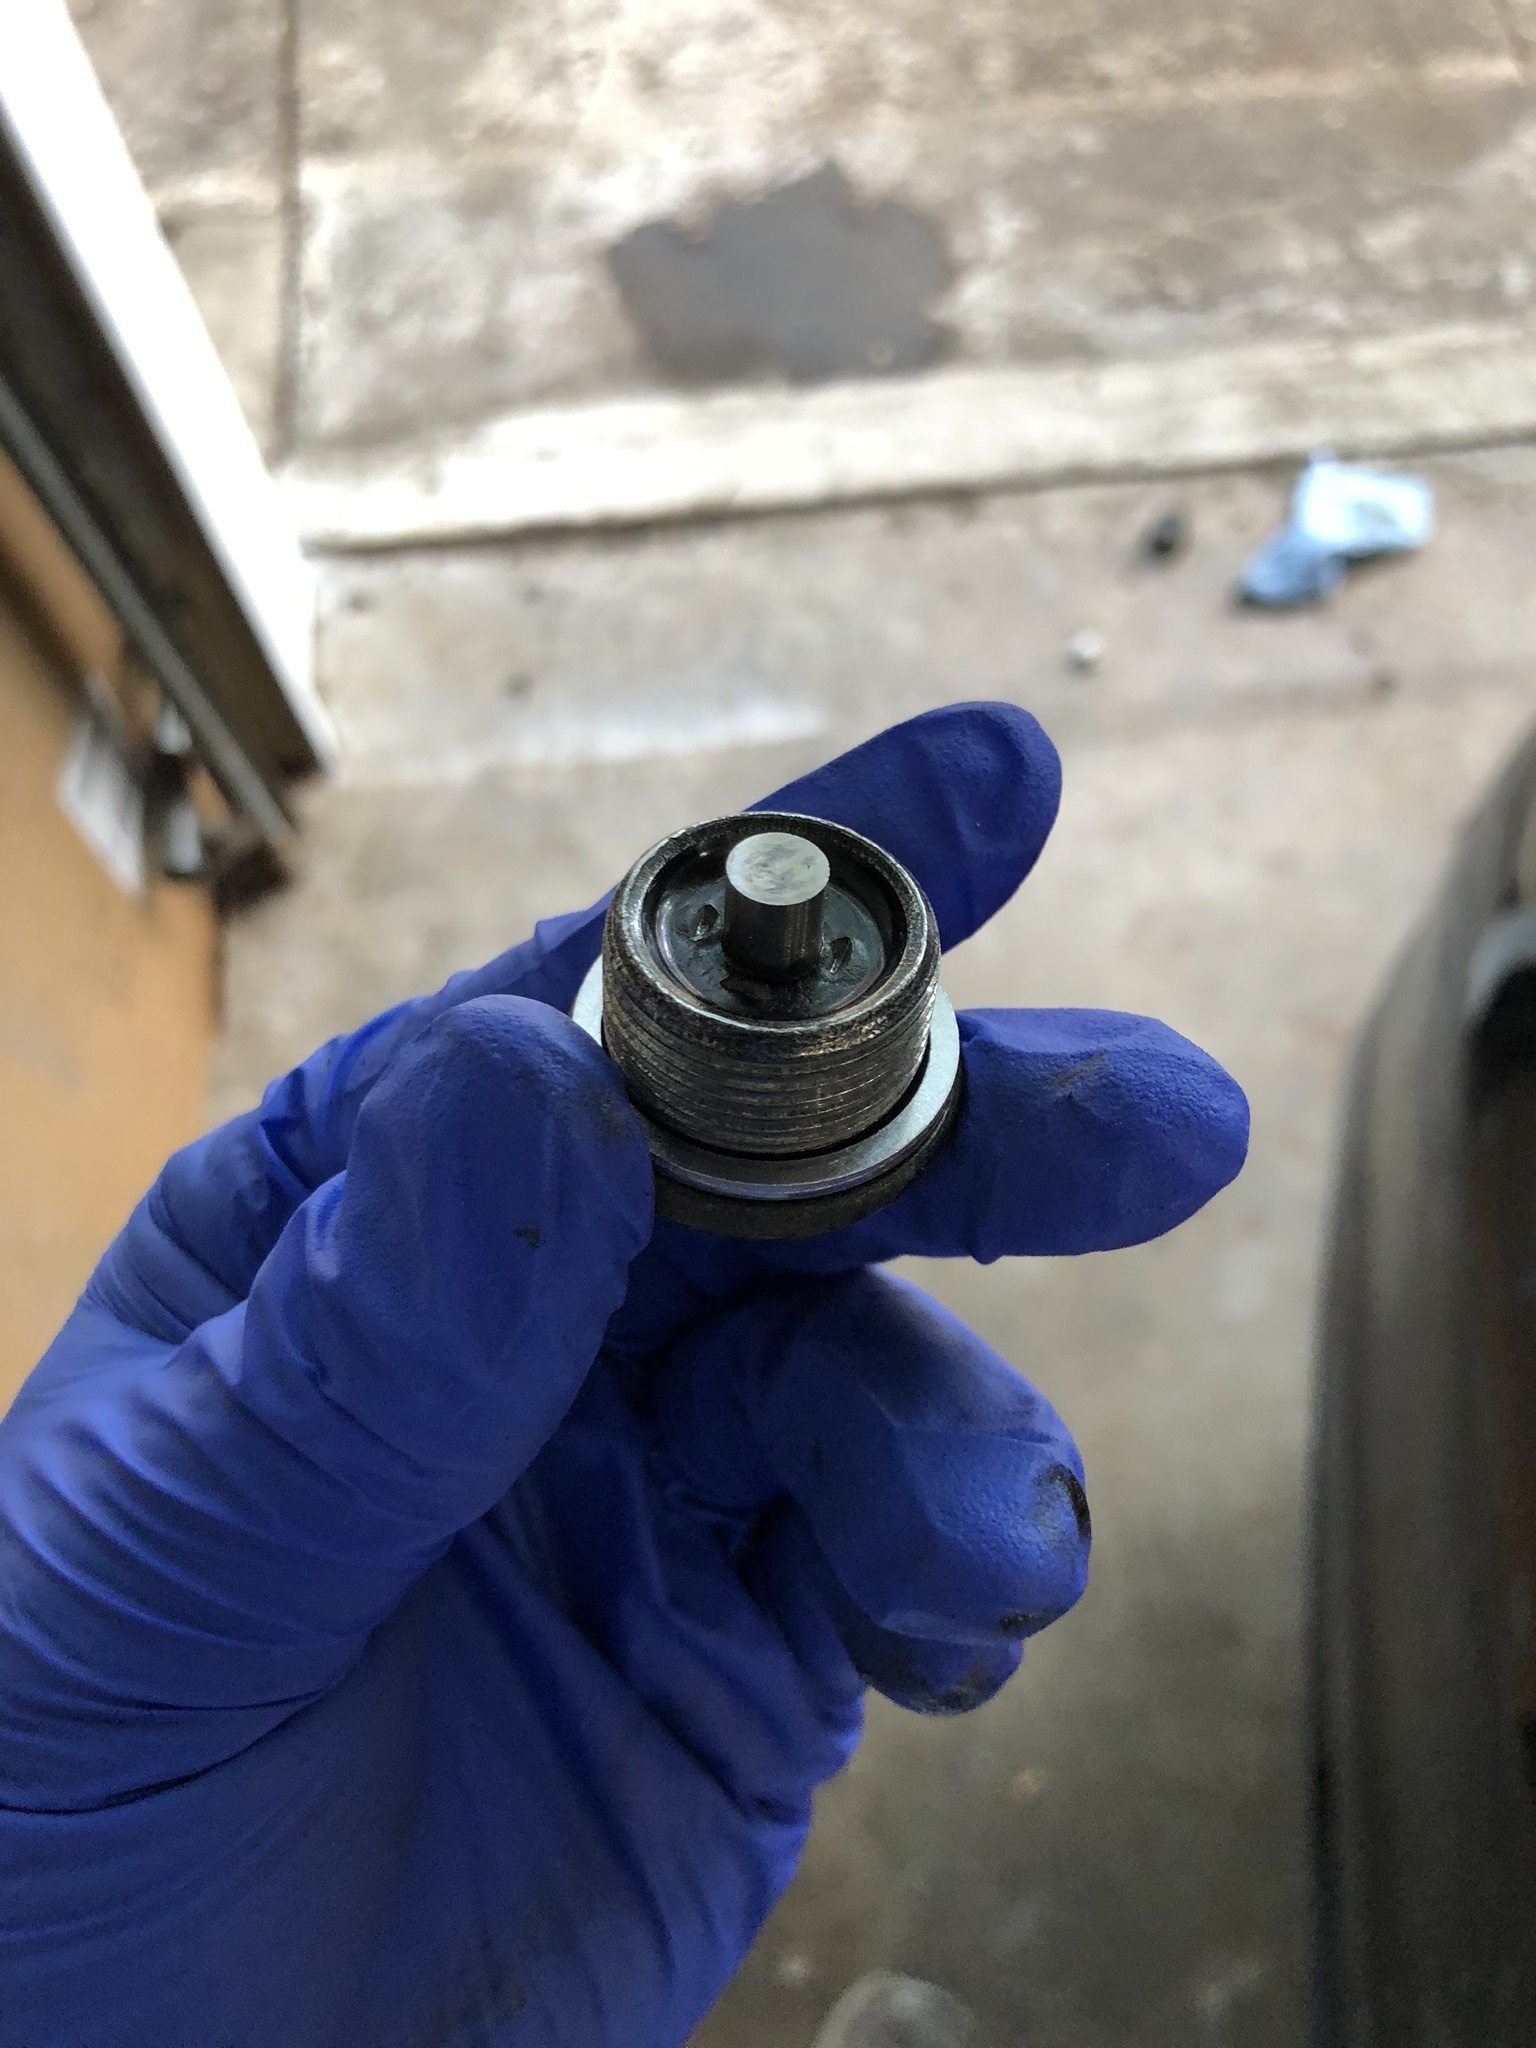
The rear diff fluid exchange is simple - undo the fill bolt (8 mm hex I believe) in front of the passenger side rear wheel half shaft, then break loose the drain bolt (14 mm hex). After draining, the bolt needs to be torqued to 19 ft lbs and new fluid pumped in. The drain bolt had an impressive amount of sludge and paste on it. The fluid that came out was dark, but not black, so I wonder if it was done at some point in the past. I just used a cheap harbor freight hand pump to transfer the new oil (Mobilube PTX)
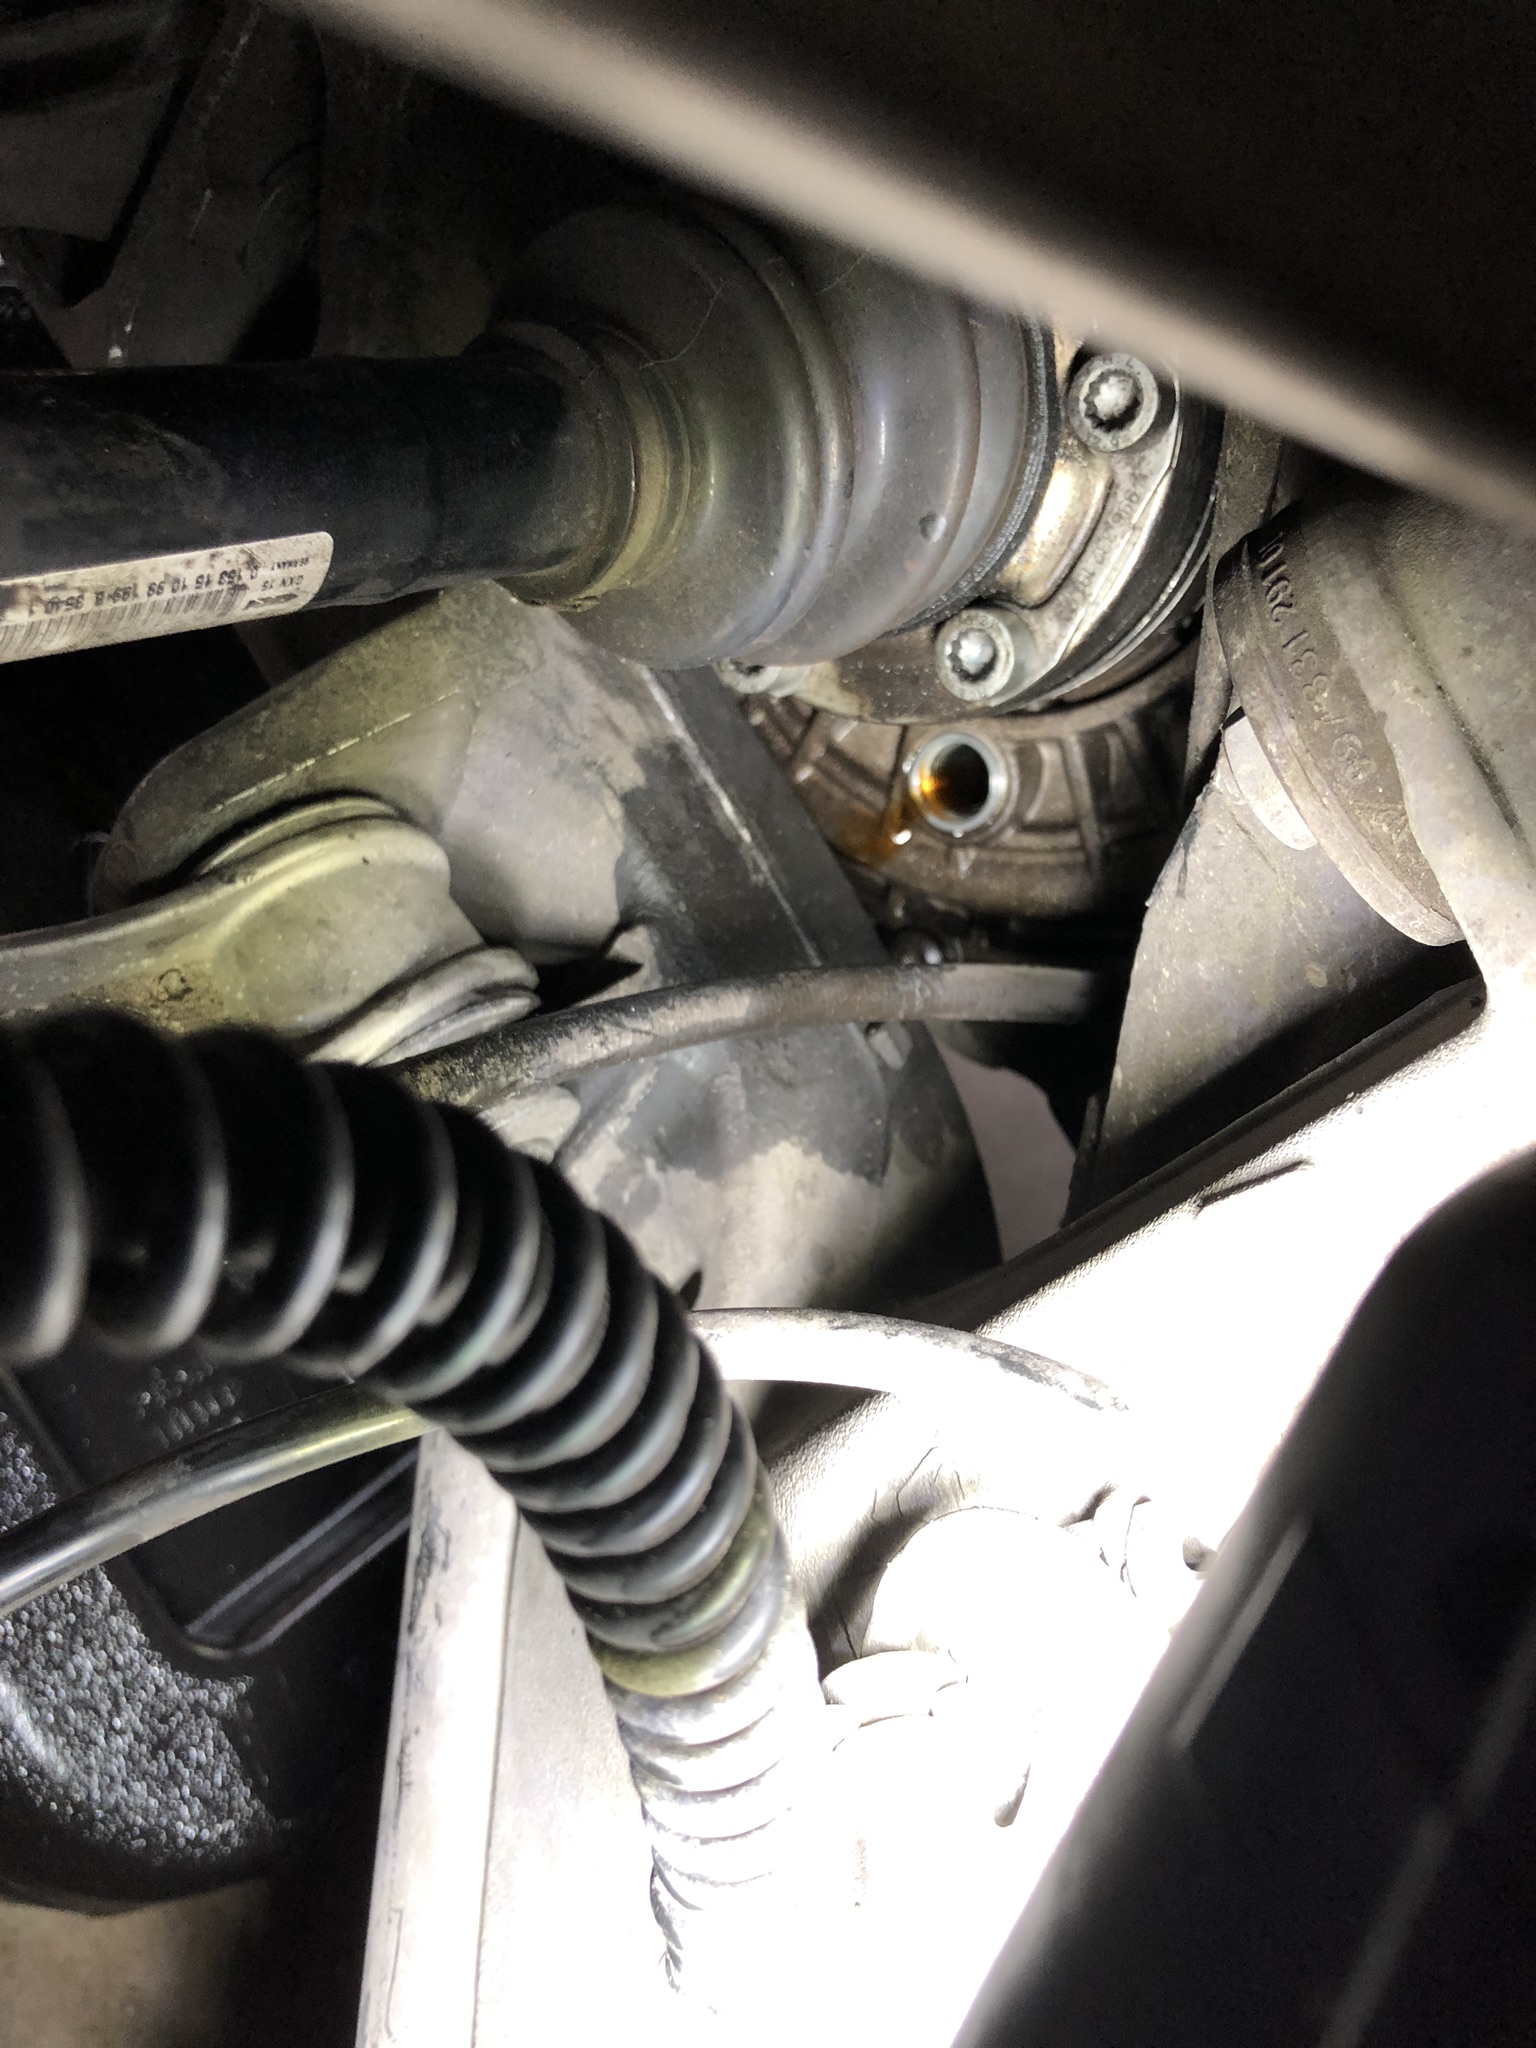
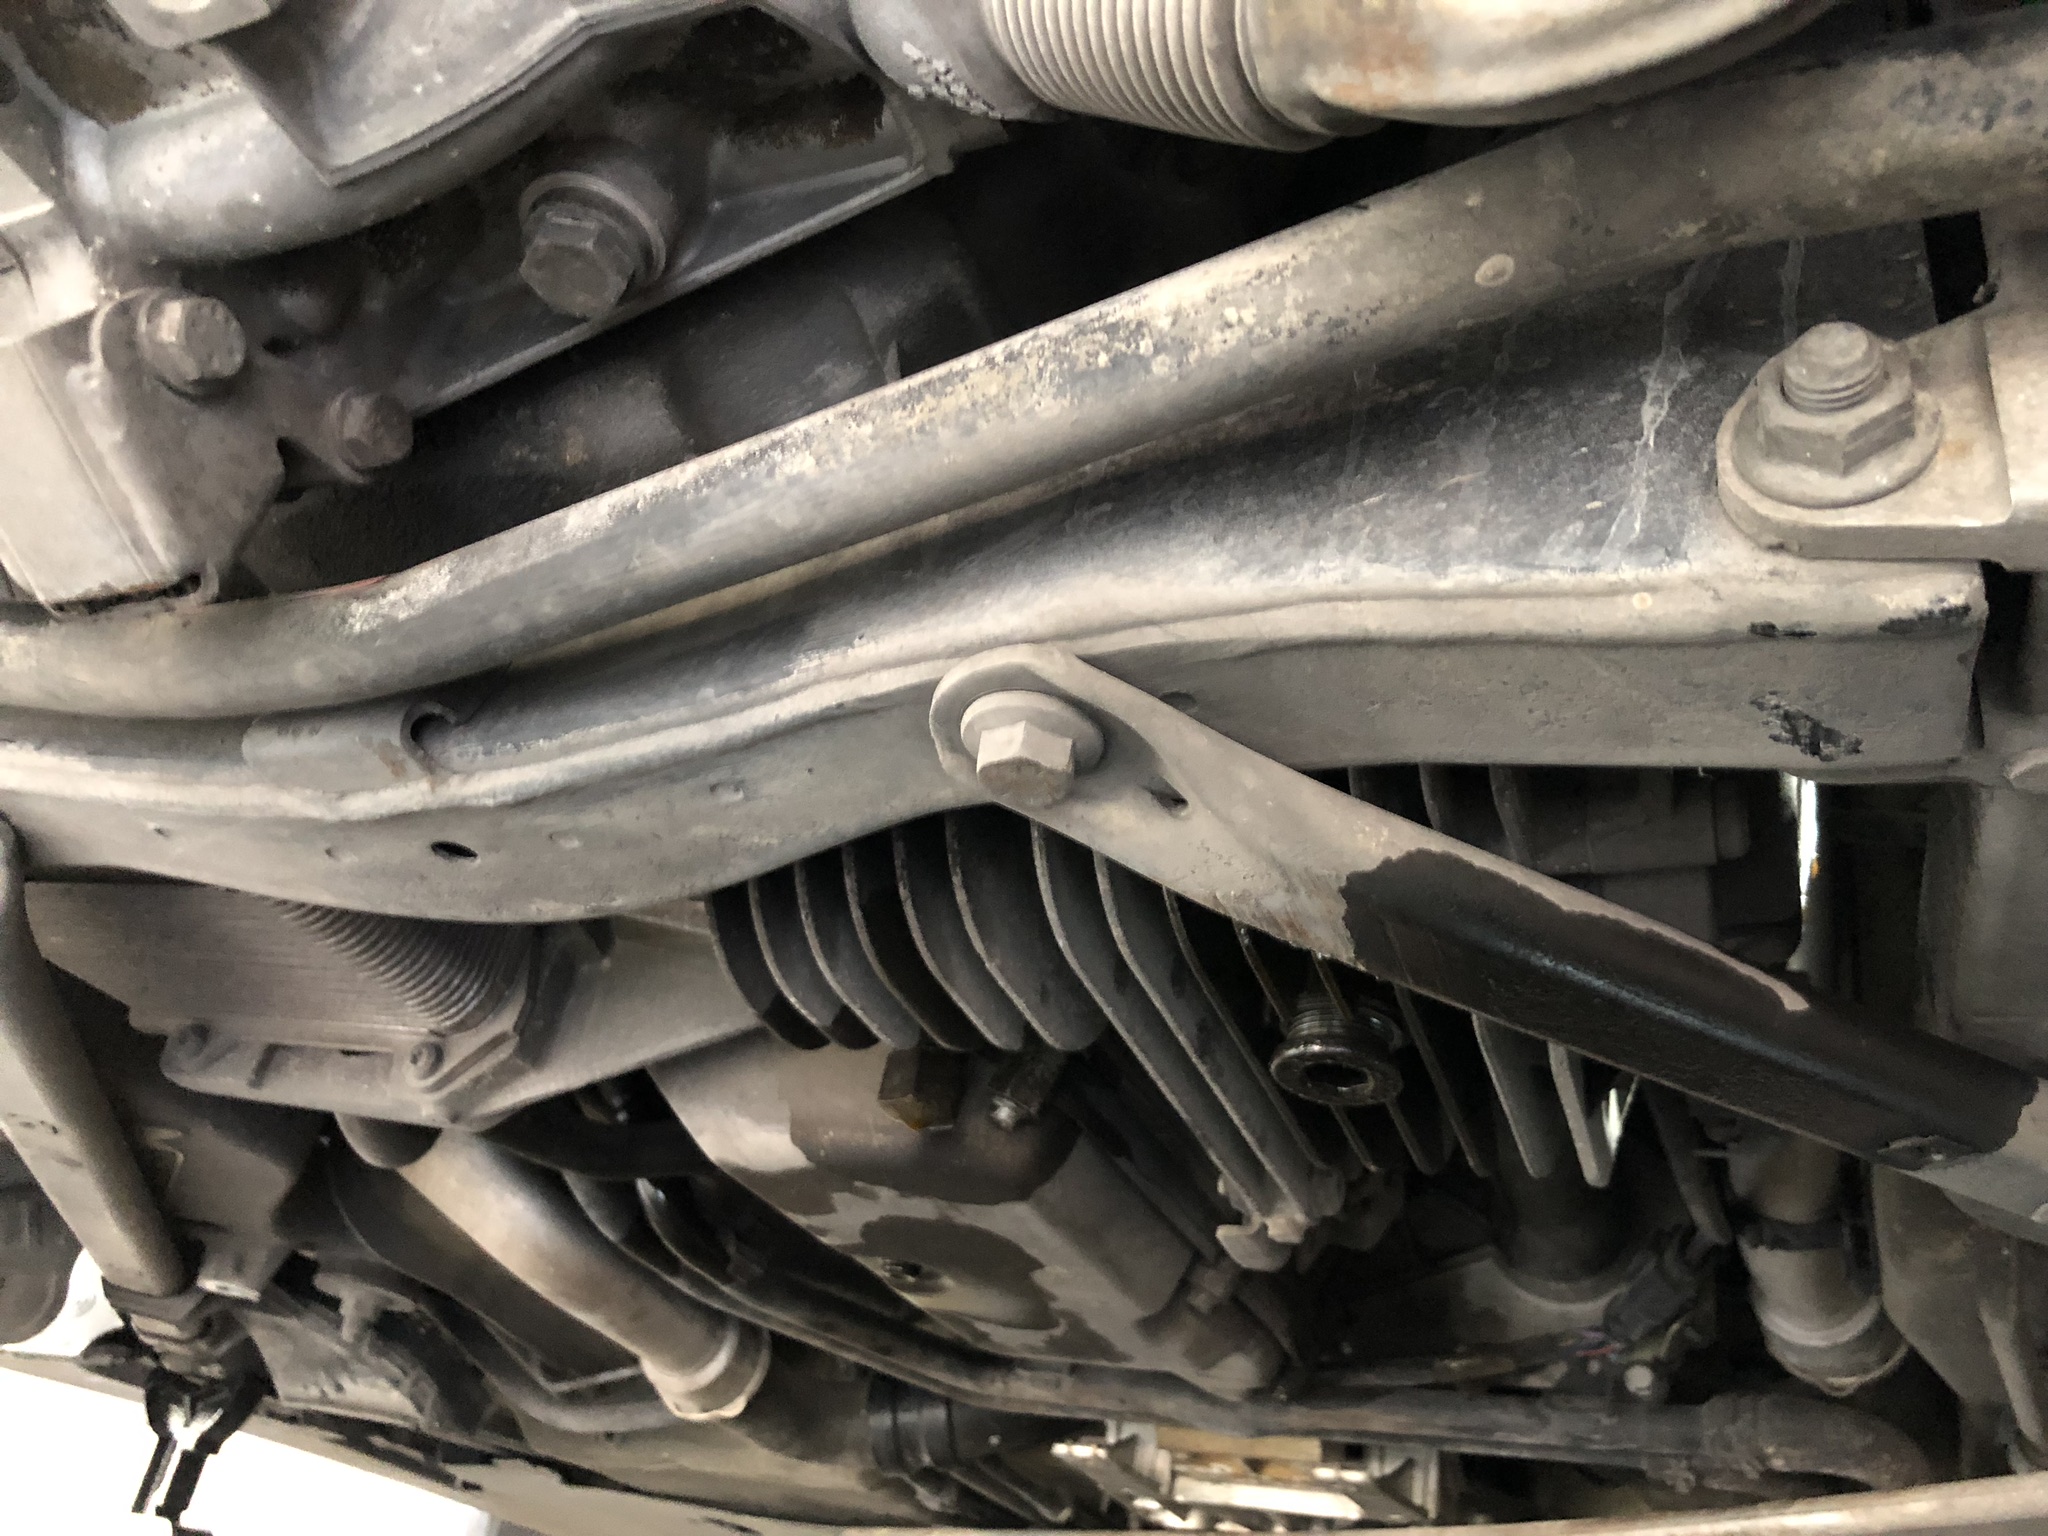
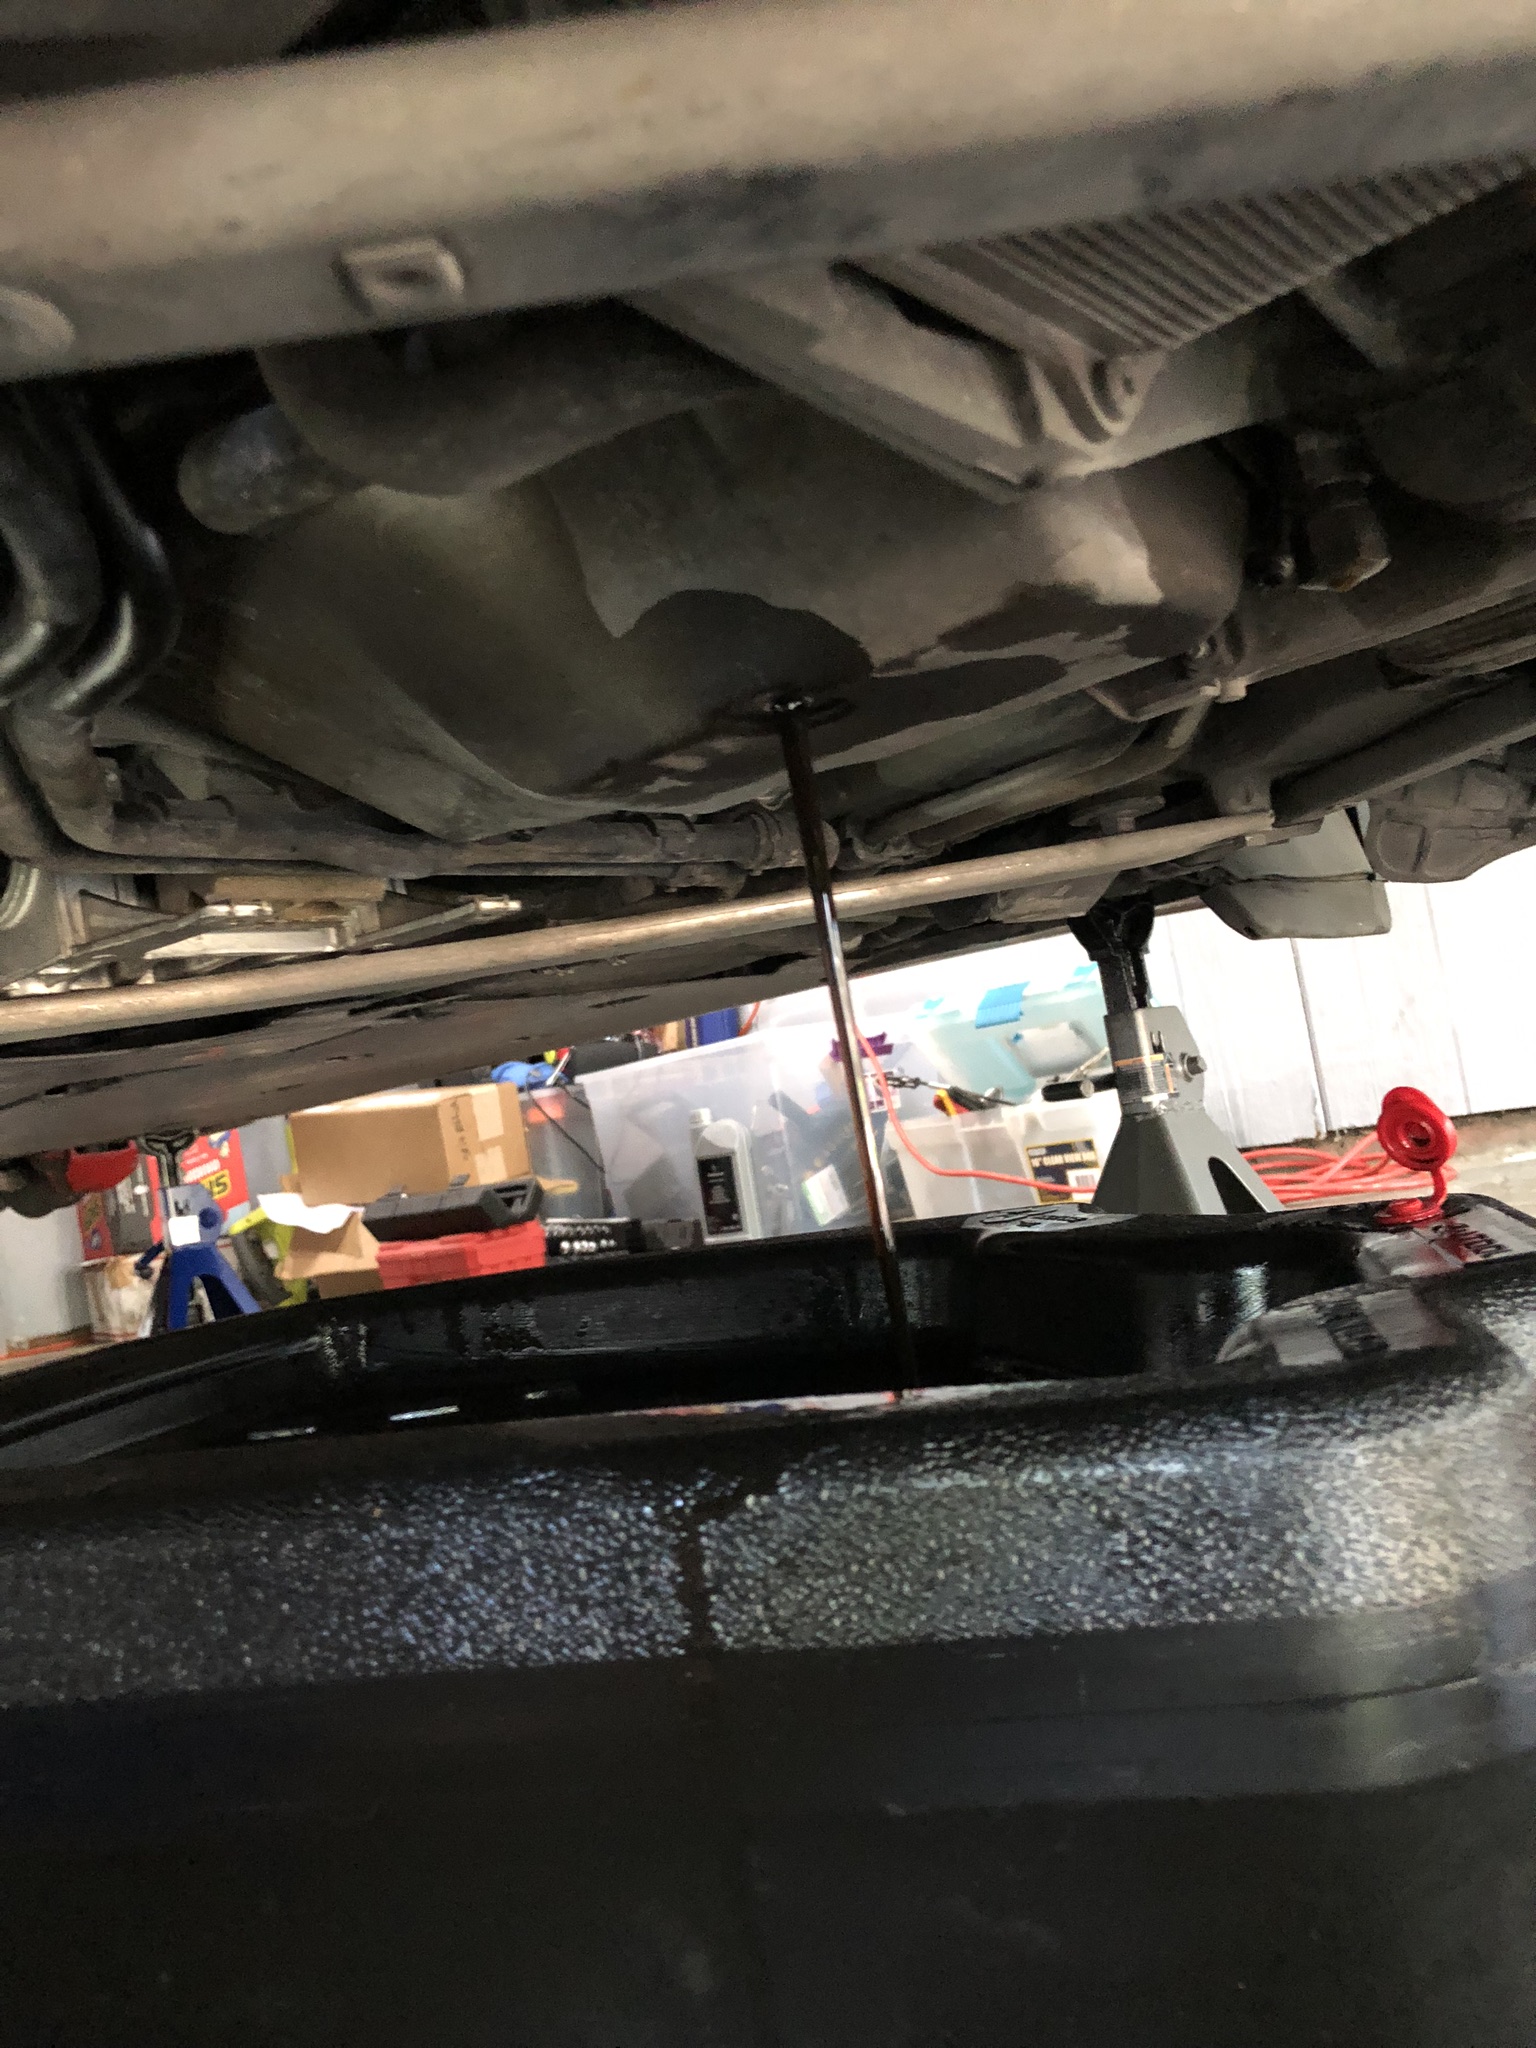
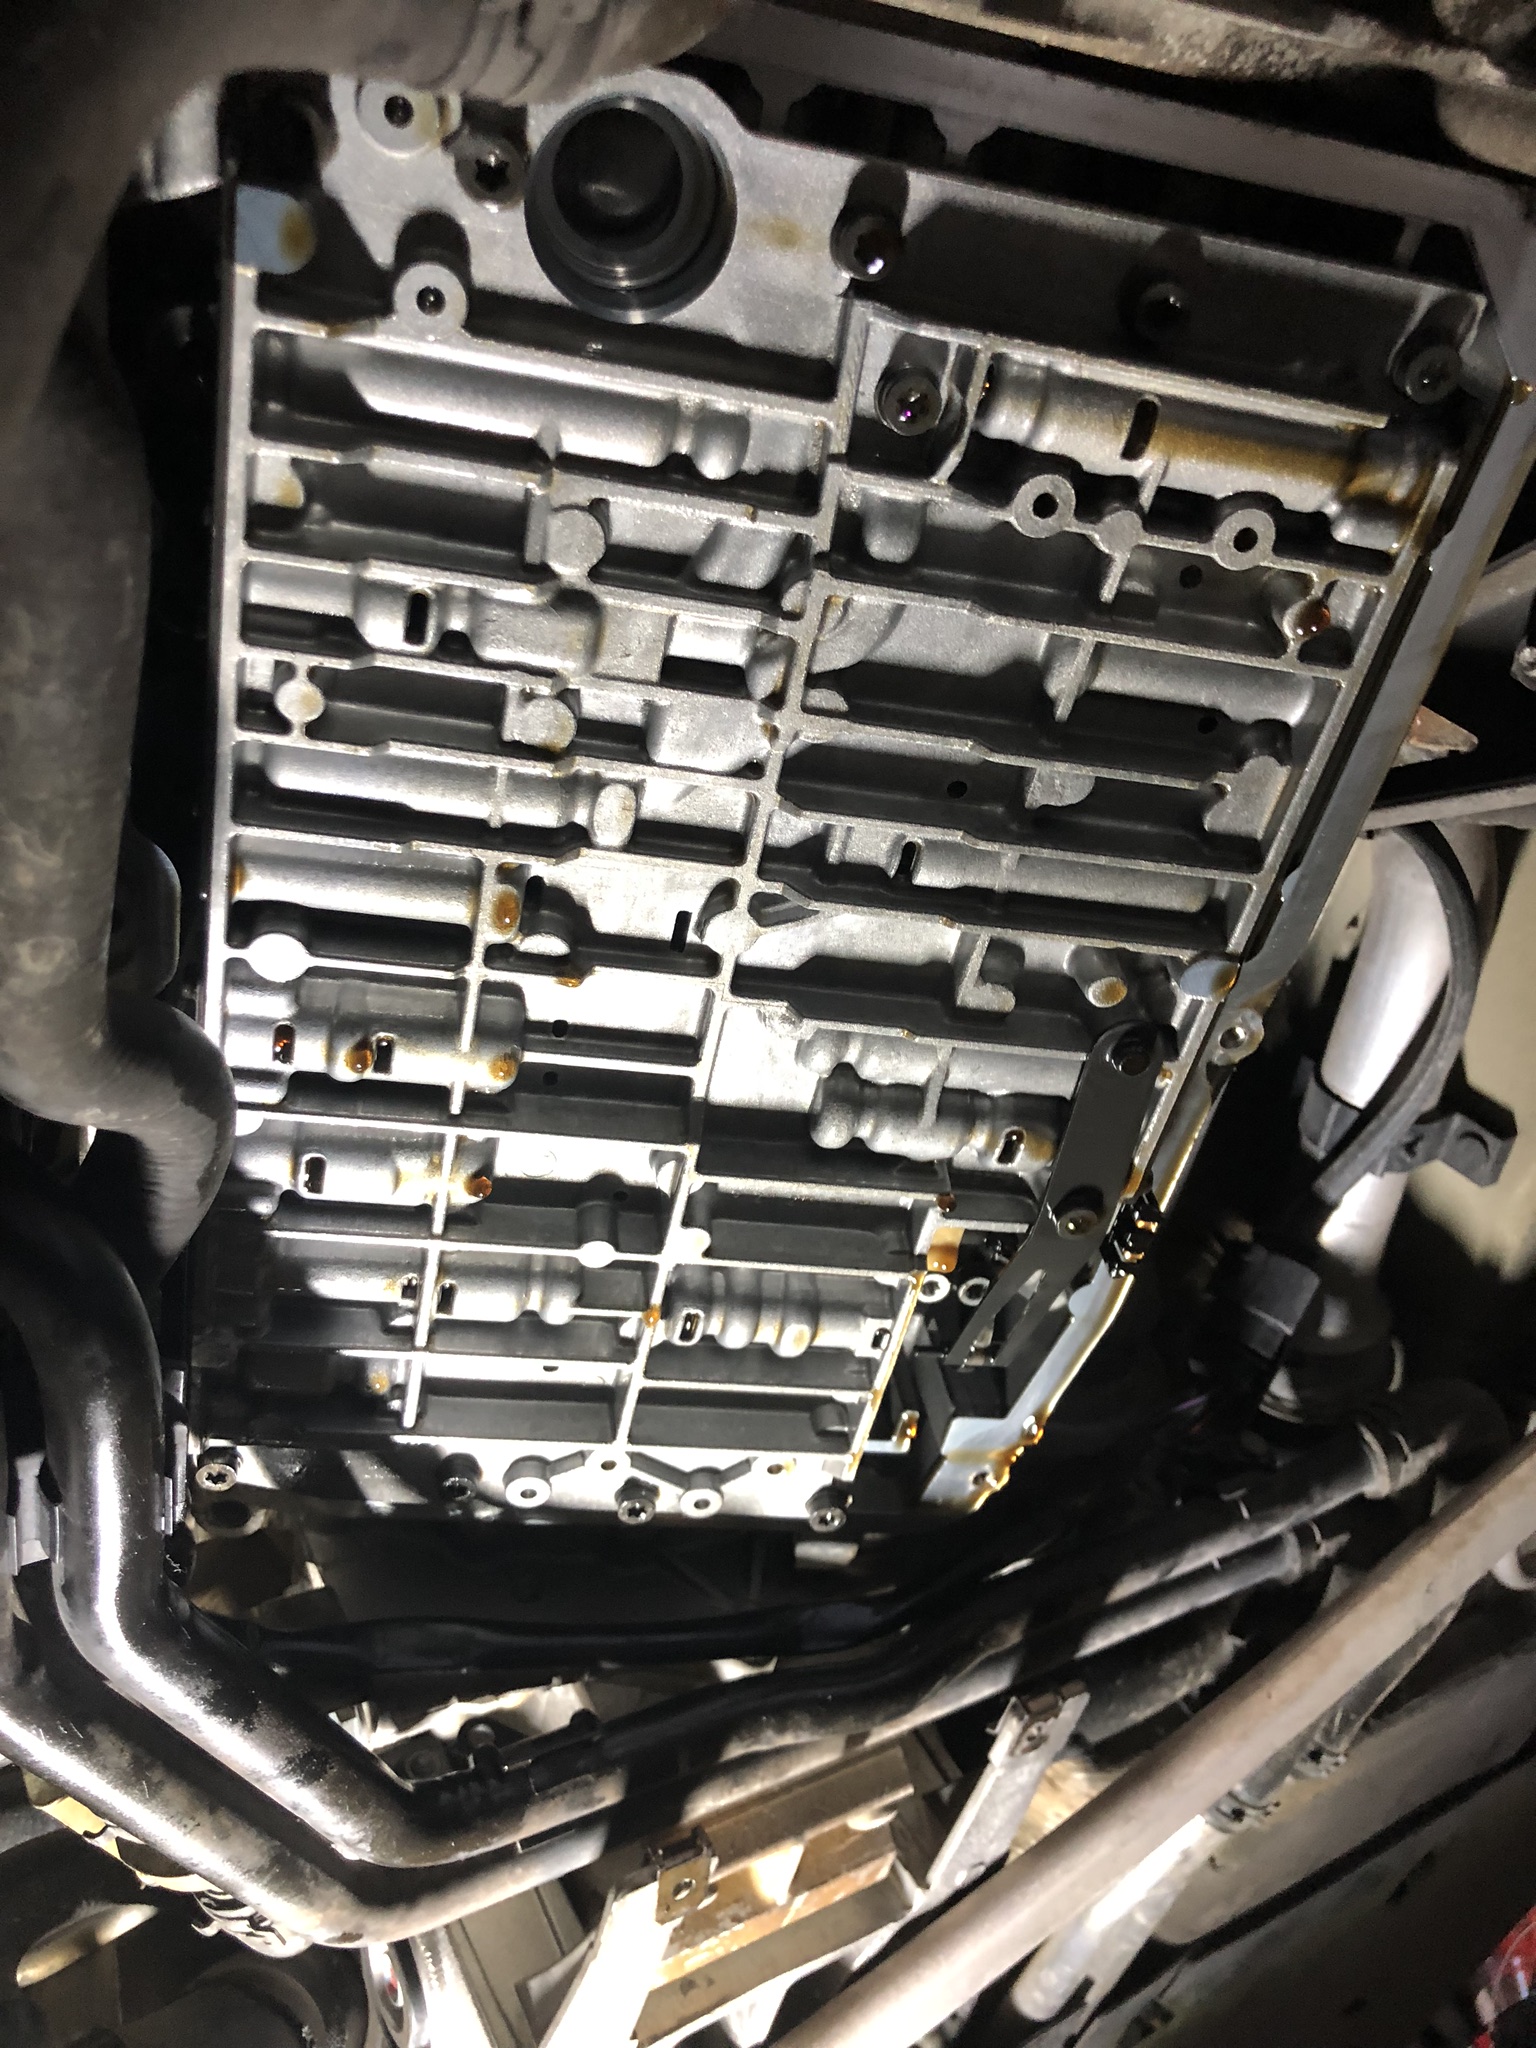
After that, I moved on to the transmission service. The drain bolt takes a 5 mm hex. I also undid the control port which is the same size. I let it drain for a while and then started undoing the T27 bolts around the pan. There are 5 or 6 and they are kind of a pain to get to because of the coolant lines in the way. I then removed the pan and the filter. The pan and magnet got a nice cleaning and so did the gasket surface on the transmission. The new filter was installed and then I began putting the cleaned pan with a new gasket back on. This was a pain in the a** with the car on jackstands and on my back so I gave up here for the day. Tomorrow I will remove the coolant line clips and hopefully that will make it easier to get everything bolted up. After that, just need to fill 'er back up with fluid.

The rear diff fluid exchange is simple - undo the fill bolt (8 mm hex I believe) in front of the passenger side rear wheel half shaft, then break loose the drain bolt (14 mm hex). After draining, the bolt needs to be torqued to 19 ft lbs and new fluid pumped in. The drain bolt had an impressive amount of sludge and paste on it. The fluid that came out was dark, but not black, so I wonder if it was done at some point in the past. I just used a cheap harbor freight hand pump to transfer the new oil (Mobilube PTX)
After that, I moved on to the transmission service. The drain bolt takes a 5 mm hex. I also undid the control port which is the same size. I let it drain for a while and then started undoing the T27 bolts around the pan. There are 5 or 6 and they are kind of a pain to get to because of the coolant lines in the way. I then removed the pan and the filter. The pan and magnet got a nice cleaning and so did the gasket surface on the transmission. The new filter was installed and then I began putting the cleaned pan with a new gasket back on. This was a pain in the a** with the car on jackstands and on my back so I gave up here for the day. Tomorrow I will remove the coolant line clips and hopefully that will make it easier to get everything bolted up. After that, just need to fill 'er back up with fluid.
05-26-2019 | 10:40 AM
#72

Rennlist Member
Nice work. I agree that working under these cars when on jackstands is quite tiring. There's just not a lot of room to move.
I saw your note on another thread about an odd suspension clunk. As luck would have it, mine seems to have something similar. I need to recheck the torque on the swaybar links. It was all quiet before I messed with it a coyple weeks ago...
I saw your note on another thread about an odd suspension clunk. As luck would have it, mine seems to have something similar. I need to recheck the torque on the swaybar links. It was all quiet before I messed with it a coyple weeks ago...
05-26-2019 | 04:41 PM
#73
Thread Starter
Three Wheelin'
Nice work. I agree that working under these cars when on jackstands is quite tiring. There's just not a lot of room to move.
I saw your note on another thread about an odd suspension clunk. As luck would have it, mine seems to have something similar. I need to recheck the torque on the swaybar links. It was all quiet before I messed with it a coyple weeks ago...
I saw your note on another thread about an odd suspension clunk. As luck would have it, mine seems to have something similar. I need to recheck the torque on the swaybar links. It was all quiet before I messed with it a coyple weeks ago...
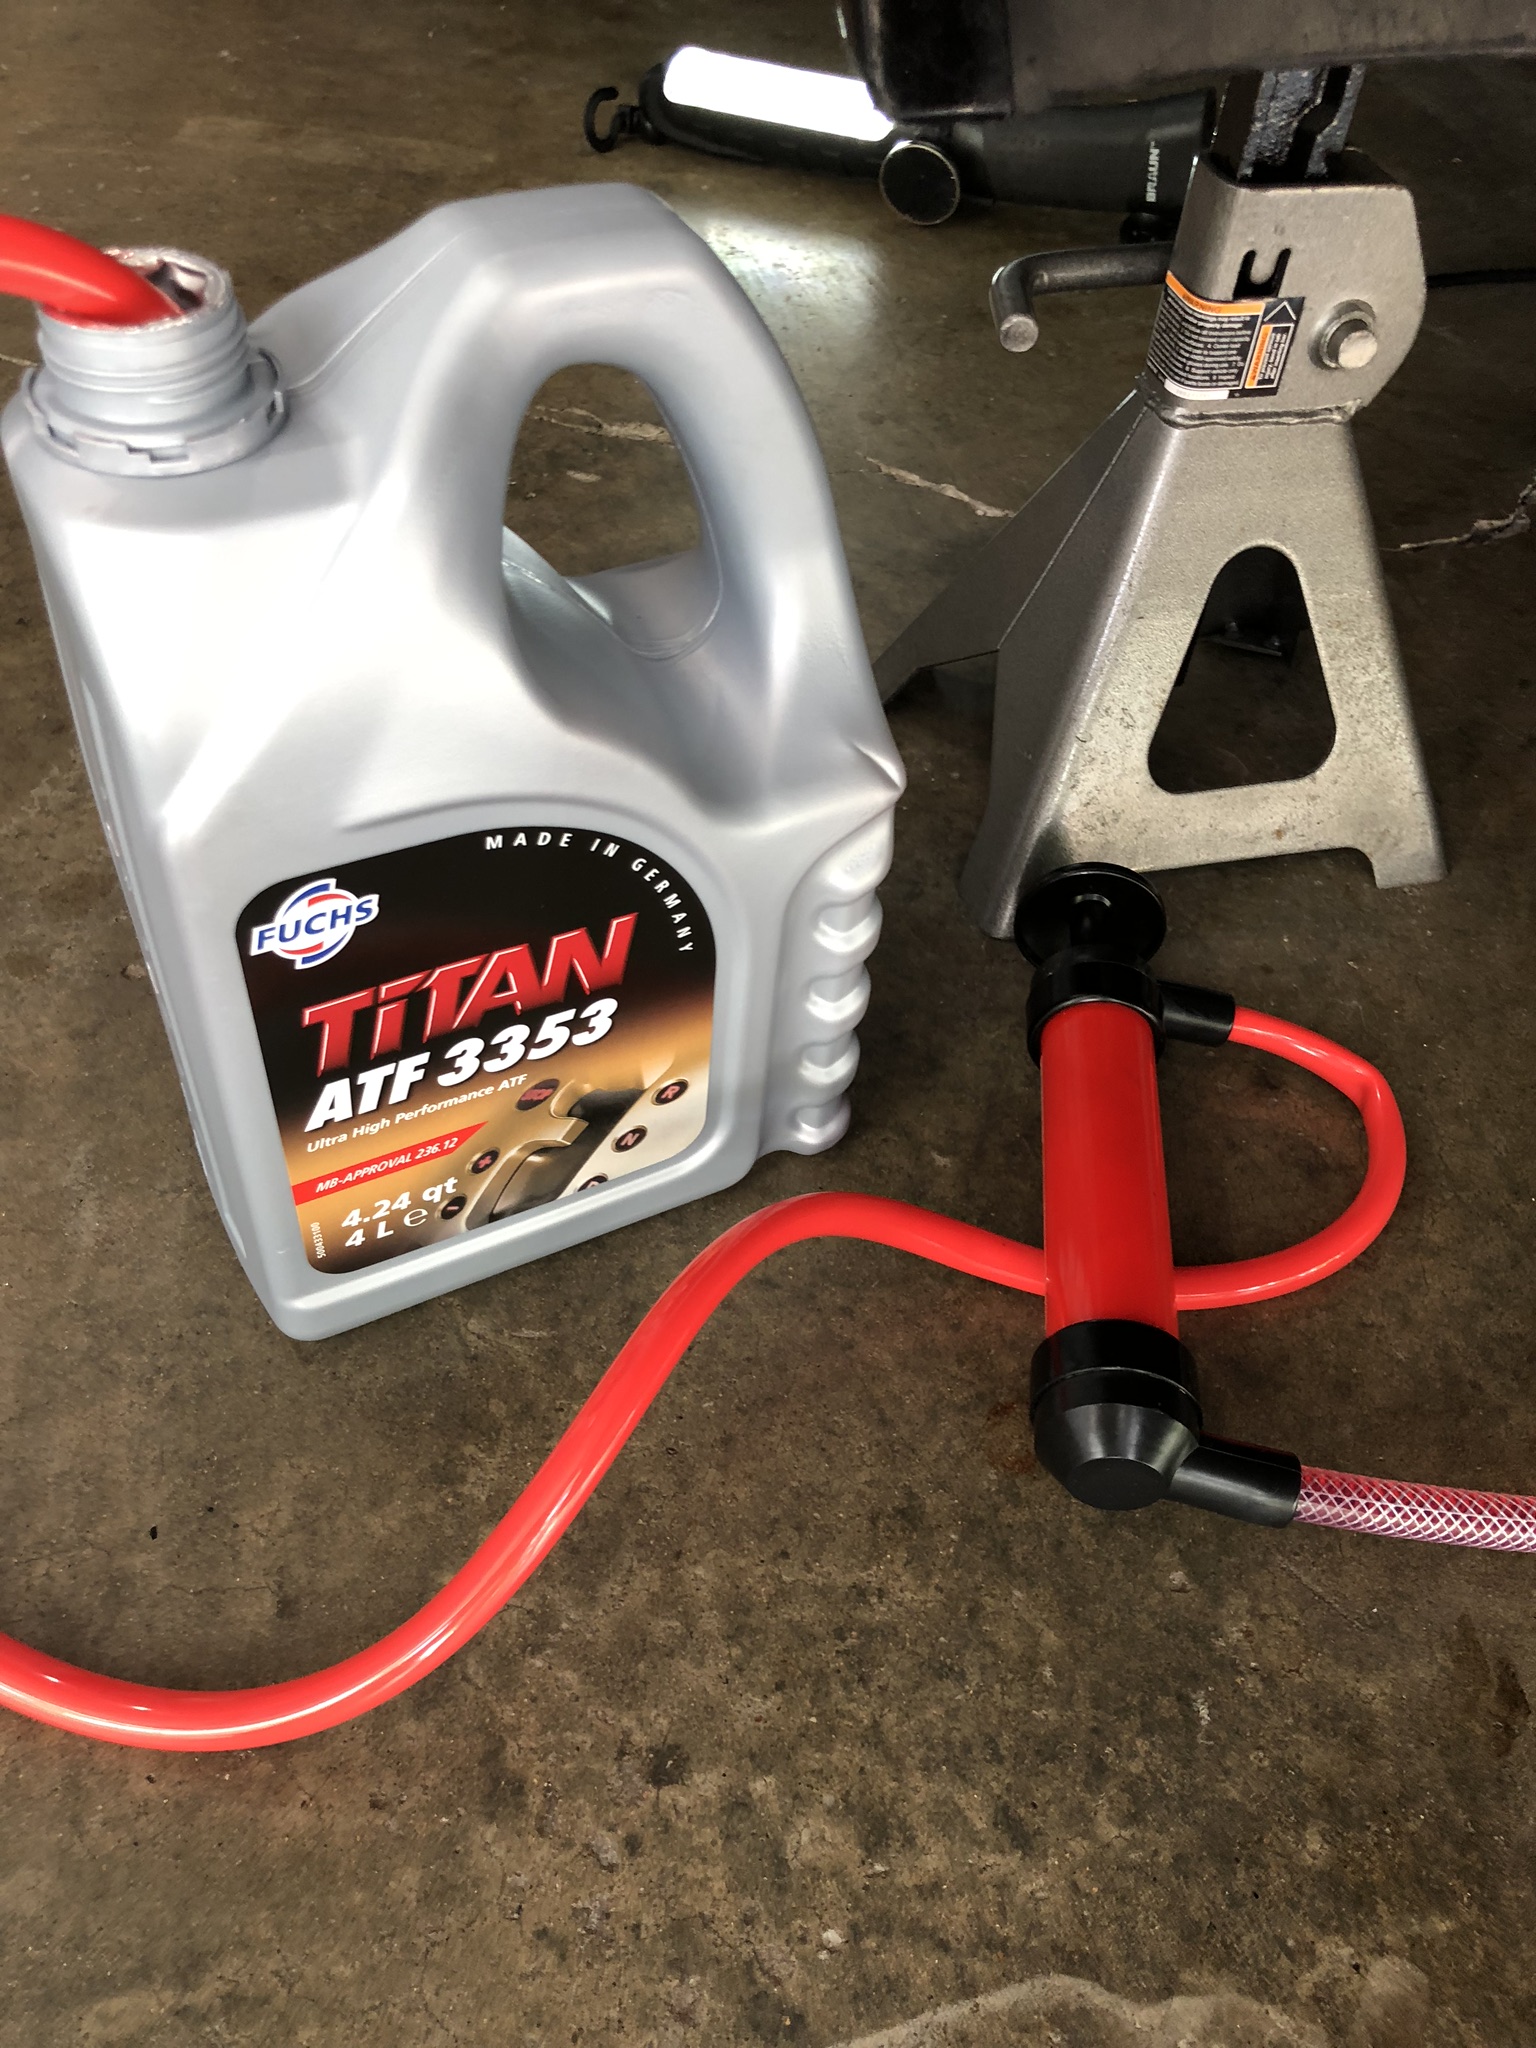
I finished up the trans service today. Definitely moving the cooling lines out of the way makes things a lot easier. I bought the porsche filling tool with the fitting on the end to do it properly instead of filling through the control port. I used about 5-6 L of Fuchs ATF. The nice thing is that the Porsche filling tube fits perfectly into one of the harbor freight fluid pump. Score.
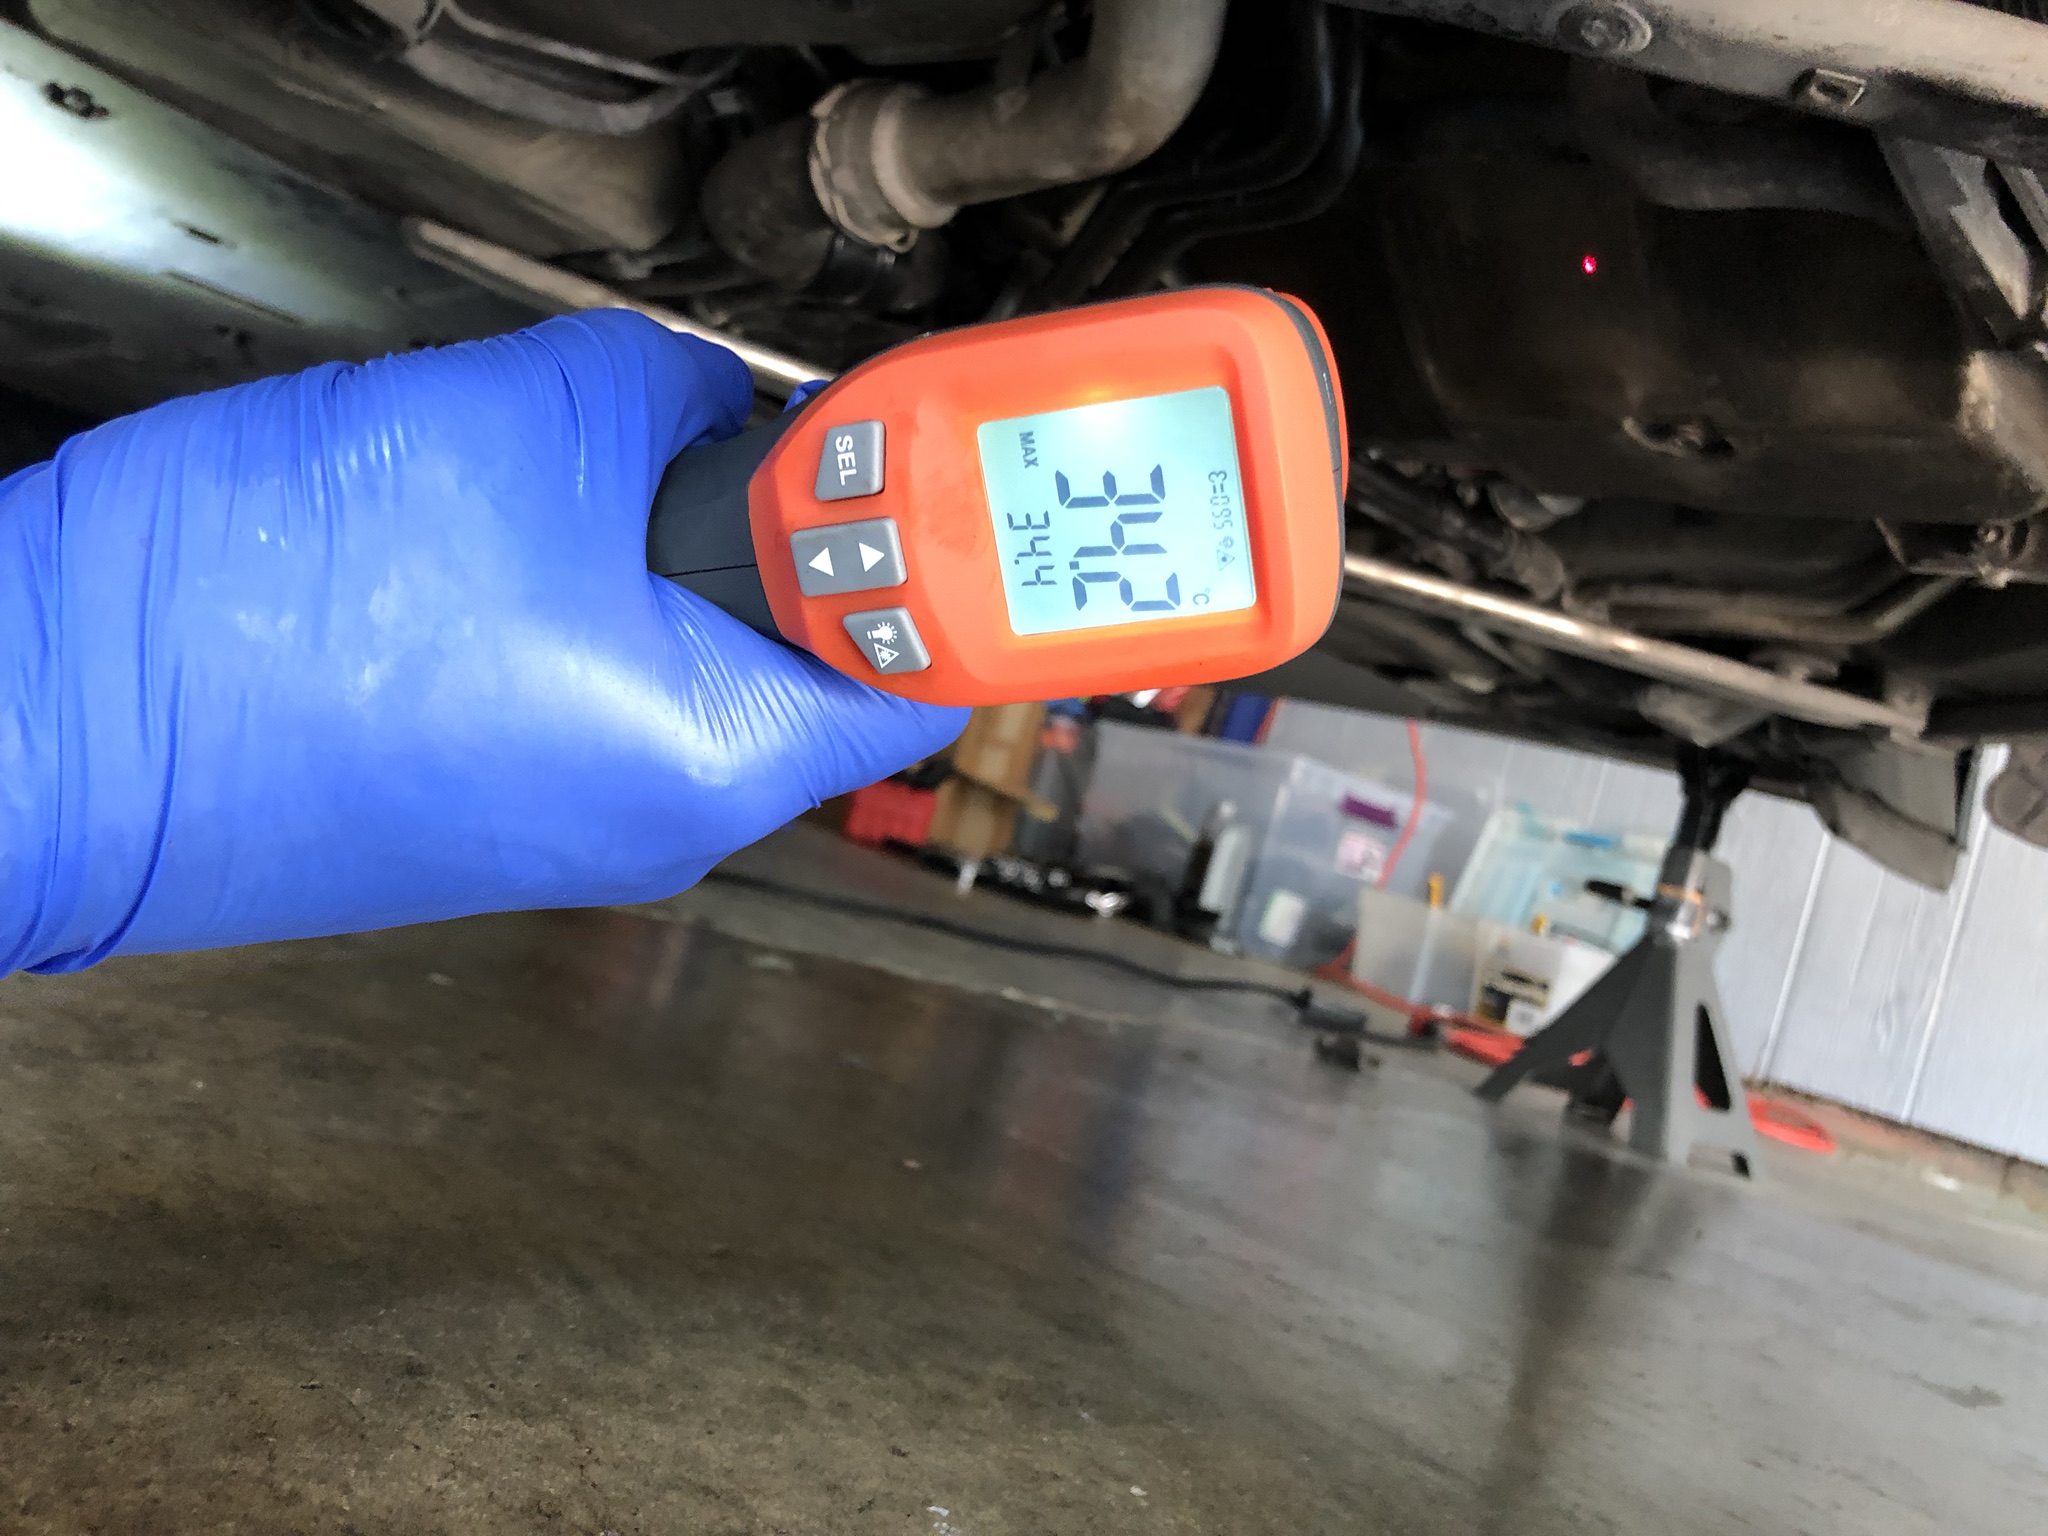
The manual states to fill the trans until fluid starts coming out of the control port. There is a bit of a delay between pumping it in and the fluid coursing through the trans and to the control port. So I kept pumping and pumping and eventually it came out rather quickly from the control port. So I let it drain a bit before starting the car and getting the transmission up to temp. The manual says to leave it in park and then fill it up again until it starts coming out of the control port. After that, you cycle through each of the gears for 10 seconds while pressing the brake. Then making sure the transmission is between 30 and 40 Celsius (I used a laser temp gun), you fill it up one last time until it starts to come out of the control port again. Then just put the plug back on the control port (16 ft lbs) and the nut back on filling fitting (30 ft lbs).
It's definitely a pain doing this on jackstands. Certainly doable, but I think it's probably worth paying someone 600 bucks or so to do it, including all the necessary replacement items and fluids. Anyway, I haven't test driven it yet, but hopefully I didn't screw anything up because it's way too hot now to have to repeat anything. At least it didn't leak when I was testing it on jackstands!
In the mean time I also cleaned the wheels. The OEM pads are absolutely ludicrous with how much dust they produce. I can't wait to get the Hawks ceramic pads installed.


 05-26-2019 | 05:22 PM
#74
Rennlist Member
Funny - - you and I are on a similar path. I put Hawk ceramics on with new Zimmerman rotors last week as the factory dust was obnoxious - - all the suspension components were black with dust.
It's early to judge the dust from the ceramics, but the braking vs stock is pretty good. I did notice a hair less initial bite, which makes sense as the ceramics are FF rated versus the factory Pagids which are GG rated (ie, higher friction) - - but there's still plenty of brakes, even when cold - - just a slightly harder pedal effort.
Does the automatic trans mount have the orange foam spacers on the insides of the bushings like the manual mount does? When I changed my trans mount out I failed to buy new foam pieces. Becuase the ones that were on there were so deteriorated, I didn't bother puting them back as there's no way 1/4" of rotten foam could do much. But now I'm wondering if thats related to my clunk.
Let me know if anyone has any ideas about those orange foam spacers and what they're actually supposed to do.
05-26-2019 | 05:32 PM
#75
Thread Starter
Three Wheelin'
Funny - - you and I are on a similar path. I put Hawk ceramics on with new Zimmerman rotors last week as the factory dust was obnoxious - - all the suspension components were black with dust.
It's early to judge the dust from the ceramics, but the braking vs stock is pretty good. I did notice a hair less initial bite, which makes sense as the ceramics are FF rated versus the factory Pagids which are GG rated (ie, higher friction) - - but there's still plenty of brakes, even when cold - - just a slightly harder pedal effort.
Does the automatic trans mount have the orange foam spacers on the insides of the bushings like the manual mount does? When I changed my trans mount out I failed to buy new foam pieces. Becuase the ones that were on there were so deteriorated, I didn't bother puting them back as there's no way 1/4" of rotten foam could do much. But now I'm wondering if thats related to my clunk.
Let me know if anyone has any ideas about those orange foam spacers and what they're actually supposed to do.
It's early to judge the dust from the ceramics, but the braking vs stock is pretty good. I did notice a hair less initial bite, which makes sense as the ceramics are FF rated versus the factory Pagids which are GG rated (ie, higher friction) - - but there's still plenty of brakes, even when cold - - just a slightly harder pedal effort.
Does the automatic trans mount have the orange foam spacers on the insides of the bushings like the manual mount does? When I changed my trans mount out I failed to buy new foam pieces. Becuase the ones that were on there were so deteriorated, I didn't bother puting them back as there's no way 1/4" of rotten foam could do much. But now I'm wondering if thats related to my clunk.
Let me know if anyone has any ideas about those orange foam spacers and what they're actually supposed to do.

My clunk started after I replaced all the suspension components and the steering rack, so it was there before I did any of the transmission work. The auto also has the orange foam spacers, mine also fell out without getting replaced, and I also agree that they are pretty much useless.
I just got back from a test drive and can safely say that the trans fluid change did the job. The shifts are noticeably smoother and there is no more roughness when shifting from P to R or P to D anymore. I am satisfied. Best part is that there is no puddle under the car
