When you click on links to various merchants on this site and make a purchase, this can result in this site earning a commission. Affiliate programs and affiliations include, but are not limited to, the eBay Partner Network.
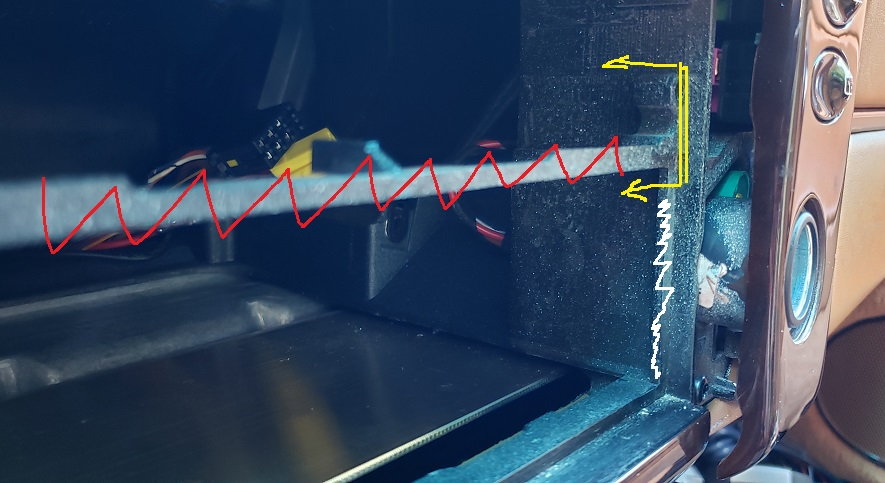
Crutchfield tech support was awesome in helping me verify correct pin mapping, particularly power and ground, as well as mic, amp feeds, GPS, backup cam, antenna with adapter, etc. Time to quit futzing around with physical fit and power up the system. In the meantime, gradually undoing the splicing of previous install for the single-DIN pre-bluetooth Eclipse deck I pulled out. Looking at the upper two DIN slots, I think I'll be hacking out the horizontal cross bar (red), the mid-cavity ears on both side (yellow), and possibly the lip on each side of the opening (white). I'm inclined to hack/saw/melt/grind in place with multiple vacuums going. Bad idea? The sharper my blade(s), the fewer bits and dust there should be. Welcome any suggestions. For backup cam, are there favorite routes for the signal wire and ground? Not sure what I'm going to do about the parking brake requirement (i.e., adhere or thwart).
EDIT: I also found the Metra cubby + AC trim piece to feel cheap, and not fit around the AC module as well as the factory trim. I will try cutting the Metra cubby free from the AC trim, and if it looks okay, go with that for now.
i just finished this project on my '01 as well.. i have the same setup as you do... premium sound with cd changer...
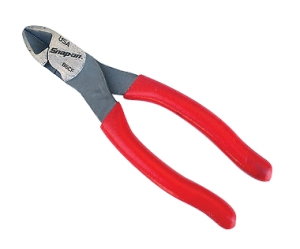
you should just remove the cage and do the cutting outside the car... yes you need to remove that horizontal bar and the screw holes in the middle and the top corners as well. do you have a dremel? makes it go quick... i have a diagram if you need i can upload...
Thanks @kamlung . Frame removed, and successfully dremmel'd to fit Kenwood. Now apparently ready physically for head unit to go in. But still plenty of peripheral issues to complete first: thwart parking switch logic, install backup camera, mic, GPS puck, decide on USB port(s) location (Kenwood has two USB cables).
Not a hard job, but plenty of hours to do it right.
Backup cam nearly done. Not sure I would undertake that journey again. Got my PhD in Porsche 996 interior layout, fastening, sound deadening, etc. Closing up everything hopefully today. If anyone wants help with custom splash screen for Kenwood, it's not straightforward how to get there. PM me for details.
Fist of all, THANK YOU! I've been researching all day for exactly this information. I can finally see my project coming to an end because of your write up and I don't have to spend any more time scratching my head about why the damn head unit won't turn on. Thank you, thank you.
One thing I want to be certain about is how you wired up MOST optical fiber decoder. Did you use the same accessory line as the head unit? Did you use the same constant line as the head unit? Did you add a fuse to either/both of those lines?
This is one of those how-to posts that, despite being a few years old, deserves perpetual recognition.. Thank you for taking the time to chronicle your installation!
Question for those who have done this on cars with factory PCM... Did you have to modify the factory double-din trim/cubby to fit the Metra double-din frame in, as you would with the cubby housing a CDR23 unit? Although my car has the CDR23, I was able to source a PCM housing off an 04 Turbo so I am wondering if I can spare my factory HVAC/CDR23 enclosure...in case I ever want to sell my car and include all the factory parts.
Side question... Was there ever a MOST decoder with 5 channel control (fader, etc...) capability? It appears even the very expensive ones lose fader control.
I�m glad my post has been helpful! I�m working off memory here, but yes you do have to cut into the factory radio frame. You have to remove some material at the bottom edges to allow the metra frame to slide in, and I believe there is a cross-brace at the back that needs to be cut out entirely. The Metra instructions are spot-on in telling you where to cut. I think you can still buy the frame new, failing that since the console is shared with boxster there should be plenty available if you ever want to go back to stock. As to the MOST adapter, I�ve never seen one with 4 channels. Good luck, and I�d suggest to plan in advance for dealing with alternator whine. It will save your taking everything apart again if/when you encounter it. There were some follow-up posts that indicated some may be better for noise than the Seicane unit I used.
I’m glad my post has been helpful! I’m working off memory here, but yes you do have to cut into the factory radio frame. You have to remove some material at the bottom edges to allow the metra frame to slide in, and I believe there is a cross-brace at the back that needs to be cut out entirely. The Metra instructions are spot-on in telling you where to cut. I think you can still buy the frame new, failing that since the console is shared with boxster there should be plenty available if you ever want to go back to stock. As to the MOST adapter, I’ve never seen one with 4 channels. Good luck, and I’d suggest to plan in advance for dealing with alternator whine. It will save your taking everything apart again if/when you encounter it. There were some follow-up posts that indicated some may be better for noise than the Seicane unit I used.
Thank you for your continued advice throughout your post! By the way, I realized how bad alternator whine affects non-filtered electronics in our cars with my current setup.. I'm using one of those cheap 12V bluetooth FM modulators plugged into the non-switched cigarette outlet and...oh boy...does it whine! Good call on sourcing the noise filter.
I did order the Metra kit from Amazon (get it early next week). When it arrives, I'm going to "test" it out with the PCM enclosure, which is not installed (I still have the CDR23 with the HVAC controls above it in my car). The PCM enclosure doesn't have all of those protruding things on the inside, so I'm hoping the Metra frame slides right in.. It'll be a good test, but if not, no big deal... I'll modify that one and keep my stock "split" frame for if I ever want to put everything back to stock.
I don't have an ETA for my HUR because, frankly, I've been spending way too much money on the car and I think I need to take a break before a divorce lawyer comes knocking at my door... But, I will at least report back on how the Metra kit fits into the PCM frame and what, if anything, I had to modify that differs from the HVAC/CDR23 frame. EDIT: I have been eyeing the Sony units because of the volume **** and matte black finish, though!
 04-30-2020, 04:50 PM