New Project: Engine drop to do coolant fittings...
 11-09-2013, 07:19 PM
#31
Racer
Thread Starter
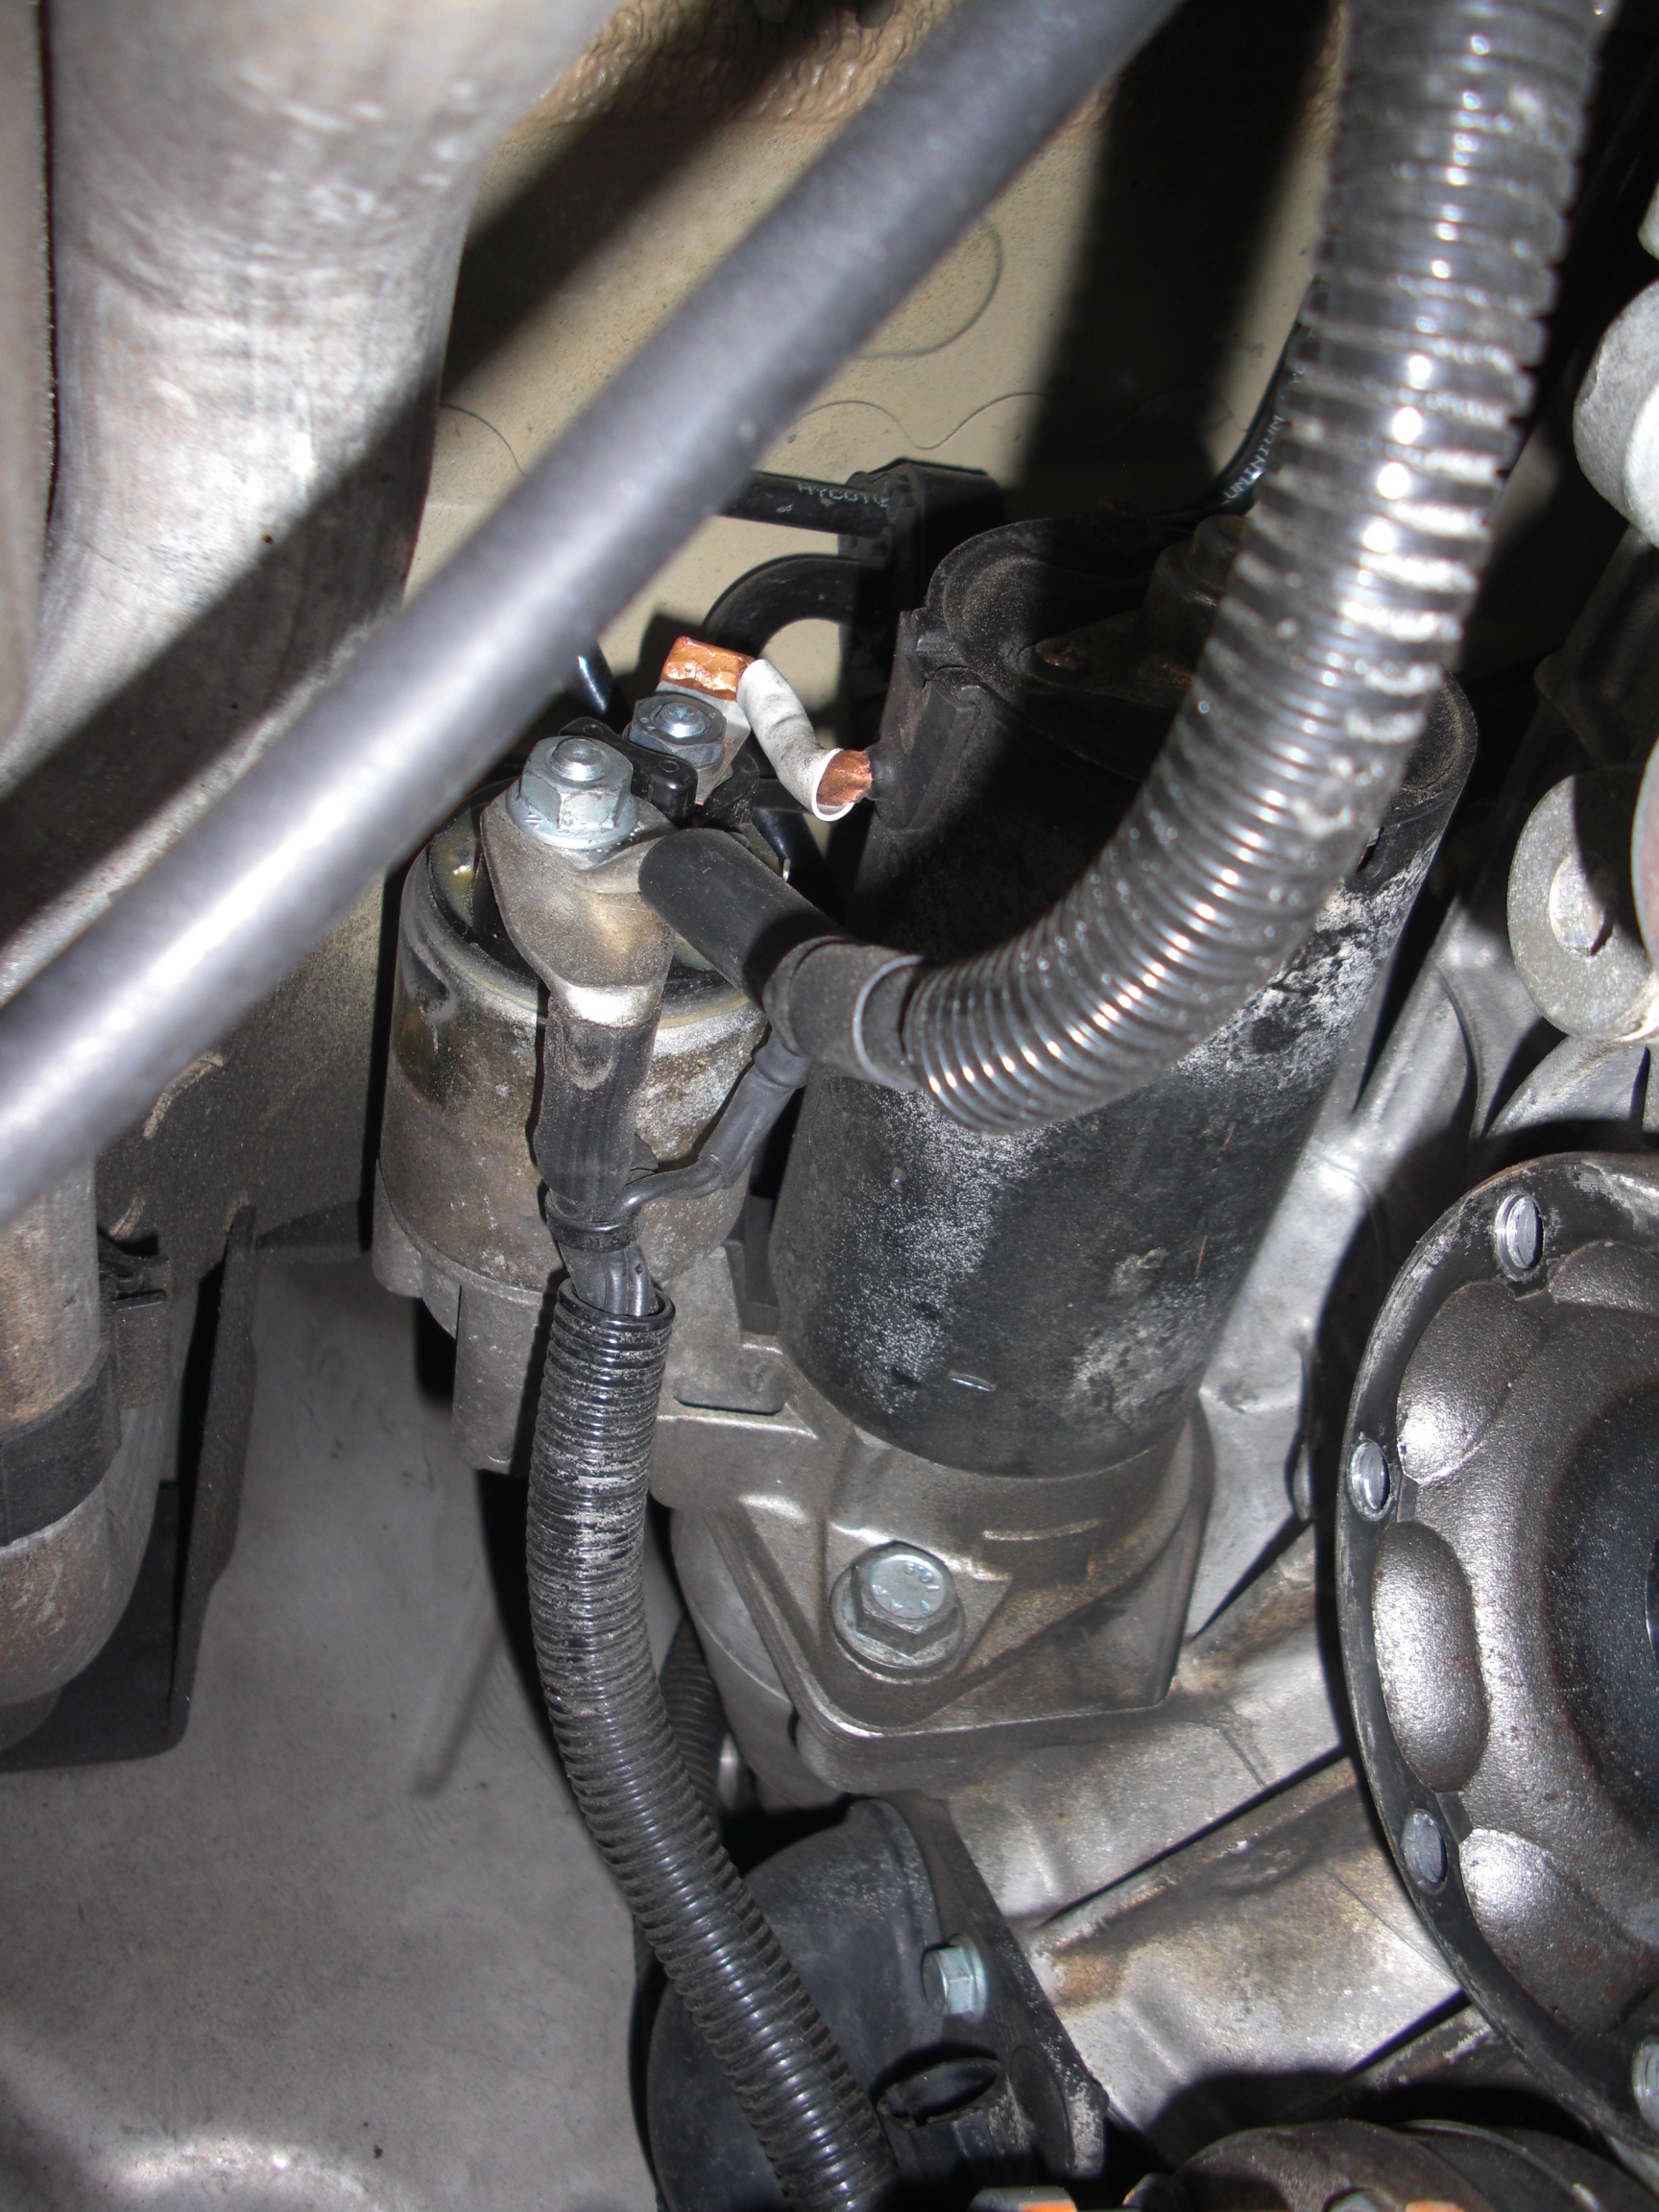
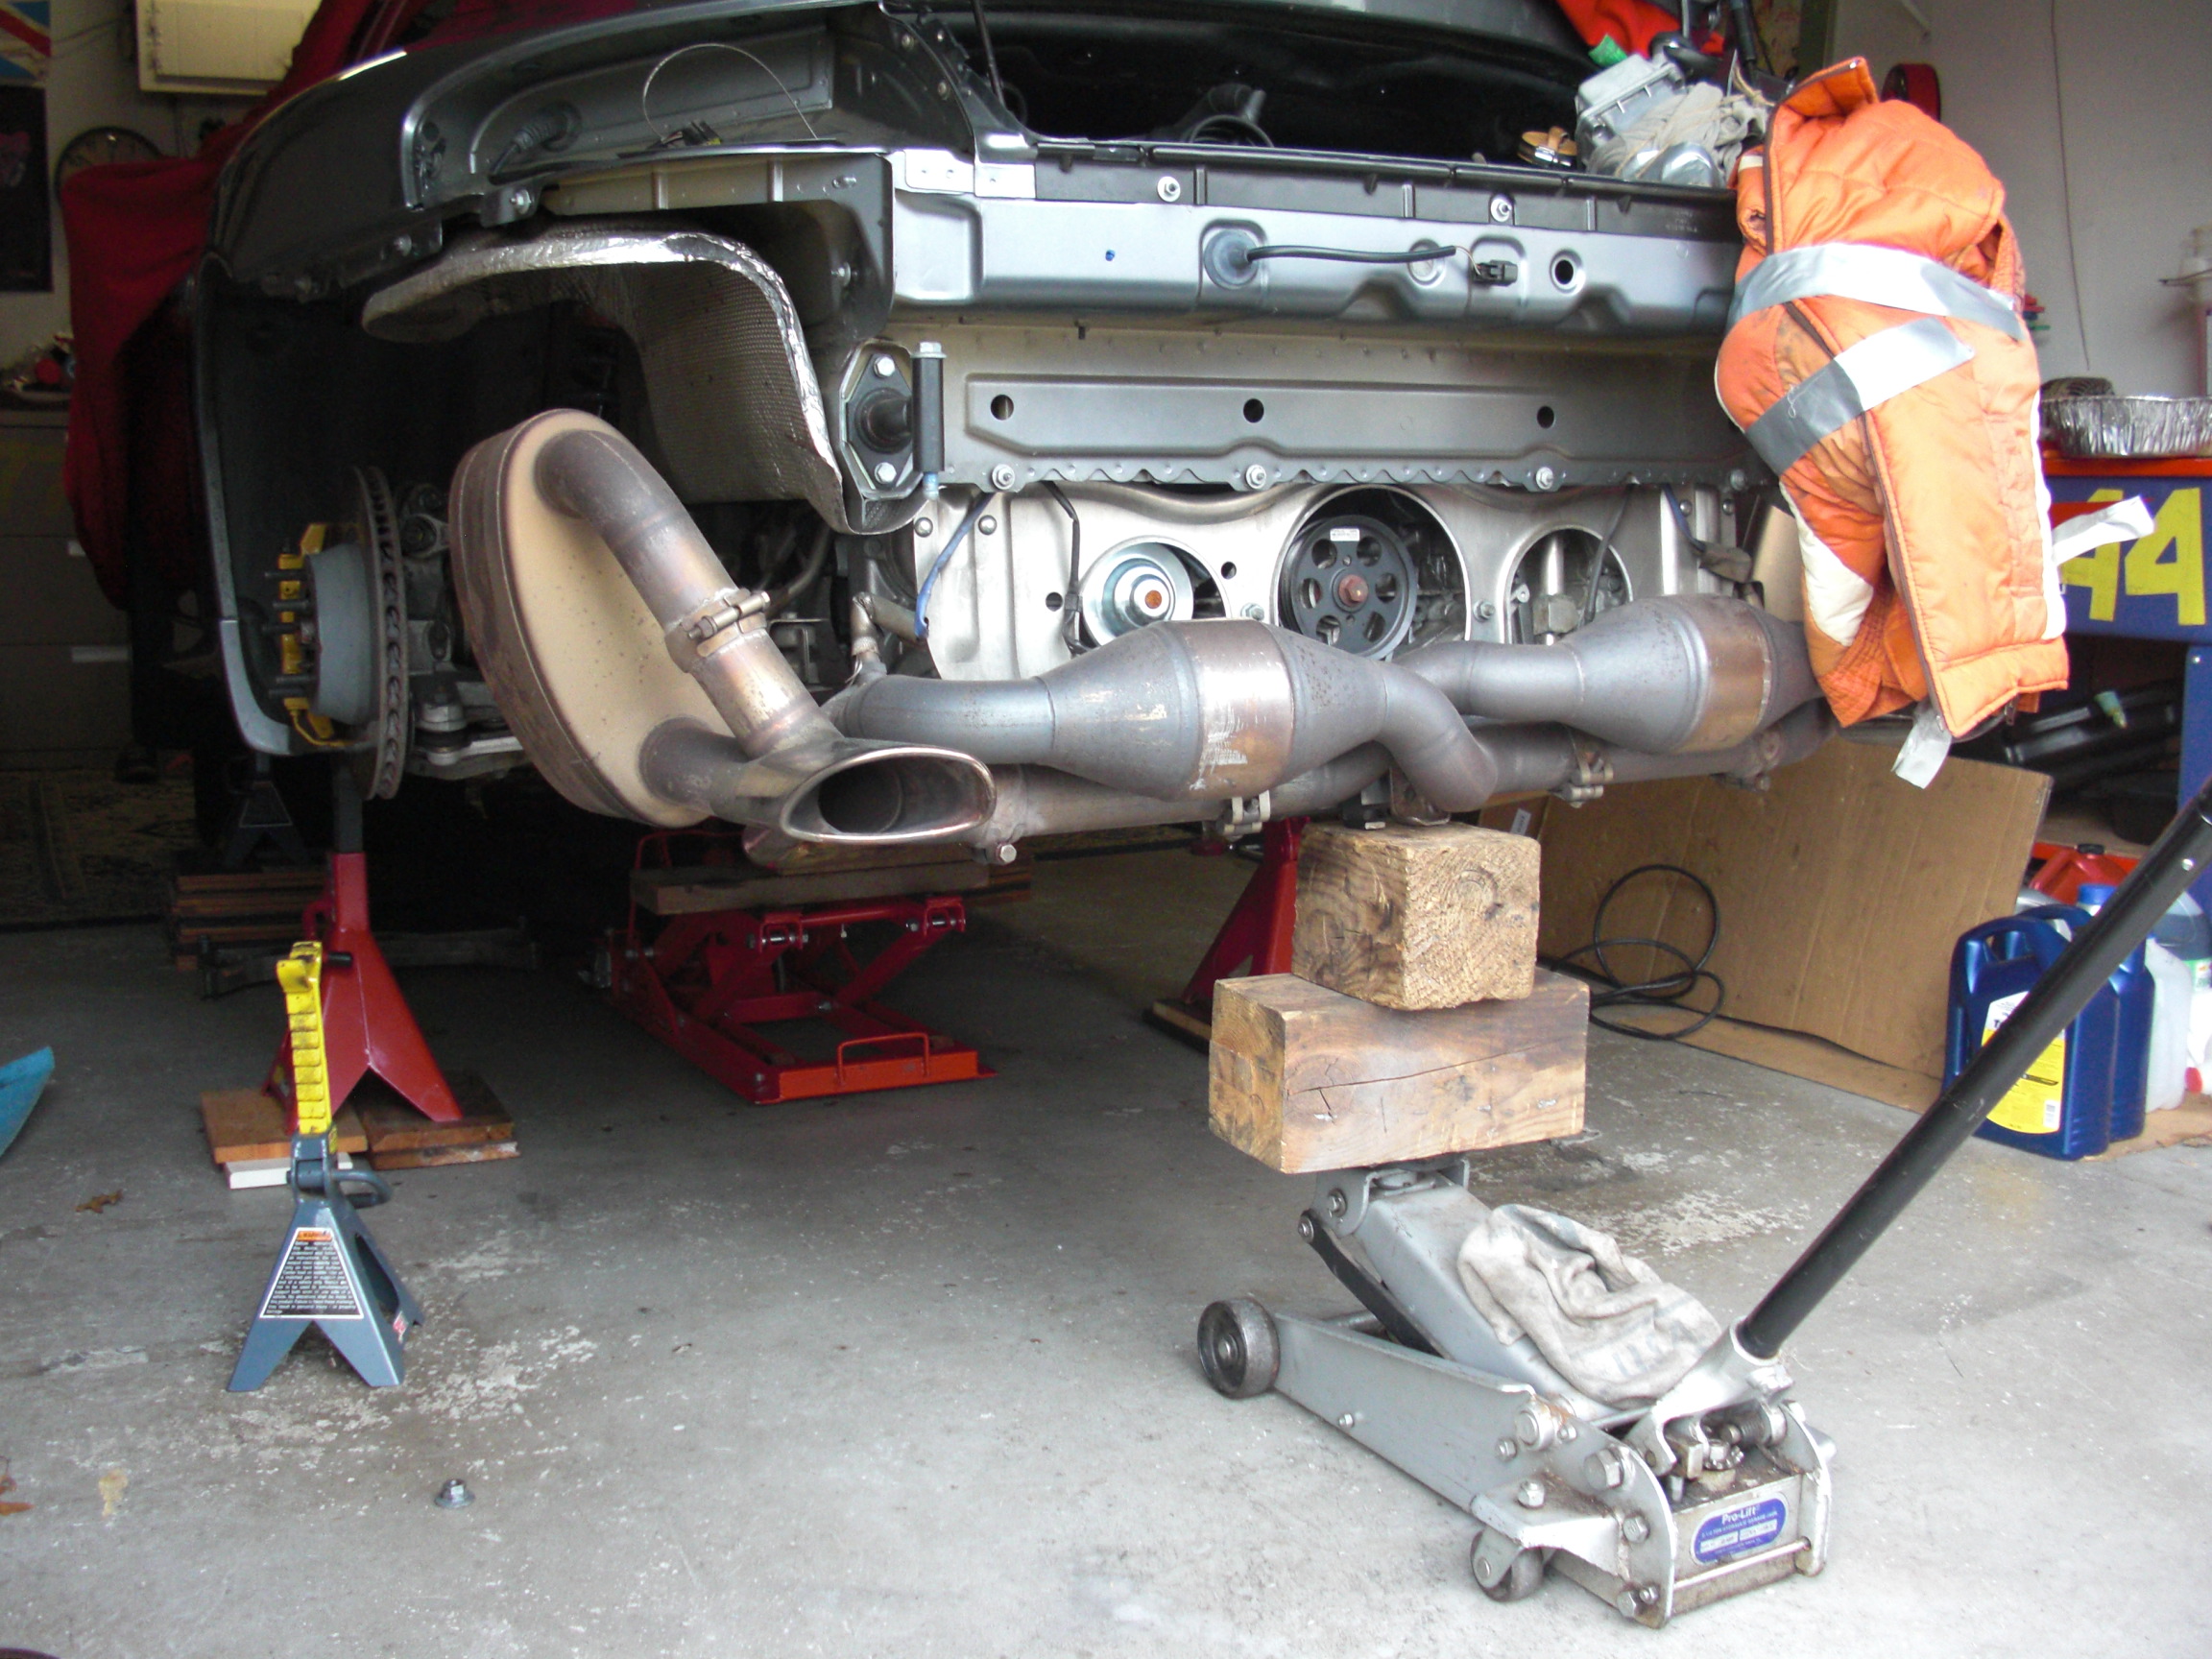
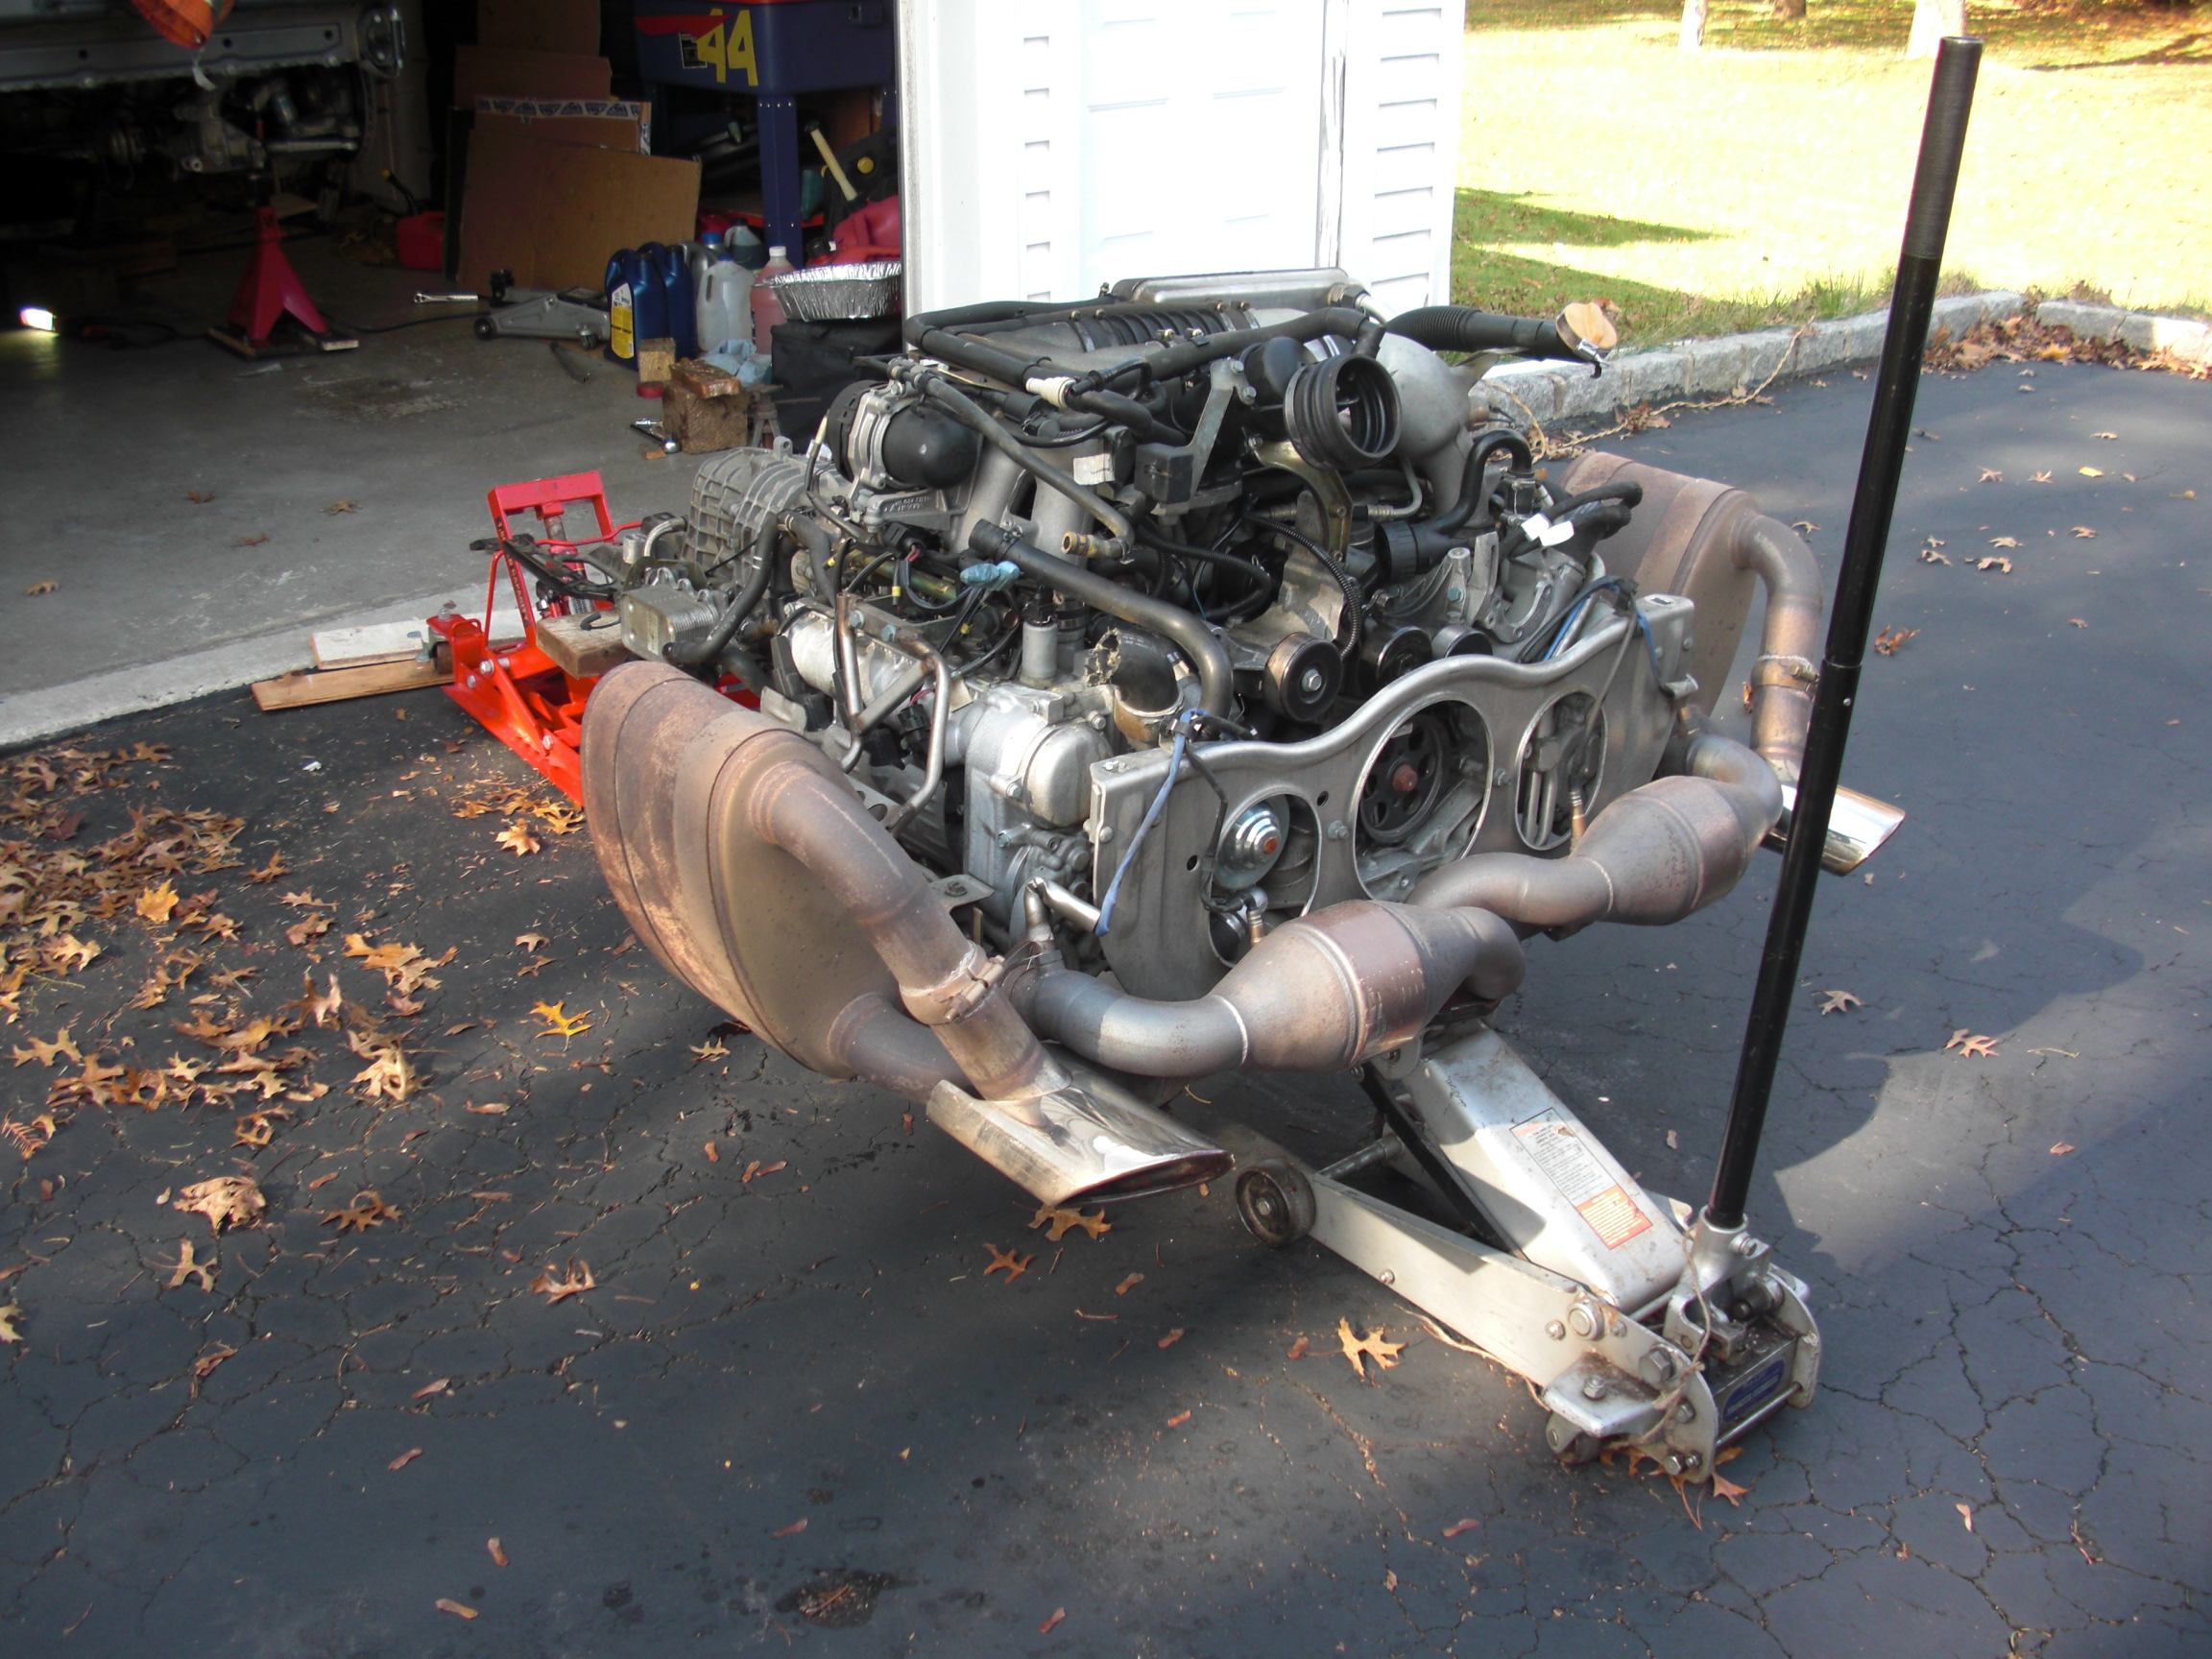
Engine is out! Here are some observations... As previously stated, the starter is best removed after lowering the engine a few inches. Make sure you connect to the right upper bolt. There is a stud adjacent to the starter bolt that holds the trans in place.
The clutch slave can also be accessed after dropping the engine a few inches. Driver side bolt is easily accessed between suspension arm. Top bolt easier to get from the other side (passenger) and going over the trans (hug it). I tied slave out of the way...
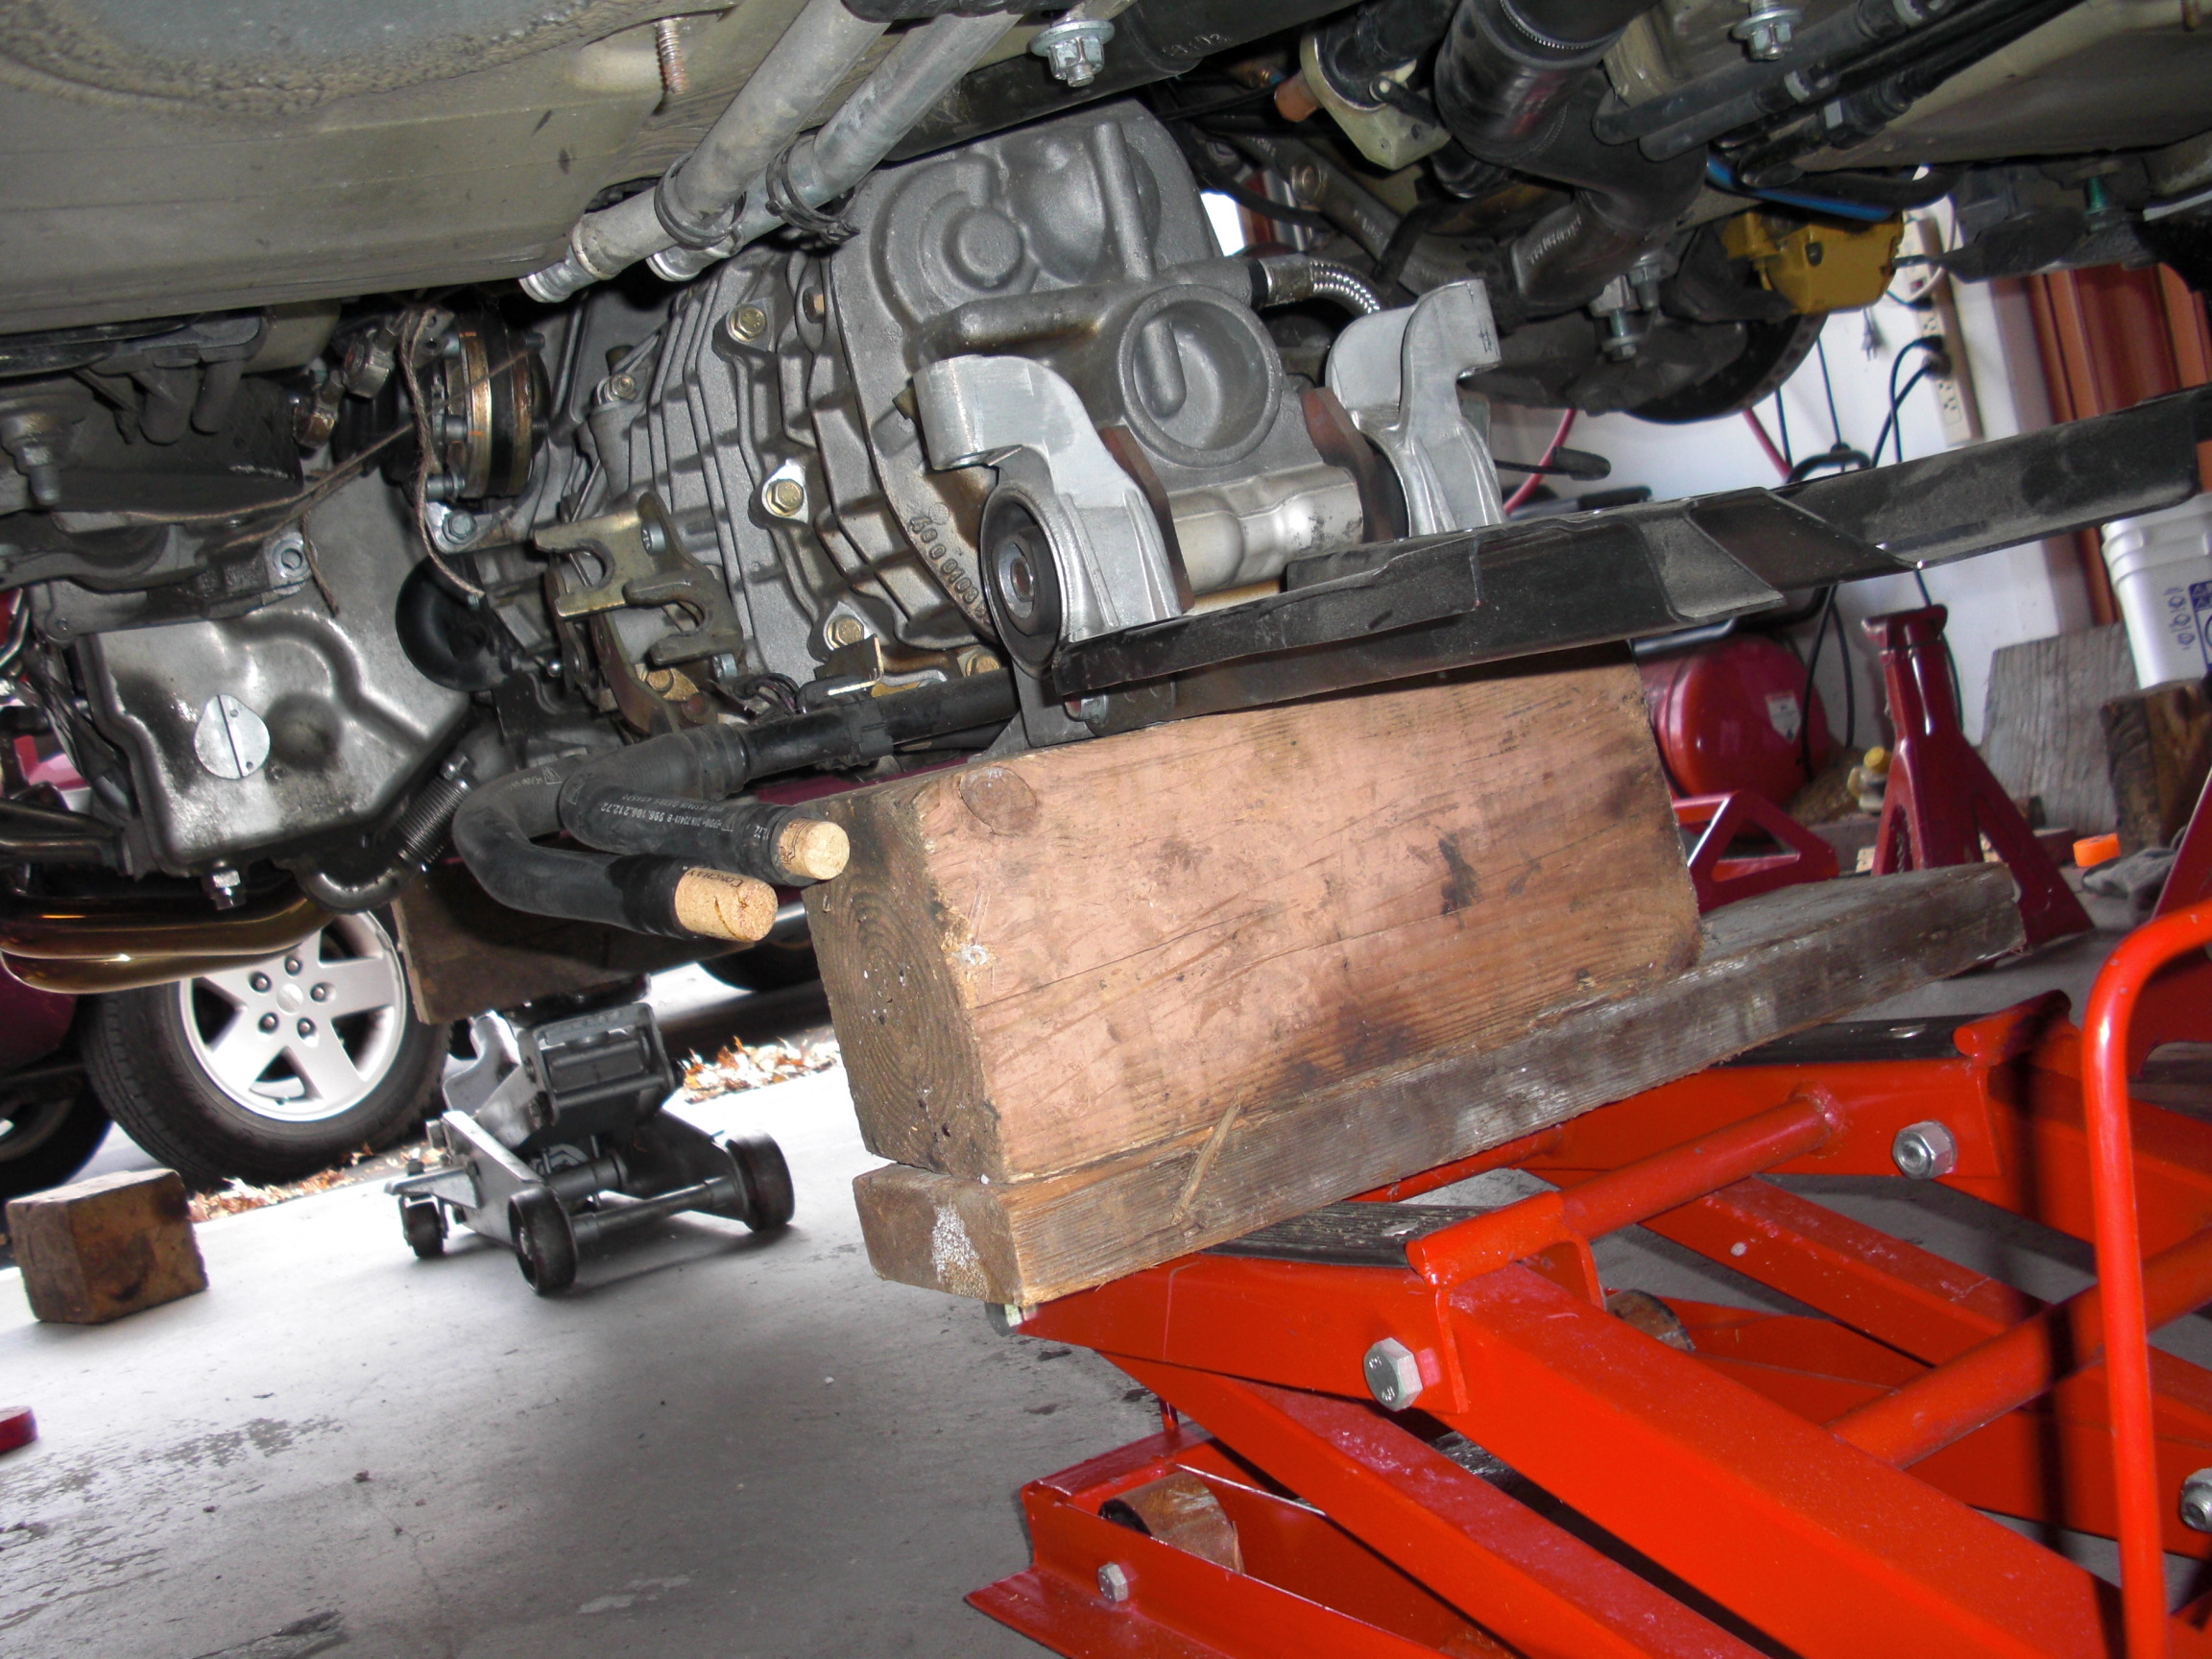
I had an issue with the 2 hoses that run over the driveshaft on the drivers side. I got them hooked on the driveshaft. Had to lift the engine back up and free them. Make sure that they get attached back to the bracket in the trans. On my car, the plastic piece was broken. I had them tie wrapped. There were some posts where the hoses rubbed the driveshaft and caused a leak.
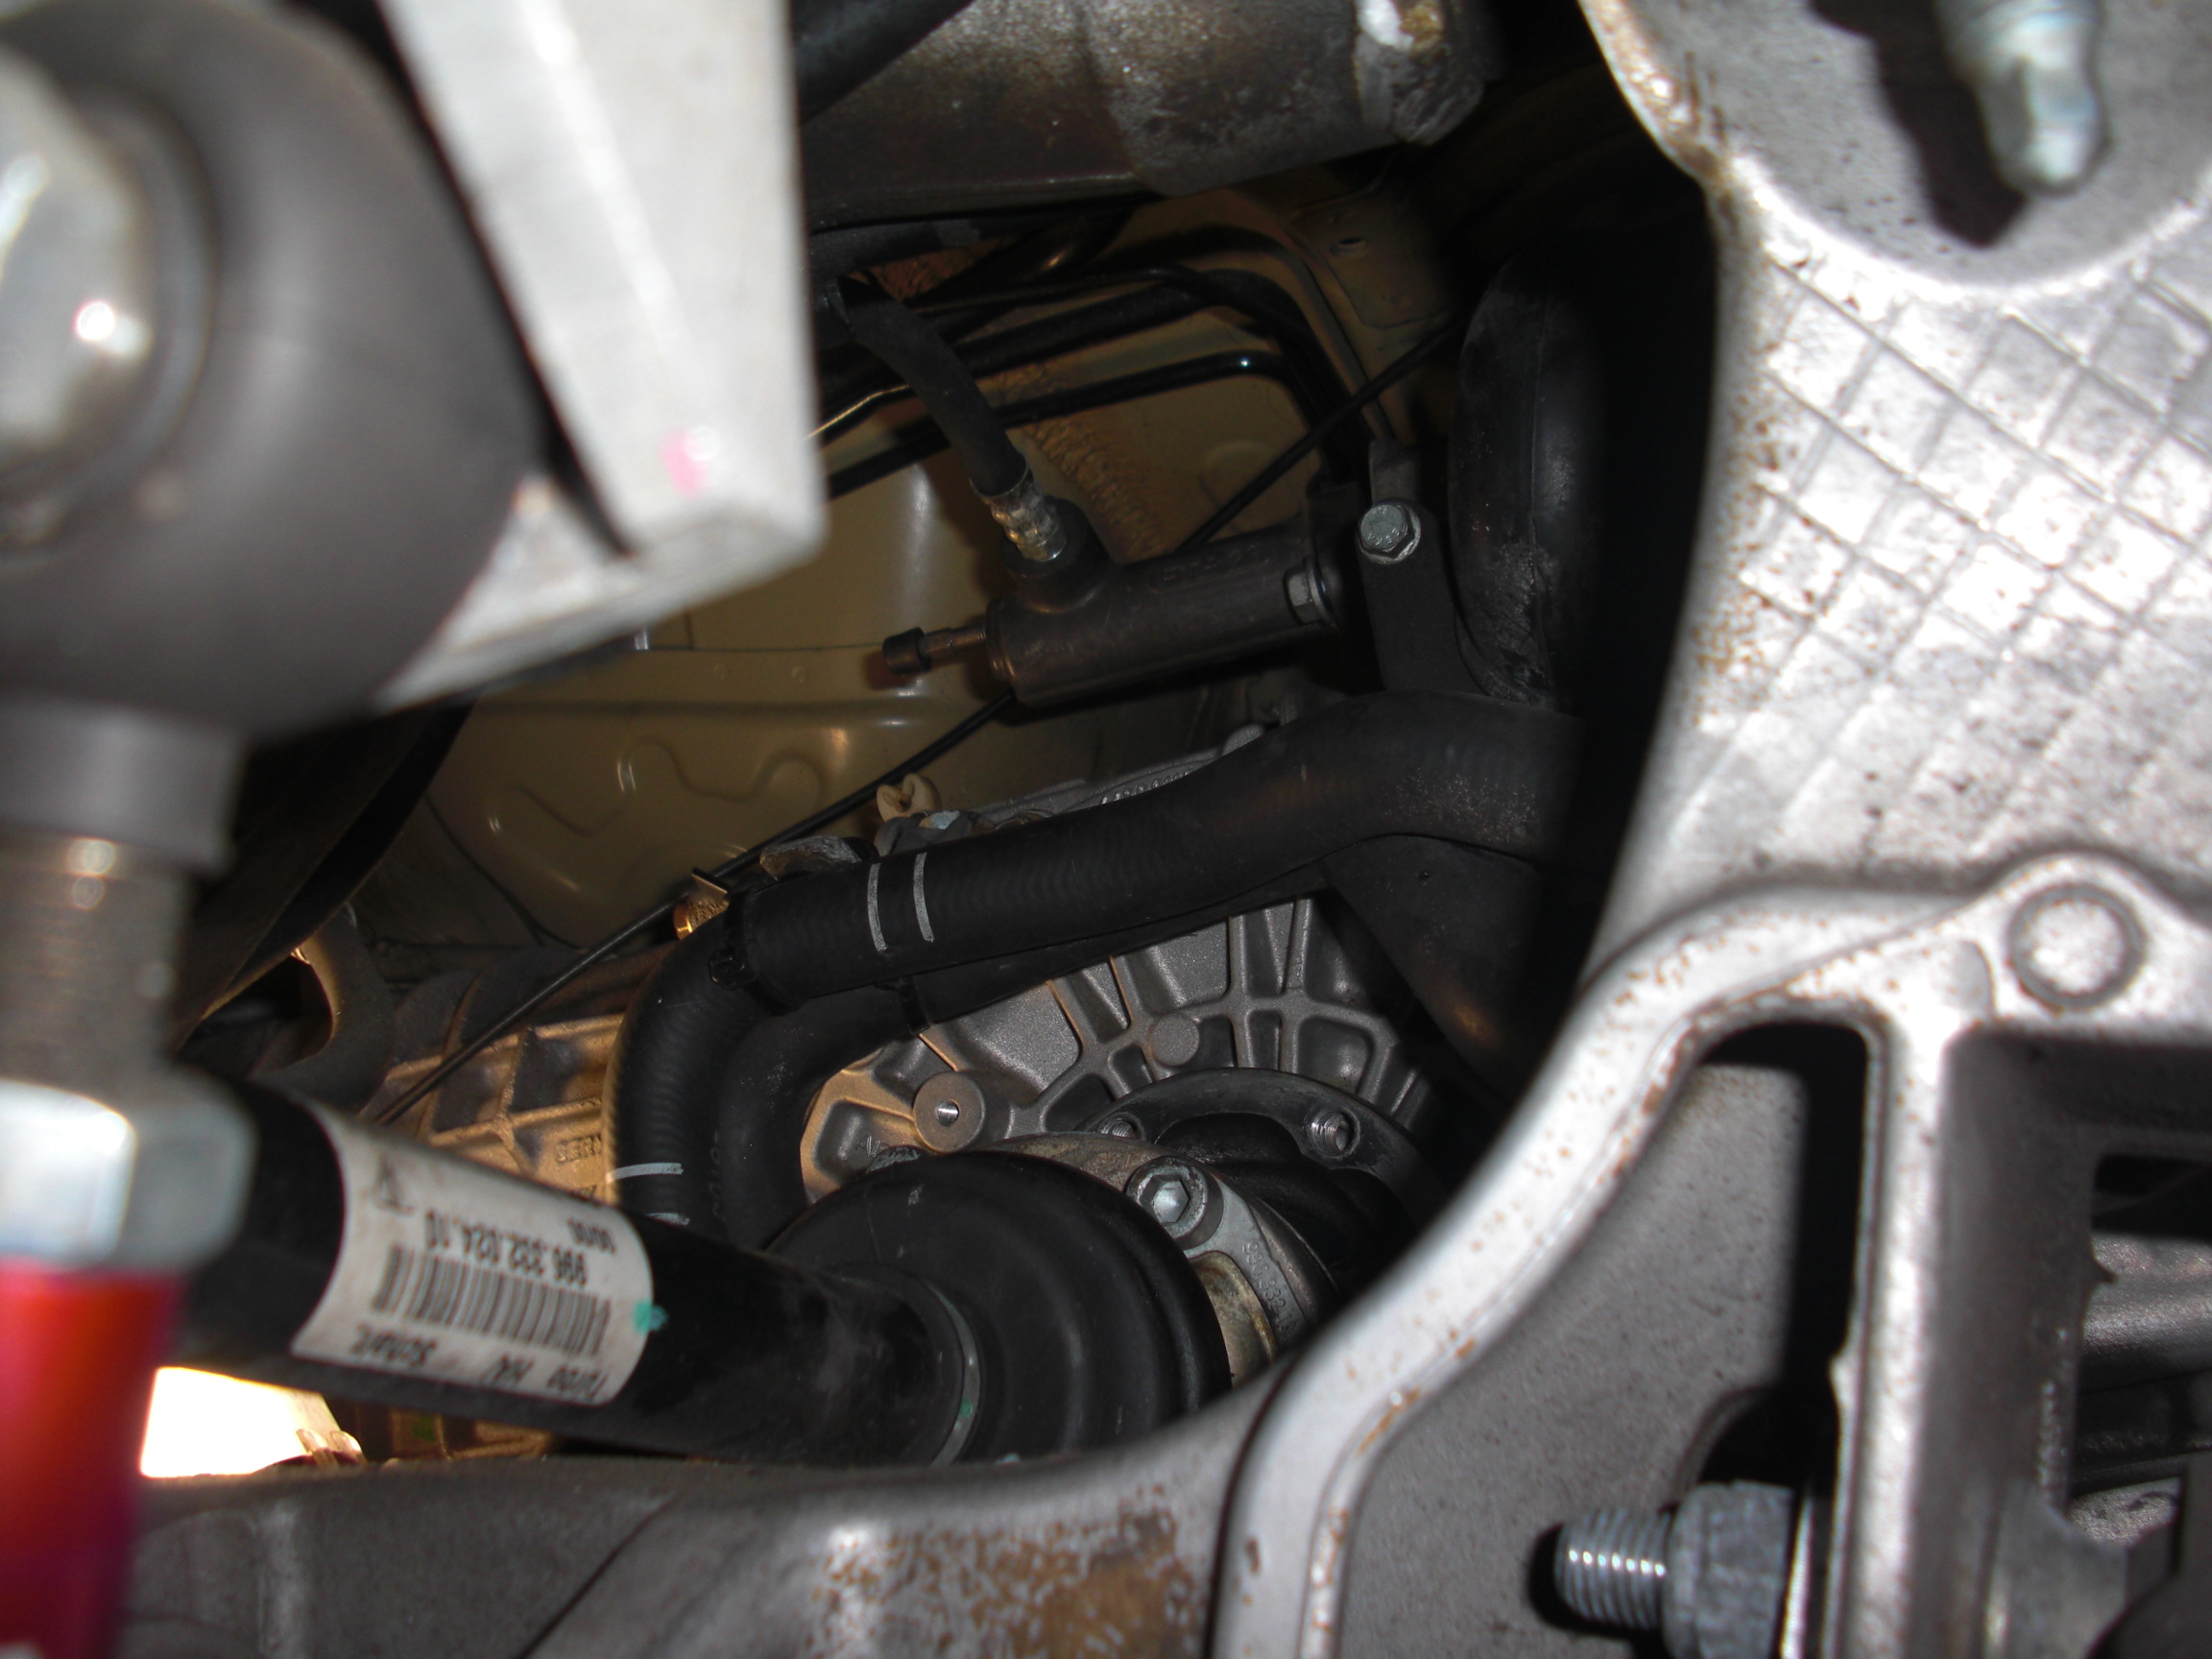
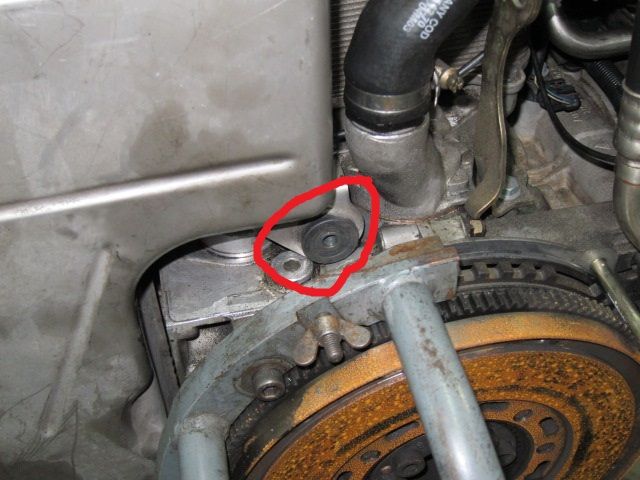
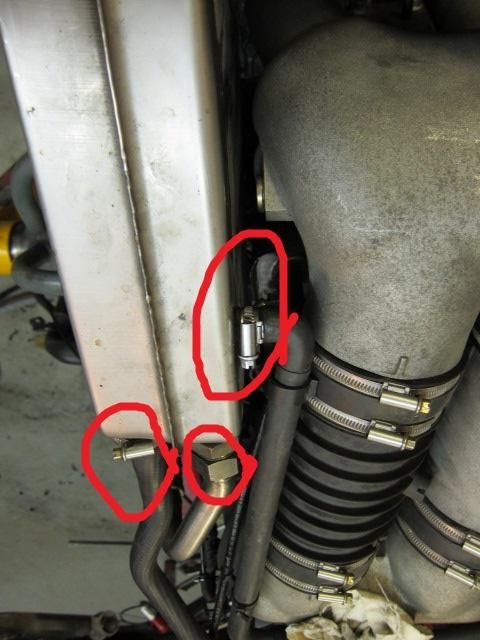
I was able to disconnect the valve that allows coolant to flow to the trans cooler by removing the tiny screw that holds it to the bracket. Then undo hose clamp and vacuum connector and slide towards the front of car. I could not undo the spring clamp towards the front of that hose due to the angle. Removing the valve was cake. Looks like it is leaking also...
There is one hose (brake booster) I missed while lowering the engine. It faces you on the Driver side. Has a C clip, undo it and disconnect hose. Also, there is a small hose to the coolant reservoir that needs to be disconnected. Main coolant hoses were still a pain even after engine was out!. Holding clips are different sizes. Don't mix them. Mine are back in the engine.
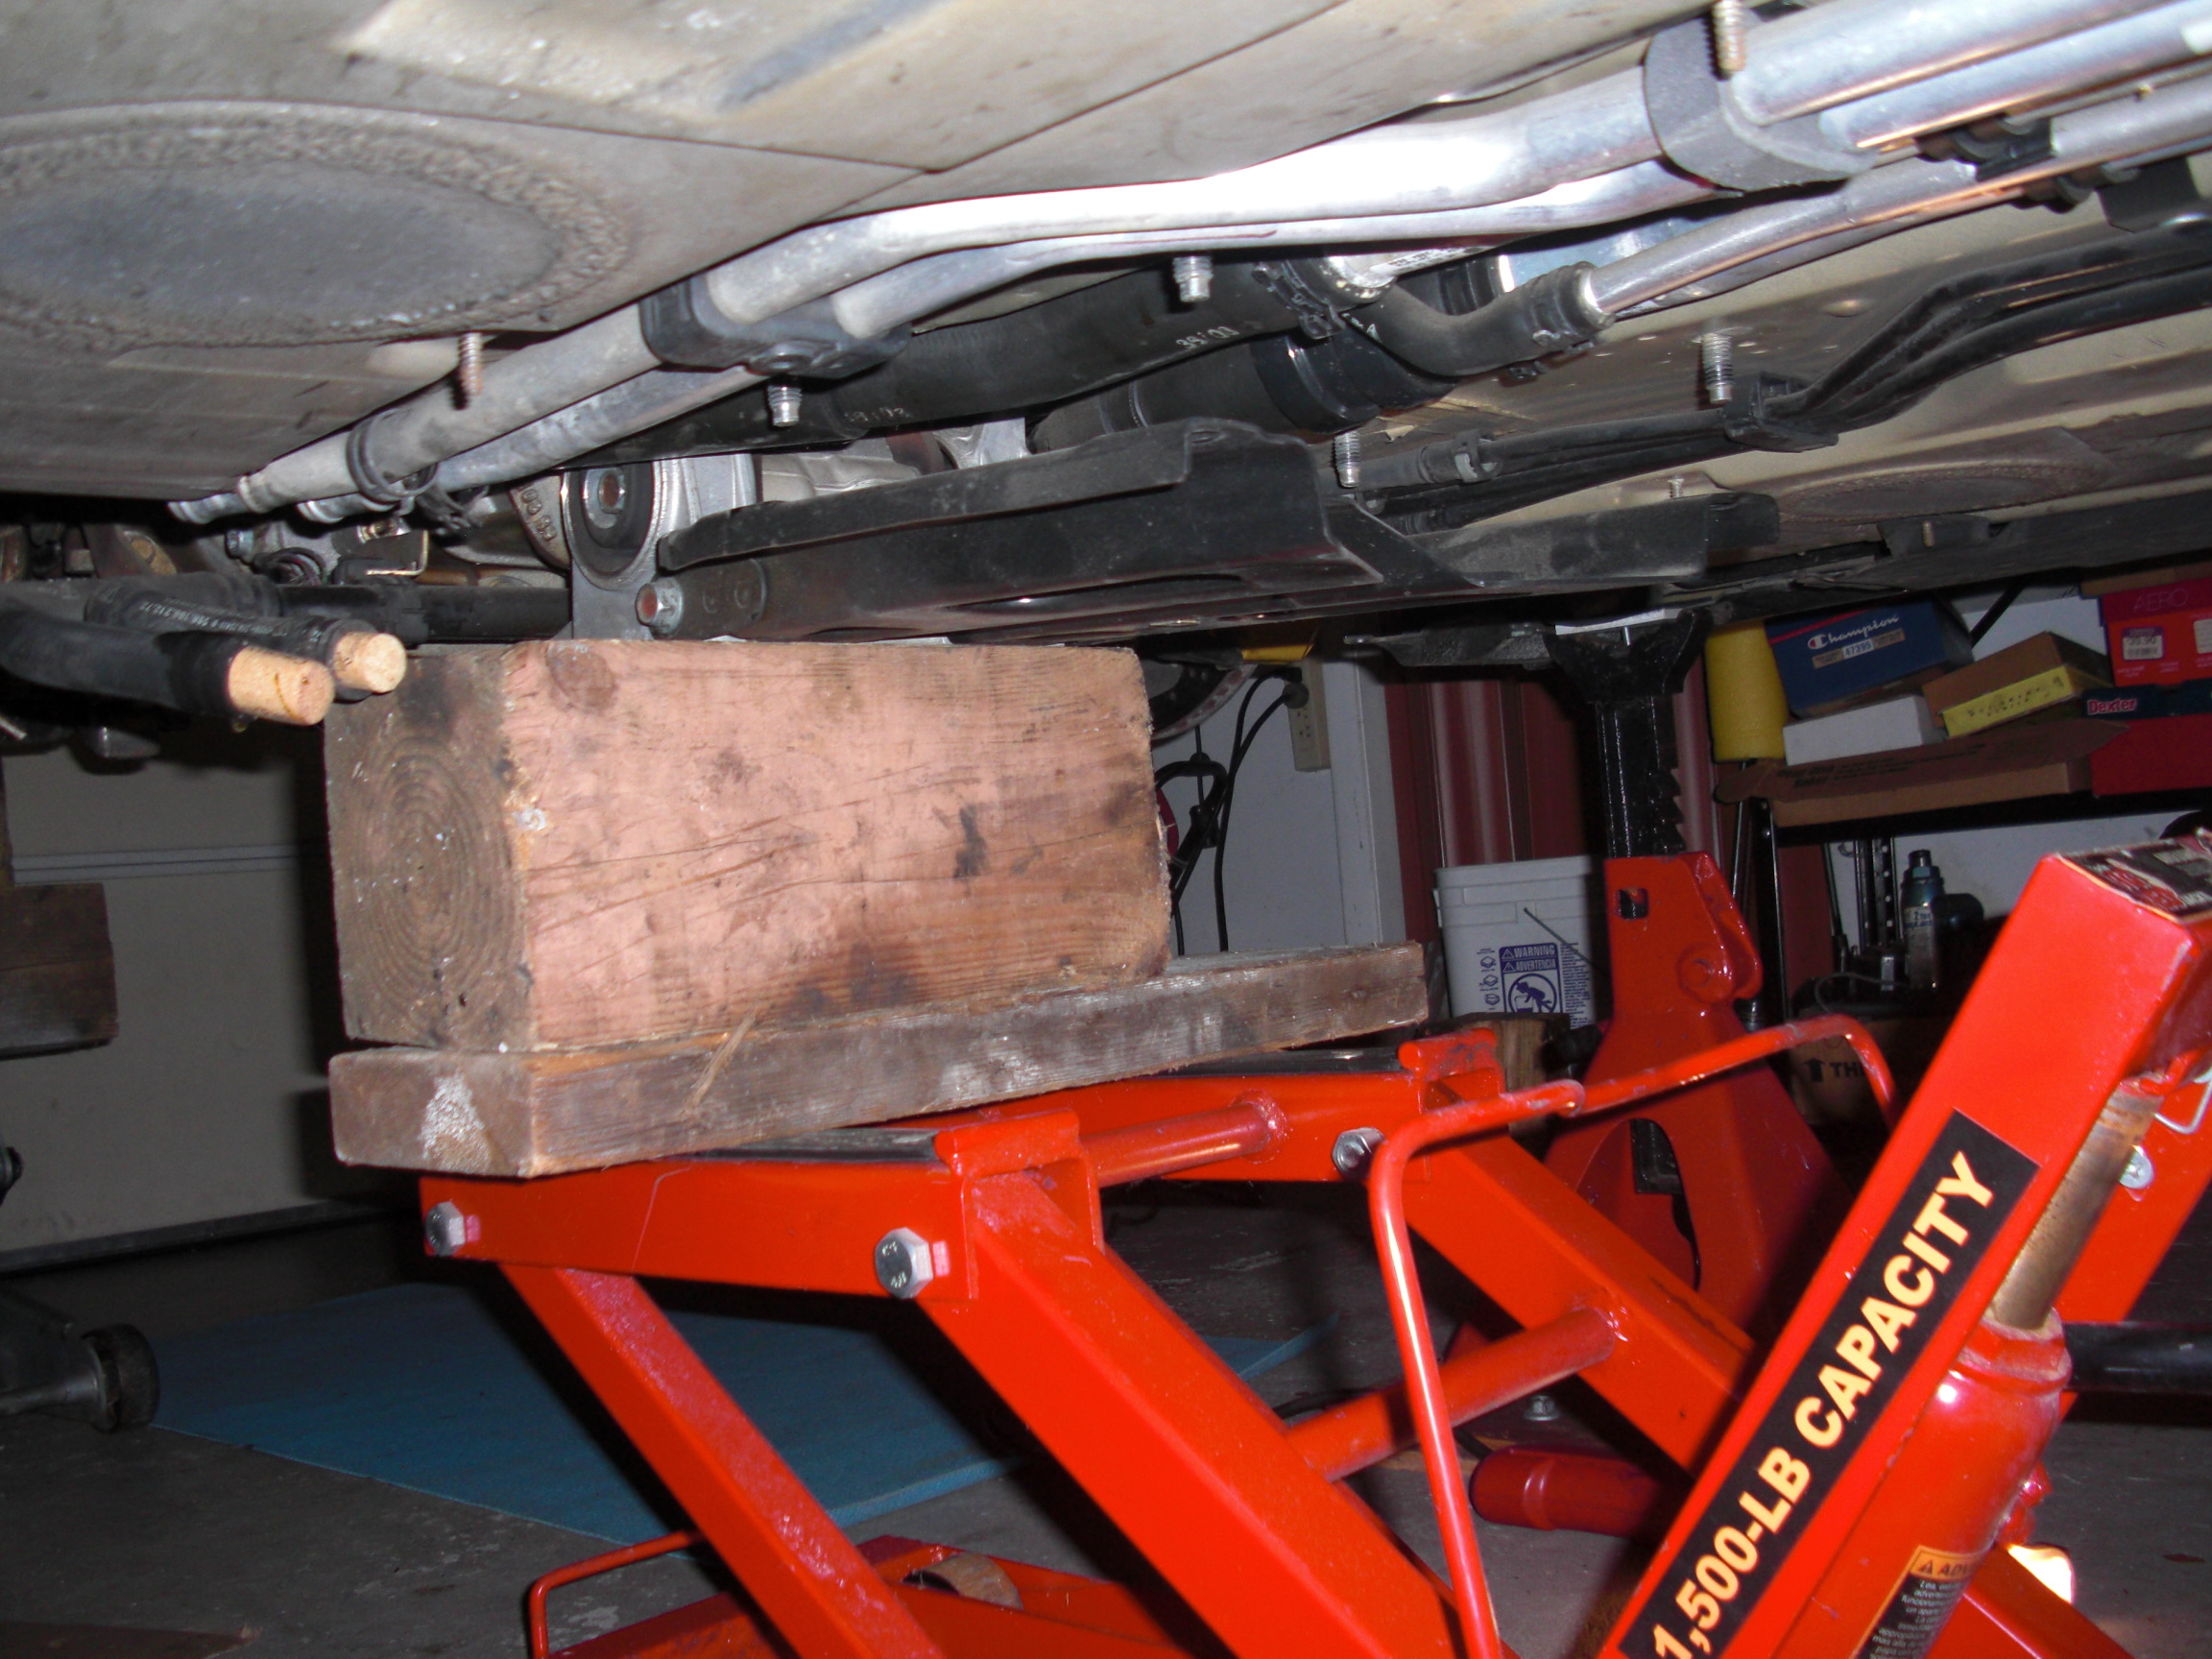
I used a motorcycle jack in the trans and regular jack under engine. Reused a couple of L brackets to provide support in the front of engine. It came down quite easily, not much different that an aircooled drop. Do not forget the ground strap (pass side). Just be meticulous and take your time. I did it single handedly. 33" from bottom of Al bumper reinforcement beam to ground gave me enough clearance.
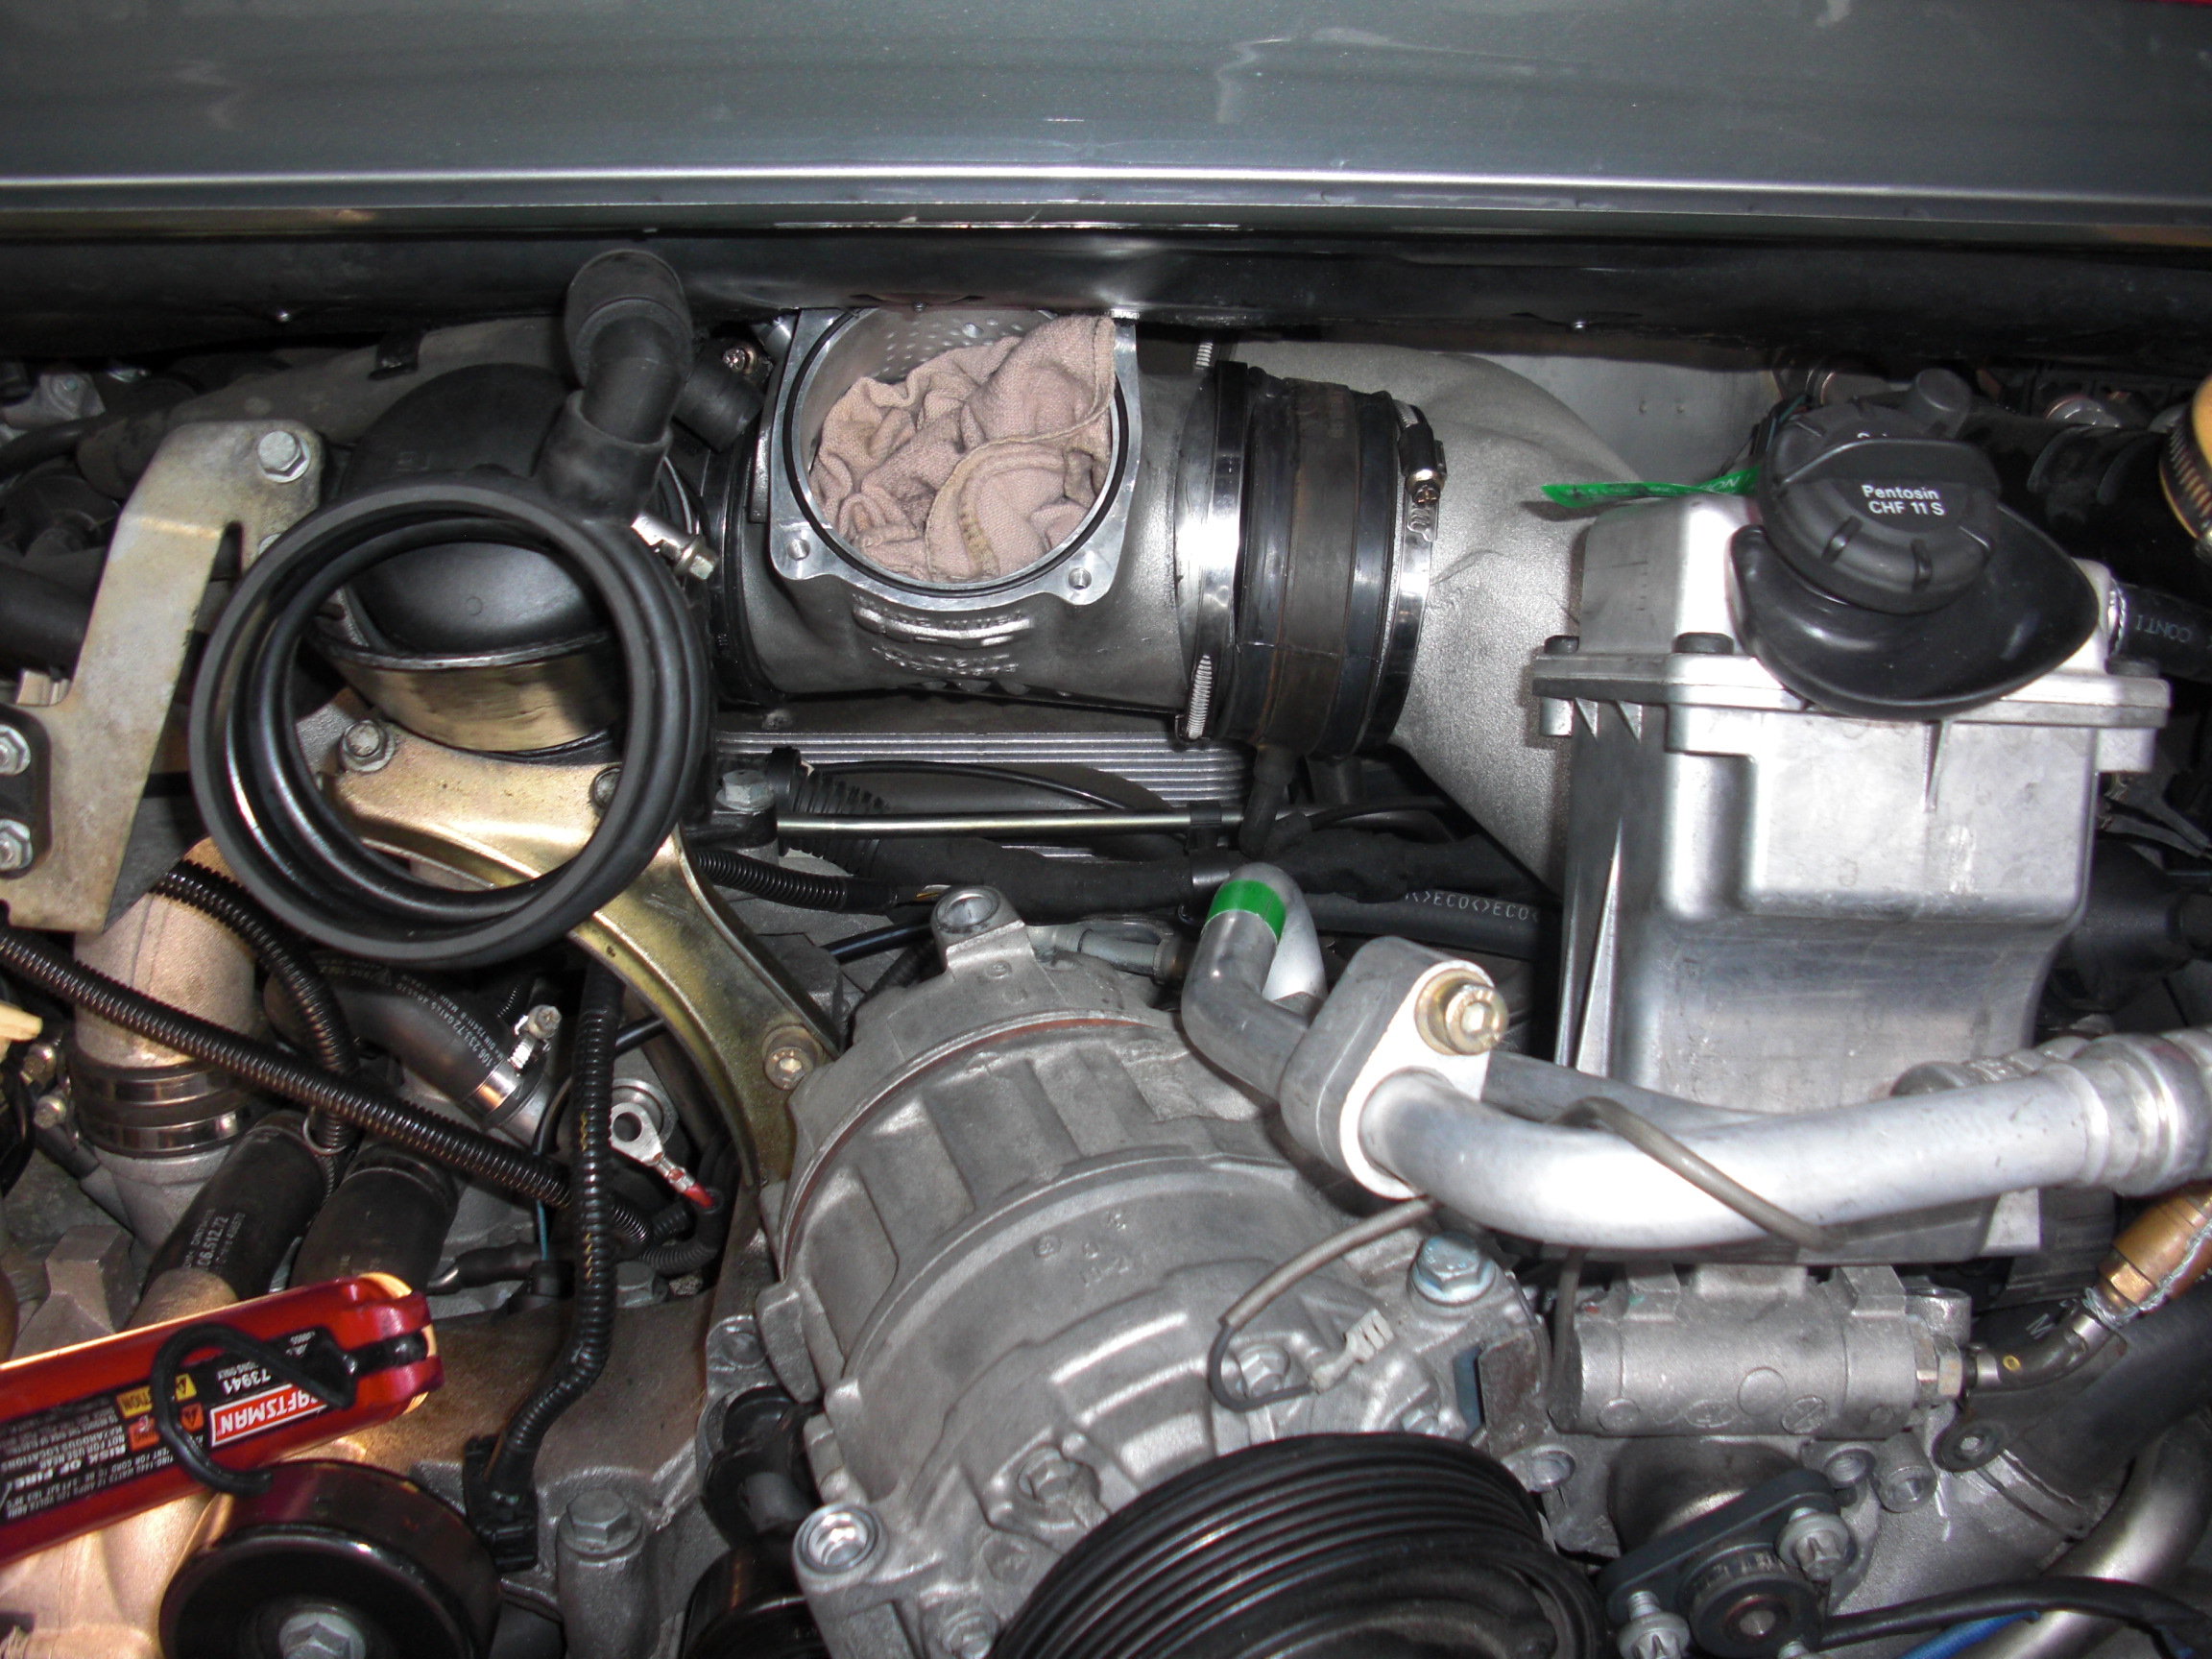
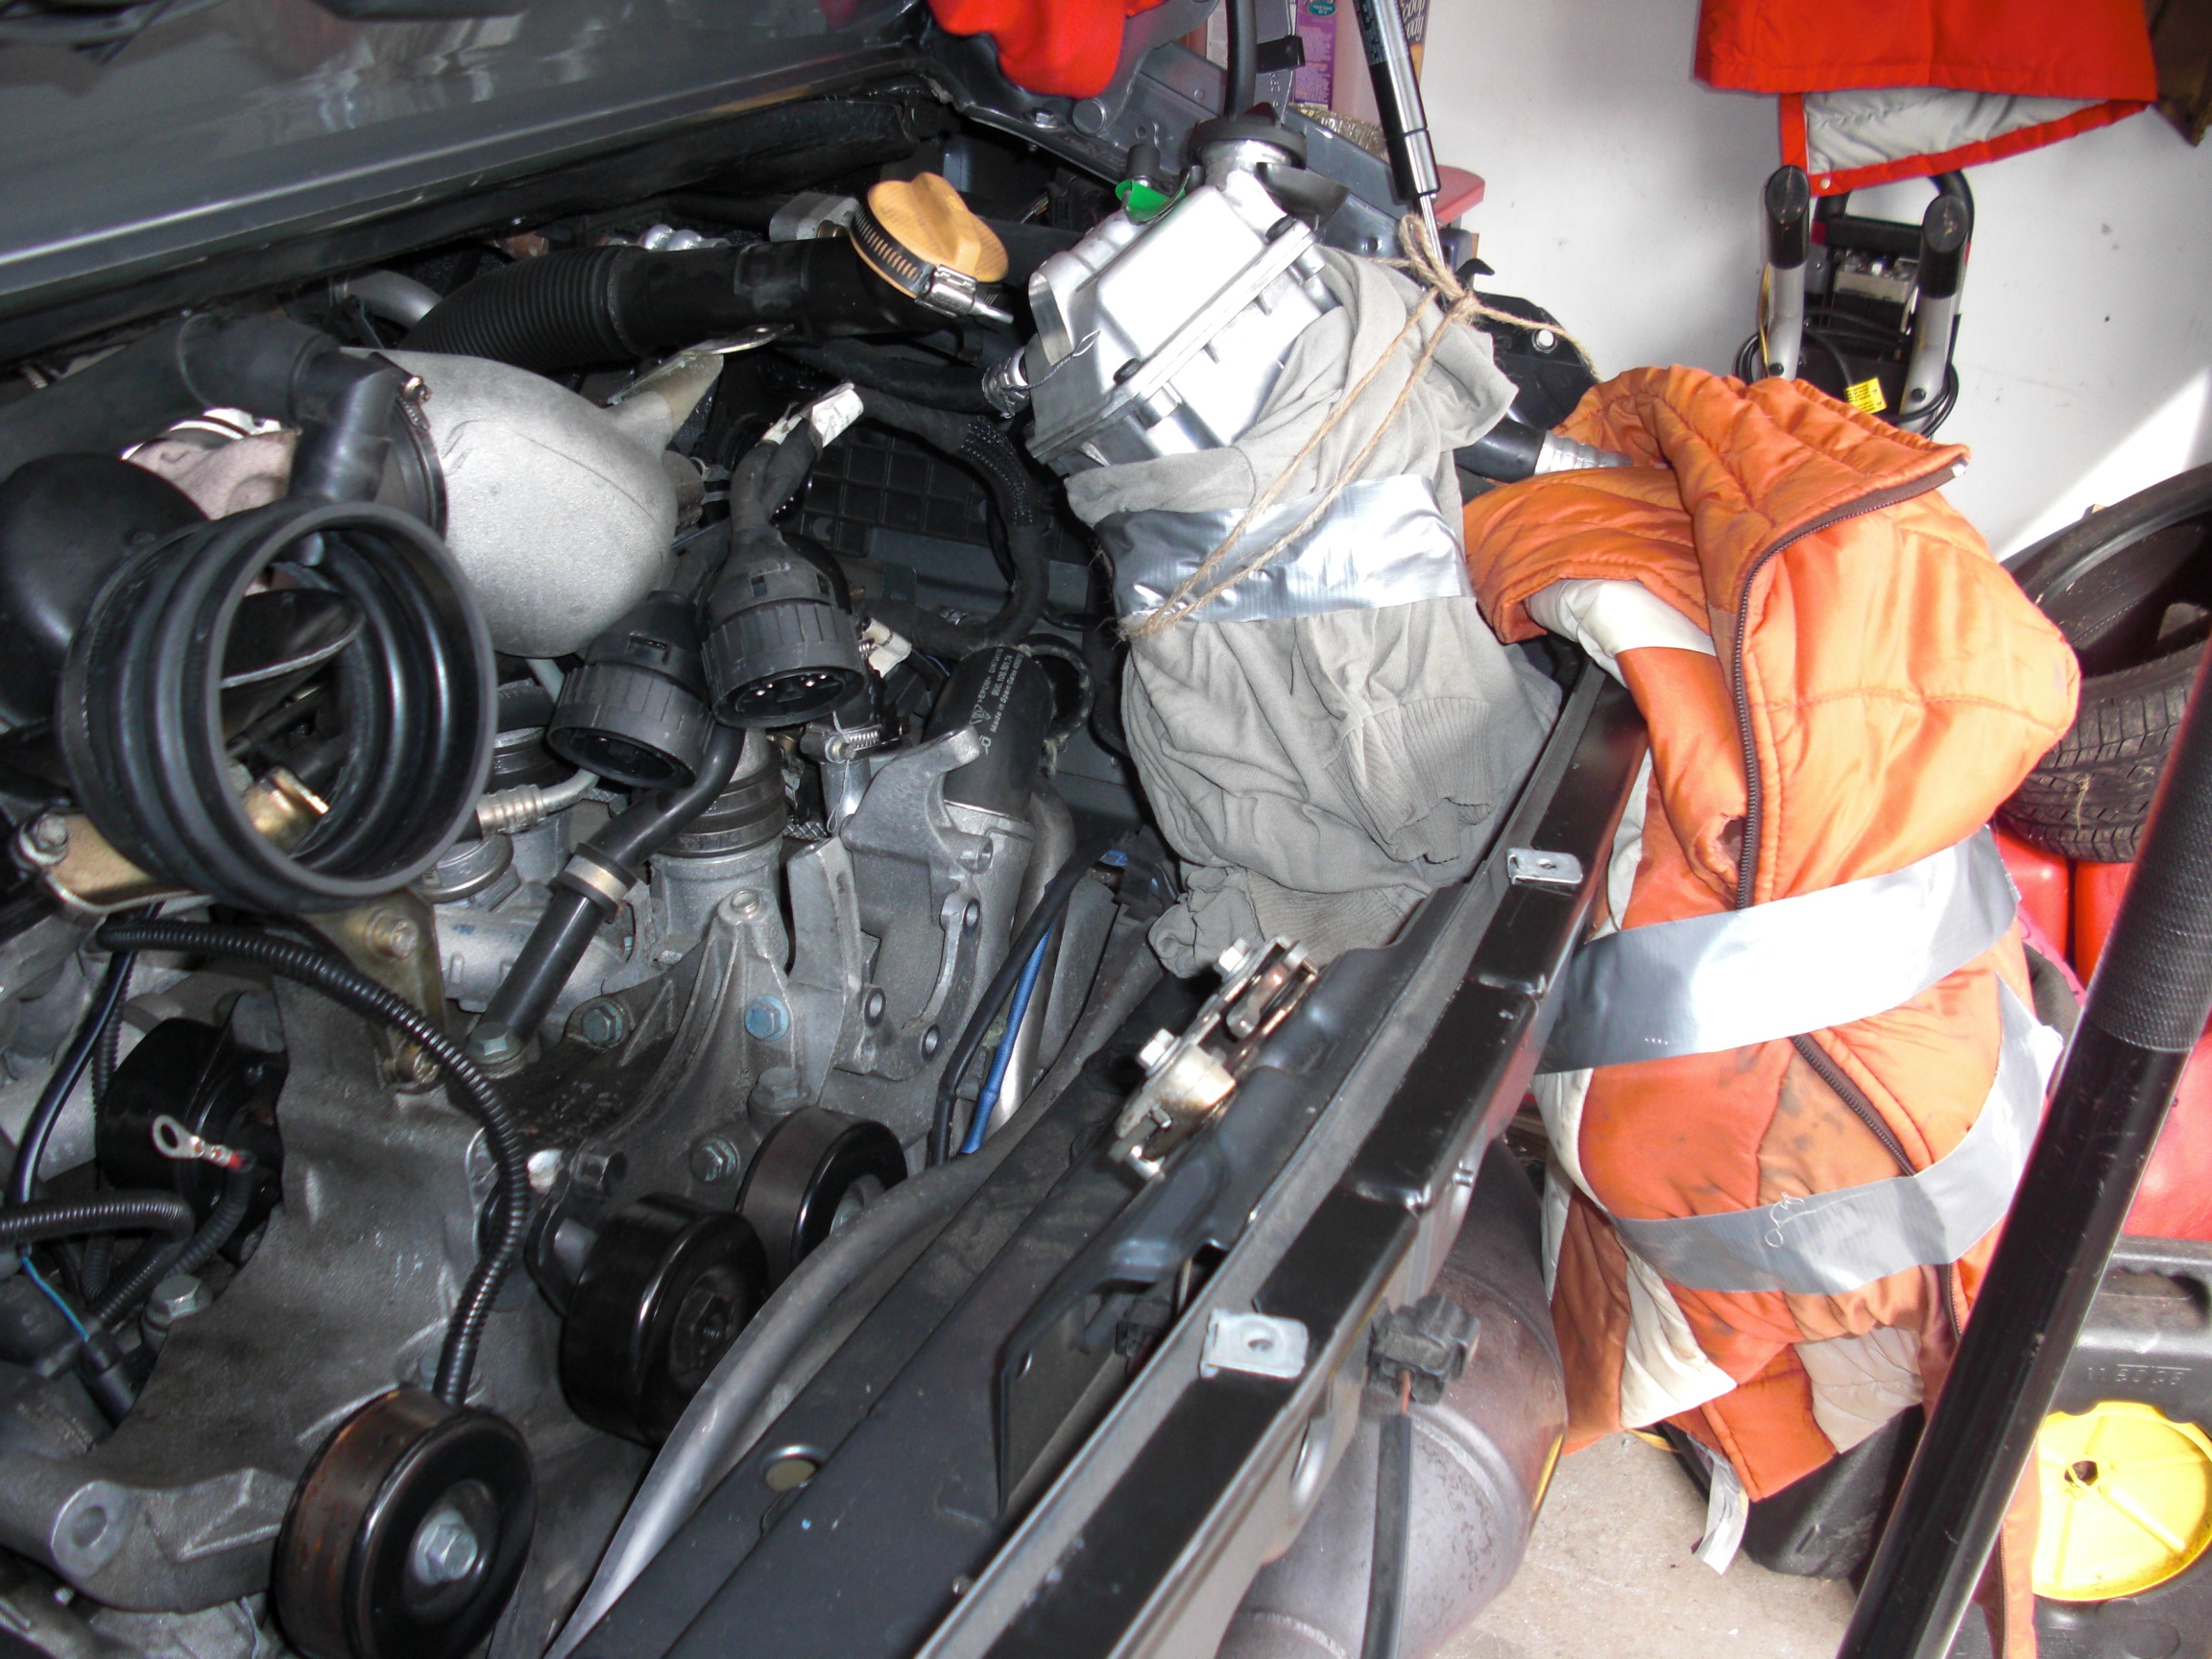
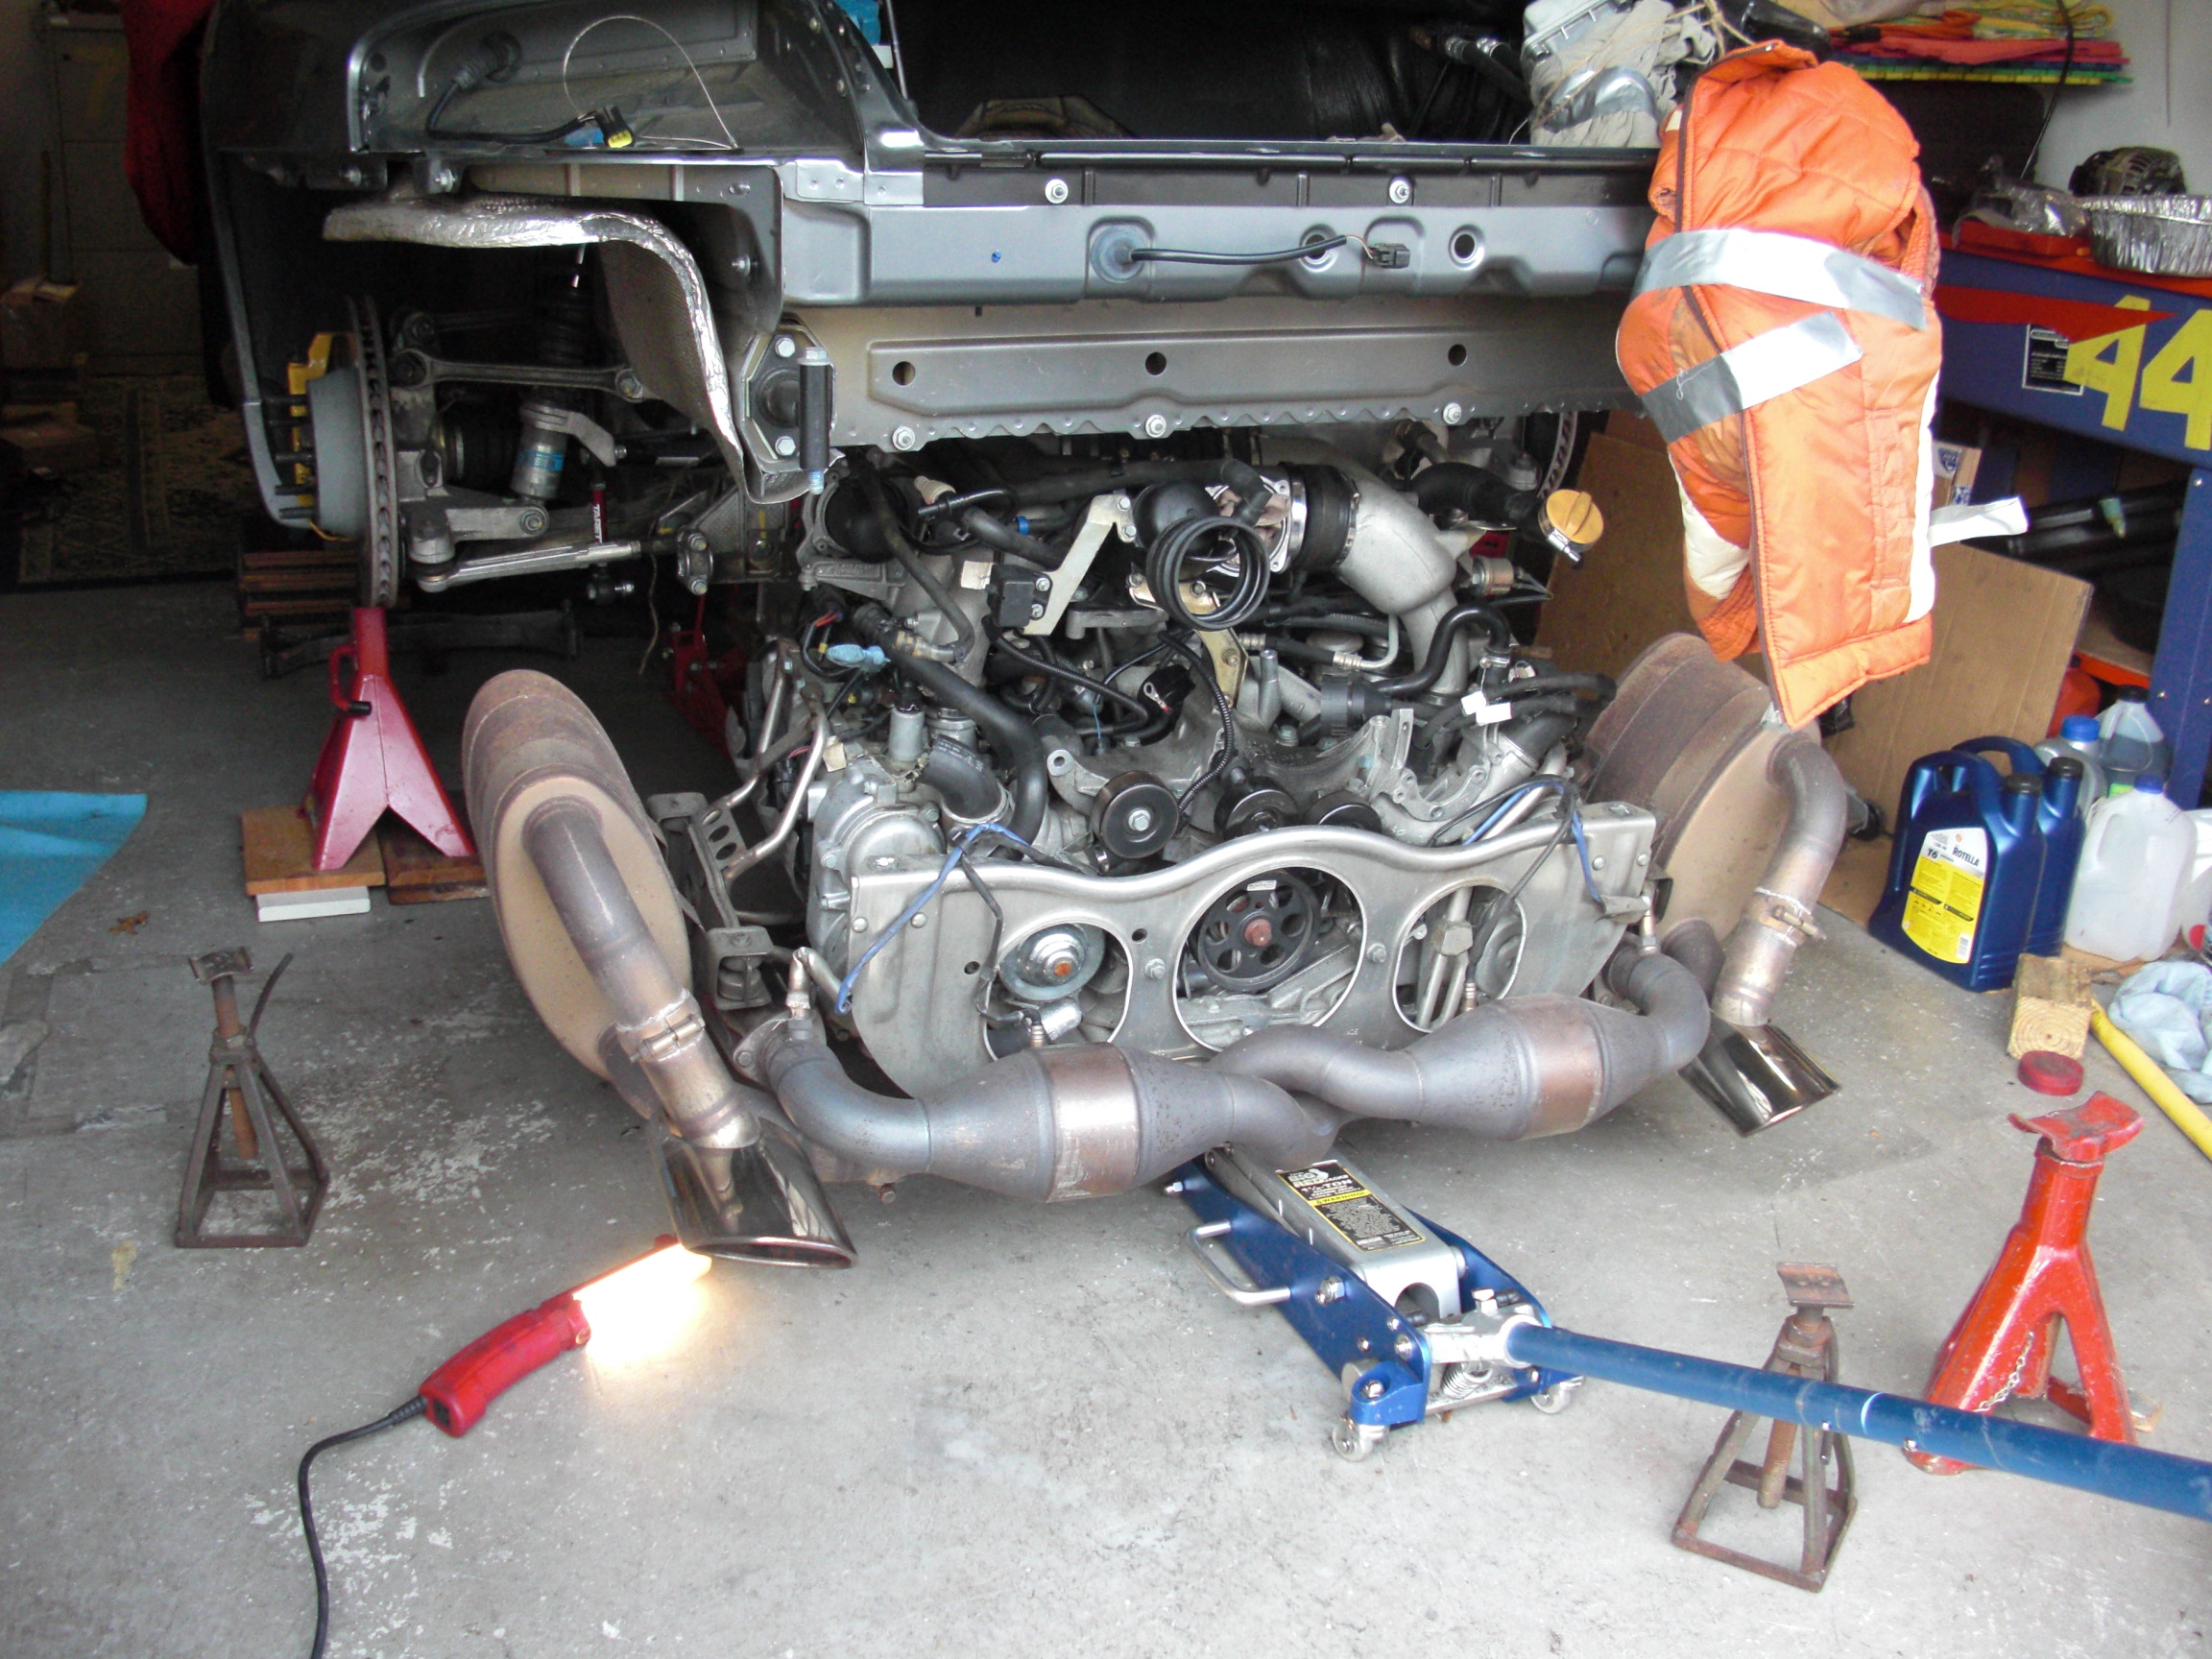
The worst part was getting the A/C compressor off... I had to undo the plenum boot and disconnect it to get clearance for the rear A/C bolt. No other way to get out. Once that was out, wrapped it and put aside. Then undid PS pump and set aside. They are now hanging...
No real surprises to speak of except for what I noted...
I cleaned the engine and hosed it off. Will move to spare garage with friends help tomorrow and the start the dis-assembly...
Andy, does the oil tank get removed? How did you do the intake? Can you access all bolts once top oil hoses are removed? Or did you do the intake by undoing the short rubber pieces? any advise on the rest of the manifolds that need to come out?
Will do all engine coolant hoses, fuel filter, separate trans from engine to investigate noise that appeared after RMS was done a couple of years back. LSD was done last year. Plugs are recent. So basically, take it apart replace O-rings, gaskets needed to weld fittings and zipper back up...
There you have it!


The clutch slave can also be accessed after dropping the engine a few inches. Driver side bolt is easily accessed between suspension arm. Top bolt easier to get from the other side (passenger) and going over the trans (hug it). I tied slave out of the way...
I had an issue with the 2 hoses that run over the driveshaft on the drivers side. I got them hooked on the driveshaft. Had to lift the engine back up and free them. Make sure that they get attached back to the bracket in the trans. On my car, the plastic piece was broken. I had them tie wrapped. There were some posts where the hoses rubbed the driveshaft and caused a leak.
I was able to disconnect the valve that allows coolant to flow to the trans cooler by removing the tiny screw that holds it to the bracket. Then undo hose clamp and vacuum connector and slide towards the front of car. I could not undo the spring clamp towards the front of that hose due to the angle. Removing the valve was cake. Looks like it is leaking also...
There is one hose (brake booster) I missed while lowering the engine. It faces you on the Driver side. Has a C clip, undo it and disconnect hose. Also, there is a small hose to the coolant reservoir that needs to be disconnected. Main coolant hoses were still a pain even after engine was out!. Holding clips are different sizes. Don't mix them. Mine are back in the engine.
I used a motorcycle jack in the trans and regular jack under engine. Reused a couple of L brackets to provide support in the front of engine. It came down quite easily, not much different that an aircooled drop. Do not forget the ground strap (pass side). Just be meticulous and take your time. I did it single handedly. 33" from bottom of Al bumper reinforcement beam to ground gave me enough clearance.
The worst part was getting the A/C compressor off... I had to undo the plenum boot and disconnect it to get clearance for the rear A/C bolt. No other way to get out. Once that was out, wrapped it and put aside. Then undid PS pump and set aside. They are now hanging...
No real surprises to speak of except for what I noted...
I cleaned the engine and hosed it off. Will move to spare garage with friends help tomorrow and the start the dis-assembly...
Andy, does the oil tank get removed? How did you do the intake? Can you access all bolts once top oil hoses are removed? Or did you do the intake by undoing the short rubber pieces? any advise on the rest of the manifolds that need to come out?
Will do all engine coolant hoses, fuel filter, separate trans from engine to investigate noise that appeared after RMS was done a couple of years back. LSD was done last year. Plugs are recent. So basically, take it apart replace O-rings, gaskets needed to weld fittings and zipper back up...
There you have it!
 11-09-2013, 11:26 PM
#32
RL Community Team
Rennlist Member
Rennlist Member
You need to remove the oil tank and the oil cooler to get access to the 2 hoses under them - which you really should do. To remove it you undo the 2 large (32mm) nuts at the top - make sure you steady the fixed one. you remore the hoses that are attached via clamps at the top. At the bottom right side as you face the motor, there is a metal flex coupling that is held in place by (2) 10mm sockets that need to be removed. Then there are 4 or 5 bolts that you remove that hold the tank in place. Make sure to have a tray under all this as there will be a lot of residual oil.
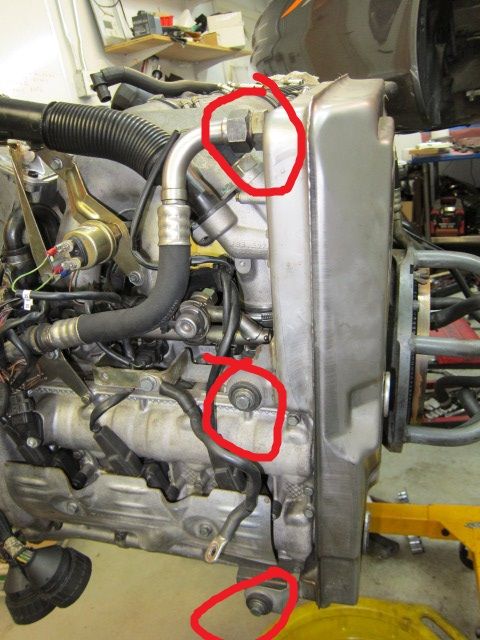
In addition to these, you need to free up the oil filler neck - (1) 10mm bolt, and the sensor connector
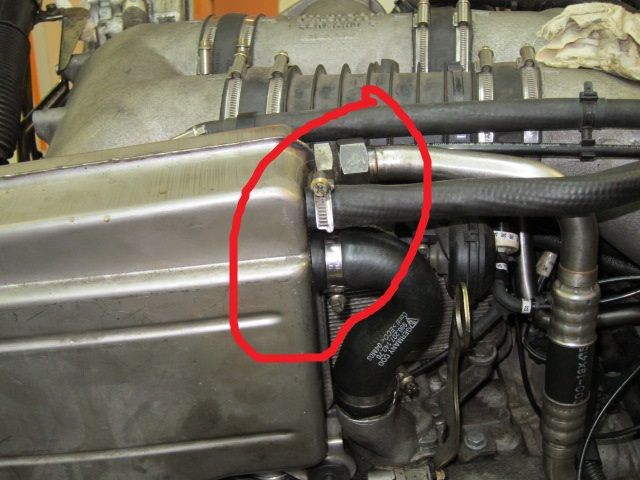
WRT the manifold - you will need to remove this as well. Straight forward - take lots of pictures AND label connectors and vacuum hoses - I use something like: http://www.cableorganizer.com/wire-marker/
I did the same thing with the line to the tranny cooler, in that I removed the small screw in order to get access to the hose.
I was able to get the A/C off just by removing the throttle body and using a flex socket - and I removed the the Power steering pump.
I found that having a wobble extension and a set of both 1/4 and 3/8 flex sockets helped a lot: http://www.sears.com/craftsman-18-pc...&blockType=G45
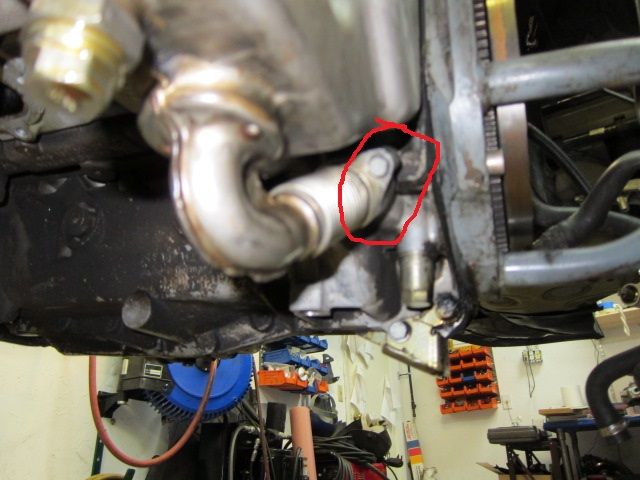
I decided to pin mine instead of welding - I suspect that this is more of a personal decision as I have seen arguments both ways...
HTH
Ray
In addition to these, you need to free up the oil filler neck - (1) 10mm bolt, and the sensor connector
WRT the manifold - you will need to remove this as well. Straight forward - take lots of pictures AND label connectors and vacuum hoses - I use something like: http://www.cableorganizer.com/wire-marker/
I did the same thing with the line to the tranny cooler, in that I removed the small screw in order to get access to the hose.
I was able to get the A/C off just by removing the throttle body and using a flex socket - and I removed the the Power steering pump.
I found that having a wobble extension and a set of both 1/4 and 3/8 flex sockets helped a lot: http://www.sears.com/craftsman-18-pc...&blockType=G45
I decided to pin mine instead of welding - I suspect that this is more of a personal decision as I have seen arguments both ways...
HTH
Ray
11-10-2013, 11:11 AM
#35
RL Community Team
Rennlist Member
Rennlist Member
Glad to help, I have a lot more pictures and the motor is still sitting on a stand and I got through this ~ 4 weeks ago, so things are still pretty fresh in my mind.
I ended up replacing a couple of hoses that had been abraded - one was the fuel line that went from one side of the motor to the other, another was a water line, both impossible without removing the motor.
For removing the intake, a very long flat head screw driver was almost essential. Be careful with the hose clamps that are near the oil tank, If the heads are along side of the tank you will not be able to replace the tank - there will be interference - you will see this as you take things apart.
I used blue Locktite everywhere except whit the screws I used to pin the sleeves - I used Red there...
Ray
11-10-2013, 11:24 AM
#36
Racer
Thread Starter
G
For removing the intake, a very long flat head screw driver was almost essential. Be careful with the hose clamps that are near the oil tank, If the heads are along side of the tank you will not be able to replace the tank - there will be interference - you will see this as you take things apart.
For removing the intake, a very long flat head screw driver was almost essential. Be careful with the hose clamps that are near the oil tank, If the heads are along side of the tank you will not be able to replace the tank - there will be interference - you will see this as you take things apart.
11-10-2013, 02:36 PM
#38
Nordschleife Master
Seeing as how you are already there... Here is another thing to consider... Its actually shown in the last batch of photos around the tank
https://rennlist.com/forums/996-gt2-...reather-5.html
https://rennlist.com/forums/996-gt2-...reather-5.html
11-11-2013, 09:33 AM
#39
Race Car
You can do it either way. I removed top and bottom together. Need lots of 1/4" extentions, 10mm and a swivel joint and you can get all of the 10mm bolts to remove the upper and lower together. Obviously requires new gaskets if you do it this way vs. just pulling the upper at the rubber joins. I found it cleaner to work with everything removed instead of just the upper but you can still get to everything with just the upper removed.
11-11-2013, 12:39 PM
#41
Rennlist Member
So it sounds like the oil tank needs to be removed so it is probably easier if the oil are drained at the time? So no reason to do an oil change before getting the car to the shop, I am guessing?
11-11-2013, 01:30 PM
#42
RL Community Team
Rennlist Member
Rennlist Member
When you do this work, you will change the oil - you could drain it into a bucket, but I would end up spilling it on the floor which is annoying :-)
Ray
Ray
11-11-2013, 07:48 PM
#44
Racer
Thread Starter
I might have found my transmission chirping noise... TO Bearing washer facing the wrong way?
Findings here... Last post has pictures...
https://rennlist.com/forums/996-gt2-...l#post10898288
Findings here... Last post has pictures...
https://rennlist.com/forums/996-gt2-...l#post10898288
11-11-2013, 10:13 PM
#45
RL Community Team
Rennlist Member
Rennlist Member
I tend to suffer from the 'while you are in there, you might as well spend the $10e6 and 'fix things' syndrome'.
Are you also doing or have done the LWFW thing?
Ray - who started by replacing a license plate bulb :-)
Are you also doing or have done the LWFW thing?
Ray - who started by replacing a license plate bulb :-)