When you click on links to various merchants on this site and make a purchase, this can result in this site earning a commission. Affiliate programs and affiliations include, but are not limited to, the eBay Partner Network.
Aviaid - specifically C mount with a 4 stage pump. I would prefer the Dailey for cost but it requires a line for each scavenge on the sump to the pump... Lot going on.
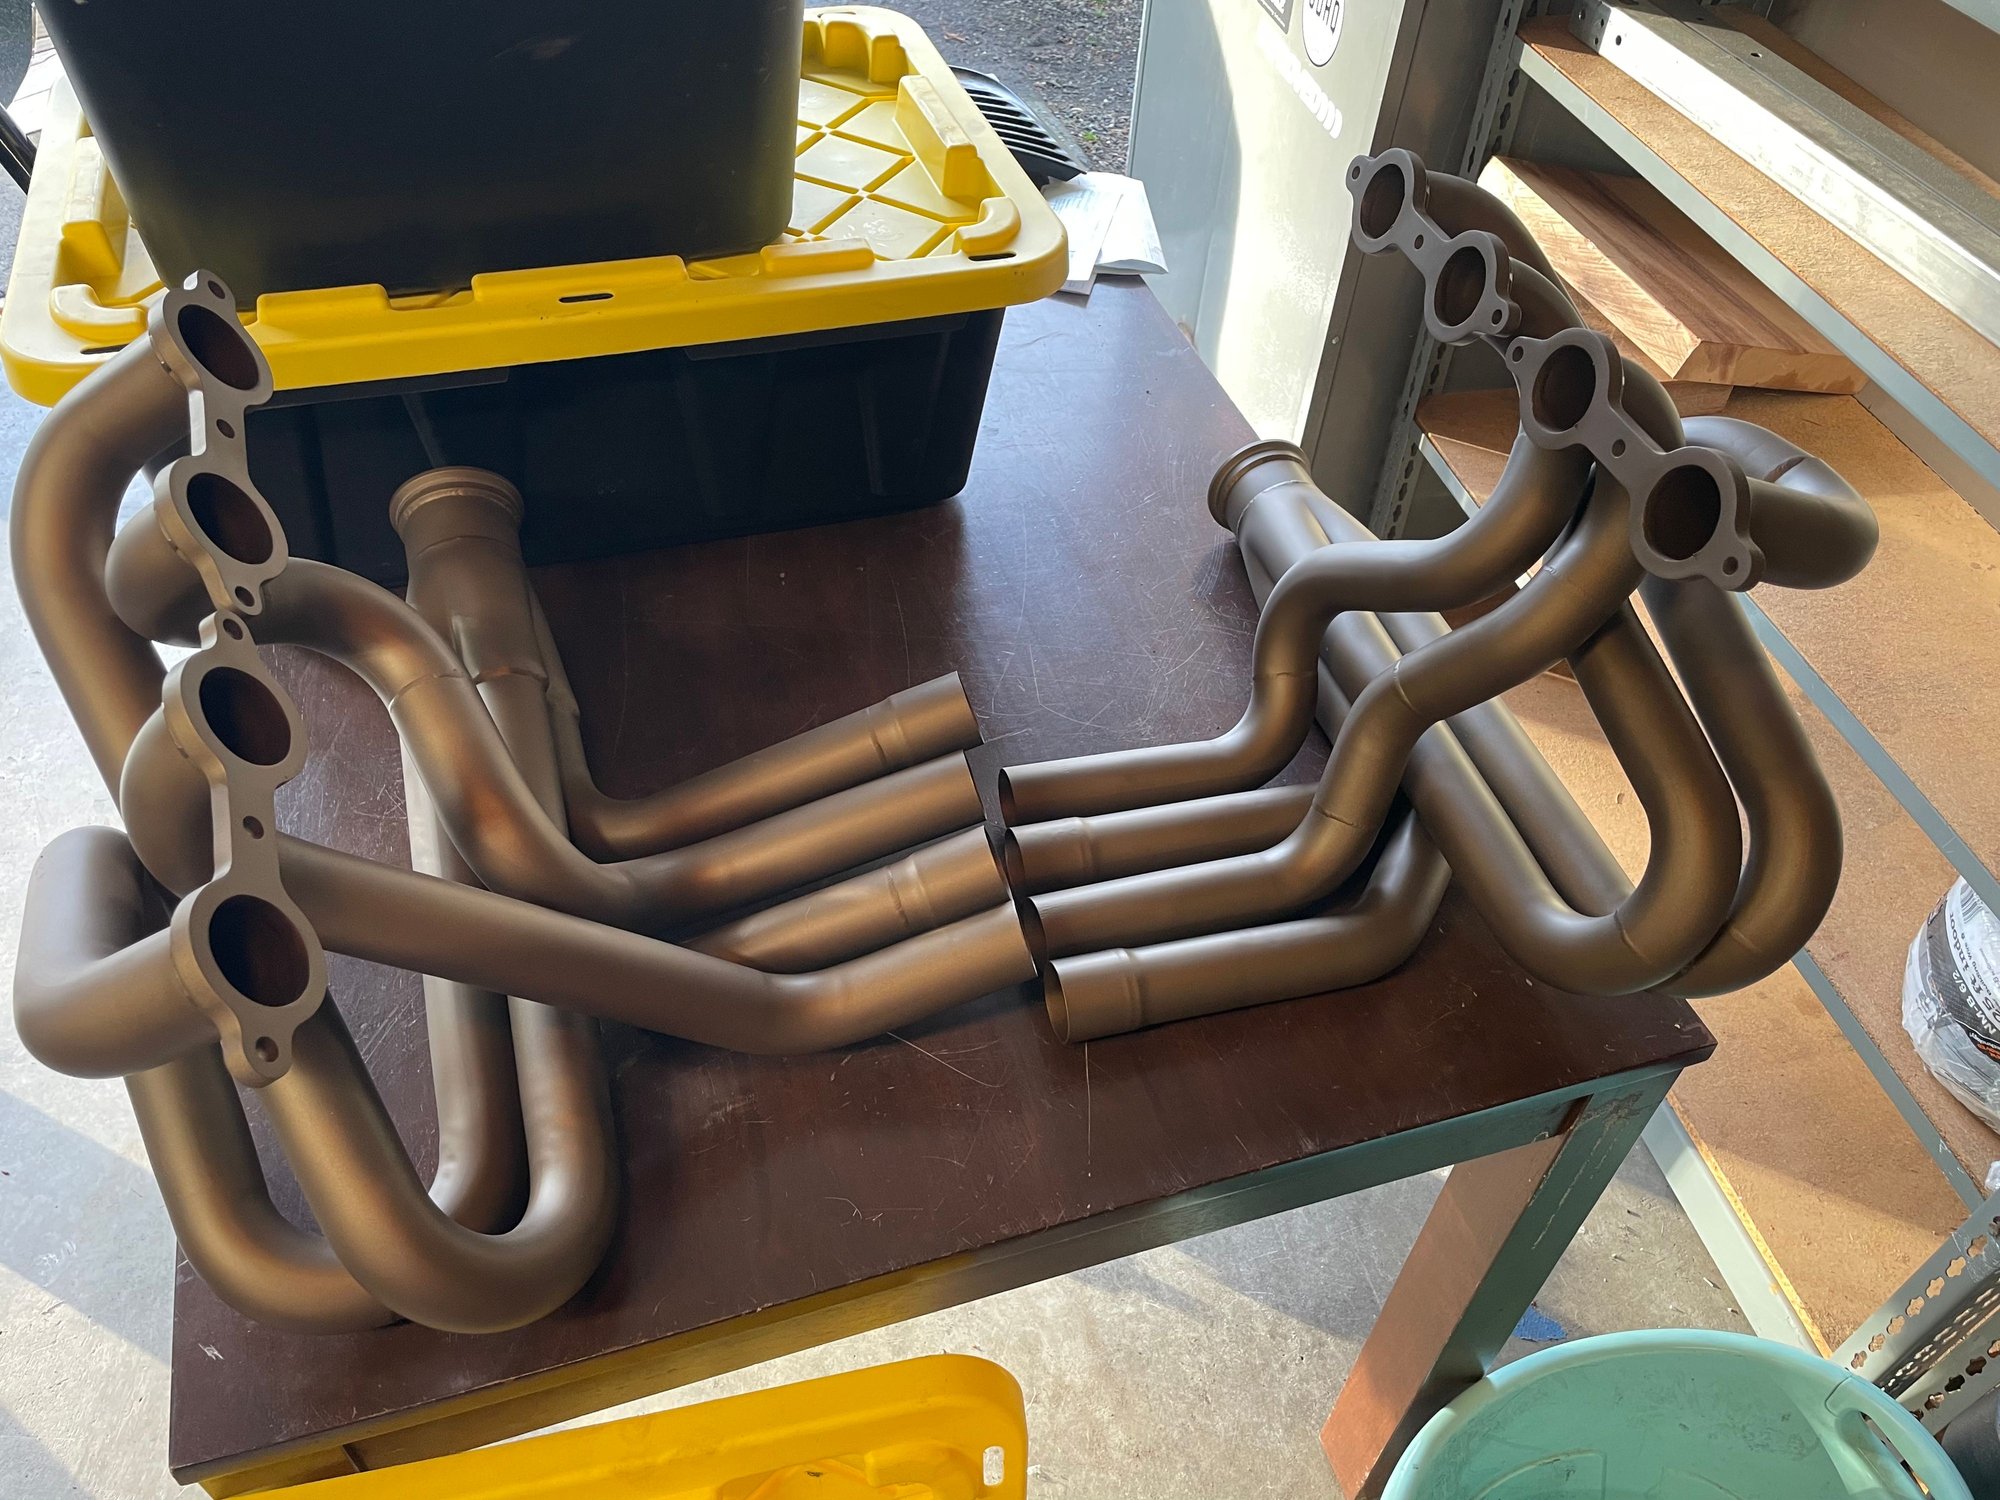
Spicy! 180 headers should fit no problem. The 180s were designed for dry sump pans and pumps in mind. Since you�re not interested in AC, I�d just run a dry sump pump in the OEM AC pump location and the ICT alternator mount for alternator. Run the ATI harmonic balancer (I think that�s the brand) with the integrated sump belt pulley and you�ll have a sweet setup. I have 1 set of 180 headers made up and waiting for a new home.
18166191[/url]]They make fittings that u can slip into the flexible hose if u cut off the aluminum section. U just slip it in and clamp the metal rings down. I had to use a repair union in one of my lines. I could have converted it to a standard ac fitting. One of the rings broke so i used s hose clamp.
@De Jeeper Did you buy the burga clip pliers for this connection? At $260, I�m hoping to borrow some and donate to a fellow Rennlister�s beer fund rather than spend that cash for a one time use tool.
Updates coming soon, I�ve been busy during the holidays and I�m wrapping up the latest upgrades.
I just have a racheting oetiker clamp pliers. Similar to the pex plumbing one. U just have to be careful because u can sqeeze too hard and snap the clamp. Thats y there is i regular hose clamp in that union.
Been busy tinkering on the LS 996 and am now burnt out. I will post some updates below. Car is softly for sale, looking to part ways with my projects and focus on some other areas in life at the moment.
Asking $30k OBO for the car as-is. I�ve sunk at least 30k into it in the last few years. It�s fast as hell but I�d like to get back into regular surfing, mountain biking, and some other sports. I�m also shifting back into off-roading with Raptor which lost its engine a week ago. So I need make some adjustments and this 996 project needs to go.
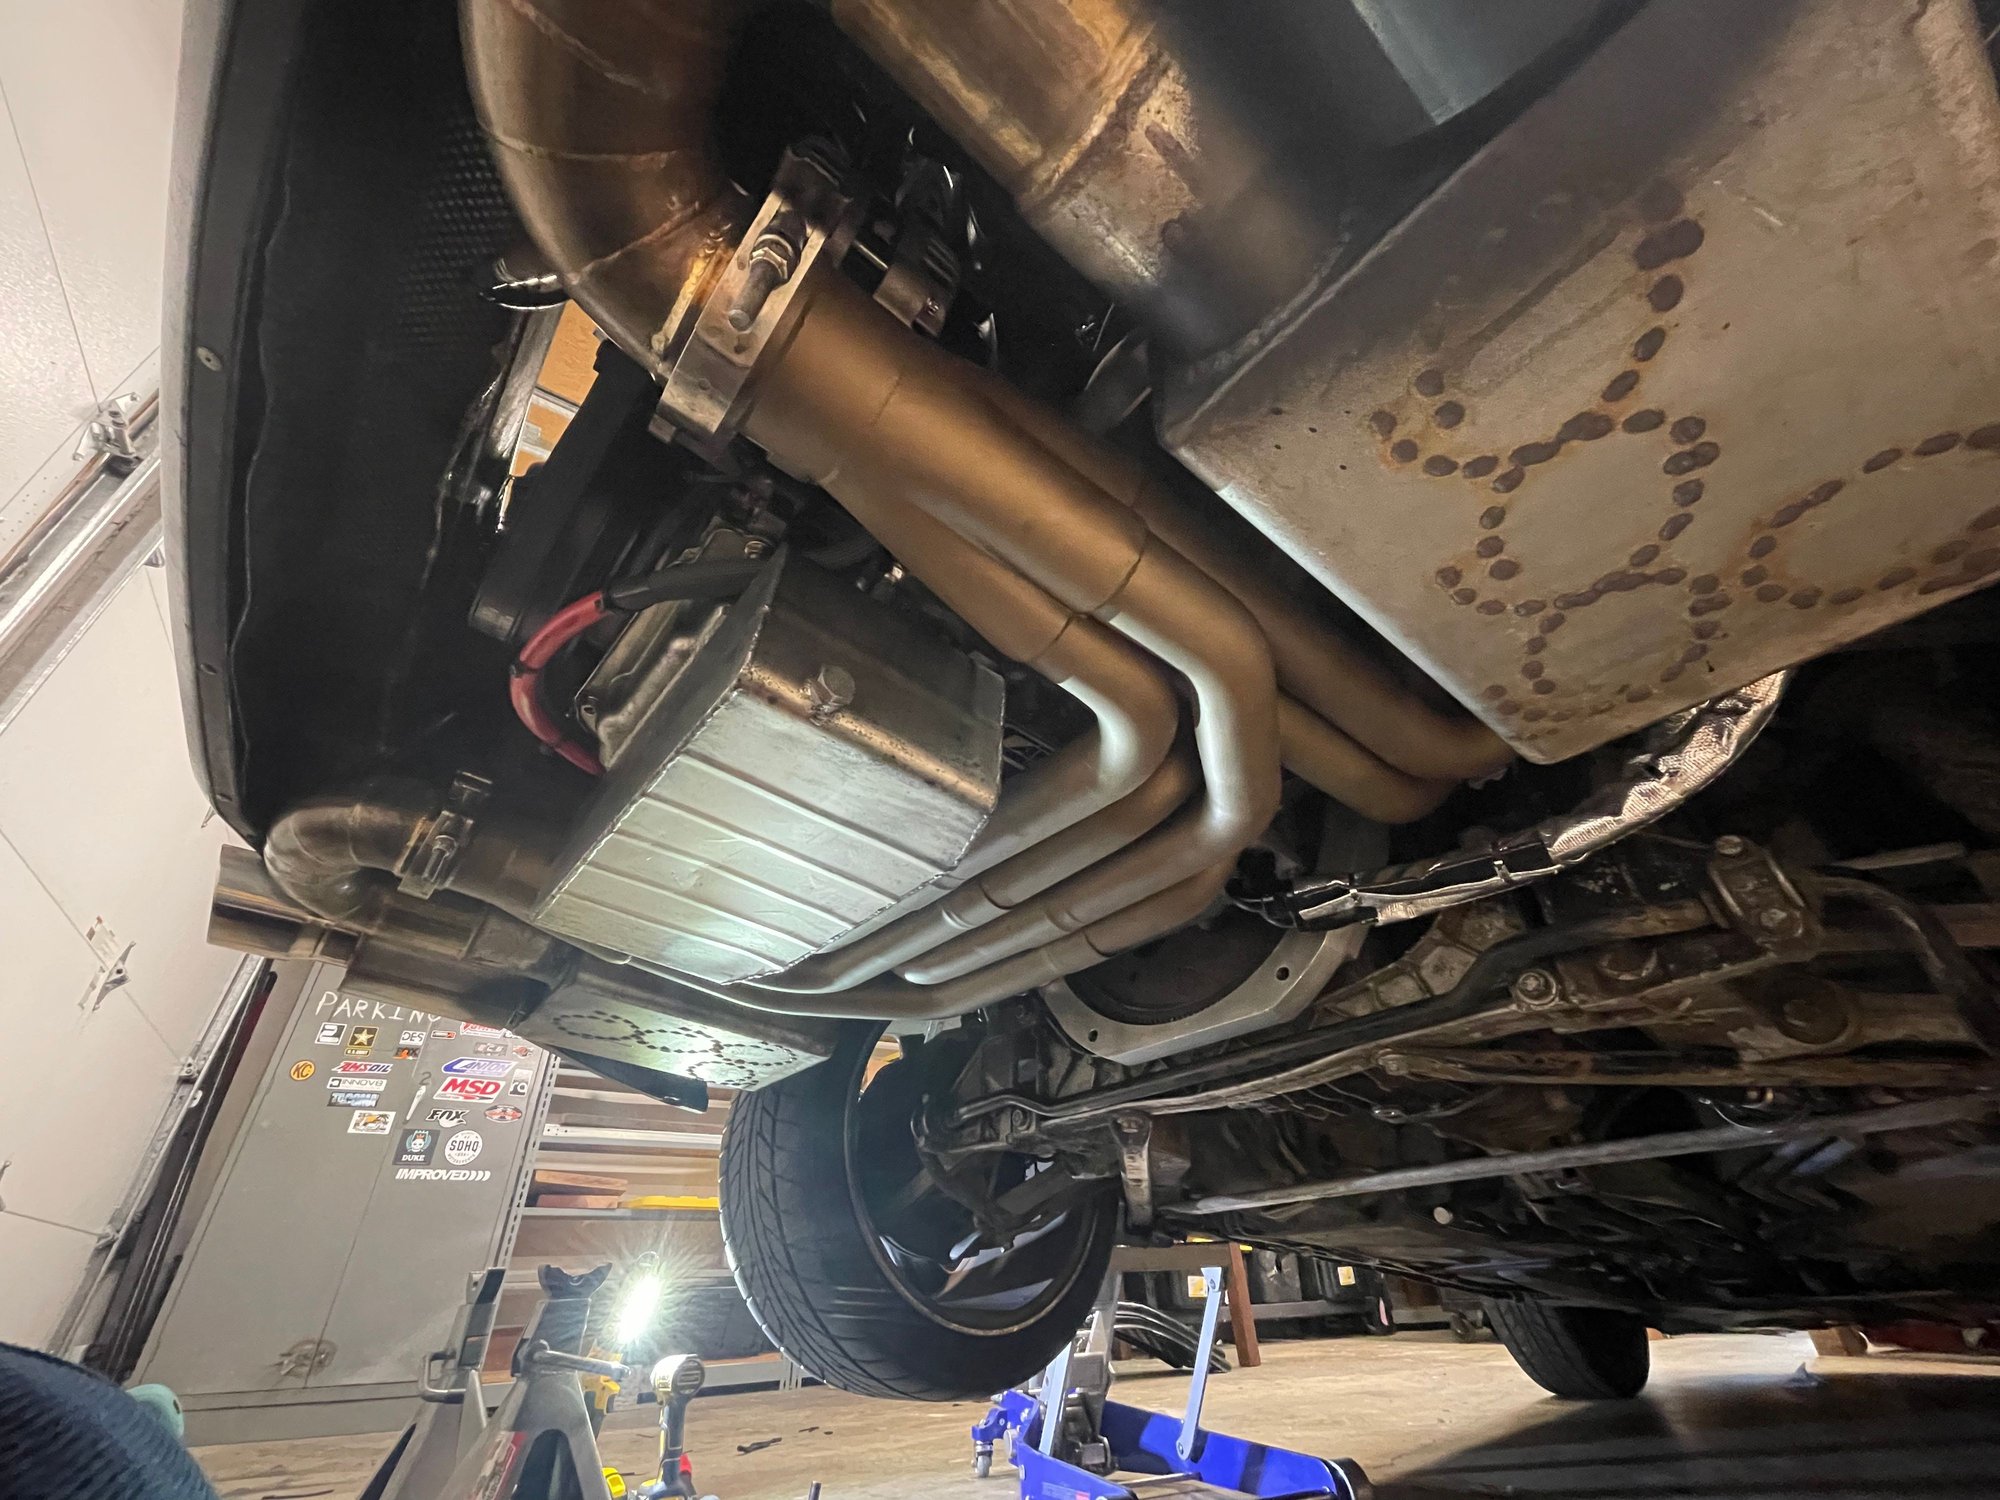
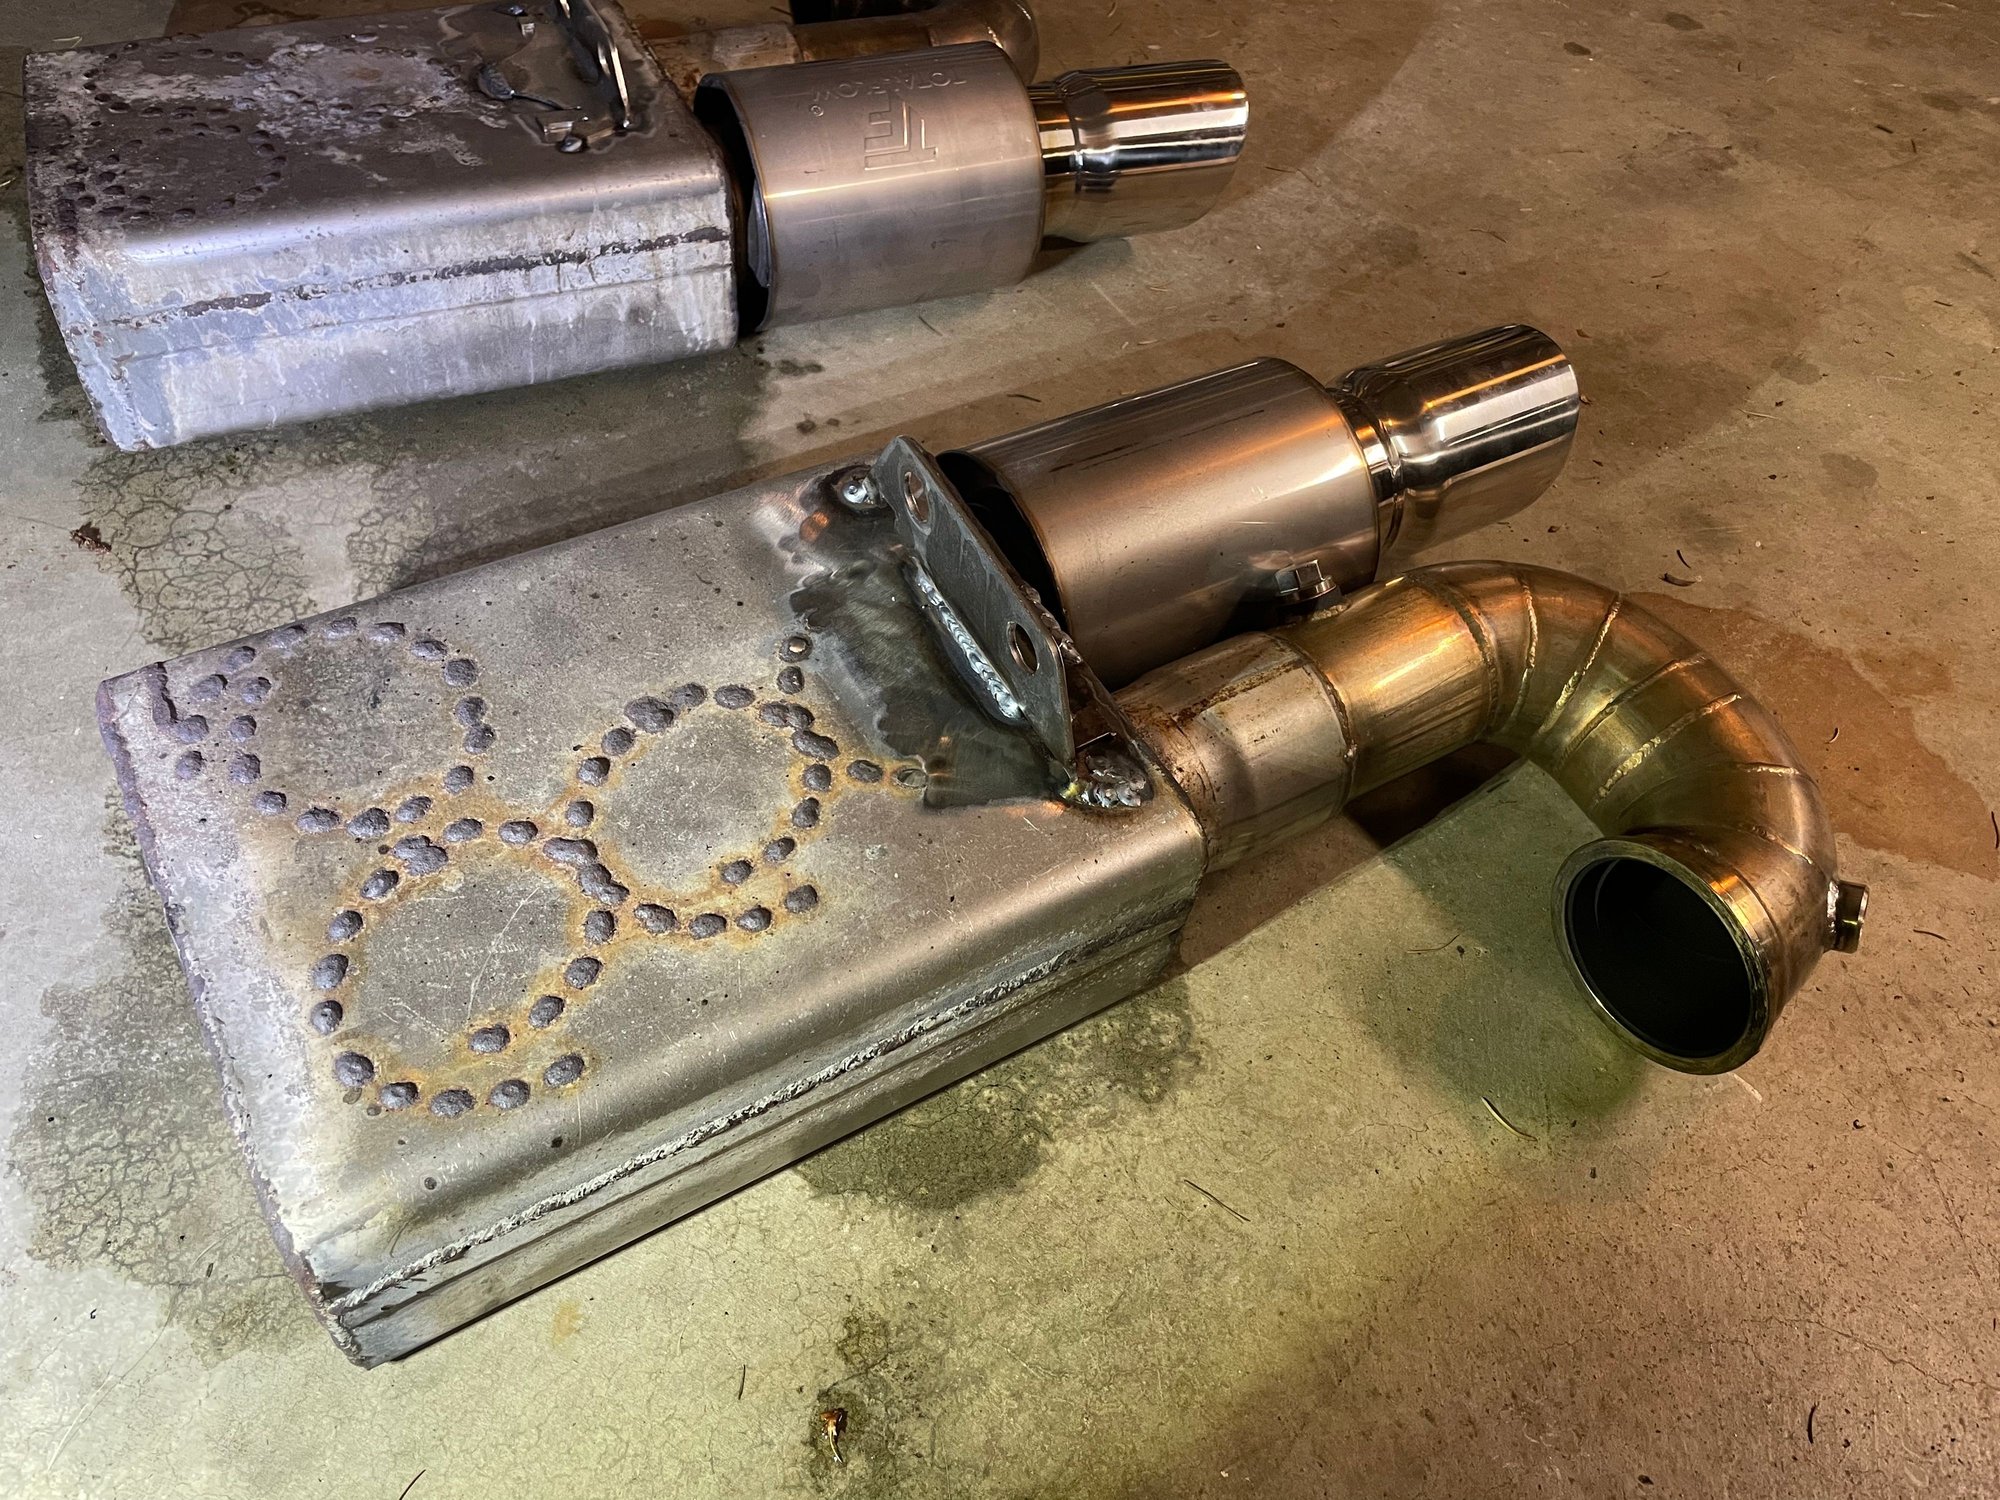
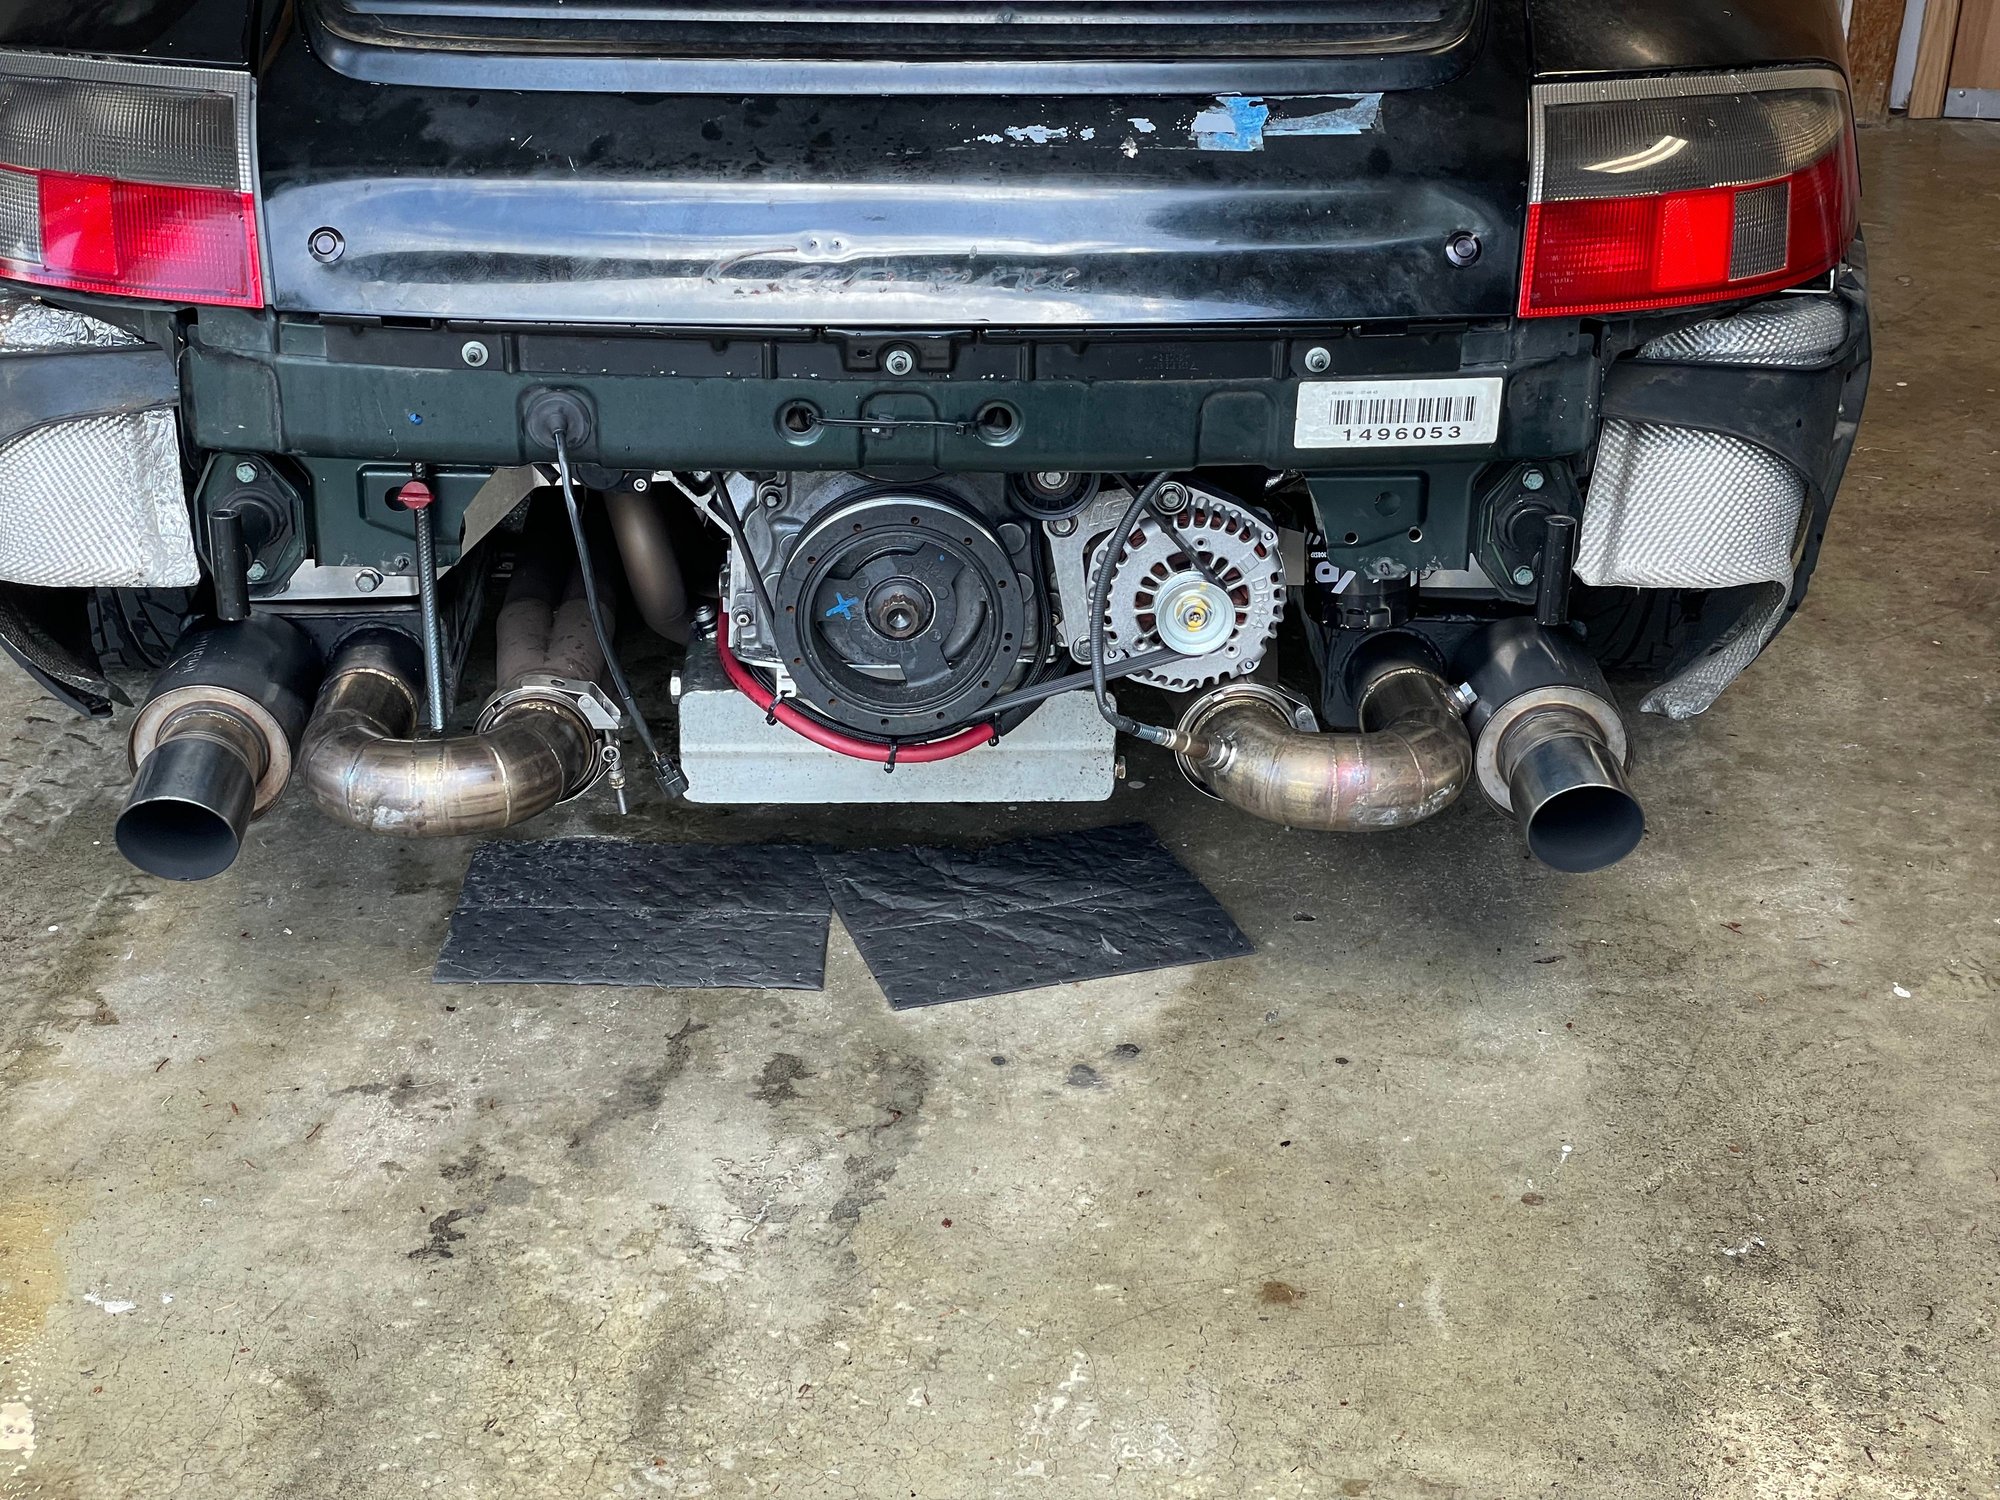
I pulled the exhaust and ceramic coated the headers. I also added smaller resonator style bullet mufflers after the existing mufflers. It�s quieter now and a lot less heat in the engine bay.
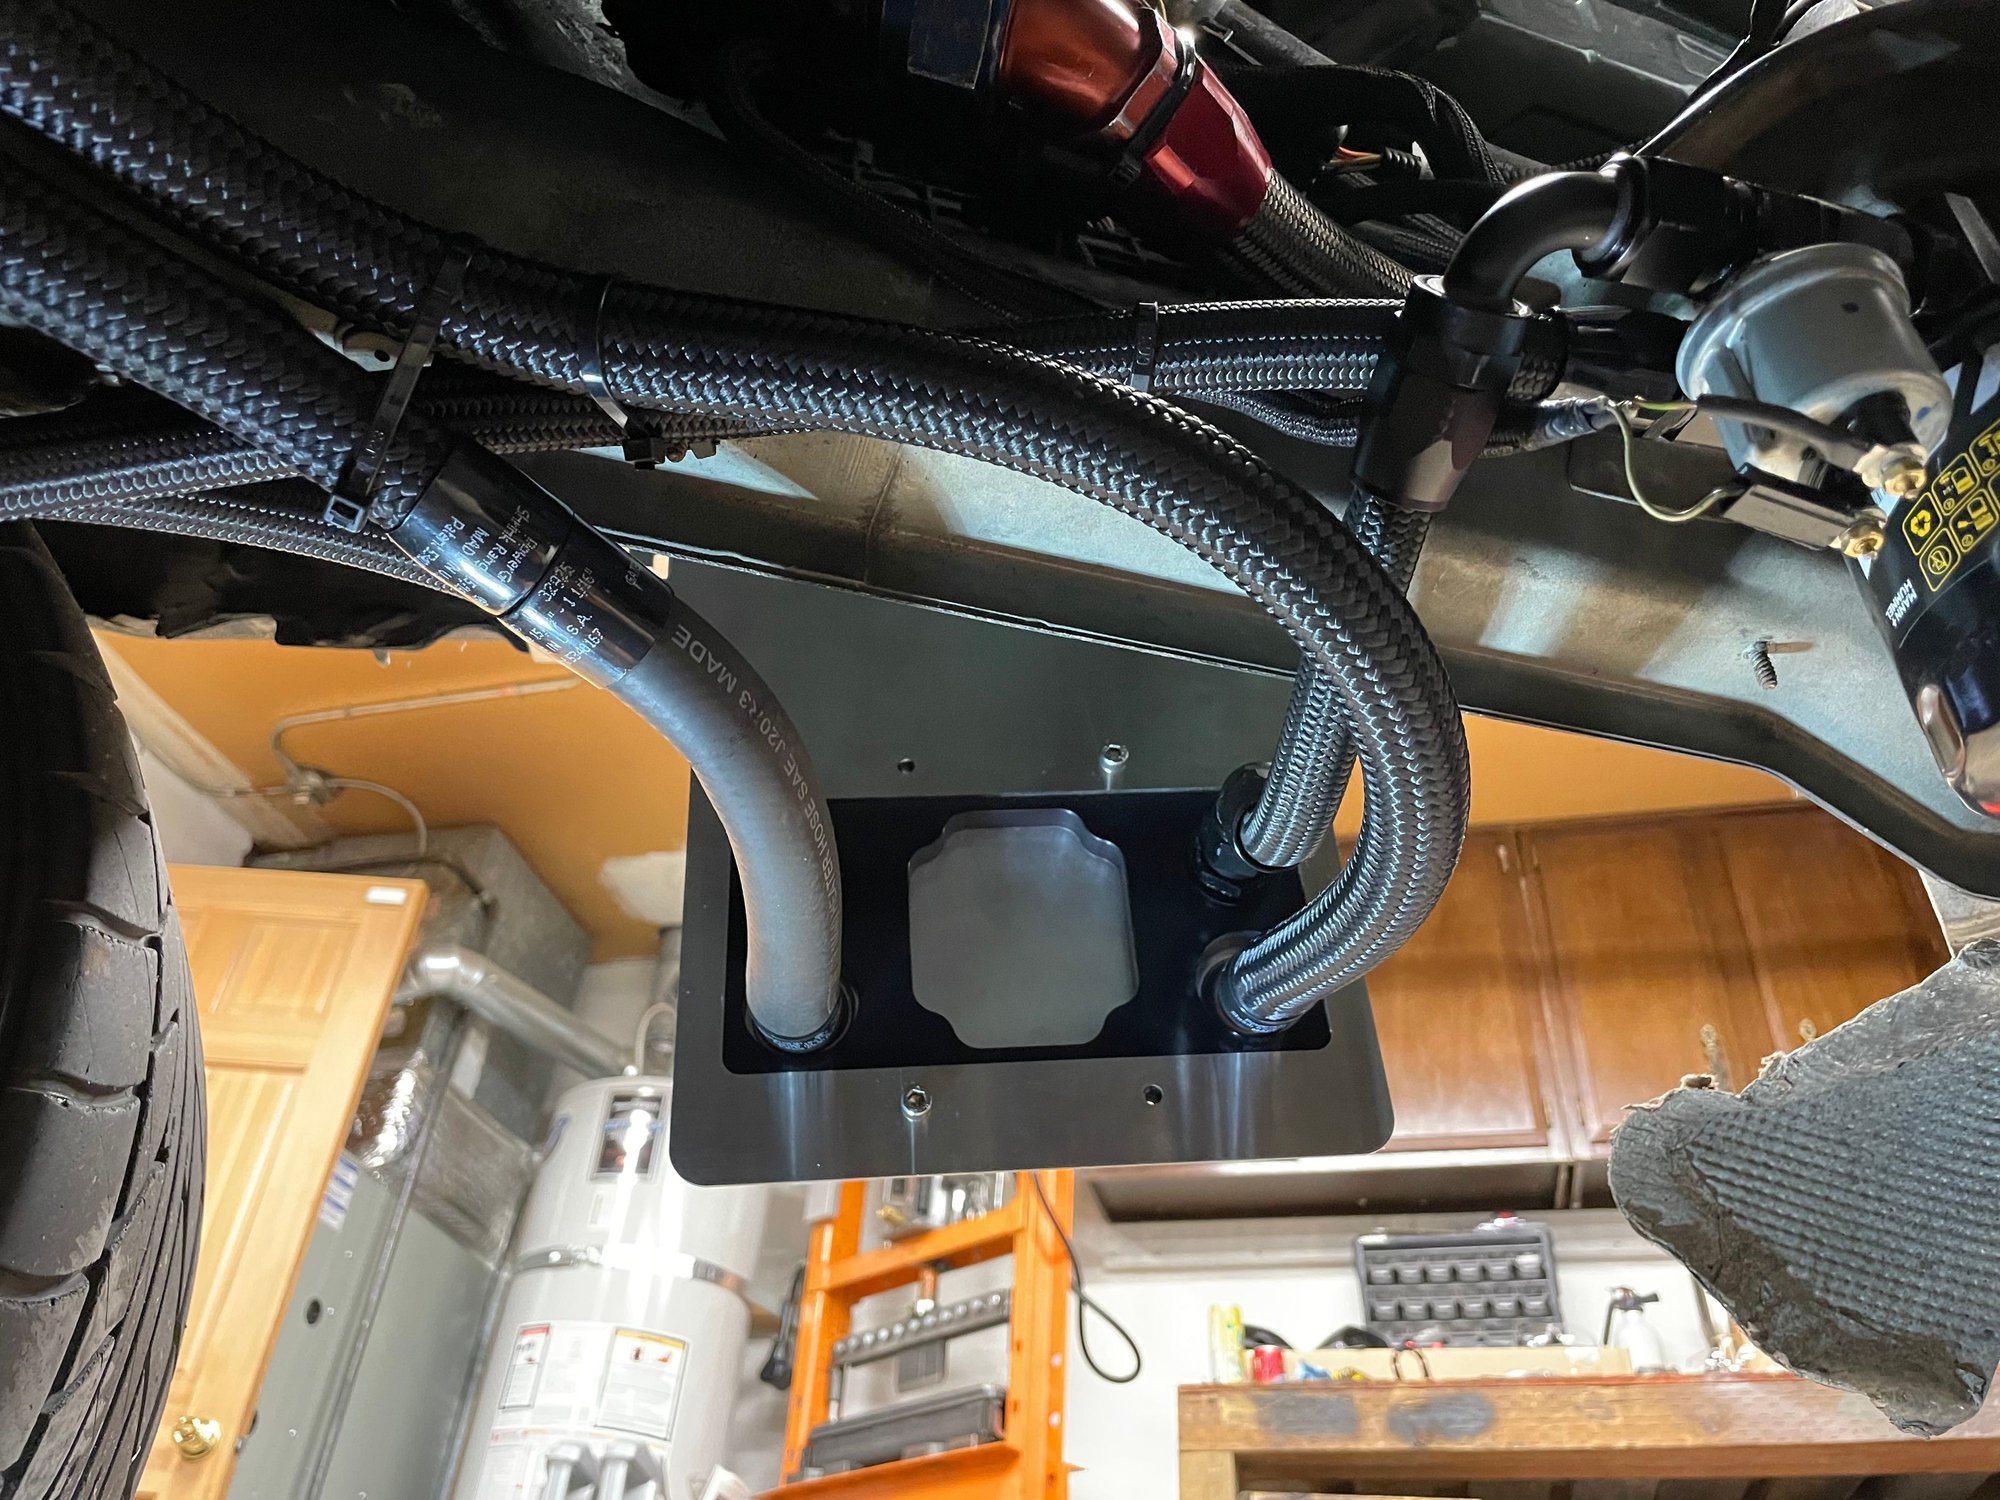
I also added a LN Engineering water to oil cooler with a stainless mount behind the rear bumper and tire. It tucks neatly into the area where the OEM mufflers used to live. I used all AN fittings and lines again and it�s a super clean install. I�m very pleased with the outcome!
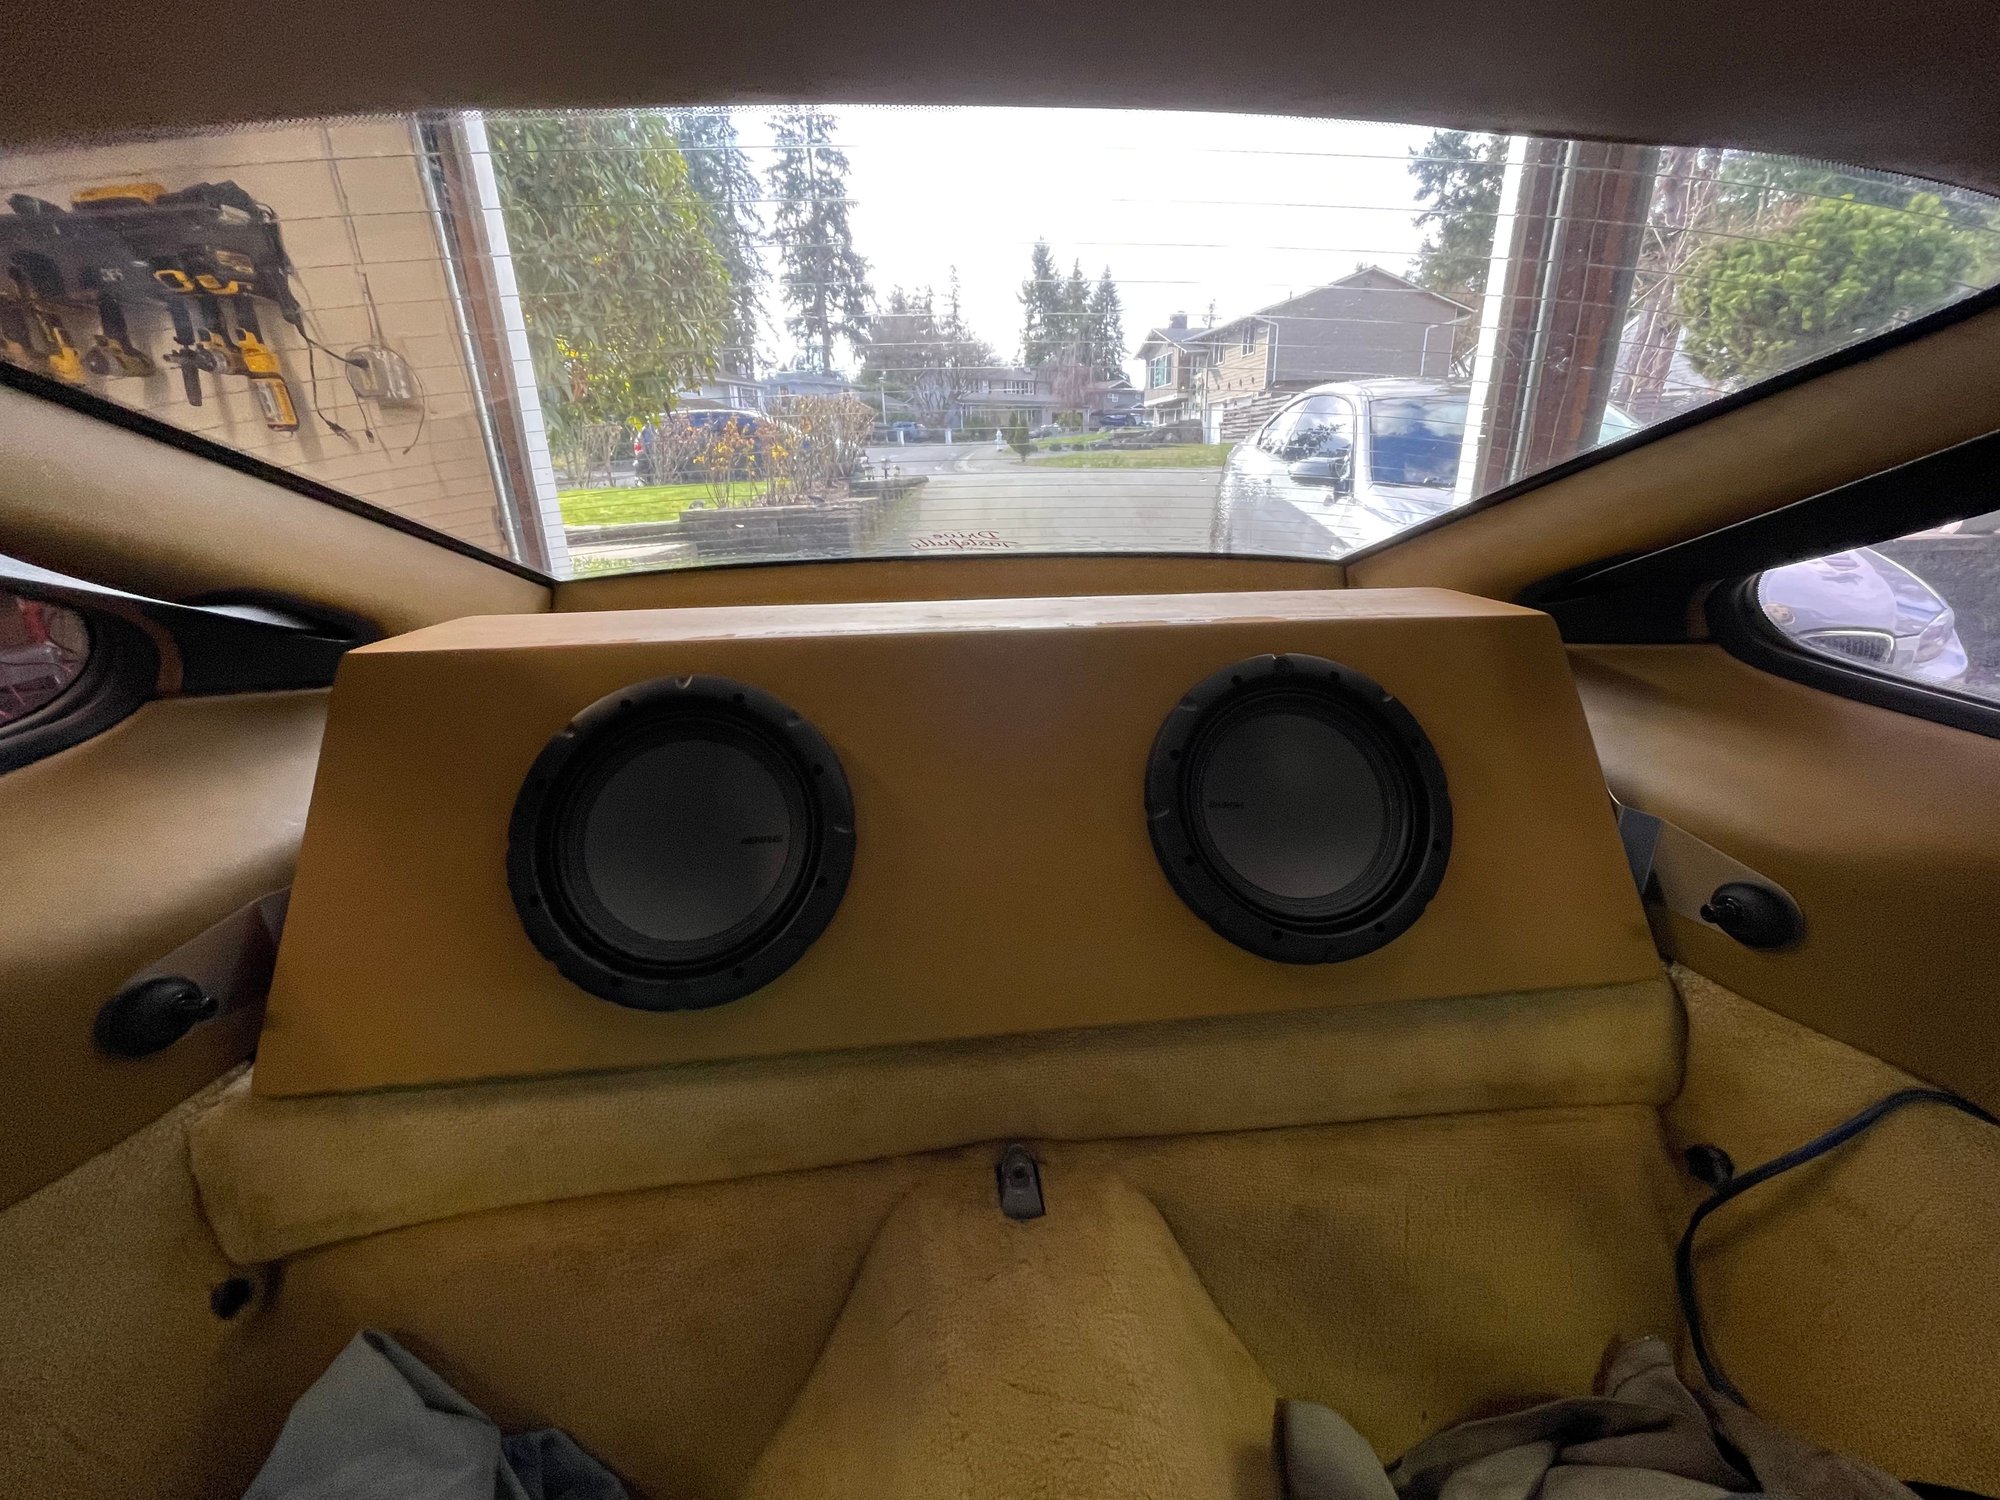
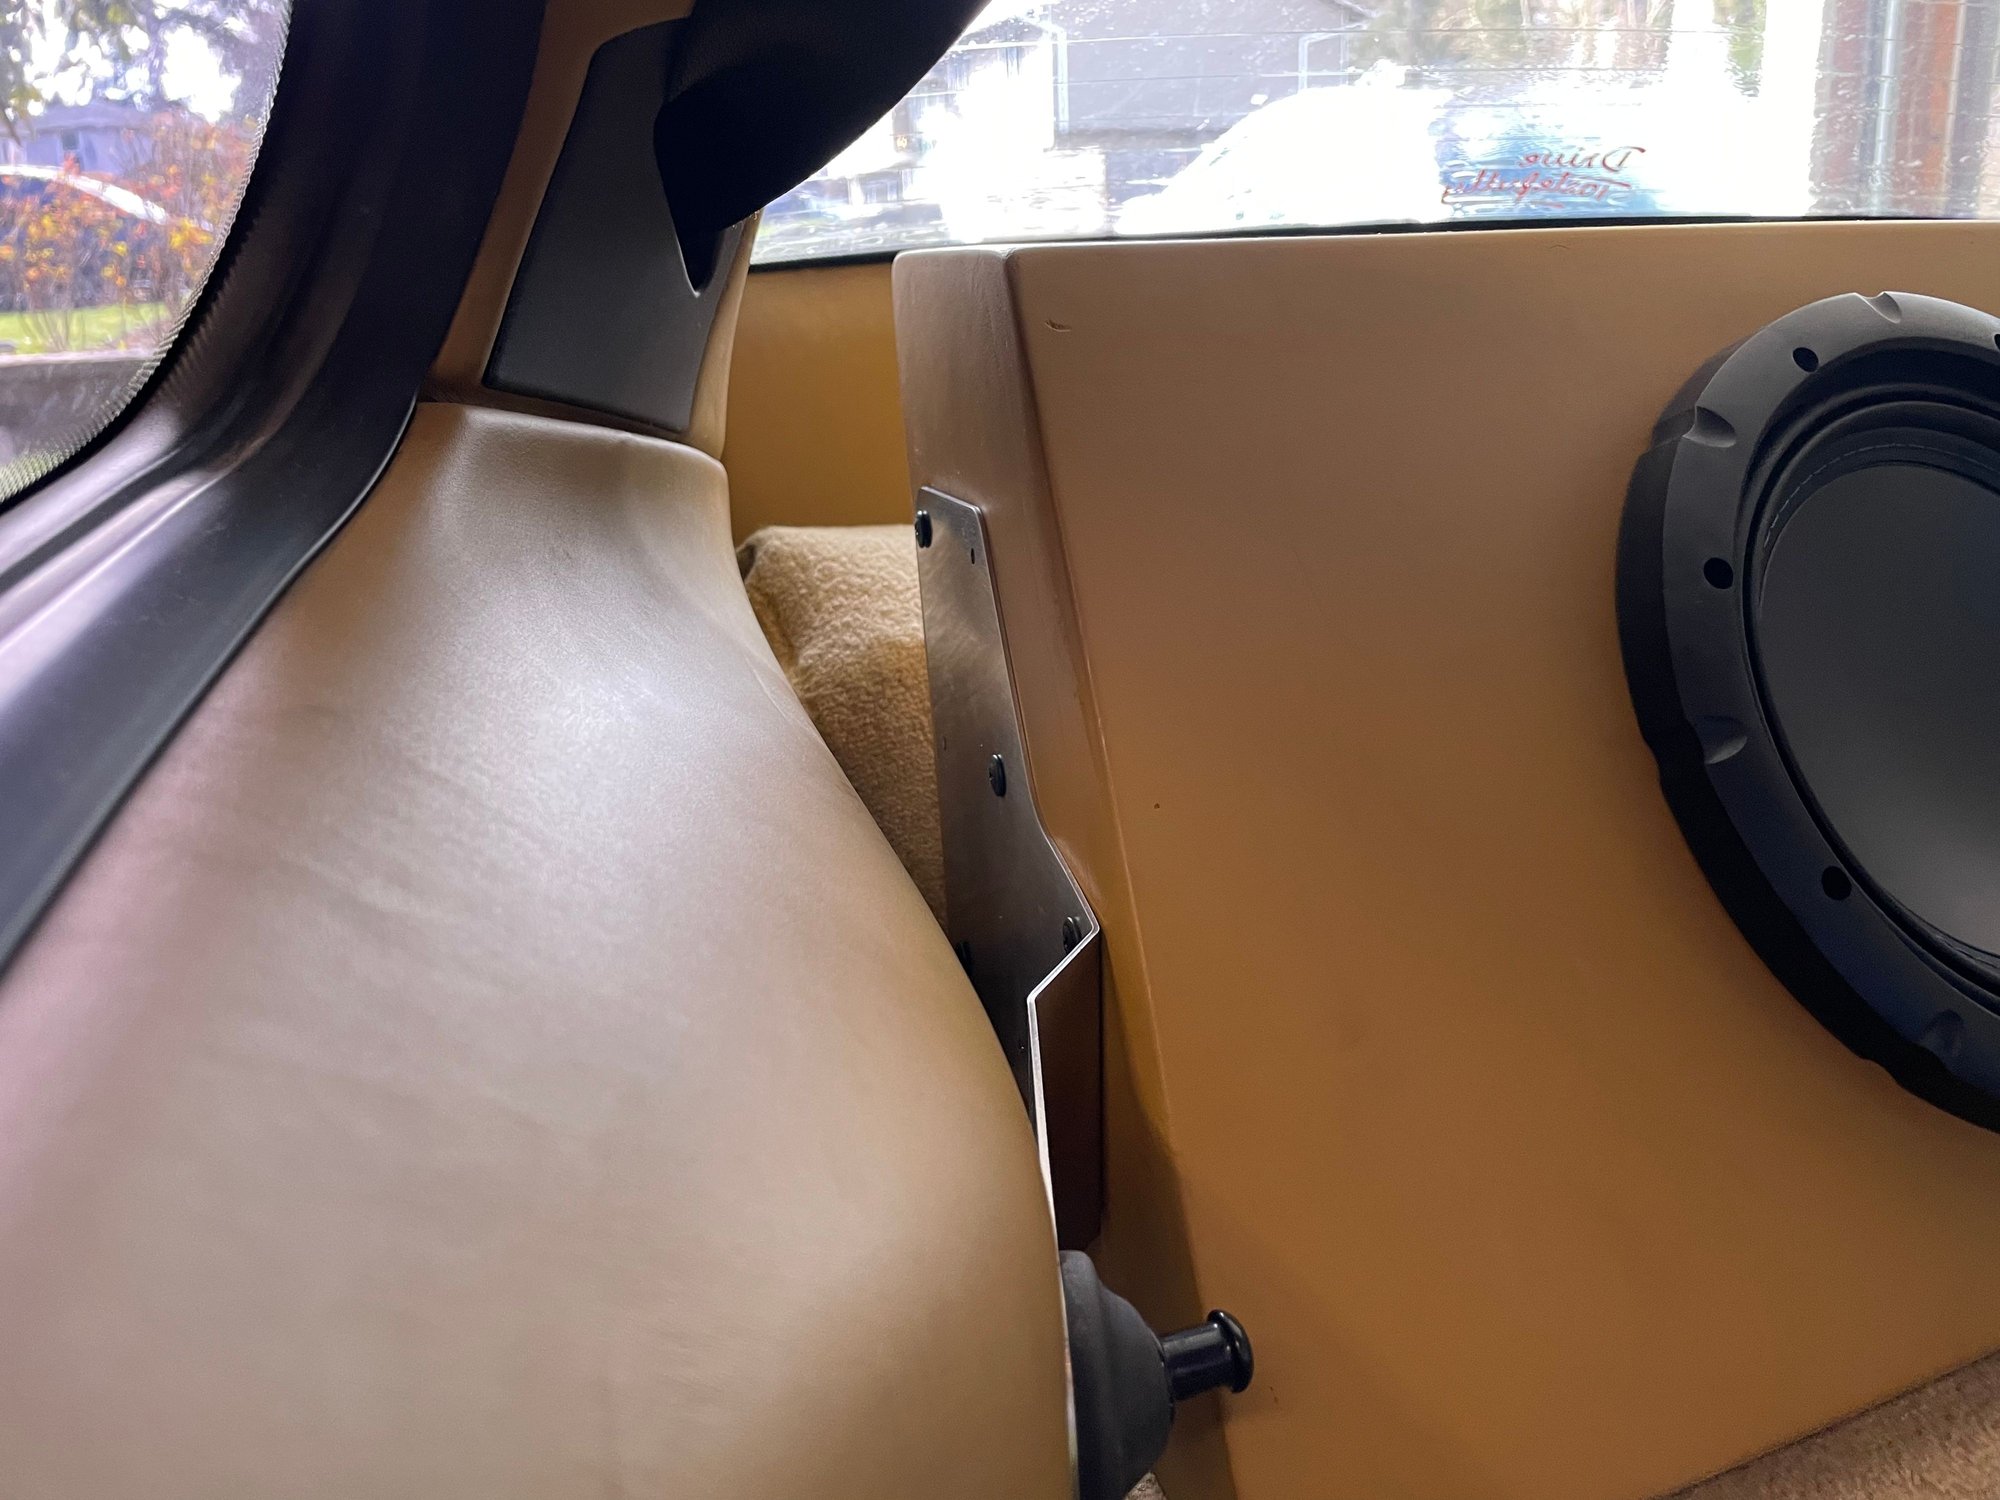
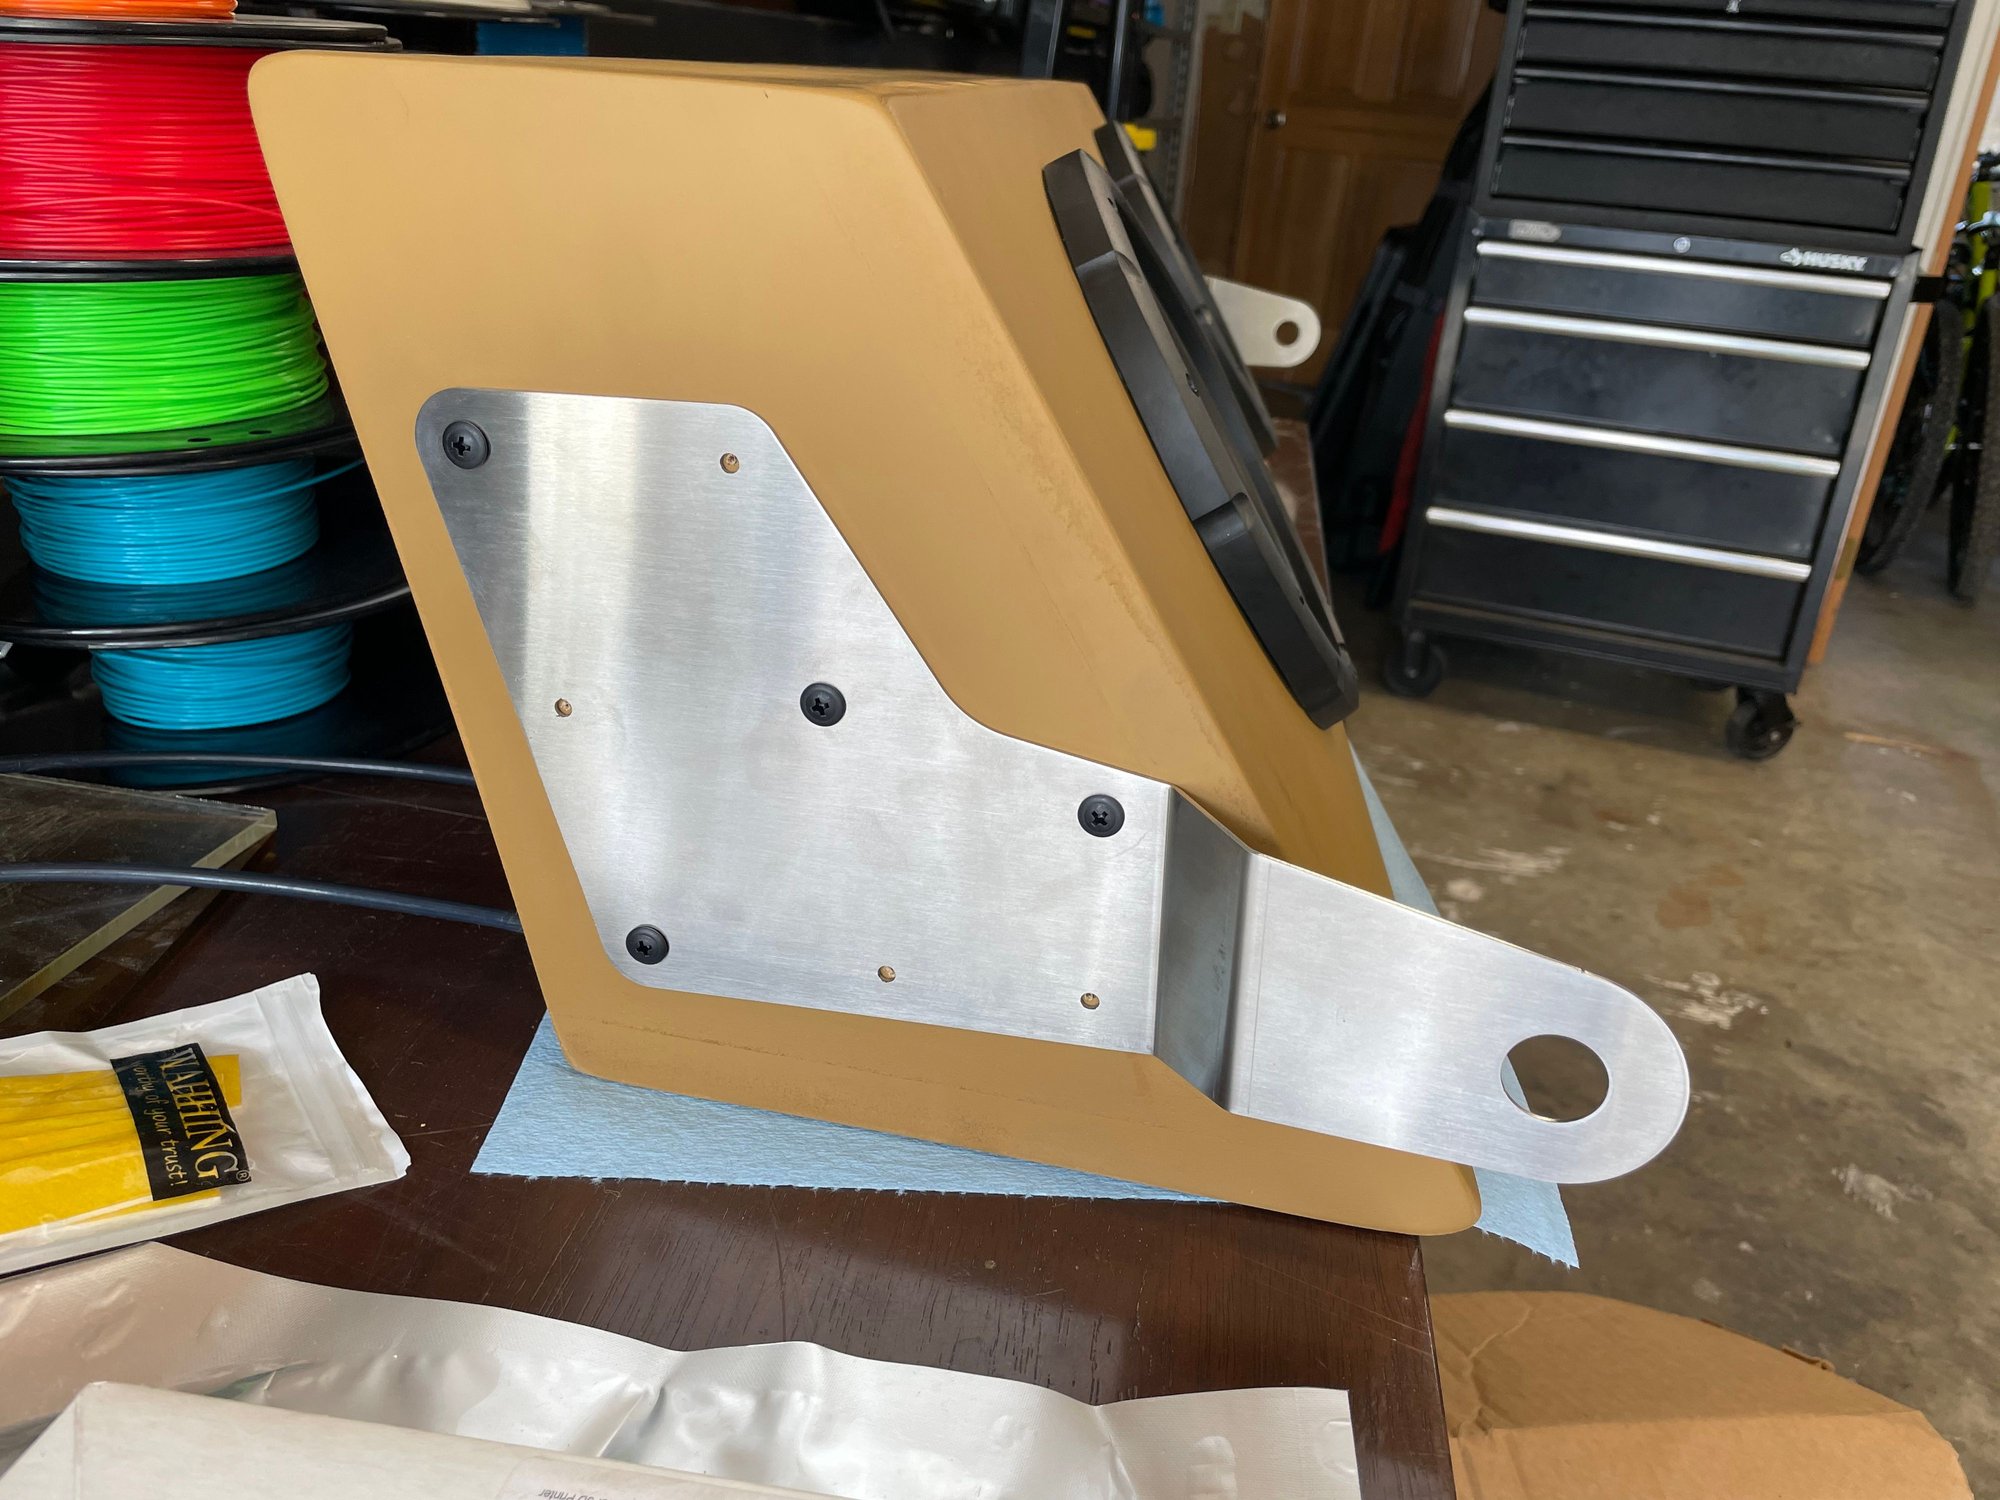
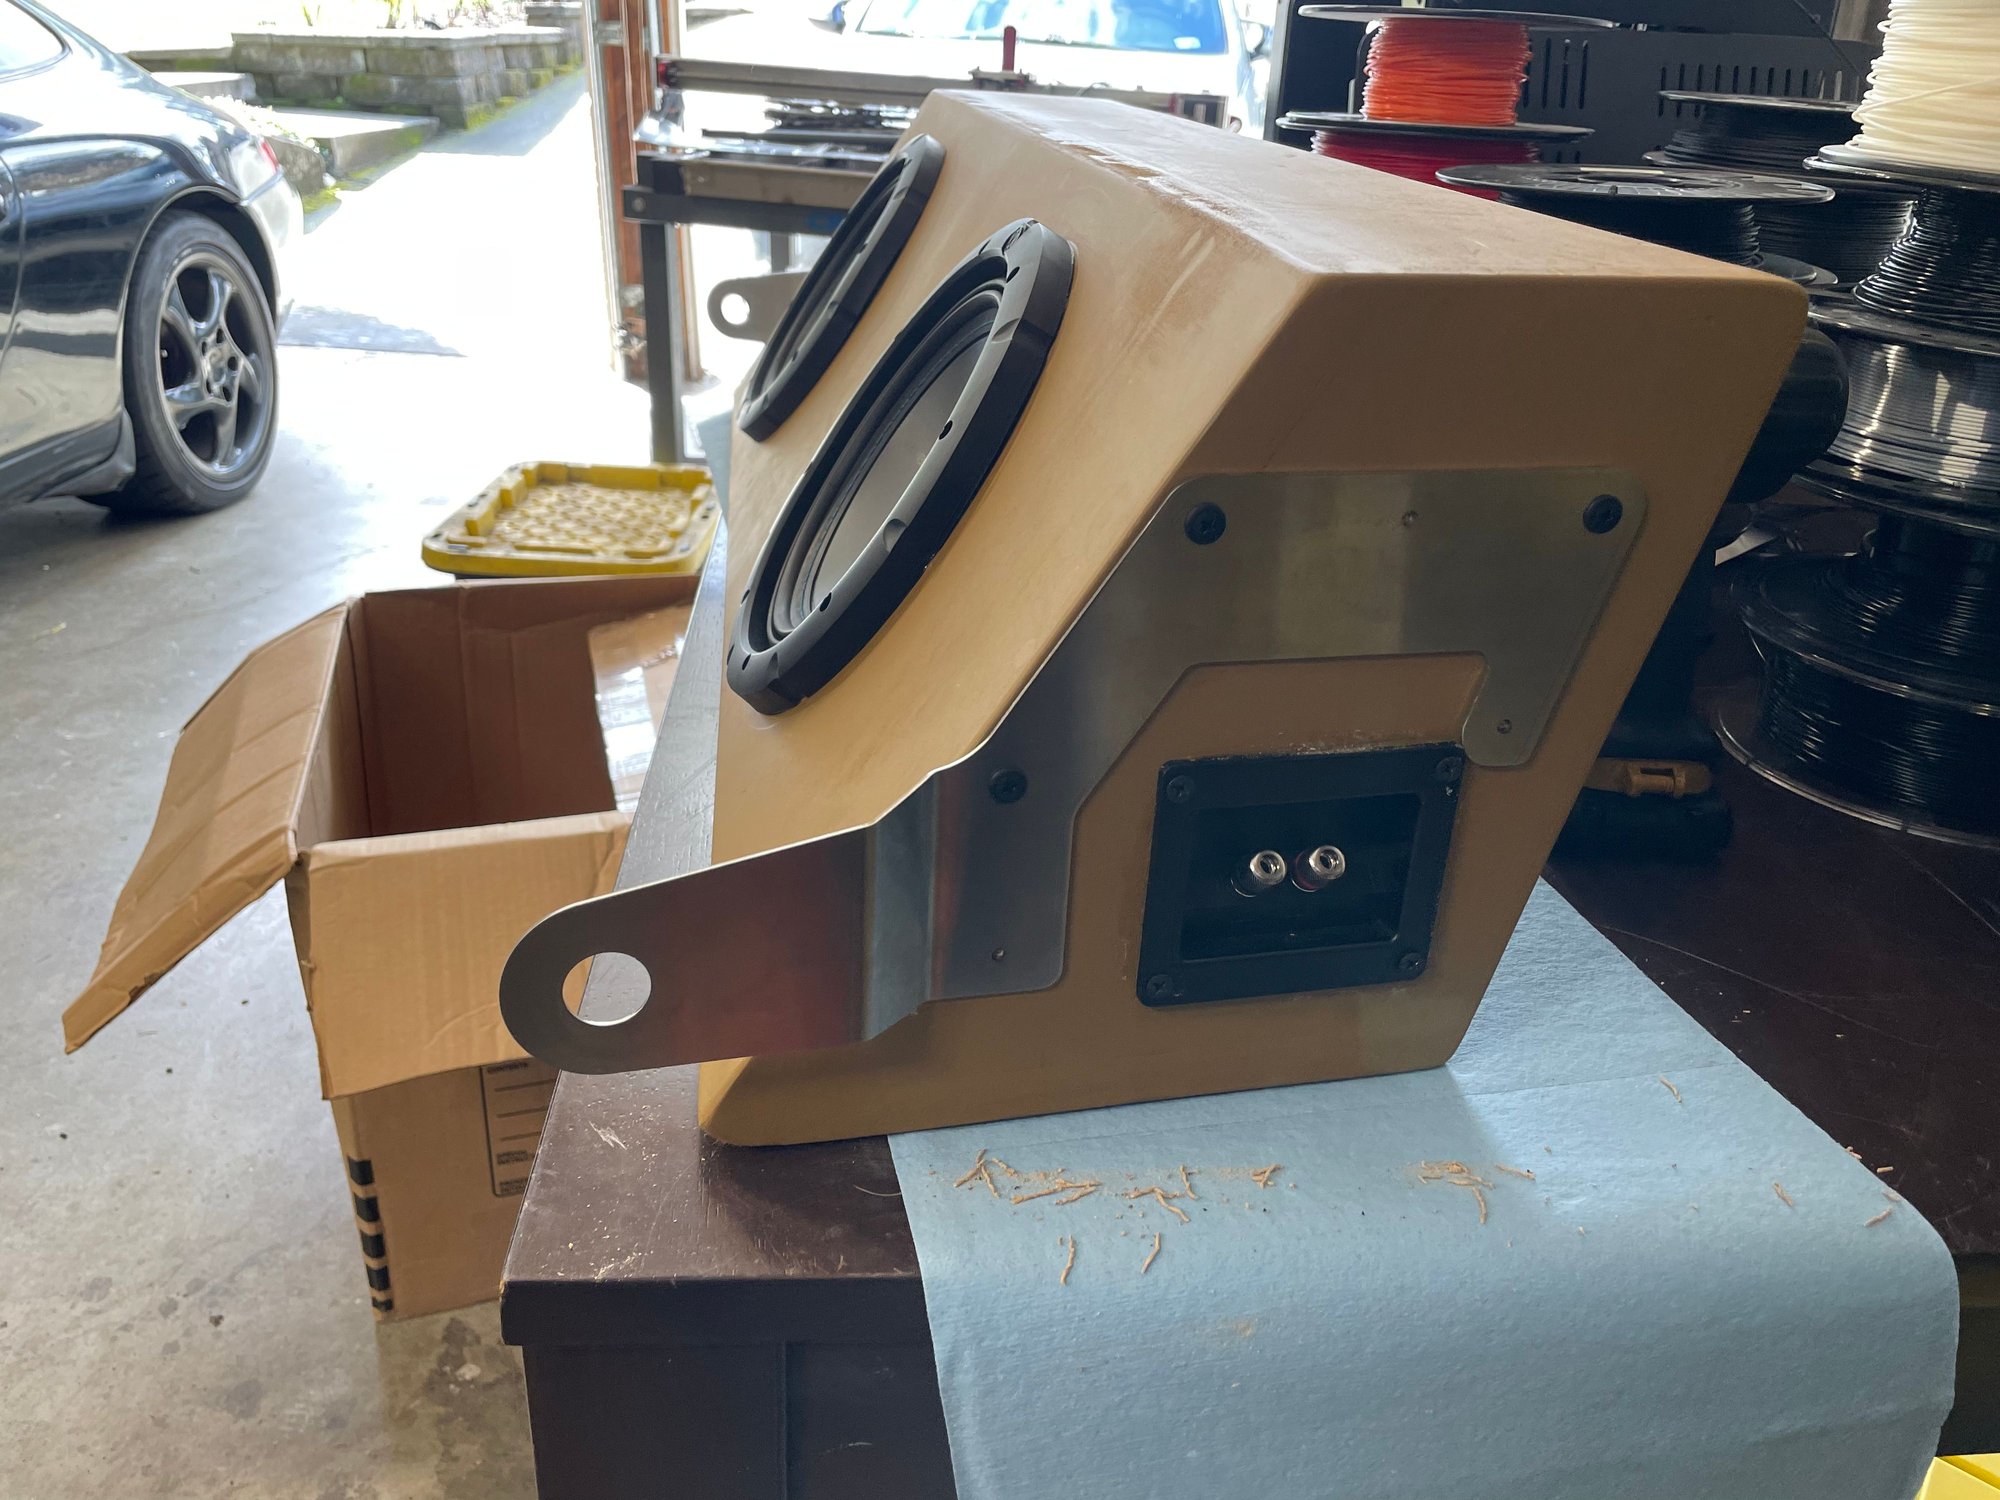
I designed new offset washers for the subwoofer box mount and has them 3D printed. They came out perfect! The mounts themselves were a couple degrees off, so those are being recut right now. This will close out the subwoofer box mount.
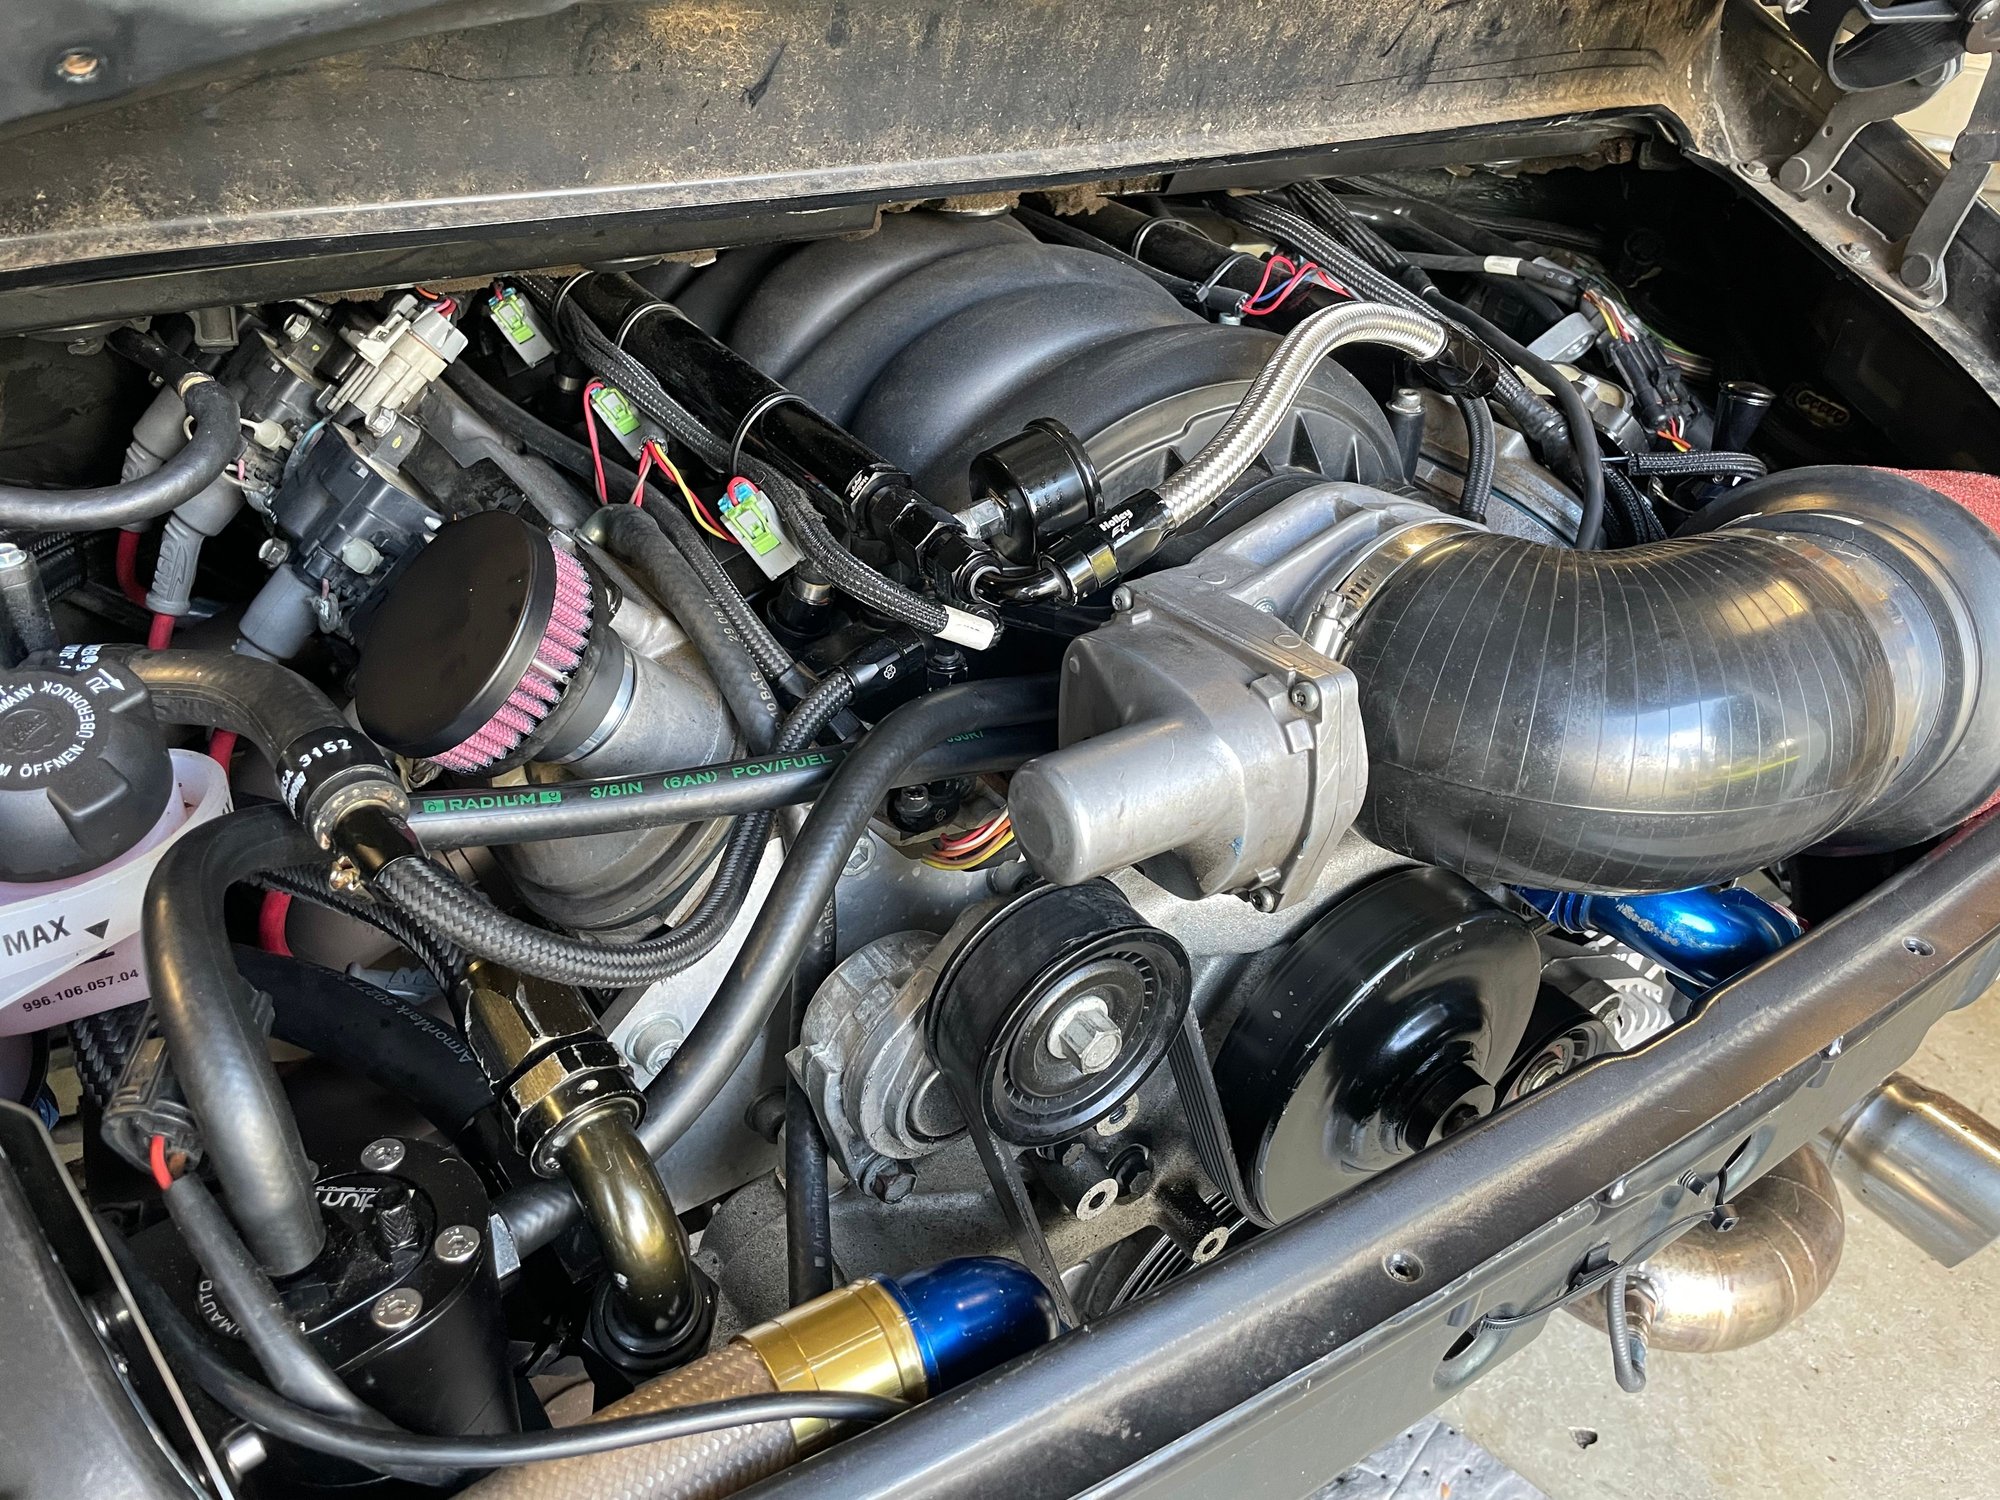
While the exhaust was out I tidied up quite a few areas. I replaced the 20AN line on the passengers side with a longer hose so the line is tucked away now, leaving more room for the air filter. I drilled holes for the air filter to pull fresh air out the deck lid. I mounted the MAT sensor in the air filter base for a nice clean install. I also found some tiny hood latch buttons from Quik Latch and installed those. Now the deck lid is flush with the tail lights and rear quarters, it came out very clean.
I replaced the cheap Canton dipstick with a new freshly black anodized Lokar dipstick and it�s muuuuuch cleaner. While I was in there I also installed two Spal puller fans to push fresh air through the bottom of the engine bay. I need to finish wiring these. I install a new coolant level sensor and cleaned up a few of the hose clamps with Gates heat shrink style clamps for a cleaner look. All in all it�s very clean looking now!
AC hoses have been custom made by Cold Hose in Florida. They were easy to work with and welded a fitting and crimped hoses to my existing Porsche lines. I also bought a low mile C5 Corvette bracket, pulley, and tensioner since mine was crusty. Those early C5 parts are spendy! AC should be able to be installed and working in the coming weeks.
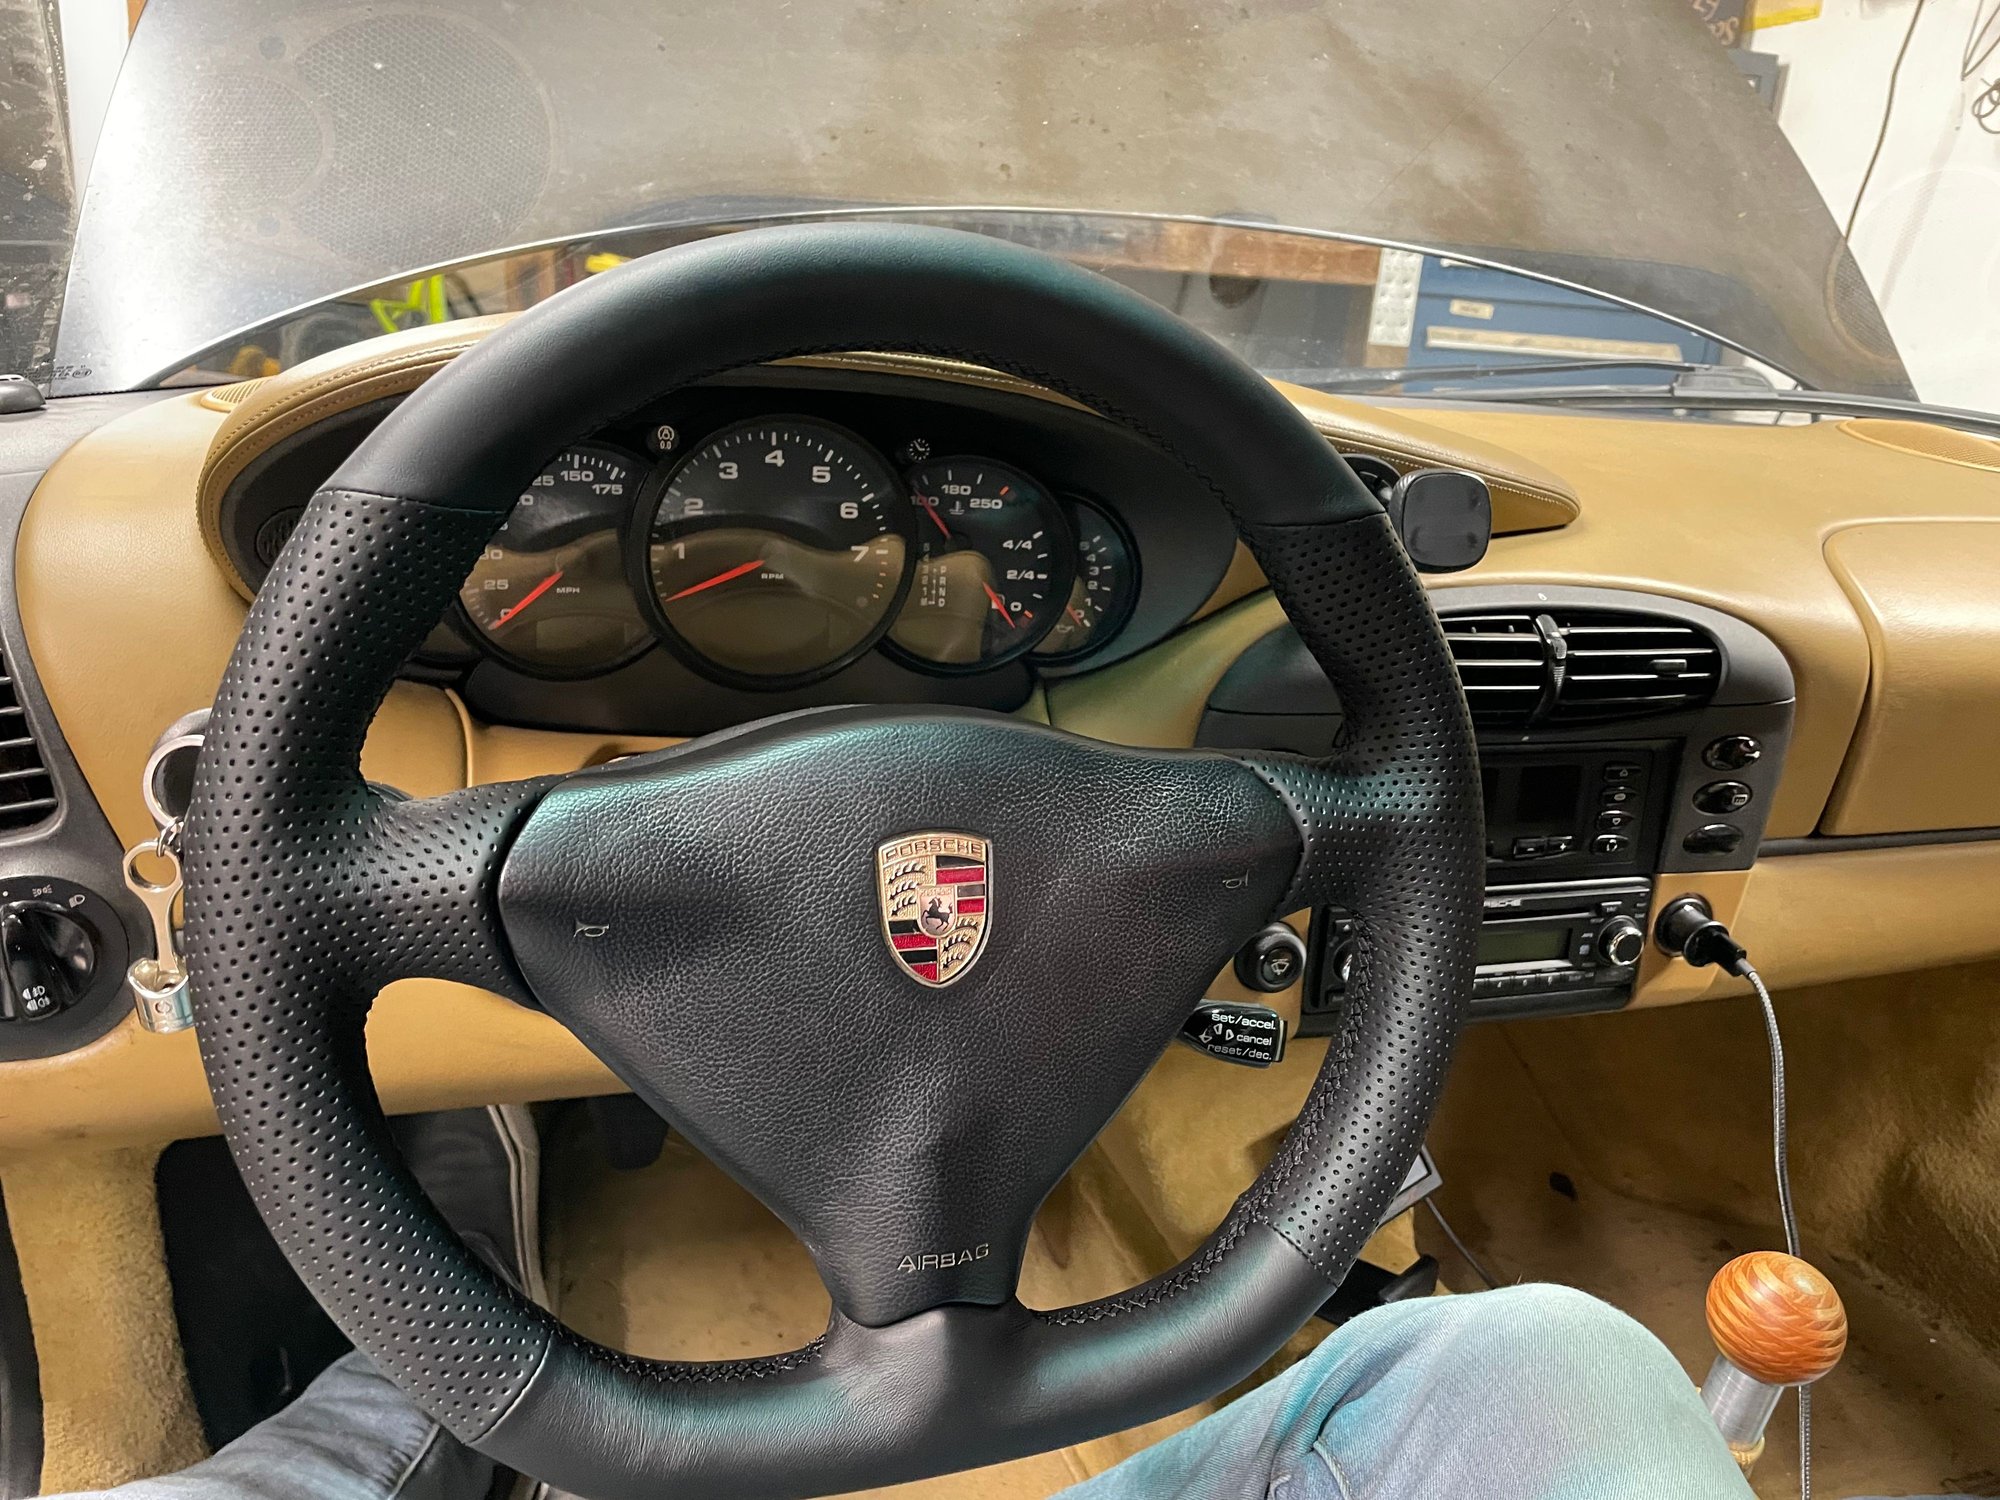
I have a T96 steering wheel on order that was supposed to be here weeks ago. Still hoping it arrives this month. Hah!
Car just needs seats, wheels/tires, and paint and body work. Everything else is basically done or only needs minor tweaking. I�ve taken this car a long way and wish I had the motivation to finish it out properly but I�ve moved on. Someone take it off my hands!
18639656[/url]]Bummed you are letting it go but wish you good luck with the sale none the less - Headers and the oil cooler install look great !
Thanks Jason. It�s been a fun car and it�s incredibly fast. The oil cooler and headers came out really great, thanks for the kind words. Priorities shift and I really want to get into a turbo or GT car next if it�s in the cards. I�d like to focus more on the driving and less on the wrenching this time.
T96 steering wheel is in and�MUCH better! Already loving the shape and grip.
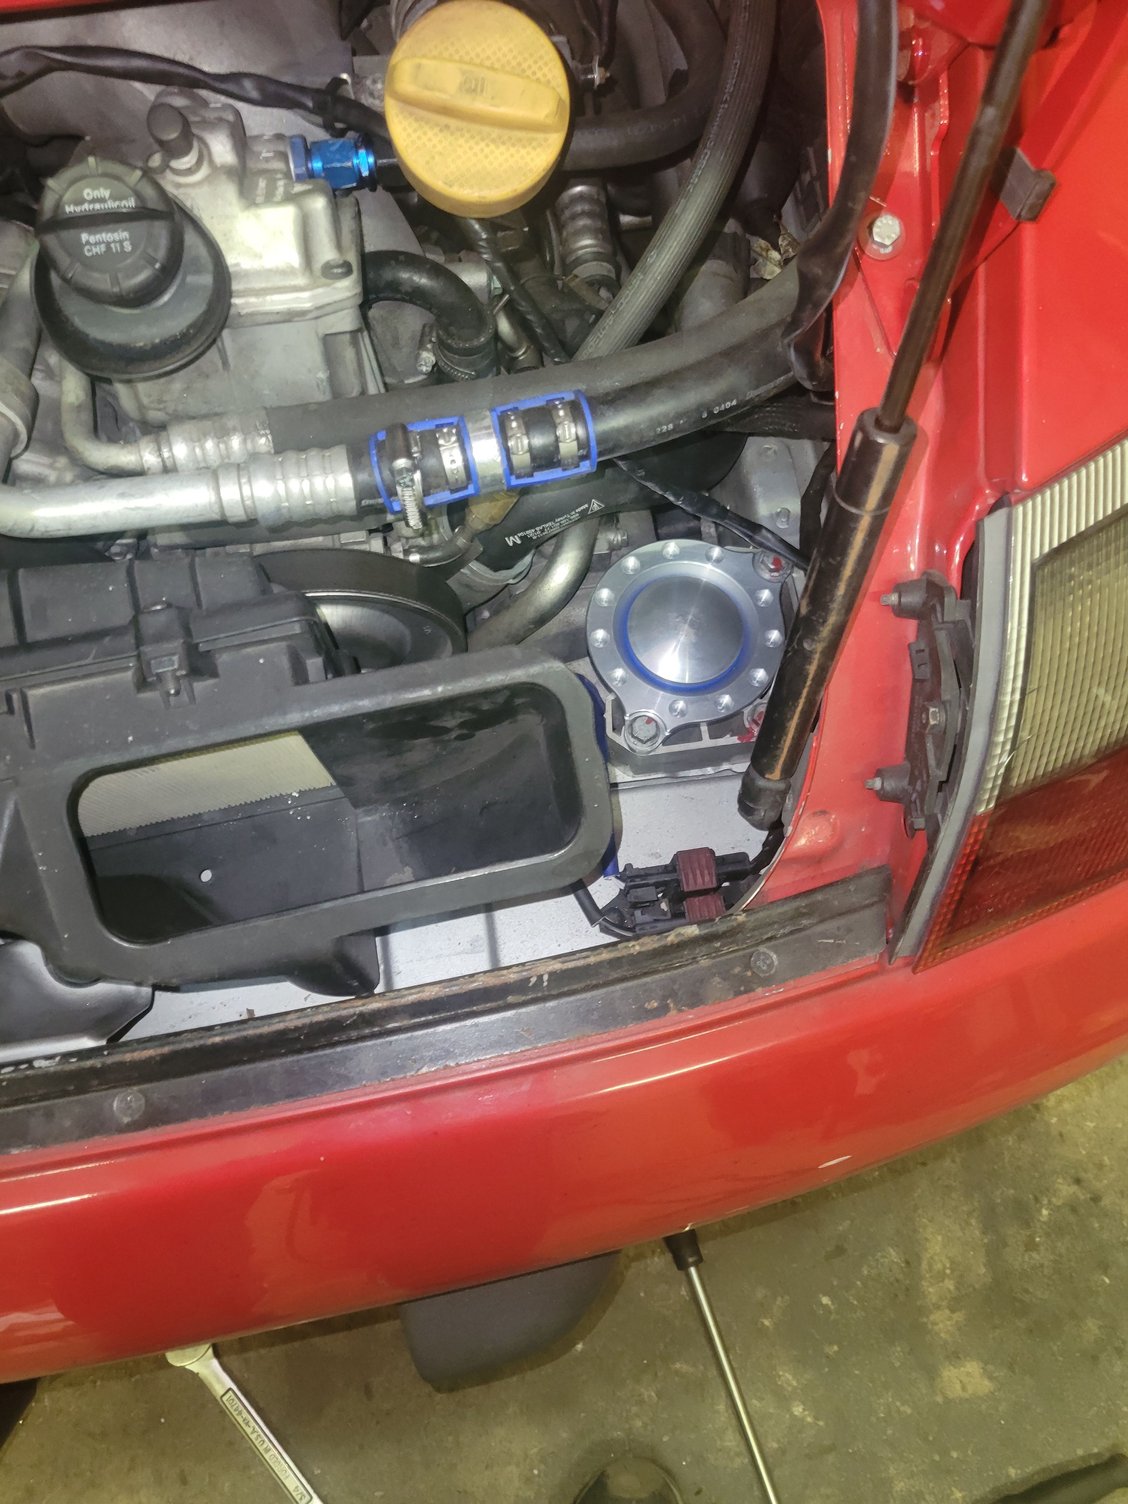
I added an oil cap breather with one way valve. This helps the engine dissipate unwanted crankcase pressure at high rpms that is difficult for the factory LS6 PCV to handle. I also tidied up the engine bay a bit more and am really pleased with the refined look. I sometimes wish the 20AN fittings were black but knowing they�re NASCAR takeoffs is cooler IMO.
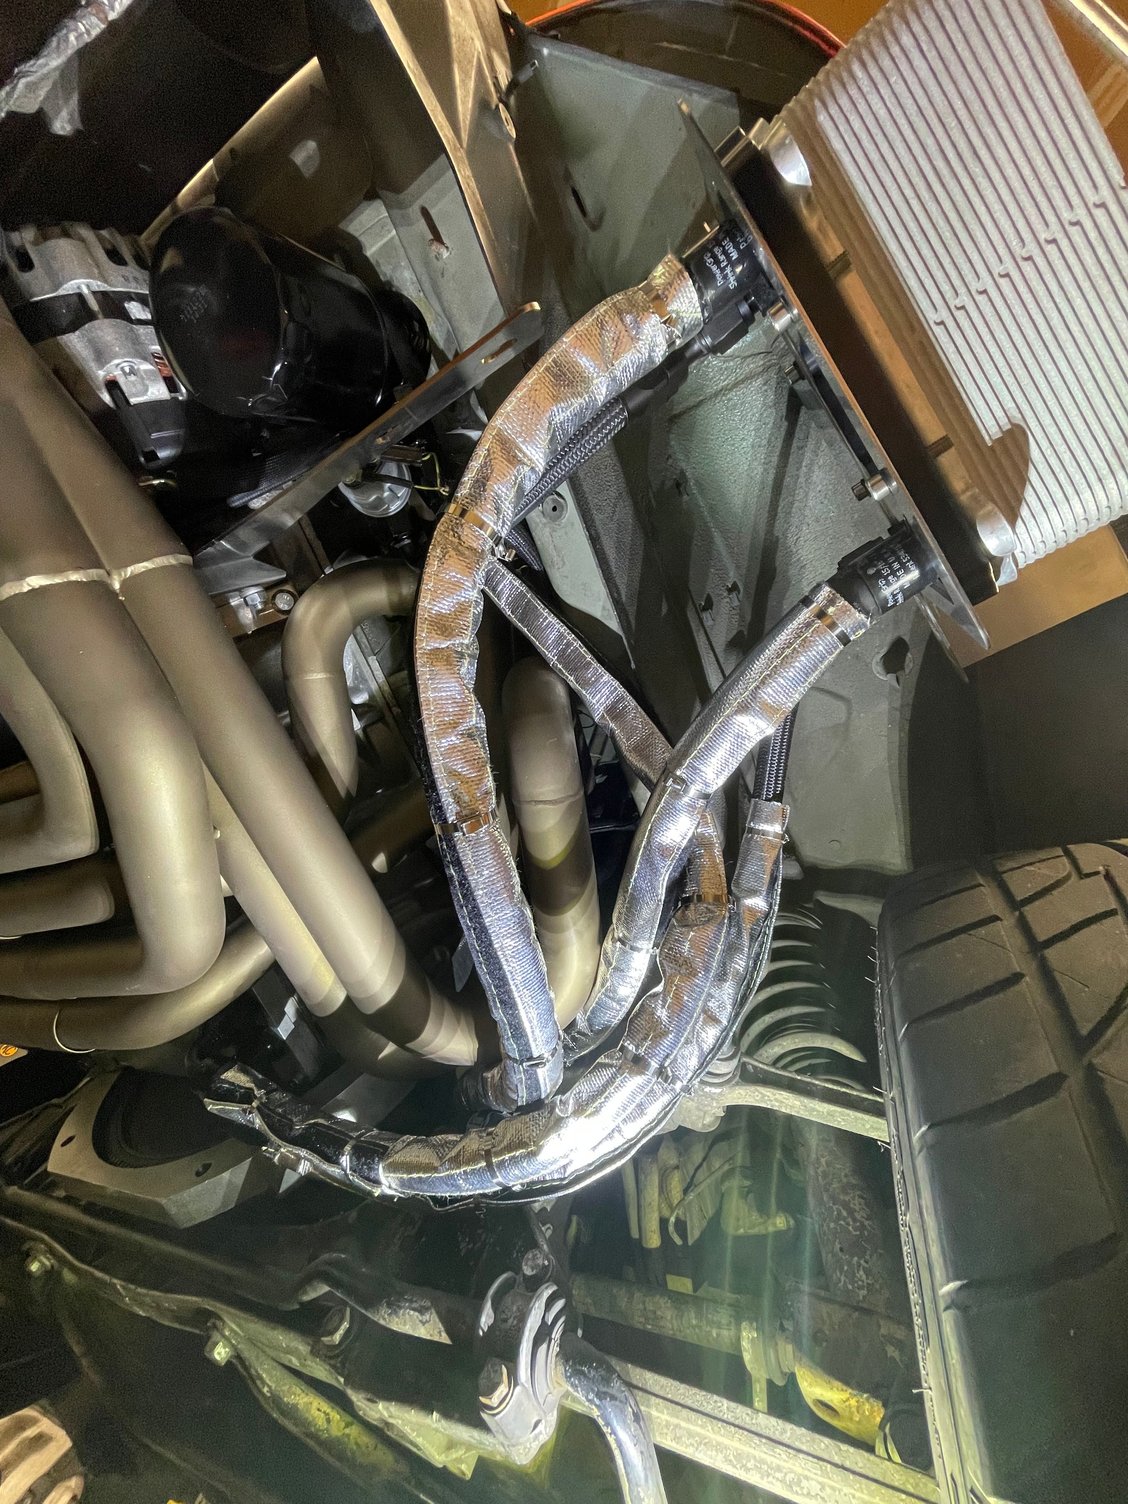
I had to take this shot before I buttoned up the crash bar and bumper. Always my favorite shot.
I had the AC hoses made up for the car finally. Cold Hose in Florida did a great job for a very reasonable price. I�d definitely recommend them and use them again. I just put the car back together but I think I�ll pull the bumper and crash bar soon to throw on the LS1 Corvette compressor and OEM mount with the new hoses. I have a buddy who can charge the system and another who has dealt with engaging the compressor in the LS swapped 996.1 AC system. Hopefully this summer I�ll have AC! Add a heat shield for my intake and I�ll be ready to rip.
The last item I took care of this past week is the subwoofer box. I made new mounts for it and 3D printed offset washers to mount to the rear seat latch mounts. It worked out great! I�ll pull the mounts off and paint them as soon as I can paint match the metallic dark gray used in the interior.
The alternator light does not appear to be working .Key on engine off light should be illuminated .With key on - the blue wire will have 12 volts and when connected to the proper alternator terminal will be grounded and turn the light on . .With engine running the alternator terminal will turn 12 volt positive and light will go out . That wire is also the engine run signal for abs operation and climate control .
The easy button for the fans is to just home the relay activation wires to the terminator .
A year later I finally circled back to the AC. I have the compressor and lines installed, and the system was charged and held 100% pressure.
Blue wire referenced above needs to be routed to L on GM alt still, but I simulated it by grounding it while key on engine off. Here�s the dash - very different than before.
With snowflake on and HVAC on auto, I see a max of 0.028v at the compressor trigger wire (green/yellow). If I ground blue wire above, goes down to 0.016.
Is the DME searching for engine RPM and not seeing it? I think this goes back to my post last year trying to feed the tach conversion box output to the DME rpm signal wire. Any other suggestions? Really want the AC to work soon, it�s in the mid 80s here now.
Climate control needs to see 12 volts on blue wire to activate ac .I bypassed dme not sure what dme signals dme needs to activate compressor ,The climate ac control wire to dme is 12 volt pwm if you choose to bypass dme .If the terrminator has pwm input slot and ac control logic better way to go .
Climate control needs to see 12 volts on blue wire to activate ac .I bypassed dme not sure what dme signals dme needs to activate compressor ,The climate ac control wire to dme is 12 volt pwm if you choose to bypass dme .If the terrminator has pwm input slot and ac control logic better way to go .
I sent 12v to blue wire with the engine running, no change in voltage to the AC compressor trigger wire (green/yellow). I recall going through the rpm signal from the converter box to the tach, and splitting it to pin 78. Pin 78 is Signal, rpm crankshaft position sensor, and I'm thinking the next step is to split the signal again so the DME thinks the engine is running, send 12v to blue wire. If this doesn't work, I'll go back to the DME and look at signal from Pin 62 - A/C compressor On and Pins 68 - Position switch/clutch switch and Pin 69 - A/C compressor requirement.
Does anyone know if pin 68 is related to AC clutch and switch? Seems so.
3 dme pins are the basic ac control .pin 14 ground signal from pressure switch-pin 69 climate control turn on ac -pin 62 ground signal to ac relay .Don't think the ac kit you reference will help -looks like a total rewire and does not handle thepwm signal from climate control .The easy button is put a ground switch on the pin 62 wire and activate ac relay .I would still explore if terminator can handle a pwm signal and have a seamless operation
 08-28-2022, 12:35 AM