When you click on links to various merchants on this site and make a purchase, this can result in this site earning a commission. Affiliate programs and affiliations include, but are not limited to, the eBay Partner Network.
Yes, no probs. That is what I did.Hey Rob, if you can share all the exact dims with me I can probably do a V2 to suit 17mm and upload to Thingyverse.....
I did a similar remote install and had problems several weeks later where the extension hose leaked and I removed it. Only my experience may have been a one-up hose failure.
Andy, did the hose leak or did the slave cylinder fitting leak? The fitting has a reputation here for needing some extra care to attach without either snapping it off or leaving it to leak.
The fitting has a reputation here for needing some extra care to attach without either snapping it off or leaving it to leak.
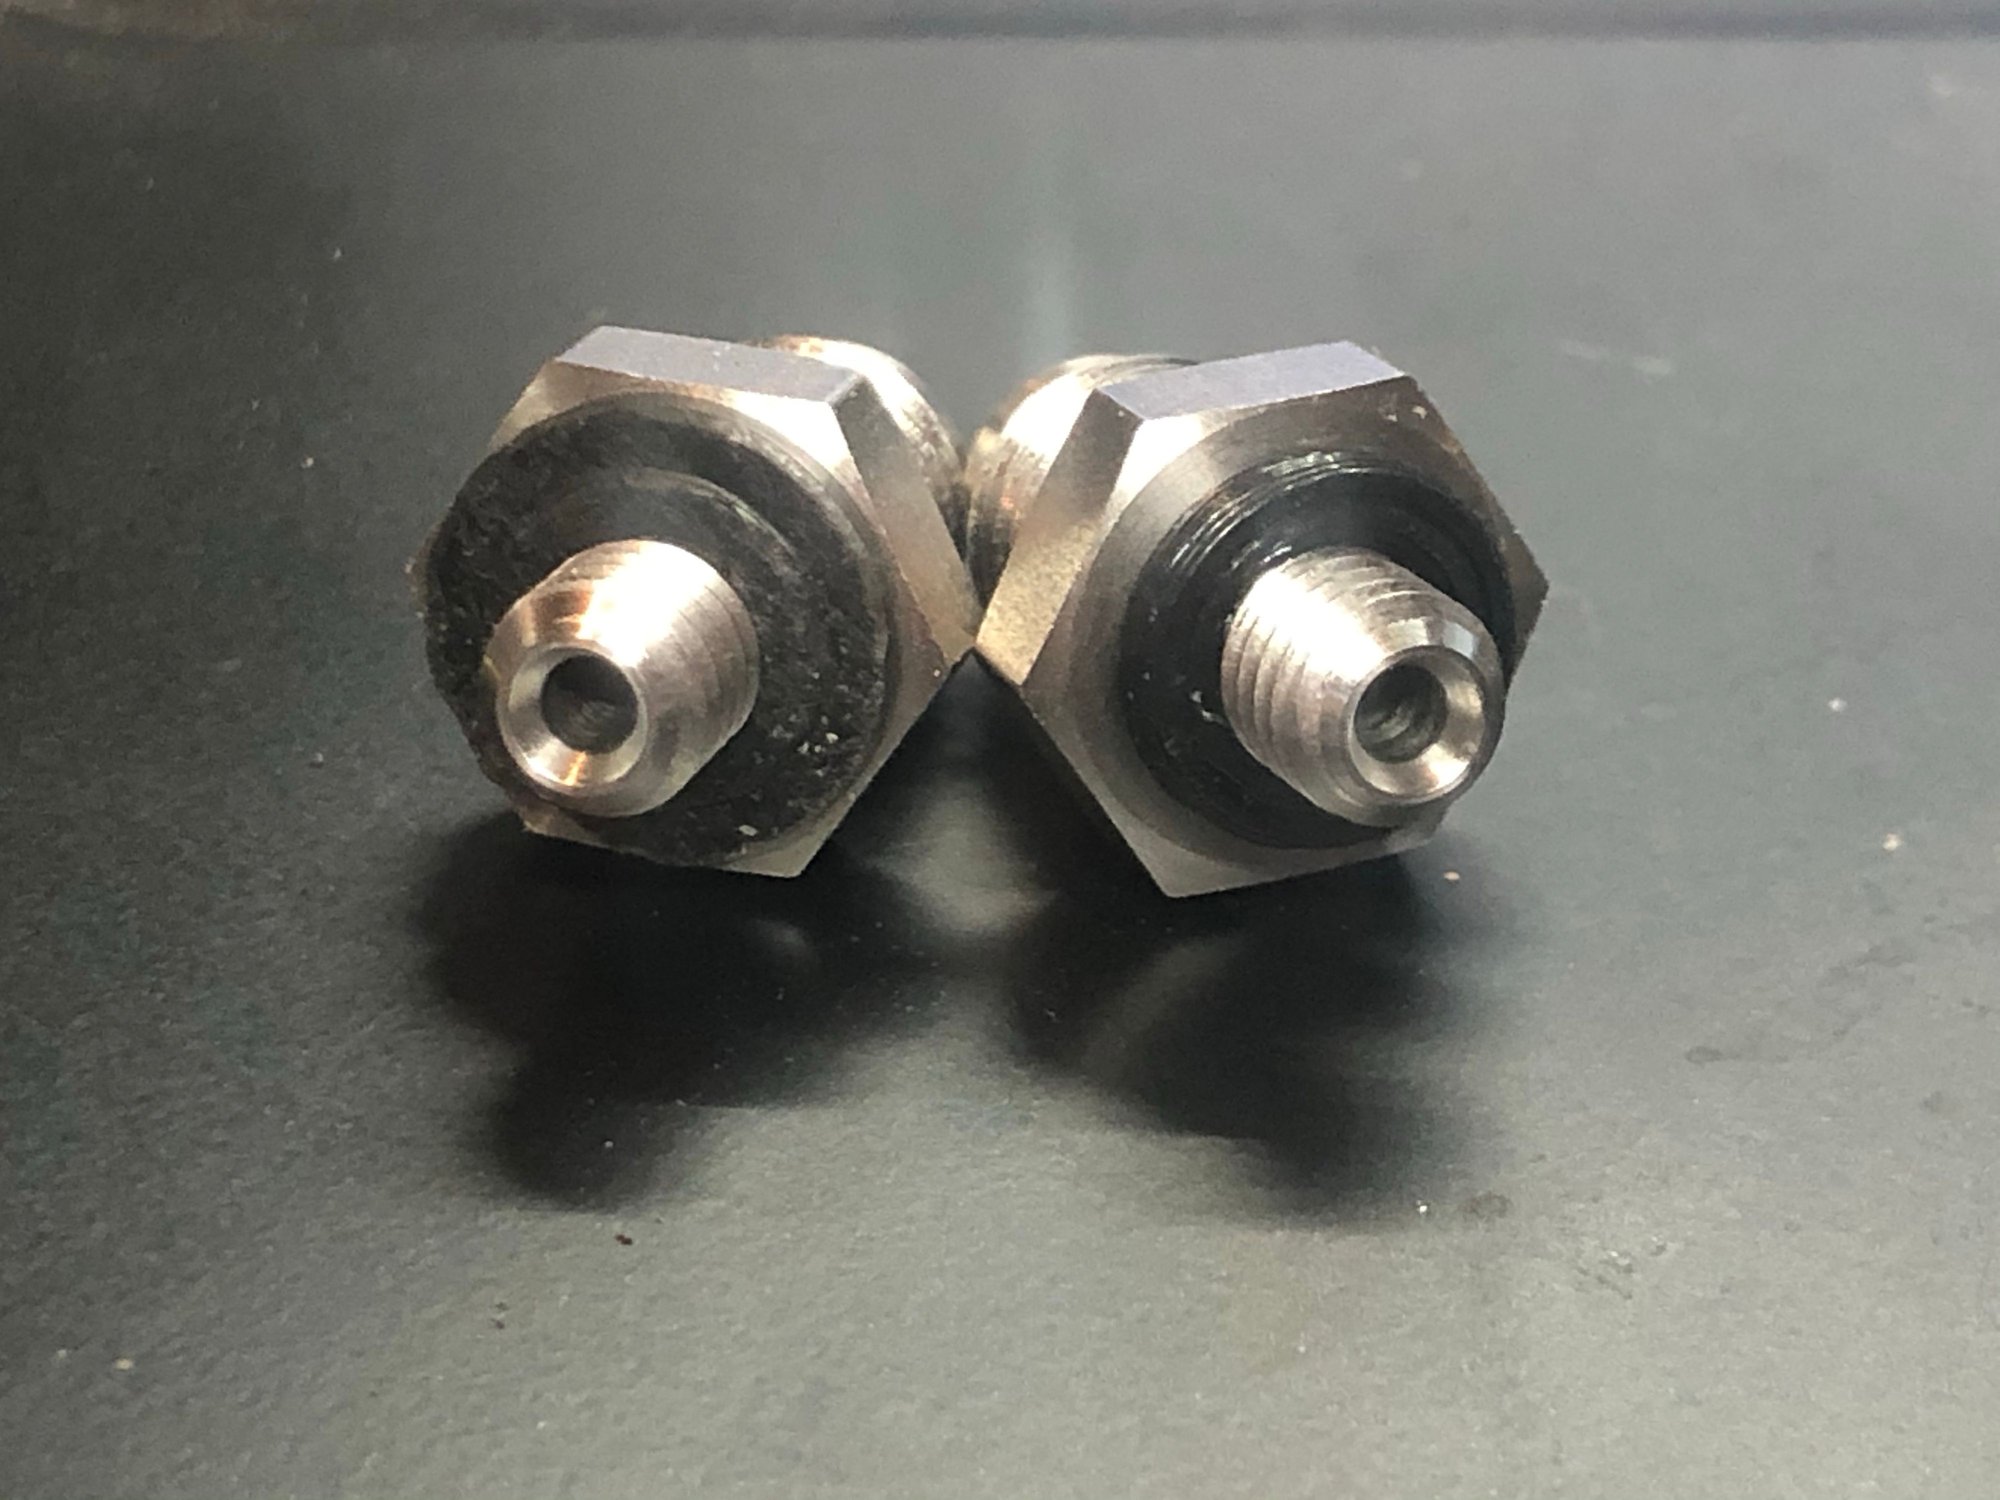
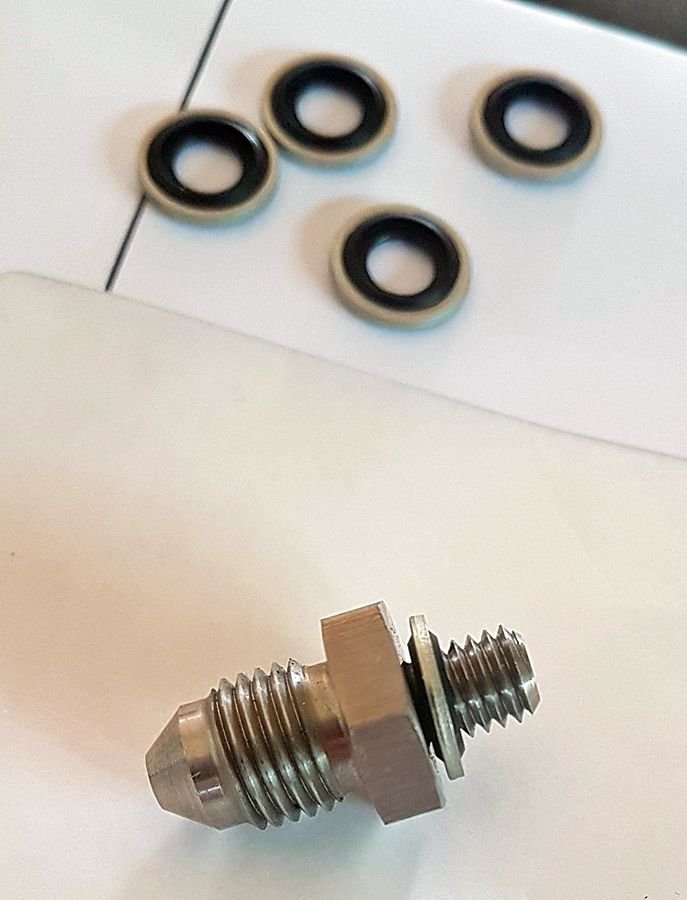
Yes the fitting you screw into the cylinder is parallel thread -and- the thread in the cylinder is parallel. With parallel-to-parallel threads, they should be sealed with an oring or gasket, or you instead use parallel-to-taper threads. However, the fitting is parallel and there is no real shoulder on the fitting under which to fit an oring or gasket.
So the solution used here is to wrap the parallel threaded fitting with tape to provide a seal. Mine is still leak free at the moment, although I would prefer to make this 100% and fit either an oring or taper thread.
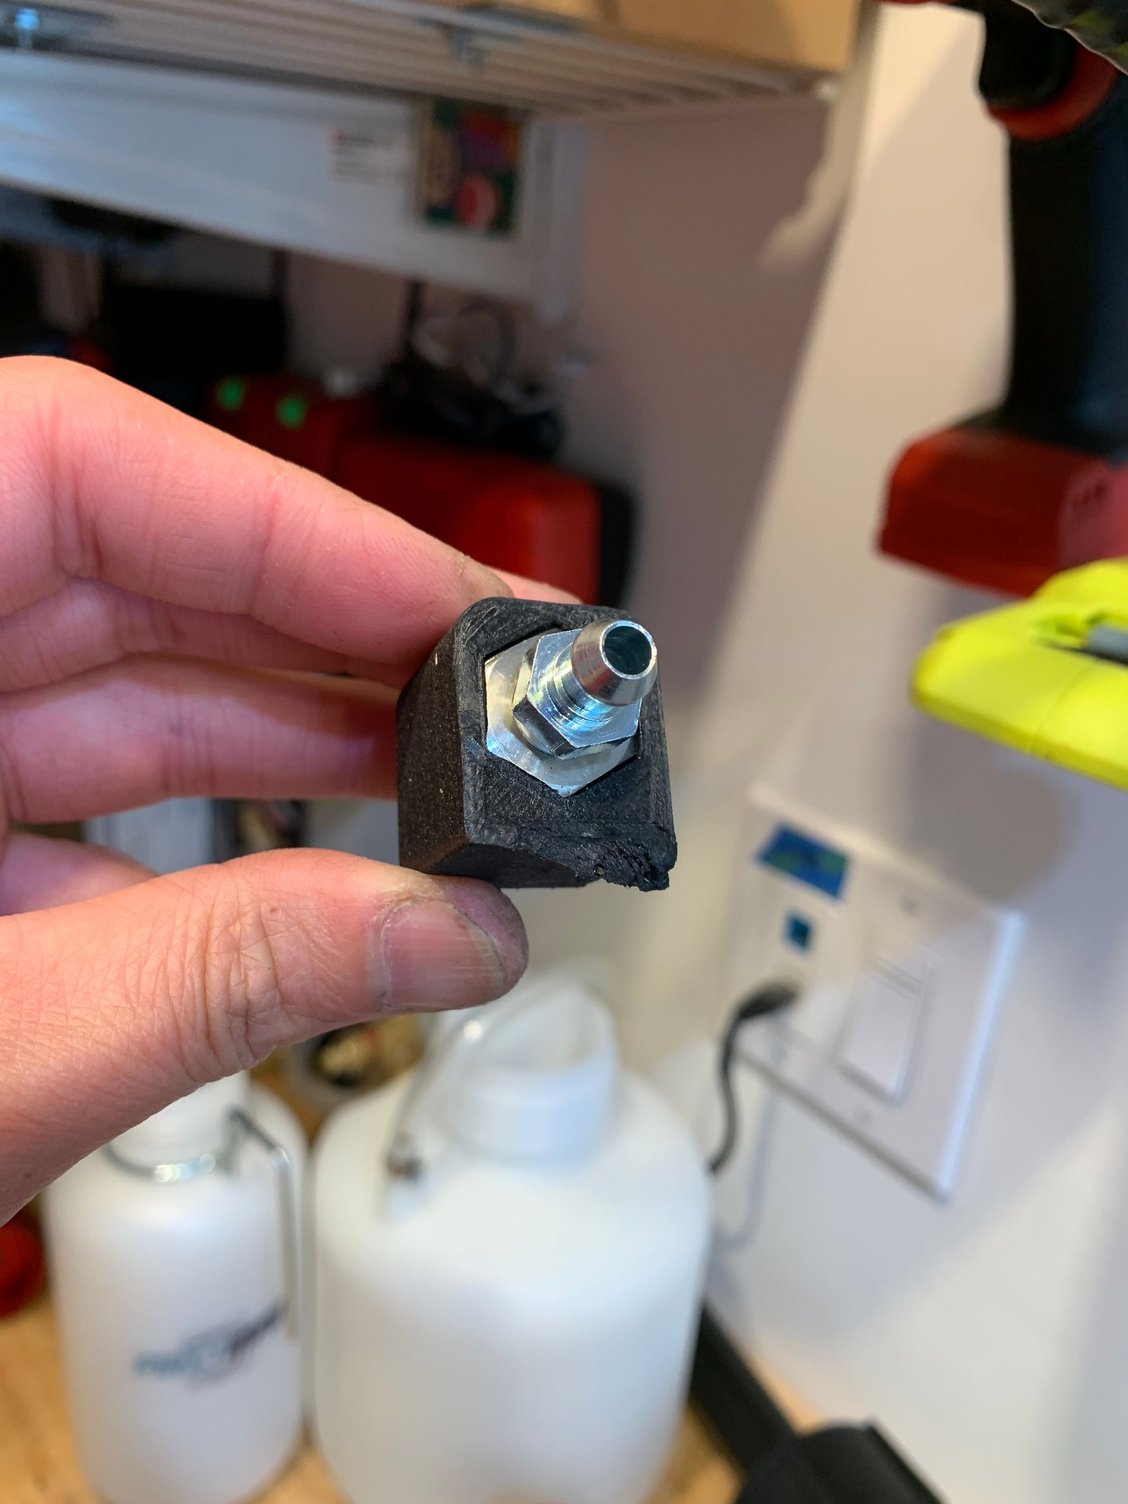
Hey Guys, I've printed up a gasket and an o-ring to go on the M6 to AN-3 adapter out of polypropylene. The 'gasket' is on the left and o-ring, which is not terribly o-ringish. For all the folks that know way more about this than I do, which do you think? Thicker o-ring or wider gasket?
Hey Guys, I've printed up a gasket and an o-ring to go on the M6 to AN-3 adapter out of polypropylene. The 'gasket' is on the left and o-ring, which is not terribly o-ringish. For all the folks that know way more about this than I do, which do you think? Thicker o-ring or wider gasket?
Interesting, nice job. Because of the below, I'm looking forward to what you discover:
(I did some leak trials on 3D printed parts - but did not cover 'high pressure liquid'. I could get an atmospheric pressure 'water tight' seal no problem, and if I treated the print (impregnated under vacuum with various adhesives) I could get a decent 'gas tight' seal. But untreated 3D prints leaked pressurised gas through the layers very easily, and my suspicion is that high pressure fluid will do the same).
But, FWIW - to start with I would pick a thick gasket...
BTW, my M6 adapter does not have such a large face available for a gasket to sit behind. Not sure what the Across Flats dimension is on mine, but it is smaller....
Before Vax so generously offered to print and sell these for his cost (is Rennlist great, or what?), I ordered 5 of these from Xometry(thanks, LimeyBoy), thinking I could keep 1 for myself, and sell the other 4, saving a few people the trouble of uploading the file and placing the order. I can't offer them as cheap as Vax, but I can offer them at my cost, $12.40, plus shipping. Per my packing list, the material they used is "Nylon 12, glass filled, gray" with a dyed black finish.
I used some Teflon tape. Be careful to finger tighten it (using a small wrench using your thumb and index/middle as the only torque to turn it)... I sheared the an3 adapter the first time around thinking it was a problem with the adapter not seating correctly.
I’ve ordered all the parts now to do the remote clutch bleed setup. Looking forward to installing this!
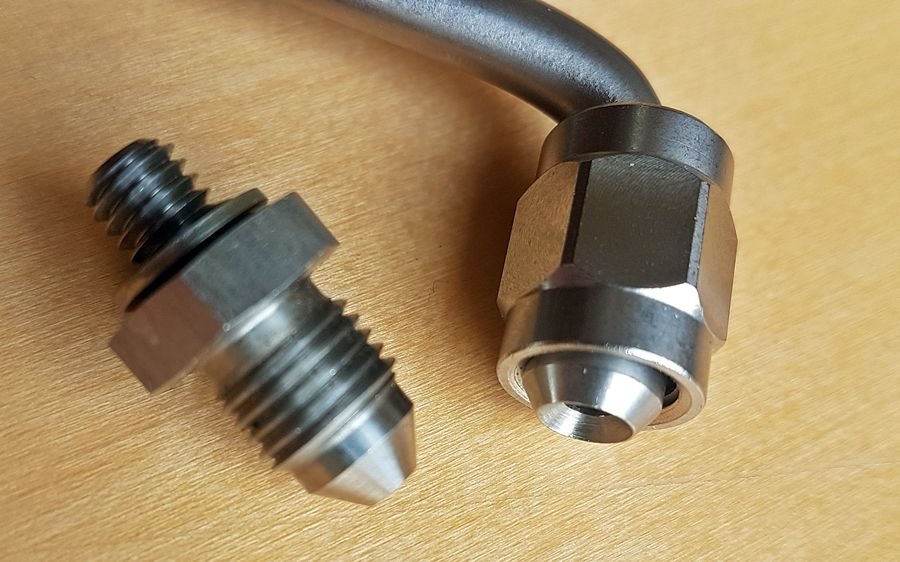
Regarding the AN -3 to M6x1.0 adapter from torques_uk that shears with too much torque, I wonder if the reason why is shears it because folks are ordering the colored versions which are made from aluminum? The “natural” color one is made from (harder) stainless steel.
Also note the “taper seat area” that exists on the M6x1.0 side on the SS version that does not seem to be there on the aluminum versions. I wonder if this would obviate the need to use teflon tape?
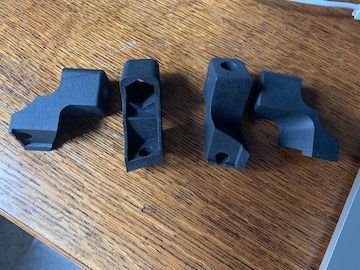
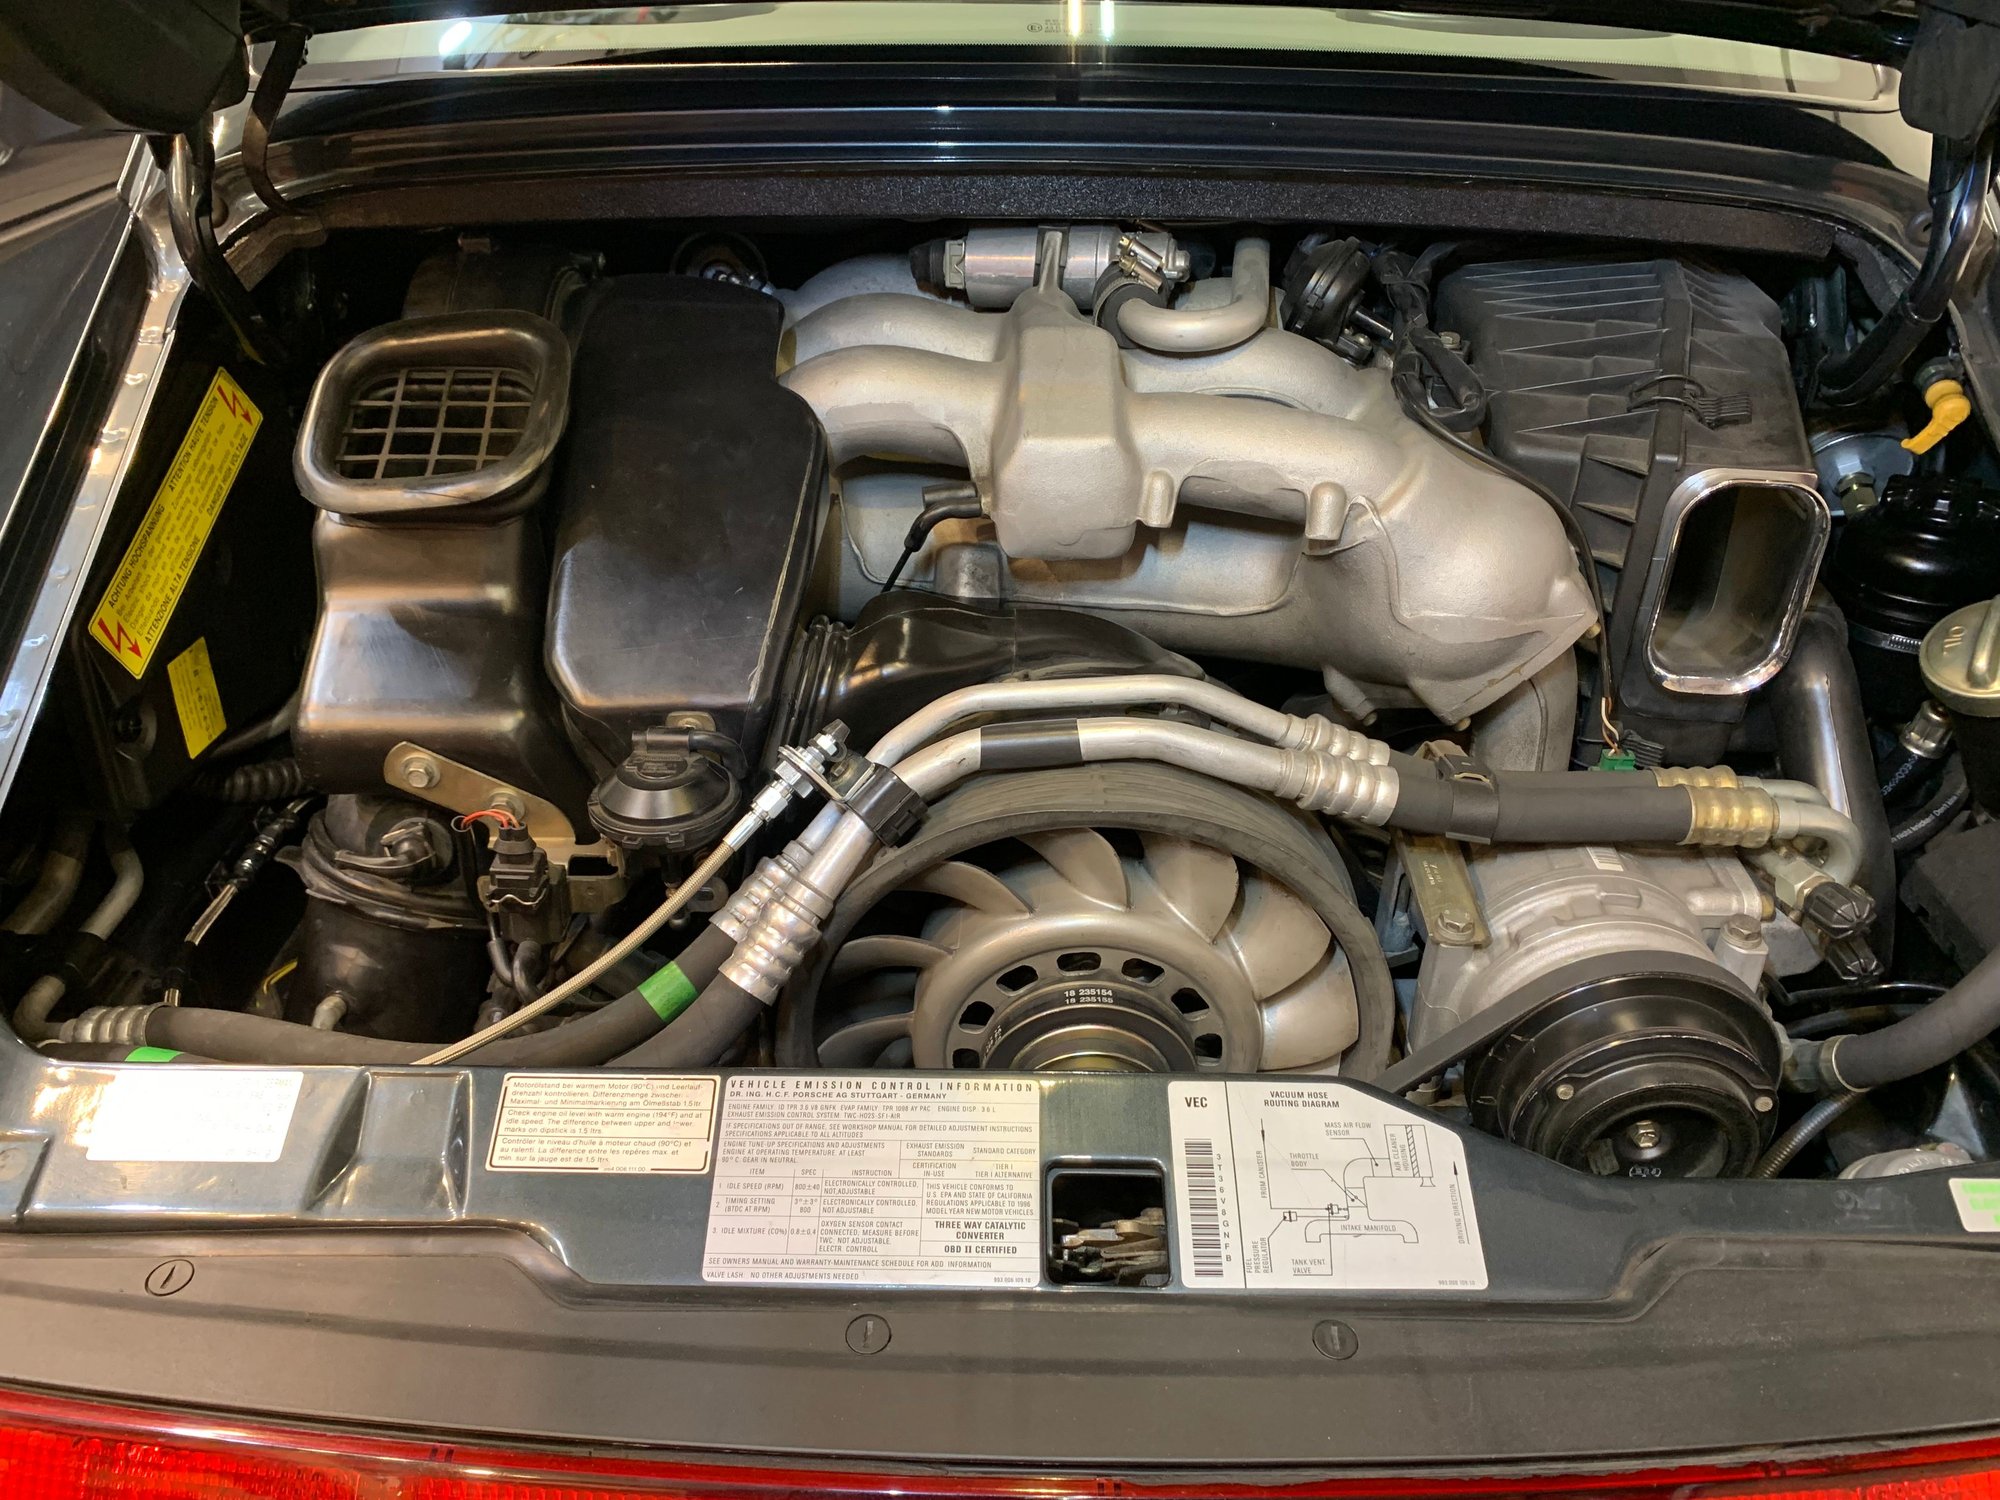
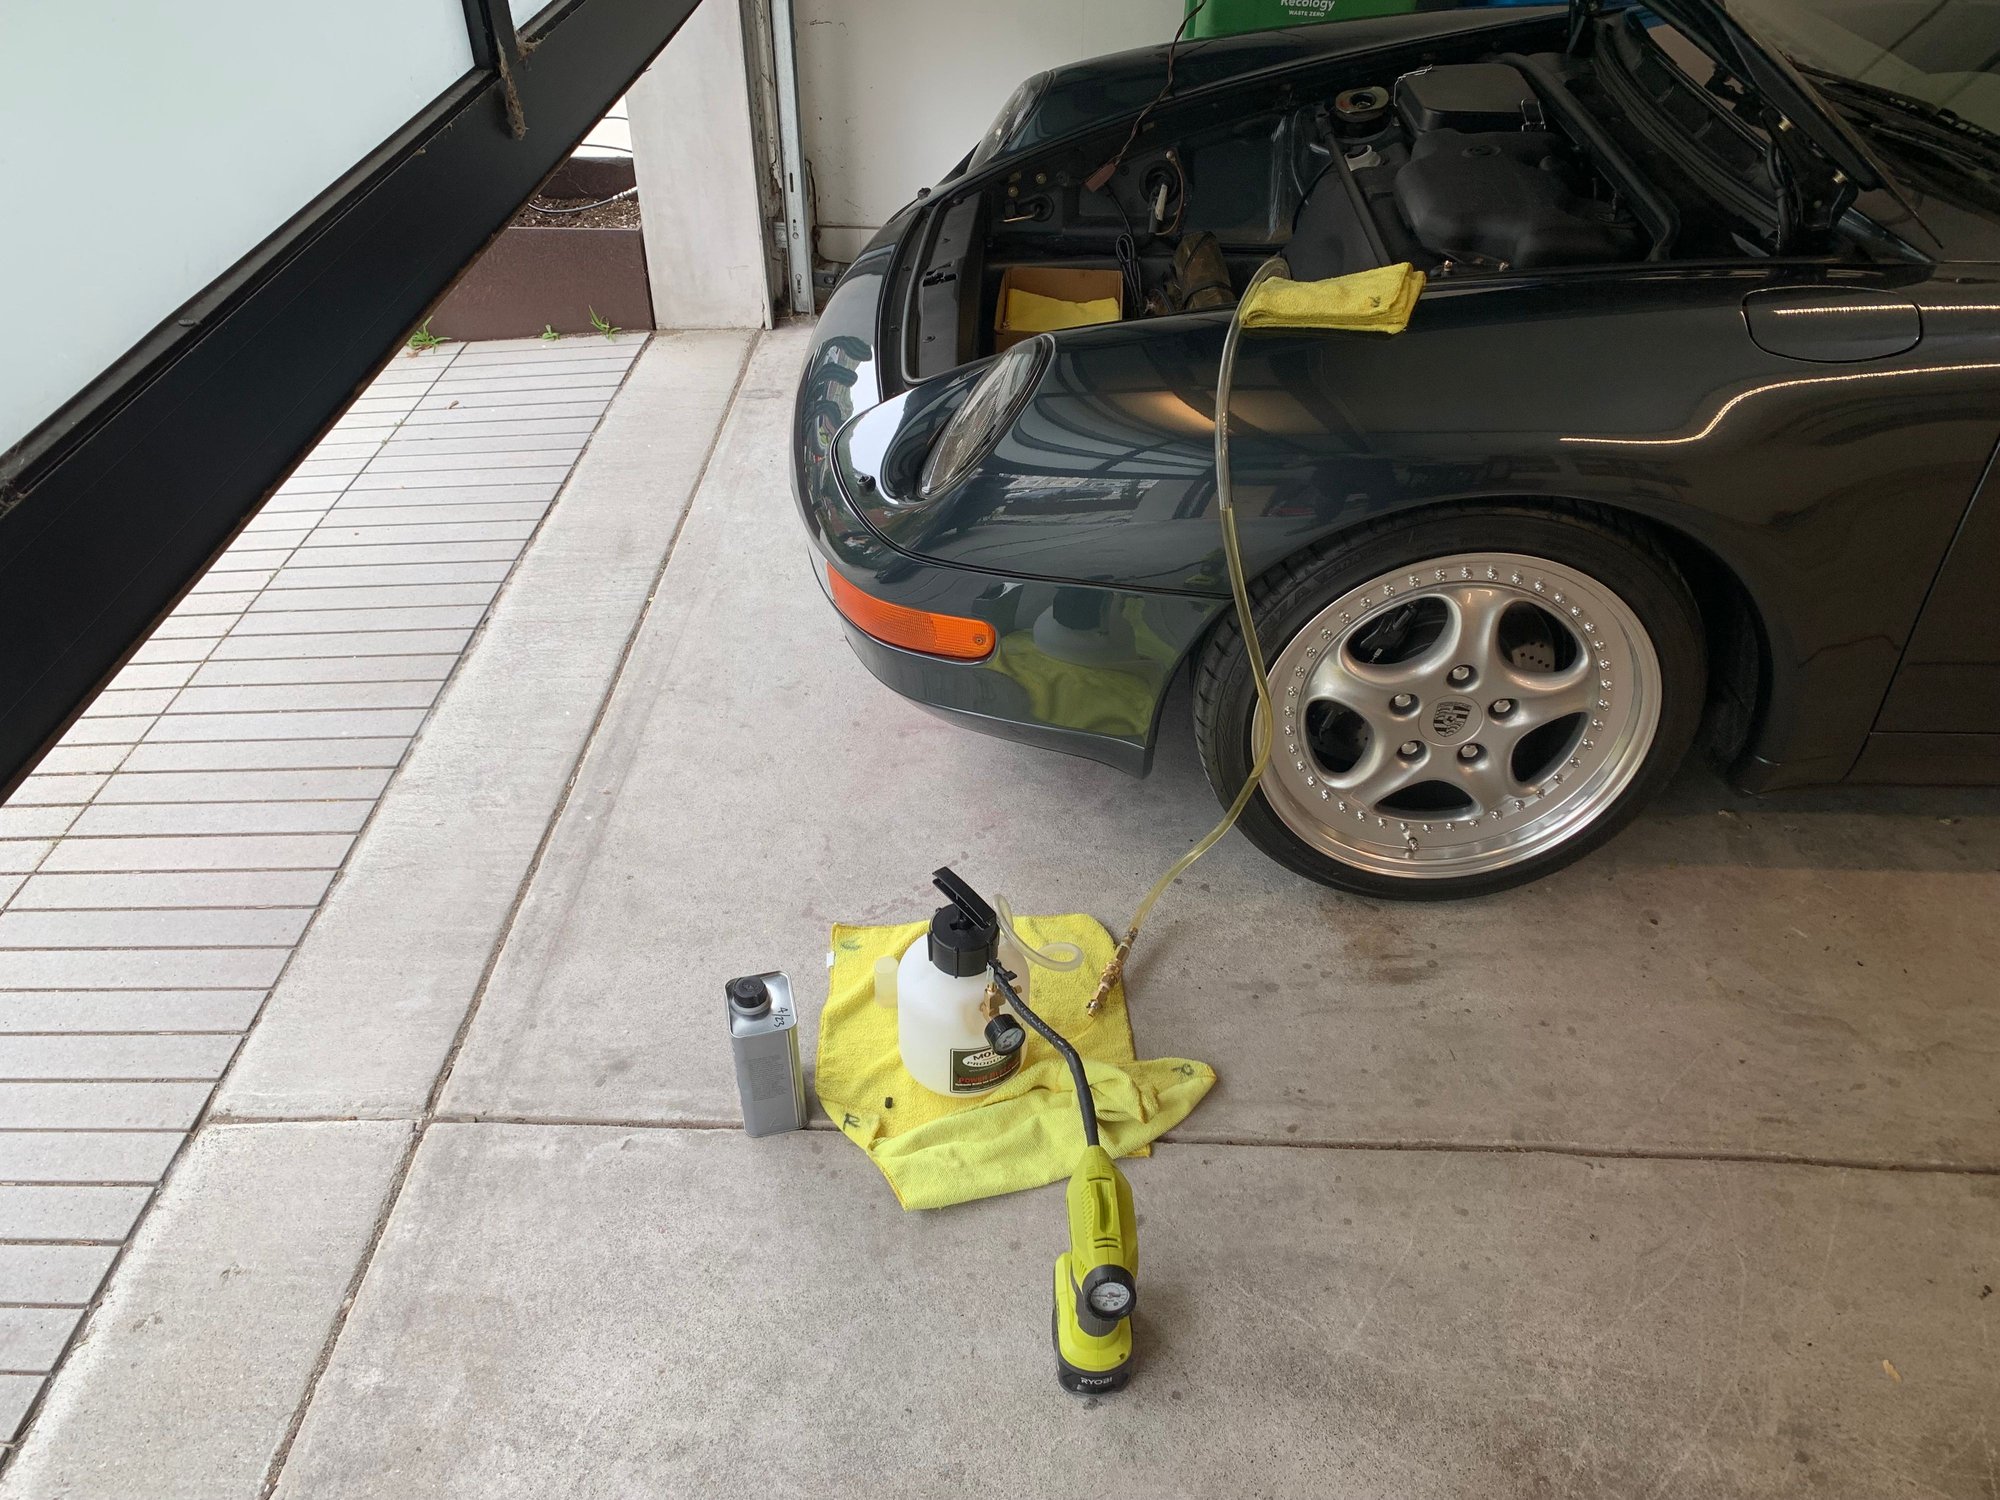
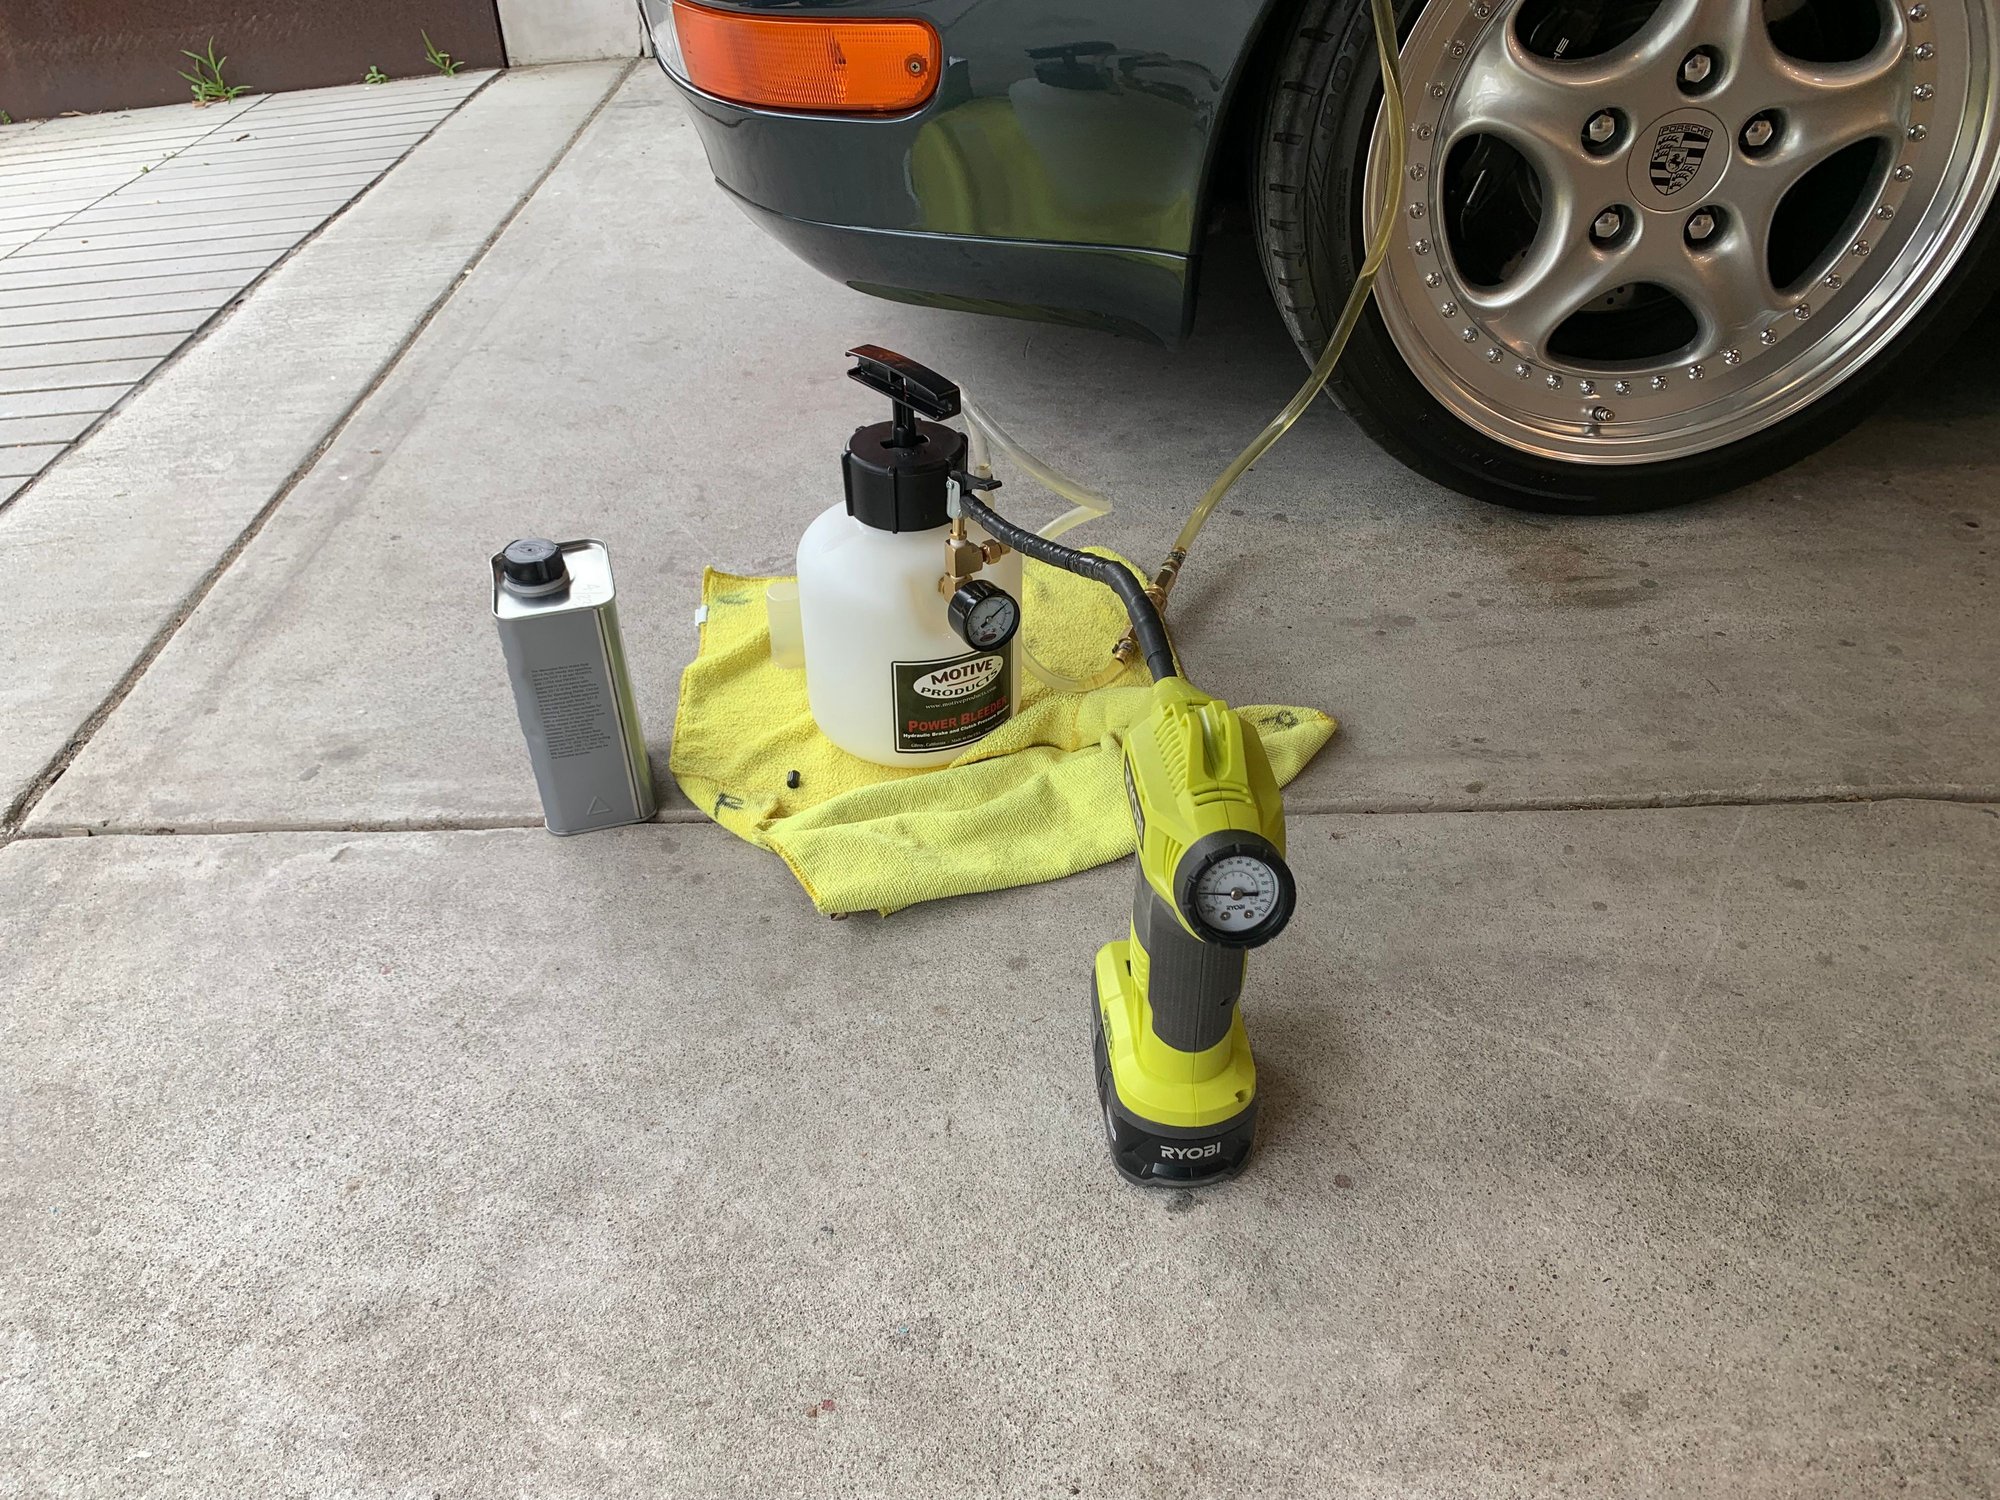
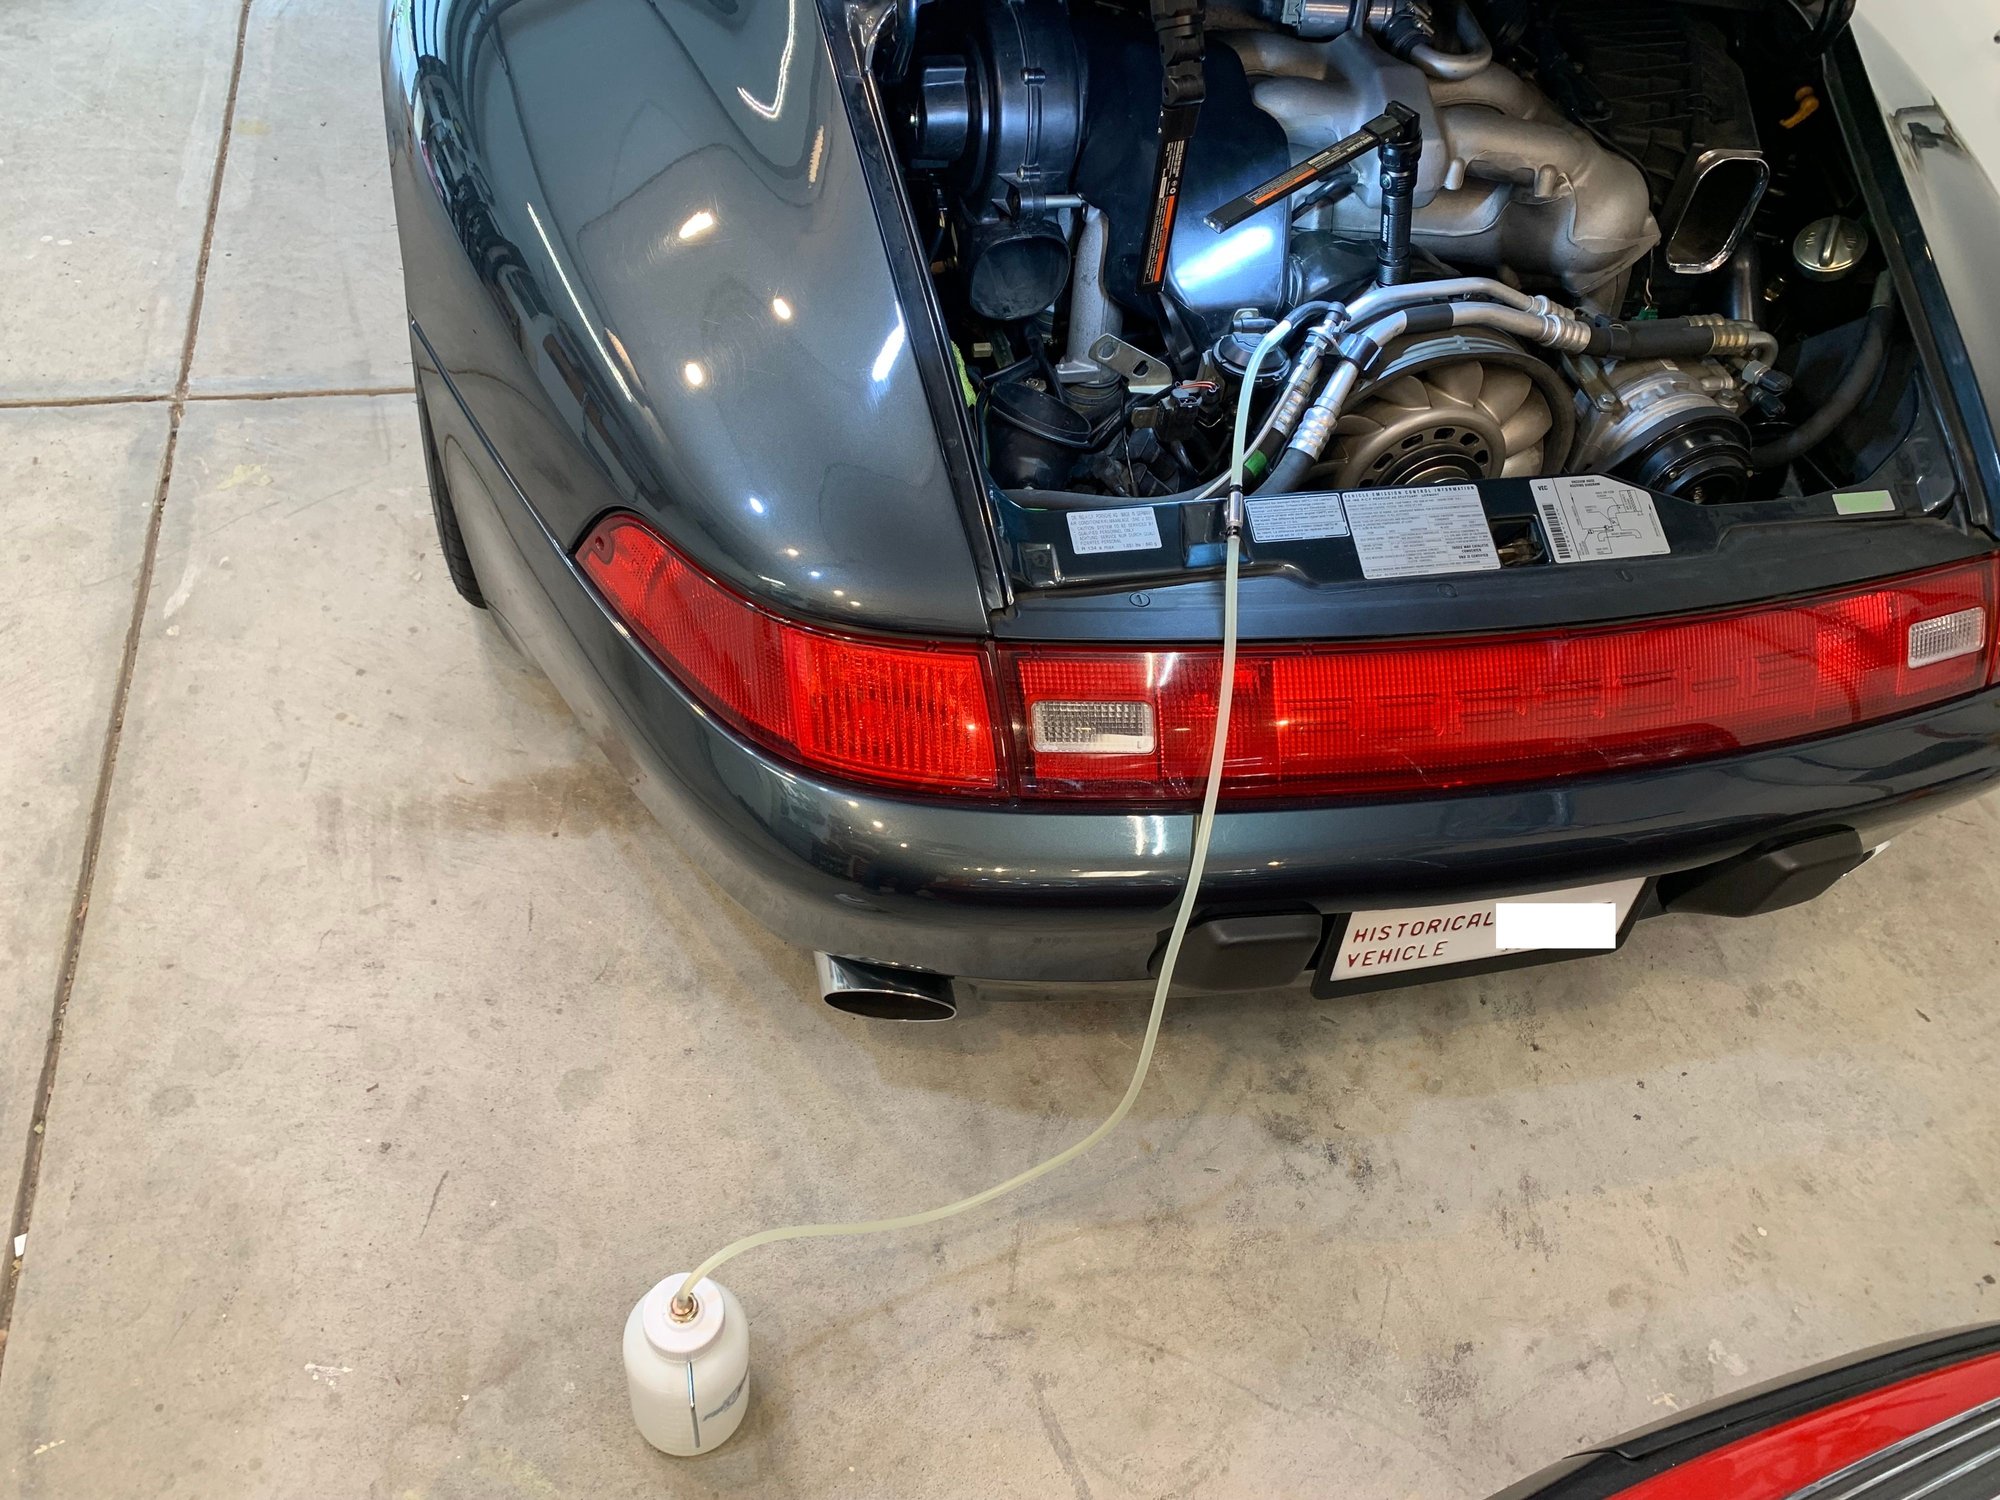
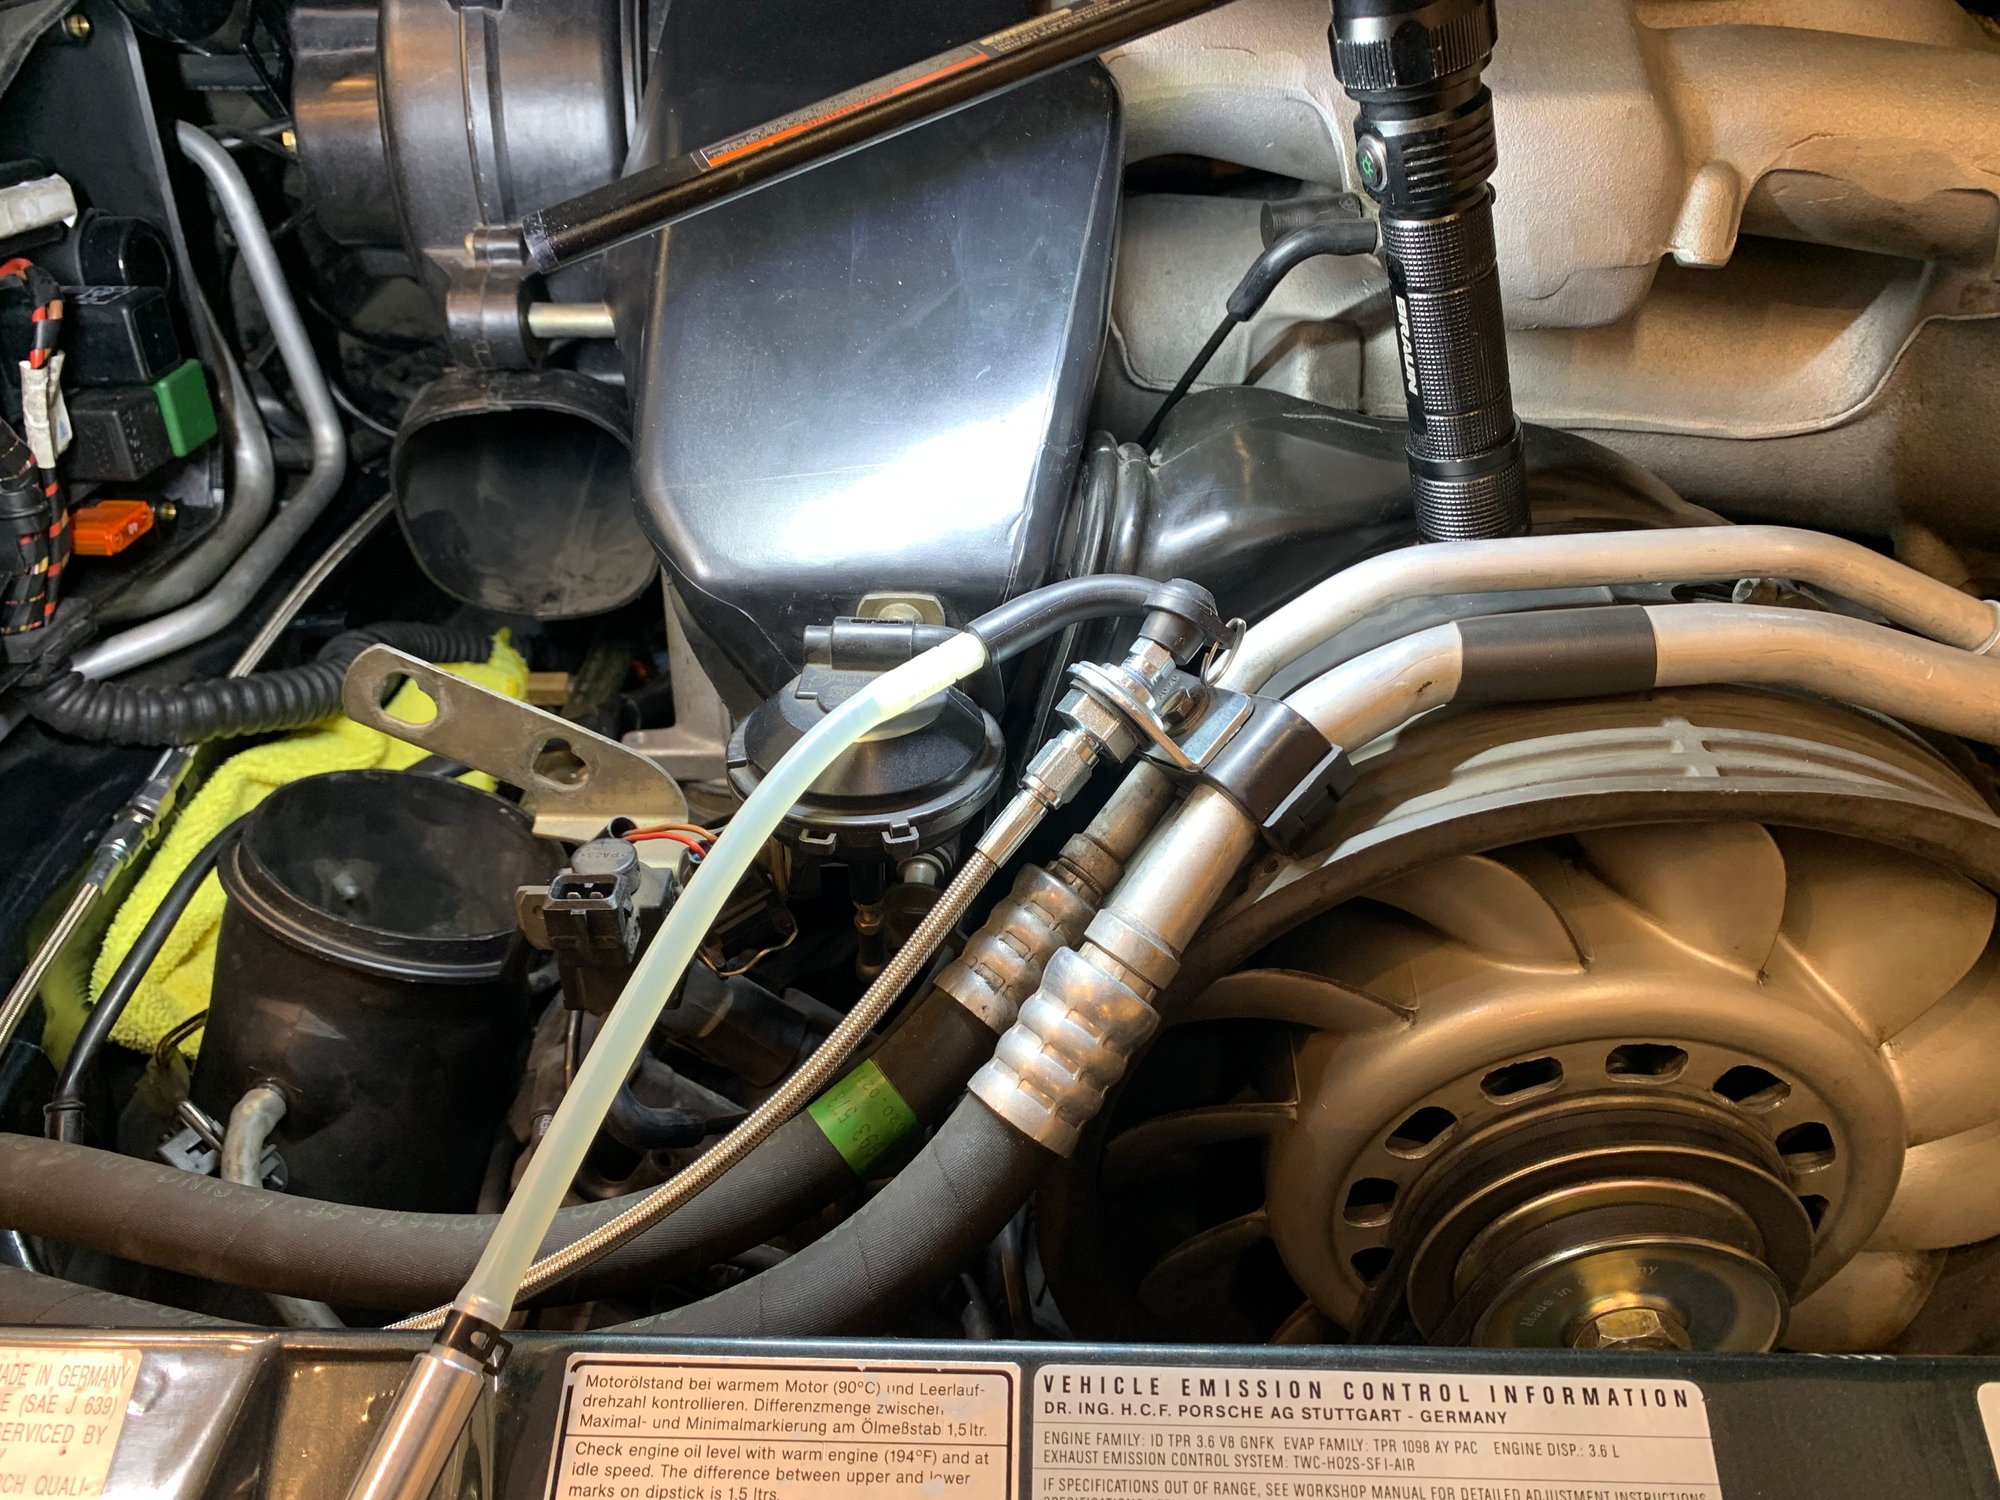
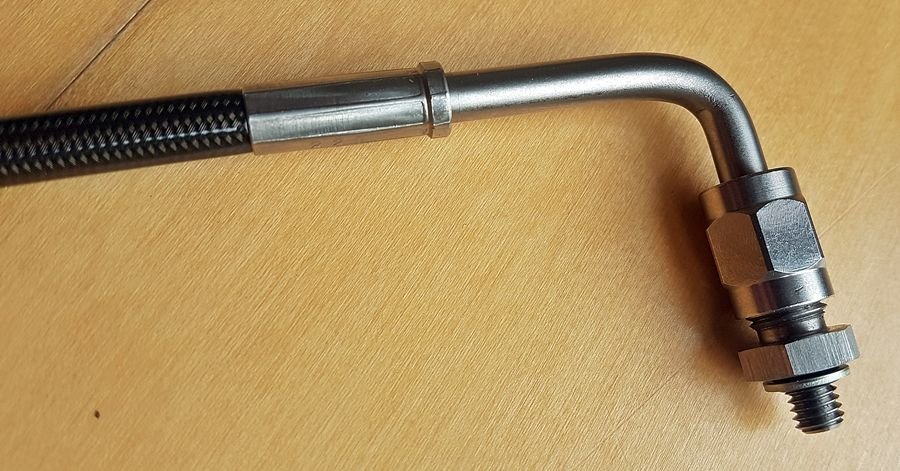
I first tried the version_1 3D printed holder that goes on top of the fan. Unfortunately, it broke. I see now that there's a v2 version on Thingverse that is perhaps more robust - I ended up using the Russell kit (very inexpensive) suggested by @samurai_k. As I have a varioram car and do not wish to remove my heater/blower motor in the engine bay, I mounted the remote bleeder as seen below. I routed the line around the left rear corner of the car and ended up using two lines -> 36" -AN line and another 21" -AN line with a male-male coupler in between. This way I can keep an eye on the line as well (as it is easy to see @ the left of the engine bay). This made bleeding the clutch simple --- not a drop wasted, and my lazy-man power-bleeder setup (Motive + 18V air pump) made bleeding almost an enjoyable affair.
I first tried the version_1 3D printed holder that goes on top of the fan. Unfortunately, it broke. I see now that there's a v2 version on Thingverse that is perhaps more robust - I ended up using the Russell kit (very inexpensive) suggested by @samurai_k. As I have a varioram car and do not wish to remove my heater/blower motor in the engine bay, I mounted the remote bleeder as seen below. I routed the line around the left rear corner of the car and ended up using two lines -> 36" -AN line and another 21" -AN line with a male-male coupler in between. This way I can keep an eye on the line as well (as it is easy to see @ the left of the engine bay). This made bleeding the clutch simple --- not a drop wasted, and my lazy-man power-bleeder setup (Motive + 18V air pump) made bleeding almost an enjoyable affair.
Lovely setup Jlaa, I will use this as a template to build my own eventually. Very sophisticated power bleeder you got there!
I first tried the version_1 3D printed holder that goes on top of the fan. Unfortunately, it broke. I see now that there's a v2 version on Thingverse.....
Nice Jlaa!!
Just fyi, there should be a Mk4 on Thingyverse. I received some feedback from a TV user and made some tweaks. If you find Mk4 there is a summery of mods listed - what I changed. Biggest mod is to add a removable plate so you don't need to break into the clutch line to remove from the Mk4.
Thanks for posting, nice to see.
Just wanted to update the thread with my effort, but mostly a big shout-out of thanks to some Rennlisters.
Andreas for giving us some great info and links to modern parts and solutions, but mostly for giving us confidence this will work, and work well.
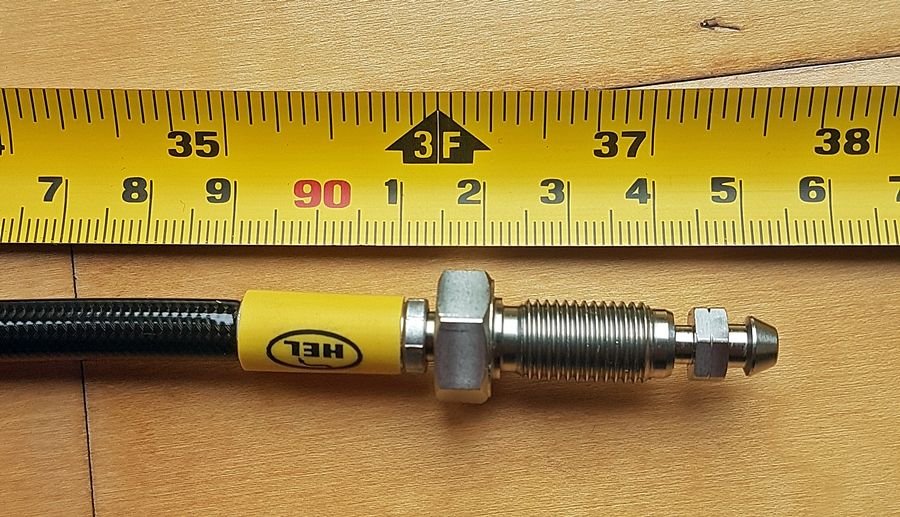
Here are the parts I sourced - I'm in Europe so slight variations - the same 'Andreas' interconnect from Ebay UK, but with an extra sealing washer.
Hose is from HEL - a UK hoses specialist that rivals Goodridge.... HEL started out on motor bikes.
but my bulkhead-end is very different from the version easily available in the US.
So huge thanks to LimeyBoy for lending me his brain, his knowledge and expertise, and the time involved in designing a number of alternative solutions for his Varioram-specific bracket for this.
Also I'm going to be driving the car in hot environments, with potential traffic jams as well, so I was worried about how well the 3D printed material (that I could source) would stand-up to the heat-soak if it was directly above the engine.
So I asked LimeyBoy about it, and he generously offered to come up with some alternatives. I'd sourced the parts as above, so we knew the dimensions, but (as I said I'm in Europe) they differed from the fixing/fitment sizes he'd already done - so he had to redesign his Mk4..... which needed a few more designs..... then I settled on avoiding the engine altogether, and he generously offered to redesign the whole thing!
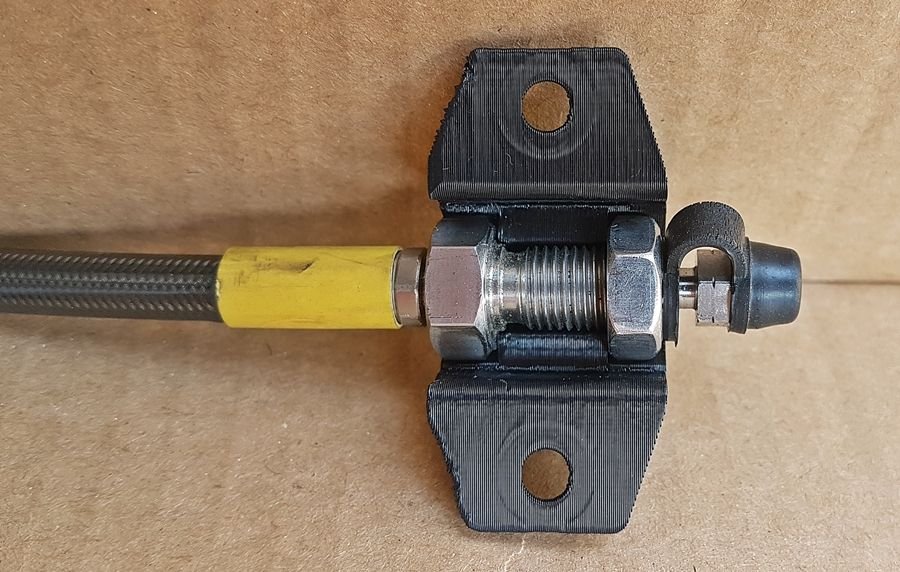
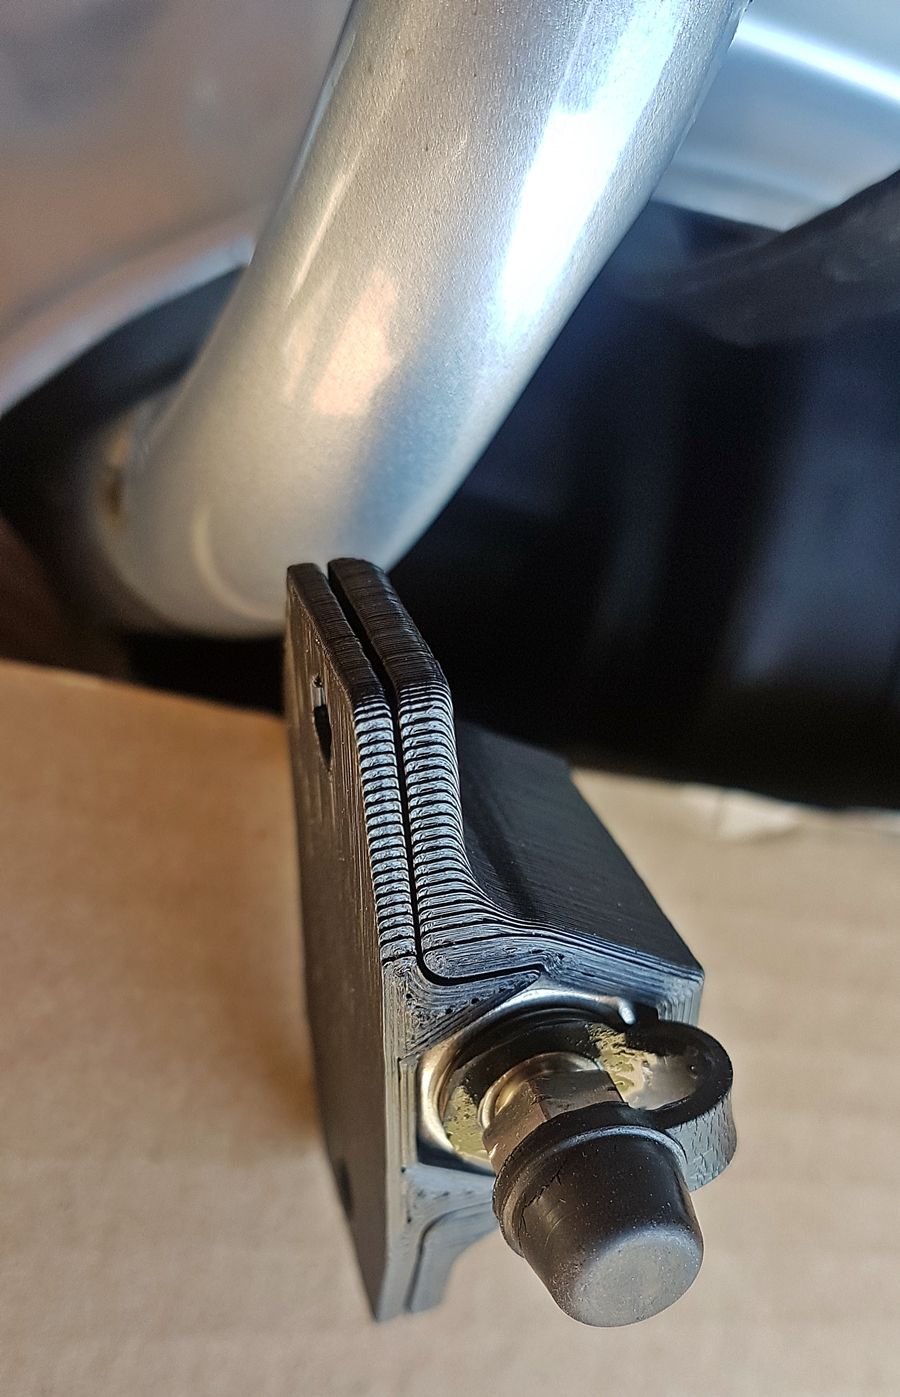
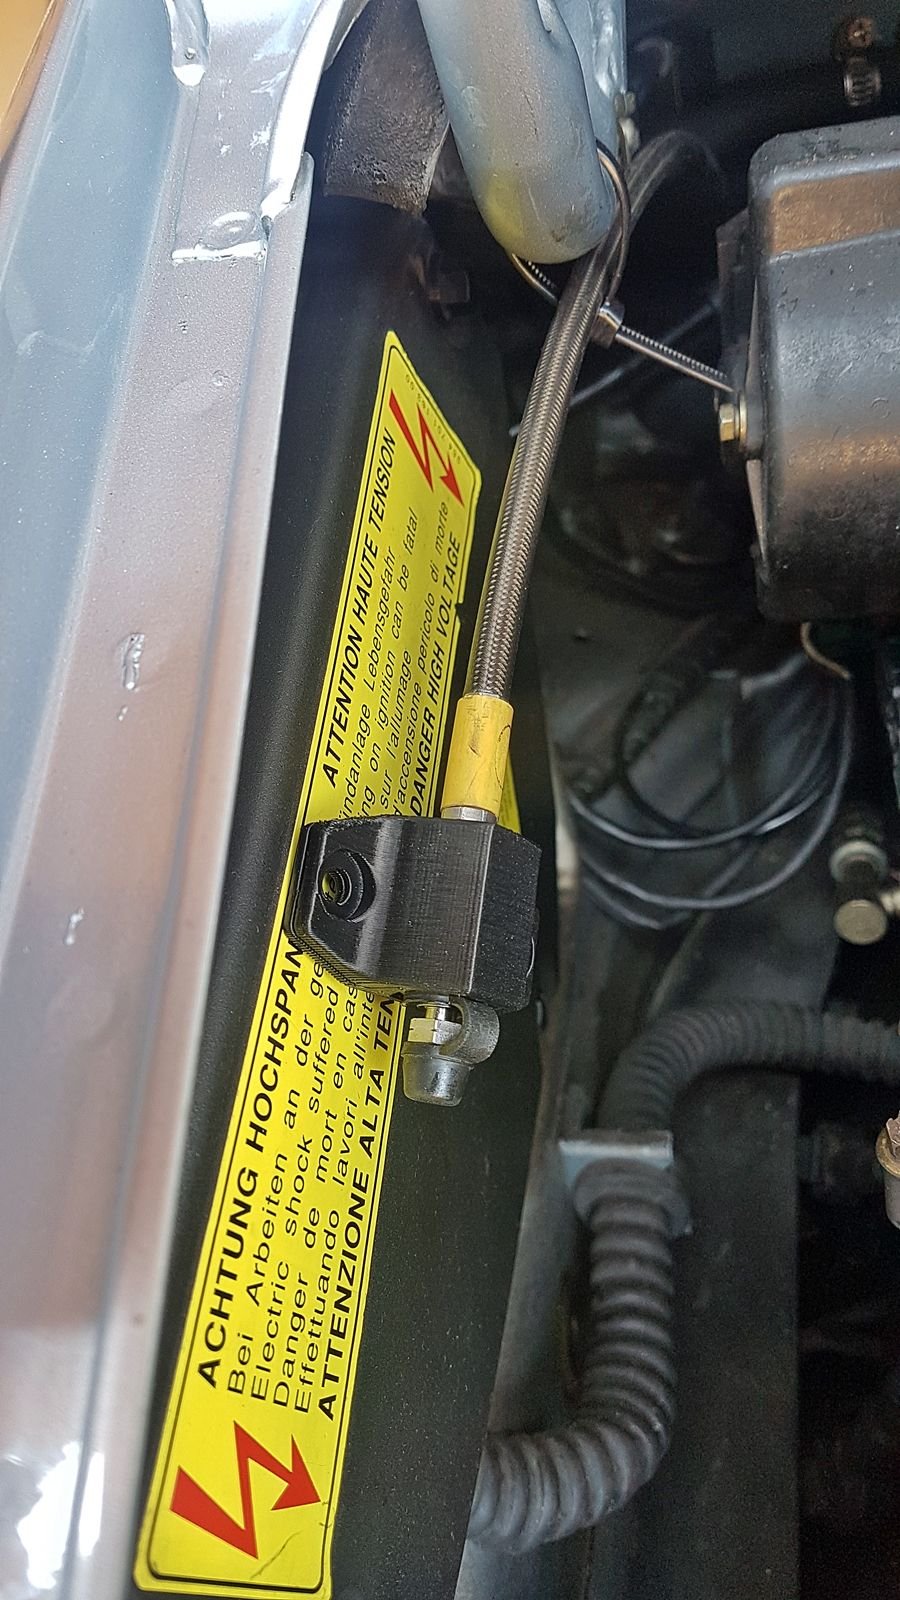
So, to great fanfare, pomp and ceremony, here we have the 'Mark 9', which is very very secure, by design, and very easy to mount if you don't mind sacrificing some easy-to-replace parts.
I'm going to source a 2nd-hand electric-box cover, drill two holes in an area away from any actual electrics, and mount the LimeyBoy Mk9 out here on the LHS of the engine bay, where there should be less heat-soak, and less vibration from the engine.
Note the zip-tie is a temporary measure until the hose is fixed via the LB-Mk9.
Thanks one and all
Last edited by orangecurry; 06-05-2023 at 01:11 PM.

 08-21-2020, 07:43 AM