When you click on links to various merchants on this site and make a purchase, this can result in this site earning a commission. Affiliate programs and affiliations include, but are not limited to, the eBay Partner Network.
I want to start by saying this is lengthy & picture heavy.
I hate to start a new thread on targa tops, but I've been looking through all of the threads since last year & none of them fully explain how to remove parts & how they should look when assembled correctly.
First off, after a drive today with the top open, I closed the top with no problem, but the wind deflector would not close. It moved slightly & made a ratcheting noise & stopped. It seems the driver's side was not moving at all, so I'm assuming it detected this & stopped.
This prompted me to get into the whole top problems - sunshade not operating smoothly all of the time, lots of creaks & rattles, pieces that didn't look correctly fitted & now the wind deflector.
I removed the front visor rail & the 2 side roof rails. Both of them have a screw in the center (with a hole in the covering vinyl) that I think somebody drilled later. They also have a lot of goo or silicon that I'm sure is not supposed to be there. They seem to be loose toward the rear with no mounting points that I can tell. Is that correct?
The first 2 pics are driver's side with a closer pic of the center screw hole, then 2 of the pass side.
After removing these rails, I realized it doesn't give much more access to see what's happening. So any help would be appreciated here - with regards to why the deflector is not closing. I also have the rear panel removed & can see that the motors seem to be working properly.
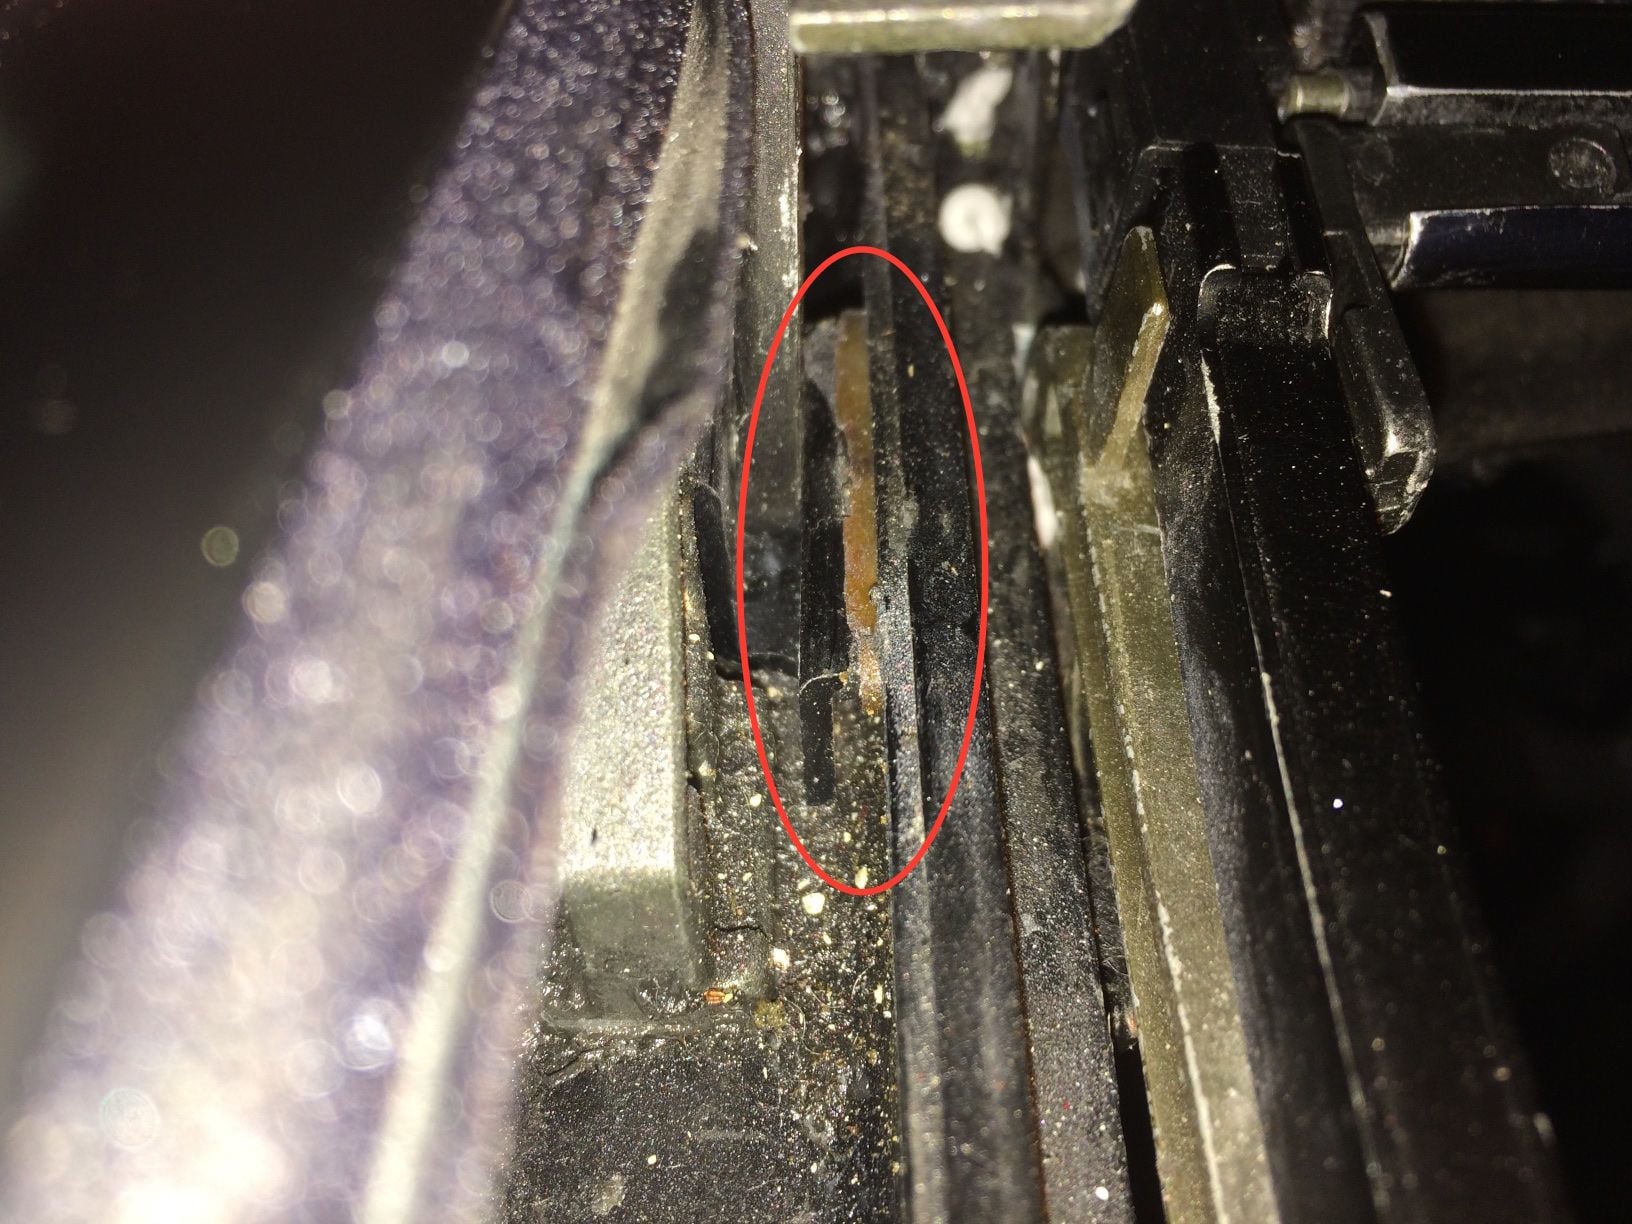
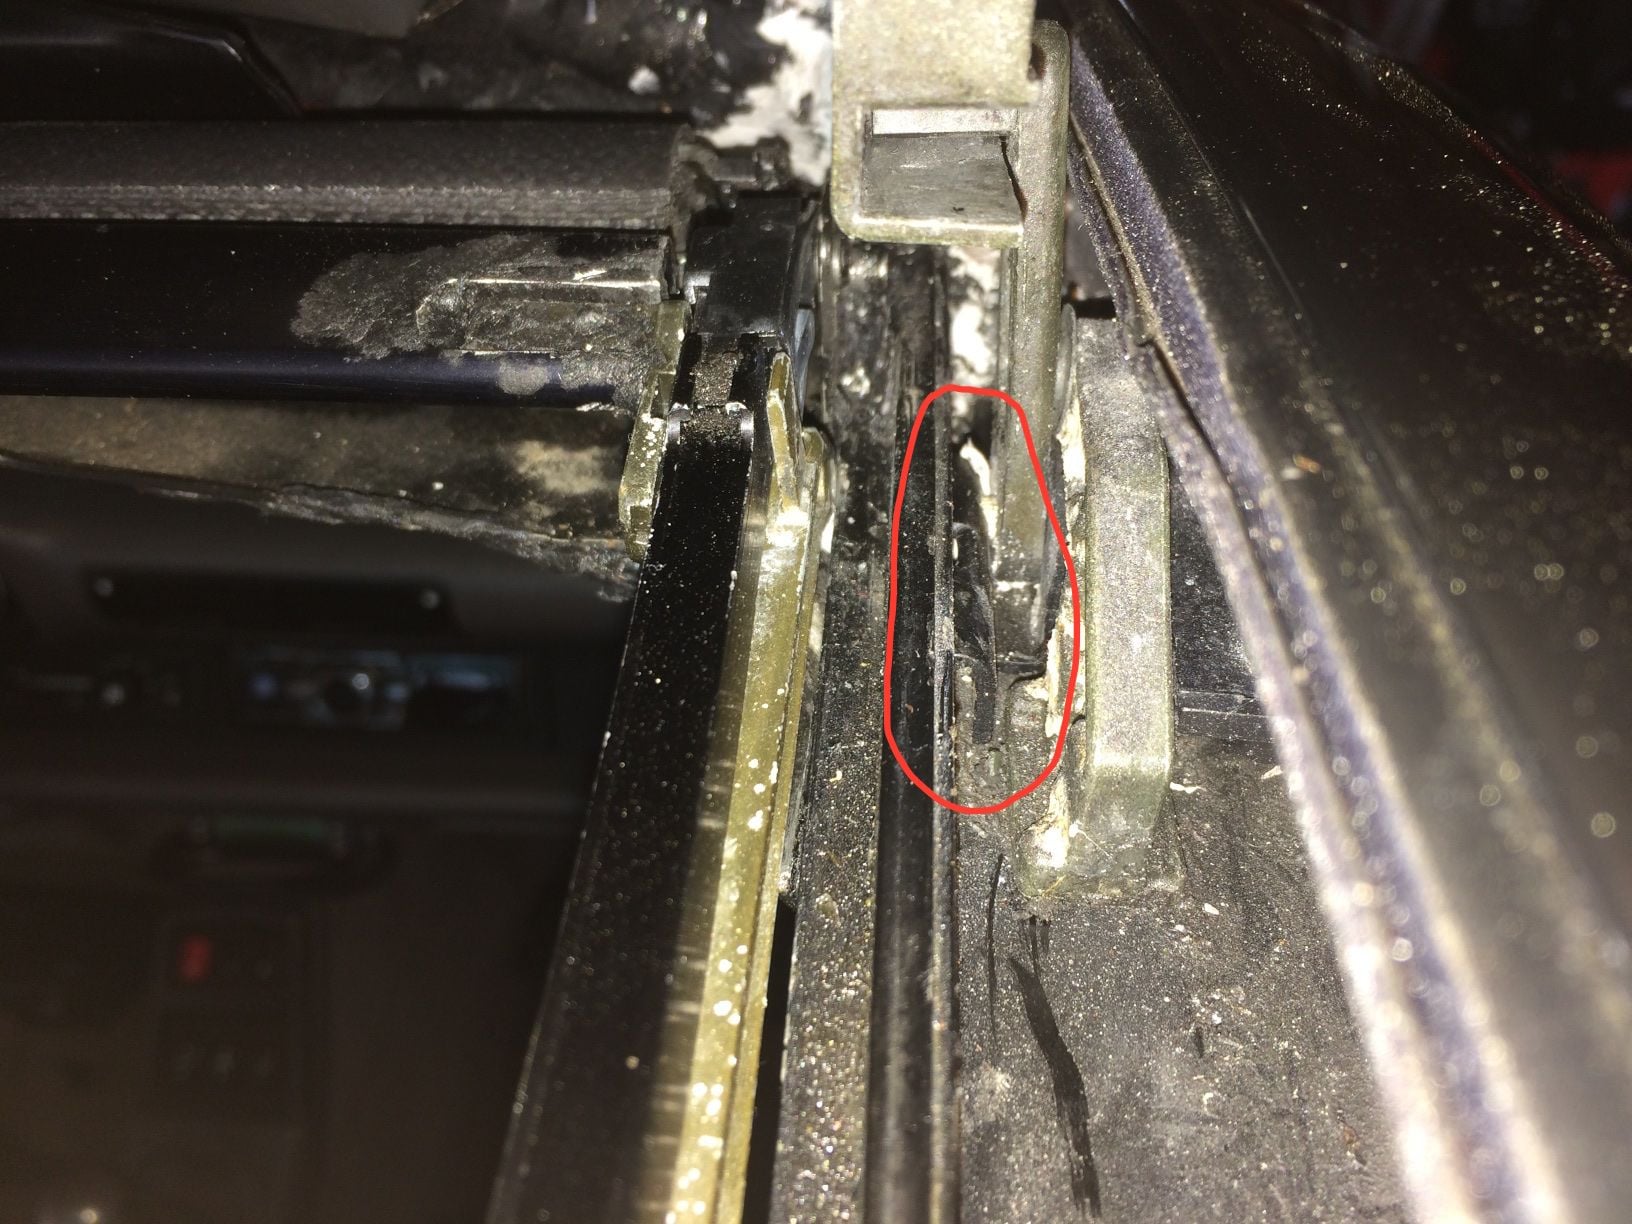
The more disturbing thing is the fact that there is a lot of different color goo or sealant all around the front. Some is rubbery & some is still soft & sticky. Also, there is a metal tab on both sides. The one on the pass side has 1 hole drilled in it with no screw, & the driver's side has 2 holes drilled & no screws. Is this supposed to be this way?
The last few pics show the front corners & along the roof on both sides.
I don't have pics, but I'd like to remove & maybe replace the 2 strips that go the length of the roof on the outside top, because they look like they have some kind of goo that should not be there. How are these removed?
Any help on removing the sunshade to tighten it would be appreciated also.
I hope this all makes sense & sorry for the long post.
Ugh - I don't have good news here. Definitely, check out the information on Mike's pcarworkshop.com site. It has a great page that explains the handoff the cables make between the sliding roof and wind deflector.
This is pure speculation, but I would imagine a cable's handoff between roof and wind deflector is failing. Unfortunately, I have no idea how to fix it.
For what it's worth, my car does not have any of that sealant in those locations, and it has no holes drilled in the interior trim pieces that cover the roof rails (I may not be interpreting the pictures correctly).
The interior trim rails are difficult to refit, and perhaps someone broke the plastic attachment pieces during a previous repair attempt.
If so, perhaps they attempted to fix the issue by drilling some holes to attach the interior pieces to the aluminum rails with screws. If so, the owner would notice after the first rain or car wash that those rails act as water channels for the rear water drains. Water would leak through the new holes - maybe that's why there is sealant there?
Does your car leak during car washes? These roofs, like all sunroofs I've seen, are not completely water tight. They expect a manageable amount of water leakage, and channel it safely out of the cabin.
Last i check, those trim pieces are available from Prosche in Germany for around $700 each.
When i took mine off, they also did not have plastic tabs to hold them in place. I 3D printed mine. Seem to have worked fine.
I'm not sure about the main glass cables in your case, but it sounds like the gear in the motor that's pulling them is stripped, which is easy to check.
1. Remove rear shelf cover (4 screws)
2. Remove one motor. Makes sure you don't remove both at the same time!
3. Check the gears and visible small sections of the cables
Thanks, everyone. I have looked at pcarworkshop. He does have a lot of very useful info, but does not explain how to disassemble & reassemble the system.
I'd love to look at another targa, so if anyone is in the CT area, please let me know so I can compare.
Last i check, those trim pieces are available from Prosche in Germany for around $700 each.
When i took mine off, they also did not have plastic tabs to hold them in place. I 3D printed mine. Seem to have worked fine.
Did you 3D print the whole piece or the tabs? At what cost & can/will you replicate?
After reading all of this & the pages from BobbyT (thanks), I started getting into it. I first removed one motor at a time to check for any stripping of gears or the cables. Everything looked fine. So then with the roof & deflector open, I studied both mechanisms at the front corners.
I noticed on the pass side, some pieces of plastic & rubber laying in the very front. I dug them out & compared to the drivers side. It looks like they were part of a slide. In the pics, you can see the plastic on the drivers side, but not pass side.
Drivers side
Pass side
So, after checking the motors & digging out the pieces, the deflector works fine!!
Obviously those pieces are supposed to be in the slide, but for now it works.
I can't figure out exactly what part it is in the PET catalog, so I don't know if they are available separately. Anyone?
Mpruden - I've had no leaks during my ownership, but there is staining on the b-piller & that screw hole is definitely in the track! I'll need to fill it somehow.
Does any one have a picture of the underside of the trim rails? I'd like to see what exactly is broken on mine.
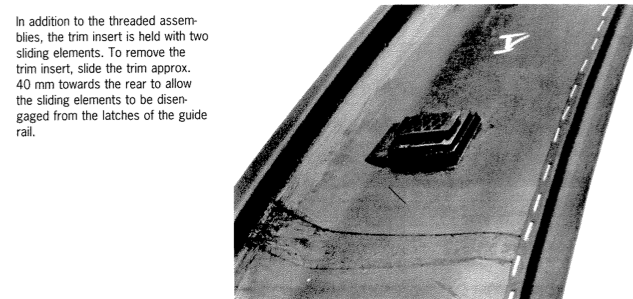
Here's a pic from the official literature. I don't have a pic of the part on my car, but I think this is the part that has broken off of your interior trim pieces.
Hello Gav. I see you've got quite a project there. I'll see if I can touch on a few things. But please PM me and perhaps we can even get on the phone and go through things in more detail. Hard to describe it all here.
Regarding your inside vinyl trim pieces that cover the sides (part # 993-562-311-00 and 993-562-312-00) do have clips that can easily get ruined if not installed properly. Looks like someone messed it up and tried to glue it back together. There are foam pieces (two on each side) that keep the covers tight and from rubbing on the underlying track. Euge, if you were successful in making 3D parts, please share. That would be an exact alternative to buying from factory. Not even sure you can buy those clip pieces anymore.
Glad you got your wind deflector working again. There should be no goo, glue, or much of anything in the tracks for the glass and shade. These mechanisms require really no lubrication. You can add a little dry silicone spray the tracks if you really want to but mostly just keep it clean with a rag or blow out debris with air.
Thanks, Mpruden for the pic. Hard to see what's what, but maybe I can figure out a way to make mine work. I'll need to get some more pieces of foam also got the rear.
Mgianzero , thanks for the info. I will pm you.
I did get the deflector working, but at the expense of a worn/broken part. Not sure how to proceed with that.
One of the reasons I bought this particular car is the fact that the PO said the top had been gone through & serviced - with receipts to back it up. Clearly the shop that did the work were hacks & made a mess of it.
Here's a pic from the official literature. I don't have a pic of the part on my car, but I think this is the part that has broken off of your interior trim pieces.
Does anyone have a clearer picture of these clips? I need to figure out how to reassemble my trim rails, as theses clips are long gone.


 04-30-2016, 08:38 PM