When you click on links to various merchants on this site and make a purchase, this can result in this site earning a commission. Affiliate programs and affiliations include, but are not limited to, the eBay Partner Network.
Left her yet another day on jackstands. Took off the wheels to get refinished. The inner lip of the wheels still had some cosmoline on it when I took them off. At RimPro, they put wheels down when clear coat was still wet, so inner lips not that pretty. Ordered new rubber to replace the 10 yr old mismatched rubber, Requested Continental Extremecontact Sports, and DWS06s came in. Ordered new lug nuts and then tracked them online as they traveled from AL to ND , CA, OH and then finally here in NH. Thanks USPS!
Replaced headlight lenses - R lens went in easy and the L lens was a total PITA. Also replaced cracked driver's door handle seal - so much work for a little gasket, but it makes such a difference in looks.
Replaced headlight lenses - R lens went in easy and the L lens was a total PITA. Also replaced cracked driver's door handle seal - so much work for a little gasket, but it makes such a difference in looks.
I just had my gaskets on door handle deteriorate despite cleaning and using rubber protectant...but 24 years is 24 years!! How complicated was it to change the gaskets for these door handles.....I need to do mine asap....thanks for any info in advance.....
I just had my gaskets on door handle deteriorate despite cleaning and using rubber protectant...but 24 years is 24 years!! How complicated was it to change the gaskets for these door handles.....I need to do mine asap....thanks for any info in advance.....
It really wasn't as bad as I feared, but it's a bit tedious.
This is a pretty good guide to removing the door panels.
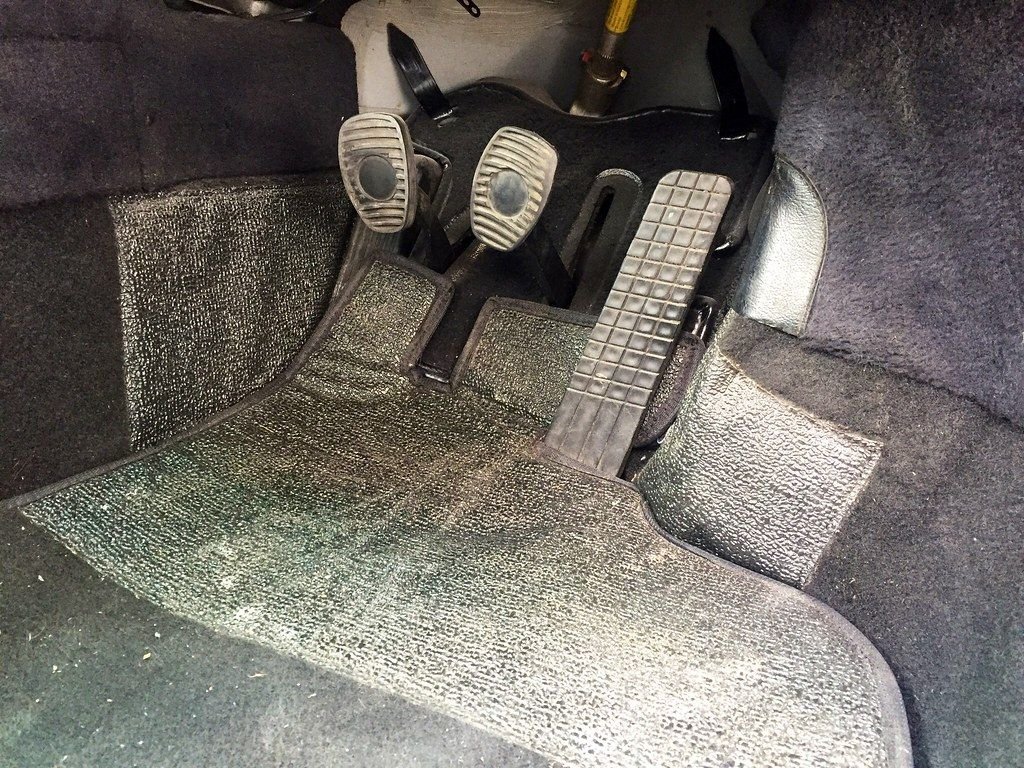
The panels came off smoothly. Only two plastic fasteners to remove - everything is else screwed in. Once you pull off the panels, peel back the plastic membrane at the top left corner of the door (the side near the door handle to expose the large oval hole. I used the backing paper of a large sticker to cover the exposed adhesive of the membrane.
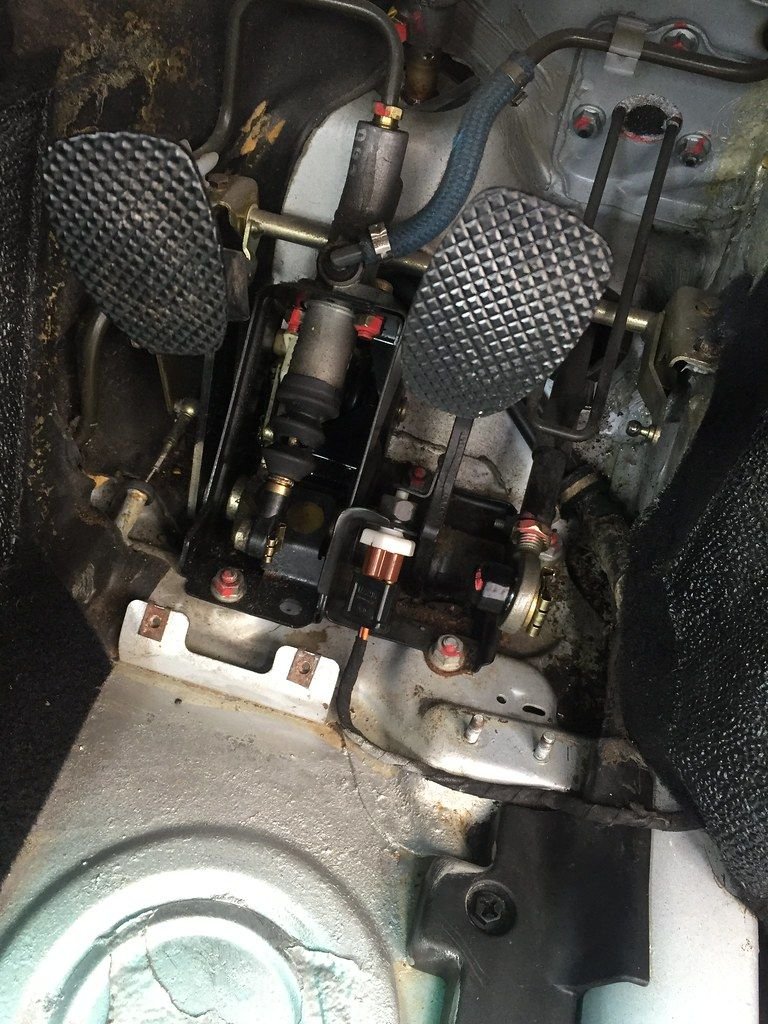
The door handle is actually held by two small nuts inside the door. The door handle trigger simply pushes a rod into a plate which opens the door latch. There are two small screws on the side of the door you remove which externally secure a black plastic cover piece that you need to remove from the inside of the door - this allows access to the far side nut. Then remove the two small nuts and remove the handle, which comes out with the mechanism attached. The trickiest part of the whole thing is removing those nuts without letting them fall inside the door. I used a small crescent wrench and put a small towel inside to catch the nuts if they fell.
After I removed the handle, I used polishing compound on the door handle cup and put fresh grease on the handle mechanism. Replace the gaskets (which are very cheap) and reverse the steps.
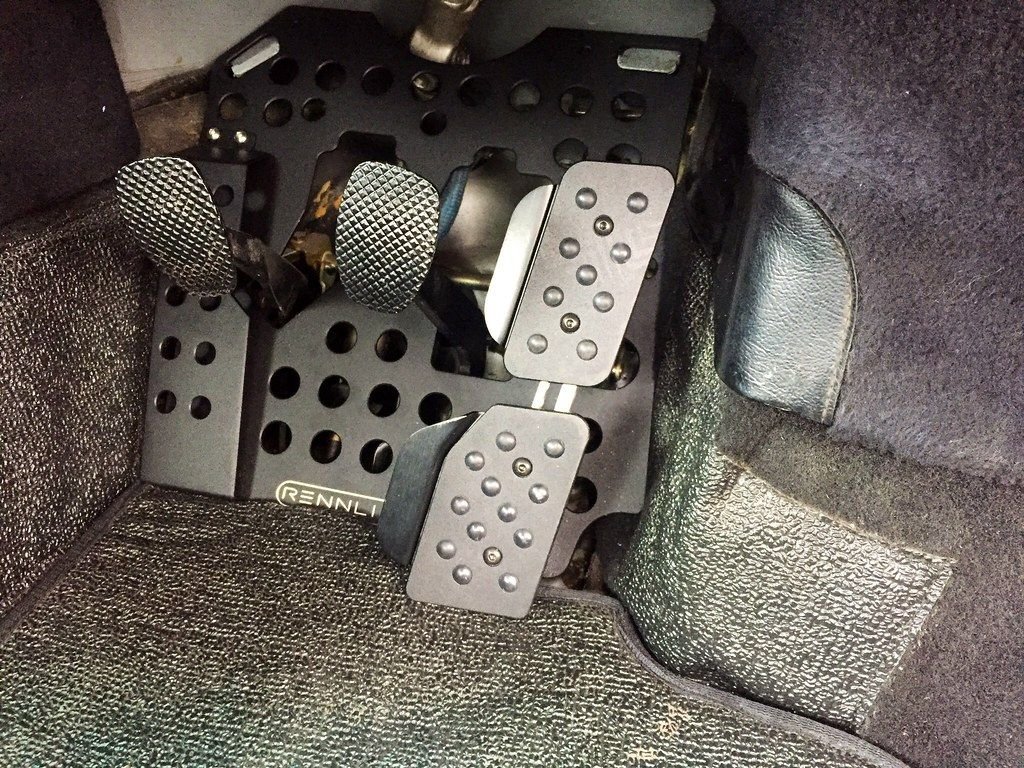
Installed a Rennline phone mount. Slick. For the first time in 17 years of ownership, I have place to put my phone that is useful! (It's my nav, radio, etc as I have deleted the stereo, have RS door cards)
Replaced headlight lenses - R lens went in easy and the L lens was a total PITA. Also replaced cracked driver's door handle seal - so much work for a little gasket, but it makes such a difference in looks.
both my door handle seals are cracked. what is required to change them out?
just saw post above. that is a lot of disassembly for two small seals. I worry things won't go back together properly.
both my door handle seals are cracked. what is required to change them out?
just saw post above. that is a lot of disassembly for two small seals. I worry things won't go back together properly.
I was worried too, but unlike modern cars, the door panels on the 993 are mostly fastened with screws and bolts. Very few plastic fasteners and zero plastic tabs to break. If you're organized with the screws and parts, it shouldn't be a problem. Reattaching the arm for the interior door handle was a little finicky, but otherwise it went back together pretty smoothly.
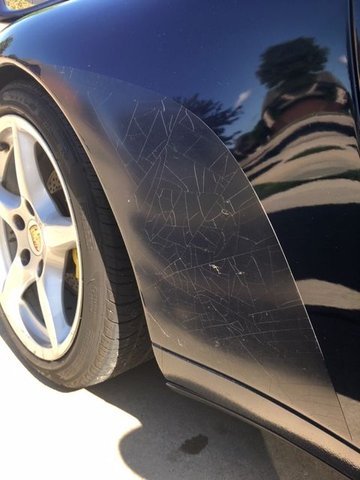
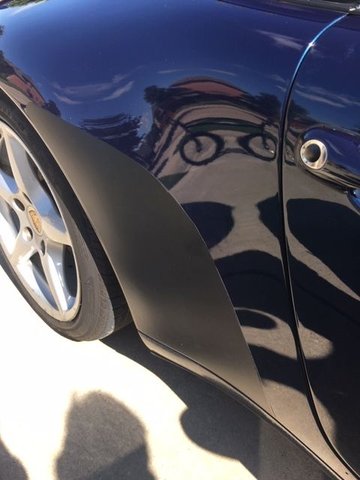
My original stone guards have cracks, chips and look like crap. After reading what a PIA it is to remove, decided to take samurai_k advise and just make my own from black car wrap.
Didn't attempt to remove the old. Just cleaned the area good, pealed and stick.
Not sure I really like the black compared to clear, but for $10 and little time, it's a definite improvement for now!


 05-04-2019, 04:18 PM

 Took off the wheels to get refinished. The inner lip of the wheels still had some cosmoline on it when I took them off. At RimPro, they put wheels down when clear coat was still wet, so inner lips not that pretty.
  Ordered new rubber to replace the 10 yr old mismatched rubber, Requested Continental Extremecontact Sports, and DWS06s came in.
  Ordered new lug nuts and then tracked them online as they traveled from AL to ND , CA, OH and then finally here in NH. Thanks USPS!