SAI system removal – success!
 01-18-2009, 12:22 AM
#1
Seared
Rennlist Member
Rennlist Member
Thread Starter
I’ve been slowly building up the courage to yank the entire intake system off in order to remove the useless SAI pump, distribution manifold, and air lines. I have a 6/94 build, OBD-1 993, so the diagnostics do not care whether this system is functional, or in a dumpster. A few Rennlist pioneers (jmarch, jscott82) encouraged me to forge ahead, so a few weeks ago I ordered the cam tower block-off bolts from Patrick Motorsports. These are necessary to plug the openings left when the air line fittings are removed from the camshaft towers.
A conversation on Thursday with good friend and 24/7 993 technical advisor, Neil Sullivan, went something like this, Me: “So I’m thinking of taking the plunge.” Neil: “Let’s do it Saturday.” So that’s what we did today. Although outside temps hovered around 10 F, we stayed comfortable enough for t-shirts courtesy of a big kerosene heater. Neither of us knew what to expect, but trusted each other’s mechanical skills to make it through this adventure.
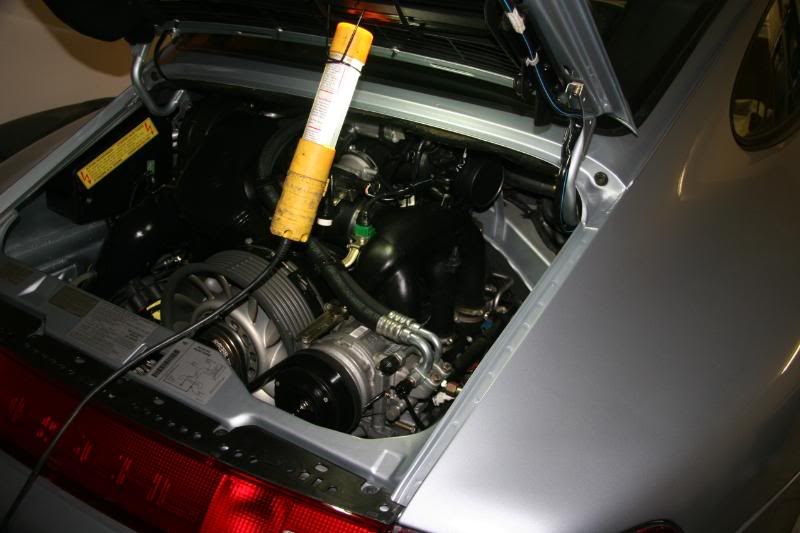
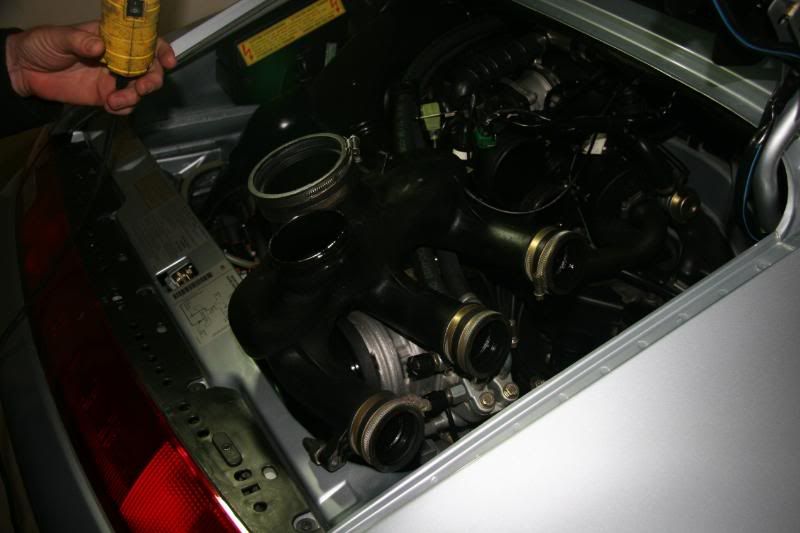
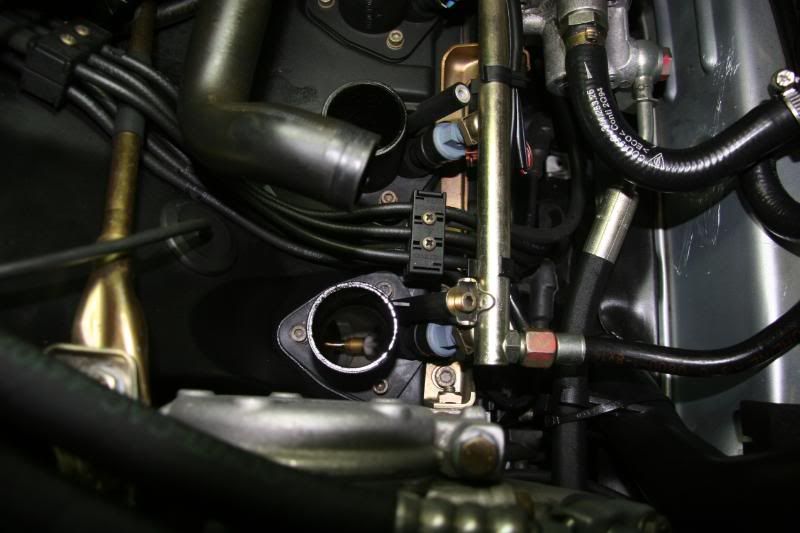
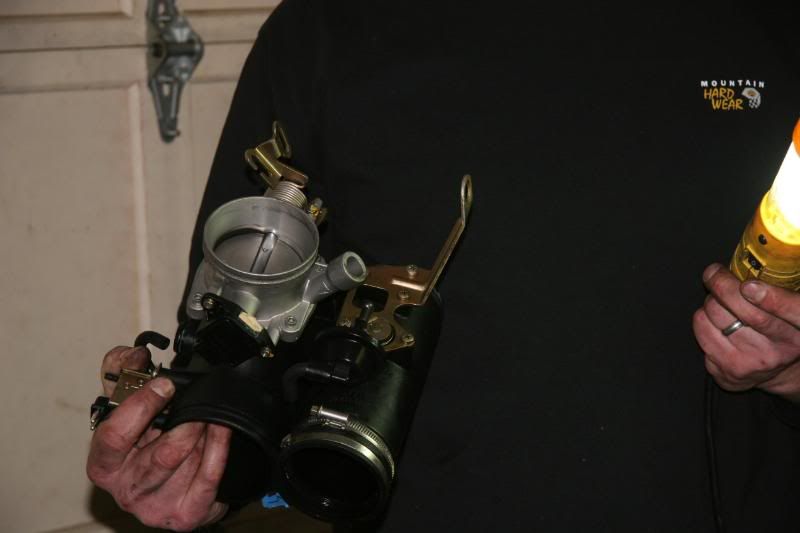
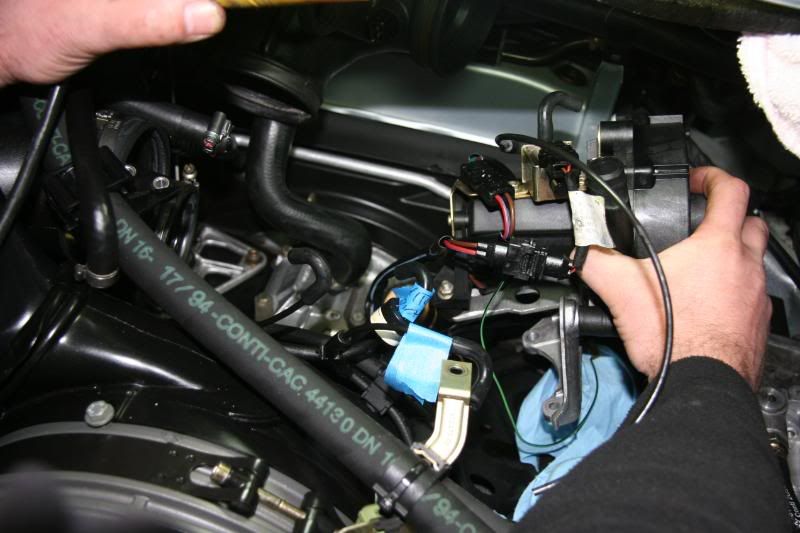
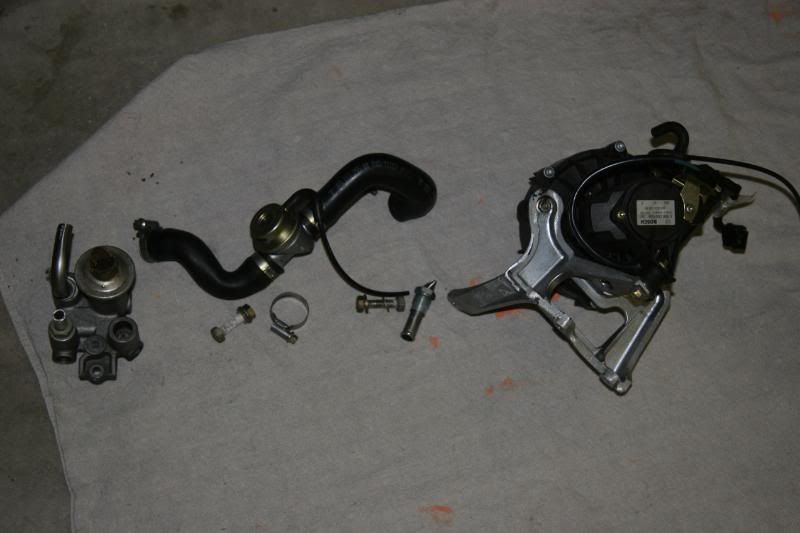
My initial plan was to pull the airbox, remove the right bank of the intake manifold, and then excise the offending mechanism. While the removal of these two items allowed a nice amount of room, we were not able to properly access the mounting bolts for the bracket that the pump is bolted to. So off came the throttle body. That allowed us to completely remove the pump, brackets, the SAI check valve manifold, and the plumbing to the right bank.
But how to remove the hard line running to the left cam tower? We tried to snake various 17mm wrenches into the tight confines behind the left intake manifold, but simply ran out of room to swing a wrench. We pulled the blower motor, and then went about undoing myriad vacuum and electrical connections that kept the left side intake manifold strapped in. Once this mess was on the garage floor, the left side connection came out without issue. We snugged the block-off bolts into place on each cam tower and then took some time to clean nearly 15 years of oil film from within the manifold passages.
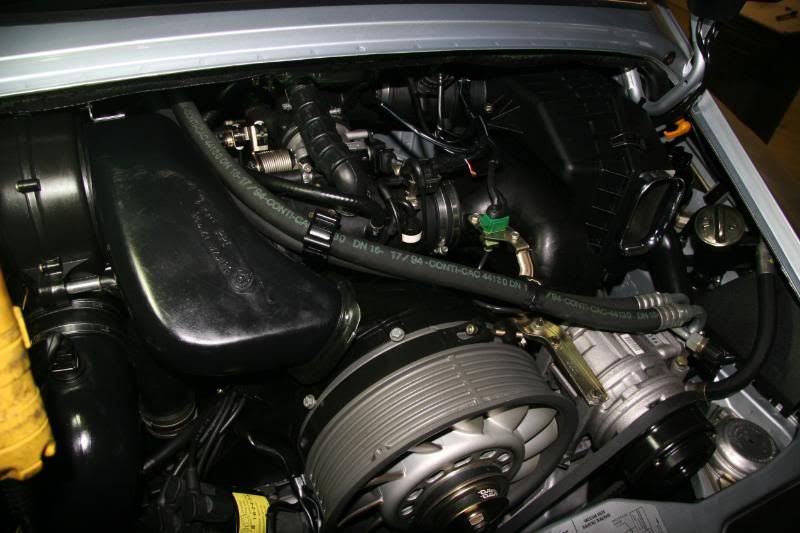
The throttle body needed a mild cleaning as well and then it was time to reverse course and make the engine compartment look normal again. We attached the left-side intake manifold, the blower motor, the throttle body, the right-side intake manifold, and finally, the airbox. Certainly easier said than done, but not impossible for a mechanically-inclined owner. Rather than describe each pic, I’ll just close with a few hints and then attach a selection of pics we took throughout the day (it took us nearly 8 hours…). FWIW, the Dung Beetle started right up and assumed a perfect idle shortly thereafter. I’m sure my neighbors enjoyed the sound of a 993 running at part throttle, without mufflers, at 7pm…….
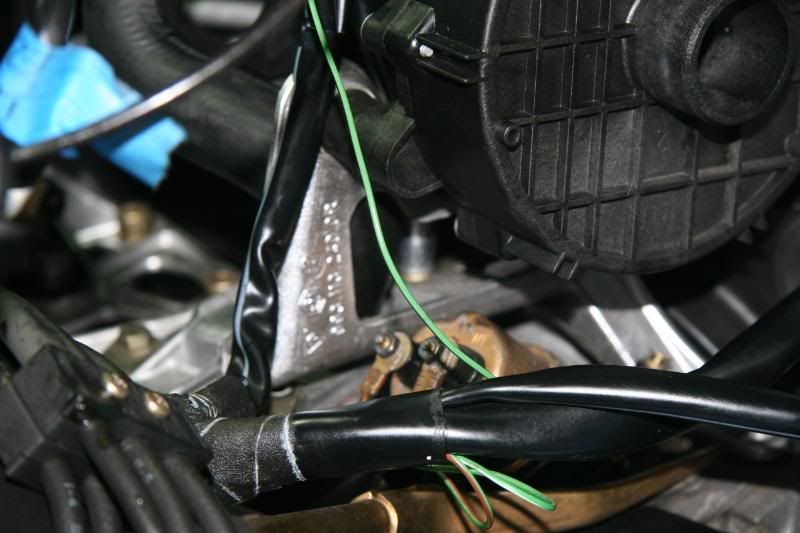
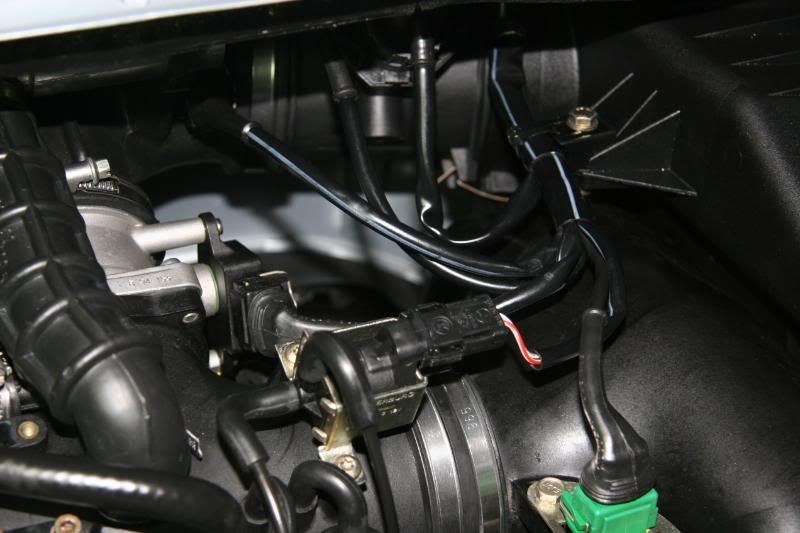
• Make sure to label the flimsy vacuum lines. They come off very easy and a few of them look the same.
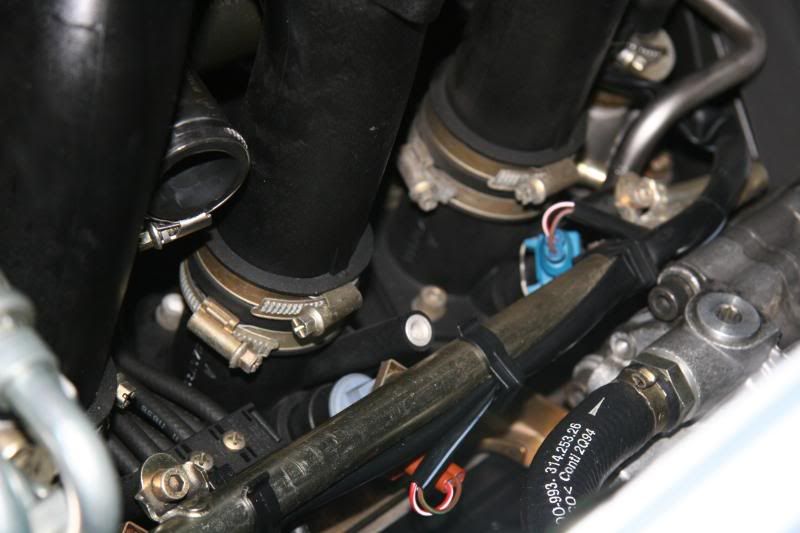
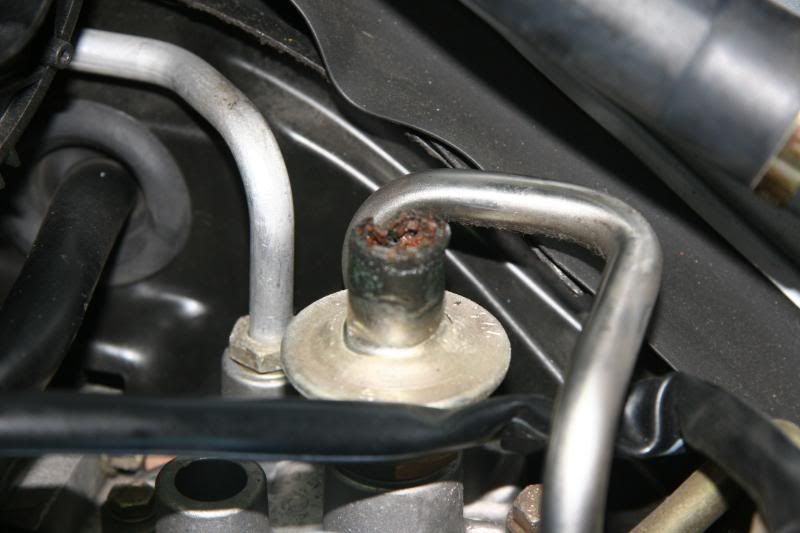
• Rather than fashion a special open socket for the air line fittings (at the cam towers), we just cut the metal lines so that a deep 17mm socket could fit over the ends.
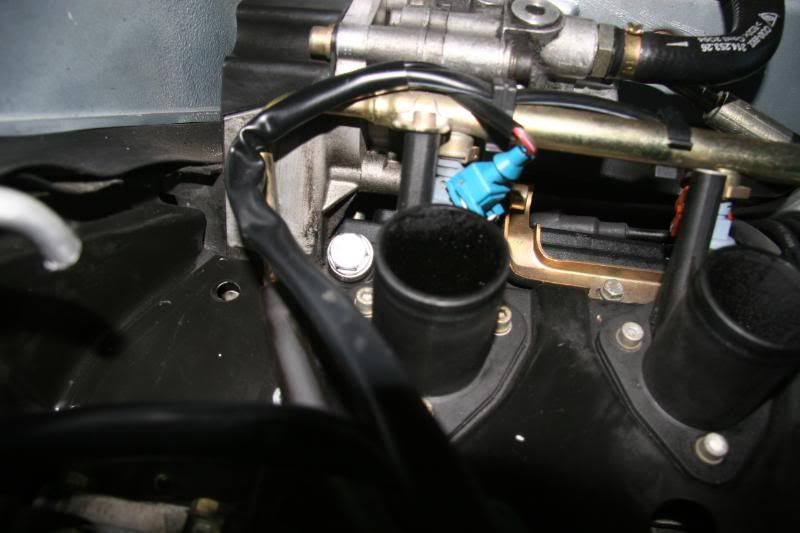
• The SAI pump is fed by one vacuum line. We simply capped this at the junction block located aft of the throttle body.
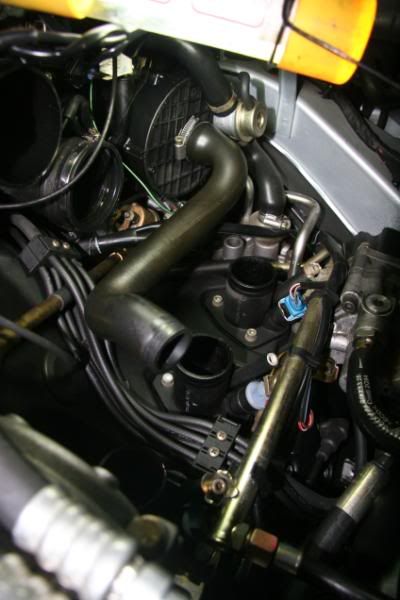
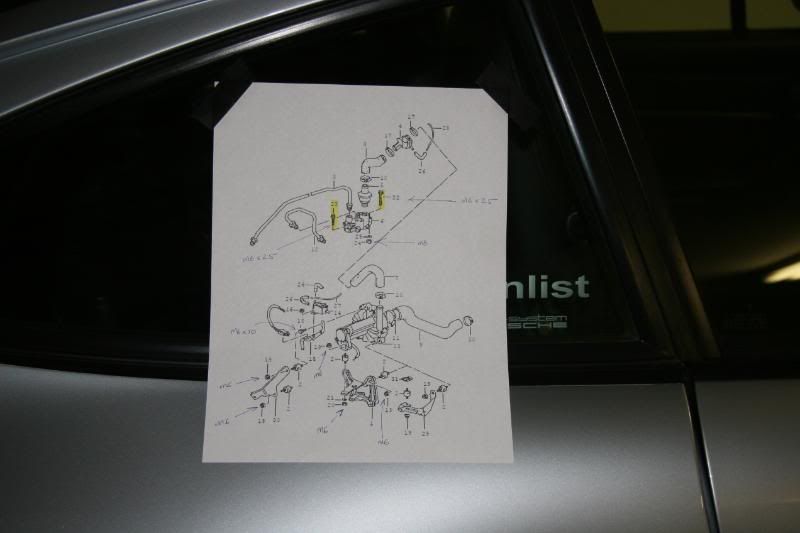
• The SAI manifold (on which the SAI check valve rests) is attached to the engine tin via four bolts (two small 10mm ones that serve to attach the tin to the engine case, and two 13mm ones that attach the manifold to the tin. The small ones come straight out, but the large ones require a long-armed monkey to hold the related nuts from below (I was that monkey). Look into the cavity above the small oil filter and you’ll see the two nuts.
• The SAI pump is connected to the rear of the airbox via a molded rubber hose. Removing this silly system means that the rear of the airbox will have a small port (less than 1”) that can either be left as is, or plugged. I found a black plastic cap in my personal hardware store that seemed tailor-made for the task.
• With the intake manifolds removed, we noticed an oily film on the insides of the plastic intake risers. We carefully cleaned the insides and then vacuumed the voids/ports. I was pleased to see that the intake valve stems and surrounding areas looked factory new (not bad for 50,000 miles).
• Neil - your help and guidance was greatly appreciated.
• Cactus, your junker is next.
Please feel free to ask questions about the process. It was a fun learning experience and we’re sure we could do the same procedure again in far less time. Enjoy the pics.


Andreas
A conversation on Thursday with good friend and 24/7 993 technical advisor, Neil Sullivan, went something like this, Me: “So I’m thinking of taking the plunge.” Neil: “Let’s do it Saturday.” So that’s what we did today. Although outside temps hovered around 10 F, we stayed comfortable enough for t-shirts courtesy of a big kerosene heater. Neither of us knew what to expect, but trusted each other’s mechanical skills to make it through this adventure.
My initial plan was to pull the airbox, remove the right bank of the intake manifold, and then excise the offending mechanism. While the removal of these two items allowed a nice amount of room, we were not able to properly access the mounting bolts for the bracket that the pump is bolted to. So off came the throttle body. That allowed us to completely remove the pump, brackets, the SAI check valve manifold, and the plumbing to the right bank.
But how to remove the hard line running to the left cam tower? We tried to snake various 17mm wrenches into the tight confines behind the left intake manifold, but simply ran out of room to swing a wrench. We pulled the blower motor, and then went about undoing myriad vacuum and electrical connections that kept the left side intake manifold strapped in. Once this mess was on the garage floor, the left side connection came out without issue. We snugged the block-off bolts into place on each cam tower and then took some time to clean nearly 15 years of oil film from within the manifold passages.
The throttle body needed a mild cleaning as well and then it was time to reverse course and make the engine compartment look normal again. We attached the left-side intake manifold, the blower motor, the throttle body, the right-side intake manifold, and finally, the airbox. Certainly easier said than done, but not impossible for a mechanically-inclined owner. Rather than describe each pic, I’ll just close with a few hints and then attach a selection of pics we took throughout the day (it took us nearly 8 hours…). FWIW, the Dung Beetle started right up and assumed a perfect idle shortly thereafter. I’m sure my neighbors enjoyed the sound of a 993 running at part throttle, without mufflers, at 7pm…….
• Make sure to label the flimsy vacuum lines. They come off very easy and a few of them look the same.
• Rather than fashion a special open socket for the air line fittings (at the cam towers), we just cut the metal lines so that a deep 17mm socket could fit over the ends.
• The SAI pump is fed by one vacuum line. We simply capped this at the junction block located aft of the throttle body.
• The SAI manifold (on which the SAI check valve rests) is attached to the engine tin via four bolts (two small 10mm ones that serve to attach the tin to the engine case, and two 13mm ones that attach the manifold to the tin. The small ones come straight out, but the large ones require a long-armed monkey to hold the related nuts from below (I was that monkey). Look into the cavity above the small oil filter and you’ll see the two nuts.
• The SAI pump is connected to the rear of the airbox via a molded rubber hose. Removing this silly system means that the rear of the airbox will have a small port (less than 1”) that can either be left as is, or plugged. I found a black plastic cap in my personal hardware store that seemed tailor-made for the task.
• With the intake manifolds removed, we noticed an oily film on the insides of the plastic intake risers. We carefully cleaned the insides and then vacuumed the voids/ports. I was pleased to see that the intake valve stems and surrounding areas looked factory new (not bad for 50,000 miles).
• Neil - your help and guidance was greatly appreciated.
• Cactus, your junker is next.
Please feel free to ask questions about the process. It was a fun learning experience and we’re sure we could do the same procedure again in far less time. Enjoy the pics.
Andreas
Last edited by AOW162435; 01-18-2009 at 12:42 AM.
 01-18-2009, 12:47 AM
#3
Seared
Rennlist Member
Rennlist Member
Thread Starter
The following users liked this post:
M. Schneider (04-09-2020)
01-18-2009, 12:51 AM
#5
Rennlist Member
Join Date: Apr 2006
Location: Rainforest (Vancouver, BC)
Posts: 7,570
Received 1,033 Likes
on
464 Posts
Very impressive. I don't know why everyone gives you such a hard time Andreas, I only found the word "clean" or any derivative three times in your very thorough write-up.
01-18-2009, 01:35 AM
#6
Seared
Rennlist Member
Rennlist Member
Thread Starter

Andreas
01-18-2009, 01:45 AM
#7
Rennlist Member
Join Date: Apr 2006
Location: Rainforest (Vancouver, BC)
Posts: 7,570
Received 1,033 Likes
on
464 Posts
Part of Speech: verb
Definition: make undirty, uncluttered
Synonyms: absterge, bath, bathe, blot, brush, cauterize, clarify, cleanse, clear the decks*, clear up, deodorize, depurate, deterge, disinfect, do up*, dredge, dust, edulcorate, elutriate, erase, expunge, expurgate, flush, hackle, launder, lave, mop, neaten, pick, pick up, polish, purge, purify, rake, rasp, refine, rinse, rout out, sanitize, scald, scour, scrape, scrub, shake out, shampoo, soak, soap, sponge, spruce up*, sterilize, straighten up, swab, sweep, tidy up, vacuum, wash, whisk, winnow, wipe

Question. Would this cause any difficulties with emissions testing?
Trending Topics
01-18-2009, 01:53 AM
#8
Seared
Rennlist Member
Rennlist Member
Thread Starter
01-18-2009, 02:17 AM
#10
Guru
Lifetime Rennlist
Member
Rennlist Small
Business Sponsor
Lifetime Rennlist
Member
Rennlist Small
Business Sponsor
01-18-2009, 02:53 AM
#13
Nordschleife Master
Nice job .... I may do the same thing on my 1995 OBD-I ... or just crimp the SAI lines shut ... 
01-18-2009, 08:54 AM
#14
Seared
Rennlist Member
Rennlist Member
Thread Starter
Originally Posted by FlatSix911
Nice job .... I may do the same thing on my 1995 OBD-I ... or just crimp the SAI lines shut ...
Andreas
01-18-2009, 09:39 AM
#15
Race Car
Great writeup. Unfortunately, since my 96 requires SAI, this is not one project that I'd follow.
Questions:
1) Did you weight all of the stuff that came out? Wonder how much weight was shaved off the car.
2) Is there a SAI wall clock art in the works?
Questions:
1) Did you weight all of the stuff that came out? Wonder how much weight was shaved off the car.
2) Is there a SAI wall clock art in the works?