When you click on links to various merchants on this site and make a purchase, this can result in this site earning a commission. Affiliate programs and affiliations include, but are not limited to, the eBay Partner Network.
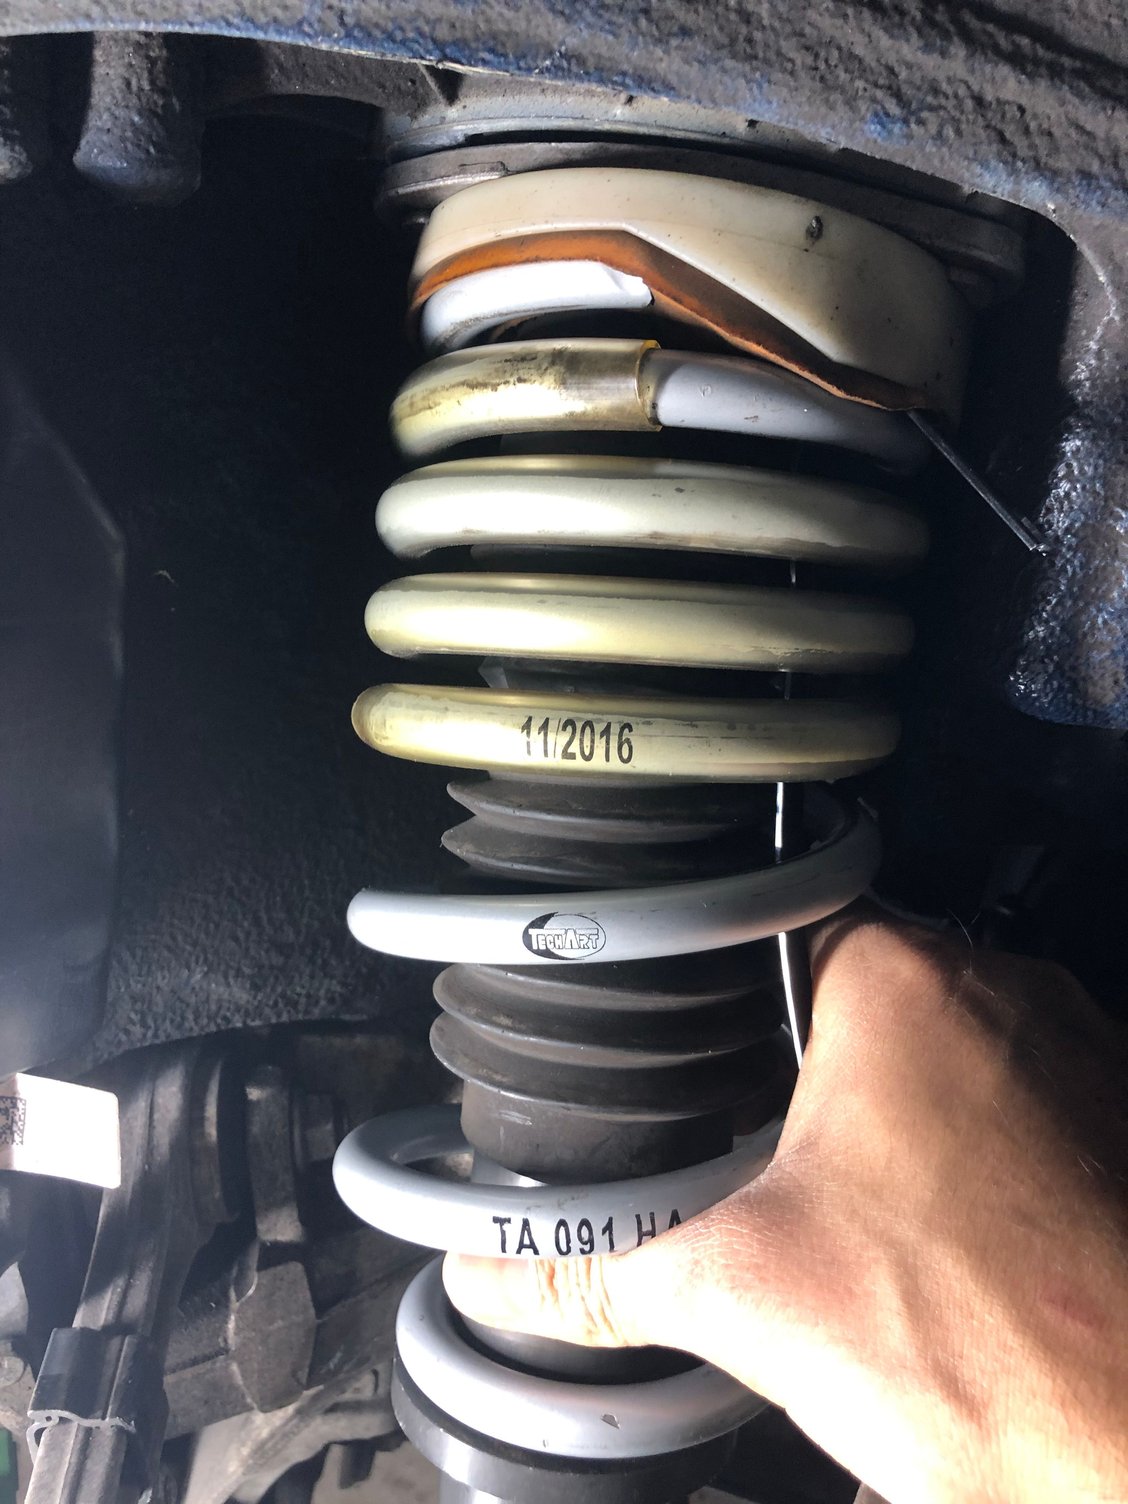
About 2cm total of adjustability between the different ring settings
Thanks for this. So theoretically possible to get 0.78~ inch out of a 991.2 Carrera rear ride height from the factory assuming they're set to maximum, or 0.39~ inch out if set to the middle. Now wish I had looked at where mine were set before the springs went in. Might be interesting to measure a number of stock 991.2 Carreras and then a number of TechArt-sprung cars to see where the fenders are. The better way is per the factory method, but tape measure and top of fender cut is fine for a ballpark on modern cars.
Ideal spring set, in my mind, would lower the rear to the "right" height (probably a bit lower than 991.2 Sport PASM, and a bit higher than TechArt) with linear-rate springs and then match them with new front spring with adjustable spring perches. Would also allow corner balancing (not perfect due to the rears, but�)
well this settles it.
im either reselling my springs
or paying to have installed!
The fronts are the easiest springs I have ever done...the rears...well they are the hardest I have ever done. I have done ALOT of spring installs in my life (probably over 100) so I have plenty of experience in suspension work. Not terrible from a DIY standpoint but the rears took me 4-5 hours the first time. I pull them back out to adjust the perches a few months after and it took me about 1/2 the time-but still a long time. The fronts were done in about 30 mins to compare. I would imagine that a good shop would charge between $600-900 to install.
Hahahaha! Soon I've been caught up with meetings all day, hoping tomorrow evening I get some time - am looking forward to seeing the final product too - beyond just the springs, but all DIY.... followed by some magic bits from SOUL....
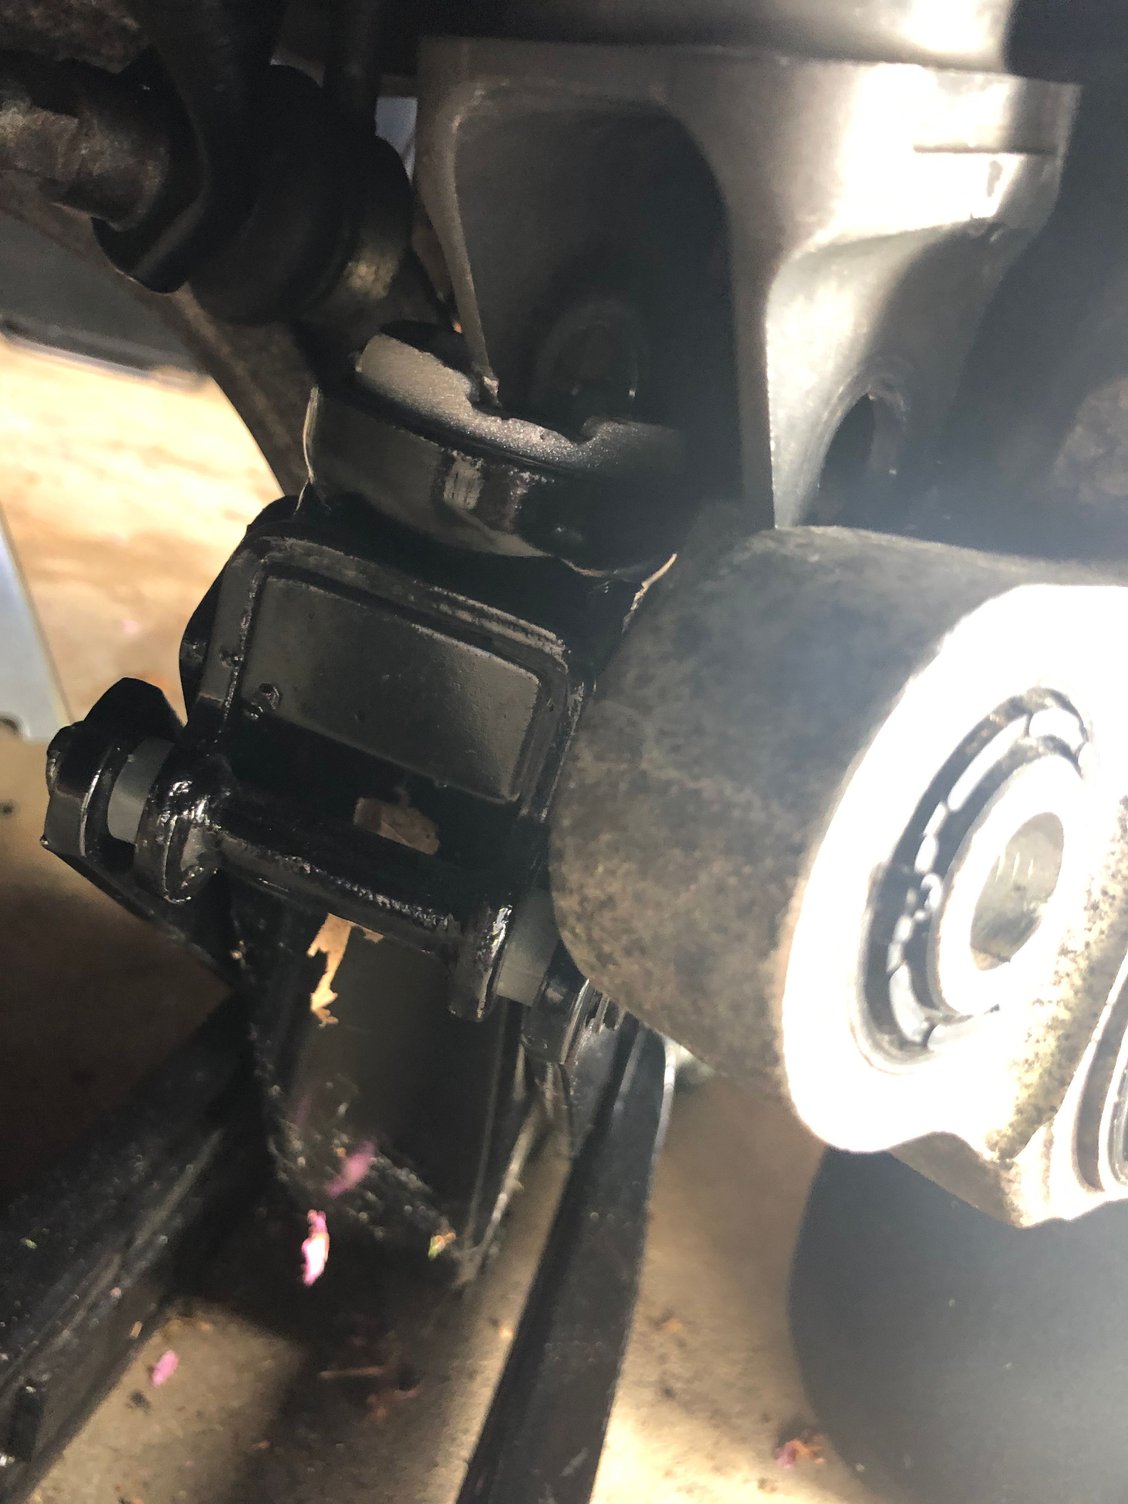
@polobai I seem to find myself stuck (figuratively and literally)... Before I try to brute force anything and potentially cause damage, could you suggest some additional tips to get the strut back in place? I've fitted the three screws through the body, jacked up the bottom of the strut, but need about another few cm of clearance to get the strut in place... could you point out my errors please?
Nope, you've got the wrong angle of approach there fella, I did try to inform you - you need a mallet and a small block of wood. Also what helps is the lug extension tool used to help get wheels on/off. Insert that in to the lug nut hole because you may need to have another person stand on it to get the wheel carrier to move around while you work the strut saddle on to the carrier. Also, get a hockey puck for the jack, looks like you're really doing a number on the saddle there.
So, here's how you get it back on. Approach from the rear bottom angle of the carrier hub that the saddle attaches to, NOT the top down approach it looks like you're doing. Once you come at it from the low rear with the jack, use the jack to lift it just enough to get it "stuck" on. This is where the wood block and mallet comes in - now you will gradually tap and pound the strut saddle upwards and forwards to align with the hole. Have the bolt handy and in place with some force pushing it laterally so that the moment the saddle aligns with the hole the bolt can slide in and lock in place.
Ditto what iwrenchmy911 said. +1 on call a friend, +2 on having a crowbar closeby, +3 on cursing freely with said friend during entire ordeal, and +4 on a drink to celebrate post-drive install. Good luck!
Thank you all! I will be having a friend coming over this evening to help out... going to swing by store later today to pickup some better pry bars also
Try this-lower the jack and remove completely. Then take the bottom of the strut and move it forward to clear the knuckle and slide it back on over it.
Because I've never done suspension on 911 myself, are you guys saying that the hub assembly still has some resistance that it needs another person to push down to help lower the knuckle so it can clear and the strut can slide on? If all the upper/lower front/rear control arms at each connection point is lose the bushing should not have any preload on them and should just fall by its own weight or at least no need for a 2nd person. Thats my experience will all suspension I've done.
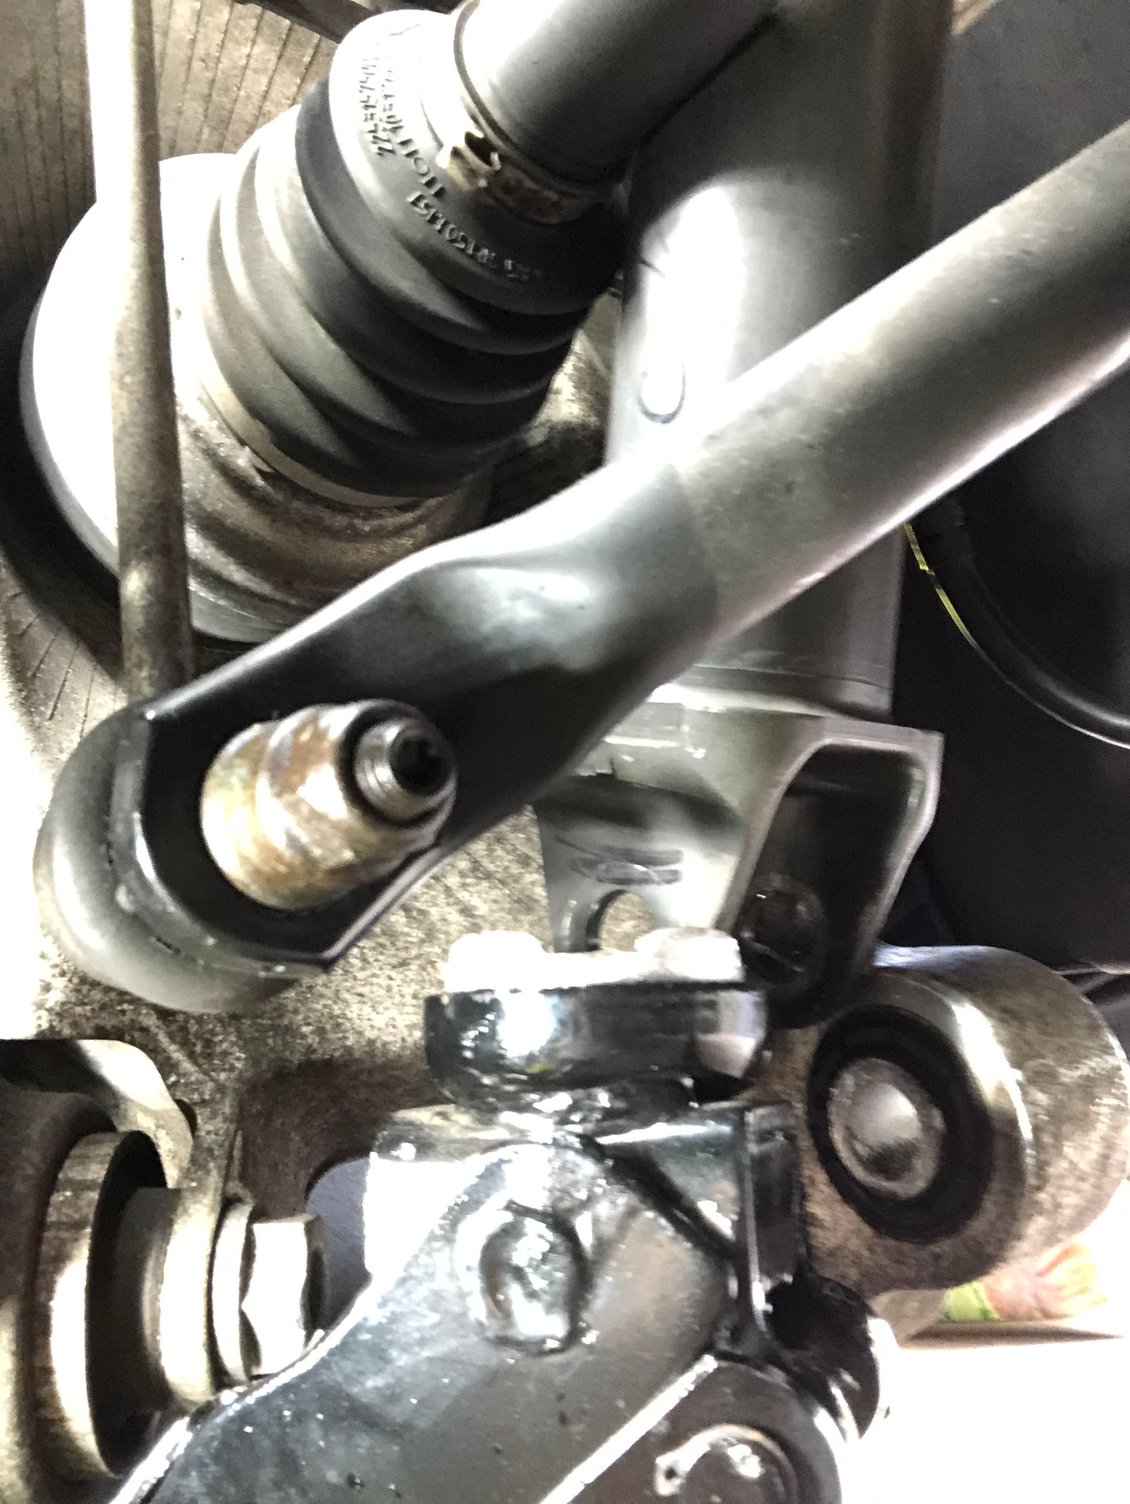
I was thinking along the same lines that if I loosen the bolts circled in red (previous post in the same thread), I would get some play for the clearance needed... elephant racing also discusses something like this in their blog post... but I'm hesitant to do this because I don't want to make a mess (first suspension ever)
Because I've never done suspension on 911 myself, are you guys saying that the hub assembly still has some resistance that it needs another person to push down to help lower the knuckle so it can clear and the strut can slide on? If all the upper/lower front/rear control arms at each connection point is lose the bushing should not have any preload on them and should just fall by its own weight or at least no need for a 2nd person. Thats my experience will all suspension I've done.
I was thinking along the same lines that if I loosen the bolts circled in red (previous post in the same thread), I would get some play for the clearance needed... elephant racing also discusses something like this in their blog post... but I'm hesitant to do this because I don't want to make a mess (first suspension ever)
Suspension bushings are preloaded. The only risk or mistake you can make is when you torque them down you do it without loading (aka putting a jack on the bottom of the assembly and lifting till the car is slightly off the jack stand) the bushing. Even still, the rate of premature wear would be maybe 5-10k miles faster unless you hardcore track the car.
What I dont know, cause I simply paid a shop to install mine (I've done at least 50-75 spring/coils/stock suspension installs on other cars) on the 911 is how much more slack youll get. With that said, it sounds like you'll get enough to clear the bottom of that strut saddle on the knuckle so why struggle when you can just loosen those four bolts, is my thought concept.


 05-11-2020 | 05:57 PM