Centerlock Wheel Installation Comments
 11-21-2014, 12:32 AM
#31
Instructor

Join Date: Feb 2014
Posts: 133
Likes: 0
Received 0 Likes
on
0 Posts
Another question: Is there any reason to favor a particular wheel centering tool? It's something I really feel I need with the PCCB's.
A version from Rennline includes a protective cap for the threads and a cap removal tool for $350. The Porsche version is $425. It has a threaded rod down the center with a hex head on one end that the Rennline version doesn't have. What's that for? Getting close to buying all the stuff I need for wheel removal so appreciate the input.
A version from Rennline includes a protective cap for the threads and a cap removal tool for $350. The Porsche version is $425. It has a threaded rod down the center with a hex head on one end that the Rennline version doesn't have. What's that for? Getting close to buying all the stuff I need for wheel removal so appreciate the input.
http://www.3rauto.com/departments/parts/3r_parts/
I am going to order this as well for my PCCBs and leave it in the car all the time.
I really like TS's torque wrench/breaker combo neatly in one package and will probably go with that. I assume the whole case will fit in the front trunk?
 11-21-2014, 12:47 AM
#32
Race Director
My guess is that the HEX nut is to set the centerlock inner locking mechanism. I used the tool that came with the car which serves to remove the cap and set the inner locking mechanism.
I opted to do without the guide, and just be extra careful when removing and re-installing the wheel. If I did have it, I would probably be too lazy next time since it is an extra step if I am trying to cut down the extra 20 mins. ;-)
I opted to do without the guide, and just be extra careful when removing and re-installing the wheel. If I did have it, I would probably be too lazy next time since it is an extra step if I am trying to cut down the extra 20 mins. ;-)
11-21-2014, 01:06 AM
#33
Rennlist Member
All the guides are pricey, and I'd love to pass on them, but if I managed to chip a $4K ceramic rotor I'd be pretty unhappy with myself. The locking mechanism is easy to set with the tool you mention or even a 1/2" socket extension so if that hex piece on the Porsche part is the only difference, I'll probably go with the Rennline and save myself $75.
1. Breaker bar
2. Crazy *** torque wrench ( are these digital?)
3. Some stupid expensive grease (added just to **** you off)
4. A $400 alignment tool.
5. A bottle of Stanahans.
Does that cover it?
11-21-2014, 01:07 AM
#34
Racer
Thread Starter
To help with my efficiency, I will probably purchase another centerlock nut tool.
I just bought a 3/4-inch x 20 inch long breaker bar from Harbor Freight Tools for $20 and a 1-inch diameter x 48-inch long galvanized pipe for extension for $16 from Home Depot so next time I don't have to switch between my combo breaker/torque wrench.
I just bought a 3/4-inch x 20 inch long breaker bar from Harbor Freight Tools for $20 and a 1-inch diameter x 48-inch long galvanized pipe for extension for $16 from Home Depot so next time I don't have to switch between my combo breaker/torque wrench.
11-21-2014, 01:13 AM
#35
Racer
Thread Starter
Otherwise pay $500+ to dealer every time.:-(
11-21-2014, 02:24 AM
#38
Race Director
To help with my efficiency, I will probably purchase another centerlock nut tool.
I just bought a 3/4-inch x 20 inch long breaker bar from Harbor Freight Tools for $20 and a 1-inch diameter x 48-inch long galvanized pipe for extension for $16 from Home Depot so next time I don't have to switch between my combo breaker/torque wrench.
I just bought a 3/4-inch x 20 inch long breaker bar from Harbor Freight Tools for $20 and a 1-inch diameter x 48-inch long galvanized pipe for extension for $16 from Home Depot so next time I don't have to switch between my combo breaker/torque wrench.
 I think I'll try getting by with just one for a while....
11-21-2014, 02:52 AM
I think I'll try getting by with just one for a while....
11-21-2014, 02:52 AM
#39
Rennlist Member
Thanks Nick, I'd forgotten about that. The vid isn't loading for me right now (getting error message) but I'll try later and see if it shows what I'm looking for.
Edit: Ok so I watched again. The crucial bit of info I'm looking for is just out of the video frame. It's hard to tell whether the spreader is braced against the seat cushion itself or a more solid piece of the seat under the cushion. I suppose this might become obvious once I try it for myself, but I was curious in advance...
Edit: Ok so I watched again. The crucial bit of info I'm looking for is just out of the video frame. It's hard to tell whether the spreader is braced against the seat cushion itself or a more solid piece of the seat under the cushion. I suppose this might become obvious once I try it for myself, but I was curious in advance...
Also, another plug for a torque multiplier, a long levered wrench always seems awkward and easy to slip off the nut.
11-21-2014, 02:57 AM
#40
Rennlist Member
To help with my efficiency, I will probably purchase another centerlock nut tool.
I just bought a 3/4-inch x 20 inch long breaker bar from Harbor Freight Tools for $20 and a 1-inch diameter x 48-inch long galvanized pipe for extension for $16 from Home Depot so next time I don't have to switch between my combo breaker/torque wrench.
I just bought a 3/4-inch x 20 inch long breaker bar from Harbor Freight Tools for $20 and a 1-inch diameter x 48-inch long galvanized pipe for extension for $16 from Home Depot so next time I don't have to switch between my combo breaker/torque wrench.
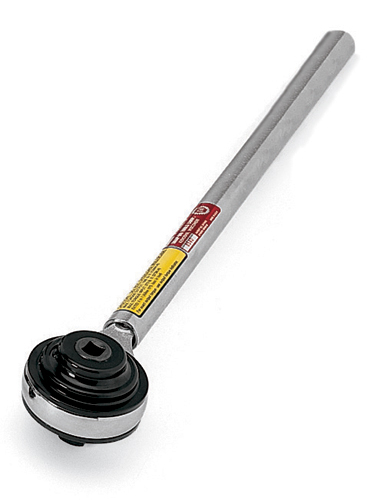
http://buy1.snapon.com/catalog/item....e=&dir=catalog
 11-21-2014, 03:01 AM
#41
Race Director
I always used the bottom of the GT2 seat with my Irwin clamp since it's steel and can take a lot of pressure. Looks like Paver uses a longer clamp and puts it against the cushion, looks easier than the bottom of the seat and I'm not sure that the sofa seats have the same piece underneath.
Also, another plug for a torque multiplier, a long levered wrench always seems awkward and easy to slip off the nut.
Also, another plug for a torque multiplier, a long levered wrench always seems awkward and easy to slip off the nut.
11-21-2014, 03:07 AM
#42
Rennlist Member
^Bam, look above I knew you would ask! That's the one I have, works great!
There is mechanical loses in the mechanism so you should factor that in your torque wrench settings, this one is +/-10% so I always set my wrench for 120 lbs instead of 111 lbs (444 lbs/4).
There is mechanical loses in the mechanism so you should factor that in your torque wrench settings, this one is +/-10% so I always set my wrench for 120 lbs instead of 111 lbs (444 lbs/4).
11-21-2014, 03:11 AM
#43
Race Director
 Thanks!
11-21-2014, 05:01 AM
Thanks!
11-21-2014, 05:01 AM
#44
Advanced

Can you get Stahwhile tools in the US?
Their torque wrench can be used as a breaker bar in reverse with no effect on the mechanism, makes it easier as you just leave the nut (bolt) tool in place. God spec too at +\- 4%, 730r is the model to look for.
Their torque wrench can be used as a breaker bar in reverse with no effect on the mechanism, makes it easier as you just leave the nut (bolt) tool in place. God spec too at +\- 4%, 730r is the model to look for.
11-21-2014, 06:40 AM
#45
Racer
Thread Starter
Don't do it! Spend your money on the right tools:
http://buy1.snapon.com/catalog/item....e=&dir=catalog