From 981 CS to Base 987.2, The Story Continues
 05-10-2019, 03:51 PM
#76
Advanced

Correct, but it's my understanding that's due to the LSD in the R, which I don't have.
I talked to a Bilstein rep and confirmed the B6 shocks are appropriate so the suspension parts (along with new mounts and bushings) have been ordered! I'll probably do the swap in June.
I talked to a Bilstein rep and confirmed the B6 shocks are appropriate so the suspension parts (along with new mounts and bushings) have been ordered! I'll probably do the swap in June.
anyway, love the thread, keep it going!
 05-10-2019, 04:12 PM
#77
Rennlist Member
The X73 nomenclature started with the 981 generation and the part numbers for the X73 springs are different than what's found on the R suspension. They both provide a 20 mm drop but I assume have different spring rates (though likely similar).
I think everyone agrees the 981 X73 is the evolution of the 987 R suspension, but definitely not identical.
I think everyone agrees the 981 X73 is the evolution of the 987 R suspension, but definitely not identical.
05-10-2019, 05:41 PM
#78
Rennlist Member
Thread Starter
Kiznarsh- you may enjoy reading some of CMOOSE's work on his 06 Cayman S in Pistonheads. He is a auto journalist, who writes many stories about the interaction between owners and cars with pictures,like his winter trip to the Alps in his Cayman. One thread was "2006 Porsche 987 Cayman 3.4 Bore Score Edition", which happened to him. He lives in England and really prefers to keep the car in its original condition, yet does acknowledge some up grades. If you read his entire 28 page journey in that thread, you will find a comparison between his car and another Cayman S on pg 23 with upgraded suspension (Ohlins and sway bars) as they exchanged cars for a few hours. Its an excellant read, inspired me to replace my OEM LCA's with solid thrust pucks and FF Orange motor mount inserts to complete the "feel" that CMOOSE suggests his friends car could improve.
 05-21-2019, 01:19 AM
#79
Rennlist Member
Thread Starter
This time when I opened up the box, the booster was actually still inside. Great start so far.

Removed the screw and pulled out the pedal assembly.
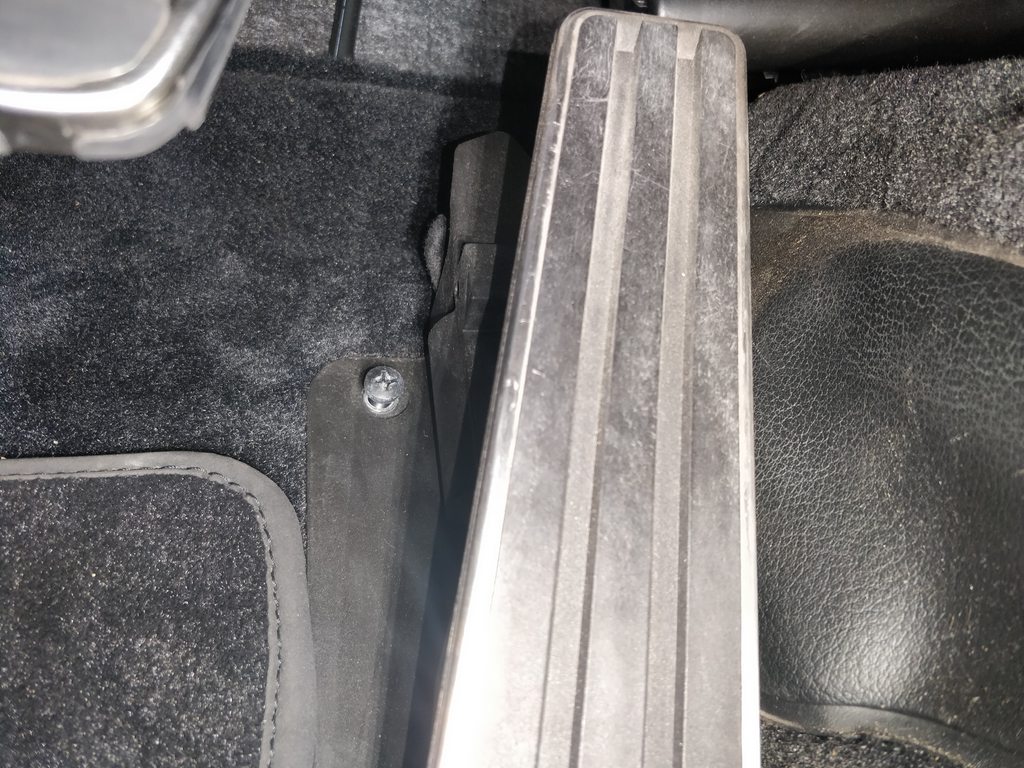
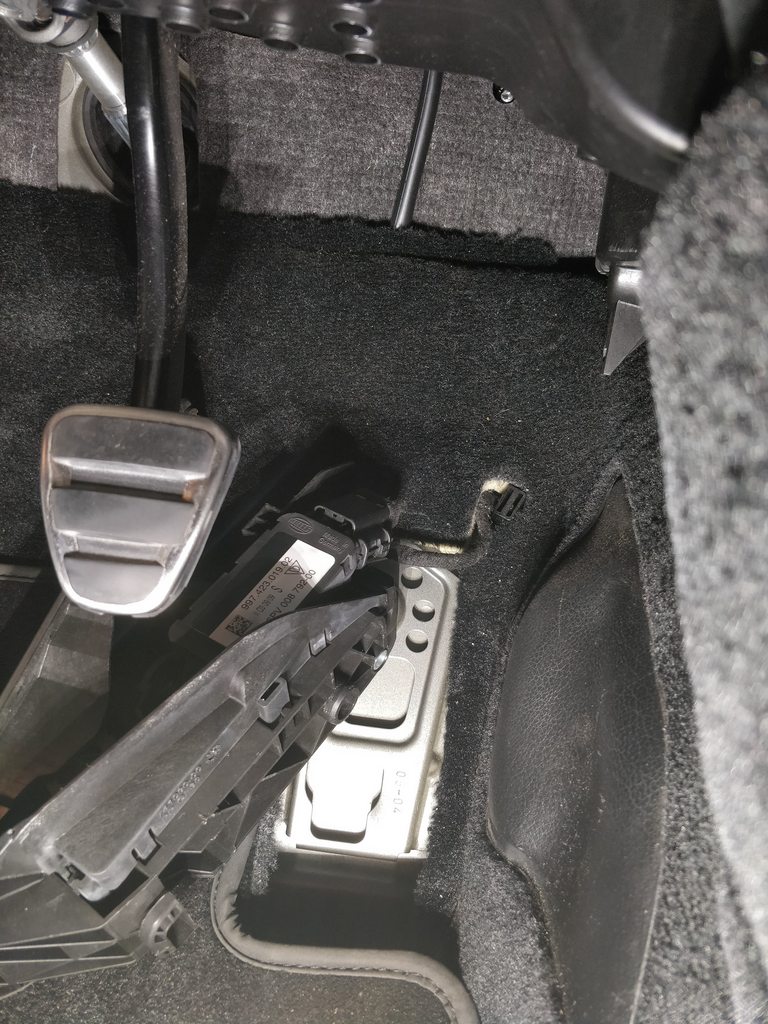
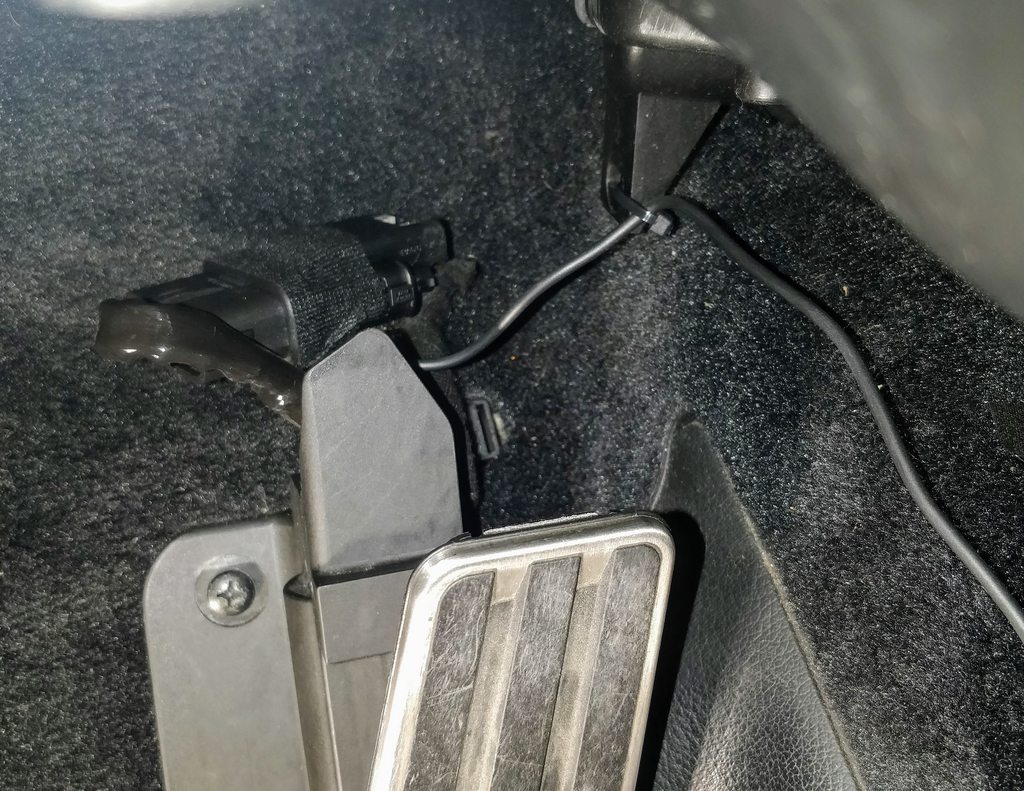
Now all ya gotta do is push the gray tab on the back and disconnect the connector. And so I did. And then the tab broke.
90 frustrating minutes later I finally got it apart. Knowing I didn't have any leverage from the back side, I tried several different tools to lift up the remainder of the gray tab from the front.
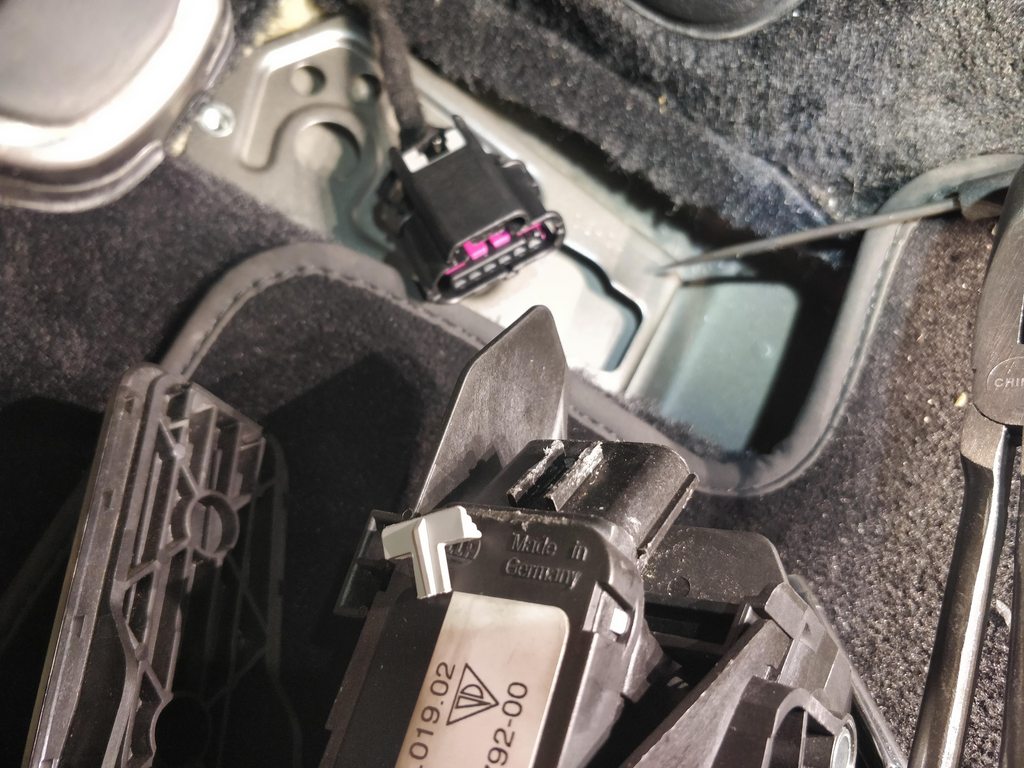
The problem was the gray tab wasn't holding it together, nay, it was the black tab which is somehow connected to the gray part. I had to lift it above the little plastic stub seen below to separate them.
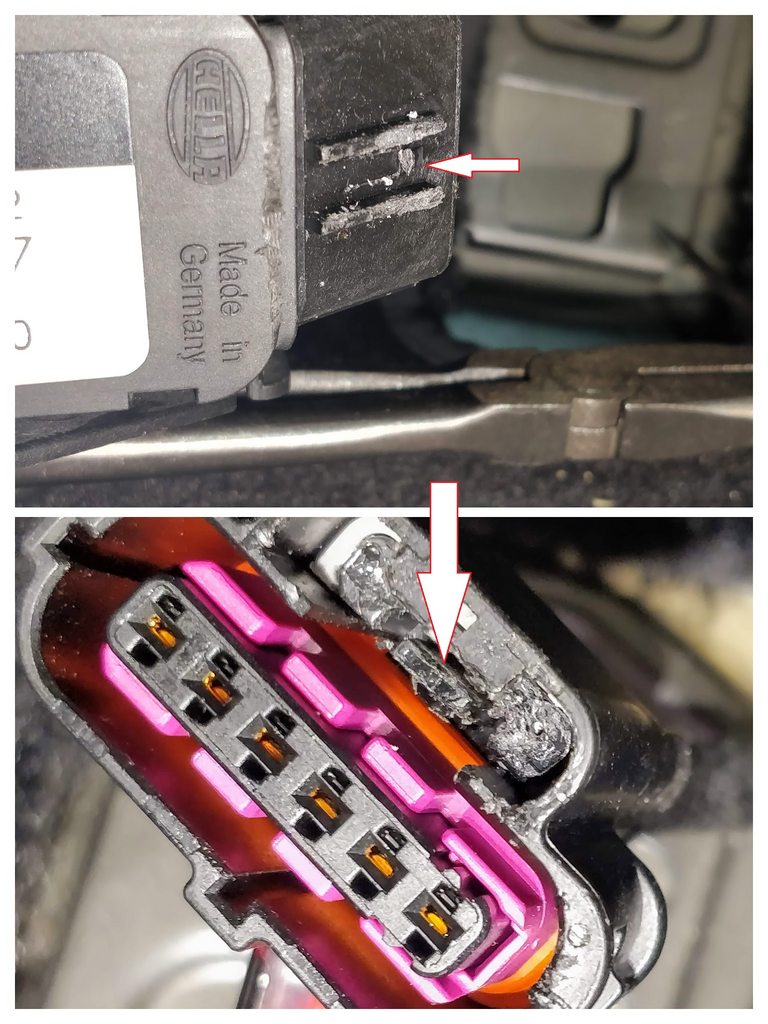
Now without the tab, there's no more "satisfying click." Fortunately the connectors are pretty tight (well not really fortunate when you're trying to remove them) and so I added some loom tape for good measure.
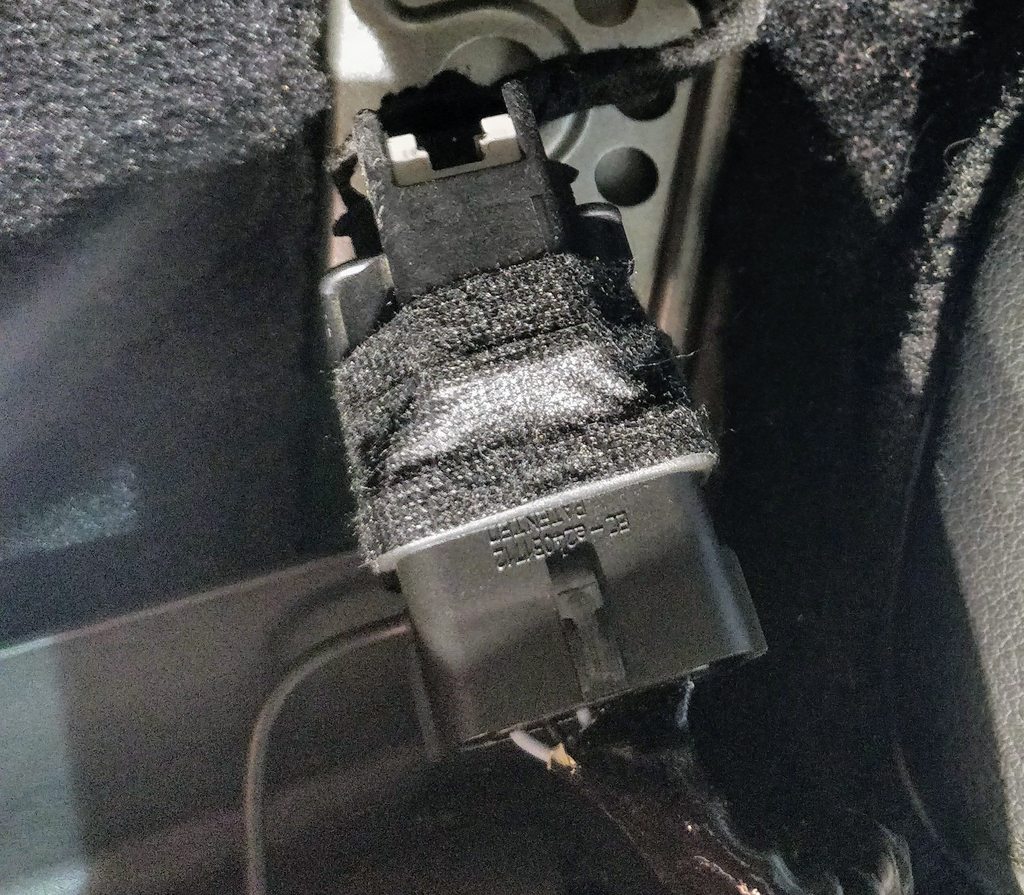
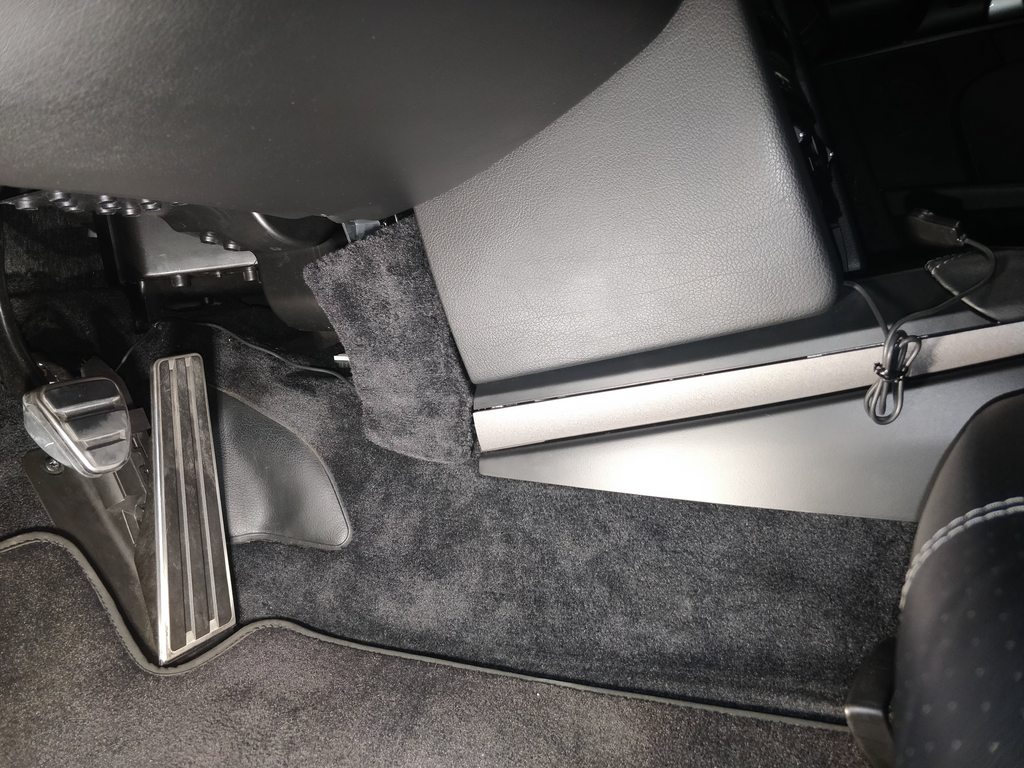
Then zip tied the cable out of the way and tucked the rest of it behind the center console. The selector can also hide inside that storage area so all in all, a pretty discrete setup.
Then I took it out and played with the settings. Noticeable improvement.
The "race" mode is too twitchy for city driving so I'll probably leave that for spirited canyon runs, but the "sport" mode on setting #7 seemed to be a good compromise. Car feels more alive and responsive.
Alrighty.
Removed the screw and pulled out the pedal assembly.
Now all ya gotta do is push the gray tab on the back and disconnect the connector. And so I did. And then the tab broke.
90 frustrating minutes later I finally got it apart. Knowing I didn't have any leverage from the back side, I tried several different tools to lift up the remainder of the gray tab from the front.
The problem was the gray tab wasn't holding it together, nay, it was the black tab which is somehow connected to the gray part. I had to lift it above the little plastic stub seen below to separate them.
Now without the tab, there's no more "satisfying click." Fortunately the connectors are pretty tight (well not really fortunate when you're trying to remove them) and so I added some loom tape for good measure.
Then zip tied the cable out of the way and tucked the rest of it behind the center console. The selector can also hide inside that storage area so all in all, a pretty discrete setup.
Then I took it out and played with the settings. Noticeable improvement.
The "race" mode is too twitchy for city driving so I'll probably leave that for spirited canyon runs, but the "sport" mode on setting #7 seemed to be a good compromise. Car feels more alive and responsive.
Alrighty.
06-24-2019, 04:00 AM
#80
Rennlist Member
Thread Starter
I have 2 other updates besides the suspension refresh, but with all the scope creep that happened, let's get right to it.
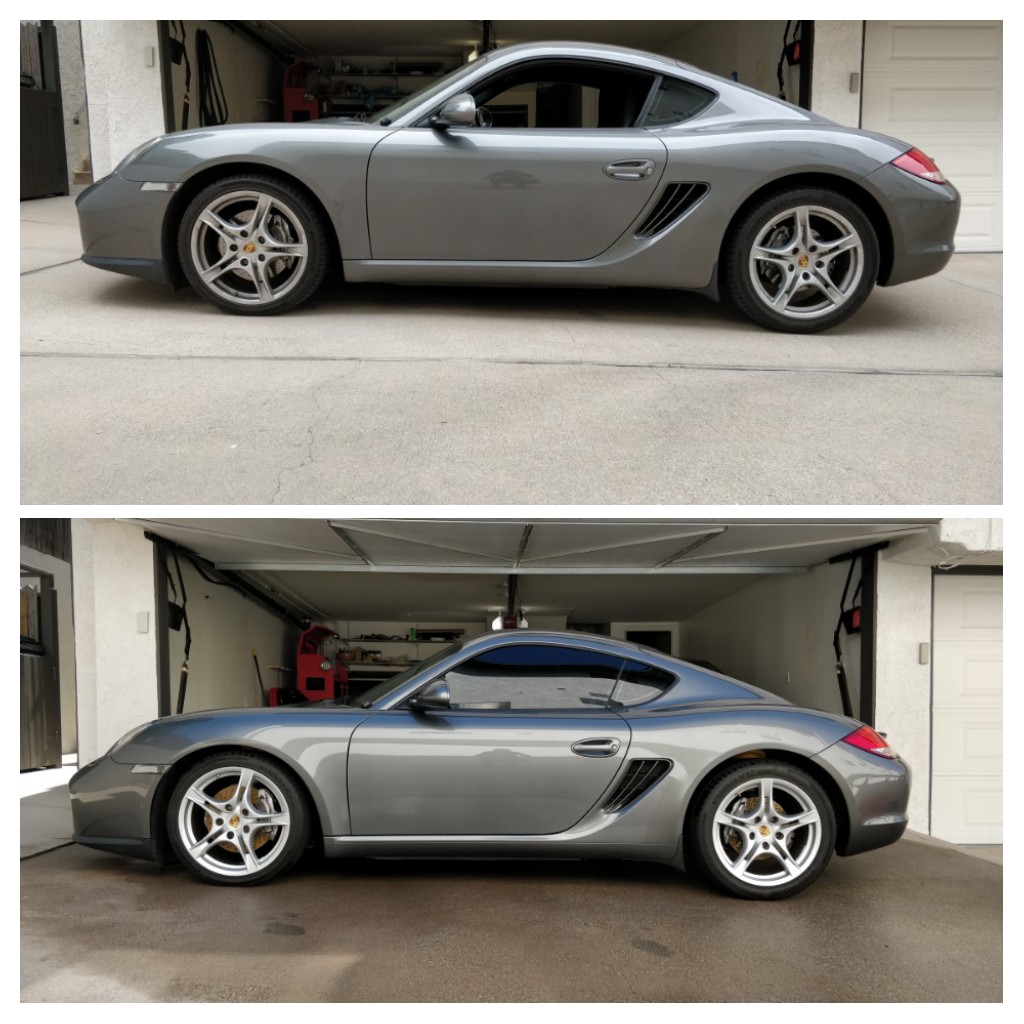
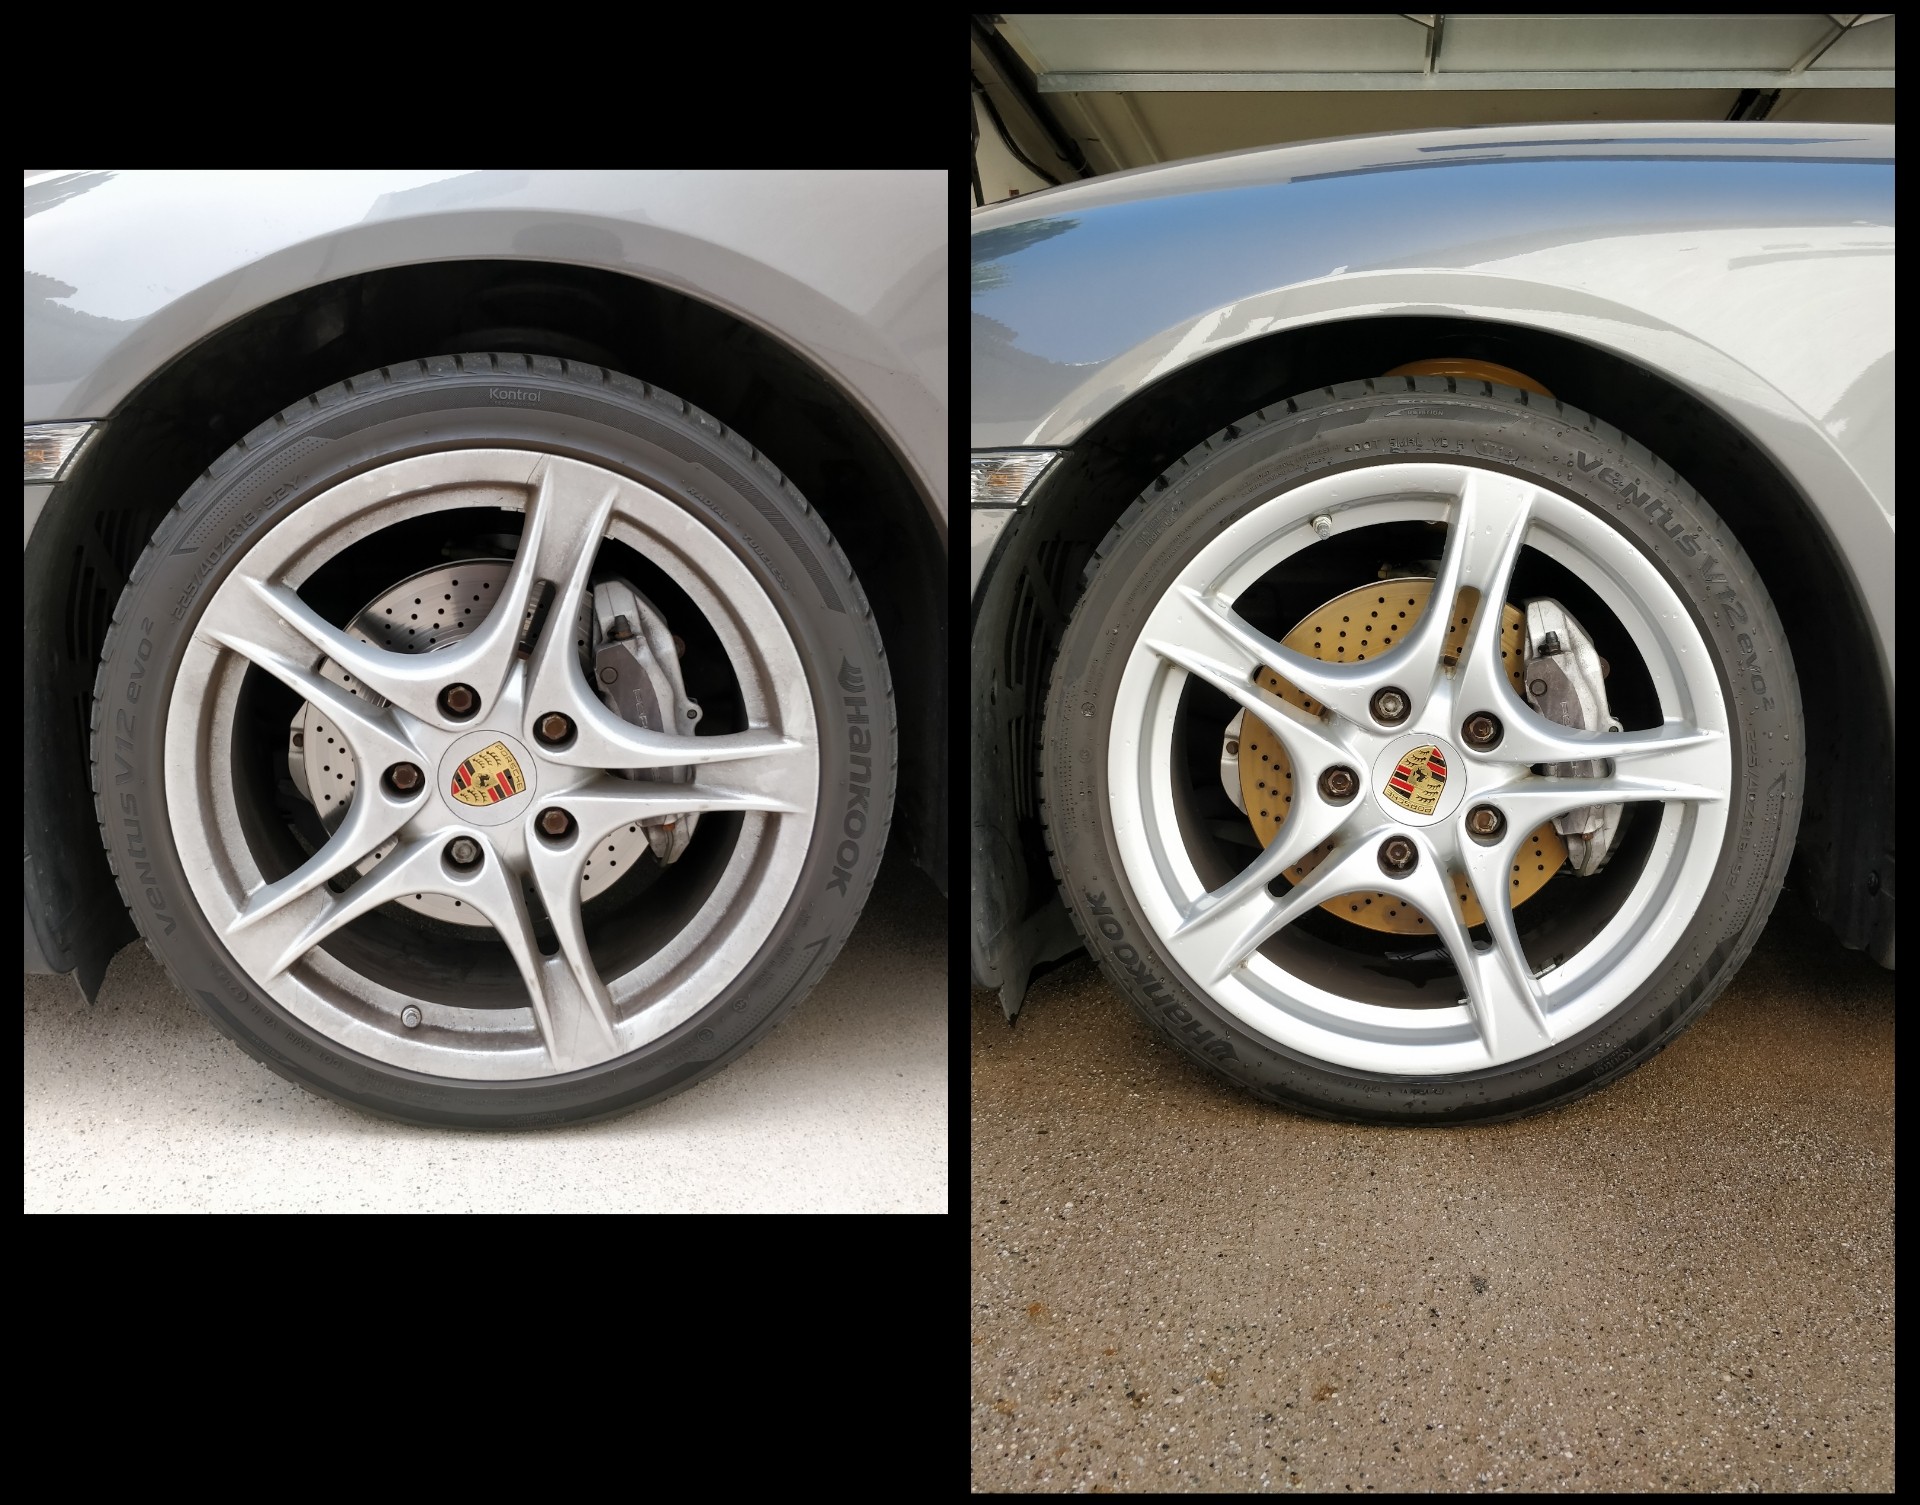
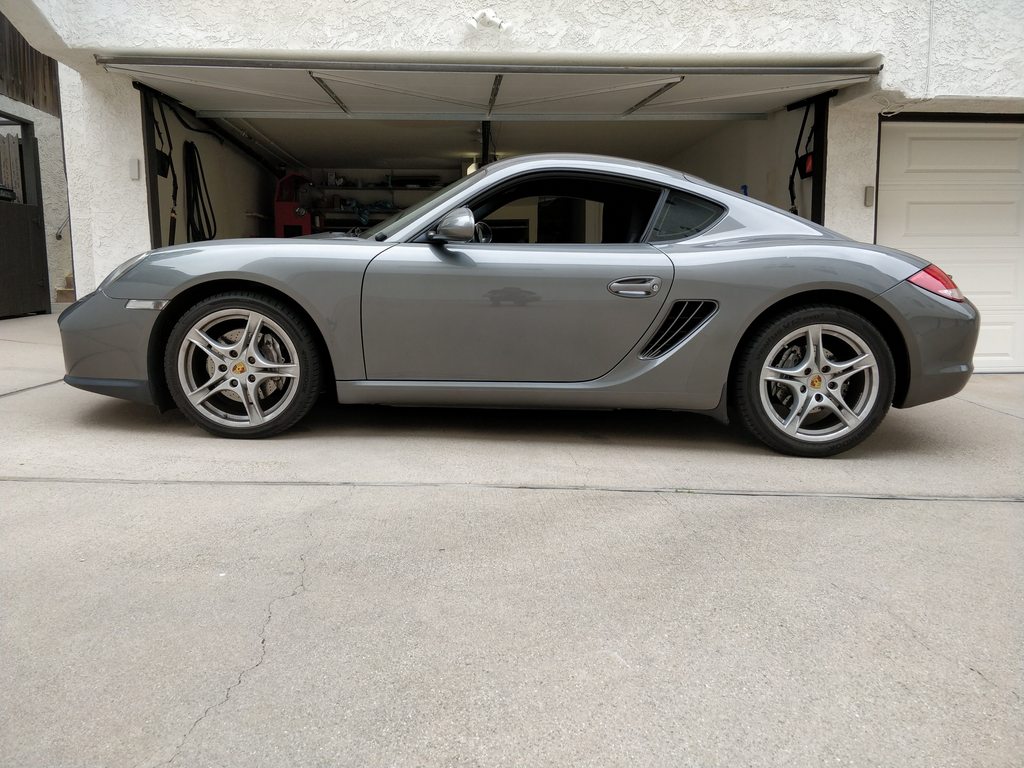
Car as it sat on the base suspension:
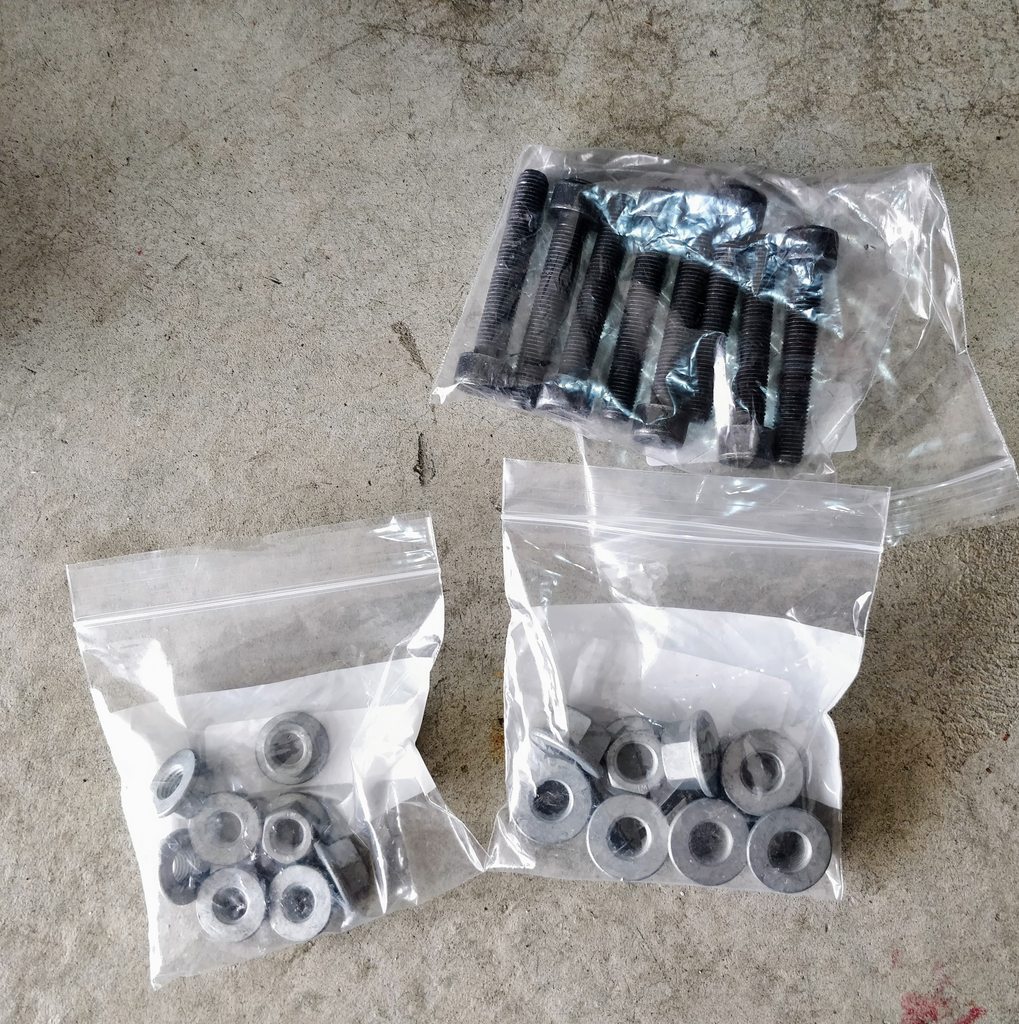
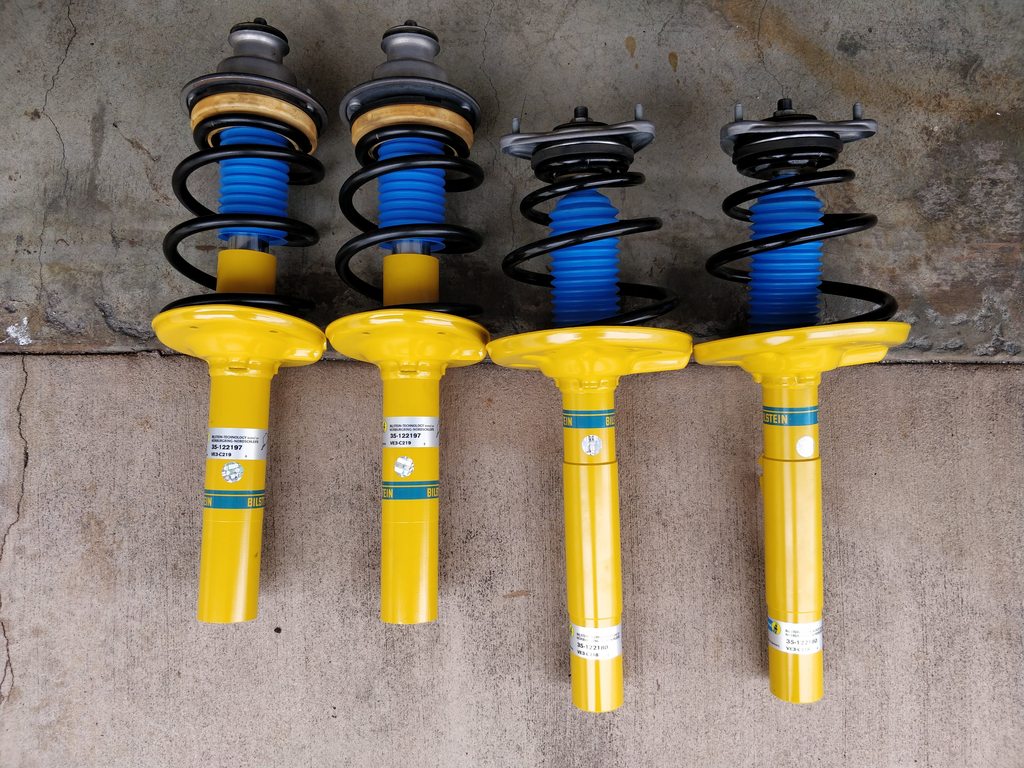
New parts:
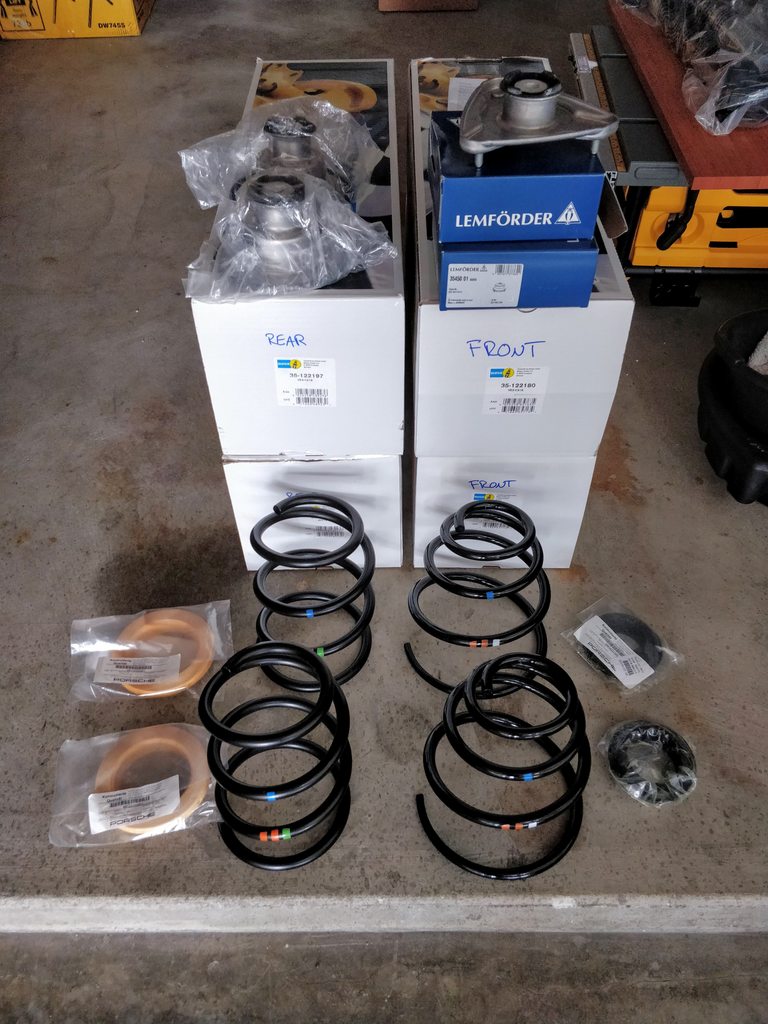
Parts List:
Front Damper - Bilstein B6 (x2)
P/N 35-122180
Cayman R Front Spring Set (x1)
P/N 98734353140504
Front Strut Mount (x2)
P/N 99734301801
Front Shock Bearing (x2)
P/N 99634351505
Rear Damper - Bilstein B6 (x2)
P/N 35-122197
Cayman R Rear Spring Set (x1)
P/N 98733353196504
Rear Shock Mount (x2)
P/N 98733305900
Rear Strut Bushing (x2)
P/N 98733350400
Also new lock nuts and caliper bolts since they're torque-to-yield.
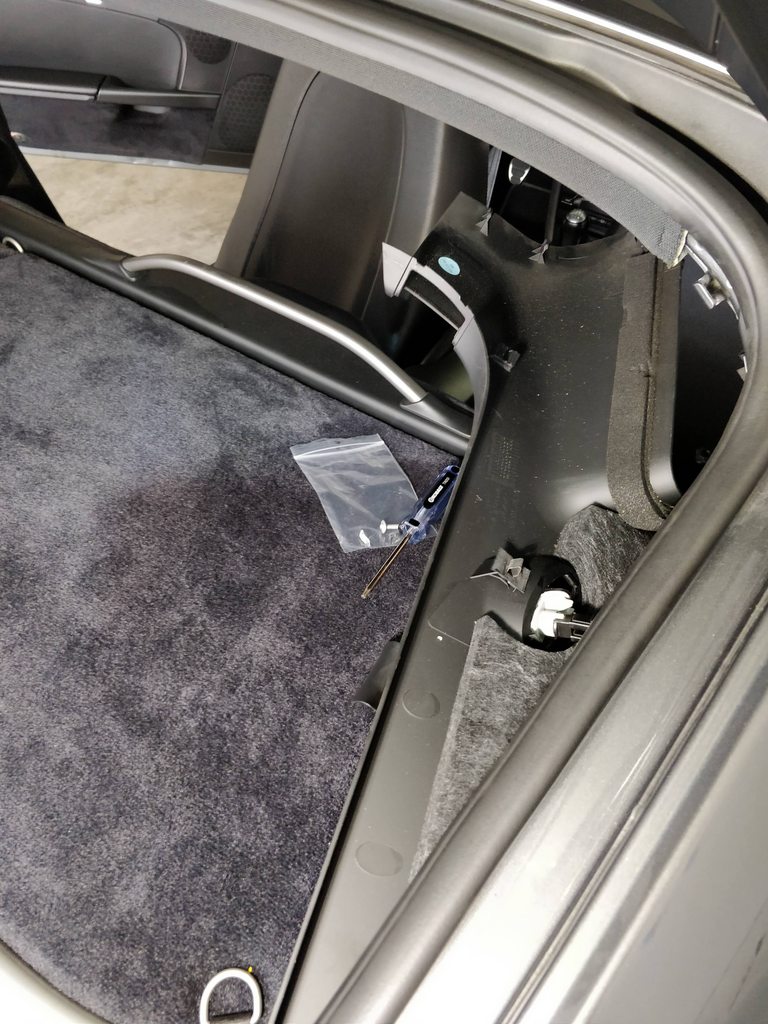
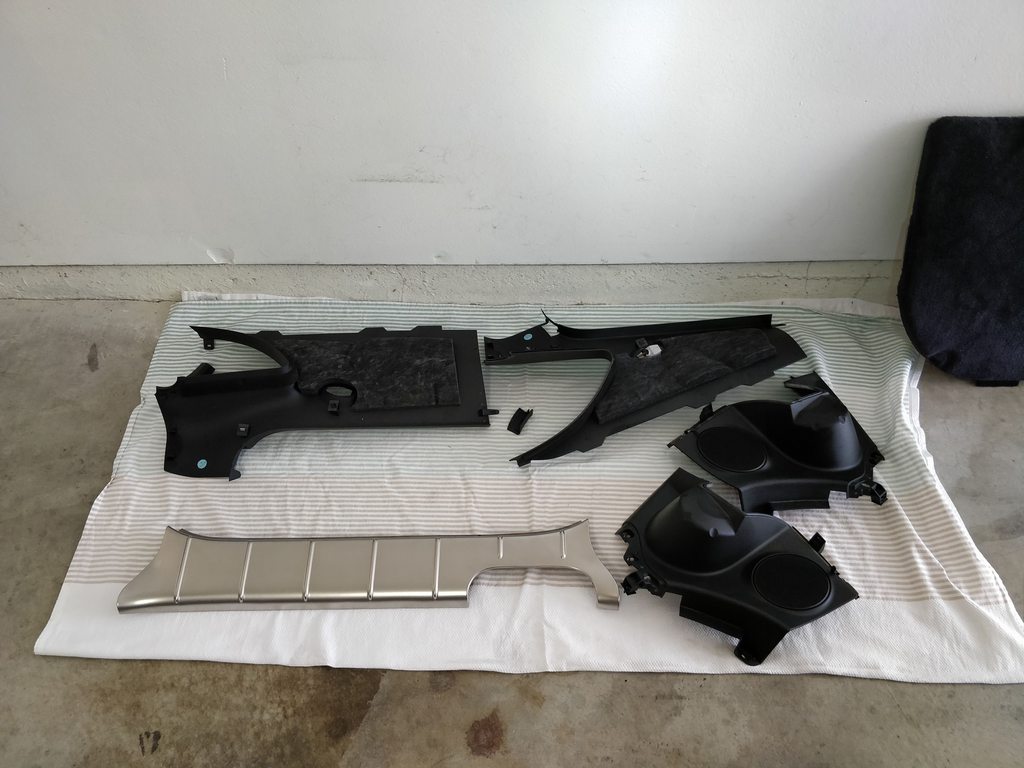
Started off with taking the interior rear panels out to get access to the rear shock mount.
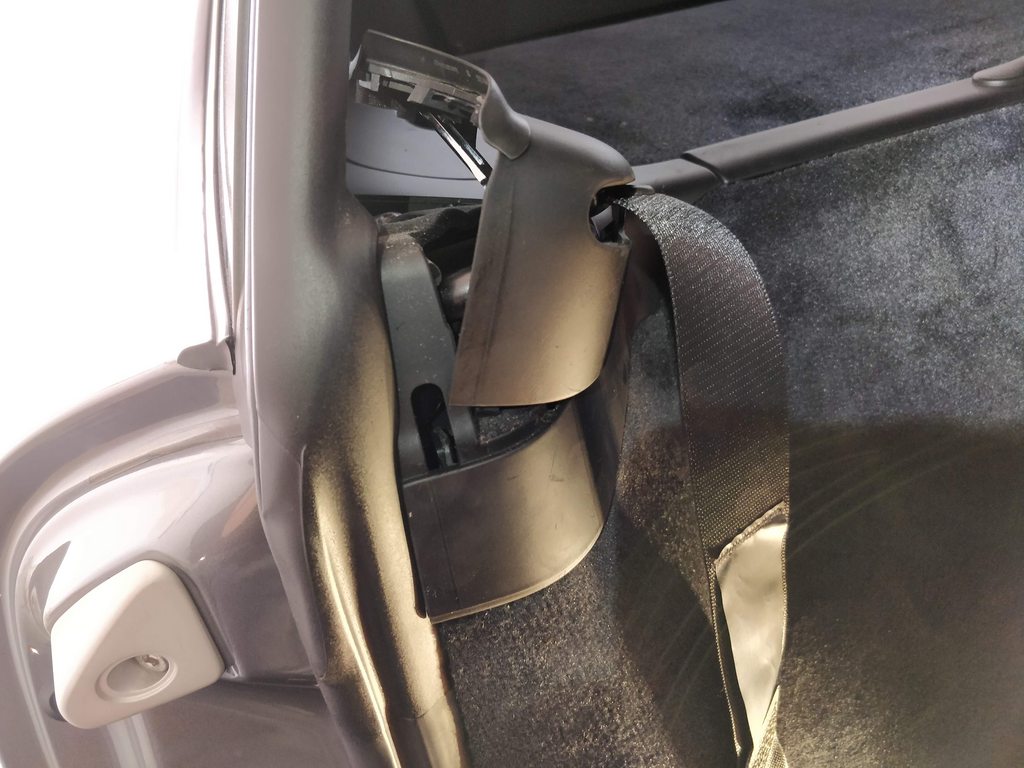
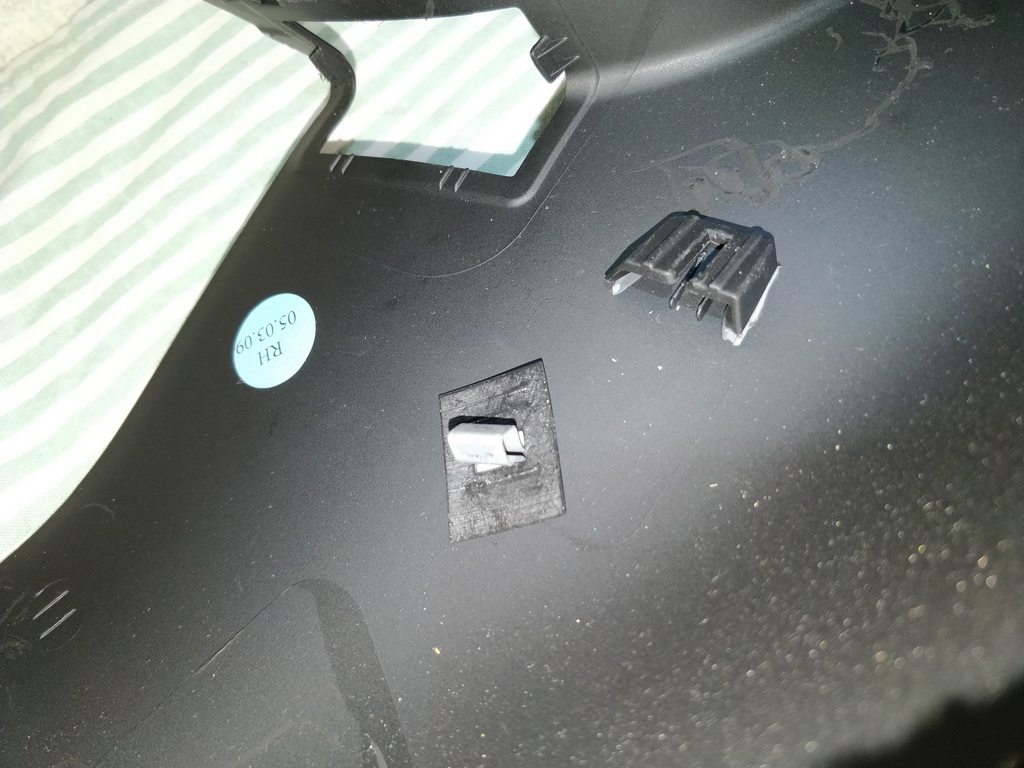
Broke the plastic standoff for this metal clip. Used epoxy to glue it back and all is well.
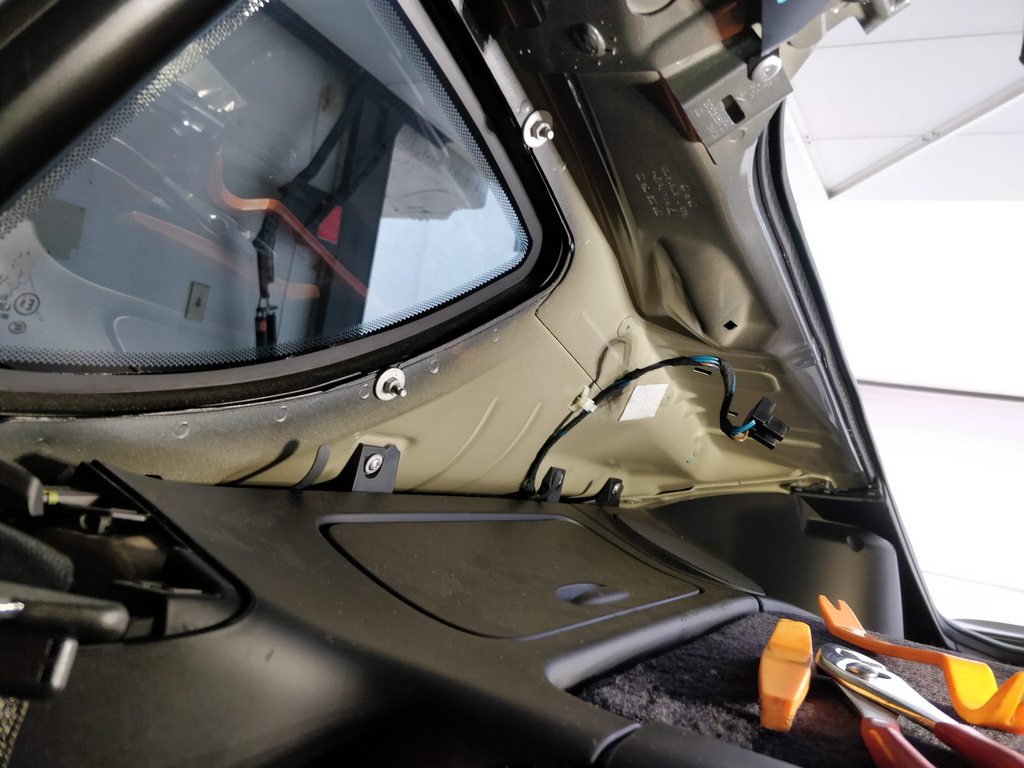
And here we are.
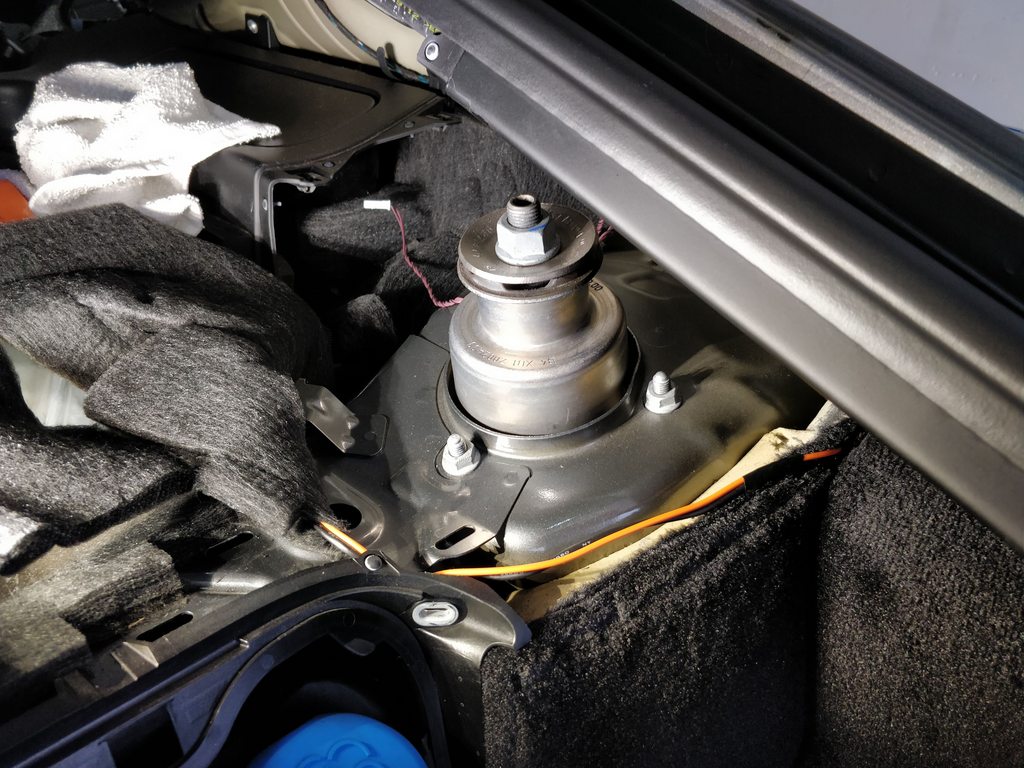
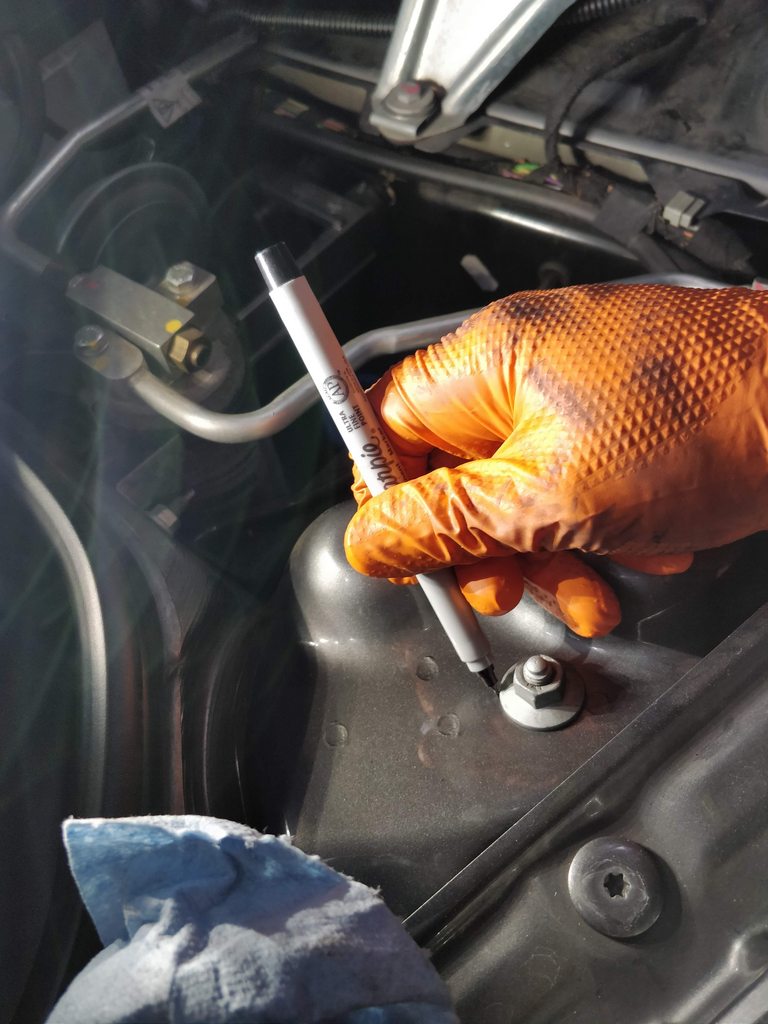
Accessing the fronts is a lot easier. Marked the location of the nuts to be consistent on both sides and make the car drive-able on my way to the alignment appointment.
Removed the sway bar bolt which pinches the strut in the carrier.
Then loosened the control arm bushing bolt to allow the assembly to rotate down. I also loosened the plastic panel underneath the car to prevent it from possibly cracking.
Not too bad.
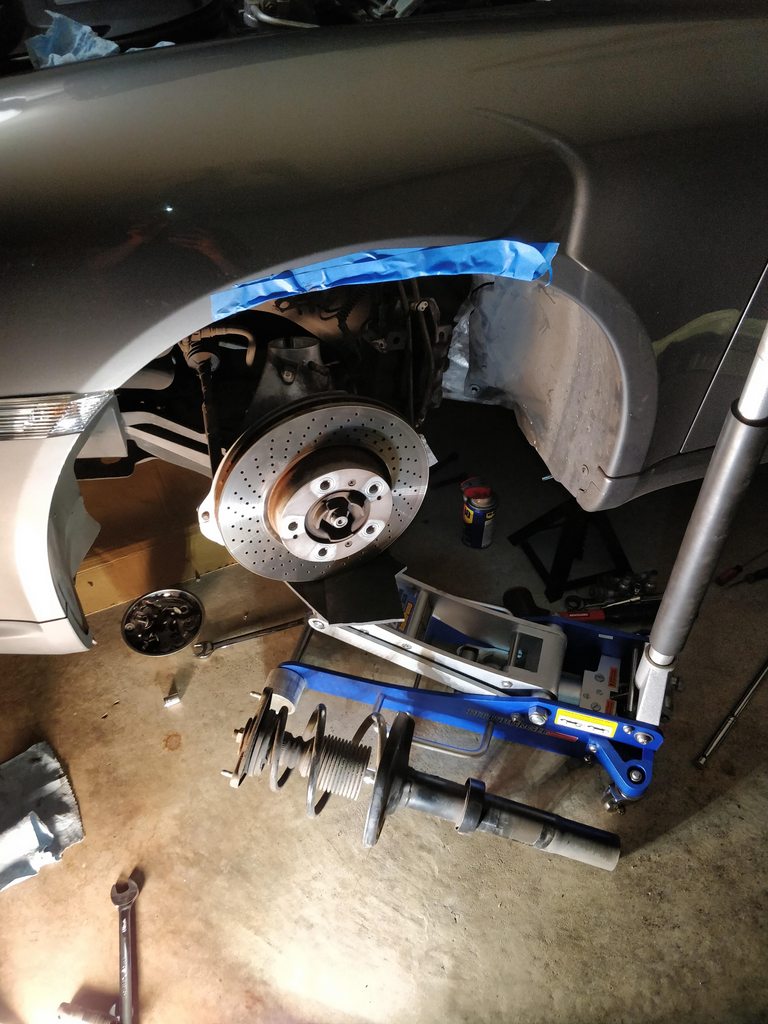
With the front carriers, rotors, and calipers all held up, moved to the rear, where the real fun begins.
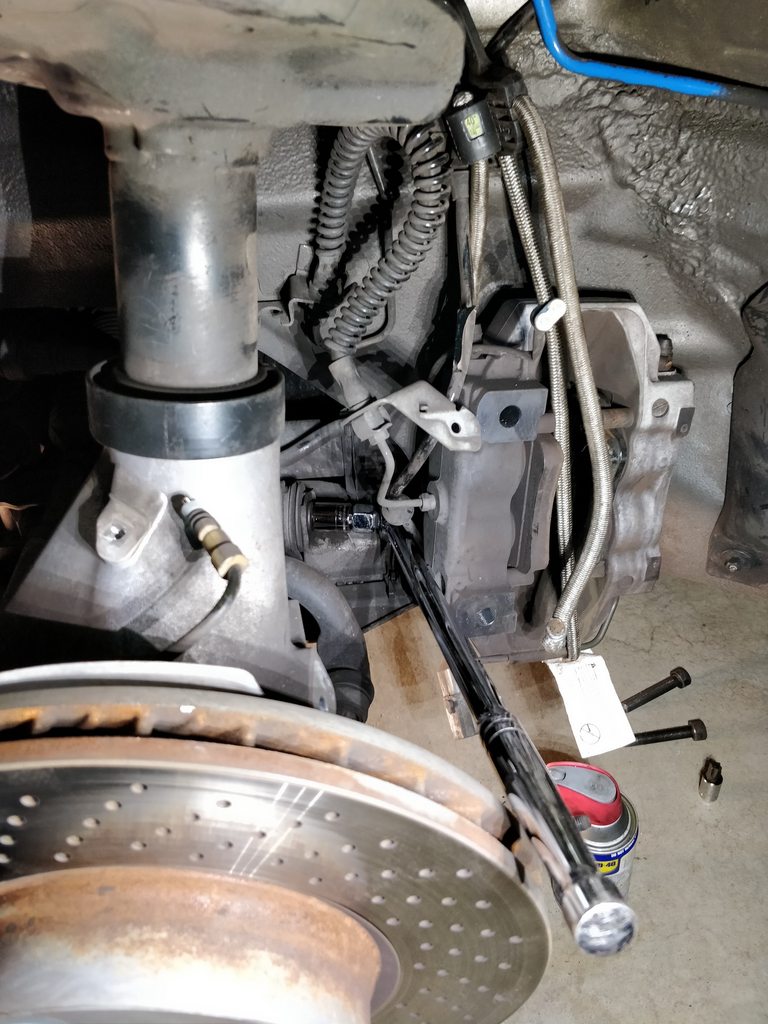
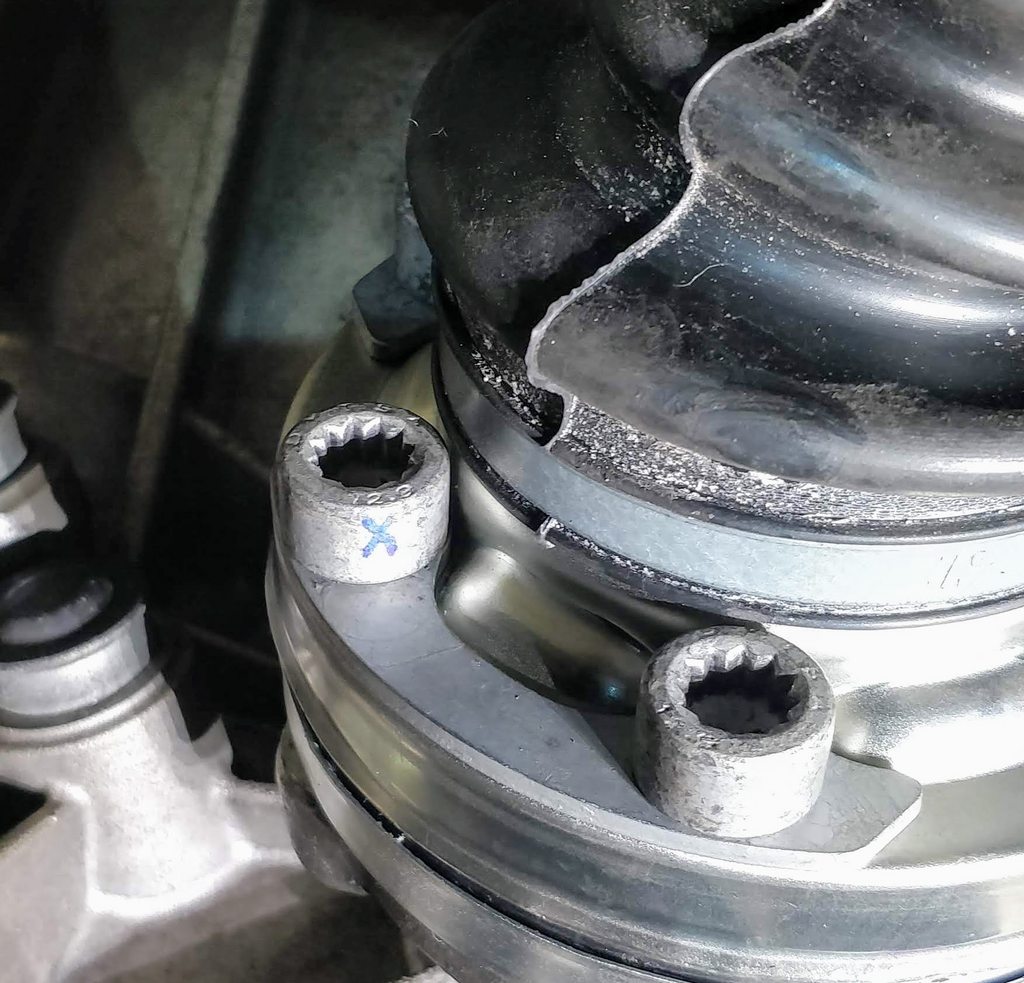
The axle is secured to the transmission with 6, M10 triple square bolts. The presence of the CV joint boot limits access to only 2 at a time before needing to rotate. But you need the parking brake on to prevent it from rotating so you can actually loosen it. So you gotta engage the brake, loosen 2, then crawl out from underneath the car, disengage the brake, crawl back under, rotate, then back to engaging the brake, then loosen, then repeat on the other side. Ay dios mio.
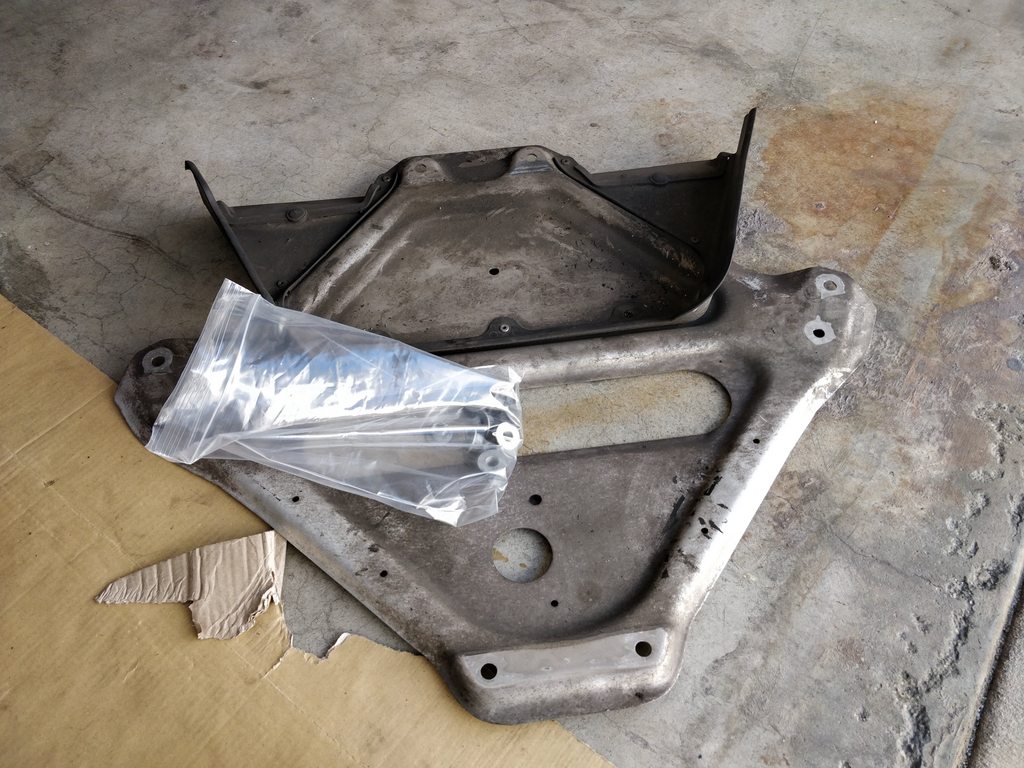
You can help yourself by removing the lower support plate so you don't need 18" of extensions. Eventually I removed the plate so at least reassembly was easier.

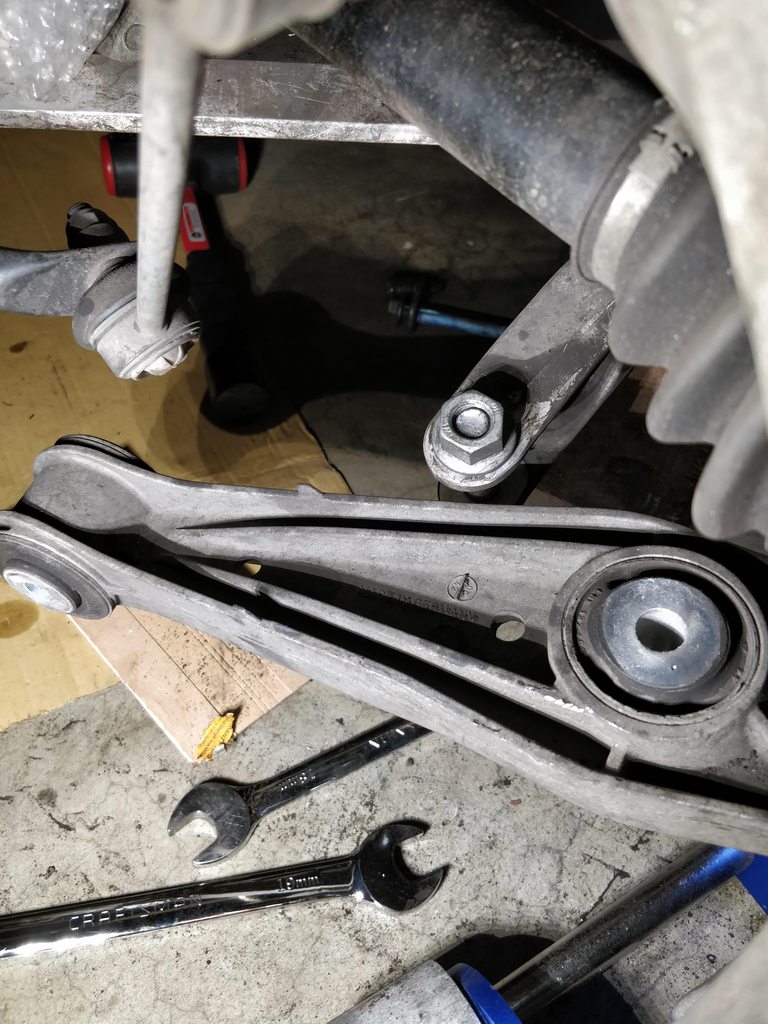
Popping off the ball joint for the toe link and removing it went smoothly.
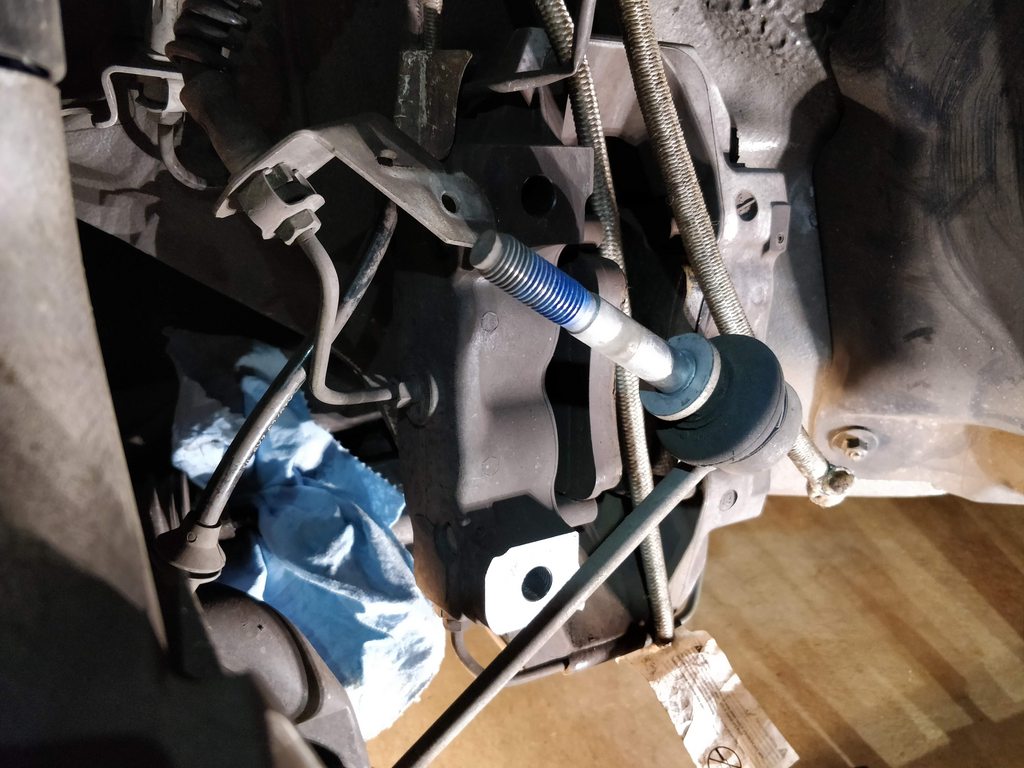
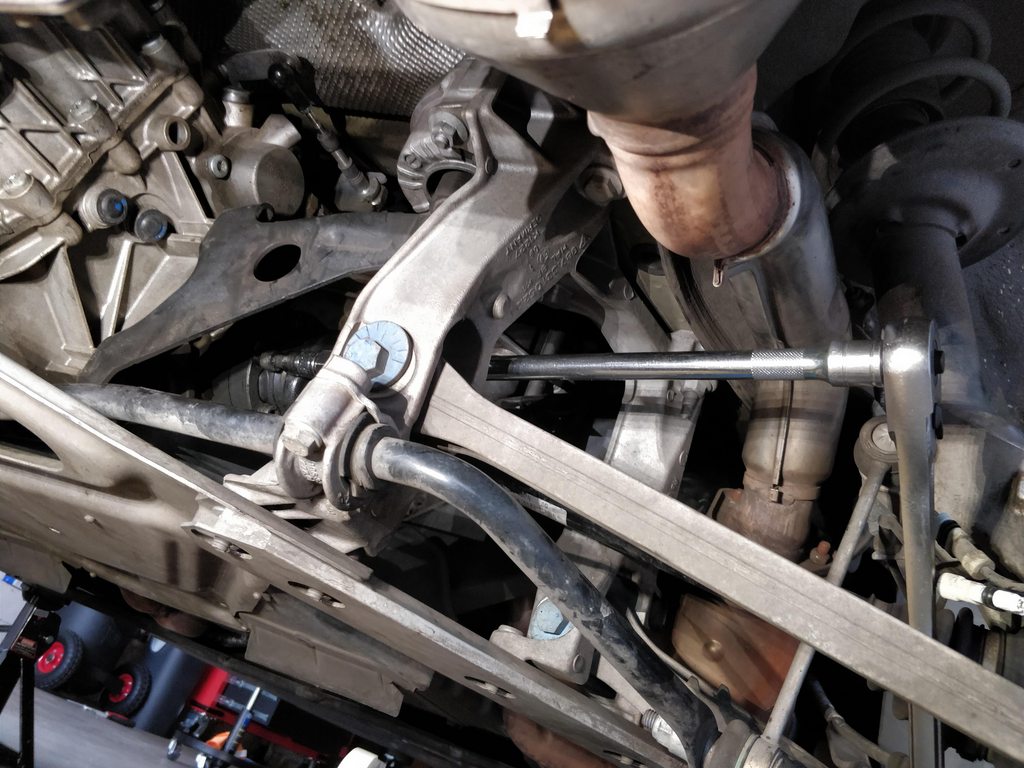
The control arm ball joint? Yeah, not so much. Technically you don't have to do this and can just loosen/remove the bushing bolt, but I tried following the factory procedures.
The inner CV boot kills your clearance and I ended up damaging the bolt since I couldn't get a good grip on it with the ball joint separator.
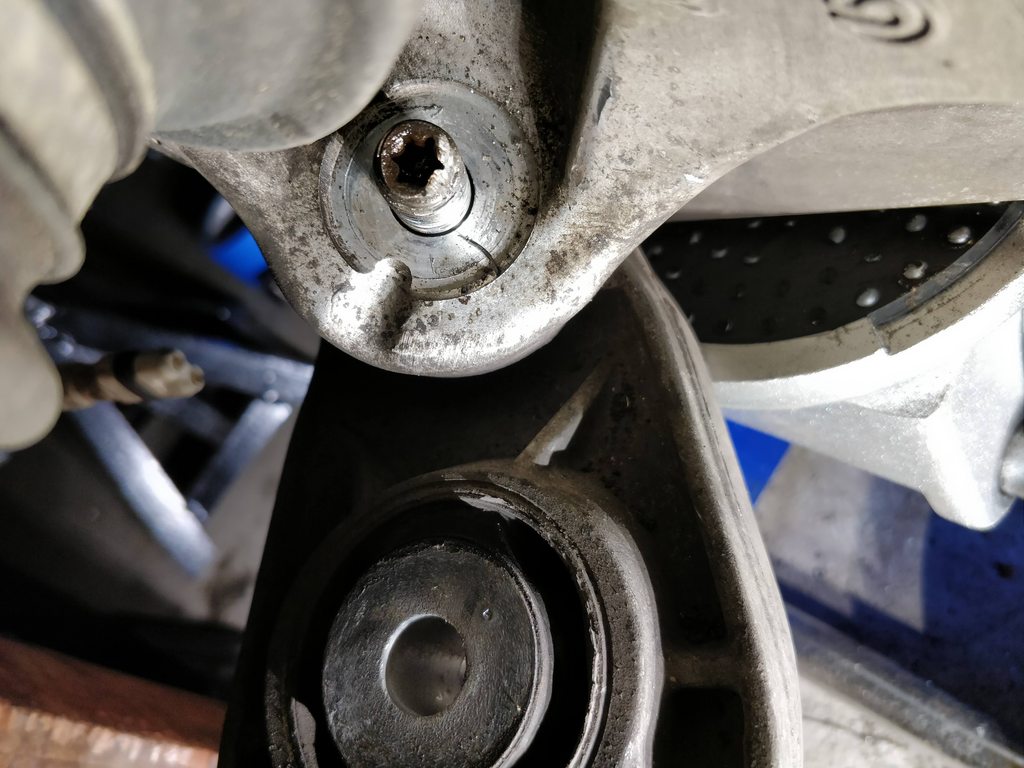
So I went ahead and removed the bushing bolt.
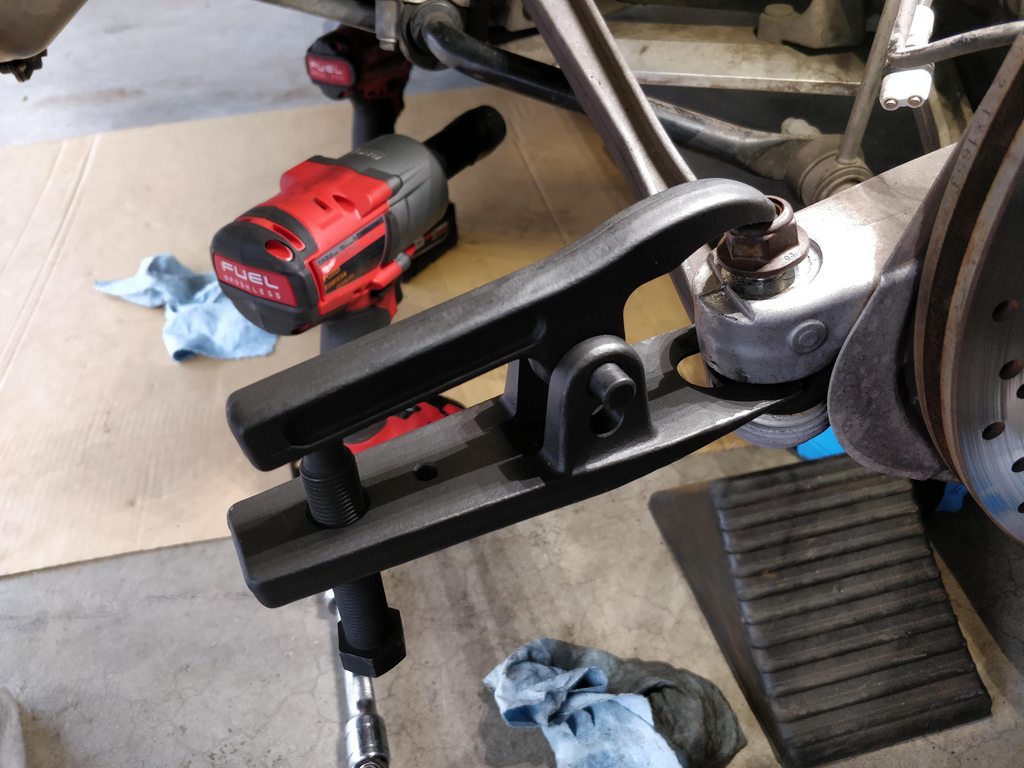
And had to use a pry bar to get it out of its housing.
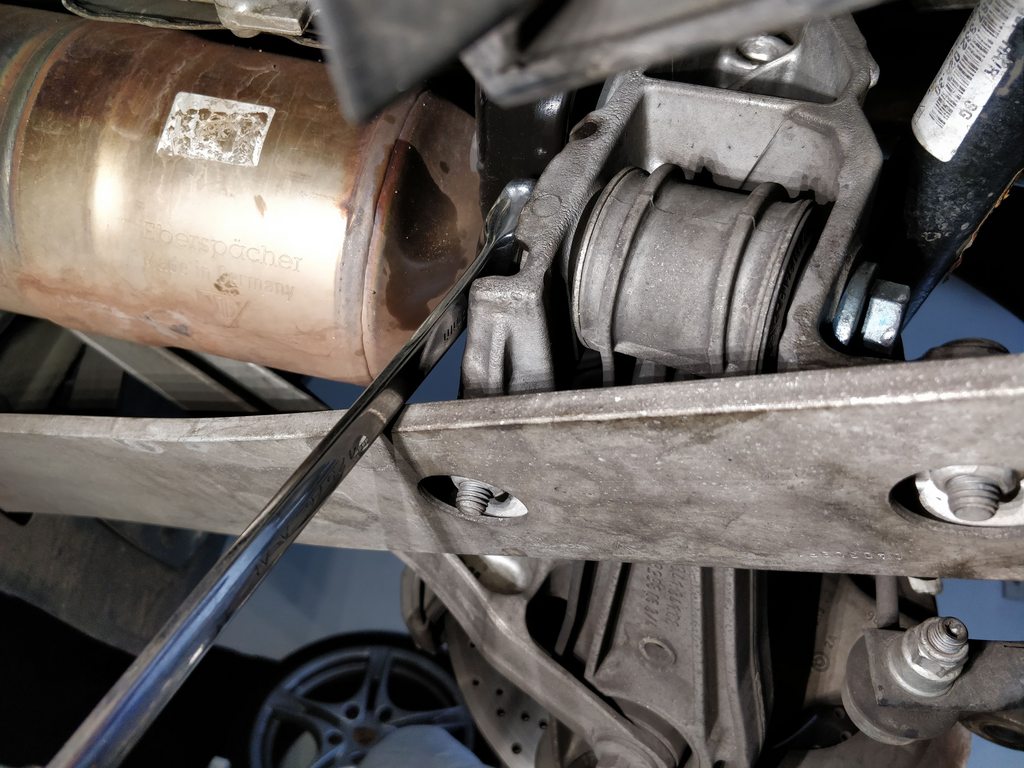
I figured that would've been enough, but that 1/2" lip at the top was blocking me from removing it.
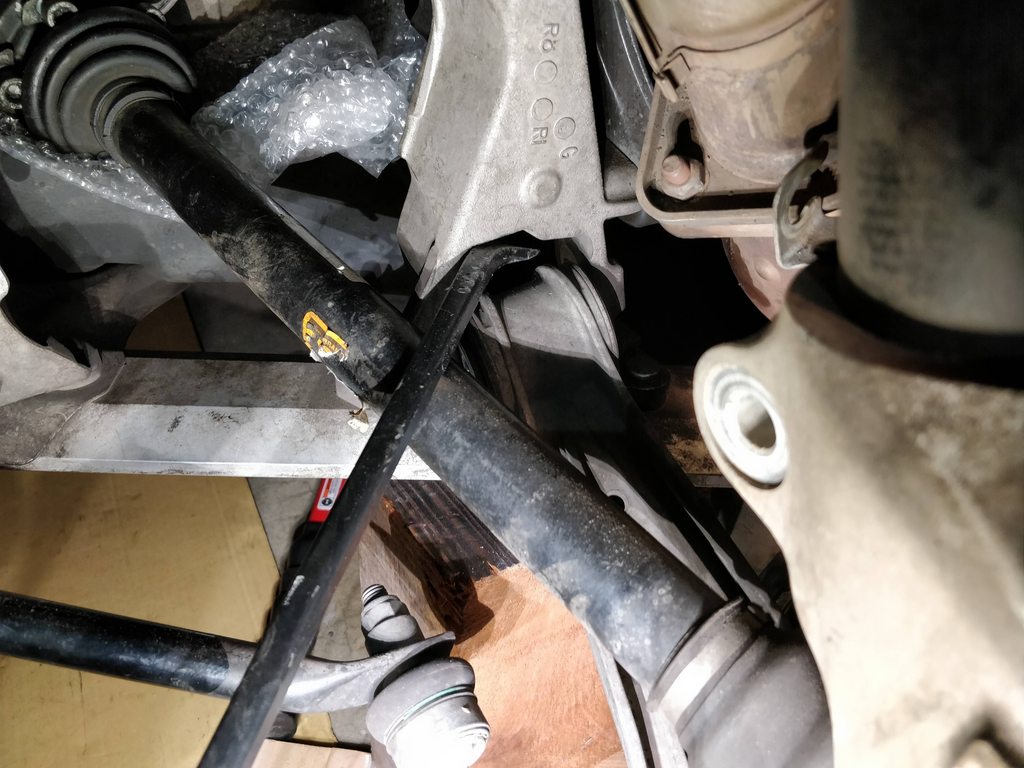
I wasn't about to try to compress the spring on the car, so I also removed the other, longitudinal control arm bolt.
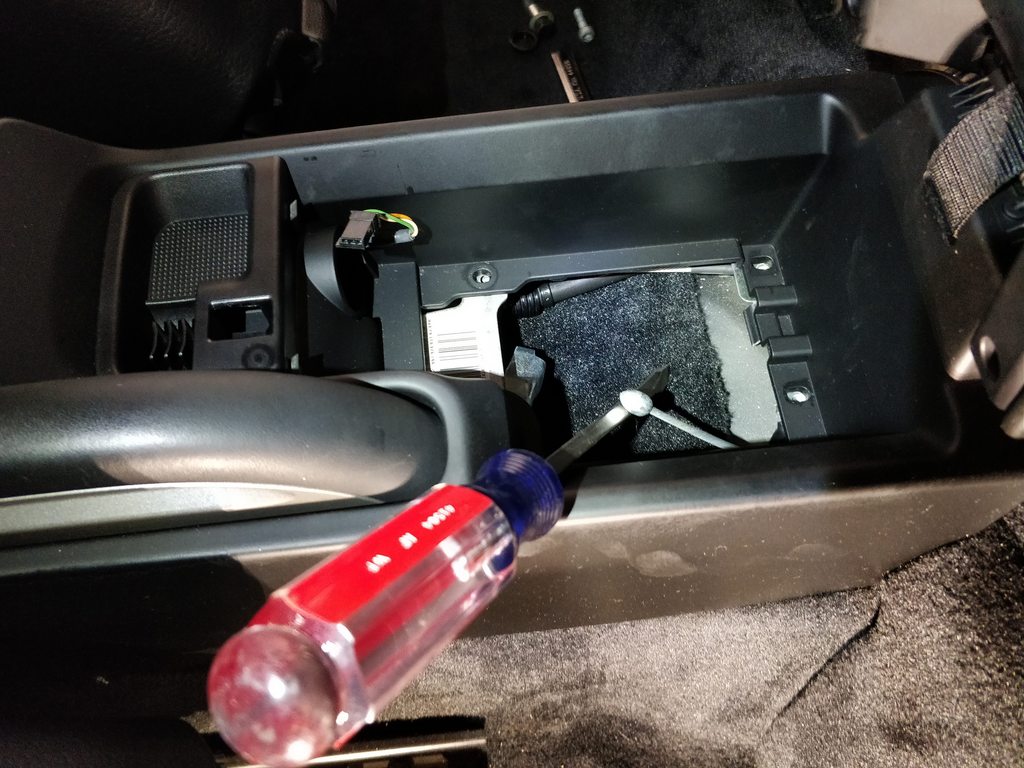
Last thing was removing the end of the parking brake cable from its base so the whole assembly can be removed from the car. Fortunately that doesn't require the entire console to be removed, just the storage area.
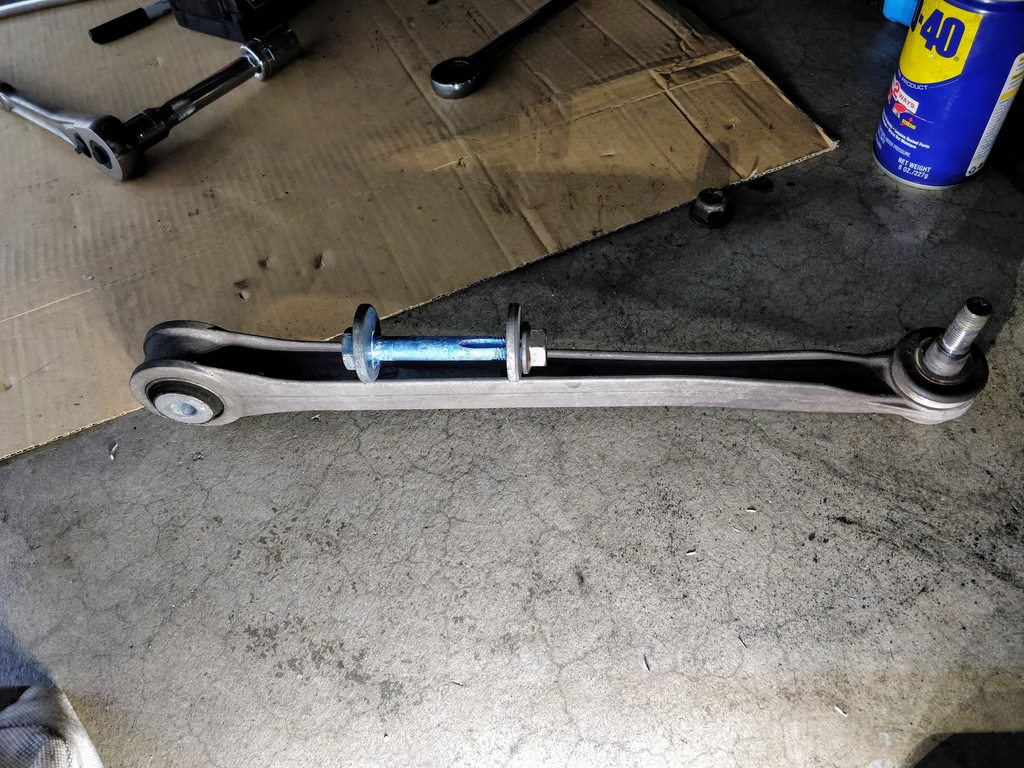
Alright, so now everything's out but I'm stuck with a bent ball joint stud on the control arm.
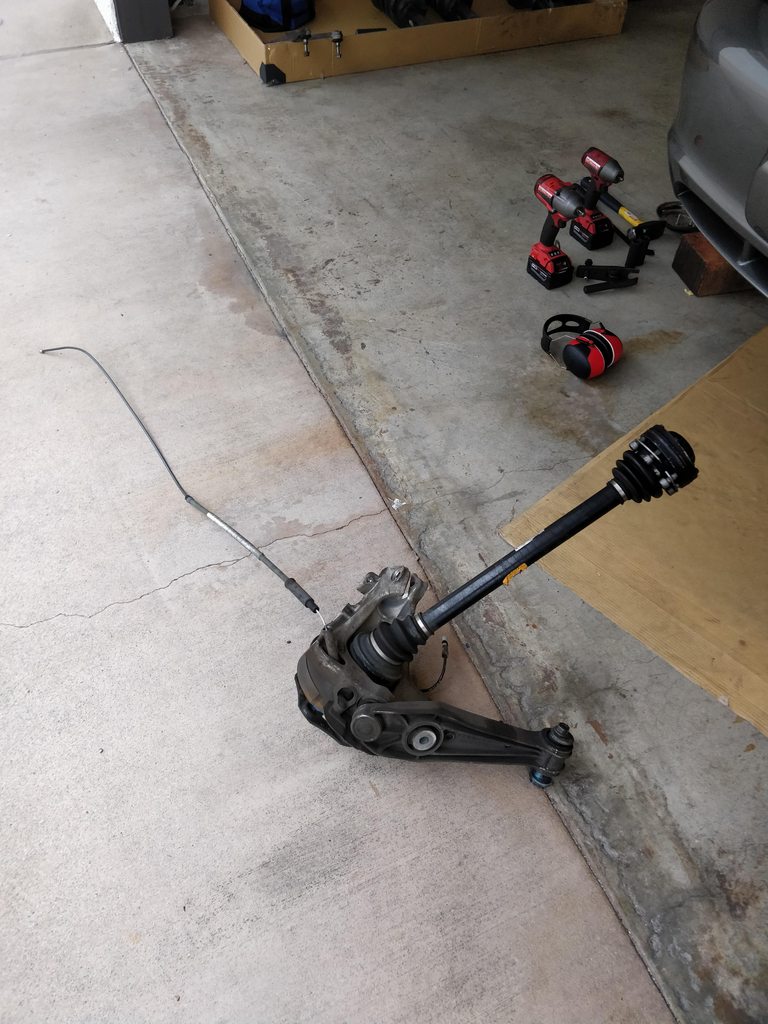
Drastic times call for drastic measures so the plan was to heat it up, bend it straight, then knock it out with a good ol' fashioned air hammer.
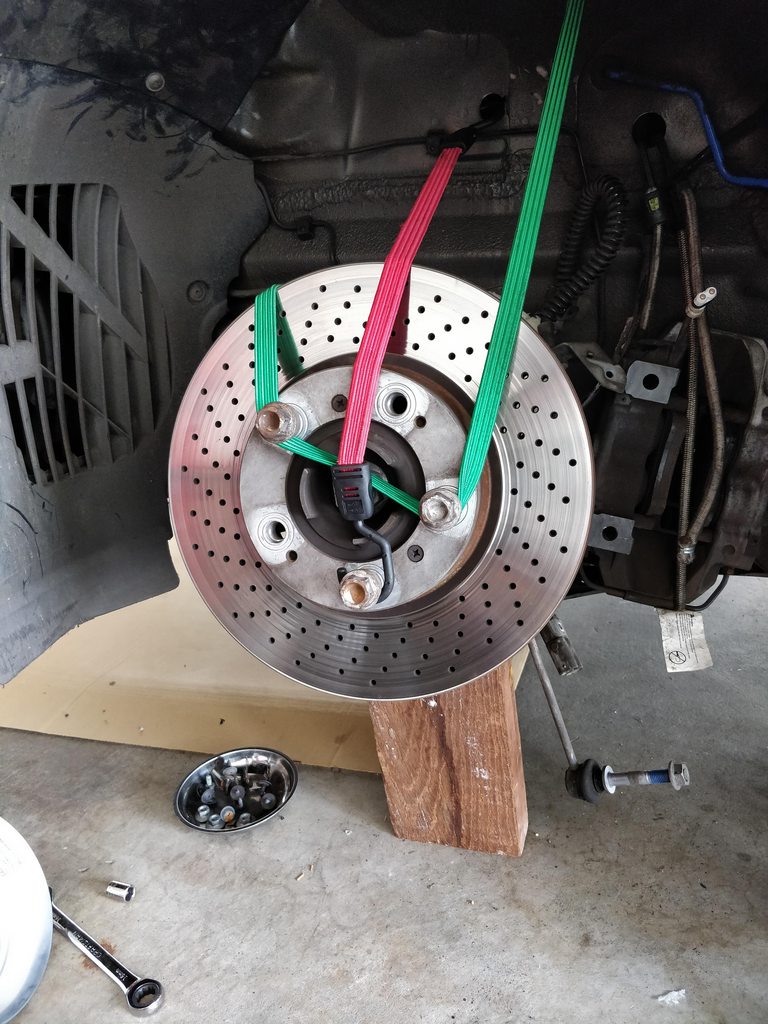
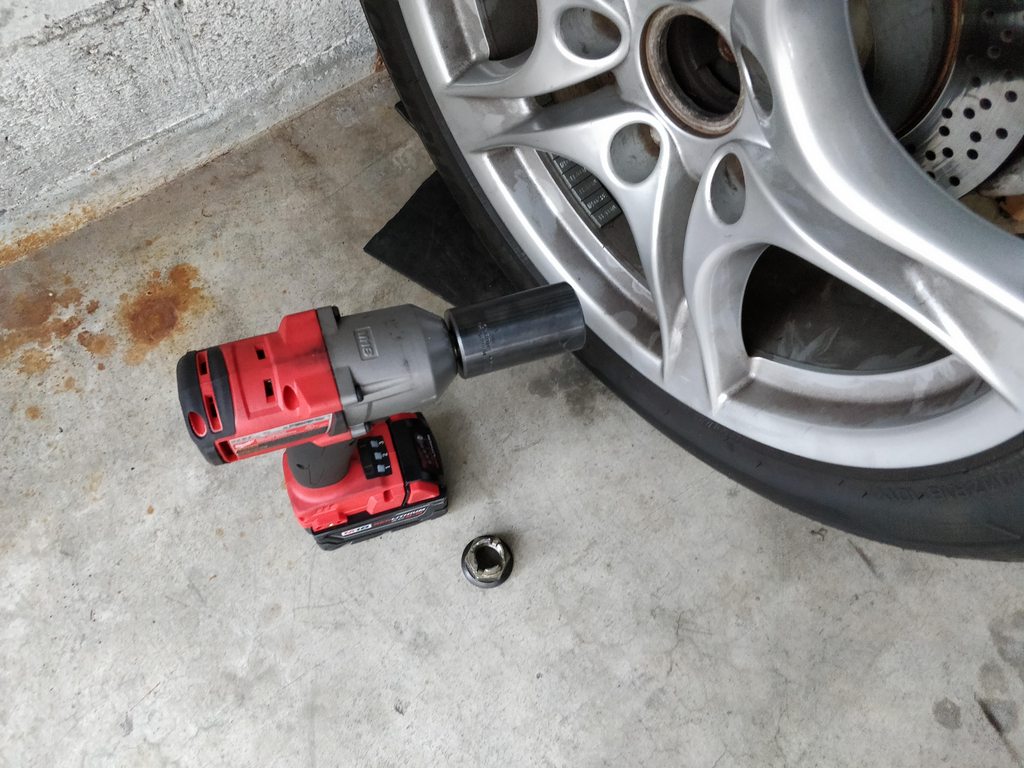
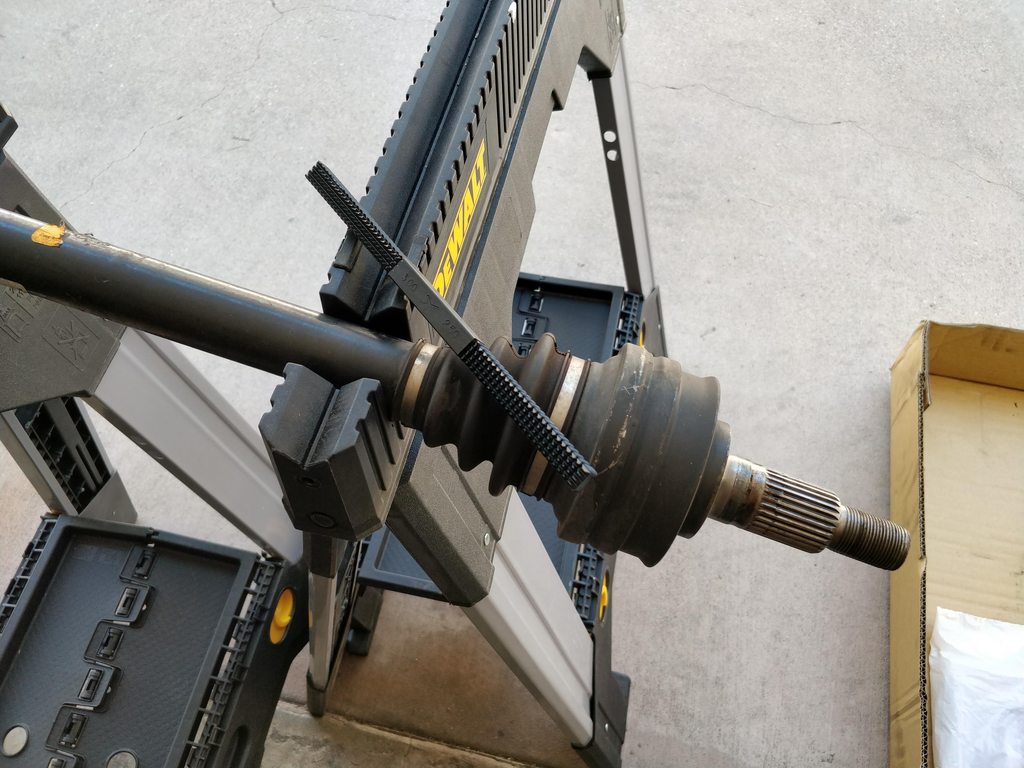
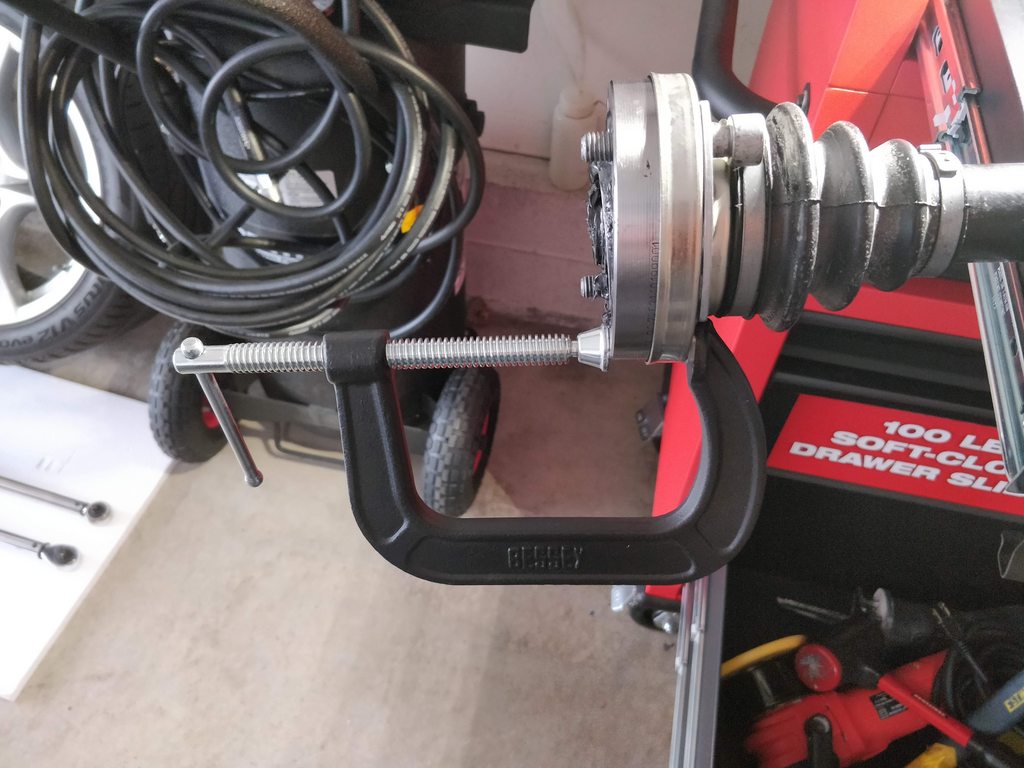
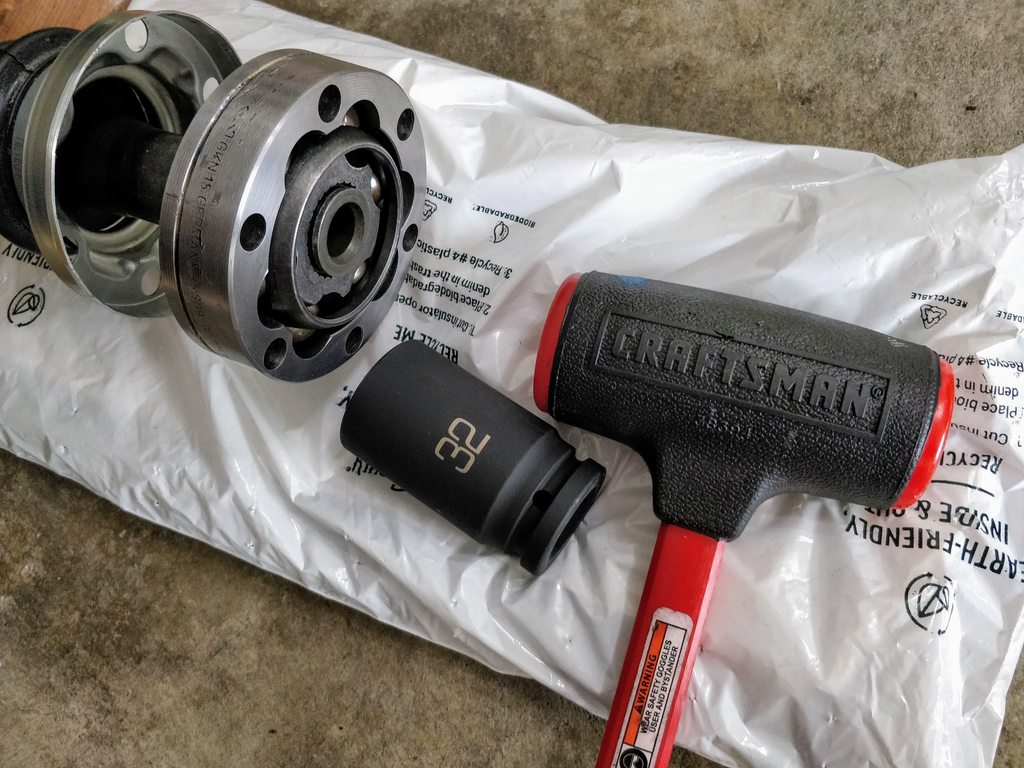
Of course doing that requires the axle to be removed so you can have direct access to the stud, plus I obviously didn't want to damage the boot. First step is getting the 32 mm axle nut off and my 1/2" impact wrench can definitely do that with its 600 ft-lbs of nut-bustin' torque, but to be safe, I wanted to have that torque react against something. If you do this on the car, it's easy but clearly that's not my situation here.
Decided to put the carrier/rotor back on the wheel which was a bit tricky given the awkward shape and weight.
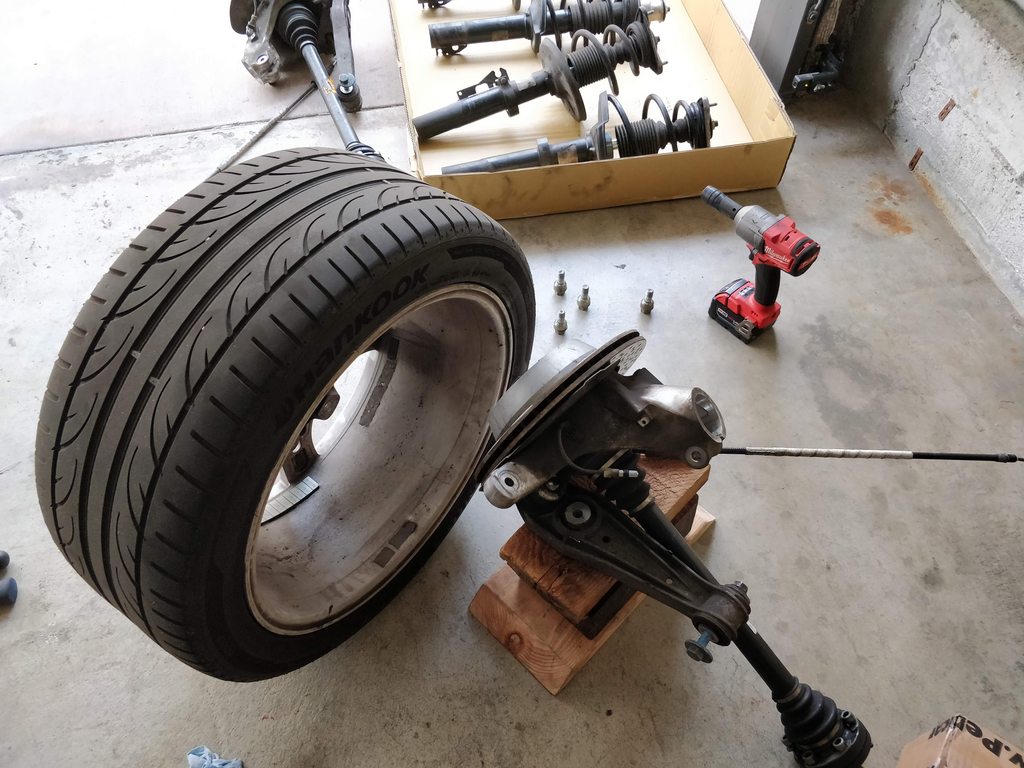
Then set the wheel against the wall so if it does wanna rotate, it'll have something to block it. At this point I was picturing the wheel climbing up the wall, rolling on the ceiling, then landing on the car.
Anyway, got it out, then realized I damaged a couple of threads on the axle.
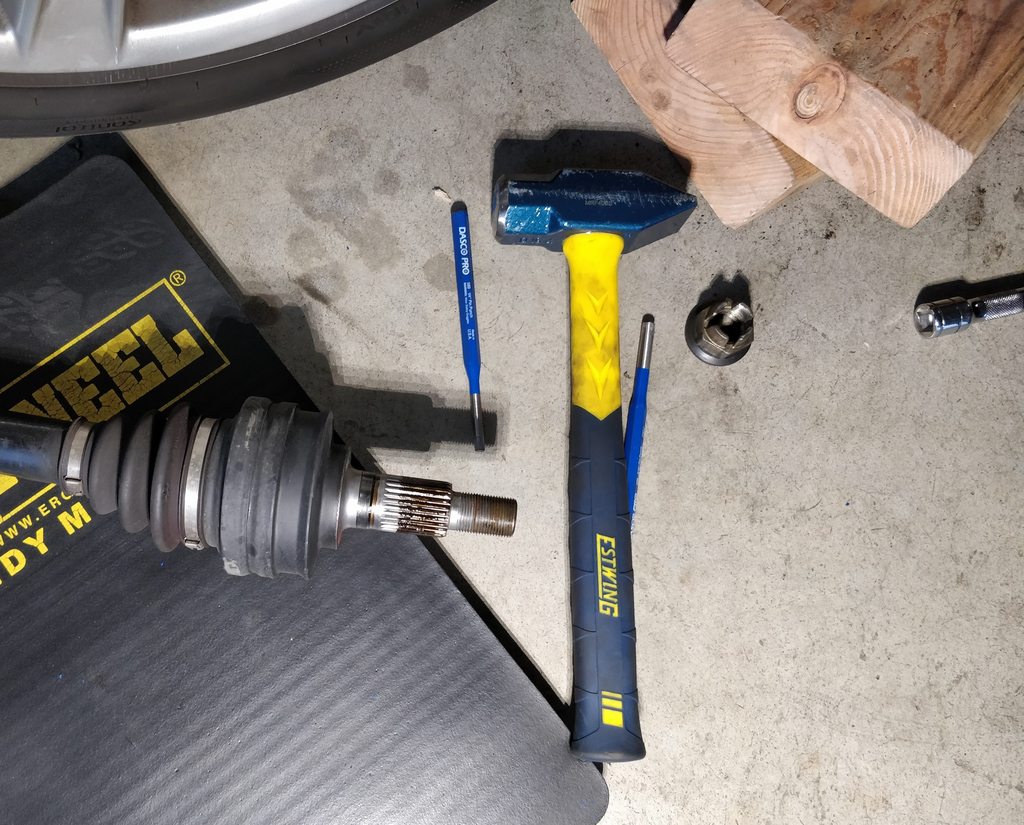
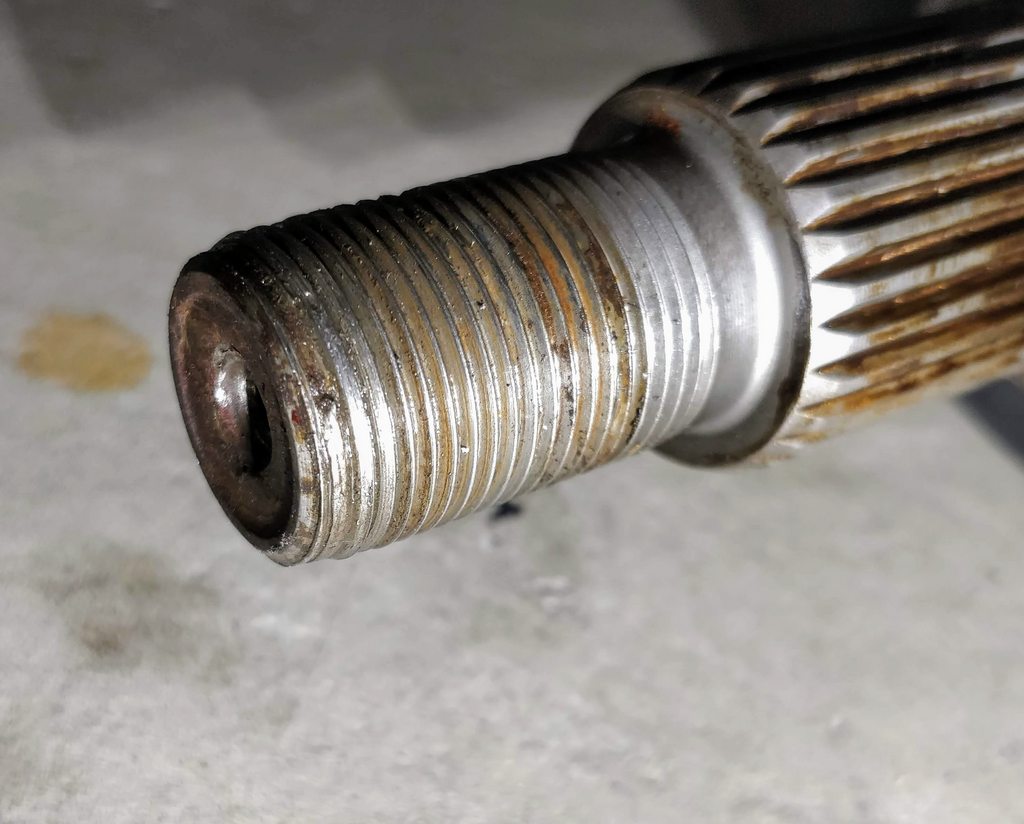
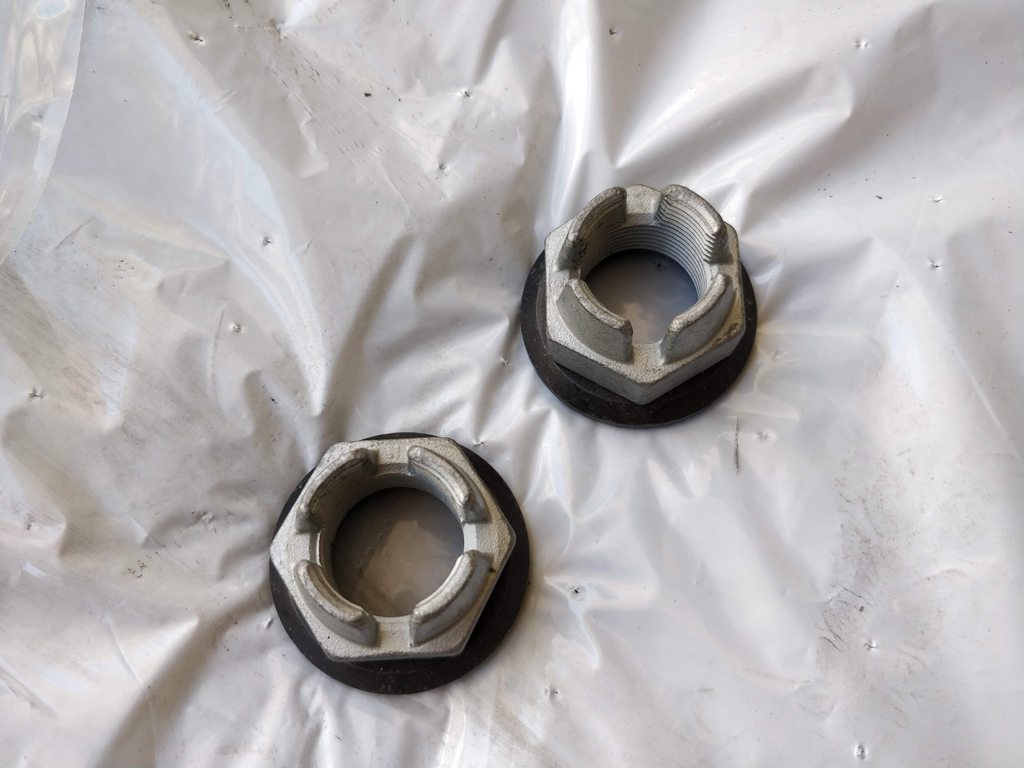
Got a thread file to help clean them up, and also bought 2 new axle nuts since they're lock nuts (scope creep continues).
Now onto my friend's house and his oxy-acetylene torch.
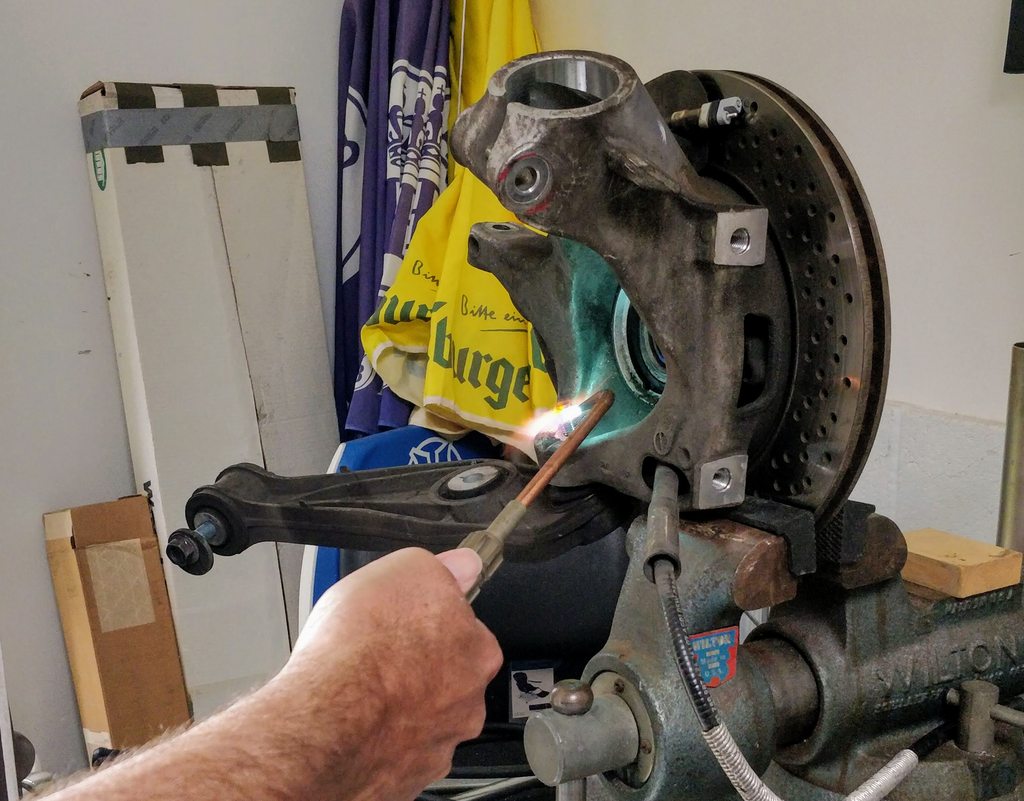
Once it was straight, busted out the air hammer and we get this:
Watching that still makes me laugh. I spent a solid hour and applied so much manual force, all to be taken care of with compressed air in 2 seconds.
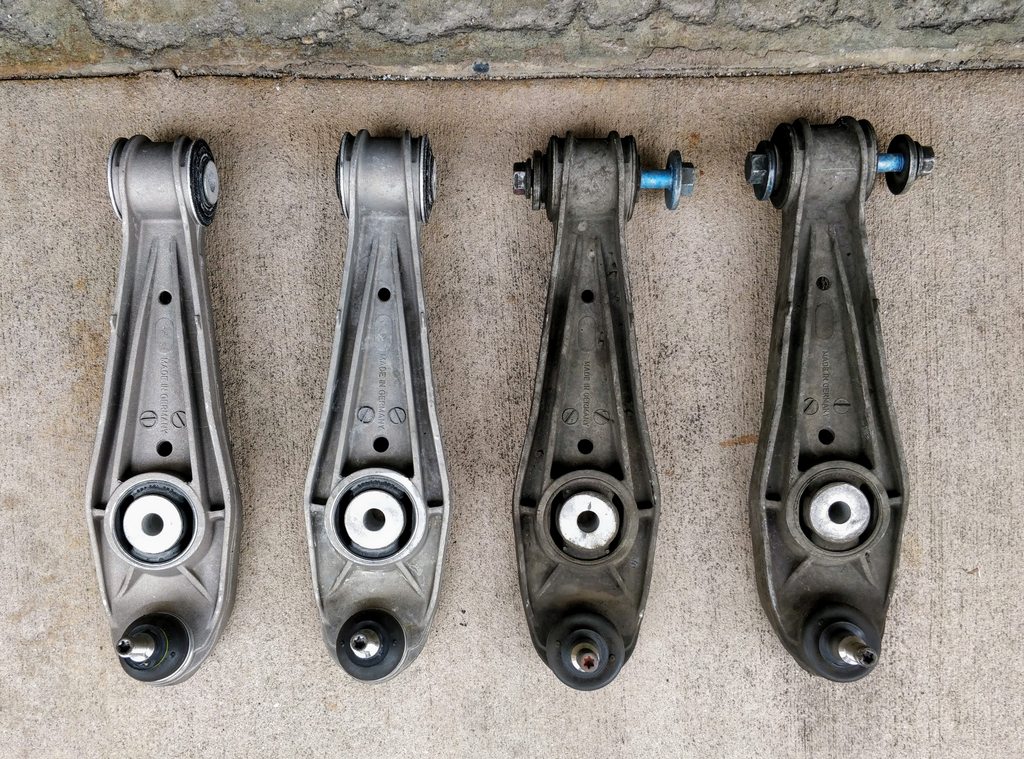
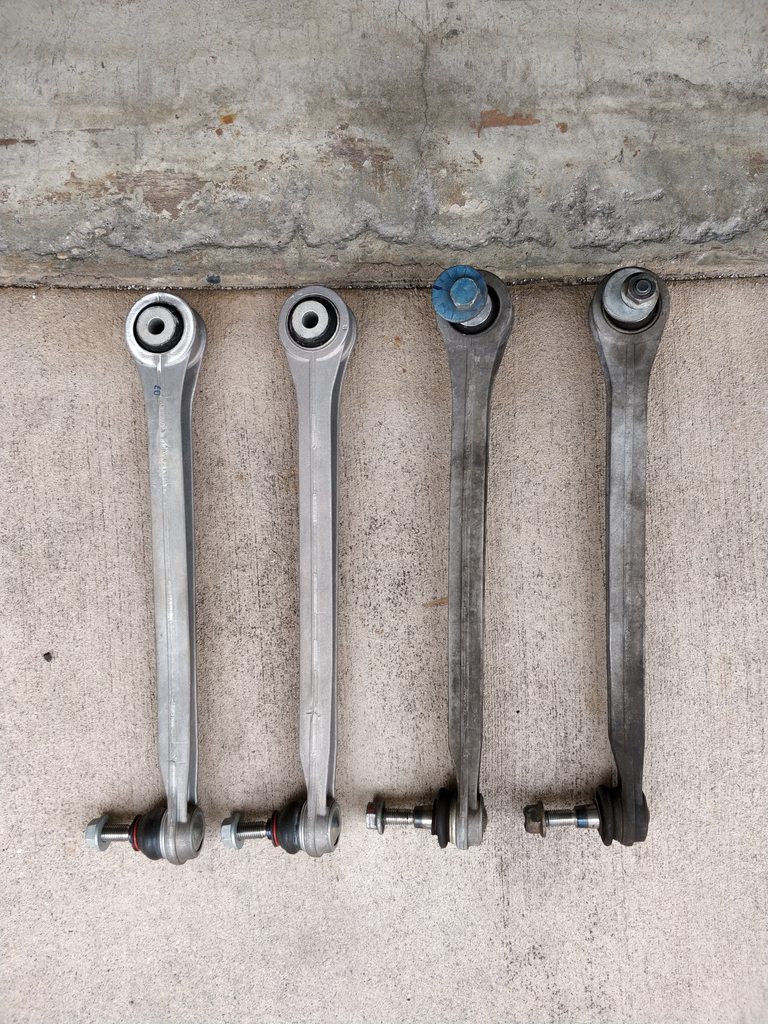
Not wanting to use that control arm again, and wanting to get fresh rubber under the car, I got new control arms and if I'm going this far, might as well get new toe links too. 75k miles was a good run.
Cat:
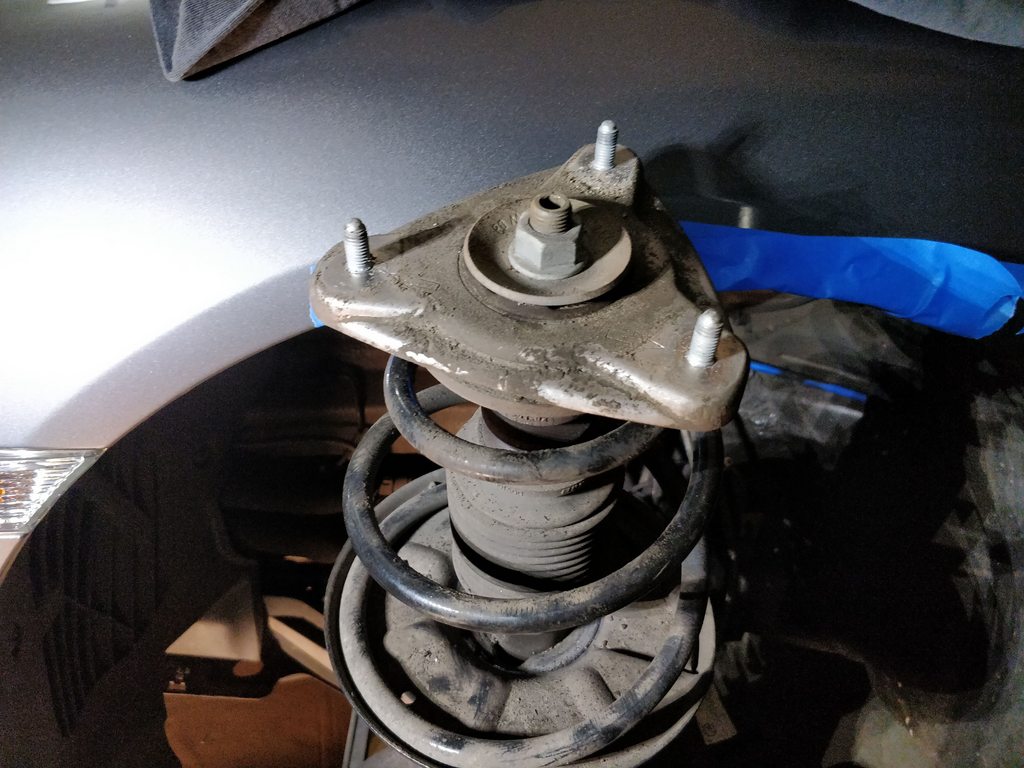
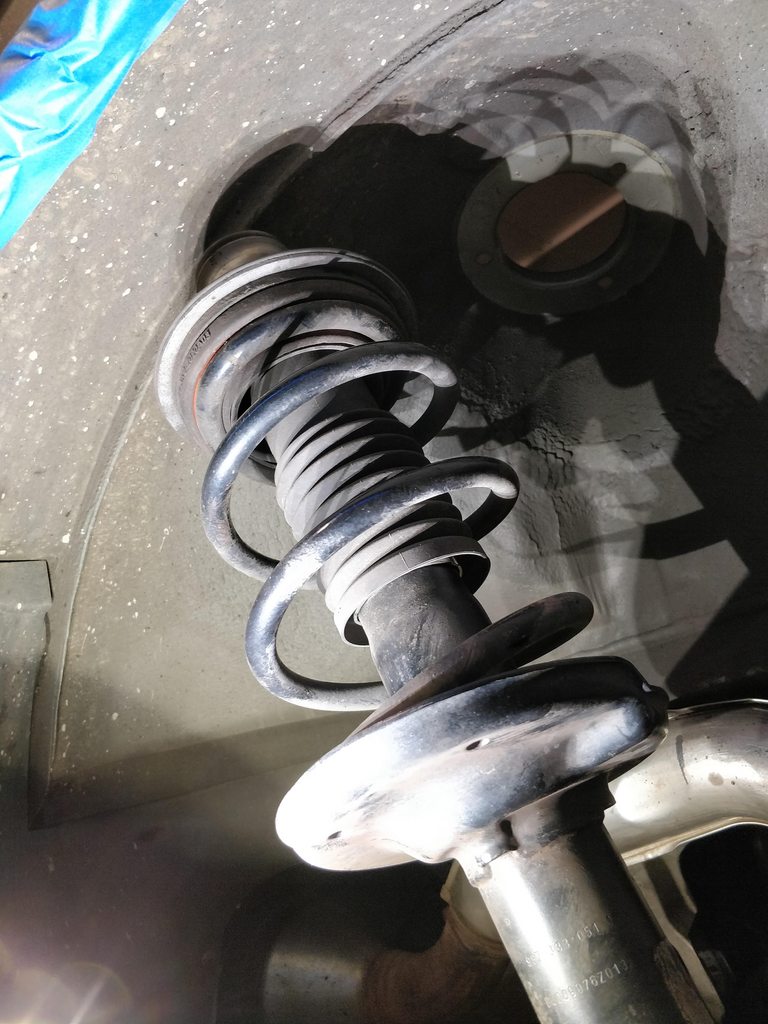
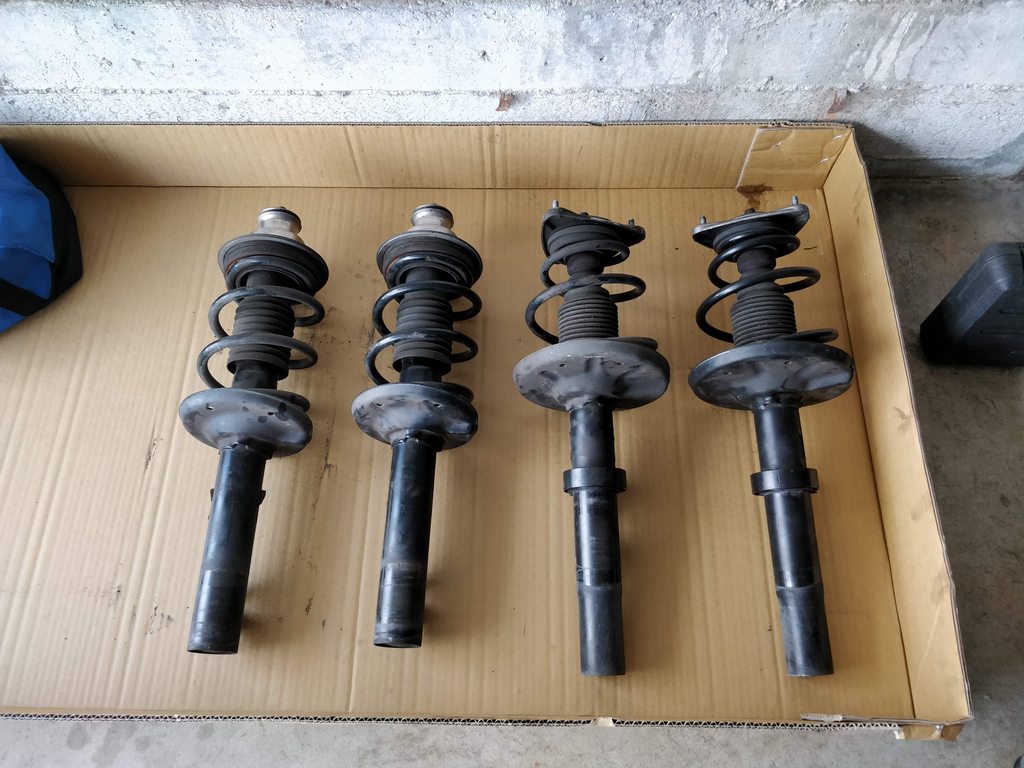
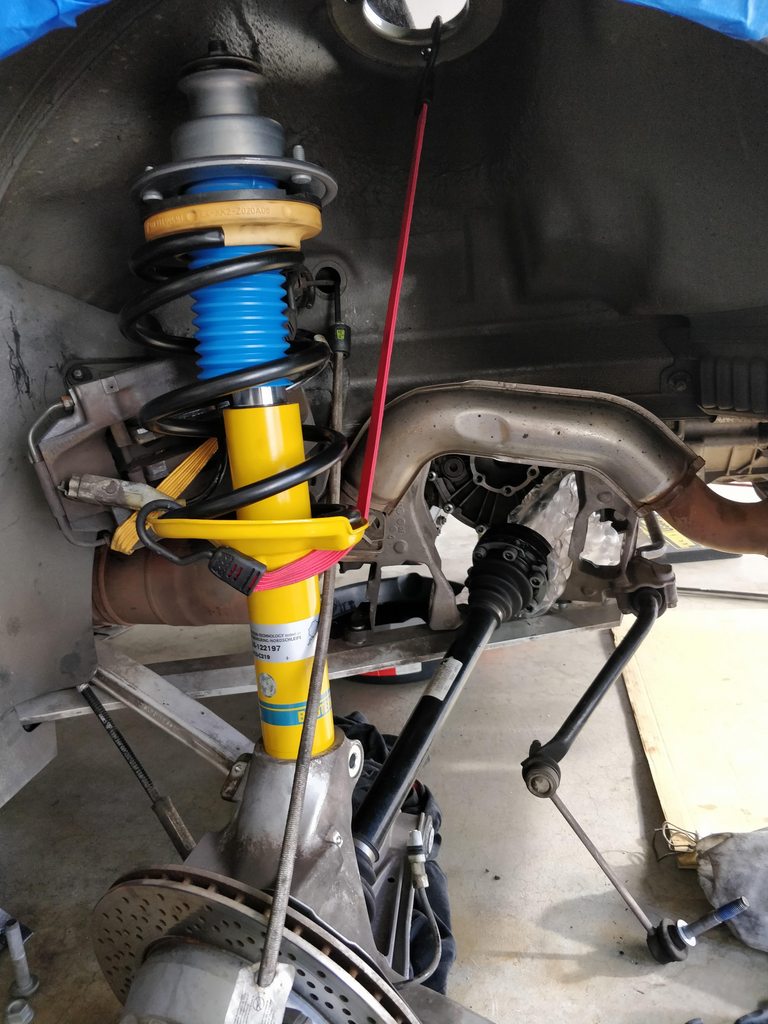
Old struts:
Took the springs and shocks to the alignment shop and had them use their wall-mounted spring compressor to assemble these. The front springs are too short for the "suicide sticks" to be used and I wasn't about to use the spring perch as the bottom hooking location so yeah, did this the safe way.
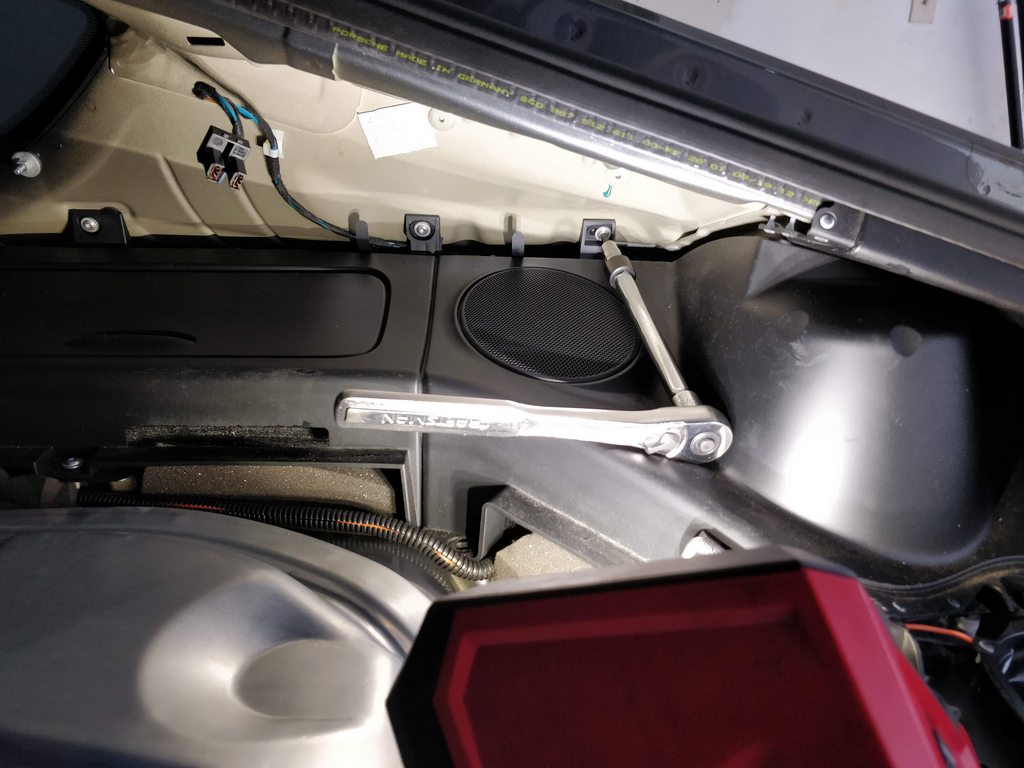
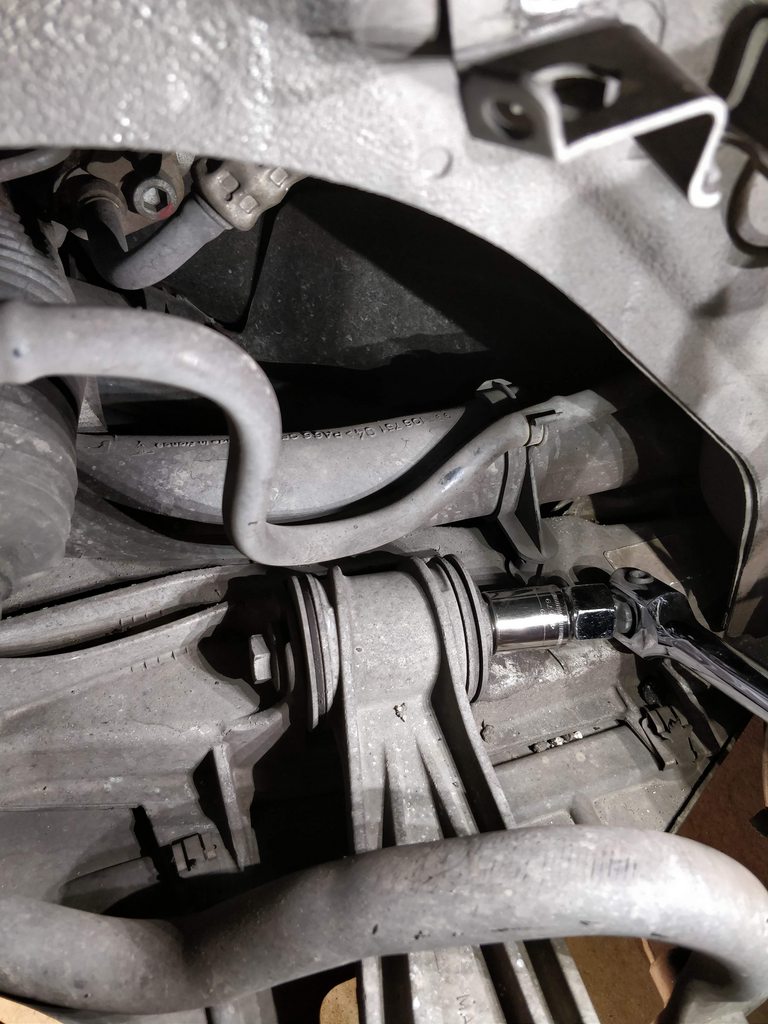
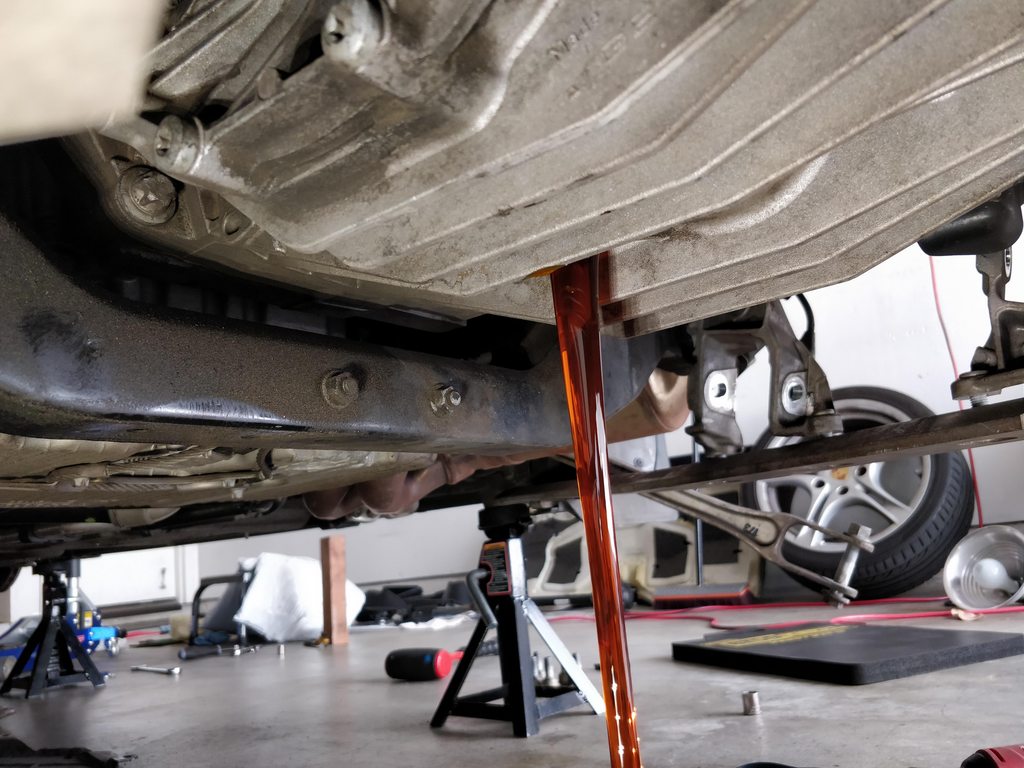
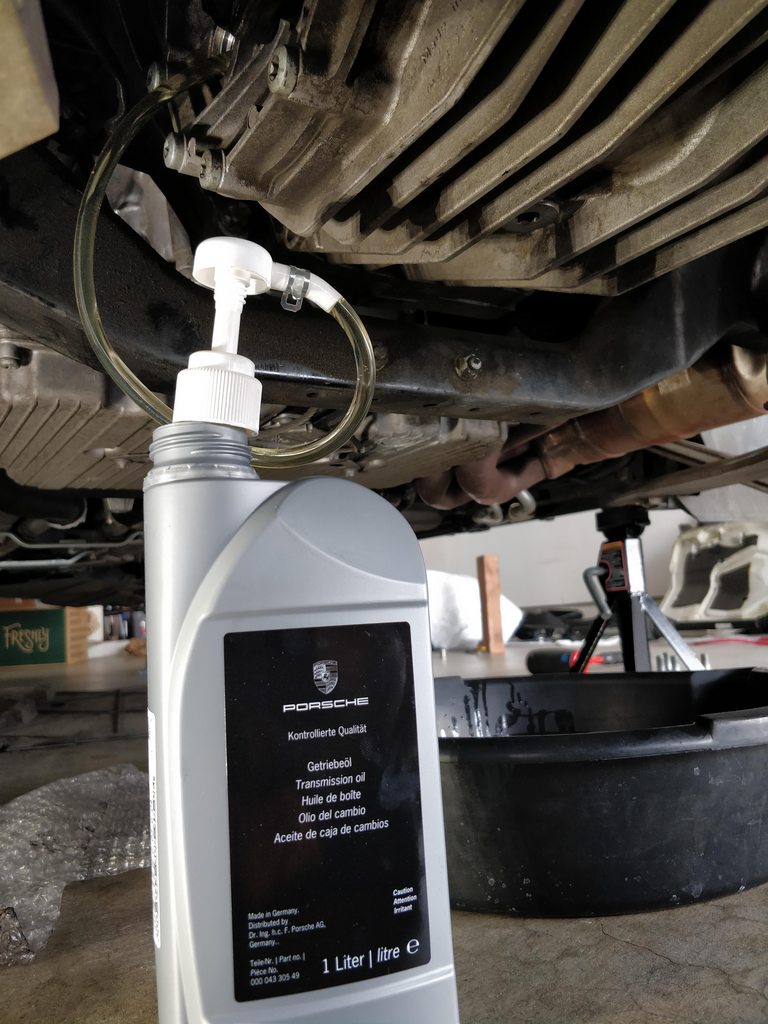
At this point I wanted to give myself a break with the suspension work and went ahead and flushed the transmission fluid which requires the support plate to be removed.
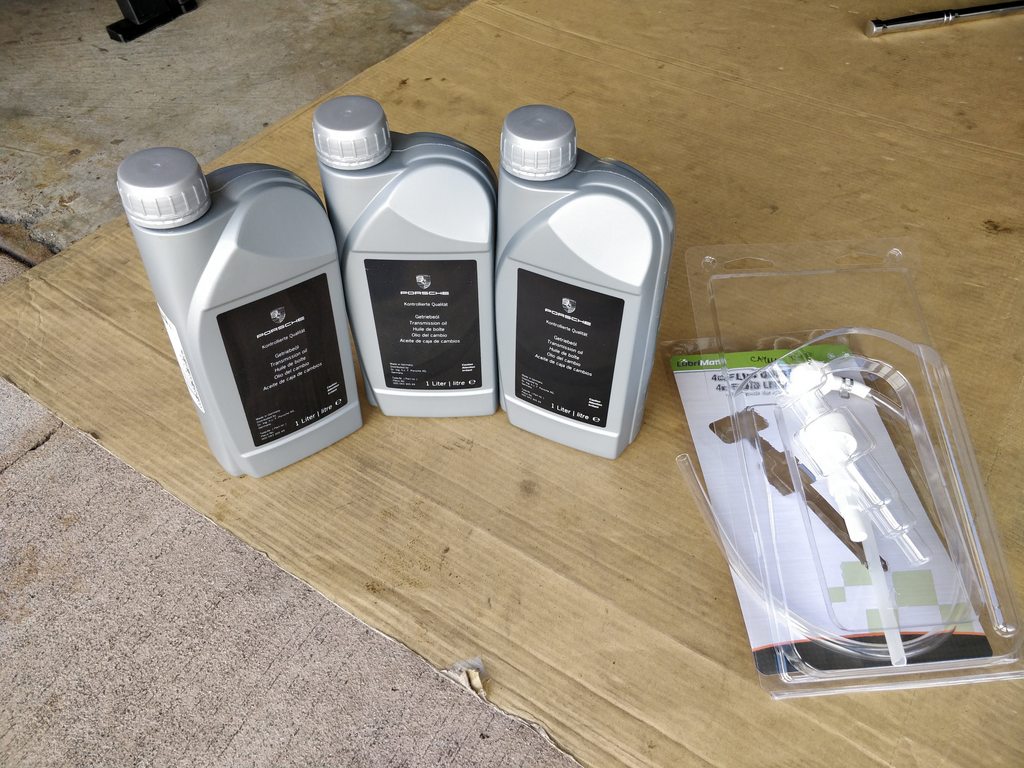
I actually bought 4 bottles and ended up using 3.2 liters so good news there. It's not supposed to overflow but be 2-3 mm just below the fill hole. You can actually see the fluid level with a flashlight.
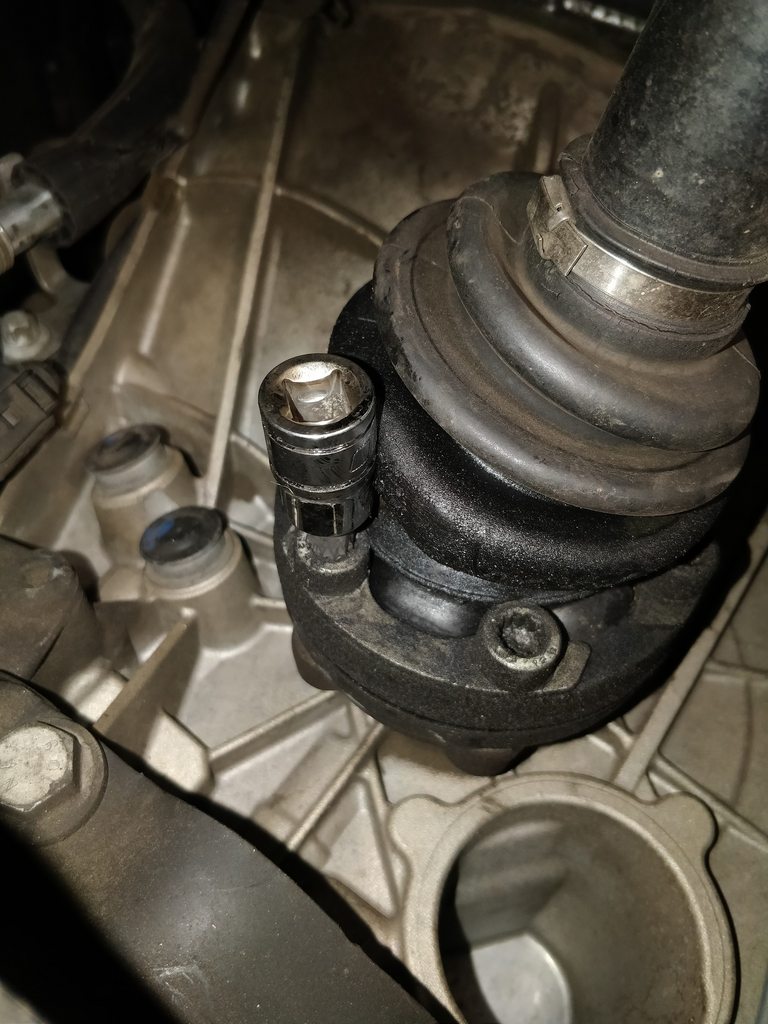
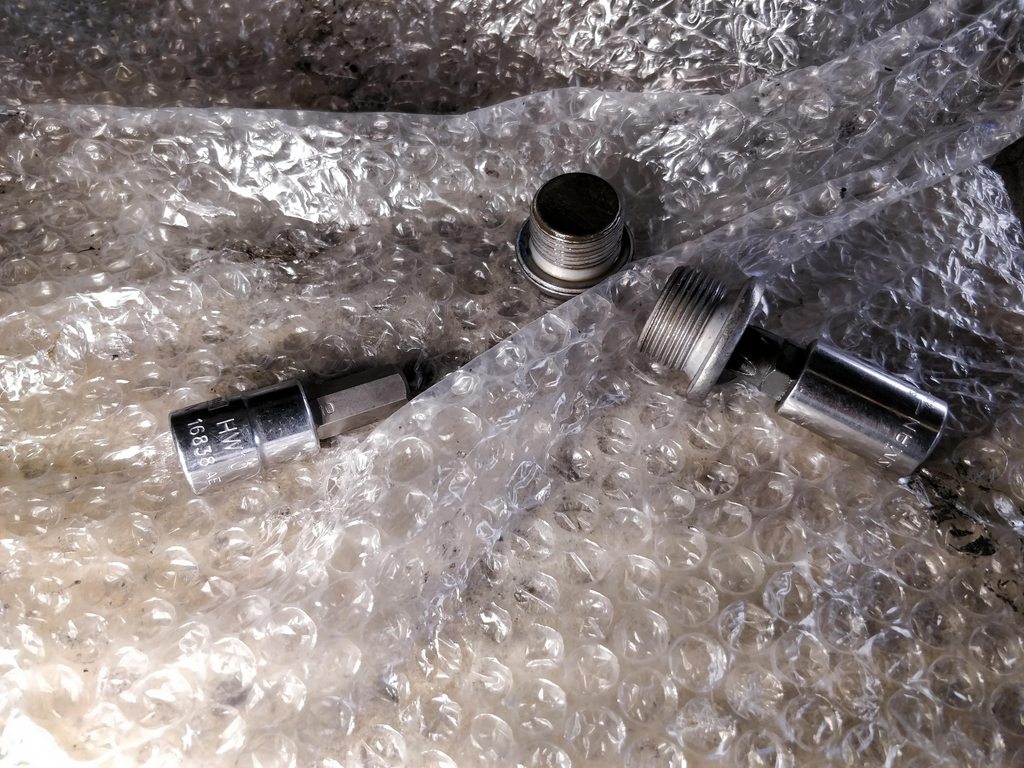
Removed the fill plug first.
Didn't look too bad but there are no records of it ever being changed. The new oil was much lighter in color than the maple syrup coming out.
Tapered plugs so no crush washers. 10 mm hex for the fill, T55 for the drain.
Pumpin'.
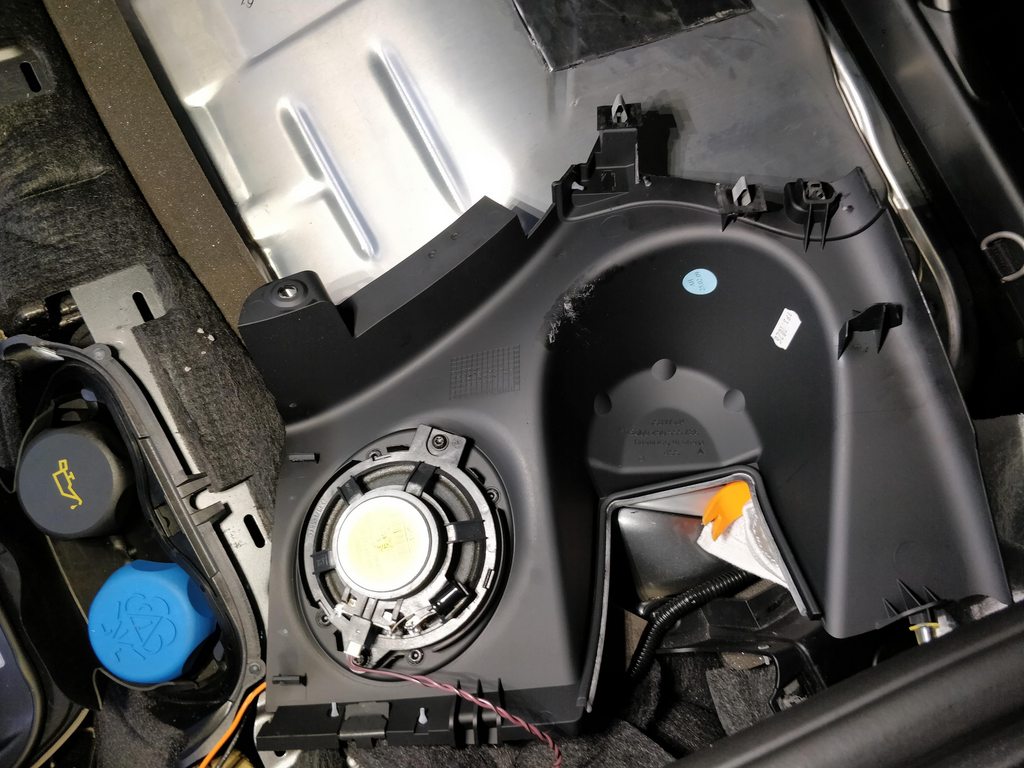
So now I'm trying to put the rears back on and there's just way too many things that need to happen at the same time. I tried for an hour, then decided to stop and wait for help to arrive. Conversely I got the fronts installed by myself in about 84 minutes.
The rear driver's side went in smoothly. Then went over to the passenger side and with my friend holding up the boot, he started moving it around when we discovered there was actually a tear.") Great, yet another thing to address.
Great, yet another thing to address.
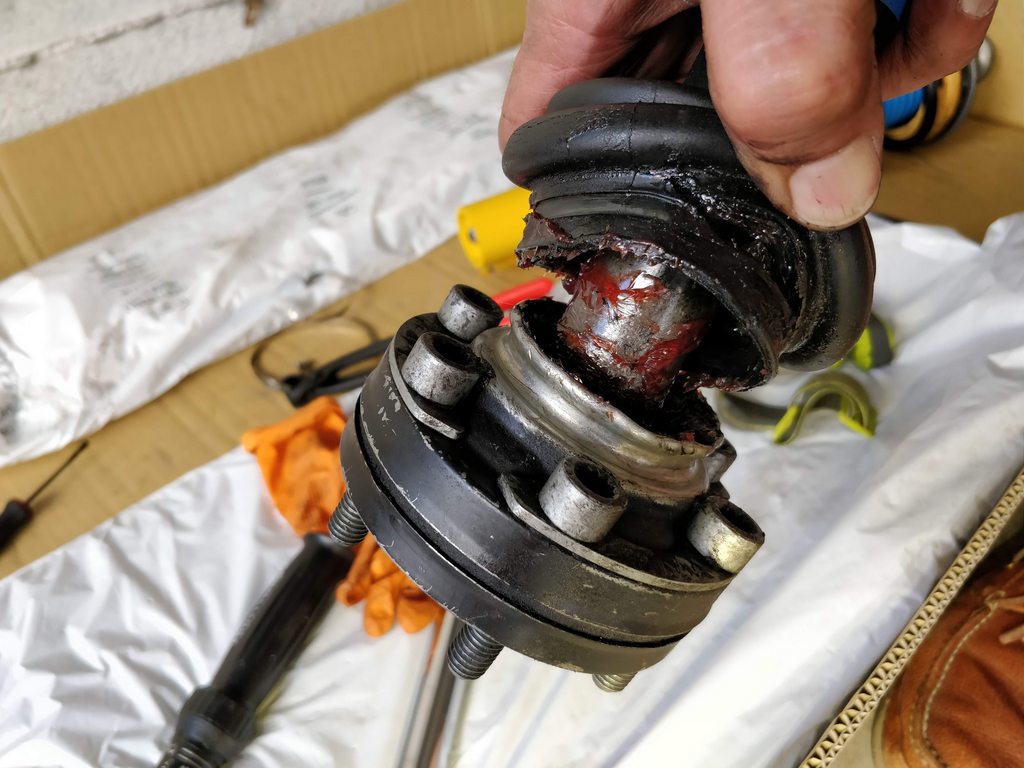
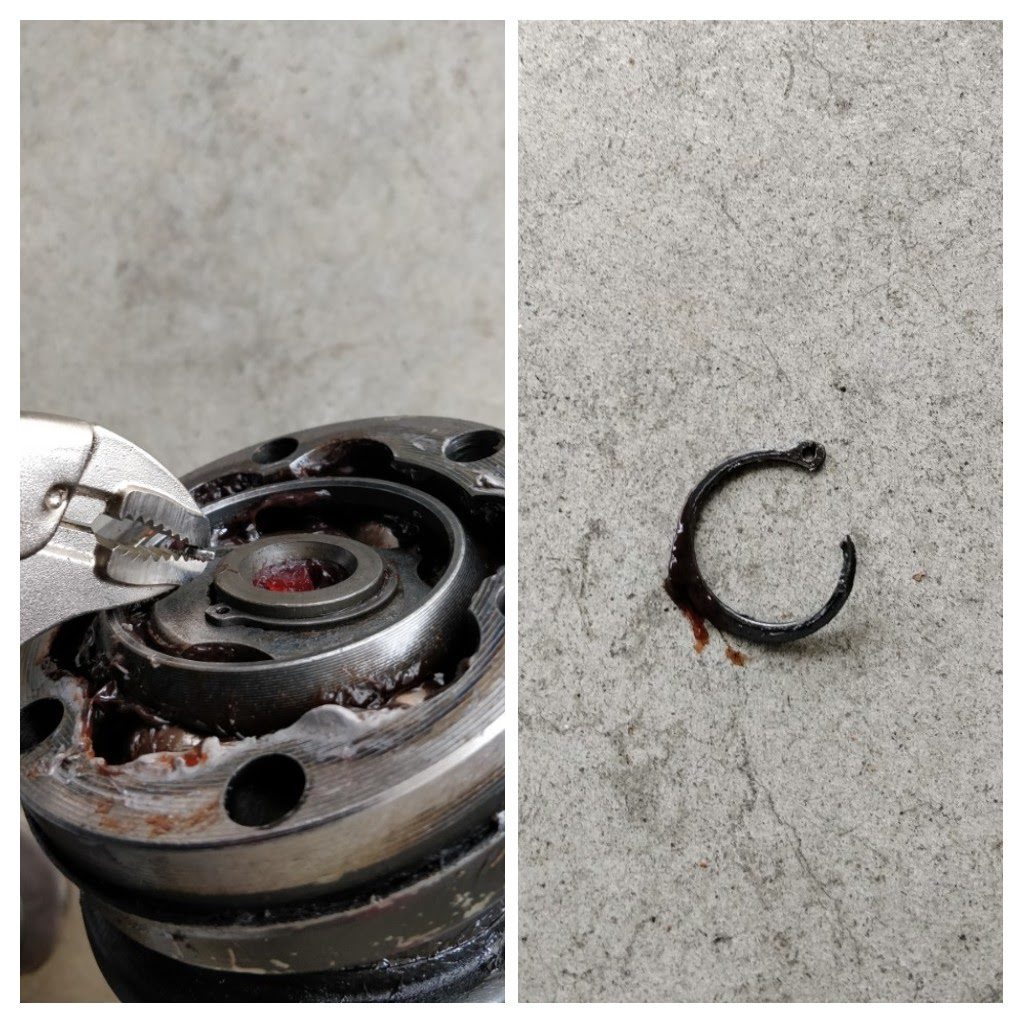
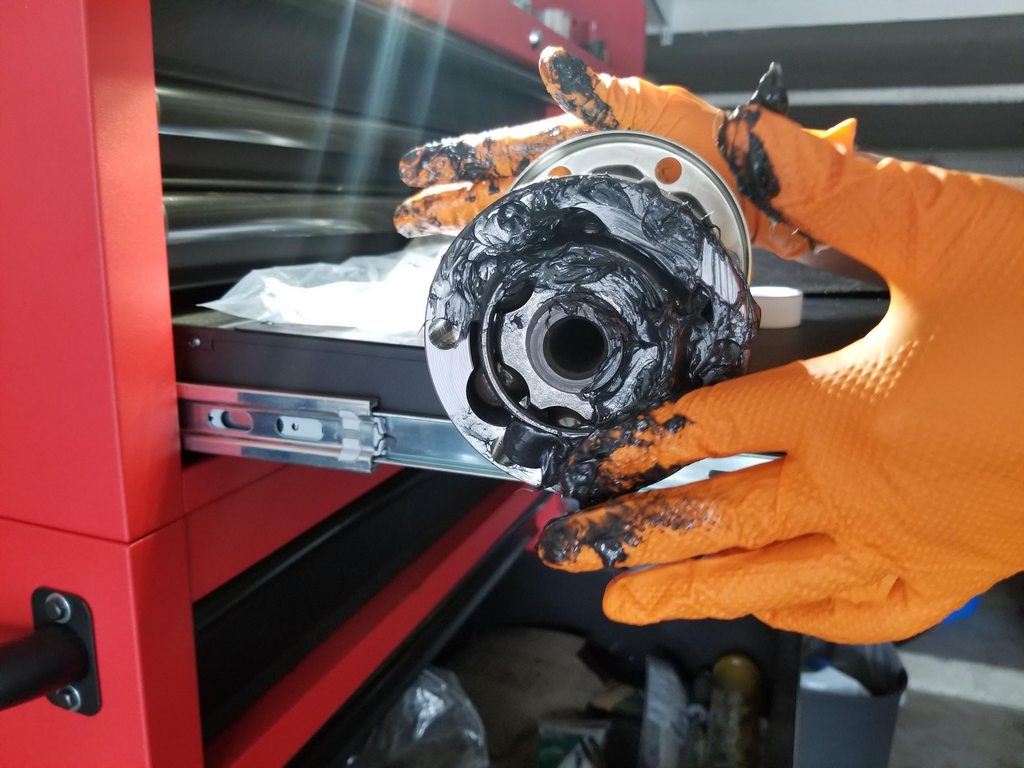
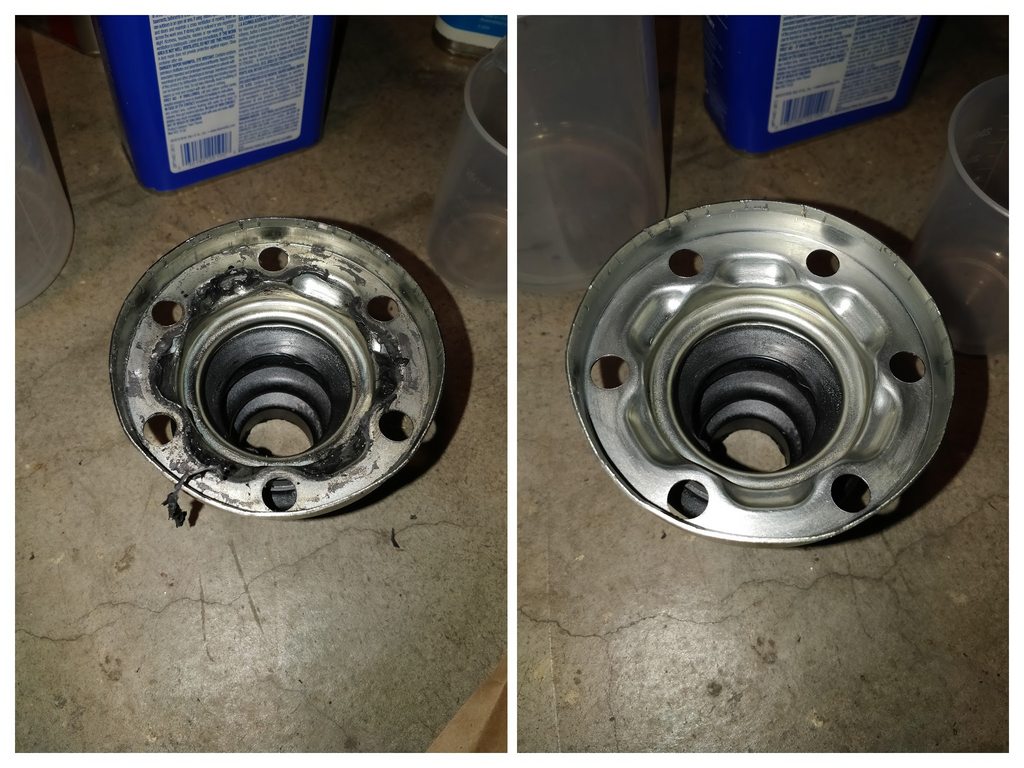
Knocked off the caps and I don't know...this looks more like wheel bearing grease.
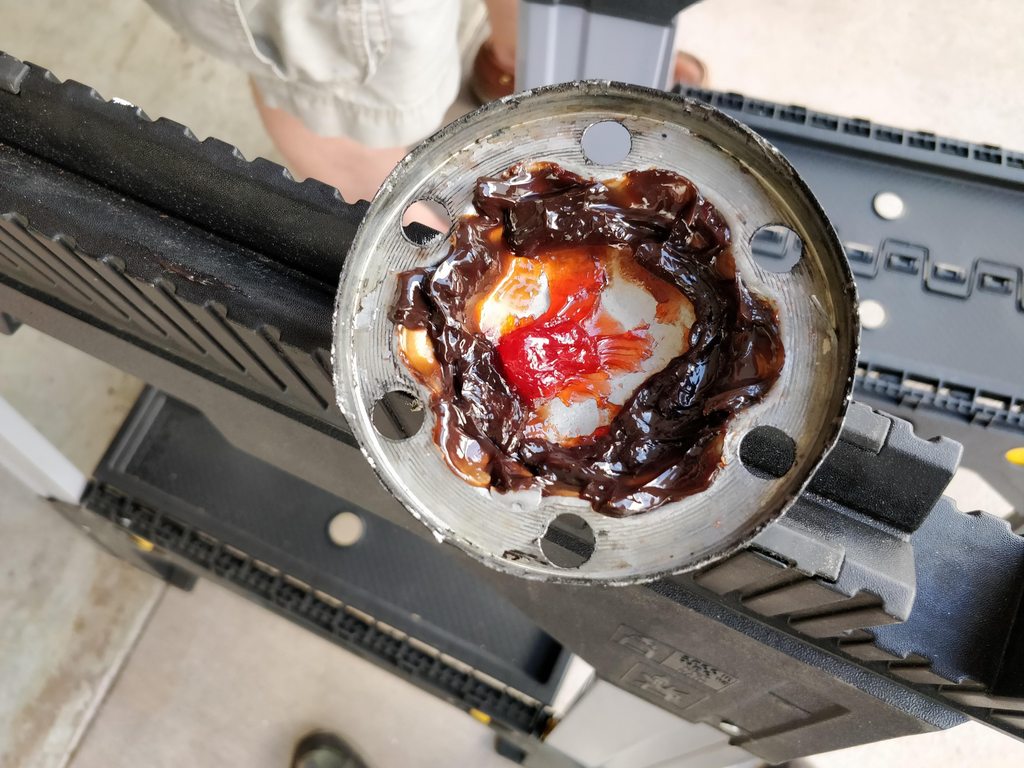
Kinda looks like raspberry jam, no? There's only one person who would dare give me the raspberry...

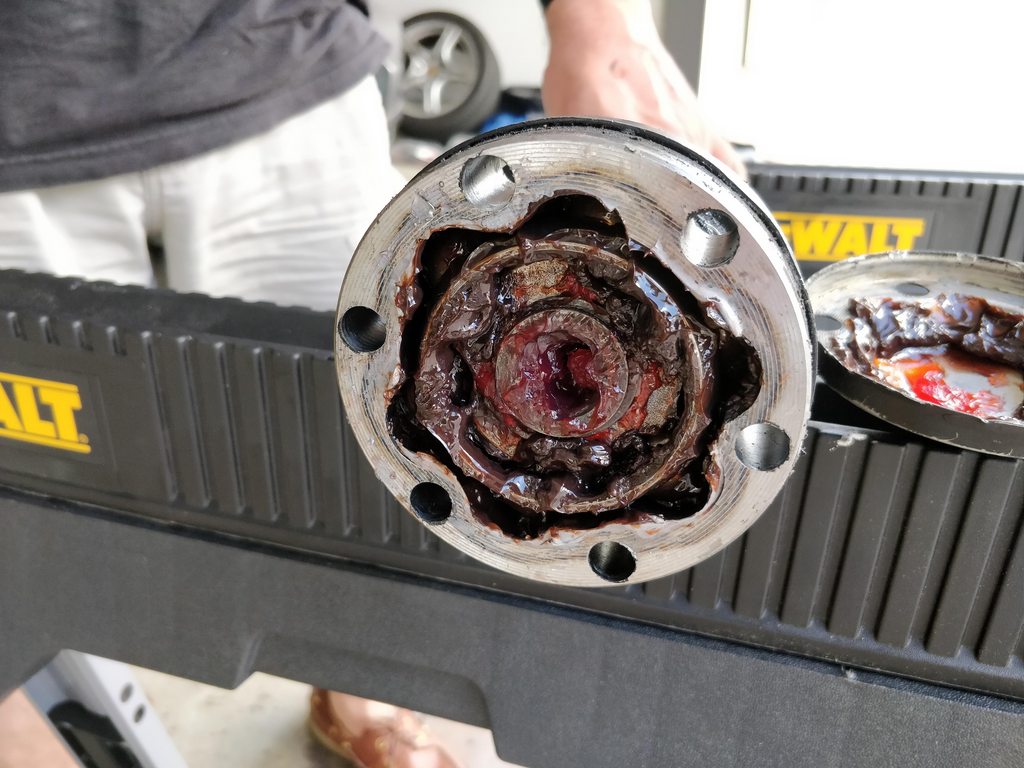
Absolute bloodbath.
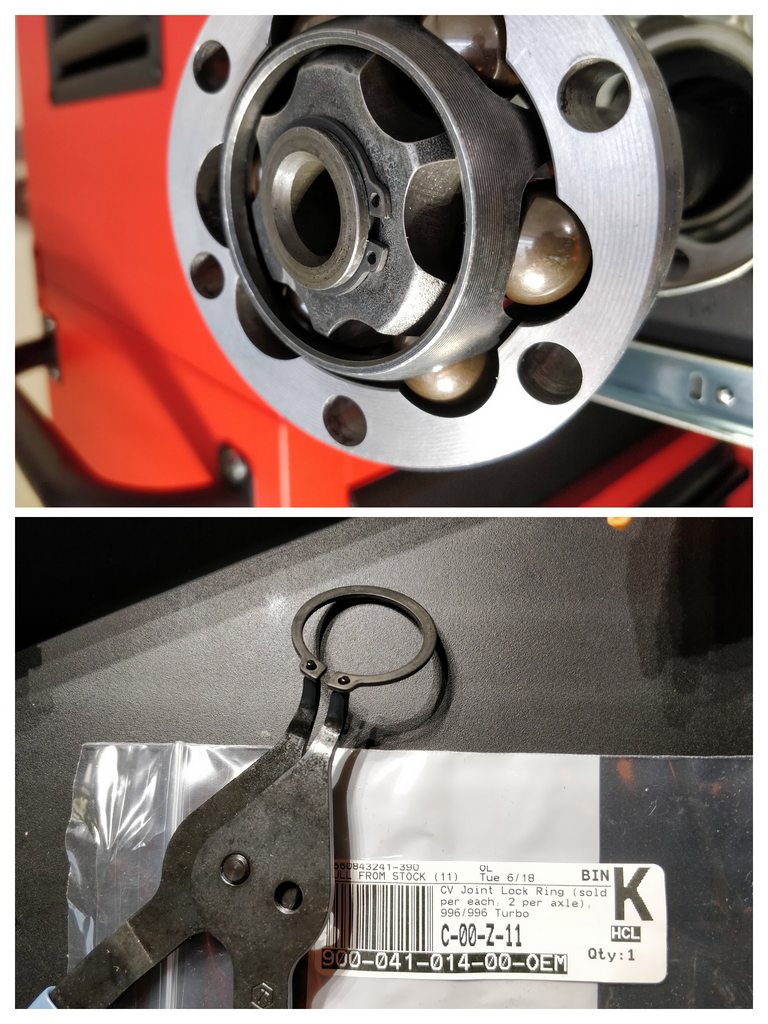
Ordered new parts, new grease, pliers, and RTV. The factory sealant is like $150 and backordered in the US. Guessing dealers just use RTV like the rest of us.
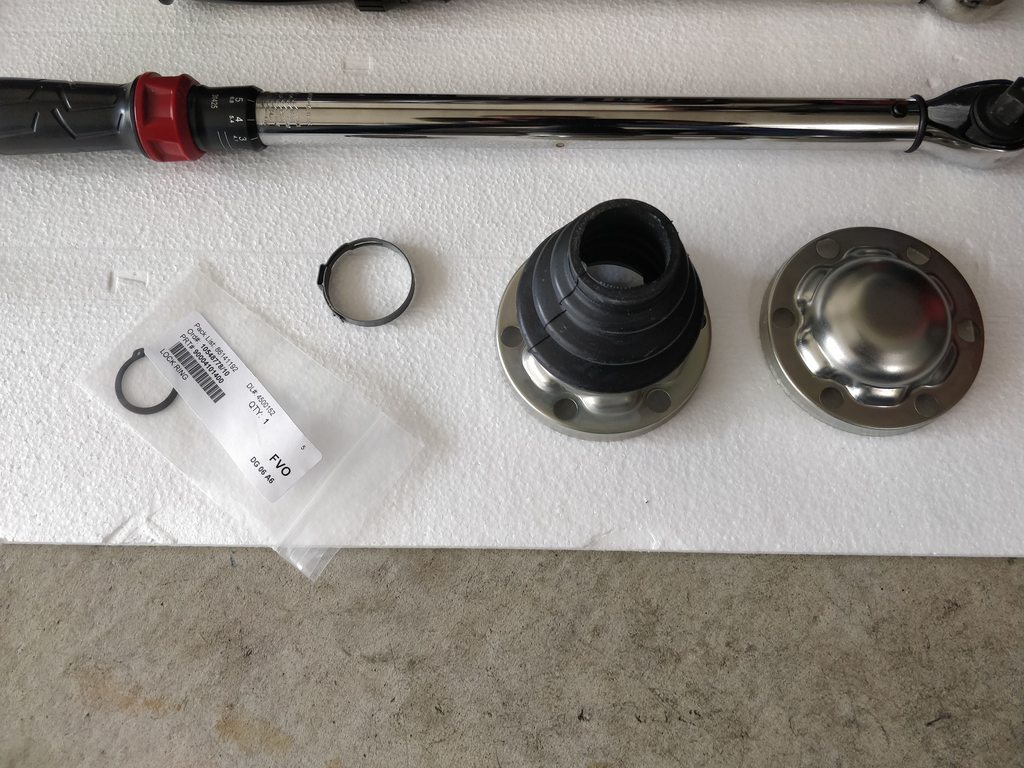

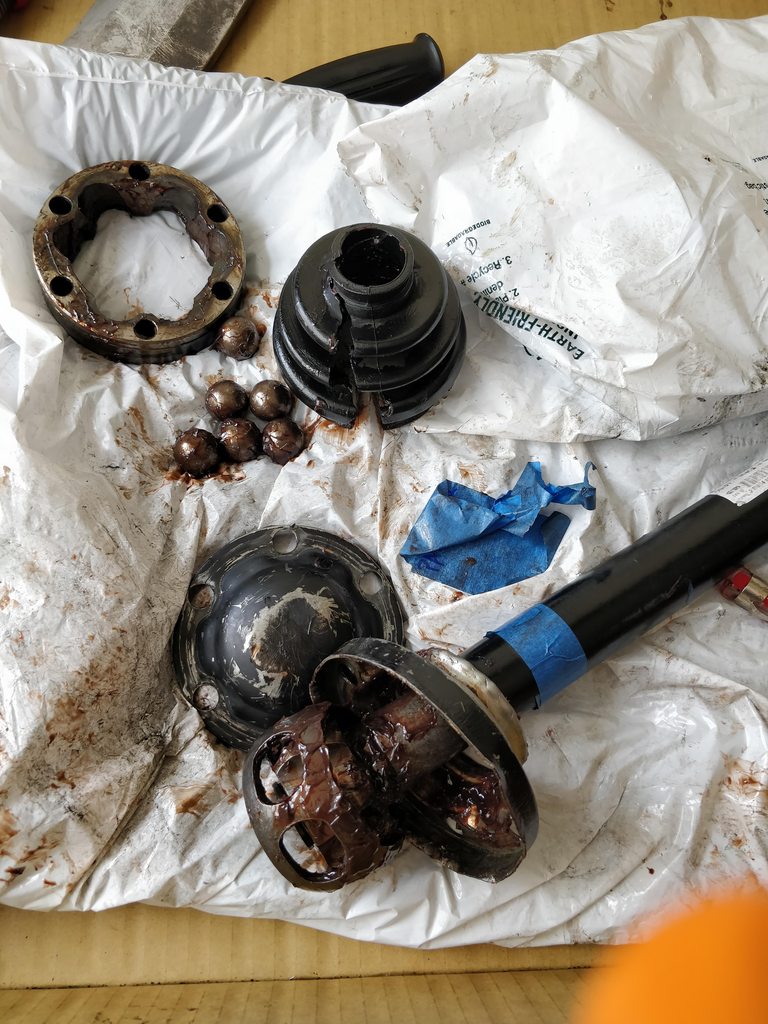
Those pliers were too big for the snap ring holes so I had to go another route.
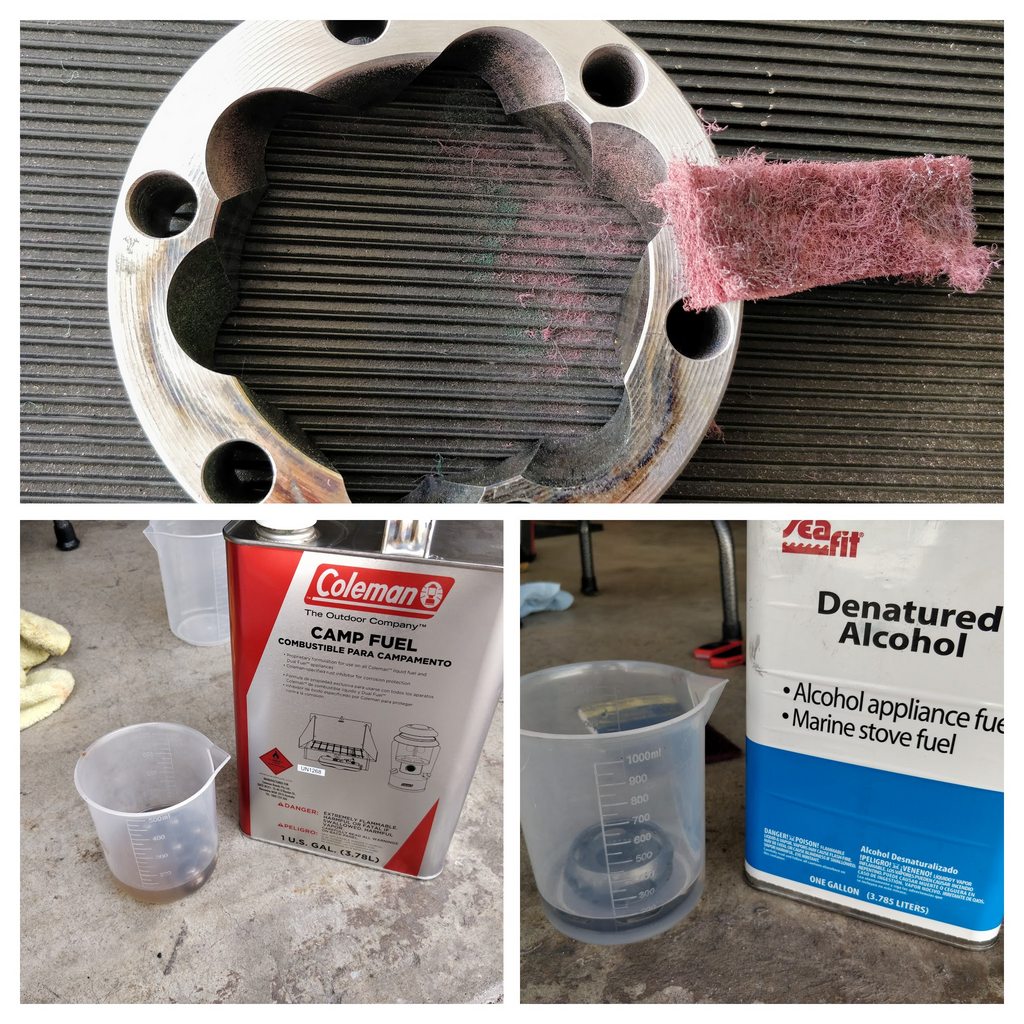
Removed the grease with Coleman fuel, then removed that residue with alcohol, and polished the outer race.
Reassembled the CV joint.
Packed it with grease.
Cleaned the holes with Q-tips to prevent grease getting on the threads.
RTV on the outer cap (also applied it to the inner one).

'twas a tight fit.
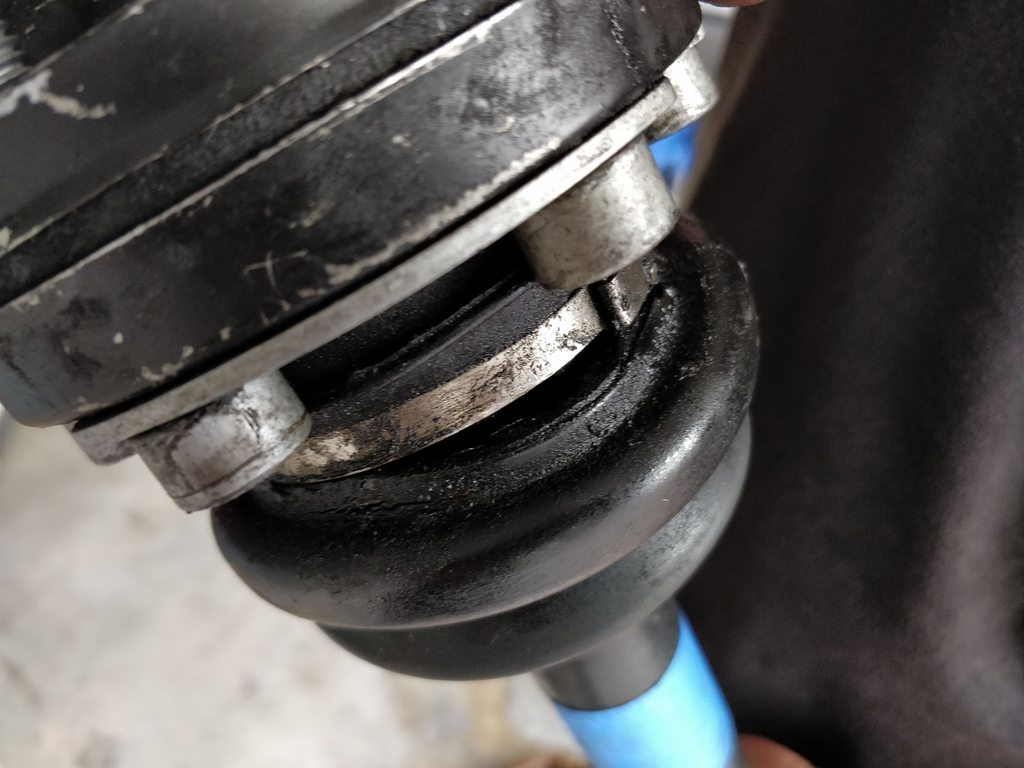
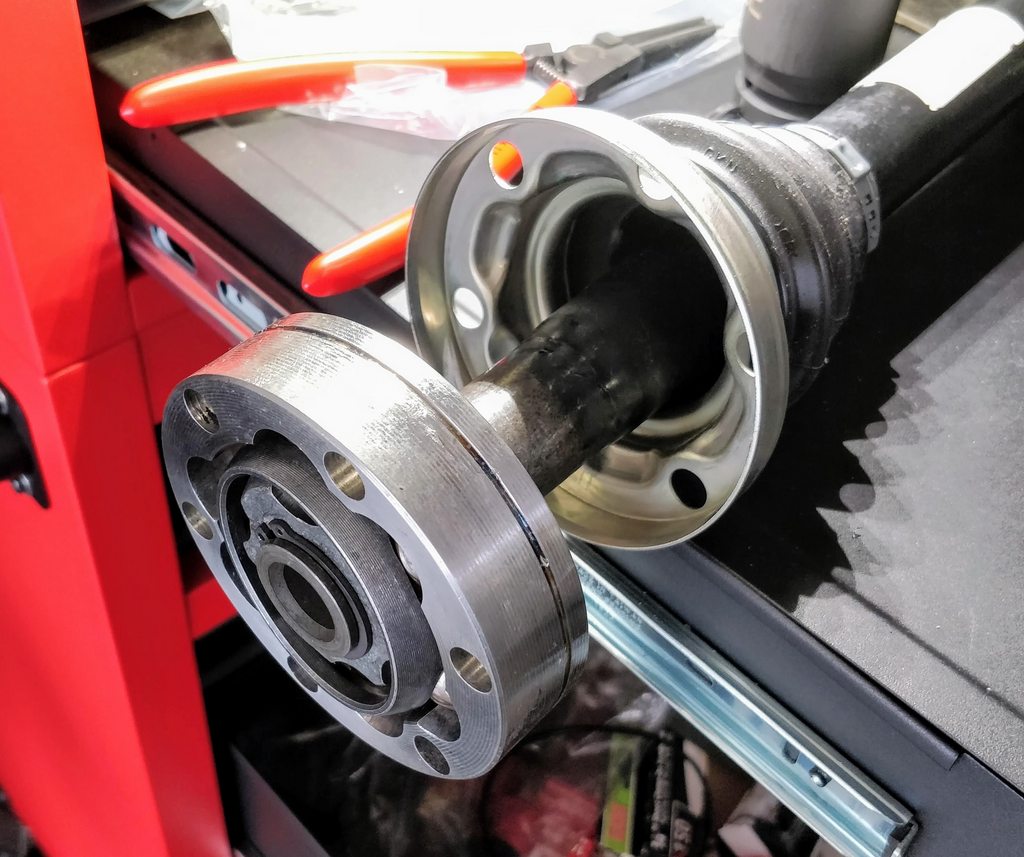
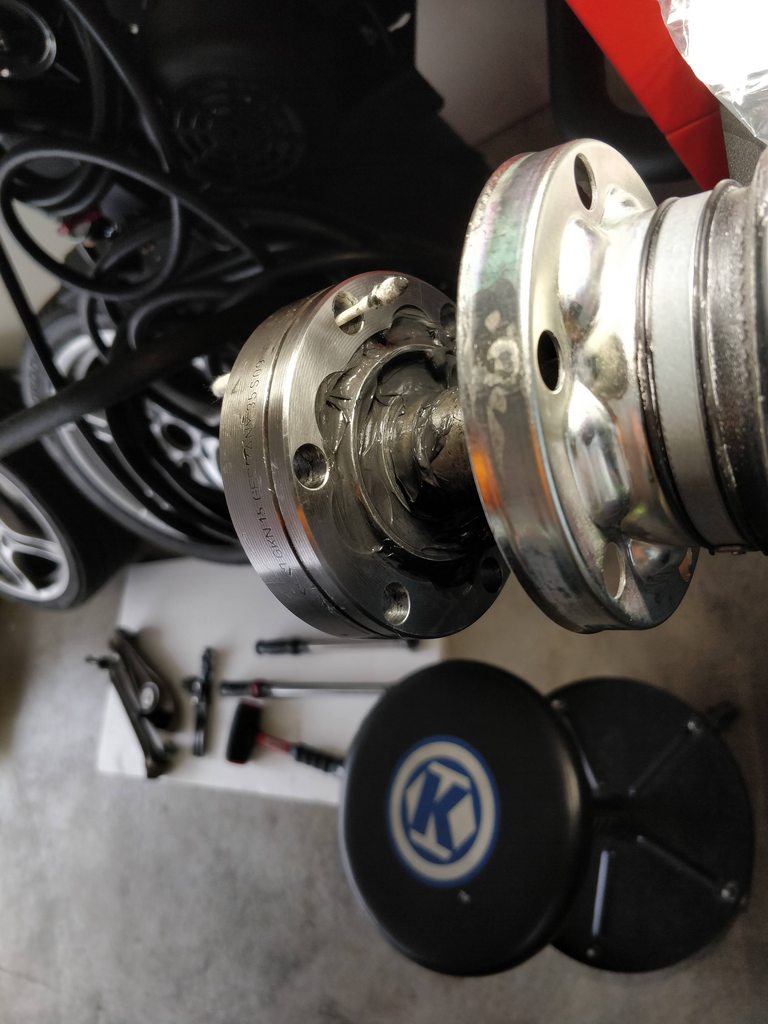
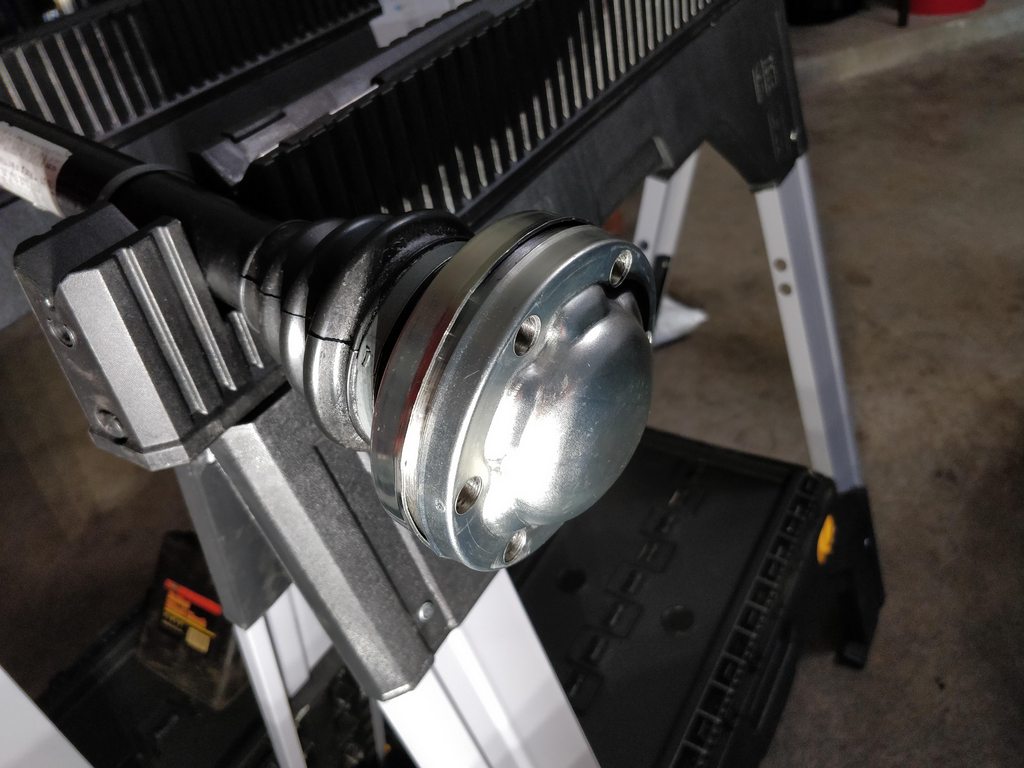
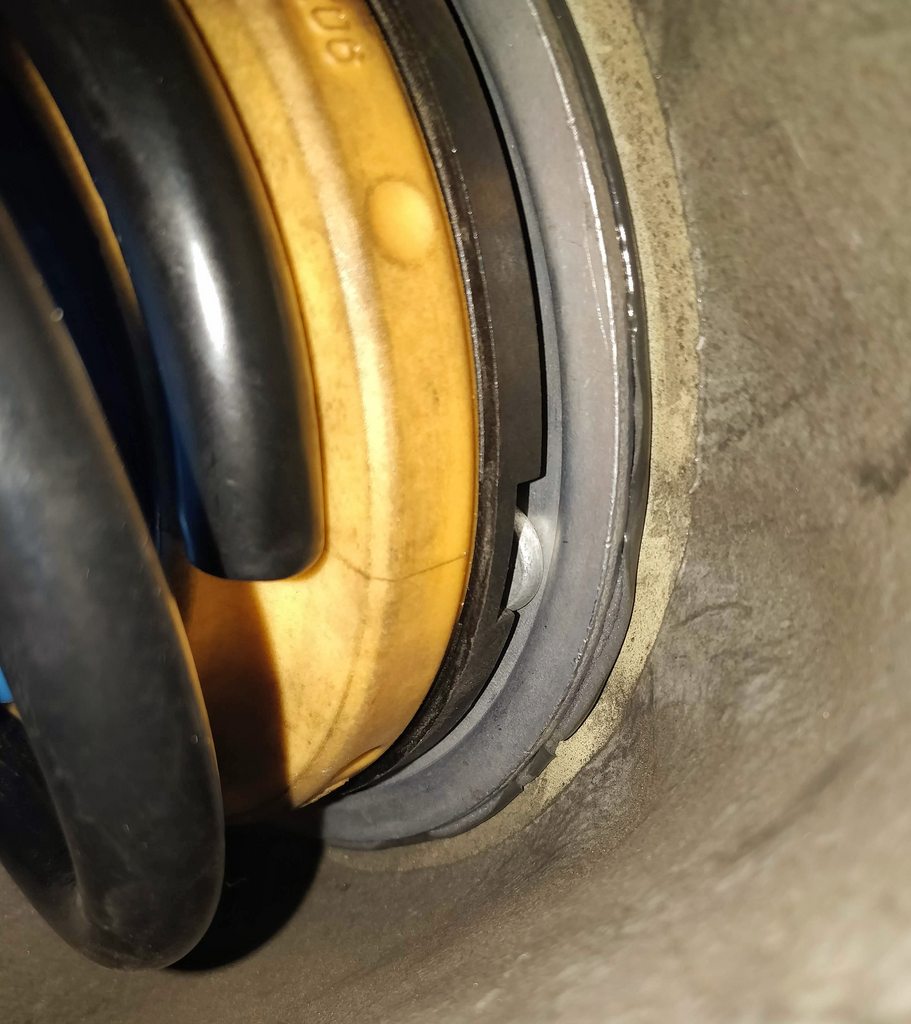
Now you may think to yourself, this looks correct:
We thought so too, but the outer race wasn't moving correctly. We thought maybe it needs to loosen up once all the grease gets everywhere and well, instead of spending a few minutes researching it, decided to install it on the diff and see if it actually moves correctly.
Spoiler alert: IT DOES NOT. The axle was sticking straight out like an 11th grade boner. So off it came and more time was spent cleaning the grease and removing the RTV.
Ordered more grease and a new snap ring (again).
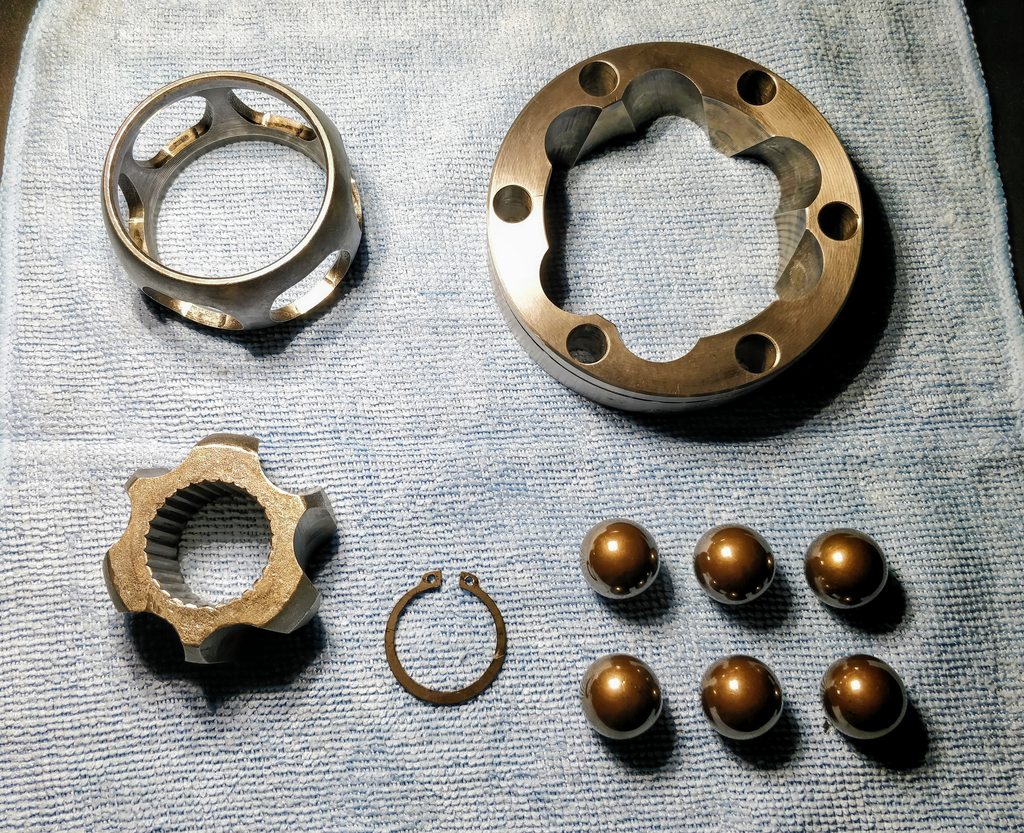
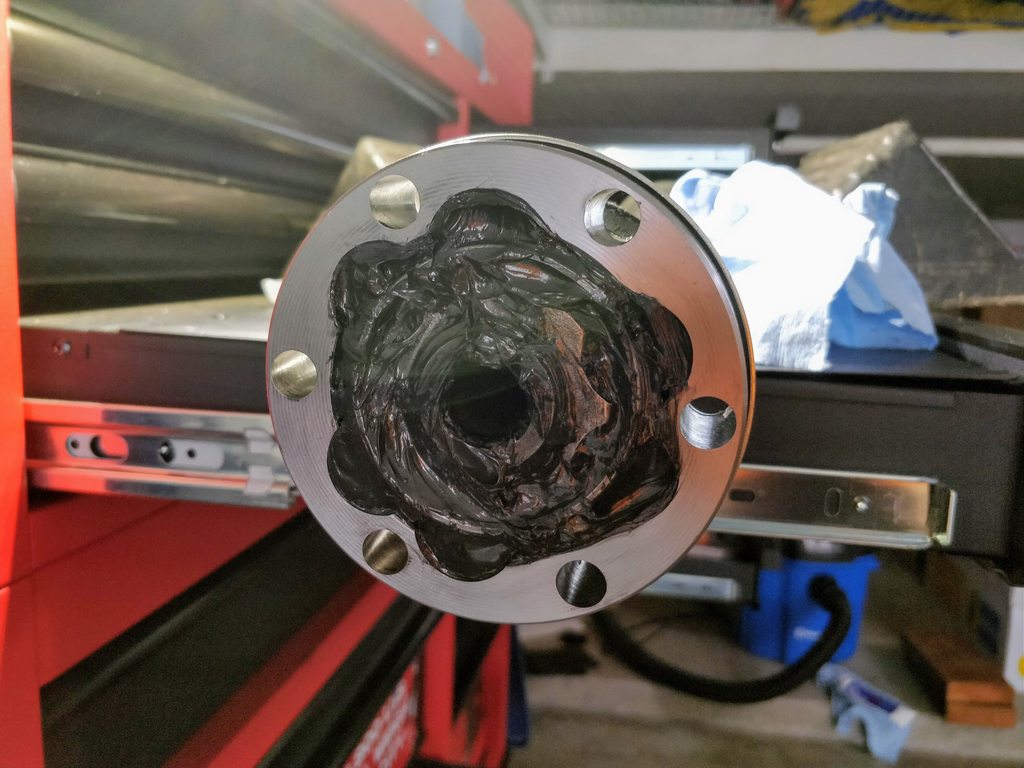
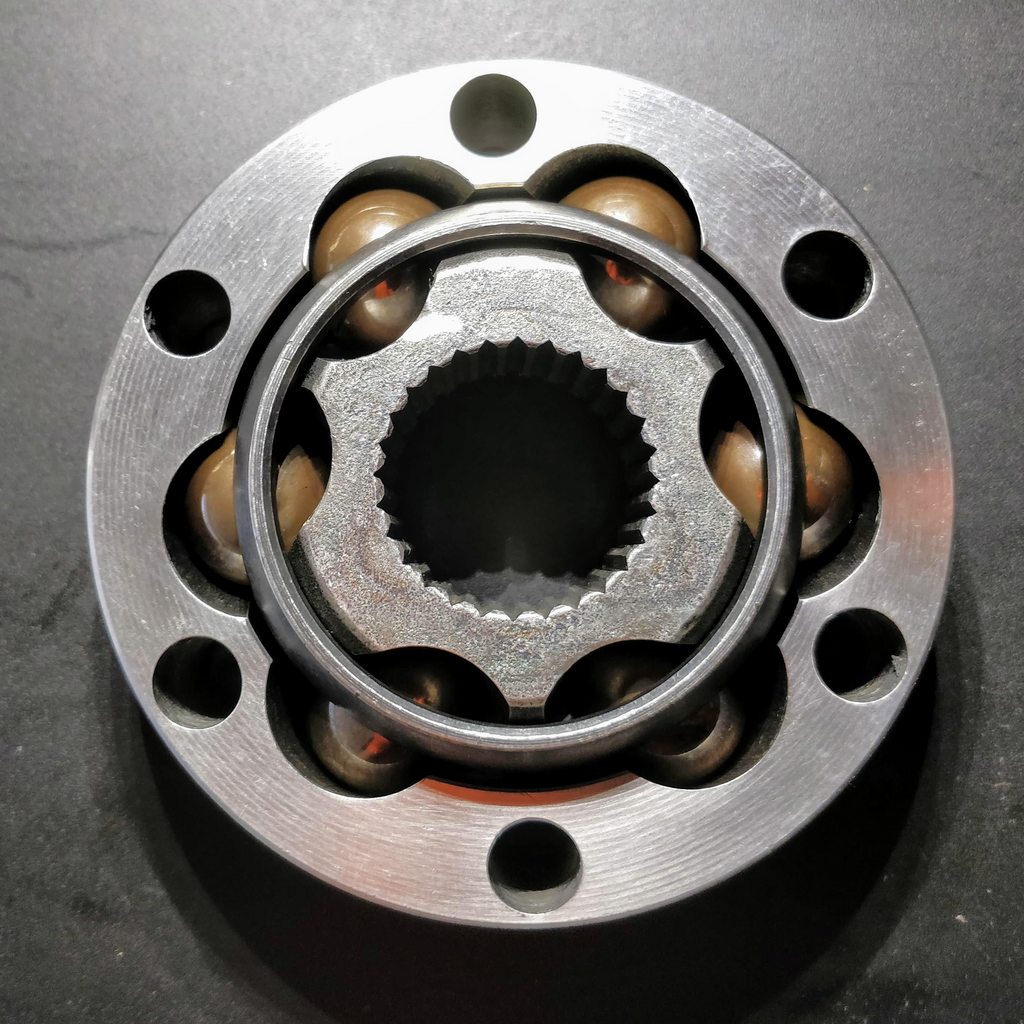
THIS. This is how it's supposed to go together, where the half-circles are offset from each other. When I first assembled it, everything was aligned but the correct way is a little counter-intuitive.
Greased the spline on the axle and used the socket to drive the inner race back on.
Got new snap ring pliers where the tips were 0.070" in diameter. Worked like a charm this time around.
Tightened the outer clamp and fully assembled.
And we're in!

Tightening and torquing the ball joints.
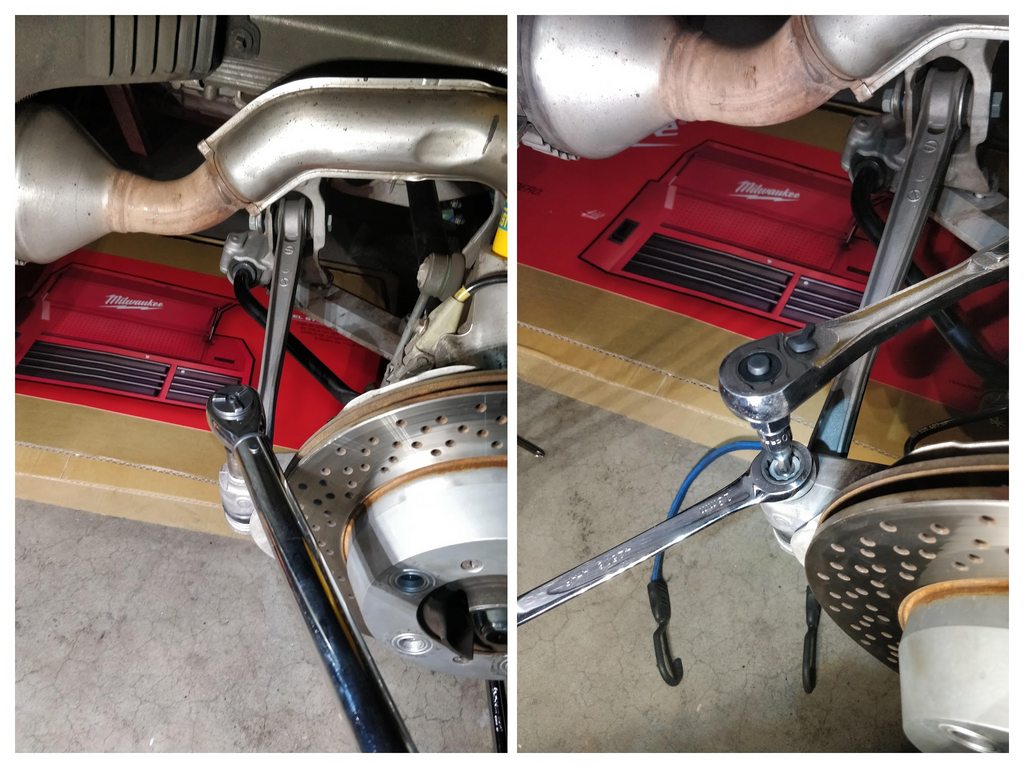
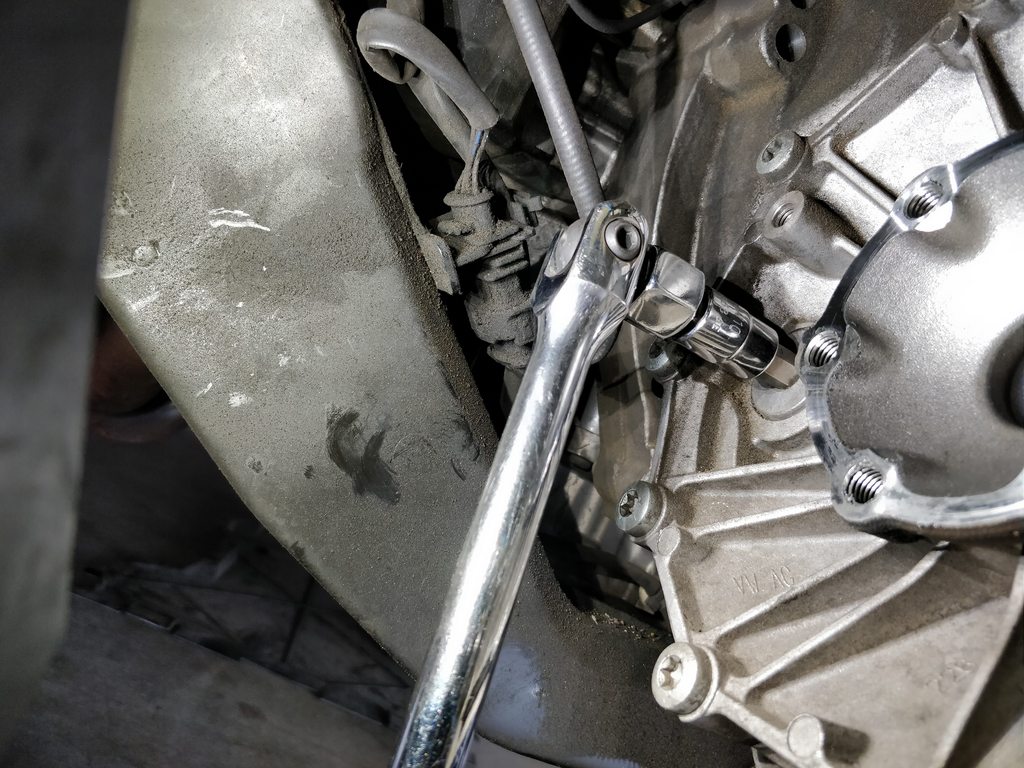
Torquing the axle bolts was even more time consuming since I wanted to go in a star pattern, which meant engaging & disengaging the brake for every single one instead of 2 at a time. But hey, at least I had enough clearance to do so.
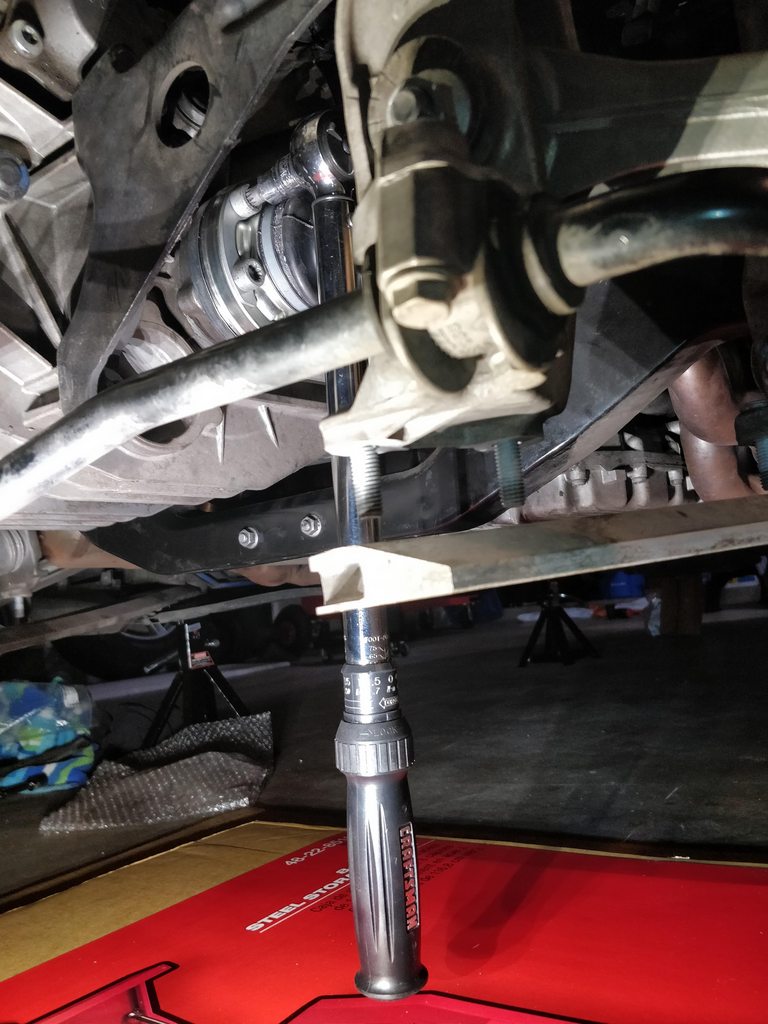
Here's me pushing on the wrench handle but having to hold myself with that crossbar to stop from sliding.
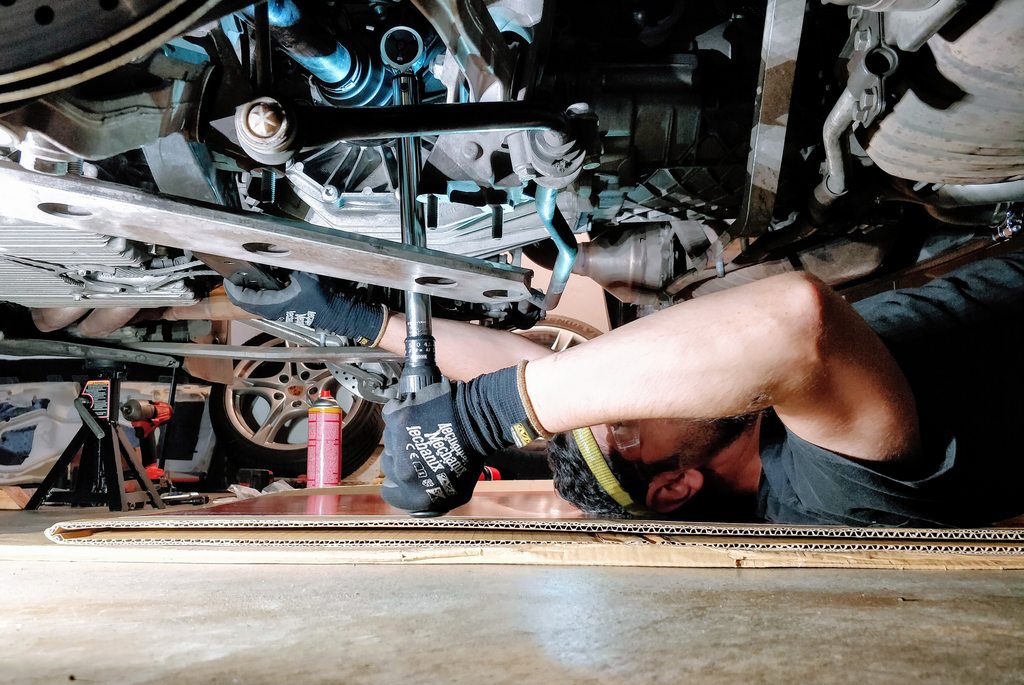
Marked the ones I actually torqued. Documentation: it's the name of the game.
The axle nut has a torque spec of 340 ft-lbs so went ahead and used this monstrosity with a 400 ft-lb capacity.
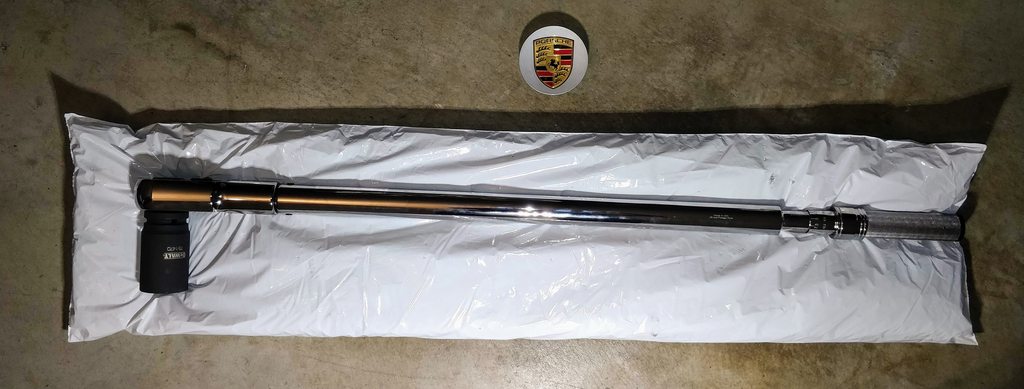
It uses a 3/4" drive which meant buying a new socket. Except it barely sticks out from the wheel. Oh wait, lemme get that 3/4" socket extension I don't have.
Fortunately the ratcheting head was big enough where I was still able to torque it without hitting the wheel, but I had to pull up while standing next to the rear bumper since that's the only way there was enough clearance from the body.
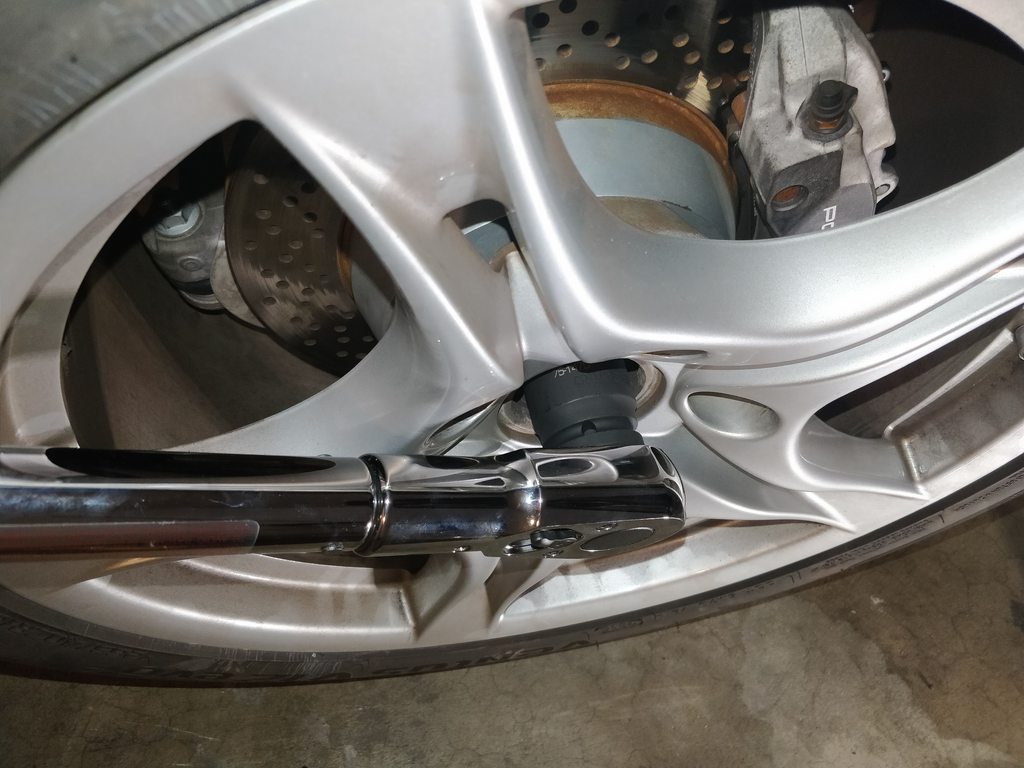
I gotta tell ya, after torquing the axle nut, the wheel bolts seemed like toys.
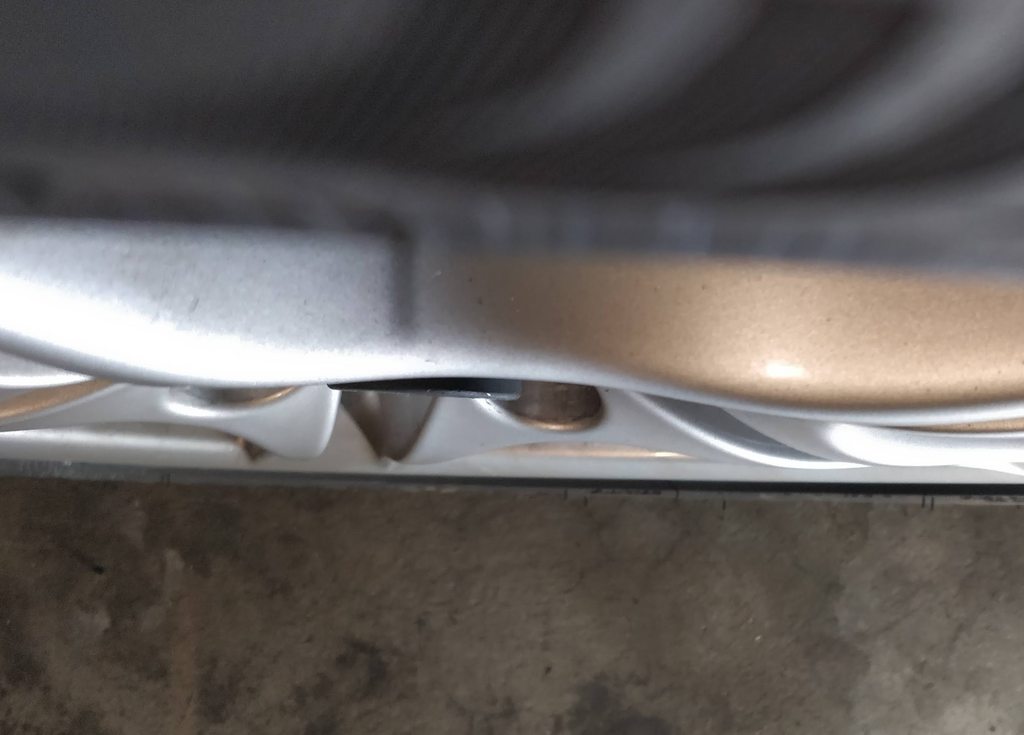
With the new shorter springs in the back, the assembly isn't under tension until the wheels are back on the ground and so you have to rotate the bearing while the car is being lowered and align the slots with the bolt heads.
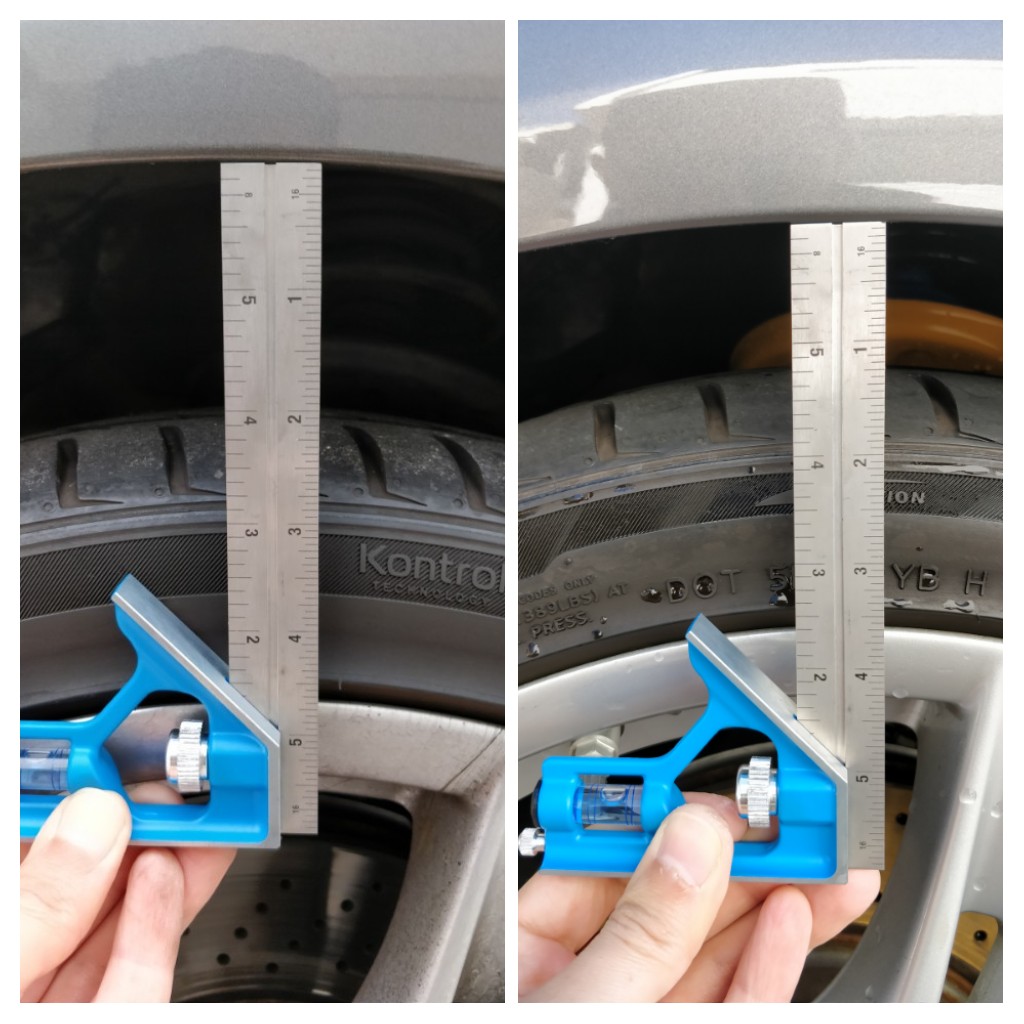
All in all, it took 3 weekends and somewhere around 50 hours for all this work. I'm sure you're eager to see what it looks like but since there's no 2nd chance for a first impression, I'm gonna wait for the springs to settle a bit before posting a true before & after. It's only been 4 days so far.
However, I have driven it and it is absolutely fantastic! The handling is significantly improved and it'll get thoroughly tested on my upcoming road trip.
A lot of work, but all worth it in the end.
Car as it sat on the base suspension:
New parts:
Parts List:
Front Damper - Bilstein B6 (x2)
P/N 35-122180
Cayman R Front Spring Set (x1)
P/N 98734353140504
Front Strut Mount (x2)
P/N 99734301801
Front Shock Bearing (x2)
P/N 99634351505
Rear Damper - Bilstein B6 (x2)
P/N 35-122197
Cayman R Rear Spring Set (x1)
P/N 98733353196504
Rear Shock Mount (x2)
P/N 98733305900
Rear Strut Bushing (x2)
P/N 98733350400
Also new lock nuts and caliper bolts since they're torque-to-yield.
Started off with taking the interior rear panels out to get access to the rear shock mount.
Broke the plastic standoff for this metal clip. Used epoxy to glue it back and all is well.
And here we are.
Accessing the fronts is a lot easier. Marked the location of the nuts to be consistent on both sides and make the car drive-able on my way to the alignment appointment.
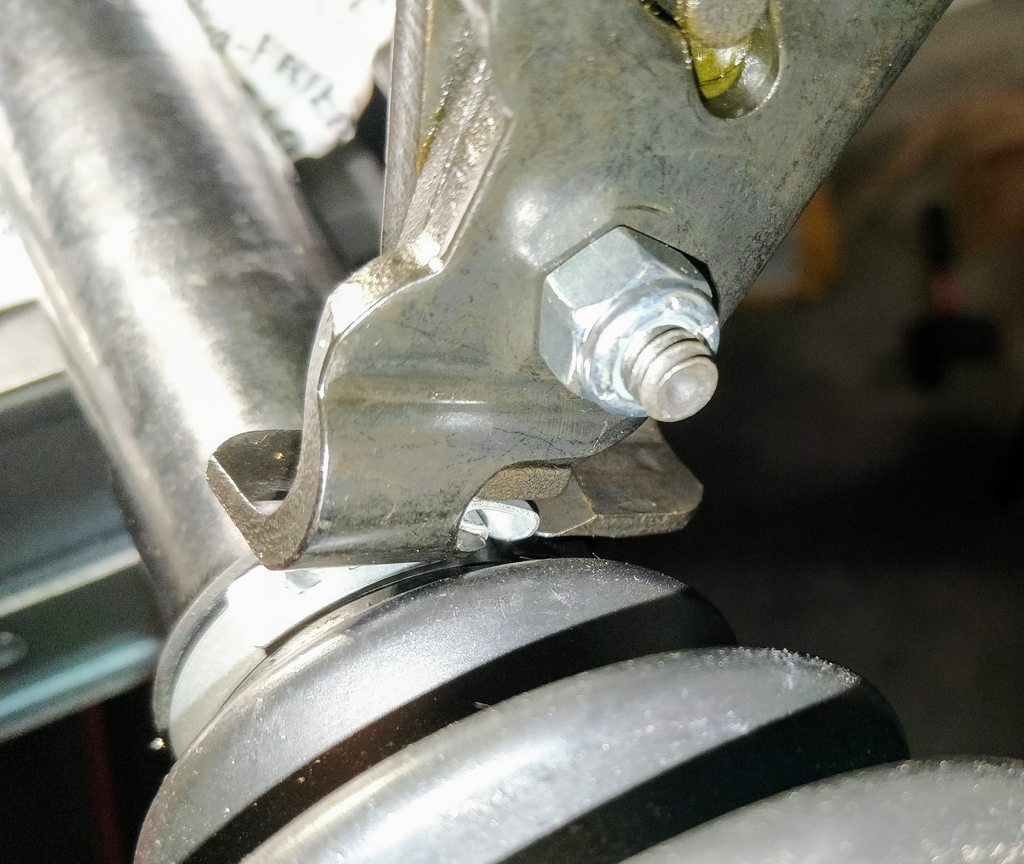
Removed the sway bar bolt which pinches the strut in the carrier.
Then loosened the control arm bushing bolt to allow the assembly to rotate down. I also loosened the plastic panel underneath the car to prevent it from possibly cracking.
Not too bad.
With the front carriers, rotors, and calipers all held up, moved to the rear, where the real fun begins.
The axle is secured to the transmission with 6, M10 triple square bolts. The presence of the CV joint boot limits access to only 2 at a time before needing to rotate. But you need the parking brake on to prevent it from rotating so you can actually loosen it. So you gotta engage the brake, loosen 2, then crawl out from underneath the car, disengage the brake, crawl back under, rotate, then back to engaging the brake, then loosen, then repeat on the other side. Ay dios mio.
You can help yourself by removing the lower support plate so you don't need 18" of extensions. Eventually I removed the plate so at least reassembly was easier.
Popping off the ball joint for the toe link and removing it went smoothly.
The control arm ball joint? Yeah, not so much. Technically you don't have to do this and can just loosen/remove the bushing bolt, but I tried following the factory procedures.
The inner CV boot kills your clearance and I ended up damaging the bolt since I couldn't get a good grip on it with the ball joint separator.
So I went ahead and removed the bushing bolt.
And had to use a pry bar to get it out of its housing.
I figured that would've been enough, but that 1/2" lip at the top was blocking me from removing it.
I wasn't about to try to compress the spring on the car, so I also removed the other, longitudinal control arm bolt.
Last thing was removing the end of the parking brake cable from its base so the whole assembly can be removed from the car. Fortunately that doesn't require the entire console to be removed, just the storage area.
Alright, so now everything's out but I'm stuck with a bent ball joint stud on the control arm.
Drastic times call for drastic measures so the plan was to heat it up, bend it straight, then knock it out with a good ol' fashioned air hammer.
Of course doing that requires the axle to be removed so you can have direct access to the stud, plus I obviously didn't want to damage the boot. First step is getting the 32 mm axle nut off and my 1/2" impact wrench can definitely do that with its 600 ft-lbs of nut-bustin' torque, but to be safe, I wanted to have that torque react against something. If you do this on the car, it's easy but clearly that's not my situation here.
Decided to put the carrier/rotor back on the wheel which was a bit tricky given the awkward shape and weight.
Then set the wheel against the wall so if it does wanna rotate, it'll have something to block it. At this point I was picturing the wheel climbing up the wall, rolling on the ceiling, then landing on the car.
Anyway, got it out, then realized I damaged a couple of threads on the axle.
Got a thread file to help clean them up, and also bought 2 new axle nuts since they're lock nuts (scope creep continues).
Now onto my friend's house and his oxy-acetylene torch.
Once it was straight, busted out the air hammer and we get this:
Watching that still makes me laugh. I spent a solid hour and applied so much manual force, all to be taken care of with compressed air in 2 seconds.
Not wanting to use that control arm again, and wanting to get fresh rubber under the car, I got new control arms and if I'm going this far, might as well get new toe links too. 75k miles was a good run.
Cat:
Old struts:
Took the springs and shocks to the alignment shop and had them use their wall-mounted spring compressor to assemble these. The front springs are too short for the "suicide sticks" to be used and I wasn't about to use the spring perch as the bottom hooking location so yeah, did this the safe way.
At this point I wanted to give myself a break with the suspension work and went ahead and flushed the transmission fluid which requires the support plate to be removed.
I actually bought 4 bottles and ended up using 3.2 liters so good news there. It's not supposed to overflow but be 2-3 mm just below the fill hole. You can actually see the fluid level with a flashlight.
Removed the fill plug first.
Didn't look too bad but there are no records of it ever being changed. The new oil was much lighter in color than the maple syrup coming out.
Tapered plugs so no crush washers. 10 mm hex for the fill, T55 for the drain.
Pumpin'.
So now I'm trying to put the rears back on and there's just way too many things that need to happen at the same time. I tried for an hour, then decided to stop and wait for help to arrive. Conversely I got the fronts installed by myself in about 84 minutes.
The rear driver's side went in smoothly. Then went over to the passenger side and with my friend holding up the boot, he started moving it around when we discovered there was actually a tear.
Great, yet another thing to address.Knocked off the caps and I don't know...this looks more like wheel bearing grease.
Kinda looks like raspberry jam, no? There's only one person who would dare give me the raspberry...
Absolute bloodbath.
Ordered new parts, new grease, pliers, and RTV. The factory sealant is like $150 and backordered in the US. Guessing dealers just use RTV like the rest of us.
Those pliers were too big for the snap ring holes so I had to go another route.
Removed the grease with Coleman fuel, then removed that residue with alcohol, and polished the outer race.
Reassembled the CV joint.
Packed it with grease.
Cleaned the holes with Q-tips to prevent grease getting on the threads.
RTV on the outer cap (also applied it to the inner one).
'twas a tight fit.
Now you may think to yourself, this looks correct:
We thought so too, but the outer race wasn't moving correctly. We thought maybe it needs to loosen up once all the grease gets everywhere and well, instead of spending a few minutes researching it, decided to install it on the diff and see if it actually moves correctly.
Spoiler alert: IT DOES NOT. The axle was sticking straight out like an 11th grade boner. So off it came and more time was spent cleaning the grease and removing the RTV.
Ordered more grease and a new snap ring (again).
THIS. This is how it's supposed to go together, where the half-circles are offset from each other. When I first assembled it, everything was aligned but the correct way is a little counter-intuitive.
Greased the spline on the axle and used the socket to drive the inner race back on.
Got new snap ring pliers where the tips were 0.070" in diameter. Worked like a charm this time around.
Tightened the outer clamp and fully assembled.
And we're in!
Tightening and torquing the ball joints.
Torquing the axle bolts was even more time consuming since I wanted to go in a star pattern, which meant engaging & disengaging the brake for every single one instead of 2 at a time. But hey, at least I had enough clearance to do so.
Here's me pushing on the wrench handle but having to hold myself with that crossbar to stop from sliding.
Marked the ones I actually torqued. Documentation: it's the name of the game.
The axle nut has a torque spec of 340 ft-lbs so went ahead and used this monstrosity with a 400 ft-lb capacity.
It uses a 3/4" drive which meant buying a new socket. Except it barely sticks out from the wheel. Oh wait, lemme get that 3/4" socket extension I don't have.
Fortunately the ratcheting head was big enough where I was still able to torque it without hitting the wheel, but I had to pull up while standing next to the rear bumper since that's the only way there was enough clearance from the body.
I gotta tell ya, after torquing the axle nut, the wheel bolts seemed like toys.
With the new shorter springs in the back, the assembly isn't under tension until the wheels are back on the ground and so you have to rotate the bearing while the car is being lowered and align the slots with the bolt heads.
All in all, it took 3 weekends and somewhere around 50 hours for all this work. I'm sure you're eager to see what it looks like but since there's no 2nd chance for a first impression, I'm gonna wait for the springs to settle a bit before posting a true before & after. It's only been 4 days so far.
However, I have driven it and it is absolutely fantastic! The handling is significantly improved and it'll get thoroughly tested on my upcoming road trip.
A lot of work, but all worth it in the end.
The following 2 users liked this post by kiznarsh:
oc911 (07-04-2020),
PhillyNate (06-24-2019)
06-24-2019, 08:19 AM
#81
Rennlist Member
Impressive, well done! Just like Lego for big kids.
06-24-2019, 09:46 AM
#82
Rennlist Member

Out of curiosity, have you changed the spark plugs on the Cayman? Is it something I could change with a pair of ramps or is a quickjack better? How about oil changes? Are ramps enough?
06-24-2019, 10:09 AM
#83
Rennlist Member
Thread Starter
Of course a QuickJack will makes things easier but for everything I've done so far on the car, I haven't required one and just used jack stands.
06-24-2019, 01:48 PM
#85
Rennlist Member
I love watching this blow-by-blow work post. Bravo and keep it coming.
As noted, rear wheels and liners come out for plugs / coils. If a quickjack is a bit of a stretch and you're as nervous as I am in doing the 'lift, place jack stand, lift elsewhere, place jack stand, etc' shuffle... you may like the liftbars option.
www.liftbars.com
Got mine and I'm never going back. Did an oil / filter, all rotors, pads, etc. in one quick shot on a Friday evening recently. Took longer to set up music in the garage than it did to get the car completely in the air. Safe, simple, solid. For me, next best thing to having a proper lift.
Good luck!
06-24-2019, 02:21 PM
#86
Rennlist Member
Thanks Dave! I think I'm just debating how likely I am to do stuff myself versus paying one of the local independent mechanics to do it. How easy are things like brake pads/bleeding/spark plugs to do with a lift? Is the 987 fairly easy to work on?
06-24-2019, 02:21 PM
#87
Rennlist Member
Thread Starter
I love watching this blow-by-blow work post. Bravo and keep it coming.
As noted, rear wheels and liners come out for plugs / coils. If a quickjack is a bit of a stretch and you're as nervous as I am in doing the 'lift, place jack stand, lift elsewhere, place jack stand, etc' shuffle... you may like the liftbars option.
www.liftbars.com
Got mine and I'm never going back. Did an oil / filter, all rotors, pads, etc. in one quick shot on a Friday evening recently. Took longer to set up music in the garage than it did to get the car completely in the air. Safe, simple, solid. For me, next best thing to having a proper lift.
Good luck!
Yeah the more I think about it, the more I think going with Lift Bars is a solid choice. I need to measure the distance between the jack points on the M5 and see how easily I can adapt it so it's more versatile.
06-26-2019, 02:59 AM
#88
Rennlist Member
Thread Starter
I ended up going with the Carnewal catback exhaust mod instead of other aftermarket options. I didn't wanna deal with emission issues in California and felt the increased noise would be the right amount. It could be louder, but this is a nice balance of being somewhat low-key while also providing aural enhancement to the driving experience.
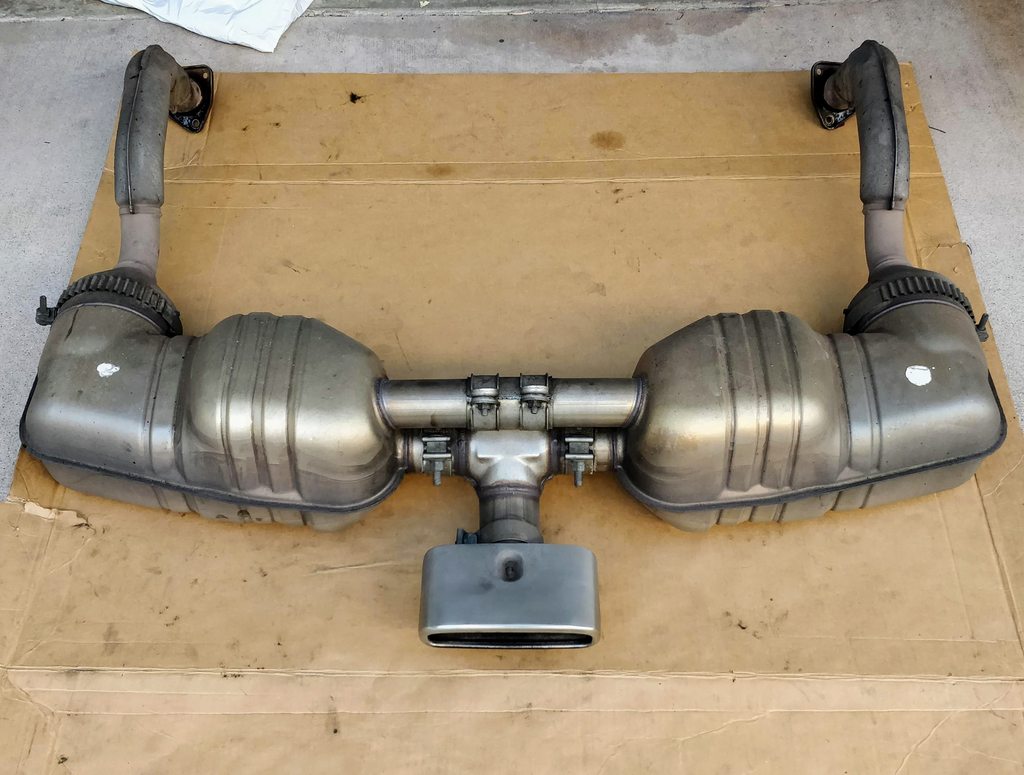
Since I was taking the exhaust off anyway, I also upgraded the tips with an X-pipe for better flow. Cleaning/polishing the tips at the end of the car wash always feels like the cherry on top. I usually don't like chrome, but they work here. These are double-walled and should remain shiny as long as I maintain them. The ones with a brushed stainless finish have a tendency to fade due to heat cycles.

I'll now direct your attention to this installation video, including sound clip comparisons.
Since I was taking the exhaust off anyway, I also upgraded the tips with an X-pipe for better flow. Cleaning/polishing the tips at the end of the car wash always feels like the cherry on top. I usually don't like chrome, but they work here. These are double-walled and should remain shiny as long as I maintain them. The ones with a brushed stainless finish have a tendency to fade due to heat cycles.
I'll now direct your attention to this installation video, including sound clip comparisons.
Last edited by kiznarsh; 06-26-2019 at 11:21 PM. Reason: Fixed YouTube video embedding.
06-26-2019, 10:15 AM
#89
Rennlist Member
That said, I certainly pick my shots. I had the IMS upgrade world done by pros, and have zero interest in dropping engine/transaxle assemblies. However, all the items listed in your question are very straight-forward in my book. Add to those, oil / filter changes, air filters, cabin filters, and you start to save a pretty big $$$.
Good luck!
07-11-2019, 01:58 AM
#90
Rennlist Member
Thread Starter
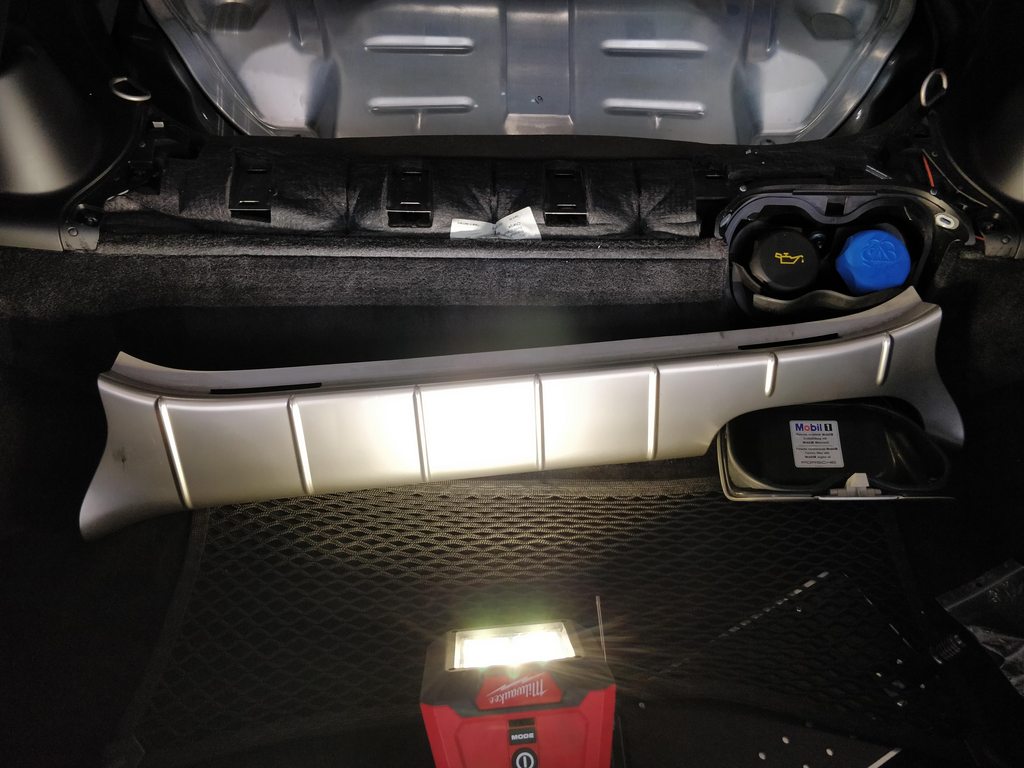
I took these photos 1 week after I finished the install to show how much it's settled: