When you click on links to various merchants on this site and make a purchase, this can result in this site earning a commission. Affiliate programs and affiliations include, but are not limited to, the eBay Partner Network.
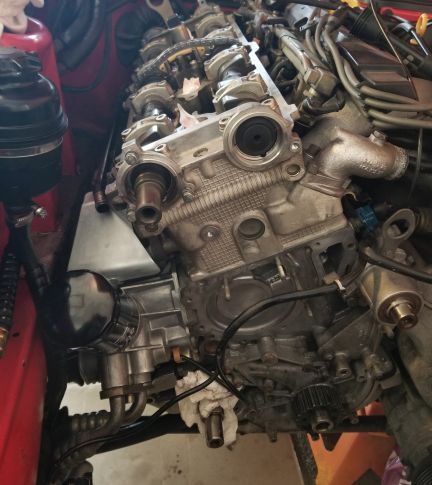
Oil housing, heat shield and cams are now installed but I'm waiting for one new bolt before I torque the bearing caps. The rest of the bolts came out without event. I was able to remove and reinstall the oil housing and heat shield WITHOUT removing the headers or dropping the sway bar links. I attached the shield support bar to the engine loosely, then slid the back shield in followed by the front shield (both from above). It took about 45 minutes to get the shield back in. I decided to try my luck with oil cooler hose fitting o-rings from the hardware store rather than pay the ridiculous prices that everyone wants for them. We'll see how it goes...
The zinc plating worked out fine. I'd like to have applied yellow chromate after plating but didn't really want to spend money on all that goes with that (trivalent chromium and PPE etc).
Taking a break now before installing lower balance housing and water pump next.
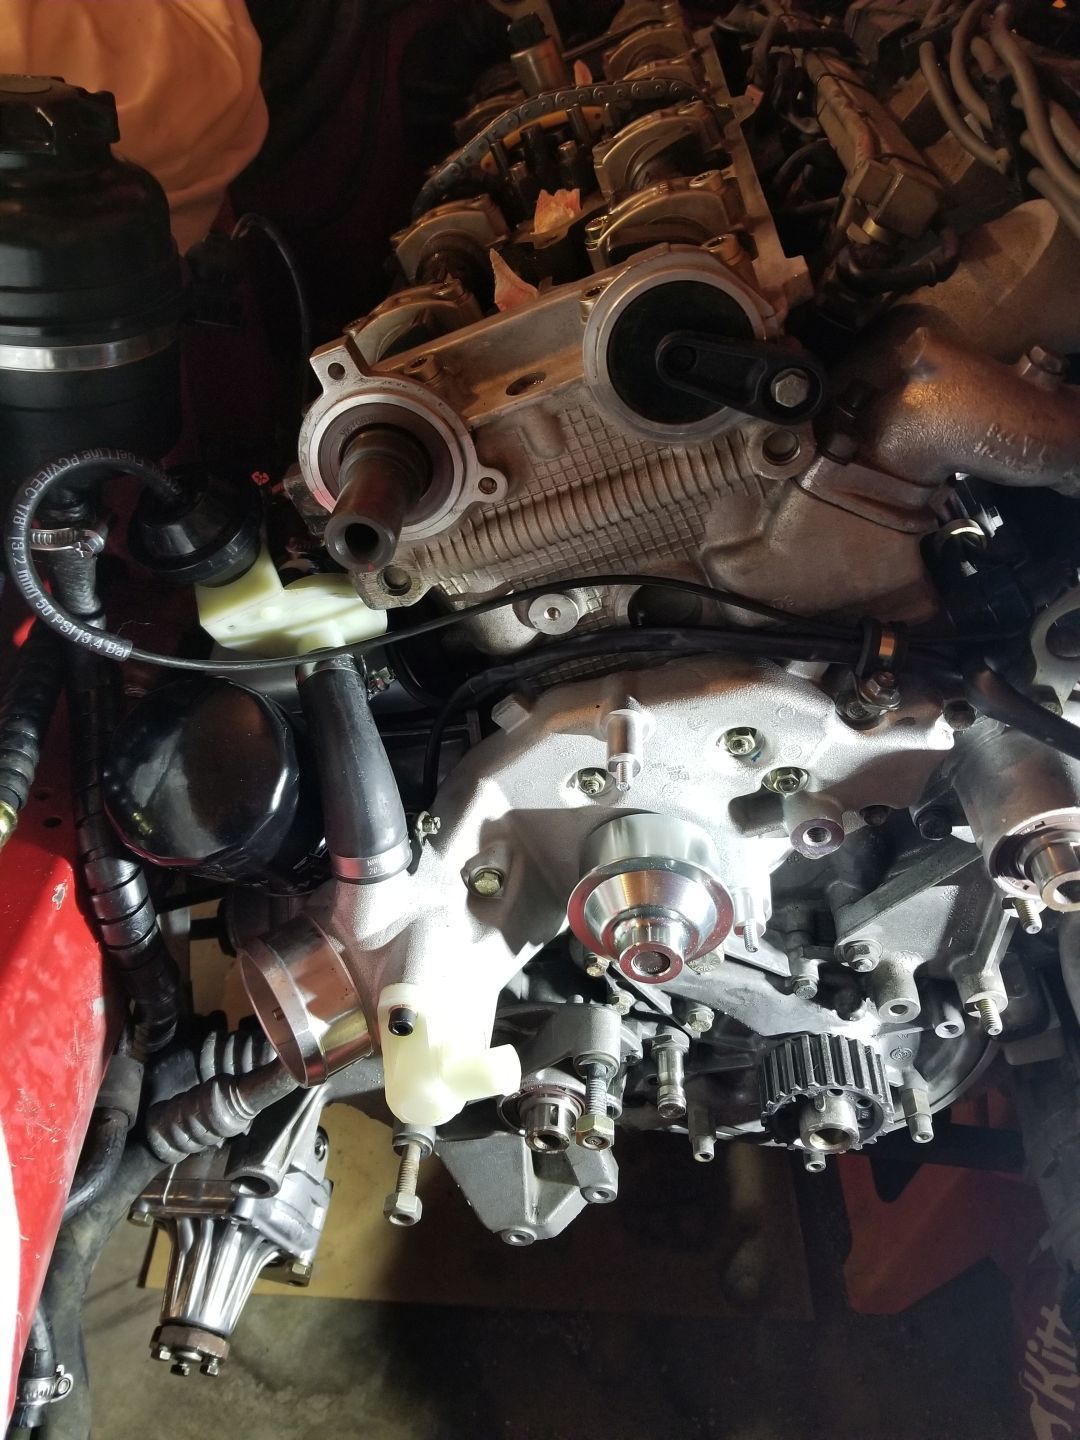
The new cam bearing cap bolt showed up so I will torque them tomorrow. Today I installed my cam seal, end plug, water pump, lower balance assembly, and HCV with new hoses. The old "U" shaped vacuum fitting was loose as a goose and I didn't like the tight bend it made. It's like they sourced that part off the shelf originally meant for another application. That area is a little busy for my tastes so I used a piece of 1/8" fuel line hose for the vacuum. It fits tighter than the standard fitting and being a fuel line it should hold up very well to vacuum and not be so prone to leaking. I also replaced the old brittle plastic loom clamp on the water pump with a new steel and rubber clamp which will also be used on the bracket near the oil pressure sender.
Arash had created a similar thread many yrs back covering the same work. Not sure if you were aware.
GL
I owe a big thank you to both you and Arash for putting that together. The thread of which you speak is one that I have referred back to many times during this refresh:
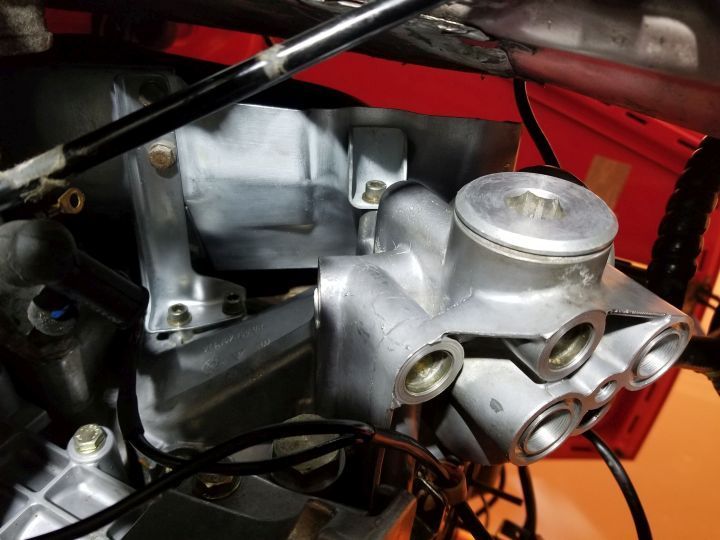
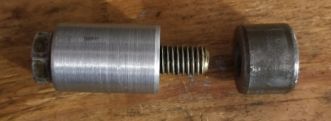
Now I know why they stripped both the PS pivot stud and adjuster link stud. The car was missing the 30mm sleeve on the back pivot of the PS pump. When I started putting things back together it seemed to me like a part was missing here. Checked the PET. Sure enough. I don't remember ever seeing this part during disassembly. I think they just had a bolt and big washer. I made this one out of a piece of 3/4" 4140 scrap I had downstairs. I bet the power steering belt stays adjusted better now.
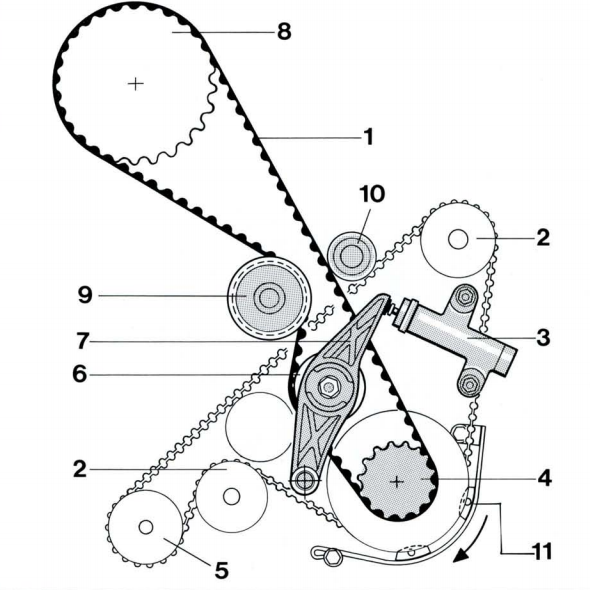
As I was going back together I noticed I had an extra roller! I was stumped at first, then going back through the old threads on here, I found that this may have been used on the S/S2? Is that right? Somehow it still appears on the 968 PET. When I made my parts list, I just pulled the numbers from the PET. Looks like it mislead me. Now that I have the part, I'm considering tapping the hole and mounting the additional roller. It seems like it couldn't hurt to have another idler closer to the lead-in on the crankwheel. Thoughts or opinions, anyone?
Another item the PET is incorrect about is the M6 x 50 mm bolt used low on the back cover. It's not shown on the PET! I was stumped for a while trying to figure out where that bolt went.
I owe a big thank you to both you and Arash for putting that together. The thread of which you speak is one that I have referred back to many times during this refresh:
I'm considering replacing the TB hydraulic tensioner even though the original is still in good health. I'm not seeing much info regarding the life span of these units. Is there any consensus or anecdotal evidence to consider?
I didn't do much today on the car. I had to go back to work after the holiday finally. I did get a little done on it there though I tapped the hole for the additional TB roller #5 after talking to Mike Lindsey about it this morning a little bit. We figured it couldn't hurt.
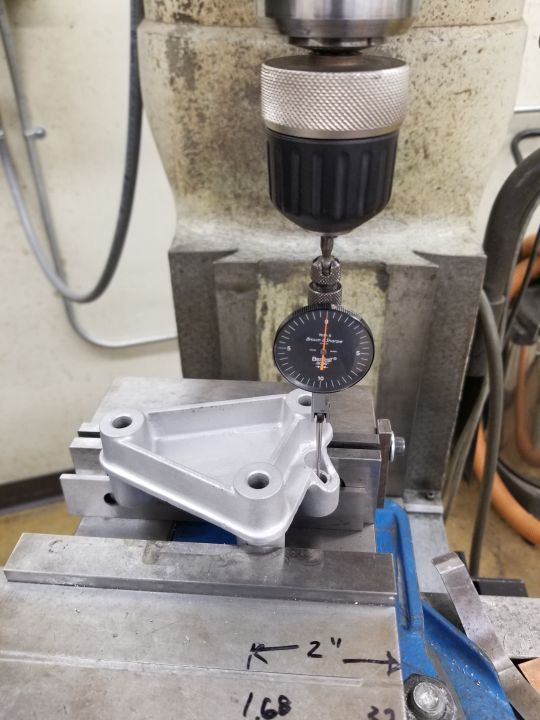
1. Indicated position from backside to run a drill through it to clean a lip out of the front side of the hole.
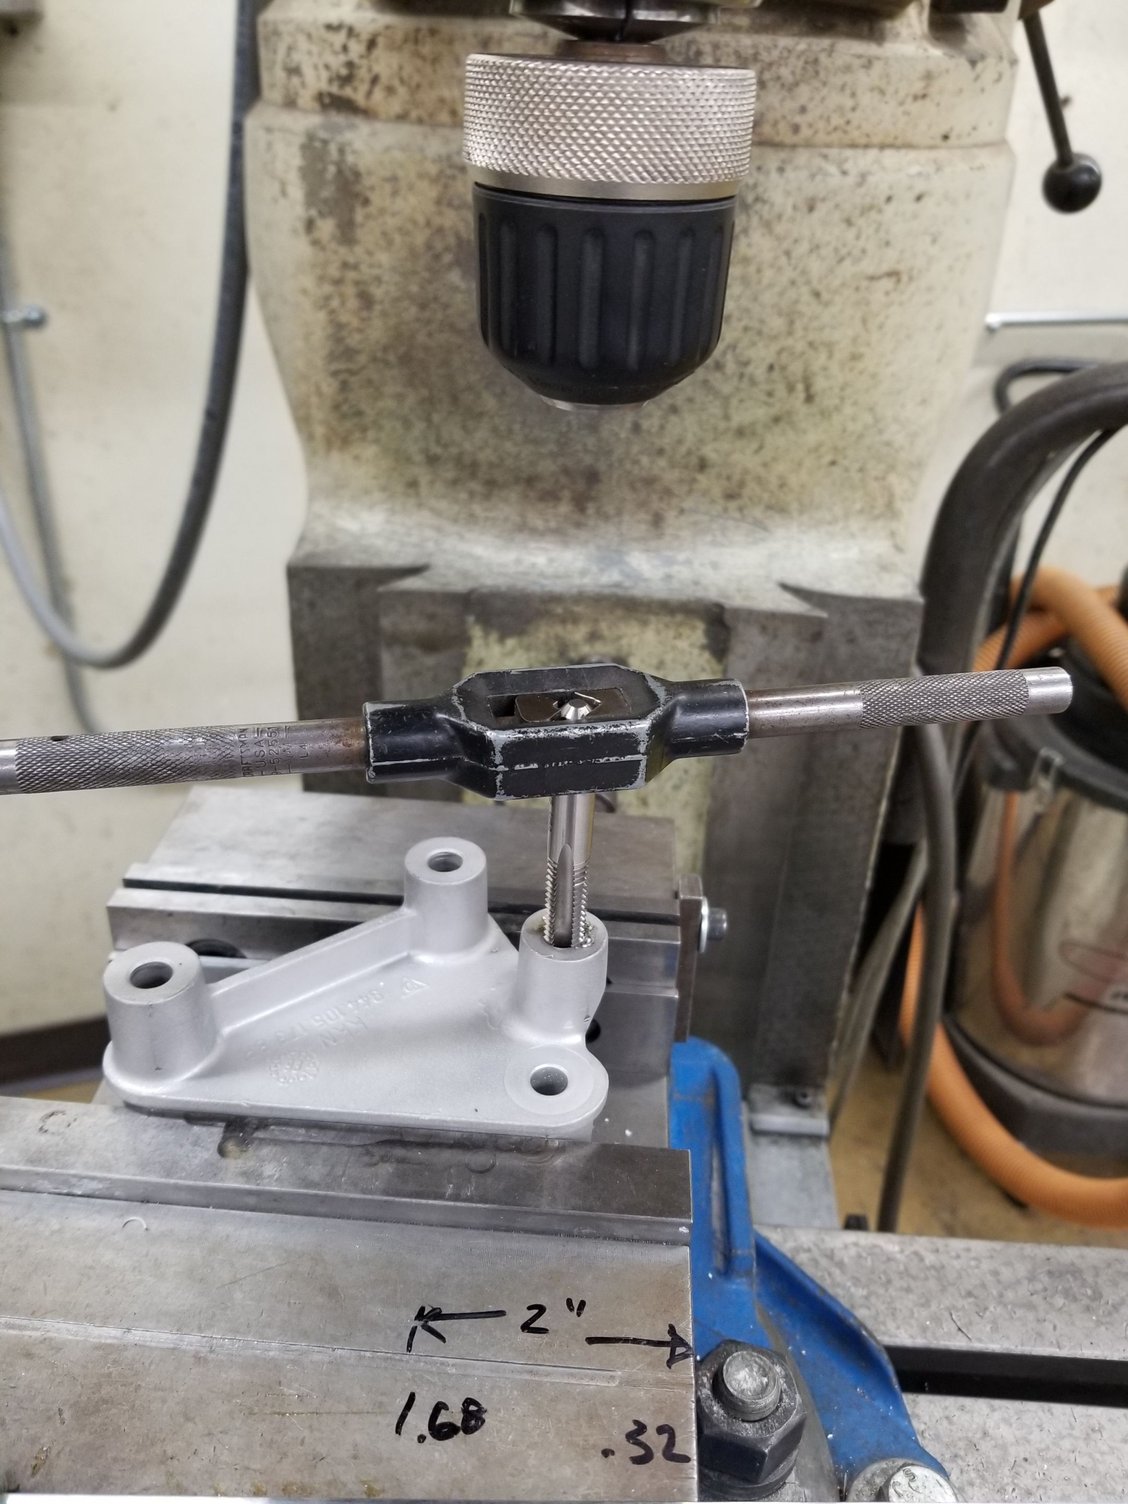
2. Flipped it, indicated hole again, machine-tapped halfway through, and then hand-tapped to finish.
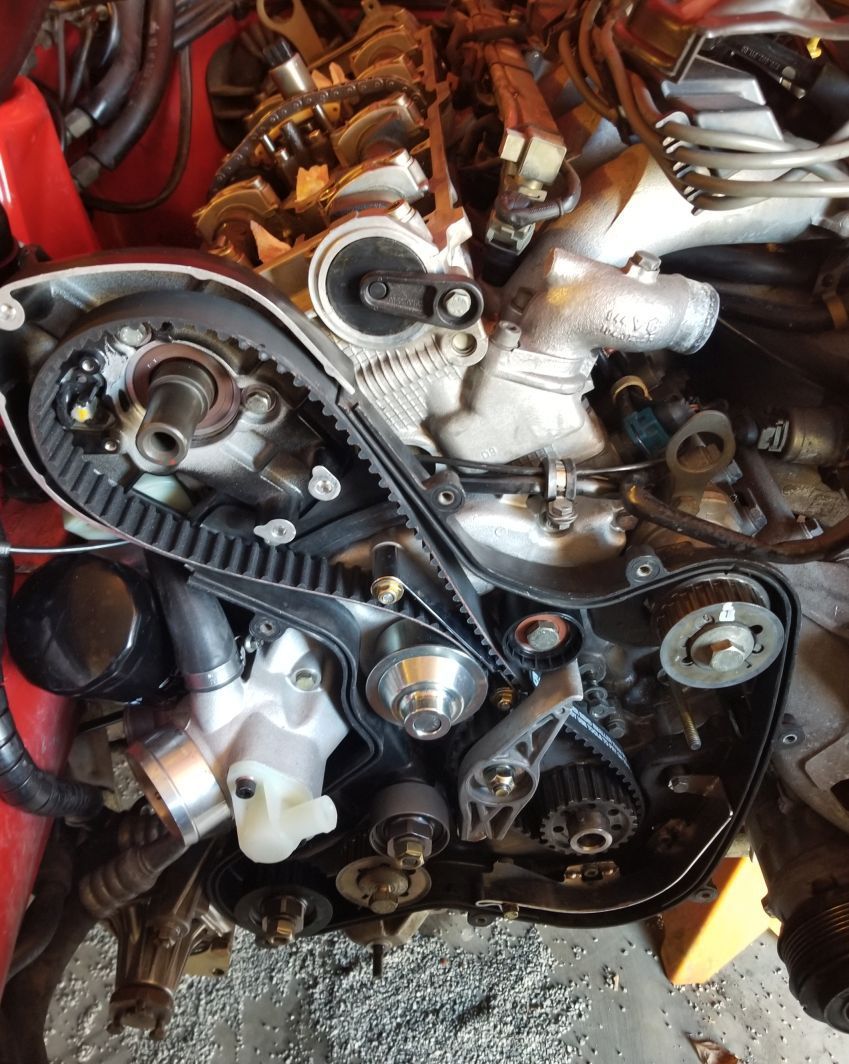
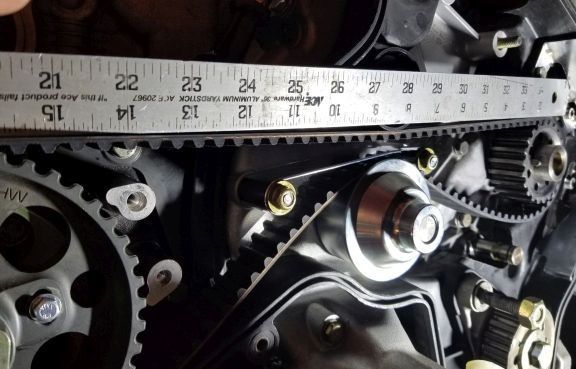
It turns out that the 46mm (new style) TB water pump idler roller #944 105 241 04 is too large with a Uro water pump. I don't know about the others. I just knew that my deflection was too extreme:
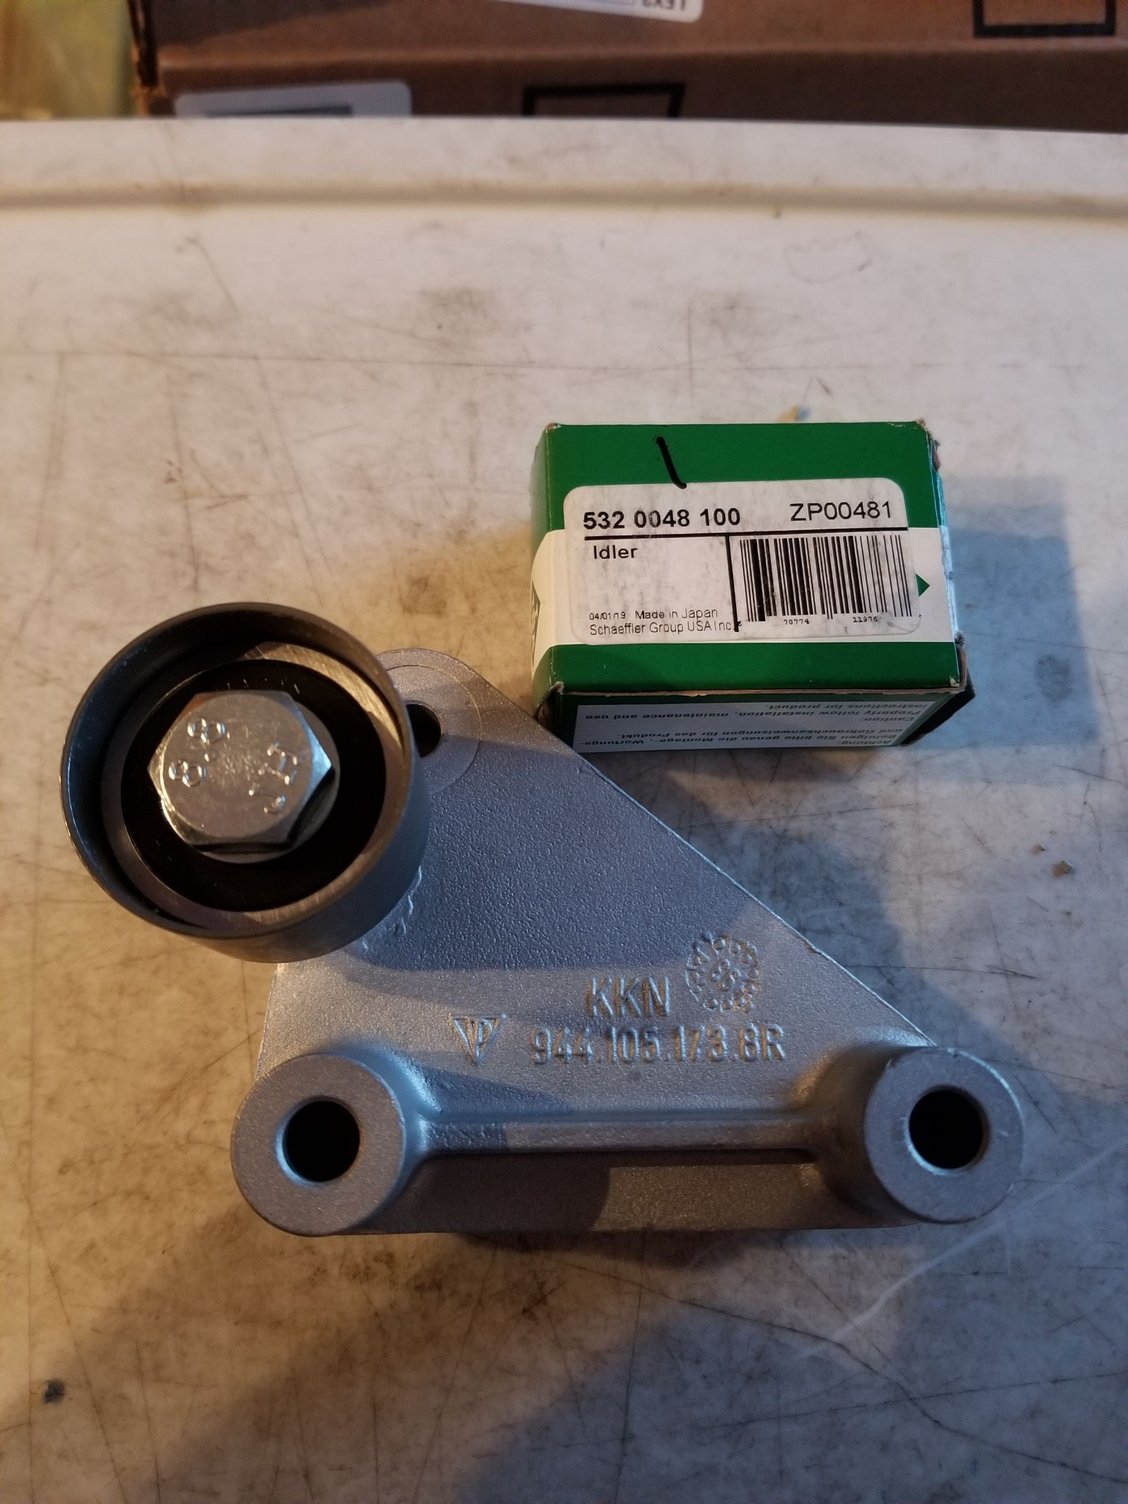
Here is the stumper though - the 32mm (old style) # 944 105 273 02 is too small! Strangely enough, the "additional roller" shown on the PET as #7, and as item #5 at Lindsey Racing 944 105 241 02 is PERFECT. It measures 37mm. I had tapped the tensioner mount to use that roller on and may buy another. The hole I tapped lines up well for use with the "additional roller". Here is what it looks like with the "additional 37mm roller" used as the water pump roller:
What makes you think that the deflection observed with the correct roller (944 105 241 03/04) is abnormal?
The lower roller (944 105 241 02) is a 944 S/S2 thing and it is not clear, to me at least, if it should be there on a 968. Why it is still mentioned somewhat confusingly in PET is perhaps a way of saying that some 968s had it while others did not.
The lower roller on the S/S2 is a pain to get to with the overlapping crank pulley and my guess is that the guard rail on the 968 prevents the timing belt from jumping teeth in the same way that the lower roller was supposed to on the 944 S/S2.
What makes you think that the deflection observed with the correct roller (944 105 241 03/04) is abnormal?
It sure looks straight in the diagrams.
The lower roller (944 105 241 02) is a 944 S/S2 thing and it is not clear, to me at least, if it should be there on a 968. Why it is still mentioned somewhat confusingly in PET is perhaps a way of saying that some 968s had it while others did not.
The lower roller on the S/S2 is a pain to get to with the overlapping crank pulley and my guess is that the guard rail on the 968 prevents the timing belt from jumping teeth in the same way that the lower roller was supposed to on the 944 S/S2.
The guard rail is close to the balance belt and drive pulley but nowhere near the timing belt and drive pulley.
I talked to Mike Lindsey about this. He said he couldn't figure out why they got rid of it but that it probably couldn't hurt to run it. As it turns out, I'm not going to add it. I tapped the hole on position of the existing hole but that would give it about .02" of deflection. If it was at zero or had a little bit of clearance, I'd run it. I wish I'd had a blueprint for the part. I could have spot-bored prior to tapping rather than following the existing hole.
You are right about the guard rail, I got confused. Sorry.
Originally Posted by Z3M&968
The preload with the old Porsche water pump and 46mm roller was close to zero, probably in the range of .01" to .02". Running .150" preload on a plastic idler on the tension side of a belt isn't something I would do. It is an idler roller. At .150" preload it is no longer "idling".
Except the upper roller is not an idler roller. The deflection is normal.
The only idler roller in the whole set up is the one for the balance shaft belt.
You are right about the guard rail, I got confused. Sorry.
Except the upper roller is not an idler roller. The deflection is normal.
The only idler roller in the whole set up is the one for the balance shaft belt.
If it's not an idler, I'm stumped as to what else it would be. I've noticed some images of the 16V show deflection and some of the 8V engine showing no deflection.
I was mistaken about my original deflection. I had balance idler in my head. Looking back through my older photos shows it. Thanks for the heads up. I'll swap it back.
You are welcome.
In the video below one can clearly see how the plastic roller causes the deflection on the main "free" length of the timing belt. It gets very close to the guard rail on the water pump, and this is normal. The video conveniently shows a 968 engine, but this particular roller applies the same deflection on all 8V and 16V engine of the series.
Incidentally, the "16V-only" lower roller used on the 944 S/S2 is not installed on this particular 968 engine.
Thanks Thom. I just swapped it and turned the engine over by hand a few rotations to let it settle. Now I am checking the variocam timing - at 4am! Work isn't until 7am.
 01-03-2020, 12:04 PM