Notices
968 Forum 1992-1995
Sponsored by:
Sponsored by: HBI Auto

Coolant drain? Where?

Thread Tools
 
Search this Thread
 
Old Oct 7, 2017 | 04:37 PM
  #1  
WolfeMacleod's Avatar
WolfeMacleod
Thread Starter
Drifting
20 Year Member
 
Joined: May 2005
Posts: 2,265
Likes: 54
From: Seattle
Default Coolant drain? Where?

I can't find a coolant drain plug on this '94 968. Maybe I'm just blind?

All I can find online is 944 and Turbo drain information.

WTH am I missing? Is it different? Radiator parts diagrams don't even show a drain plug!


Reply
Old Oct 7, 2017 | 04:41 PM
  #2  
WolfeMacleod's Avatar
WolfeMacleod
Thread Starter
Drifting
20 Year Member
 
Joined: May 2005
Posts: 2,265
Likes: 54
From: Seattle
Default

Nevermind. Geeze, I must be blind. Didn't see it because it's black, just like all the other black around it.

You'd think the parts diagram would show it though...
Reply
Old Oct 7, 2017 | 04:48 PM
  #3  
dkdm's Avatar
dkdm
Instructor
 
Joined: Jul 2007
Posts: 134
Likes: 0
From: Troy, IL (East of STL)
Default

You should see a screw plug low on the driver's side of the radiator. It's blue and plastic. That will at least drain the radiator.
Reply
Old Oct 7, 2017 | 04:56 PM
  #4  
dkdm's Avatar
dkdm
Instructor
 
Joined: Jul 2007
Posts: 134
Likes: 0
From: Troy, IL (East of STL)
Default


This might be a better diagram
Reply
Old Oct 7, 2017 | 04:58 PM
  #5  
WolfeMacleod's Avatar
WolfeMacleod
Thread Starter
Drifting
20 Year Member
 
Joined: May 2005
Posts: 2,265
Likes: 54
From: Seattle
Default

Originally Posted by dkdm
You should see a screw plug low on the driver's side of the radiator. It's blue and plastic. That will at least drain the radiator.
Yeah.. mine was black, and the reason I didn't see it easily. Nothing like the plug in my 924S. All drained.

Much better diagram, DK.
Reply
Old Oct 7, 2017 | 07:54 PM
  #6  
Jfrahm's Avatar
Jfrahm
Addict
Rennlist Member

20 Year Member
 
Joined: Mar 2002
Posts: 6,911
Likes: 215
From: Boulder, CO
Default

I just use a wetvac and the upper radiator hose.
Reply
Old Nov 16, 2017 | 07:43 AM
  #7  
LM964's Avatar
LM964
Three Wheelin'
15 Year Member
 
Joined: May 2009
Posts: 1,279
Likes: 135
From: Bucks, Herts, Beds Tri-Border, UK
Default

Have finally completed my coolant drain, flush and refill. I've replayed below the steps I took and tools used with a few images I hope others will find useful. I followed the 968 workshop and service manuals plus other forum posts.

I managed to complete the whole job without the car on stands or wheels off. However, if you have a lift then this would be much easier than lying around on the garage floor!

Tools used:
- Short cross head screwdriver (for the tapping screws fixing the front undertray to the bumper underside).
- 10mm hex socket and ratchet (for the 6mm set screws attaching the rear end of the front undertray to the adjacent undertray and under body).
- 10mm open-ended spanners (for the 6mm set screws and nuts attaching the undtertray sides to the front fender/wing).
- 13mm open-ended spanner (for the radiator plastic drain plug).
- 12mm ring spanner (for the top bleeder screw on the coolant manifold).
- Flat screwdriver or 7mm socket (for water hose clamp).

  1. First off were the 16 tapping screws along the front and side of the undertray (remove the rubber grommet each end of the undertray to access one other screw). Next off the 3 setscrews/bolts rear of undertray followed by the single setscrew/bolt and nut holding each end the undertray side flange to the front wing. Rusting screws needed some prior WD40 before shifting. I also cut the cable tie holding some lower cabling near the radiator drain plug - more spanner room.
  2. Engine warmed up to normal temp with heater temp dial on hot. Large catch trays under the front ready for water that will travel along the underside radiator bracket support. After the engine had cooled some then protective gloves on and drain plug removed slowly. I did make up a plastic shield to help direct the spouting water down into the catch tray.
  3. Coolant expansion tank cap removed slowly and carefully. Then when draining water was down to a minimum I disconnected the coolant hose from the auxiliary plastic flange of the water pump.
  4. Coolant all drained and now to refill. Reverse of the above (apart from the undertray). Then cracked open the bleeder screw atop the coolant manifold [image below].


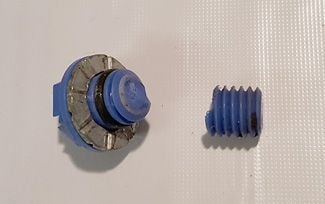
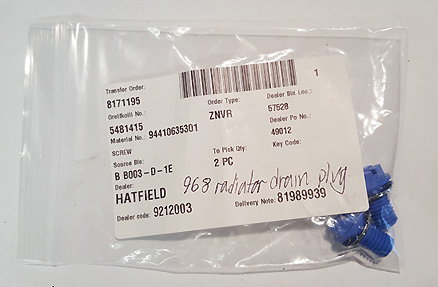
    WARNING - I snapped the drain plug when tightening up! Maybe over time it had become brittle but it snapped pretty easily and the threaded stud was left in the radiator. Ordered two new replacements and used a braddle with 90 degree bend to work out the snapped plastic stud which was not difficult (a bent nail pin would work too). I was very careful not to overtighten the new plug and only tightened enough that the o ring on the plug was fully in and only tightened as far as the washer plus a gentle quarter turn. The tightening torque for the plug is stated at 4ftlb, which is nothing and not even an increment on any of the small torque wrenches I have!


  5. I refilled with plain soft water (no coolant/anti-freeze) - I wanted to fully flush through all old coolant. Do not fill expansion tank up to max mark (avoids over expansion on warm up) - only half fill tank and until water flows from bleeder screw then loosely close the bleeder screw.
  6. Warm up engine until radiator fan comes on then off. Keep an eye on bleeder screw and when warmed up open bleeder screw further until no more bubbles escape then tighten. The bleeder screw aluminium washer may be worn or past its best but it will/should seal - do not overtighten.
    ALERT - Before starting the engine ensure the coolant hose that was disconnected from the plastic flange is mounted back in its hose clip/support further along its length and has not been dislodged to overhang the radiator fan shroud - the fan will when on will cut into the hose!
  7. I repeated the drain steps above once the engine had cooled a bit. The flushed water still showed evidence of previous (pink) coolant and was cloudy. I performed a second water-only refill, warm up and drain. This time the flushed water was much clearer with no sign of previous coolant.
  8. I decided to go for a water/coolant mix that gives @ -25oC protection (despite being in UK and garaged every night). I used 3 litres of Comma Xstream G48 mixed in with nearly 5 litres of de-ionised water.
  9. Nice long spirited hard drive to achieve max water temps where possible. All good, no leaks from anywhere. Once cooled down I topped up to the expansion tank max mark.
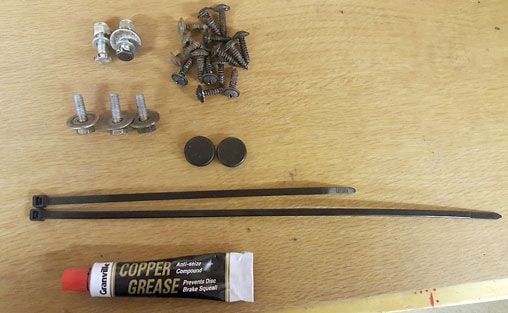
  10. Undertray back on having replaced rusted screws/bolts etc and used copper grease on all threads - ready for next coolant change.


Porsche 968 coolant bleeder screw.
Porsche 968 coolant radiator drain screw.
Reply
Old Nov 16, 2017 | 08:48 AM
  #8  
RajDatta's Avatar
RajDatta
Rennlist Member
20 Year Member
 
Joined: Feb 2003
Posts: 9,733
Likes: 24
From: NJ
Default

Very nicely written. Thx for sharing.
Reply
Rennlist Stories

The Best Porsche Posts for Porsche Enthusiasts

story-0

Porsche Reveals Coupe Variant of the Electric Cayenne With a Fresh Look

 Verdad Gallardo
story-1

10 Porsche Colors That Have More Personality Than Most People

 Verdad Gallardo
story-2

Guntherwerks' Final Speedster Creation Is the Ultimate Porsche Restomod

 Verdad Gallardo
story-3

10 Reasons I Hate Going to the Porsche Dealership (& the 1 Reason I Stay)

 Joe Kucinski
story-4

Porsche Shakes Up The Nürburgring Lap Record Table Once Again

 Verdad Gallardo
story-5

6 Ways the Porsche 911 GT3 S/C Redefines Performance

 Joe Kucinski
story-6

10 Wildest Homologation Specials Porsche Ever Sold

 Verdad Gallardo
story-7

Super Rare RUF BTR III Comes Out of Hibernation, Looking For a New Home

 Verdad Gallardo
story-8

10 Porsche Opinions That Can Start a Fight

 Joe Kucinski
story-9

One-Off Porsche 911 S/T Takes Inspiration From Famous '70s Race Car

 Verdad Gallardo
Old Nov 16, 2017 | 09:15 AM
  #9  
LM964's Avatar
LM964
Three Wheelin'
15 Year Member
 
Joined: May 2009
Posts: 1,279
Likes: 135
From: Bucks, Herts, Beds Tri-Border, UK
Default

Thanks Raj...
Reply
Old Nov 16, 2017 | 02:25 PM
  #10  
Cloud9...68's Avatar
Cloud9...68
Burning Brakes
10 Year Member
 
Joined: Mar 2011
Posts: 1,243
Likes: 31
From: Lafayette, CA
Default

Originally Posted by Jfrahm
I just use a wetvac and the upper radiator hose.
Interesting idea - I'd never heard of anyone doing that. Do you drain the coolant from the radiator first, and then use the wet vac to pull out what's left in the engine, or do you use the wet vac for the whole thing?
Reply
Old Nov 24, 2017 | 05:45 PM
  #11  
Jfrahm's Avatar
Jfrahm
Addict
Rennlist Member

20 Year Member
 
Joined: Mar 2002
Posts: 6,911
Likes: 215
From: Boulder, CO
Default

Pretty much the whole thing. I vacuum out the coolant tank with the bleeder open and then pull the upper hose and go at that. Gets the wet vac nice and clean.
Reply
Old Nov 25, 2017 | 12:27 PM
  #12  
thomasmryan's Avatar
thomasmryan
Drifting
 
Joined: Feb 2014
Posts: 2,585
Likes: 124
From: smoky mountains
Default

I am lazy. I lift the passenger side and let the coolant trickle down the ridge in the batwing overnight into a pan. zero mess with the drain valve opened a couple turns.
Reply
Old Nov 27, 2017 | 06:53 PM
  #13  
V2Rocket's Avatar
V2Rocket
Rainman
Rennlist Member
15 Year Member
 
Joined: Jan 2007
Posts: 45,844
Likes: 784
From: Nashville, TN
Default

part of the problem is that the drawing below is from a 928...LOL

Originally Posted by WolfeMacleod
I can't find a coolant drain plug on this '94 968. Maybe I'm just blind?

All I can find online is 944 and Turbo drain information.

WTH am I missing? Is it different? Radiator parts diagrams don't even show a drain plug!


Reply
Old Mar 28, 2018 | 06:53 PM
  #14  
Motosport's Avatar
Motosport
Racer
15 Year Member
 
Joined: Nov 2010
Posts: 327
Likes: 46
From: Denmark
Default

Just reviving this thread as I have been replacing the coolant in my car and run into a little problem. I removed the blue plastic drain plug from the radiator during the process, but when I installed the plug again I broke it like LM964 in his post. When I tried to remove the remaining bit from the radiator hole I ended up pushing it inside the radiator and its impossible to get out again.

So my question is, will the remaining bit of the plug do any harm at the bottom of the radiator if I just install a new plug and refill with coolant, or do I need to install a new radiator.?

Alex.
Reply
Old Mar 29, 2018 | 08:03 AM
  #15  
LM964's Avatar
LM964
Three Wheelin'
15 Year Member
 
Joined: May 2009
Posts: 1,279
Likes: 135
From: Bucks, Herts, Beds Tri-Border, UK
Default

Bit of bad luck there Alex

Good question too. As it's a tight cooling matrix in the rad then in theory you might get away with it (it won't/shouldn't move around much). However, it may reduce coolant flow, purely as an obstacal. Is it actuall all the in and through the other side of the threaded hole?

Marcus
Reply


All times are GMT -3. The time now is 08:36 PM.

story-0
Porsche Reveals Coupe Variant of the Electric Cayenne With a Fresh Look

Slideshow: Porsche's latest electric Cayenne Coupe blends dramatic styling with supercar acceleration, turning the brand's midsize SUV into a 1,139-horsepower flagship.

By Verdad Gallardo | 2026-04-27 19:39:30


VIEW MORE
story-1
10 Porsche Colors That Have More Personality Than Most People

Slideshow: Porsche's wildest paint colors aren't just shades-they're full-blown personalities on four wheels.

By Verdad Gallardo | 2026-04-27 19:38:13


VIEW MORE
story-2
Guntherwerks' Final Speedster Creation Is the Ultimate Porsche Restomod

Slideshow: The last of the Speedsters doesn't just close a chapter, it makes quite the bold, air-cooled statement.

By Verdad Gallardo | 2026-04-22 17:55:04


VIEW MORE
story-3
10 Reasons I Hate Going to the Porsche Dealership (& the 1 Reason I Stay)

Slideshow: Going to a Porsche dealership may not be the dream experience you expect it to be and these are the reasons why.

By Joe Kucinski | 2026-04-21 13:54:19


VIEW MORE
story-4
Porsche Shakes Up The Nürburgring Lap Record Table Once Again

Slideshow: Porsche just proved-again-that precision engineering can outrun brute force at the Nürburgring.

By Verdad Gallardo | 2026-04-18 20:27:02


VIEW MORE
story-5
6 Ways the Porsche 911 GT3 S/C Redefines Performance

Slideshow: Six reasons why you will love the Porsche 911 GT3 S/C and 1 reason you will hate it.

By Joe Kucinski | 2026-04-14 10:21:39


VIEW MORE
story-6
10 Wildest Homologation Specials Porsche Ever Sold

Slideshow: Some of the most desirable Porsche models are those that were sold to the public solely for homologation purposes.

By Verdad Gallardo | 2026-04-08 09:54:26


VIEW MORE
story-7
Super Rare RUF BTR III Comes Out of Hibernation, Looking For a New Home

Slideshow: The lone BTR III-spec Targa features rare RUF engineering with a 430-hp turbo flat-six and fewer than 30 miles since its rebuild.

By Verdad Gallardo | 2026-04-06 20:03:25


VIEW MORE
story-8
10 Porsche Opinions That Can Start a Fight

Slideshow: If you want to start a debate with a Porsche friend, these 10 opinions are a great way to get started.

By Joe Kucinski | 2026-04-02 16:53:02


VIEW MORE
story-9
One-Off Porsche 911 S/T Takes Inspiration From Famous '70s Race Car

Slideshow: A one-off Porsche 911 S/T created through the Sonderwunsch program pays tribute to a little-known 1970s race car from the Camel GT Challenge.

By Verdad Gallardo | 2026-03-30 19:44:11


VIEW MORE