

TJ's Intro, Build Thread, & Questions

 05-26-2016, 10:46 AM
#17
Rennlist Member
Thread Starter
Thanks Poli.
I found the 964 PET in a PDF online, its been absolutely invaluable as far as assembly and part numbers go. Considering asking someone like Staples or Office Depot how much it would cost to print the 250 pages, laminated, and bind them. Probably a lot less than buying a hard copy PET...
I found the 964 PET in a PDF online, its been absolutely invaluable as far as assembly and part numbers go. Considering asking someone like Staples or Office Depot how much it would cost to print the 250 pages, laminated, and bind them. Probably a lot less than buying a hard copy PET...
08-12-2016, 02:54 PM
#18
Rennlist Member
Thread Starter
Okay, time to get this thread up to speed. A lot have hours have gone in since the last update, but few of them very exciting. Most were in the form of research or cleaning.
The motor was due June 4th and I still don't have an ETA, but thats okay. More time to prep the car and work on the rear end without the motor in the way.
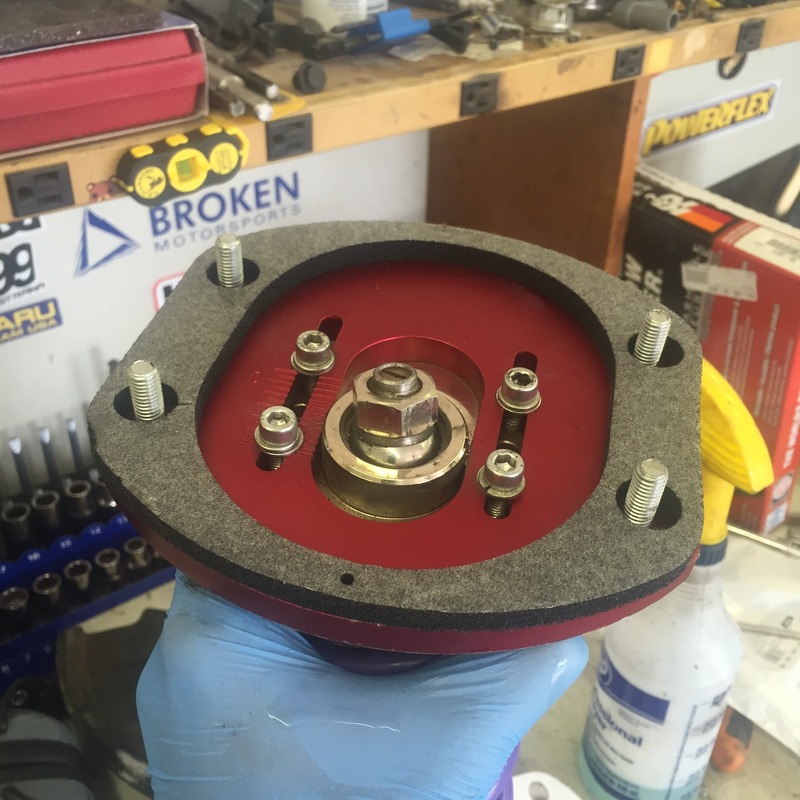
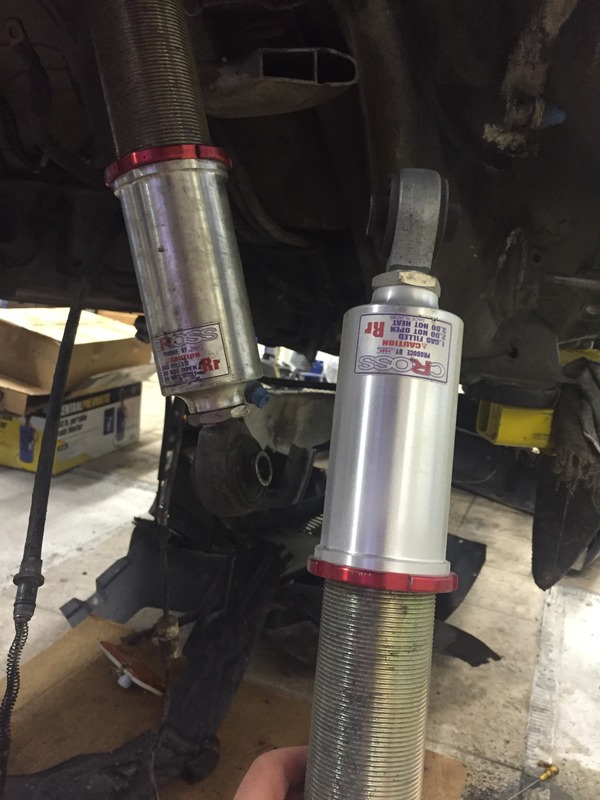
Disassembled the camber plates. Cleaned up the coilovers, and put new gaskets on top.
Pulled the entire oiling system out for a makeover. This was less than fun, very messy, but a good learning experience to get an idea of how the system works.
The tank and cooler got sent off to be cleaned and pressure tested.
Tank in:
Tank, thermostat, oil filter housing and lines all out.
First round of cleaning.
The floor after just that one fender well.
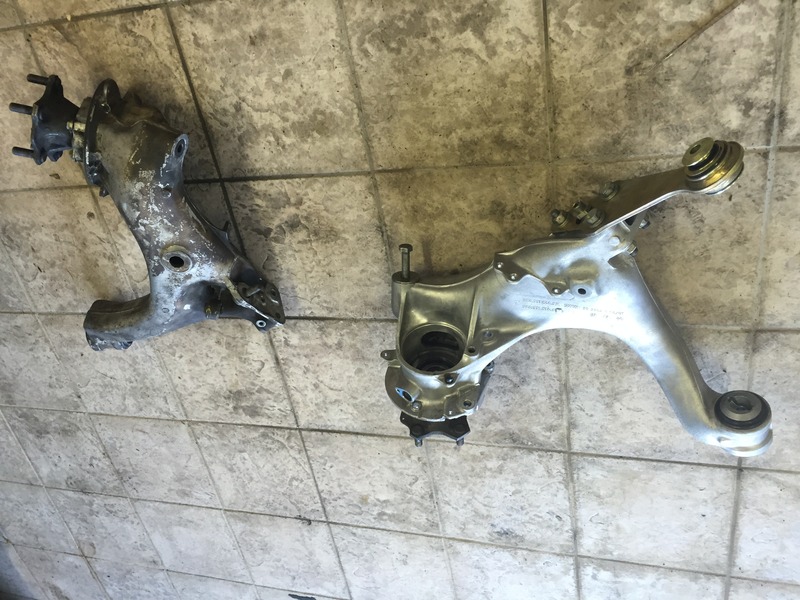
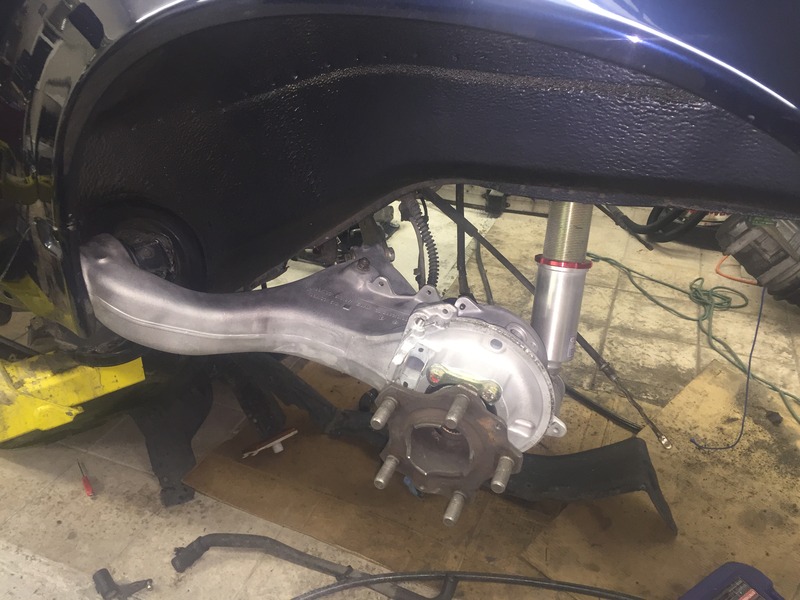
Moving to the front. I mocked up one corner. Still needs the new brake lines installed and the tie rods reattached before everything is torqued.
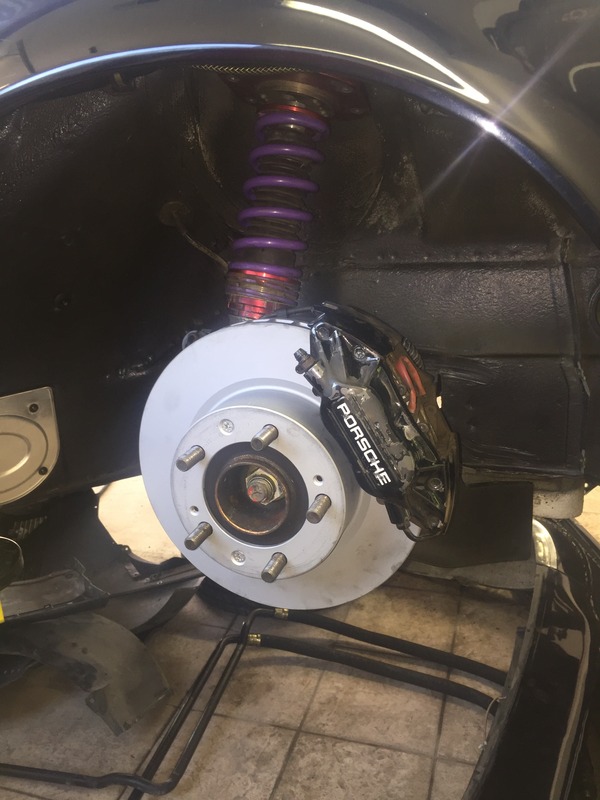
The calipers I cleaned up quickly, but ultimately, I am going to do an entire front end restoration hopefully this winter which should include all new bushings, tie rod ends, and funds pending, a 993 conversion: struts, subframe, steering rack, EVO/RS carriers, and brakes. So I didn't bother getting the calipers rebuilt or repainted. If they leak, I will do seals ASAP, but they showed no signs of leakage and the boots looked okay.
The motor was due June 4th and I still don't have an ETA, but thats okay. More time to prep the car and work on the rear end without the motor in the way.
Disassembled the camber plates. Cleaned up the coilovers, and put new gaskets on top.
Pulled the entire oiling system out for a makeover. This was less than fun, very messy, but a good learning experience to get an idea of how the system works.
The tank and cooler got sent off to be cleaned and pressure tested.
Tank in:
Tank, thermostat, oil filter housing and lines all out.
First round of cleaning.
The floor after just that one fender well.
Moving to the front. I mocked up one corner. Still needs the new brake lines installed and the tie rods reattached before everything is torqued.
The calipers I cleaned up quickly, but ultimately, I am going to do an entire front end restoration hopefully this winter which should include all new bushings, tie rod ends, and funds pending, a 993 conversion: struts, subframe, steering rack, EVO/RS carriers, and brakes. So I didn't bother getting the calipers rebuilt or repainted. If they leak, I will do seals ASAP, but they showed no signs of leakage and the boots looked okay.
08-12-2016, 03:04 PM
#19
Rennlist Member
Thread Starter
Back to the rear end.
Initial plan was to do wheel bearings and ERP spring plate bushings along with some cleanup.
Took a lot of notes and added everything to my spreadsheet plan. Printed out a lot of PET pages.
I went back and forth on buying the $700 kit to do the wheel bearings on the car, buying a Harbor Freight shop press, or taking the arms to a friends shop to have them pressed in.
In the end, I decided first I would pull the arms and add Powerflex control arm bushings for the rear, as it was the only bushing left original on the back and "why not."
Mistake #1: I pulled the old bushings out of the trailing arms before reading the Powerflex instructions, and I removed the soft metal trim ring. You need to leave these in for PFlex bushings, UNLIKE the ERP kit (which is twice the price.)
Oh well, returned the PFlex bushings, ordered EPR's to the tune of $750. Ouch. Hope it's worth it. I also ordered a full rebuild kit for the 2 thermostat to oil cooler, and the thermostat to oil filter housing lines form their oil line rebuild page. They are at the shop getting rebuilt now. Fingers crossed.
The old spring plate bushings that inspired the first step down the slippery slope.
08-12-2016, 03:11 PM
#20
Rennlist Member
Thread Starter
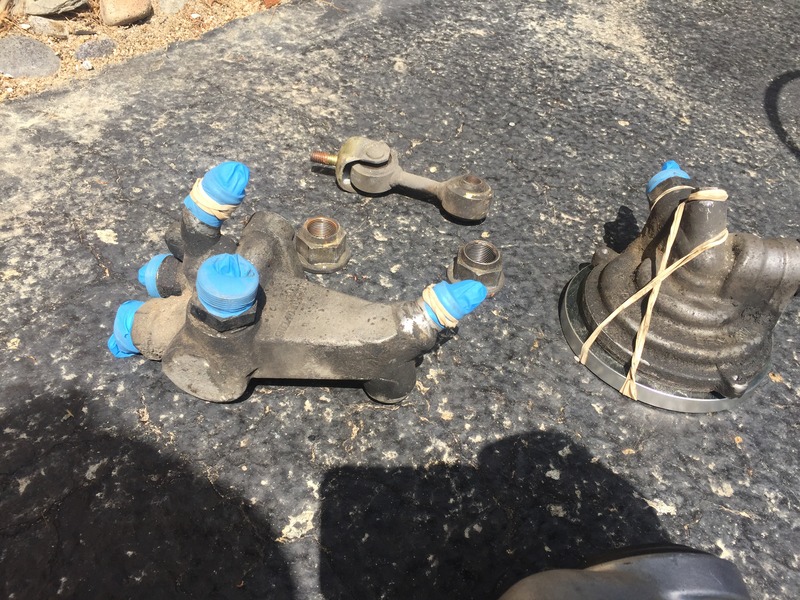
One control arm, cleaned up with a new OEM Porsche wheel bearing and ERP trailing arm bushings.
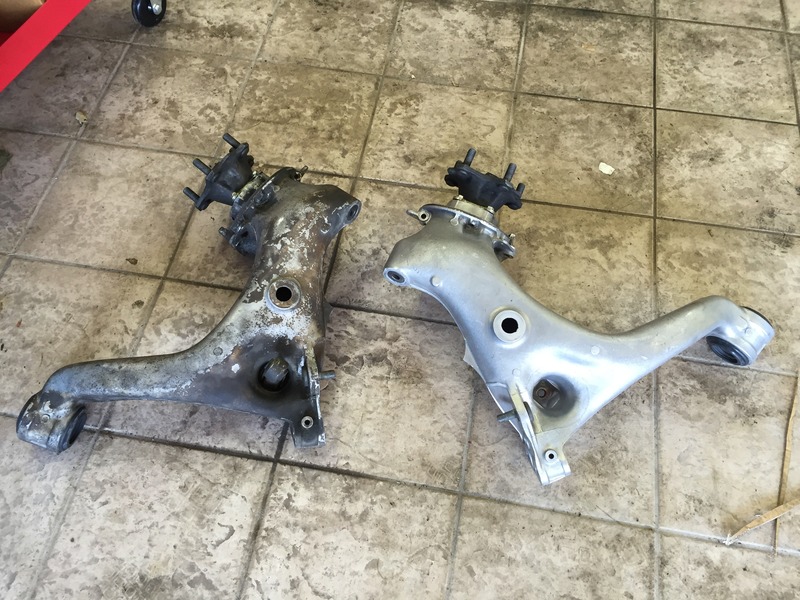
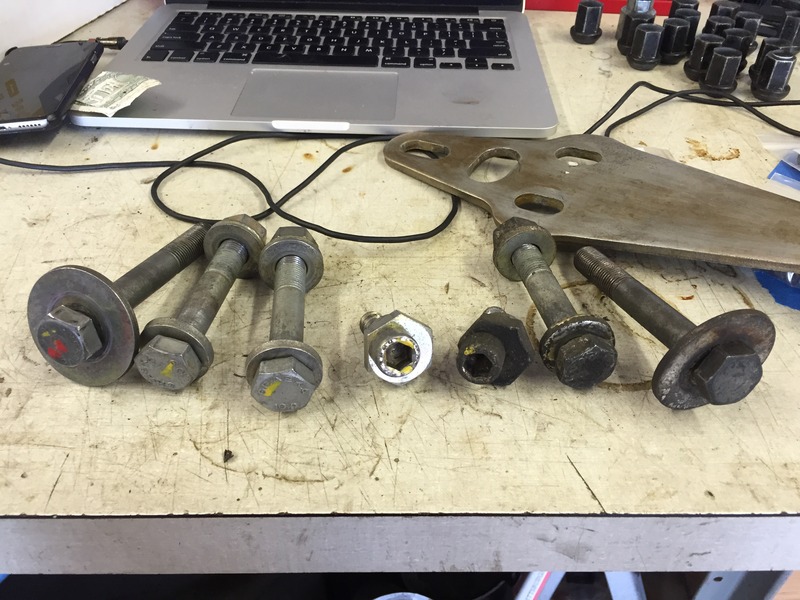
Cleaning up the spring plate hardware. As you will see from my notes in the post prior, I priced out buying all new hardware, and it was not happening. I ended up cleaning up the original hardware and it came out quite nice.
(cleaned v as it came out)
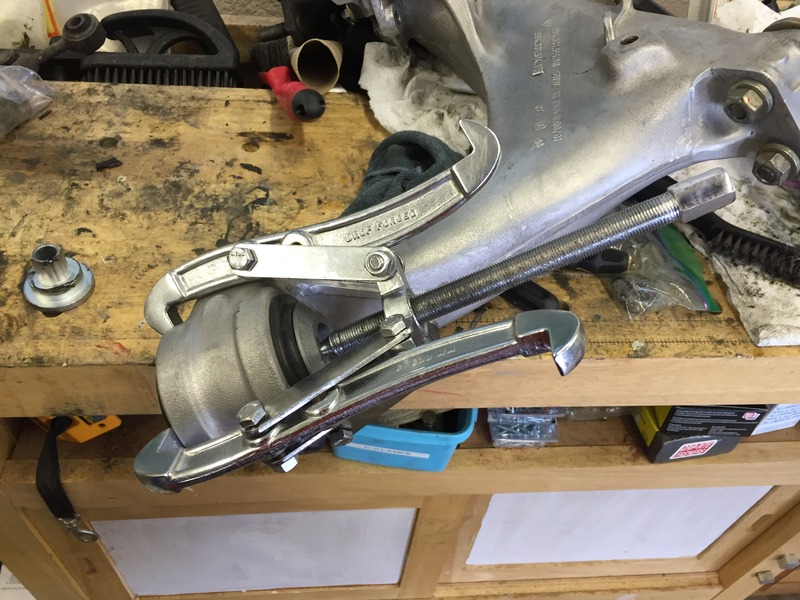
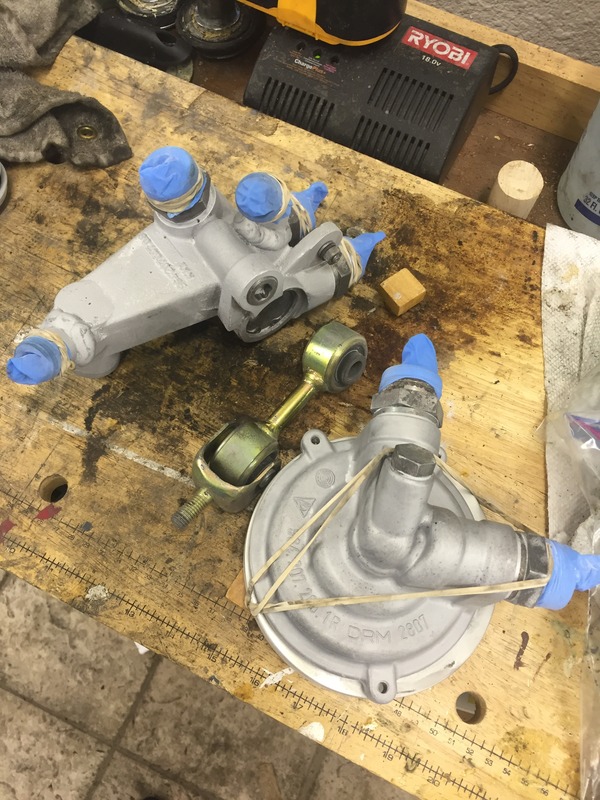
Pressing the center piece into the ERP bushing. The rubber sections were pressed using the provided cups by ERP on my buddies shop press at the same time the spring plates and wheel bearings were done. I did the center sections at home with the 3 arm, it was quite easy.
One fully assembled control arm and spring plate with all new bushings and bearings. The other has everything pressed in, but I was sitting there staring at it thinking about how long I spent wire brushing the clean one, and the fact that I still had to finish the trans case, and I said "F THIS!"
More to come...
Cleaning up the spring plate hardware. As you will see from my notes in the post prior, I priced out buying all new hardware, and it was not happening. I ended up cleaning up the original hardware and it came out quite nice.
(cleaned v as it came out)
Pressing the center piece into the ERP bushing. The rubber sections were pressed using the provided cups by ERP on my buddies shop press at the same time the spring plates and wheel bearings were done. I did the center sections at home with the 3 arm, it was quite easy.
One fully assembled control arm and spring plate with all new bushings and bearings. The other has everything pressed in, but I was sitting there staring at it thinking about how long I spent wire brushing the clean one, and the fact that I still had to finish the trans case, and I said "F THIS!"
More to come...
08-12-2016, 03:19 PM
#21
Rennlist Member
Thread Starter
I had been on the fence about investing in air tools. I wanted to wait until I get a new shop set up, rather than further deface this beautiful garage, but I also really wanted to soda blast the control arms, trans case, and some other little parts.
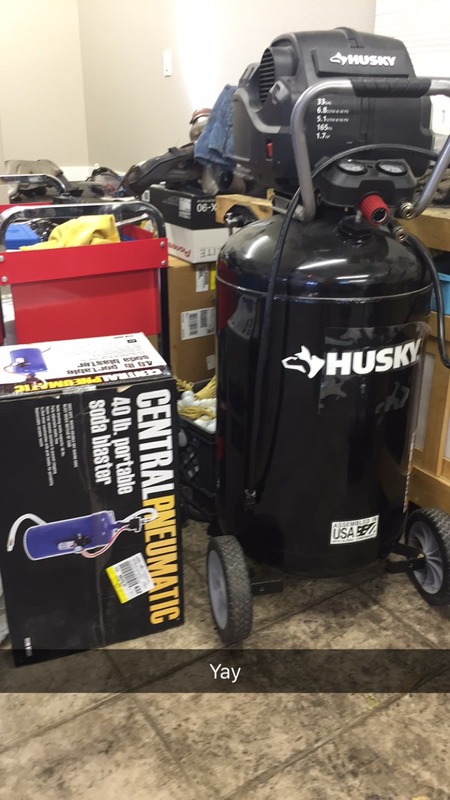
I went to Home Depot to look into renting an air compressor. $50 for the day, and I would probably need it more than one day. No thanks, so I walked over to the tool section.
I was set on buying a 20gal Husky "quiet" model, which would be a little small for air tools, but very portable on wheels and good for sand blasting, filling tires, and little jobs. Next to it was a 33gal similar model with no price tag. Long story short, it was a discontinued product that retailed for $299. The floor model I was looking at was the only one they had in the store, with no box to go with it. After a bit of patience, I walked out of there with it for $75 with the OEM 2 year warranty and a Home Depot 3 year warranty for another $12
Drove straight to Harbor Freight, and now I'm headed to the garage to get this kit set up.
NO MORE WIRE BRUSHES!
08-16-2016, 11:35 PM
#22
Rennlist Member
Thread Starter
Well after playing with the media regulator a bit this thing has been worth every penny. It's definitely not the sturdiest product and it uses more soda than I expected. But it's very simple and incredibly effective.
The compressor is keeping up without issue also which is nice.
Before a quick session on the trans. Ran out of daylight and patience, but made awesome progress in just a few minutes.
After. The top trailing arm is the one I did by hand with solvents and brushes. The lower one is the dirty one from the prior post after about $5-$8 worth of media. The trans took $12-$15 worth.
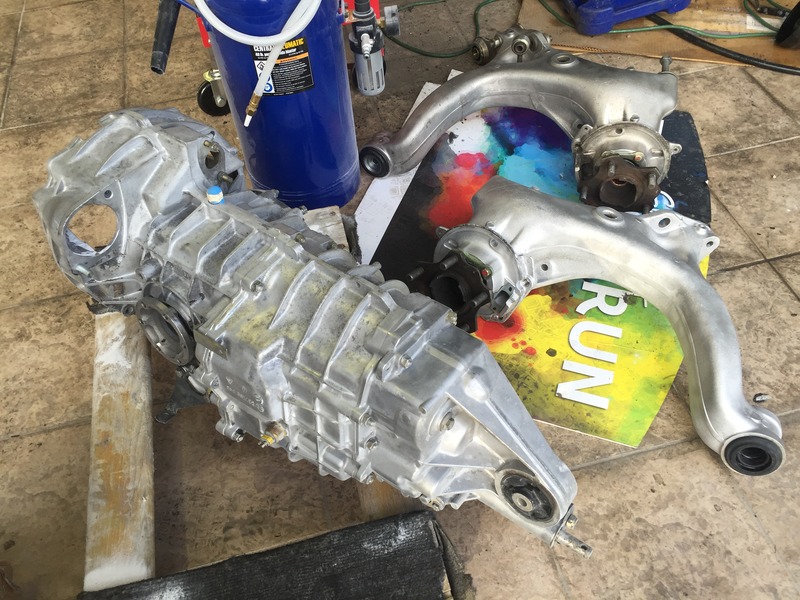
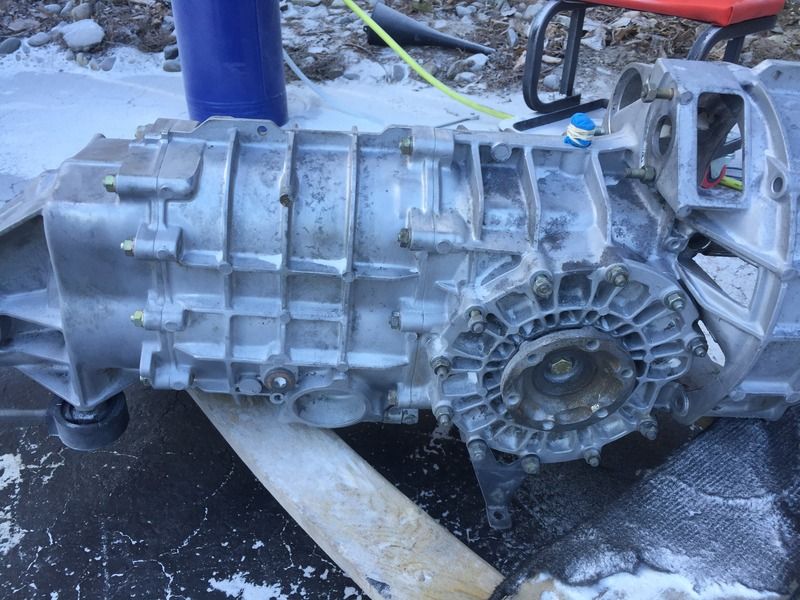
I'll do the other arm, the rest of the trans, and a few other little bits next go around.
One thing I noticed... The soda is great at cleaning up dirty hardware without removing the yellow zinc plating. Brushes, particularly wire brushes, strip it off quickly.
The compressor is keeping up without issue also which is nice.
Before a quick session on the trans. Ran out of daylight and patience, but made awesome progress in just a few minutes.
After. The top trailing arm is the one I did by hand with solvents and brushes. The lower one is the dirty one from the prior post after about $5-$8 worth of media. The trans took $12-$15 worth.
I'll do the other arm, the rest of the trans, and a few other little bits next go around.
One thing I noticed... The soda is great at cleaning up dirty hardware without removing the yellow zinc plating. Brushes, particularly wire brushes, strip it off quickly.
08-25-2016, 08:23 PM
#23
Rennlist Member
Thread Starter
I'm really starting to love this soda blaster... It can't be exaggerated how well it cleans up zinc plated parts without removing the plating. I didn't buy a "basting box" because I didn't foresee using it for many small parts that would fit inside a box that my garage could accommodate. But now I am considering grabbing one for using on hardware and other small parts.
Yesterday I ran through the rest of my 50lb bag of media.
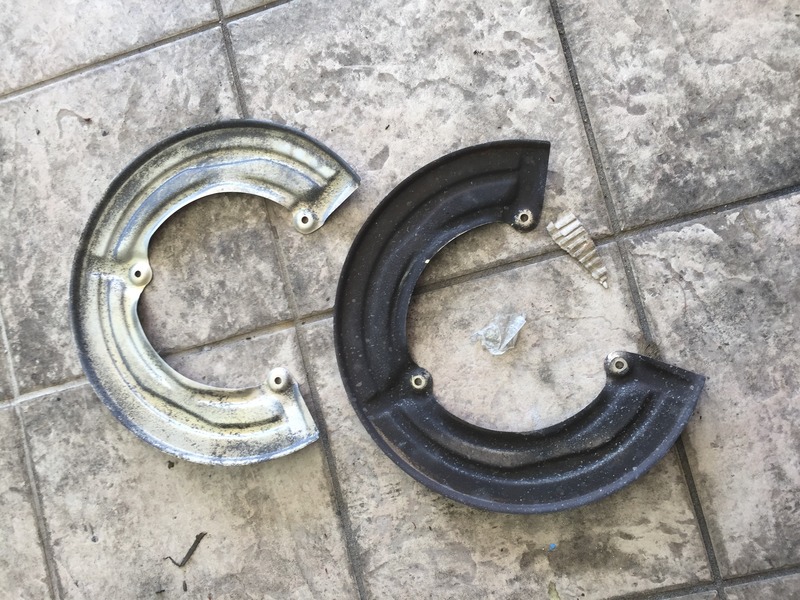
Second trailing arm, thermostat housing, oil filter housing, some hardware, and I started on the dust plates.
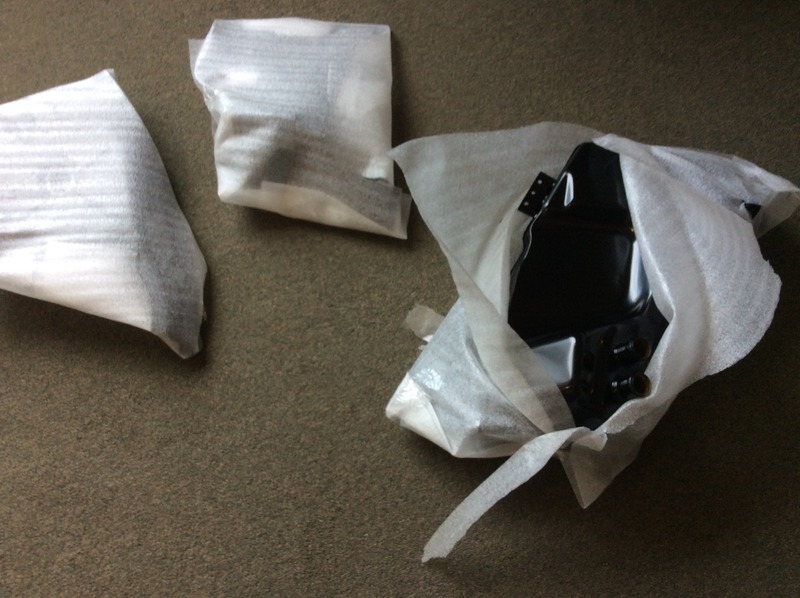
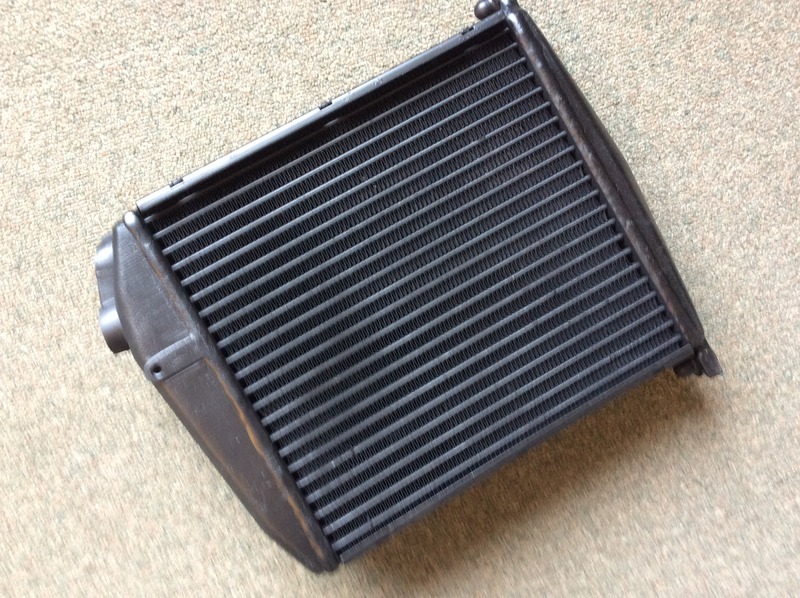
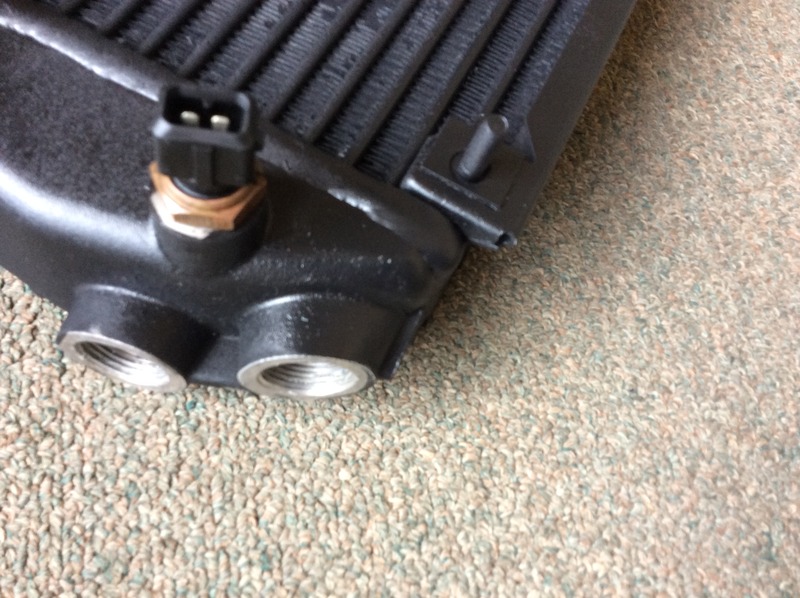
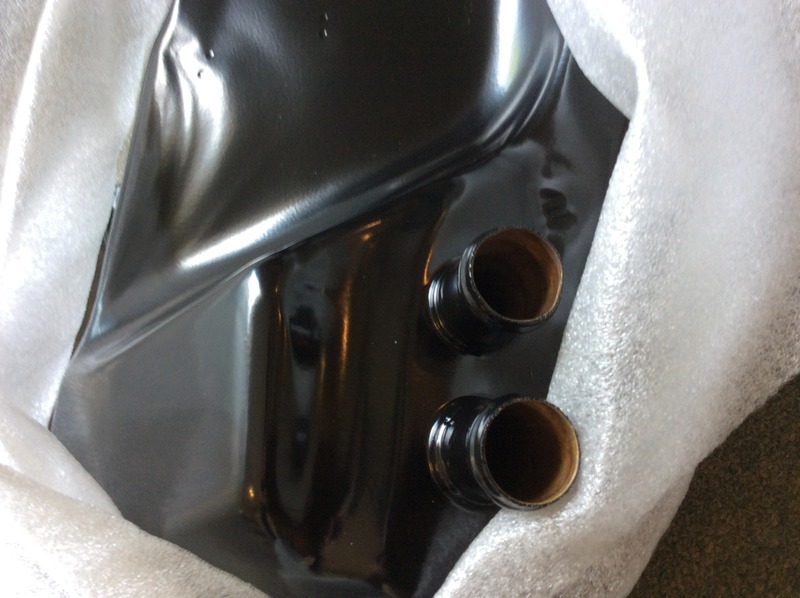
Finally some news that doesn't involve the soda! The oil tank and oil cooler arrived back from being cleaned, pressure tested, and refinished. The shop sent me these pictures. I'll be picking them up tomorrow along with the rebuilt oil lines to put back in the car.
The oil filter housing and thermostat are heading to a sonic cleaner to insure no media is left inside for the fresh motor.
The tstat will get broken down before and rebuilt with fresh parts when it returns.
Yesterday I ran through the rest of my 50lb bag of media.
Second trailing arm, thermostat housing, oil filter housing, some hardware, and I started on the dust plates.
Finally some news that doesn't involve the soda! The oil tank and oil cooler arrived back from being cleaned, pressure tested, and refinished. The shop sent me these pictures. I'll be picking them up tomorrow along with the rebuilt oil lines to put back in the car.
The oil filter housing and thermostat are heading to a sonic cleaner to insure no media is left inside for the fresh motor.
The tstat will get broken down before and rebuilt with fresh parts when it returns.
08-25-2016, 09:04 PM
#24
Rennlist Member
Thread Starter
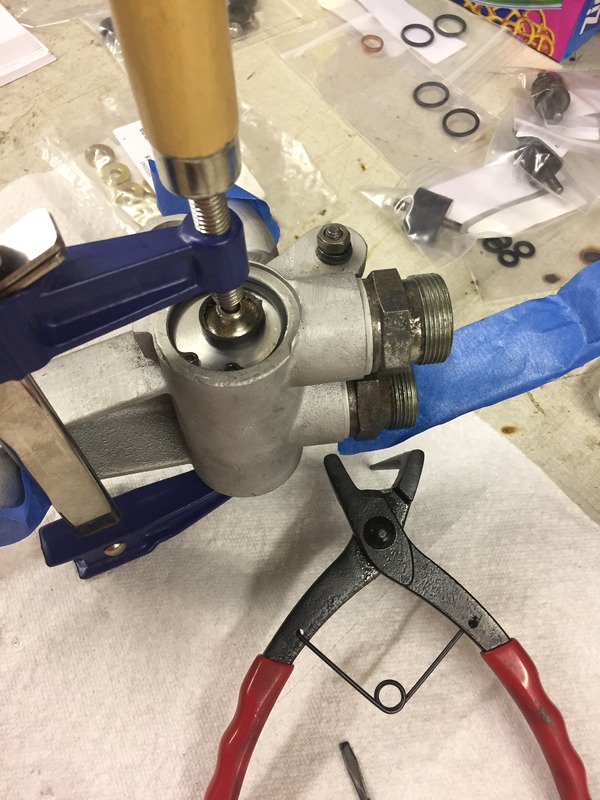
Well, as I sat and complied that last post and started outlining my next parts order. I figured if I had enough time to type all that, I have enough time to break down the tstat and see how it looks.
The sealing plate came out with a tap on the wooden bench. Fortunately I didn't have to drill it out like others have mentioned doing in the past. The ball seat plug, on the other hand, would not give. I put it in the wooden vice, used a new/clean 10mm allen, a breaker bar, and breaker pipe, and finally a little heat. It didn't budge. I guess it will stay in when it goes through the cleaner, as I don't want to damage the housing.
Bonus pic, I hit my old coilovers with the soda blaster because why not? Before/after below!
08-26-2016, 05:50 AM
#25

All your refinished parts look lovely. Makes me feel I need to try much harder with mine! Any ideas about what you'll do with the brake guards? I think the plain alloy finish looks rather nice but how to keep it shiny? I was thinking of high temp clear lacquer rather than back to black paint.
Z
Z
08-26-2016, 11:58 AM
#26
Rennlist Member
Thread Starter
All your refinished parts look lovely. Makes me feel I need to try much harder with mine! Any ideas about what you'll do with the brake guards? I think the plain alloy finish looks rather nice but how to keep it shiny? I was thinking of high temp clear lacquer rather than back to black paint.
Z
Z
08-26-2016, 12:51 PM
#27
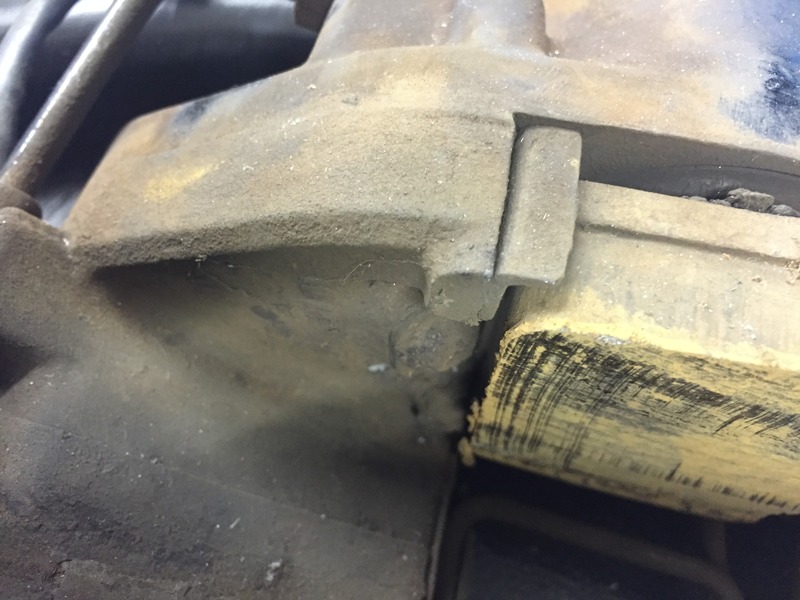
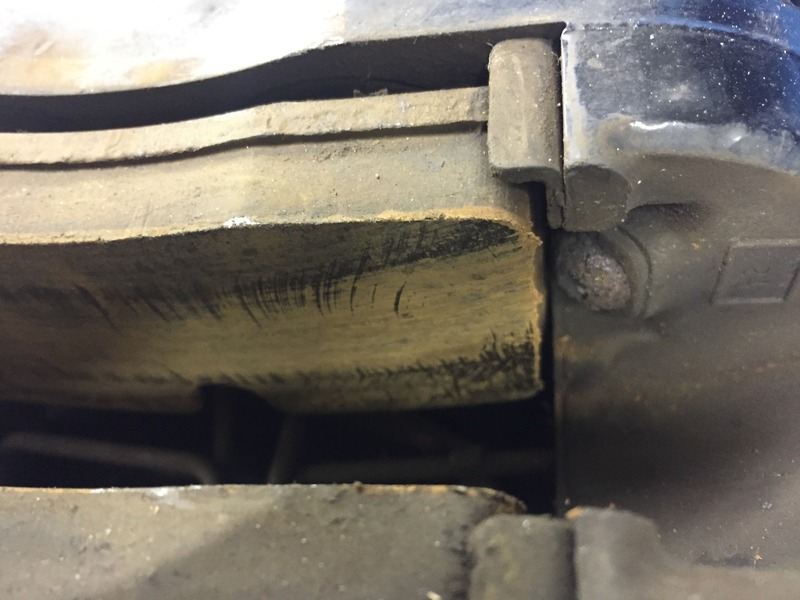
Incidentally, even if you're just doing maintenance on the current brakes, take a good look for corrosion lifting the pad guide plates. You probably know the issue better than I but a small amount of corrosion can cause pads to bind with a consequent knock on effect to discs etc. (Ask me how I know). It's reasonably easy to deal with if not too severe and imho worth the trouble even if you're upgrading.
Z
Z
10-05-2016, 08:09 PM
#28
Rennlist Member
Thread Starter
Time for an update! A lot of little things have happened over the past few weeks. Some may be out of order by a few days, but the majority of it is below.
Prepping the oil tank to go back into it's home. I sent it off with the pressure relief valve and it came back without one. That held me up a week while I ordered a new replacement. I cleaned up the level sensor and now that I know how easy it is to replace, I'm going to install the old one to see if it works before dropping a couple hundred on a new unit.
Ready to go home.
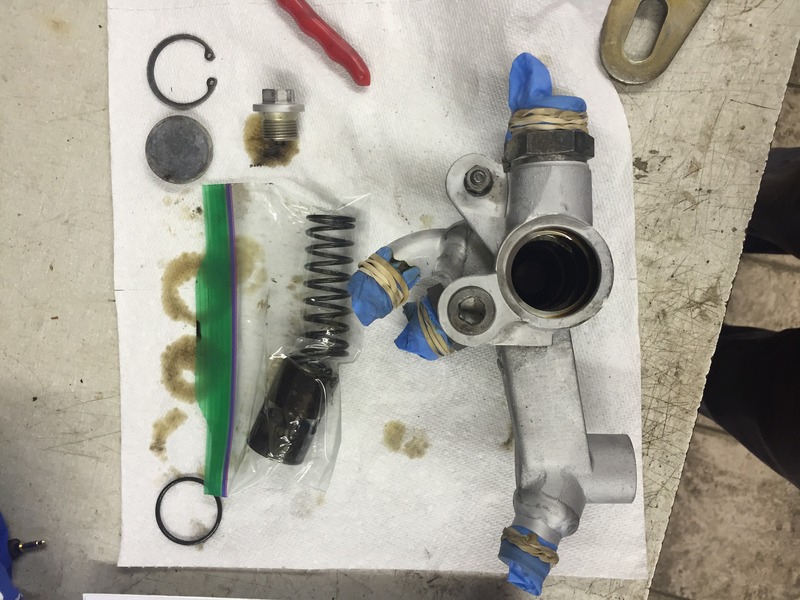
Reassembling the tstat and oil filter housing.
Both were sonically cleaned after the sand blasting to ensure they are free of media and debris.
I do need to find the PN for these double threaded inserts that mount the oil filter housing. They *should* be in a bag with the motor that is getting rebuilt, but I'd rather just buy them and have it installed ready to go when I drop the chassis off. If anyone knows the PN, I'd appreciate it. It's not shown in the PET that I can see. Otherwise, new hardware, new bushings for the mounts, and a new body gasket.
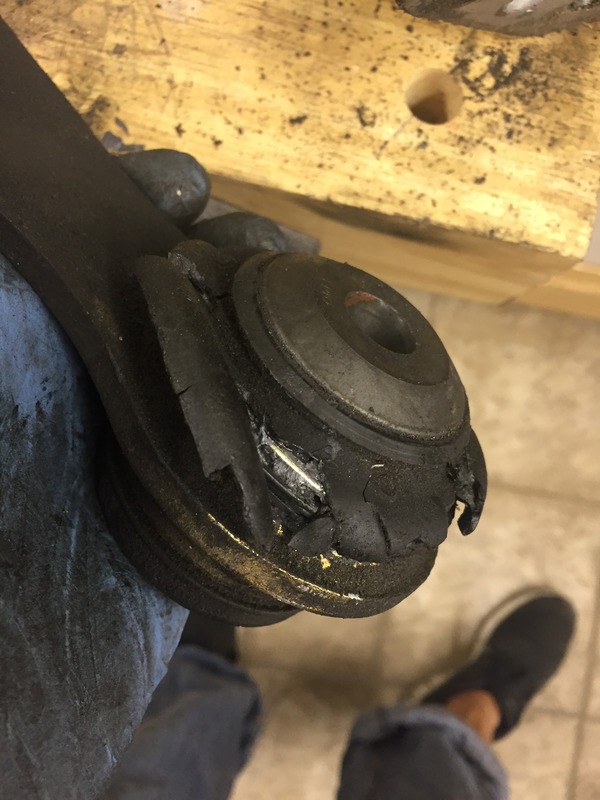
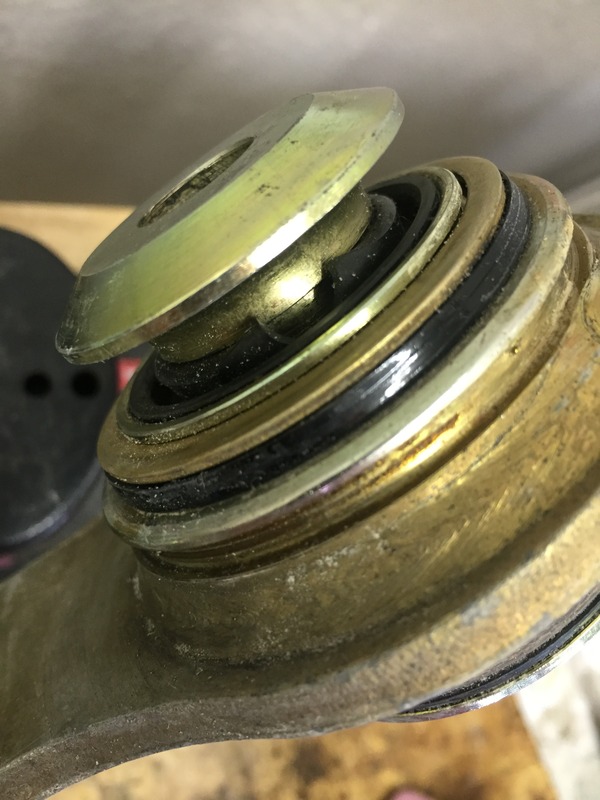
Somewhere between pressing these bushings in and getting ready to put the spring plates in the car, this boot tore. I reached out to Elephant for advice in replacing it and they sent me a new one and instructions, free of charge. You can't beat that customer service!
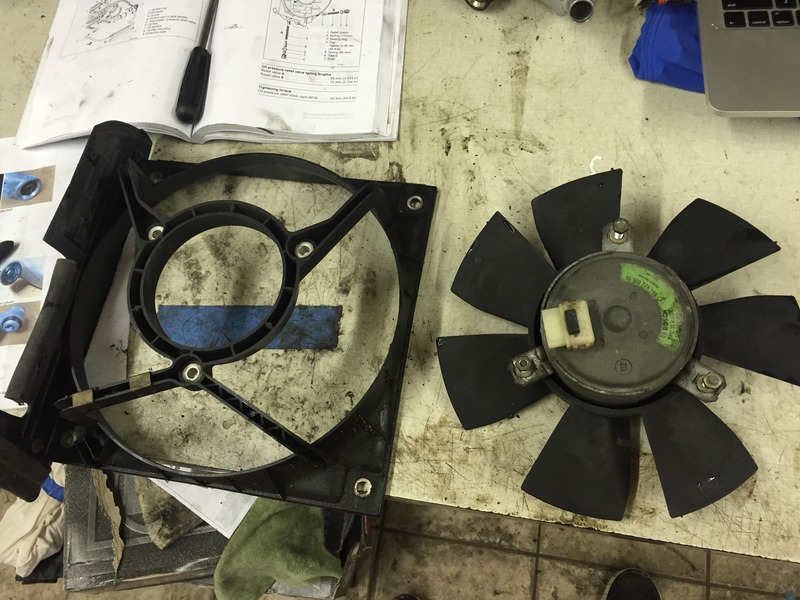
Disassembled the oil cooler fan for cleaning. Crazy how much oil and grime came off of it. Much better now.
Mocked up the left rear trailing arm and spring plate. The right will wait until the oil lines are installed to go back on, but it is ready to go.
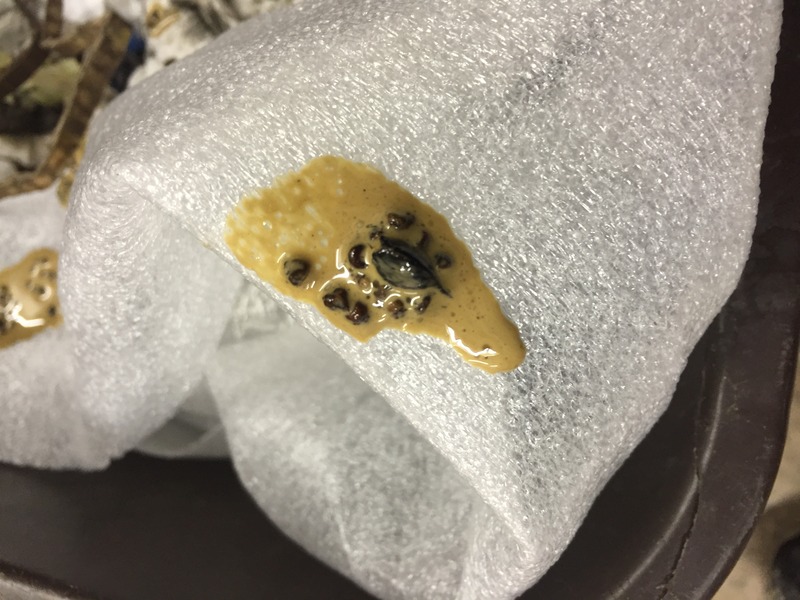
This gunk came out of one of the oil breather lines that feeds in to the top of the oil tank. Looks like something you would see in a water cooled car with a blown head gasket? Not sure what it is honestly...
Prepping the oil tank to go back into it's home. I sent it off with the pressure relief valve and it came back without one. That held me up a week while I ordered a new replacement. I cleaned up the level sensor and now that I know how easy it is to replace, I'm going to install the old one to see if it works before dropping a couple hundred on a new unit.
Ready to go home.
Reassembling the tstat and oil filter housing.
Both were sonically cleaned after the sand blasting to ensure they are free of media and debris.
I do need to find the PN for these double threaded inserts that mount the oil filter housing. They *should* be in a bag with the motor that is getting rebuilt, but I'd rather just buy them and have it installed ready to go when I drop the chassis off. If anyone knows the PN, I'd appreciate it. It's not shown in the PET that I can see. Otherwise, new hardware, new bushings for the mounts, and a new body gasket.
Somewhere between pressing these bushings in and getting ready to put the spring plates in the car, this boot tore. I reached out to Elephant for advice in replacing it and they sent me a new one and instructions, free of charge. You can't beat that customer service!
Disassembled the oil cooler fan for cleaning. Crazy how much oil and grime came off of it. Much better now.
Mocked up the left rear trailing arm and spring plate. The right will wait until the oil lines are installed to go back on, but it is ready to go.
This gunk came out of one of the oil breather lines that feeds in to the top of the oil tank. Looks like something you would see in a water cooled car with a blown head gasket? Not sure what it is honestly...
10-05-2016, 08:14 PM
#29
Rennlist Member
Thread Starter
Incidentally, even if you're just doing maintenance on the current brakes, take a good look for corrosion lifting the pad guide plates. You probably know the issue better than I but a small amount of corrosion can cause pads to bind with a consequent knock on effect to discs etc. (Ask me how I know). It's reasonably easy to deal with if not too severe and imho worth the trouble even if you're upgrading.
Z
Z
 04-19-2017, 09:50 PM
#30
Rennlist Member
Thread Starter
REALLY excited to be resurrecting this thread. Went through a tough stretch of time with my engine builder (it's been over a year and it's still not done) and had a very busy winter myself, but it should be wrapped up in the next few weeks.
Today I put the 964 back on the lift after 2 months of fighting broken studs on one the Audis.
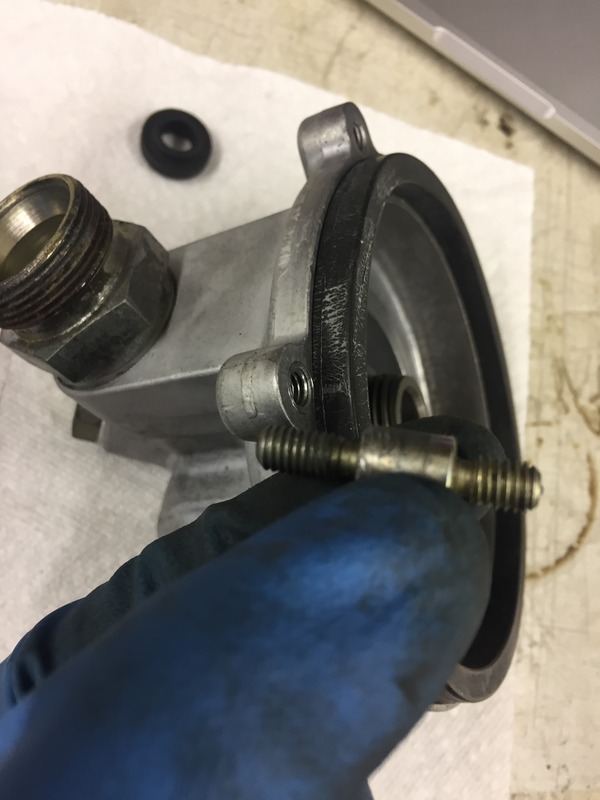
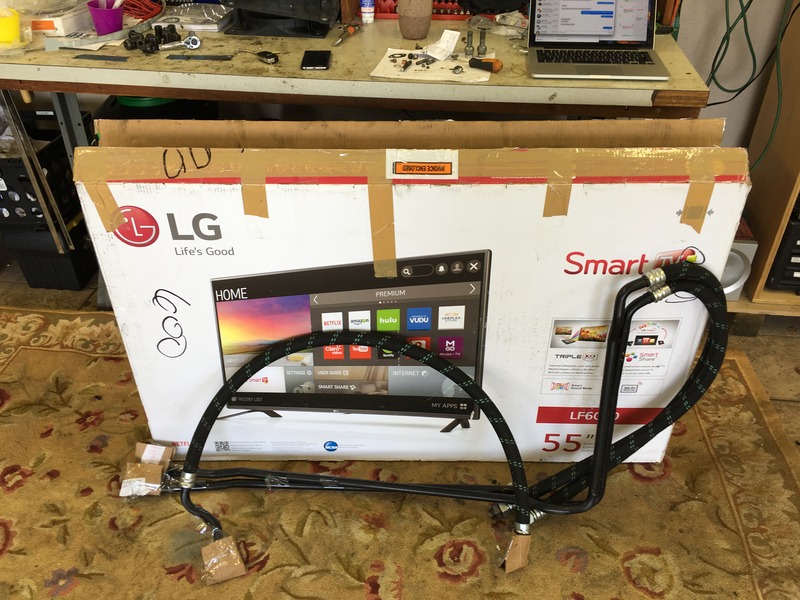
I think I mentioned this earlier, but getting a shop to rebuild the tstat to cooler, and tstat to oil filter housing is a MASSIVE PITA. I ended up shipping them 6000 miles round trip to Elephant to have them done. If anyone is looking into doing something similar, a 55" TV box fits the long hard lines that run under the rocker quite well.
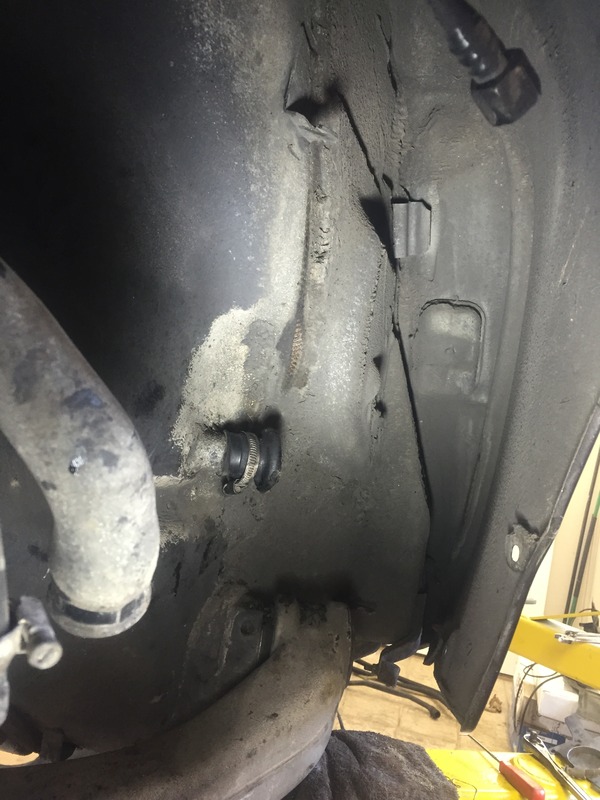
One last cleaning of the area under the rocker under the hardlines before they go in. Meguiars APC and a scrub brush does the trick.
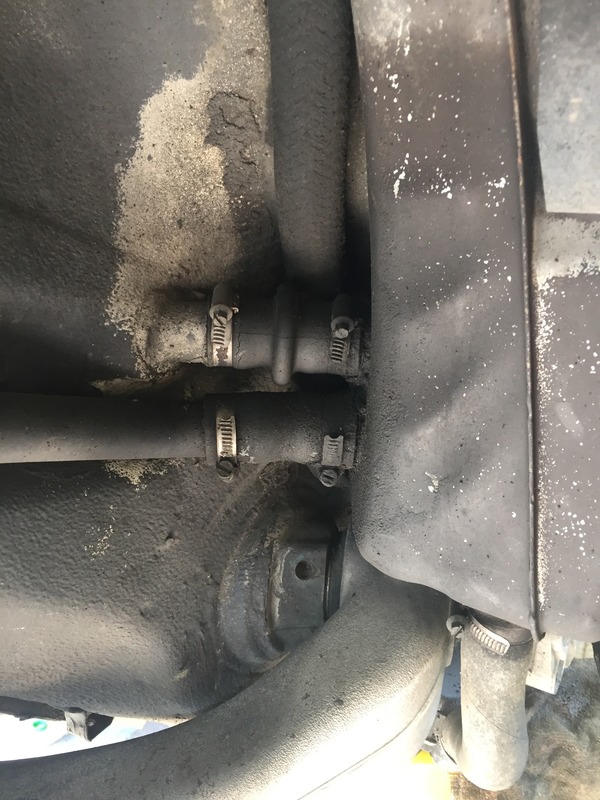
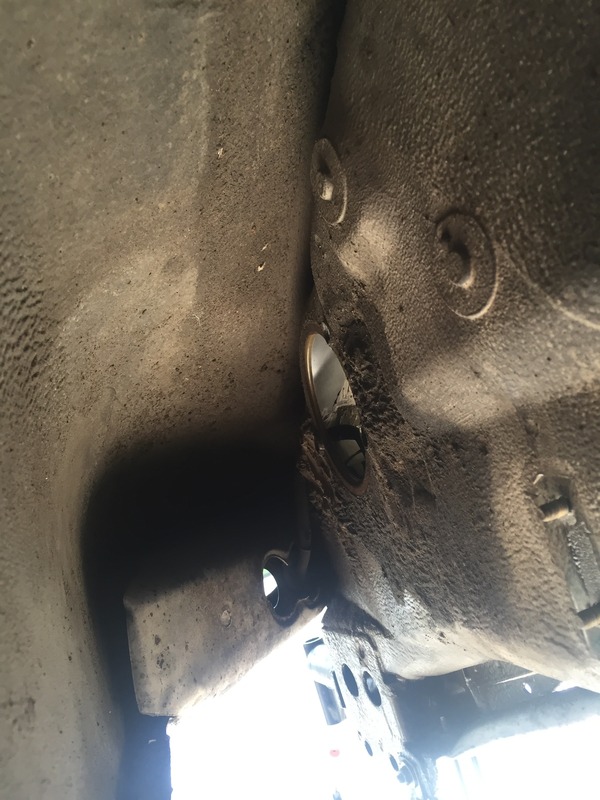
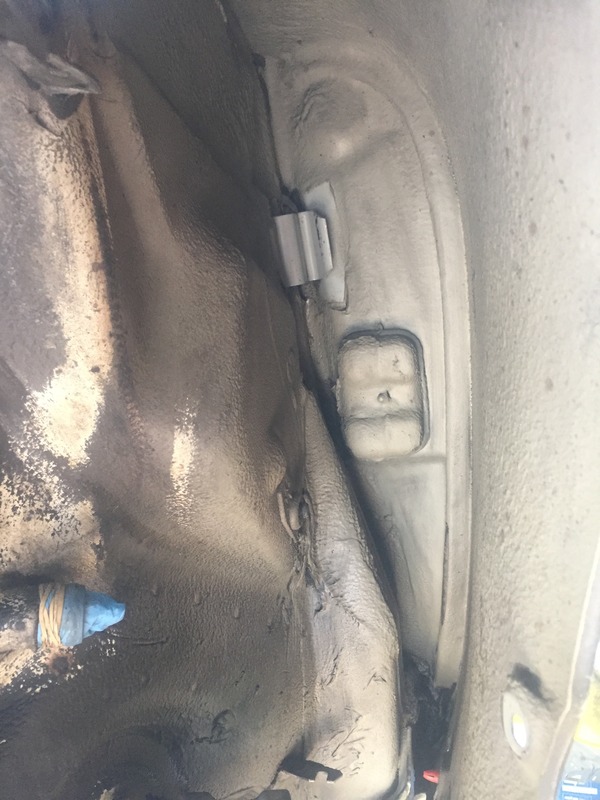
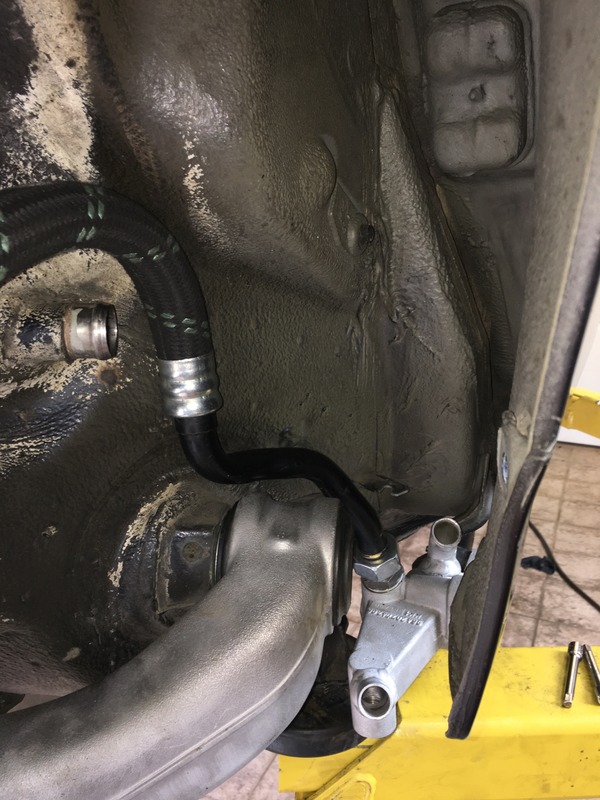
So after not touching these lines for 6+ months, I forgot the orientation of the tstat to oil filter housing line. I couldn't remember if it went behind or in front of the tank (the hard line section on the tstat actually looks like it would work either way), which crease in the body it followed, in front or behind the upper tank mount and therefore above or below the breather lines. Below is the picture it took me wayyy too long to find via Google.
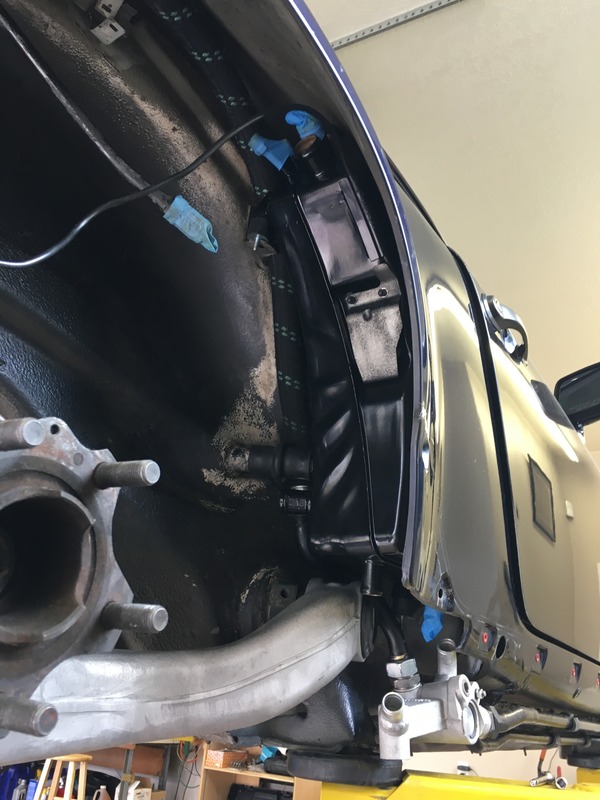
Oil tank back in.
A few tips for anyone attempting this assembly:
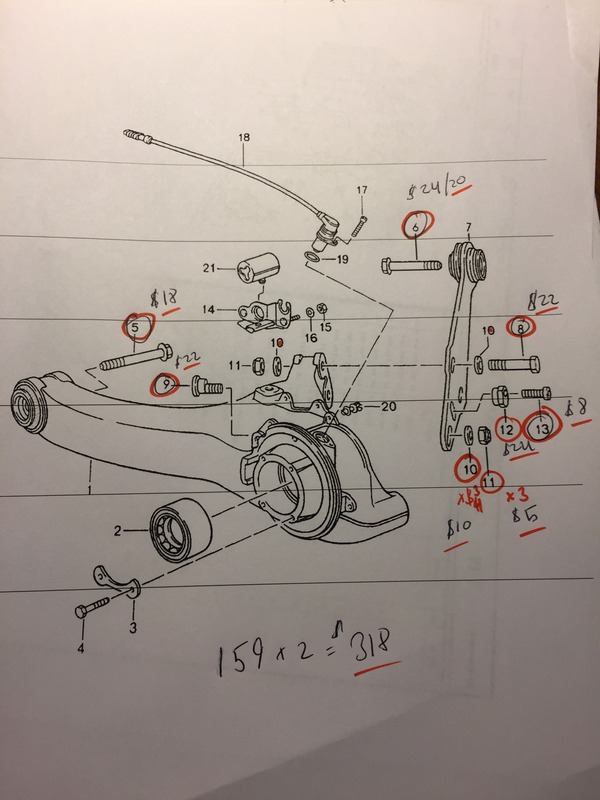
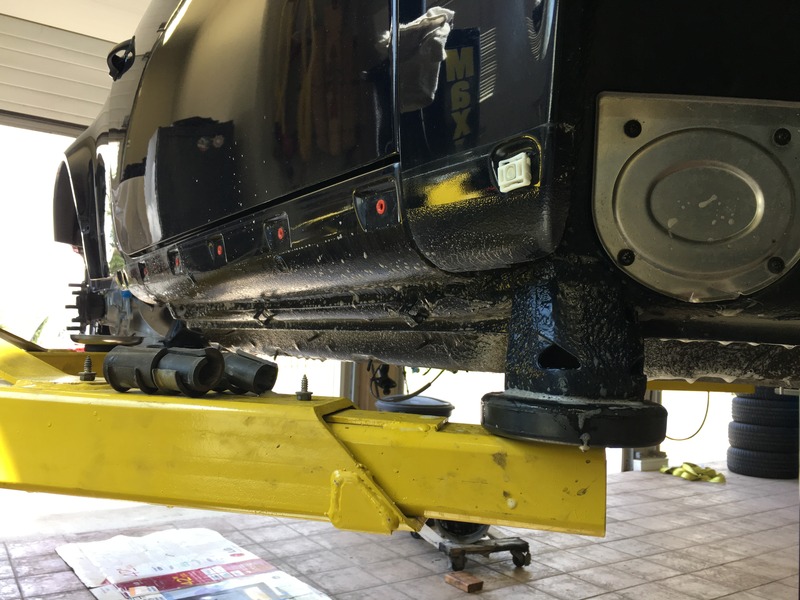
1. Torque the a arm down first if needed. Spec is 339lbs, my wrench only goes to 250. I took it to 250, went another 3/4 turn. I'll ask the shop installing my motor to check it with a stronger torque wrench.
BEFORE you install the oil tank (I made the mistake of putting the tank in first, had to remove it to do the following:
2. Line up the hard line on the tstat/oil filter line by attaching the rubber bumper to the tstat and attaching the long hardlines of the tstat/oil cooler lines to the body. Holding the tstat, align it with the lines to the oil cooler, and rotate the hard section to the oil filter housing until it hugs the body of the car as it wraps around the a arm.
3. When you get the hard section of the oil filter housing line where you want it, slide the stat out, tighten it with oil line wrenches. This took me about 4 adjustments in and out to get it perfect.
4. After resting the tstat back in place, release the long hard lines to the oil cooler from the body. Tighten the inner line to the stat first with the outter line out of the way. Then tighten the outter line to the stat. Then reinstall the brackets to the body along the runner.
5. Tuck the soft section of the tstat to oil filter line behind the upper oil tank bracket.
6. Reinstall the oil tank with the short straight section that goes to the body (shown installed in the last picture above.)
7. Add the lower tank to tstat rubber lines.
8. I had to have someone pull up on the stat to oil filter line to get the tstat up to the mounting bracket on the body. The last picture above was taken before that step so you will see the tstat is a bit low. Once it's lined up, tighten the rubber mounts to the stat and the oil tank.
Tomorrow I'm back at it.
Today I put the 964 back on the lift after 2 months of fighting broken studs on one the Audis.
I think I mentioned this earlier, but getting a shop to rebuild the tstat to cooler, and tstat to oil filter housing is a MASSIVE PITA. I ended up shipping them 6000 miles round trip to Elephant to have them done. If anyone is looking into doing something similar, a 55" TV box fits the long hard lines that run under the rocker quite well.
One last cleaning of the area under the rocker under the hardlines before they go in. Meguiars APC and a scrub brush does the trick.
So after not touching these lines for 6+ months, I forgot the orientation of the tstat to oil filter housing line. I couldn't remember if it went behind or in front of the tank (the hard line section on the tstat actually looks like it would work either way), which crease in the body it followed, in front or behind the upper tank mount and therefore above or below the breather lines. Below is the picture it took me wayyy too long to find via Google.
Oil tank back in.
A few tips for anyone attempting this assembly:
1. Torque the a arm down first if needed. Spec is 339lbs, my wrench only goes to 250. I took it to 250, went another 3/4 turn. I'll ask the shop installing my motor to check it with a stronger torque wrench.
BEFORE you install the oil tank (I made the mistake of putting the tank in first, had to remove it to do the following:
2. Line up the hard line on the tstat/oil filter line by attaching the rubber bumper to the tstat and attaching the long hardlines of the tstat/oil cooler lines to the body. Holding the tstat, align it with the lines to the oil cooler, and rotate the hard section to the oil filter housing until it hugs the body of the car as it wraps around the a arm.
3. When you get the hard section of the oil filter housing line where you want it, slide the stat out, tighten it with oil line wrenches. This took me about 4 adjustments in and out to get it perfect.
4. After resting the tstat back in place, release the long hard lines to the oil cooler from the body. Tighten the inner line to the stat first with the outter line out of the way. Then tighten the outter line to the stat. Then reinstall the brackets to the body along the runner.
5. Tuck the soft section of the tstat to oil filter line behind the upper oil tank bracket.
6. Reinstall the oil tank with the short straight section that goes to the body (shown installed in the last picture above.)
7. Add the lower tank to tstat rubber lines.
8. I had to have someone pull up on the stat to oil filter line to get the tstat up to the mounting bracket on the body. The last picture above was taken before that step so you will see the tstat is a bit low. Once it's lined up, tighten the rubber mounts to the stat and the oil tank.
Tomorrow I'm back at it.
The following users liked this post:
993Porsche (06-30-2023)