

Teardown begins. Suspension madness...
 12-18-2015, 09:14 PM
#316
Race Car
Thread Starter
Originally Posted by HiWind
how long/kms should bearings last on aggressively driven road cars?
The way these are designed, there is no worry of a wheel falling off under bearing failure like on a lot of other cars. So drive them till they are making noise, or getting wobbly and then replace. We are doing this mostly as a "while you're in there" and since I have the tools now, it's an easy job with everything apart. Shops charge huge money to do bearings, so it would be idiotic to leave them out...but I have to say, I'm now also rebuilding all the new bearings before install, after having seen that video.
 12-18-2015, 10:29 PM
#317
Race Car
Thread Starter
As long as we are all about me for a moment...
Lately there has been lots of goodness coming my way. New "old" torque wrenches,
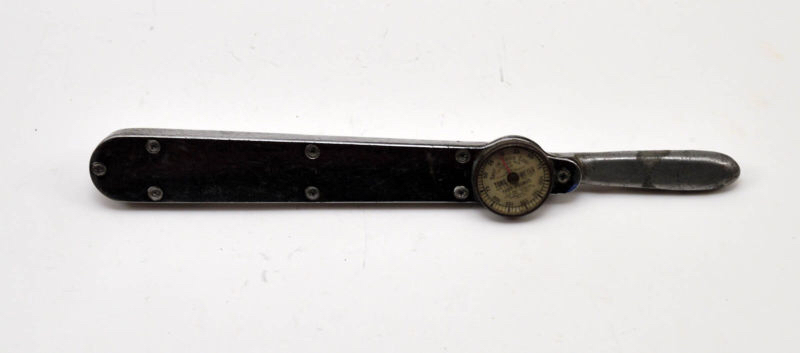
trim rings to play with, maybe make some grills...
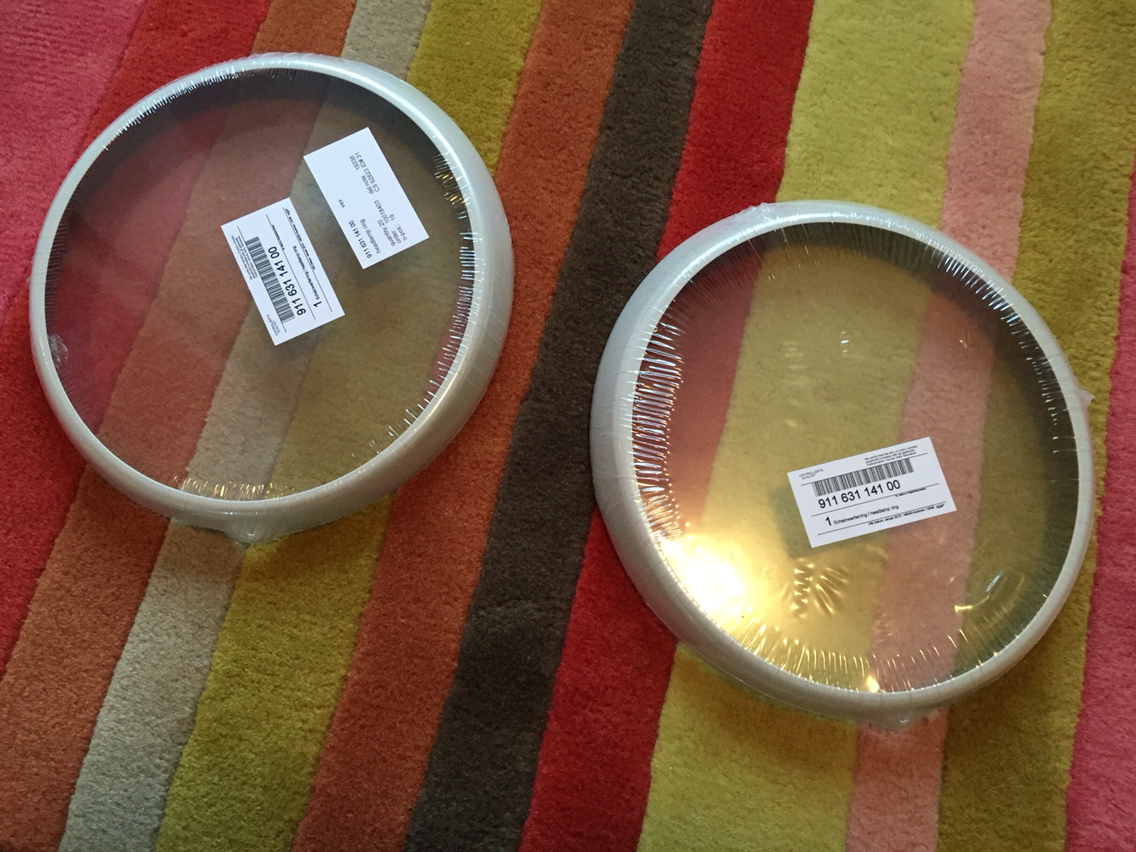
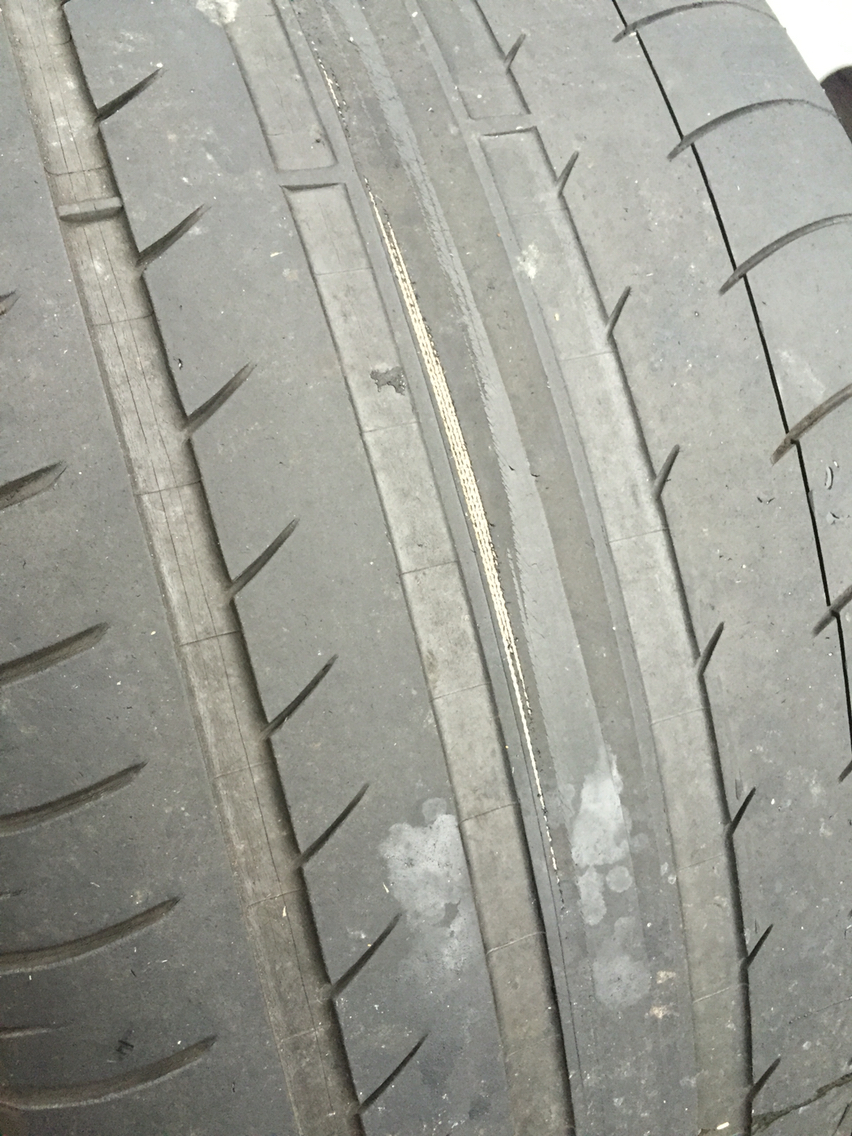
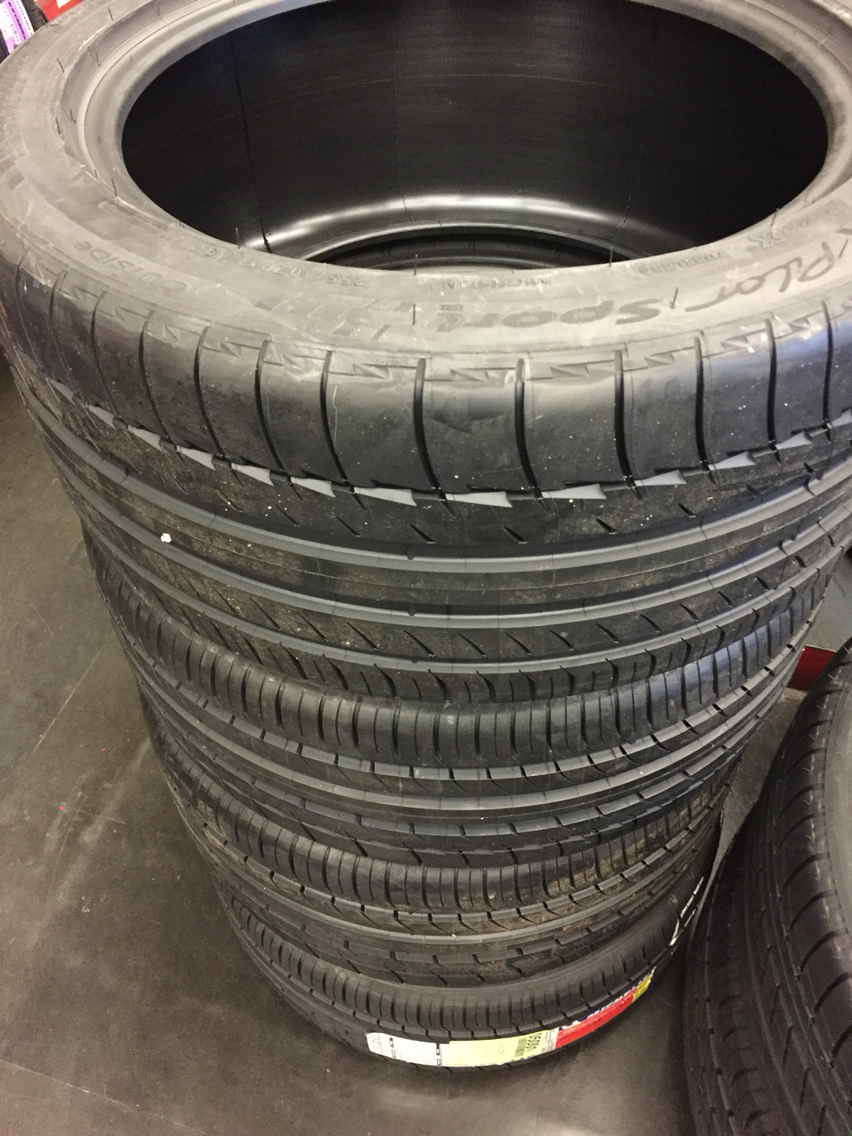
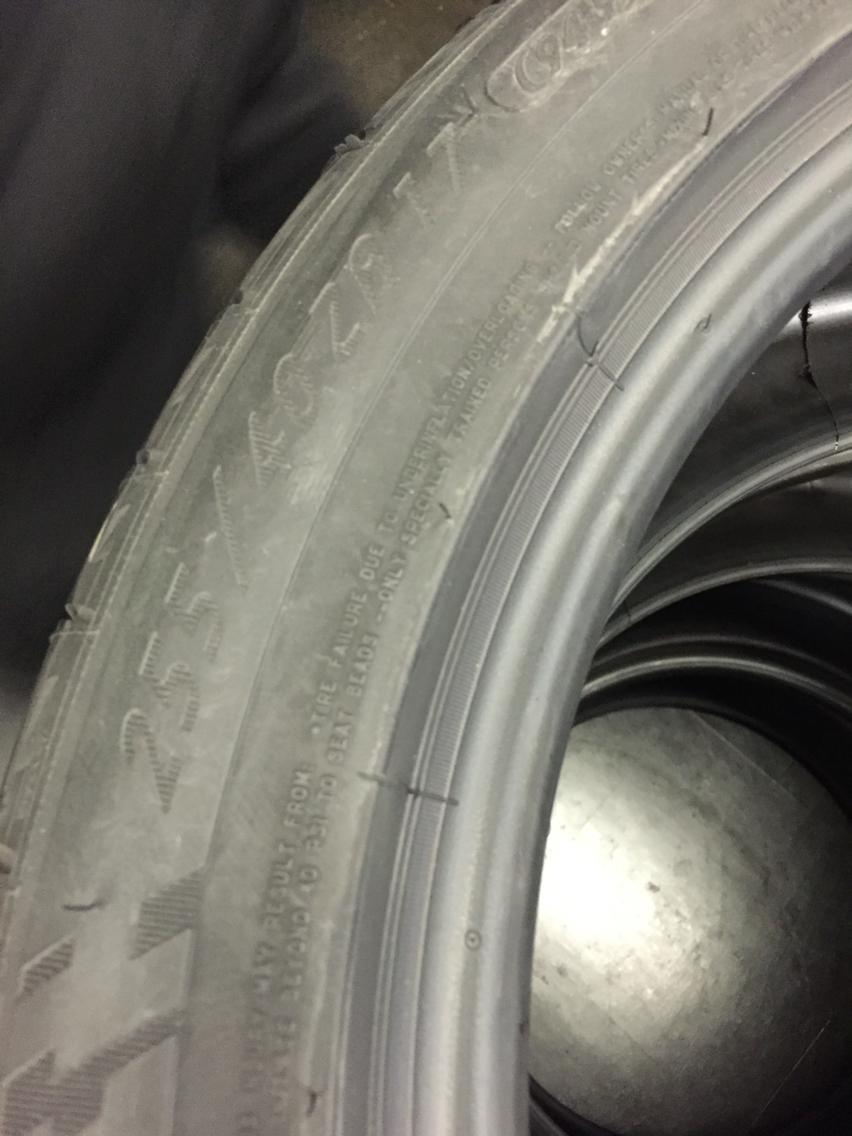
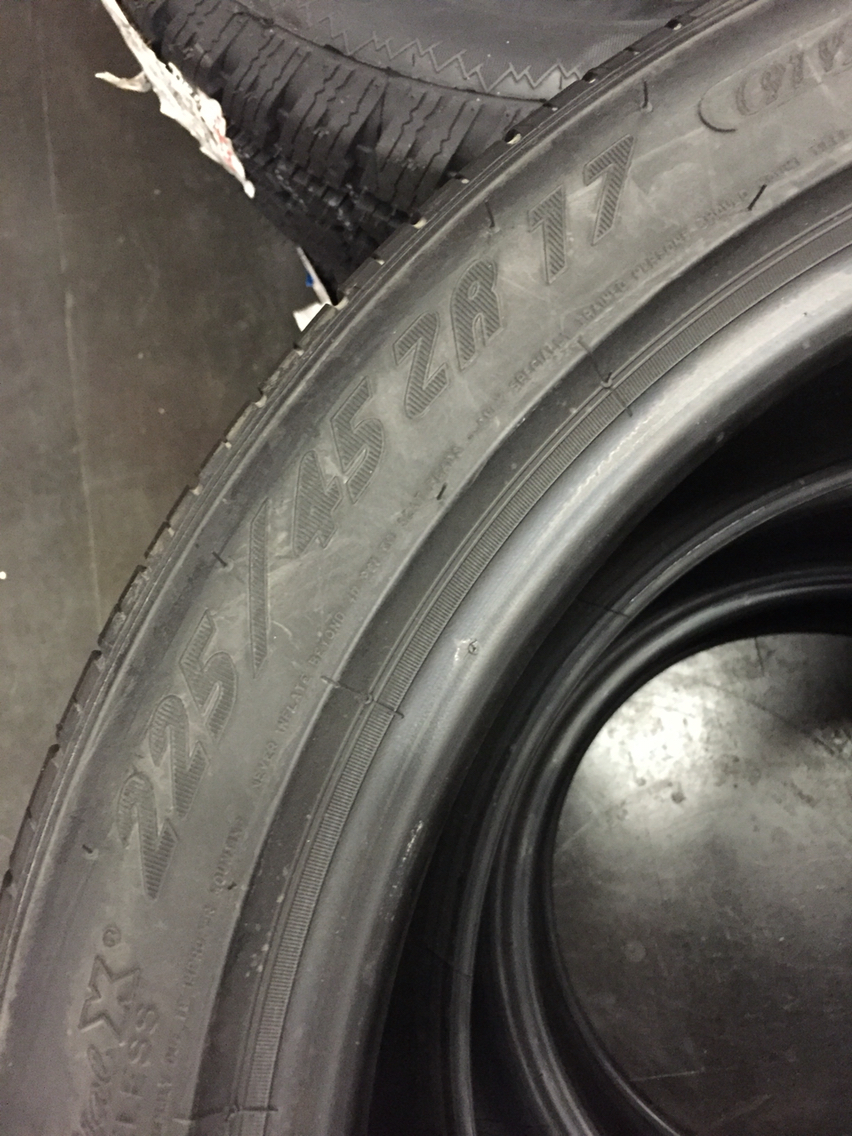
and new shoes for summer...very excited for the new shoes, because my rears wee shot, and they were getting old. I think maybe the 36 lbs I'm running in the rear is too high since the centers are corded...also important because I'm changing my wheel studs and adding spacers and I switched to 225/45/17 fronts and needed the right tire size to verify my spacer choice. I don't want it to look like I am running spacers, I just want it to be right. So it'll come down to millimeters...

Lately there has been lots of goodness coming my way. New "old" torque wrenches,
trim rings to play with, maybe make some grills...
and new shoes for summer...very excited for the new shoes, because my rears wee shot, and they were getting old. I think maybe the 36 lbs I'm running in the rear is too high since the centers are corded...also important because I'm changing my wheel studs and adding spacers and I switched to 225/45/17 fronts and needed the right tire size to verify my spacer choice. I don't want it to look like I am running spacers, I just want it to be right. So it'll come down to millimeters...
12-18-2015, 11:03 PM
#319
Race Car
Thread Starter
Today we go to do one axle. I was running around this am getting my tires mounted and then only had a few hours available to really work. So one axle got done and then some cleaning and a bit of busywork.
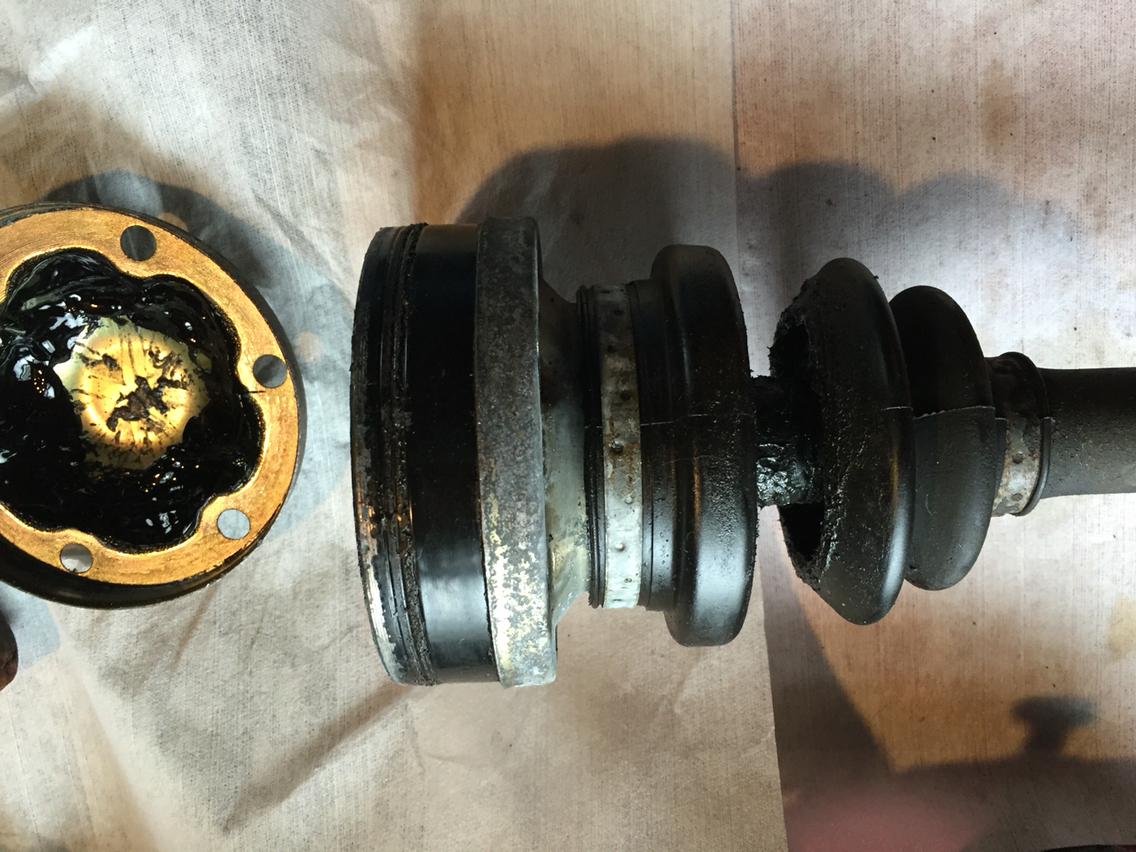
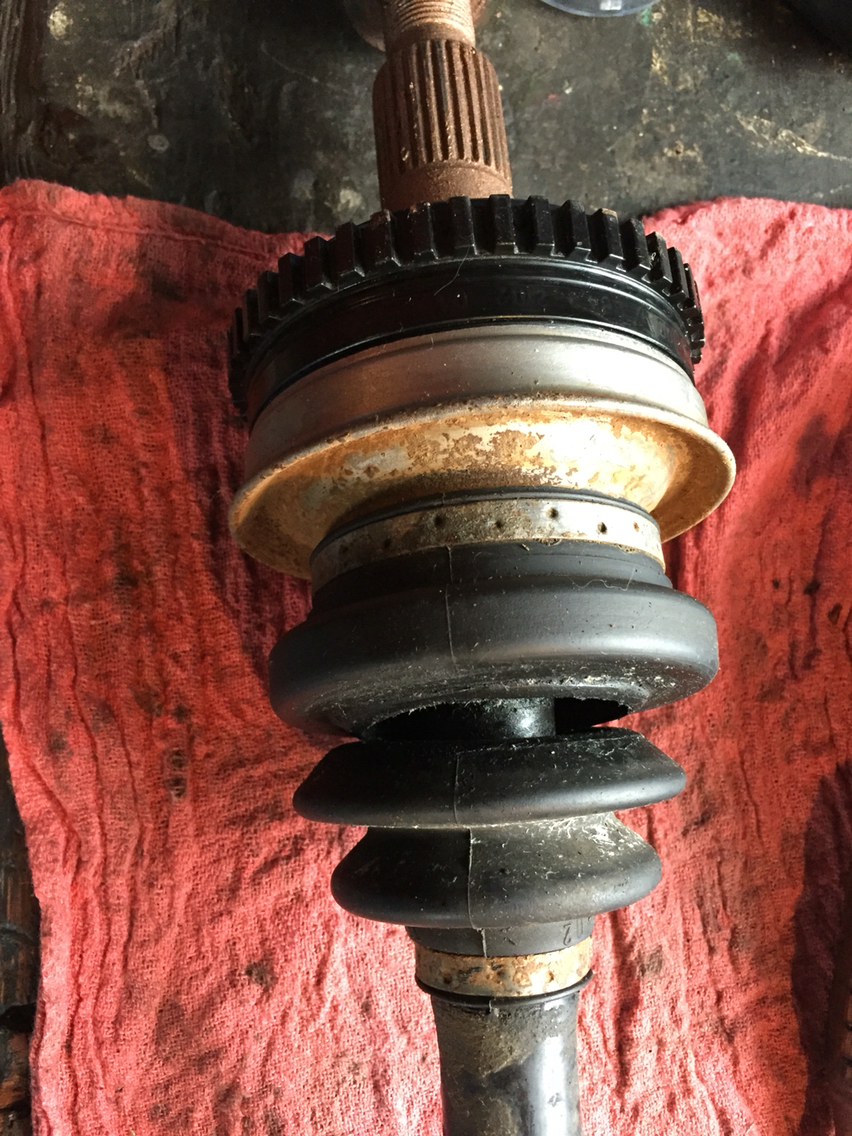
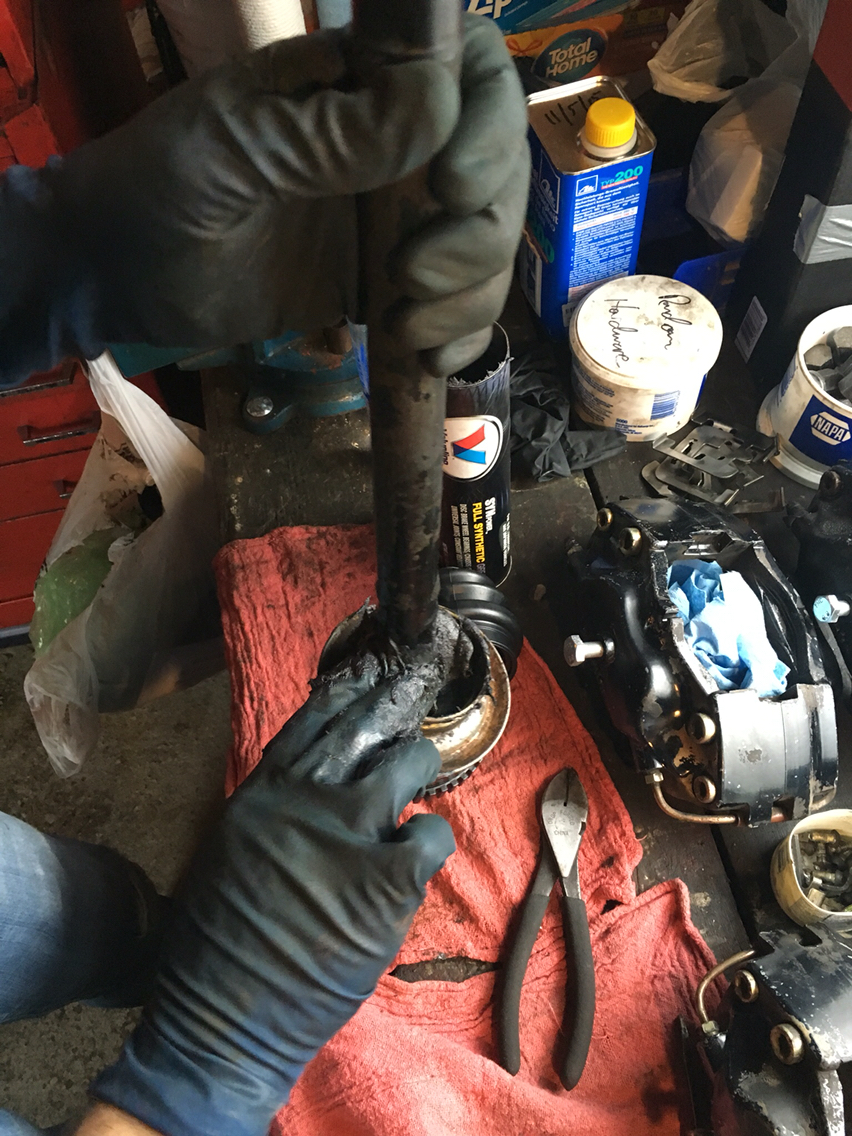
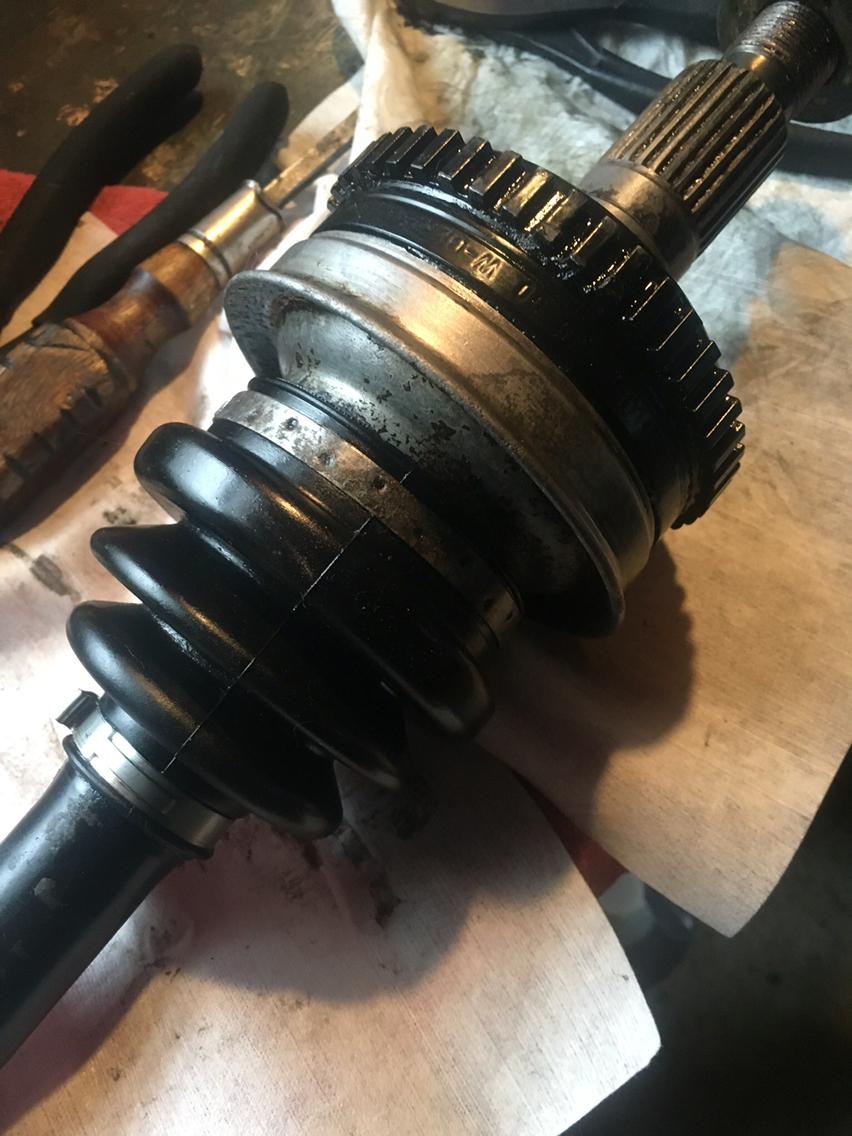
So first look at the axle, the inner and outer boots are torn, which sucks cuz outer boots are a bitch cuz all good to just repack and reboot, which is what 99% of the shops would do, but I like to take the time to clean the joint, dry it and then carefully repack it so it's good to go.
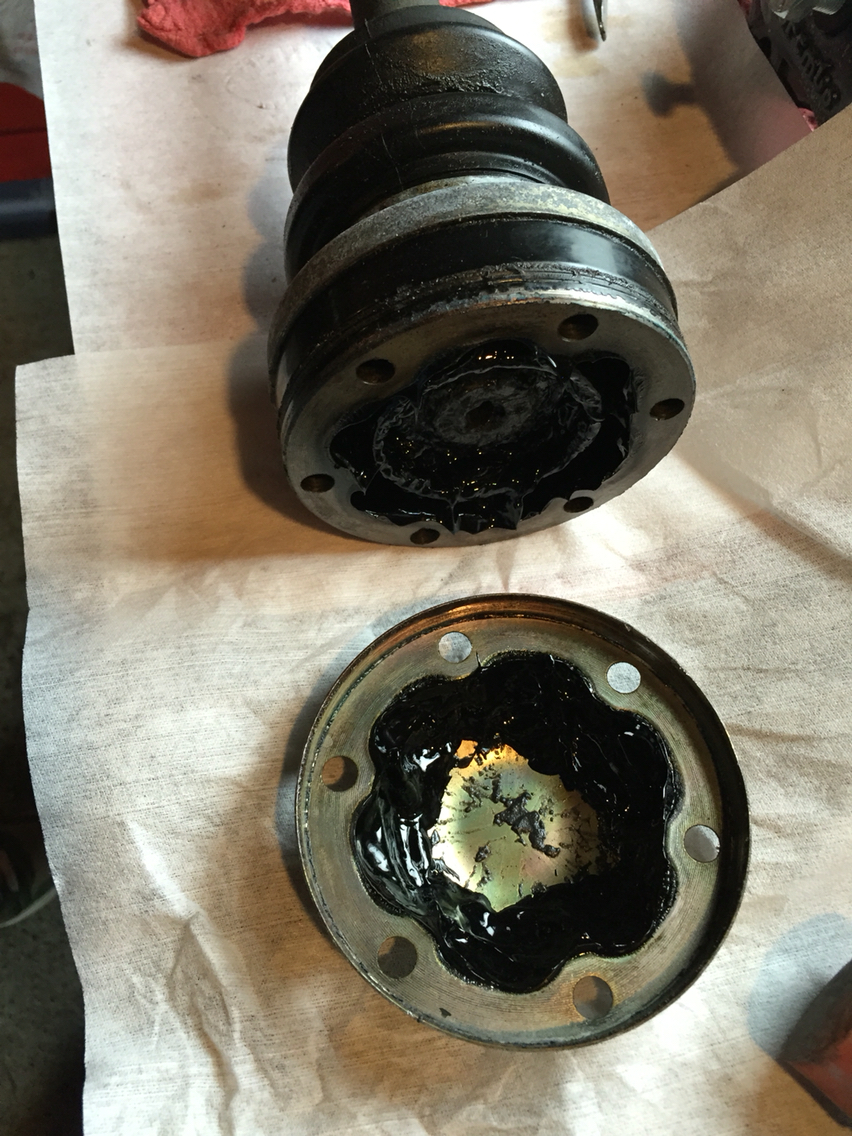
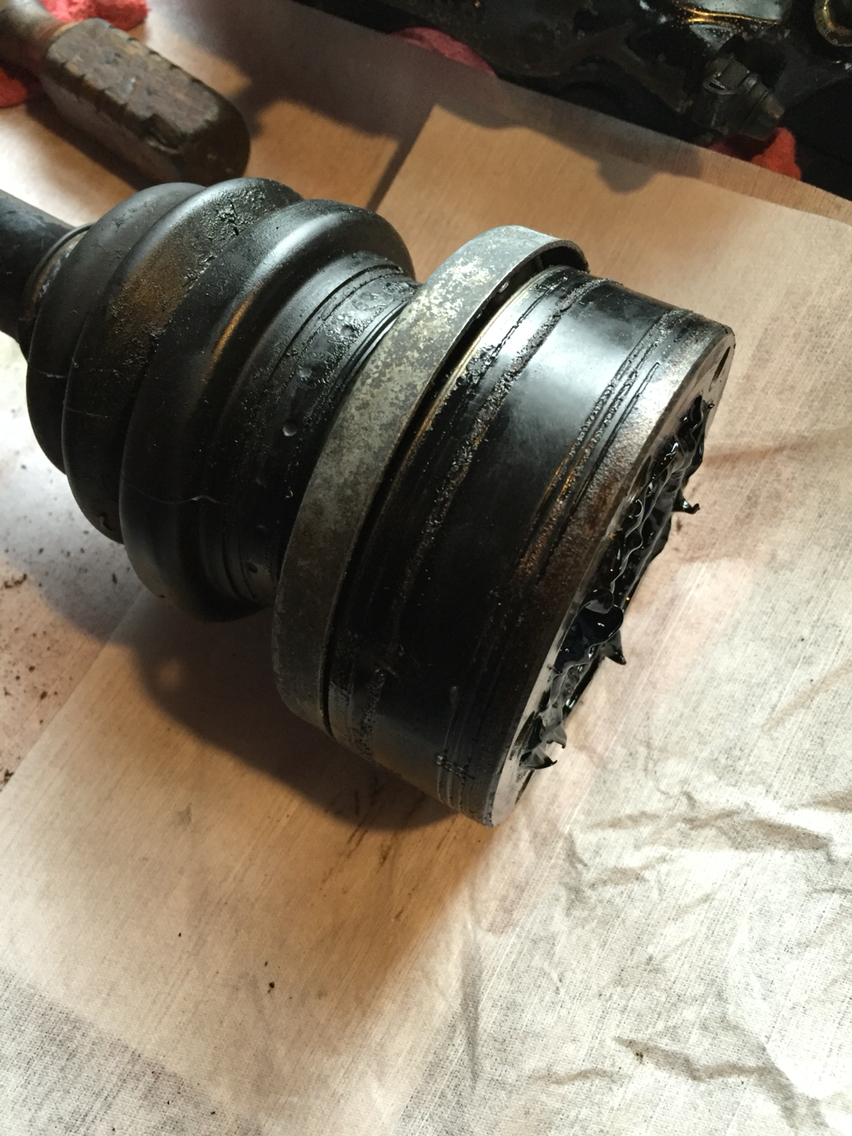
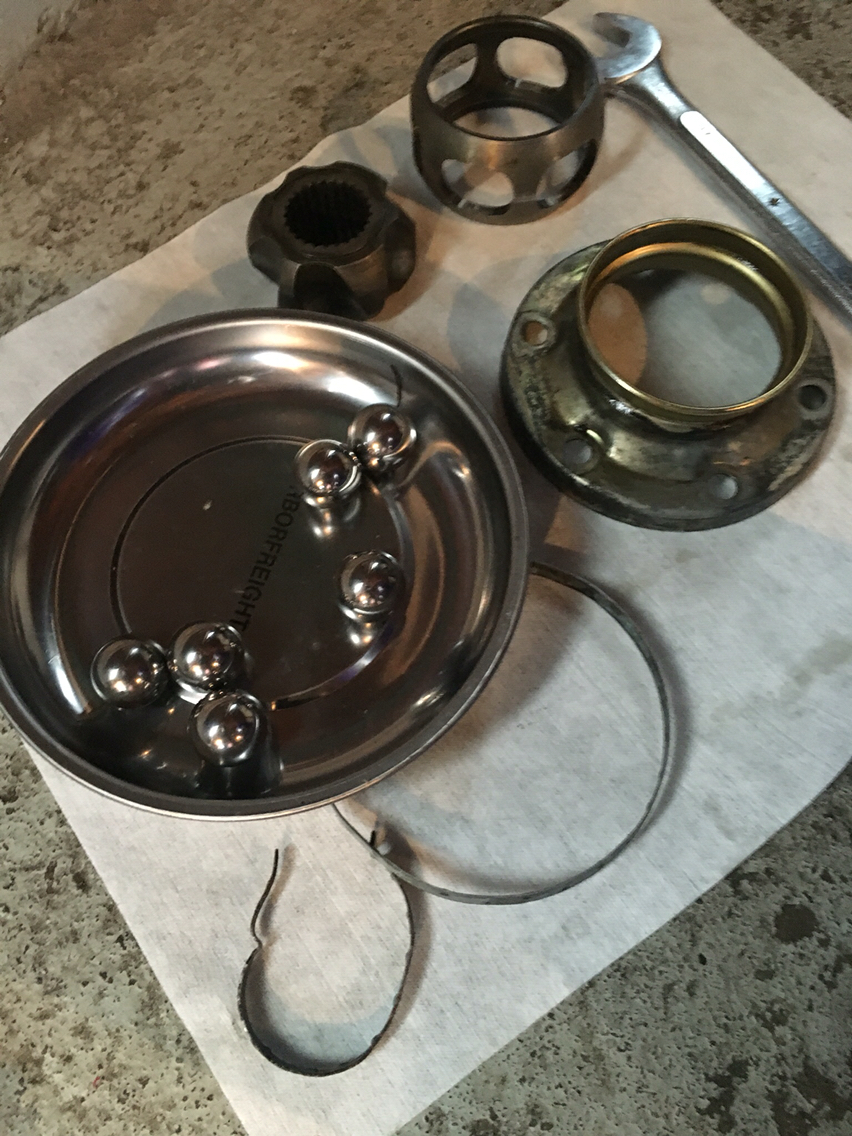
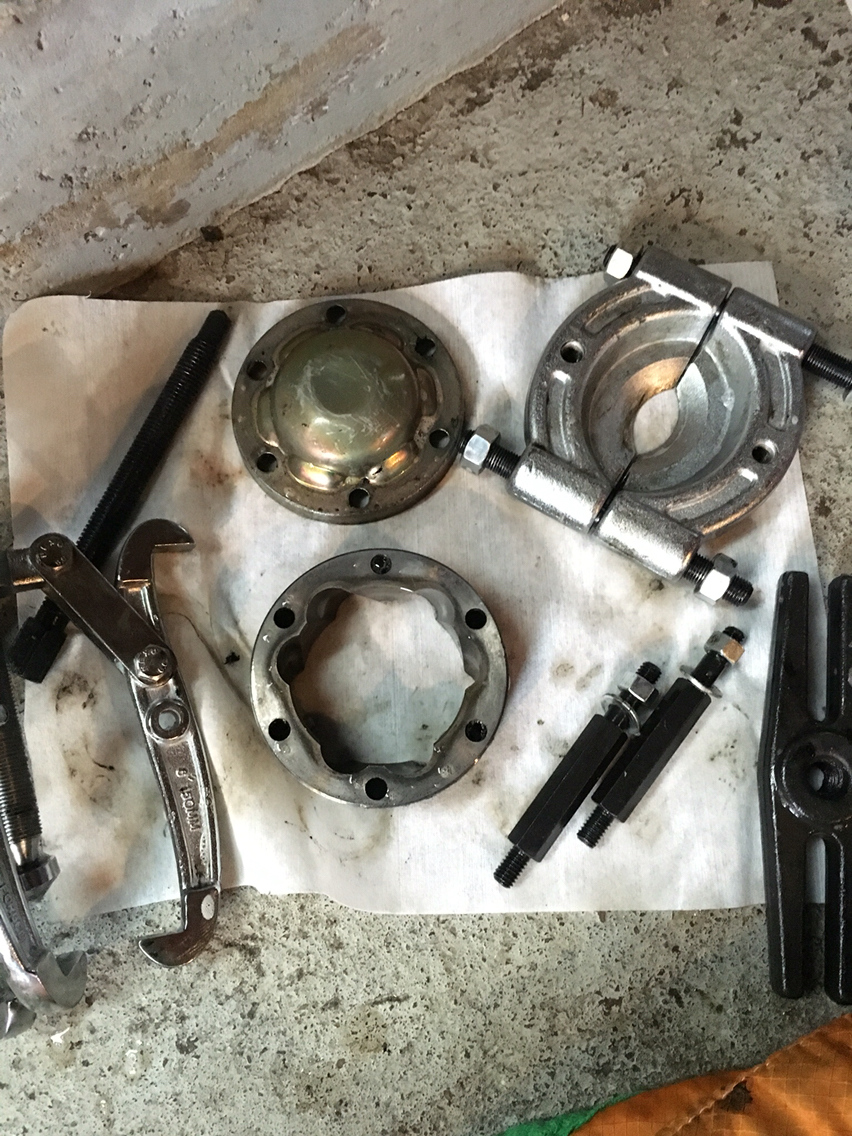
So, off with the cups. You litterally stick a screwdriver against the lip and tap it off. These are only pressed on, so they come off relatively easy. Then, take a rag to the inner cv and wipe out as much grease as you can. You'll see the circlip. Take the circlip off. If the cups are disconnected from both side of the cv, you can wiggle it apart at this stage. Careful not to drop the *****. Pull the race apart from the cage. As the ***** fall away, it'll get easier. You will then be left with the inner race which is pressed into the axle. The rear axle is hollow, so you need a three arm puller that's big enough to not thread itself into the hollow axle as you pull the inner race off. Pull that off. Then pull the inner cup off and all the parts go to the cleaning tank.
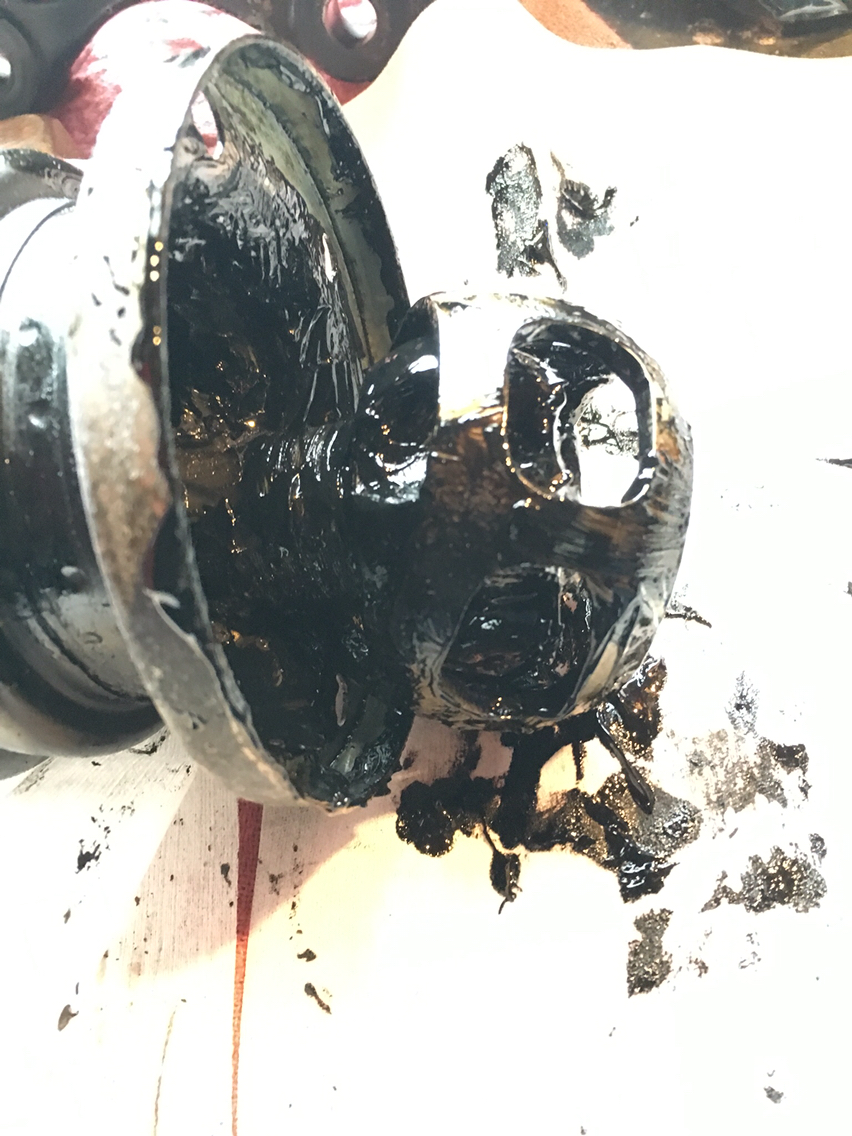
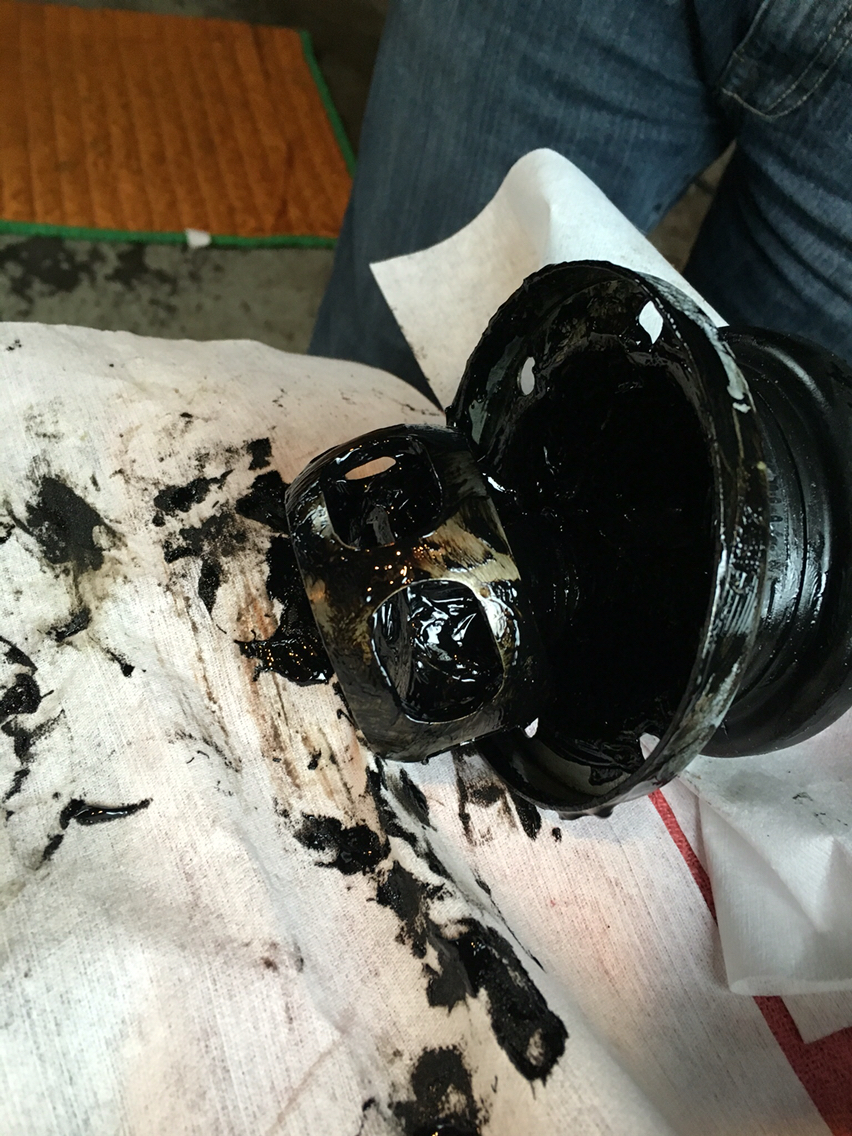
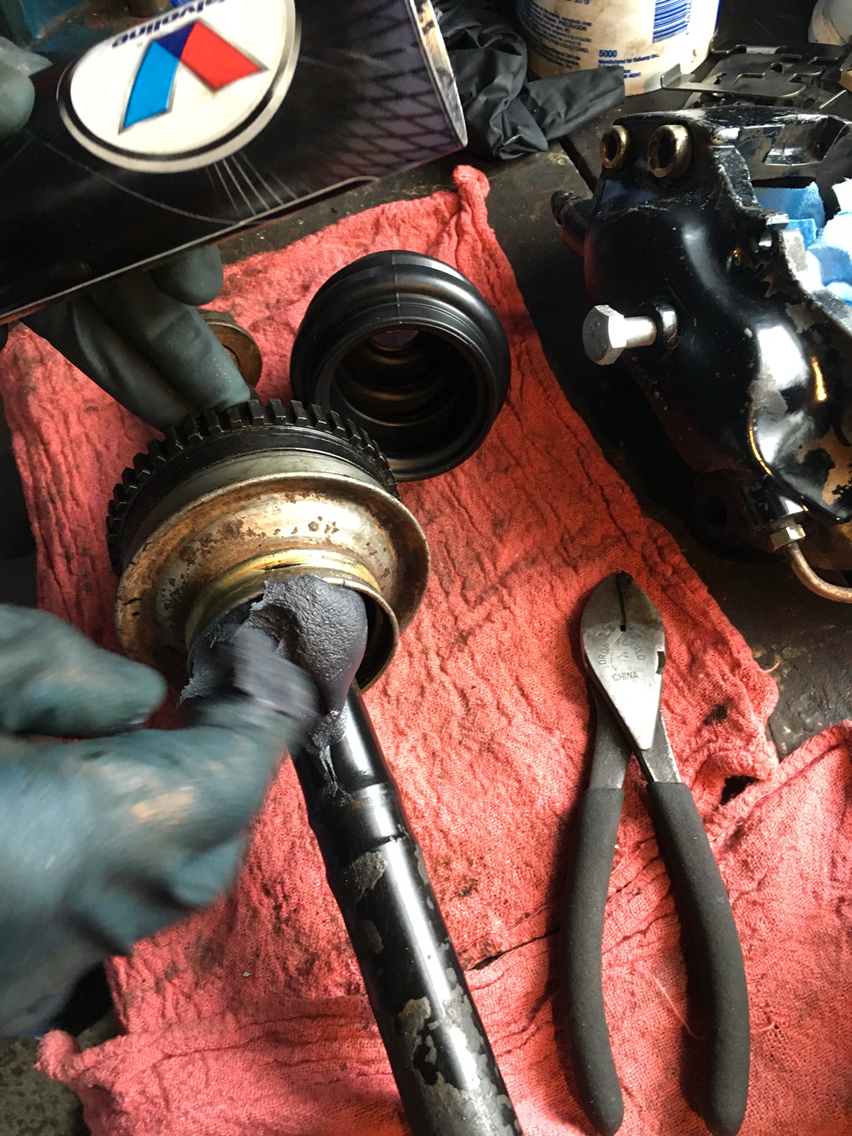
Now you have an axle and an outer cv. You aren't going to take the outer cv off the axle. Pry off the boot (after unclipping the clips) and pull that off. Then start cleaning it out by taking a rag and wiping away as much of the moly grease as you can. Then using a solvent, and a brush, work the solvent into the joint and start letting it do its job. Keep cleaning till you can rinse out all the grease and dirt . Blow it out with the air hose and you are ready for reassembly. Pack new moly grease into the outer joint, you'll have to spend some time working it in since you can't get to both sides of the joint, so be patient. Remember it's approx half of one of those big cardboard tubes of grease per joint, so as you work it in there, you'll know when you have gotten that much caked into the joint.
Then for the inner joint, put your new oetiker clamp on the axle, then the boot, then the other oetiker (I haven't been able to find the right size clamp, so I am reusing the old oem ones, so far none have broken. Then the inner cup, and the bearing cage and inner race come next. Remember which side is the side toward the axle, coat the axle teeth with copper grease, and then with a plastic hammer. Tap the inner race and cage onto the axle. When you have it almost seated. Grab a big impact socket that's bigger than the axle diameter and tap the race until it fully seats and you can clip the circlip back on.
Now the tricky part, and I apologize that I don't have pics that are good enough to show, but there are some good threads on this on rennlist that show this well...
Slip the outer race over the bearing cage and onto the axle, apply some grease if you like to hold the ***** to the cage as you put them in. Get all six ***** into the cage and wiggle the outer race over the ***** and inner race. I'll look for a picture of the orientation and try to post it. But remember this, if you don't get it on right, the joint will lock up, so if your joint doesn't work, take it apart and do it again. Anyway, it's a total bitch to get the two back together. And then, it's really not. The thing will just not go, you will futz with it and cuss your nose off, and then you'll get it just right and it'll pop into place so easily you won't understand how it happened.
Pack the joint with grease.
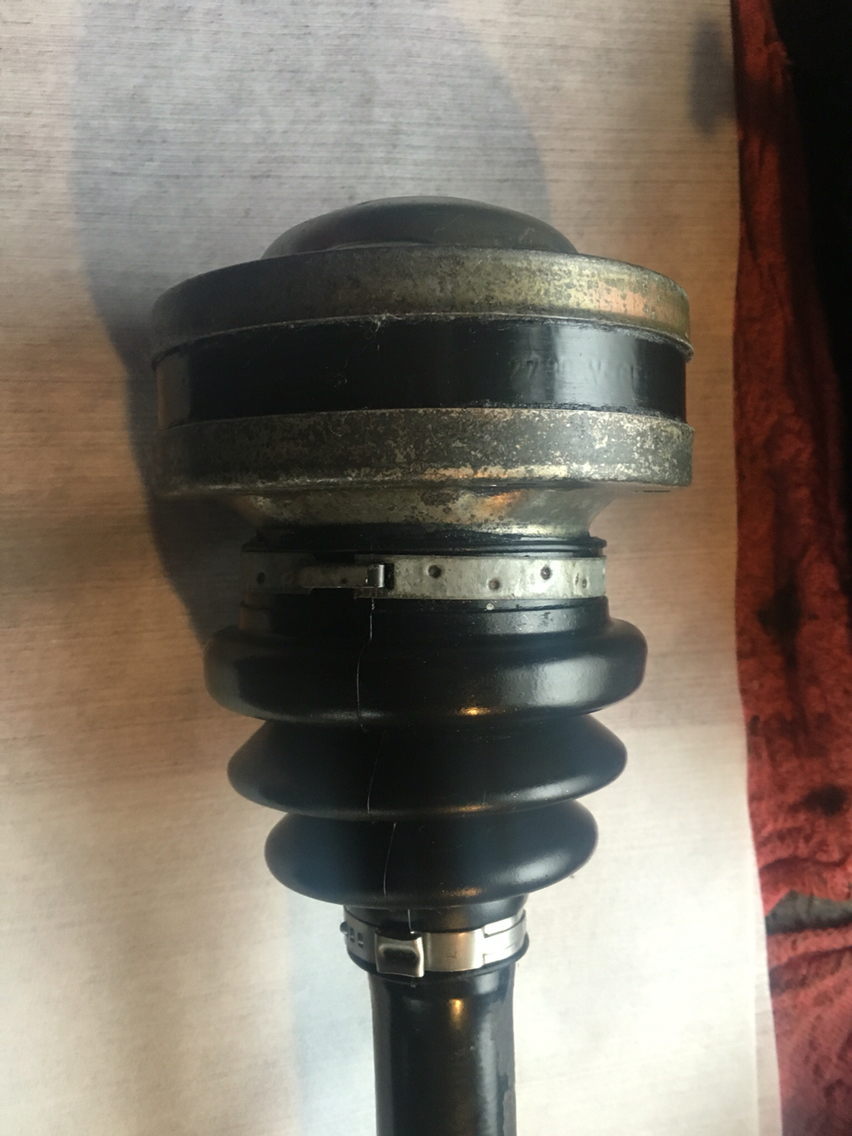
Ok, joint back together, you stick a few bolts through the outer cup, and slide them though the bolt holes in the outer race and into the inner cup to line it all up. Take a pair of adjustable pliers and carefully squeeze the cups together, working your way around the cups till they are fully seated. Pack more grease if needed on the inner side, and then boot it.
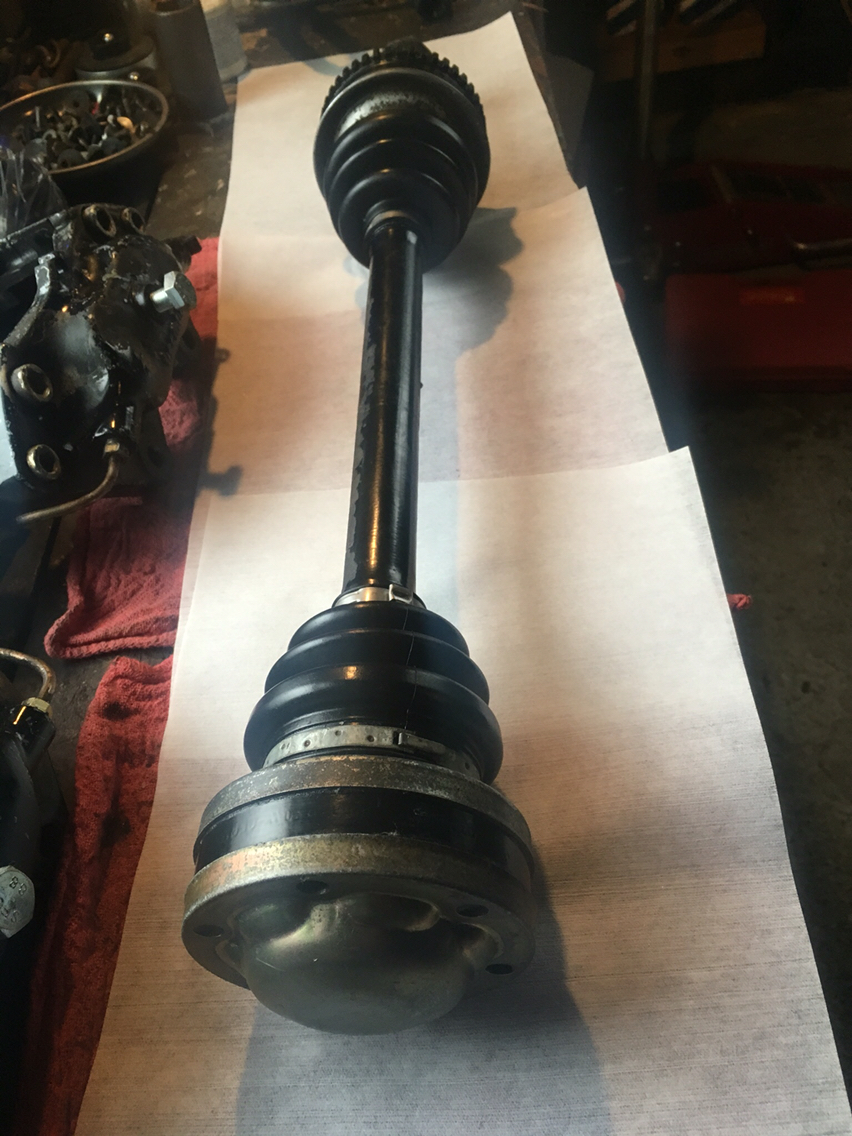
Clean the outside and done.
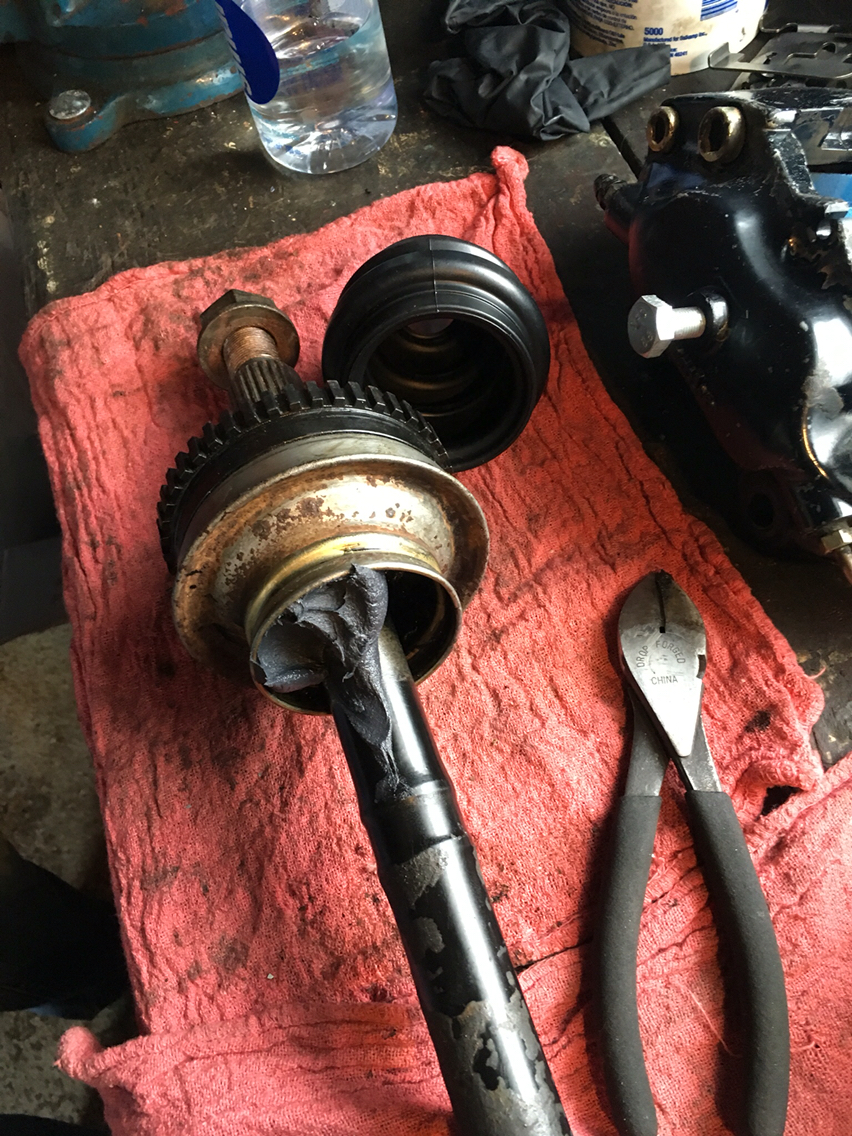

So first look at the axle, the inner and outer boots are torn, which sucks cuz outer boots are a bitch cuz all good to just repack and reboot, which is what 99% of the shops would do, but I like to take the time to clean the joint, dry it and then carefully repack it so it's good to go.
So, off with the cups. You litterally stick a screwdriver against the lip and tap it off. These are only pressed on, so they come off relatively easy. Then, take a rag to the inner cv and wipe out as much grease as you can. You'll see the circlip. Take the circlip off. If the cups are disconnected from both side of the cv, you can wiggle it apart at this stage. Careful not to drop the *****. Pull the race apart from the cage. As the ***** fall away, it'll get easier. You will then be left with the inner race which is pressed into the axle. The rear axle is hollow, so you need a three arm puller that's big enough to not thread itself into the hollow axle as you pull the inner race off. Pull that off. Then pull the inner cup off and all the parts go to the cleaning tank.
Now you have an axle and an outer cv. You aren't going to take the outer cv off the axle. Pry off the boot (after unclipping the clips) and pull that off. Then start cleaning it out by taking a rag and wiping away as much of the moly grease as you can. Then using a solvent, and a brush, work the solvent into the joint and start letting it do its job. Keep cleaning till you can rinse out all the grease and dirt . Blow it out with the air hose and you are ready for reassembly. Pack new moly grease into the outer joint, you'll have to spend some time working it in since you can't get to both sides of the joint, so be patient. Remember it's approx half of one of those big cardboard tubes of grease per joint, so as you work it in there, you'll know when you have gotten that much caked into the joint.
Then for the inner joint, put your new oetiker clamp on the axle, then the boot, then the other oetiker (I haven't been able to find the right size clamp, so I am reusing the old oem ones, so far none have broken. Then the inner cup, and the bearing cage and inner race come next. Remember which side is the side toward the axle, coat the axle teeth with copper grease, and then with a plastic hammer. Tap the inner race and cage onto the axle. When you have it almost seated. Grab a big impact socket that's bigger than the axle diameter and tap the race until it fully seats and you can clip the circlip back on.
Now the tricky part, and I apologize that I don't have pics that are good enough to show, but there are some good threads on this on rennlist that show this well...
Slip the outer race over the bearing cage and onto the axle, apply some grease if you like to hold the ***** to the cage as you put them in. Get all six ***** into the cage and wiggle the outer race over the ***** and inner race. I'll look for a picture of the orientation and try to post it. But remember this, if you don't get it on right, the joint will lock up, so if your joint doesn't work, take it apart and do it again. Anyway, it's a total bitch to get the two back together. And then, it's really not. The thing will just not go, you will futz with it and cuss your nose off, and then you'll get it just right and it'll pop into place so easily you won't understand how it happened.
Pack the joint with grease.
Ok, joint back together, you stick a few bolts through the outer cup, and slide them though the bolt holes in the outer race and into the inner cup to line it all up. Take a pair of adjustable pliers and carefully squeeze the cups together, working your way around the cups till they are fully seated. Pack more grease if needed on the inner side, and then boot it.
Clean the outside and done.
12-18-2015, 11:05 PM
#320
Race Car
Thread Starter
Originally Posted by jpar
I vaguely remember reading something about the 993 pedals, what's the advantage again?
12-19-2015, 09:10 AM
#322
Race Car
Thread Starter
Originally Posted by C4inLA
Were the wheels refreshed recently? What is coating, paint or powder coat?
12-19-2015, 11:41 AM
#323
Technical Guru
Rennlist Member
Rennlist Member
Make sure you update that kinematic lever. A lot of places replaced entire pedal assemblies instead of, so these are floating around. Porsche had to update the updated 993 pedal assembly 3 or 4 times because of various problems during production (ex. hanging clutch pedal). And I don't remember ever hearing of any advantages.
12-19-2015, 02:04 PM
#324
Race Car
Thread Starter
Originally Posted by JasonAndreas
Make sure you update that kinematic lever. A lot of places replaced entire pedal assemblies instead of, so these are floating around. Porsche had to update the updated 993 pedal assembly 3 or 4 times because of various problems during production (ex. hanging clutch pedal). And I don't remember ever hearing of any advantages.
Thanks very much
12-19-2015, 08:55 PM
#325
Race Car
Thread Starter
Another epic day. Found out today, exactly how easy it is to change the differential axle seals and the same seals in the transaxle. Part number 999.113.347.40 same front and rear so on a c4, you need four.
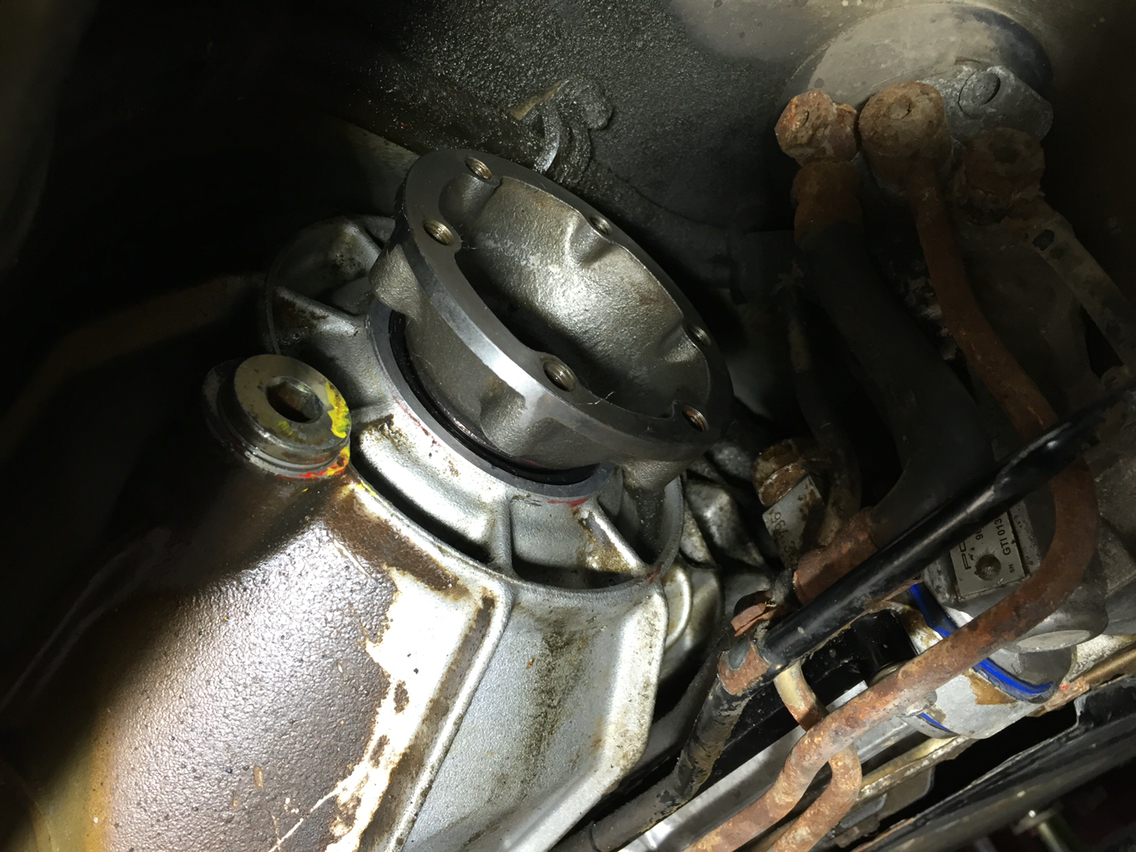
Photos were tough today. So I'll try to keep this organized as best I can. To be clear, on the front diff, we are doing part 11 in the picture. The bolt, part 5, is retorqued at the end at 32.5 ft/lbs or 44nm.
The seal is rubber with a steel insert and a small spring in the middle. It's pressed in and very tight to remove. So don't expect it to just come out. I gripped it with a pair of vise grips, and then twisted the vice grips to bend the metal away from the outer lip and then break it loose. Worked well, but there has to be an easier way.
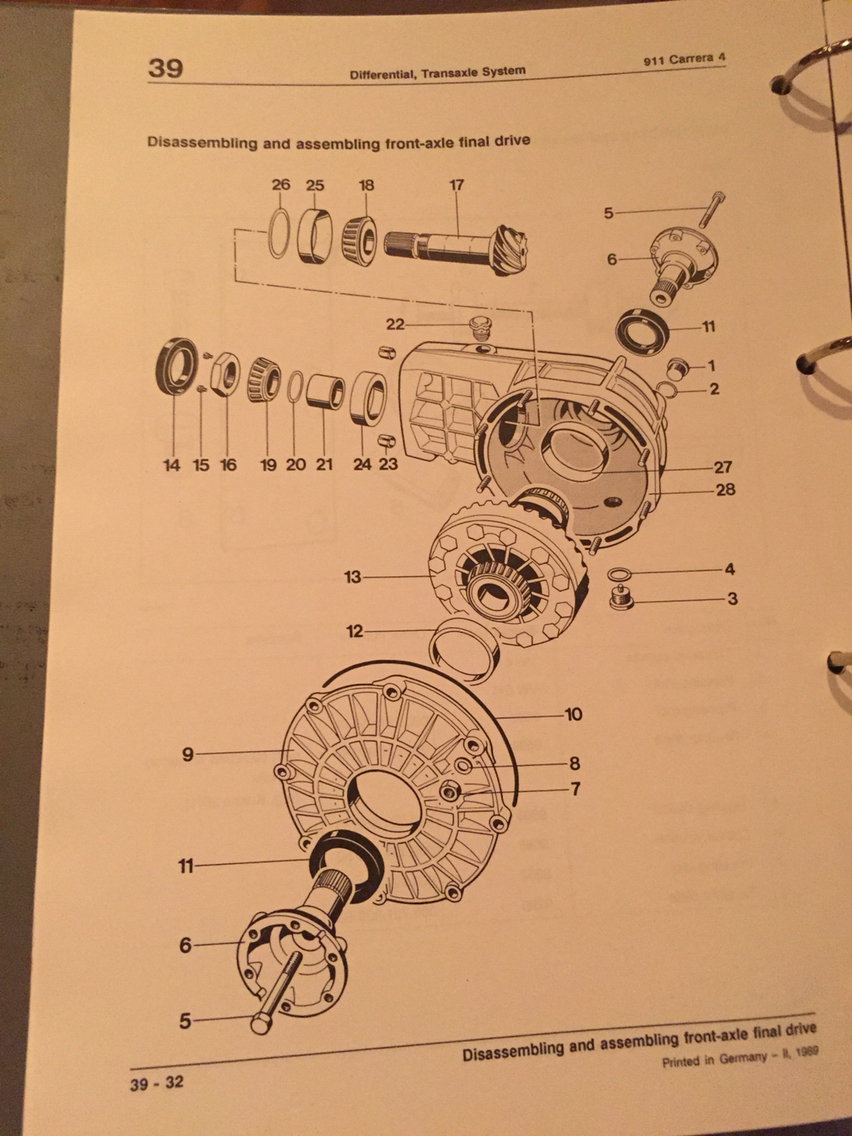

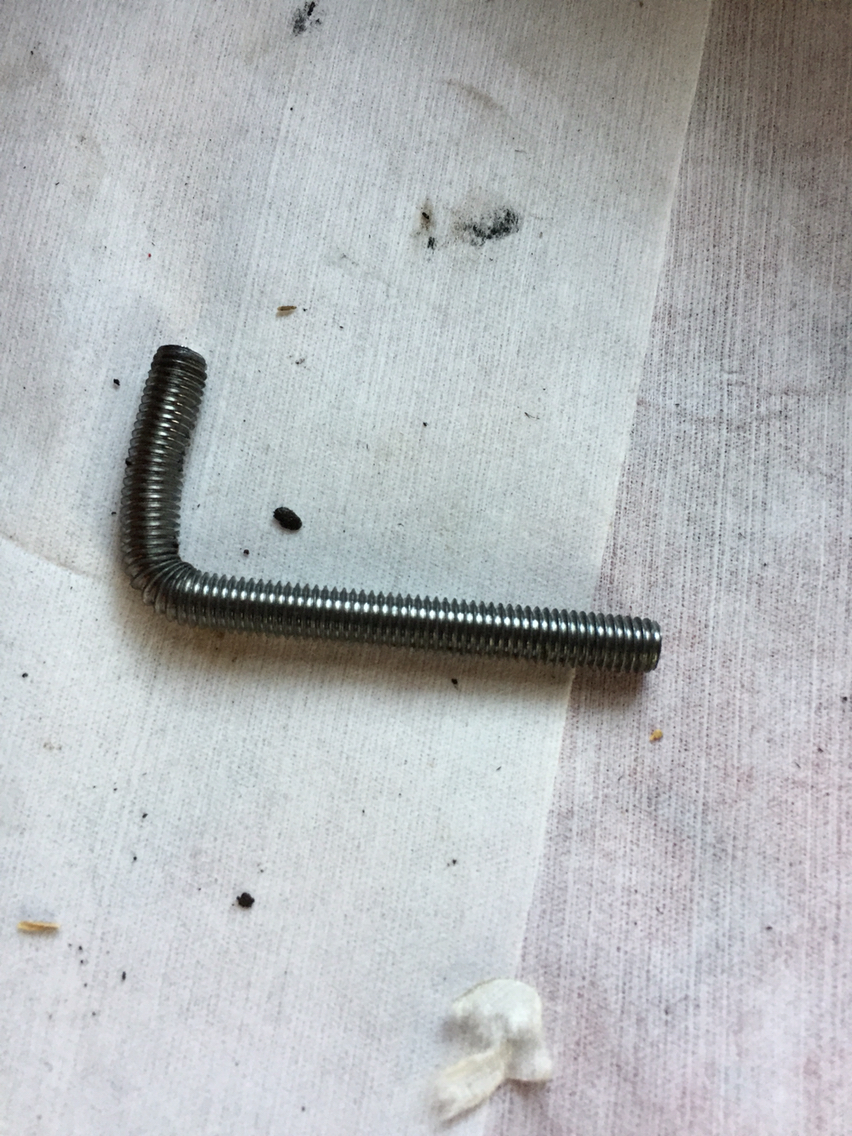
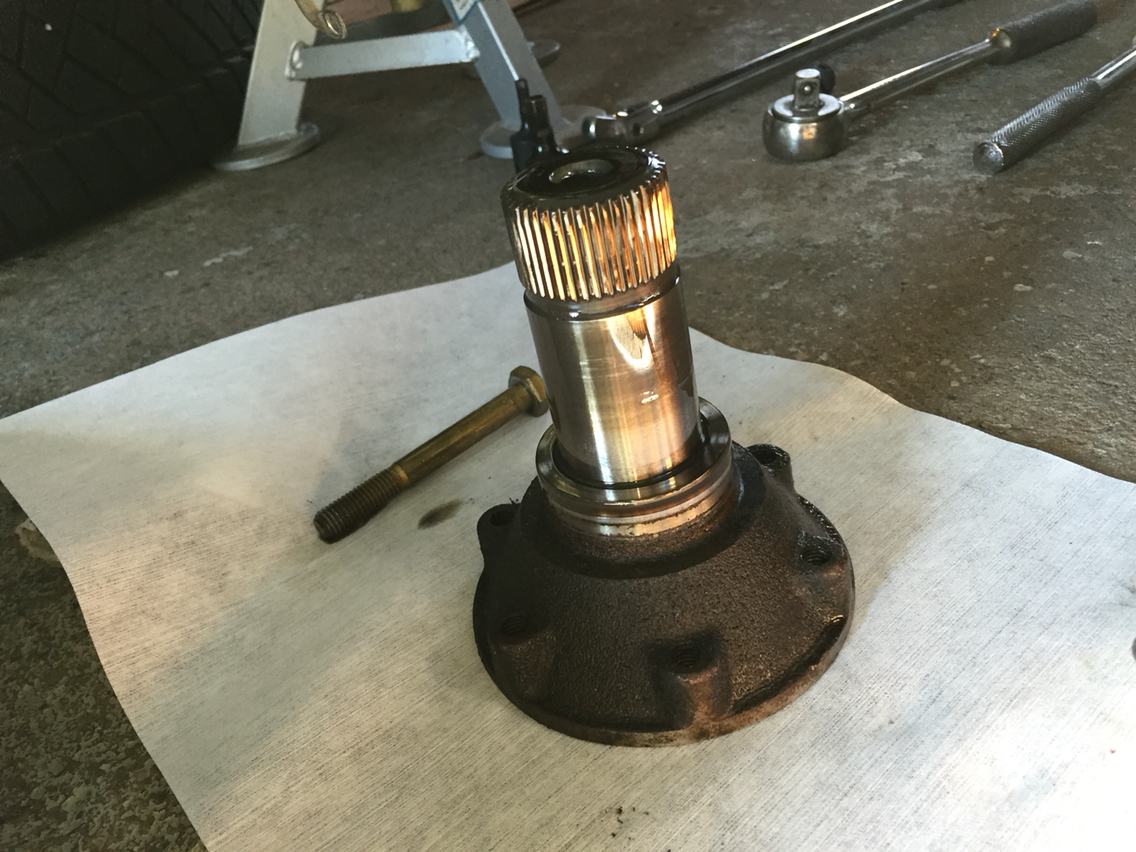
I broke the bolt loose with an impact gun, but if you don't have one, and regardless to retorque, you will need a long m8 bolt to hold the flange from rotating. I had to make one out of rod stock.
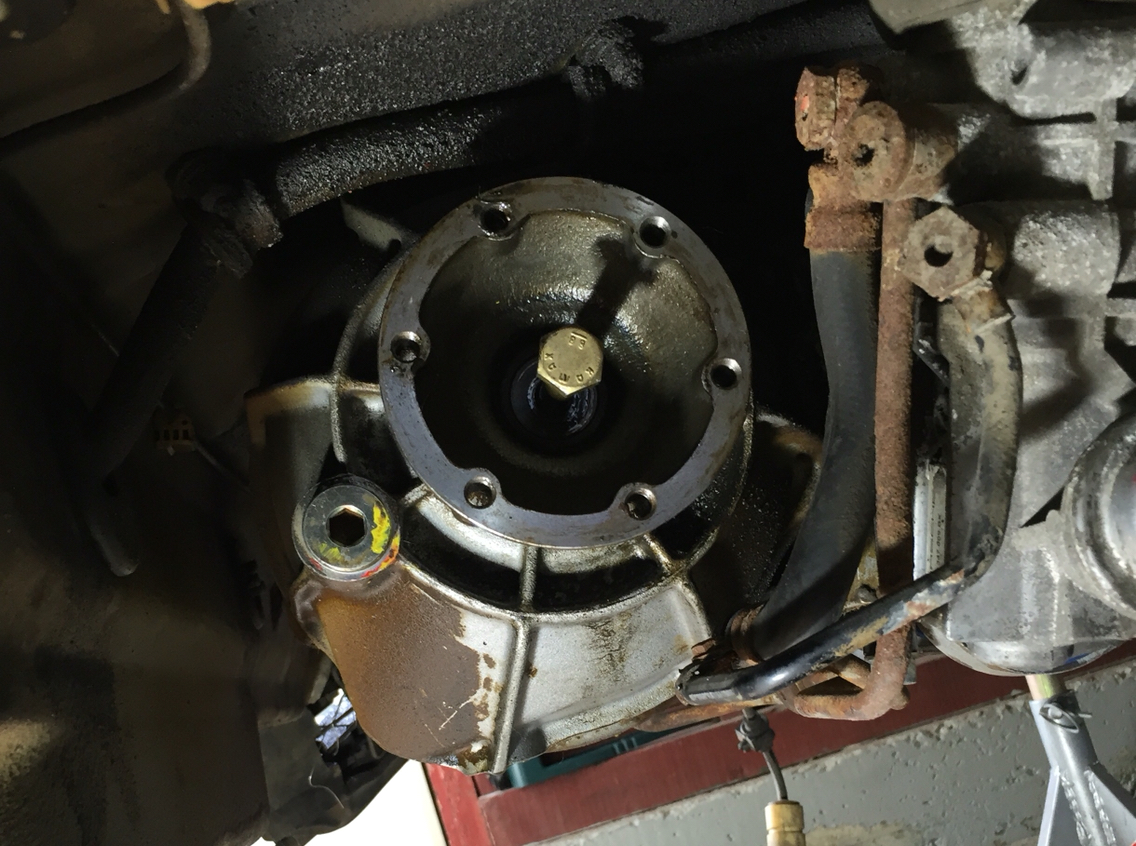
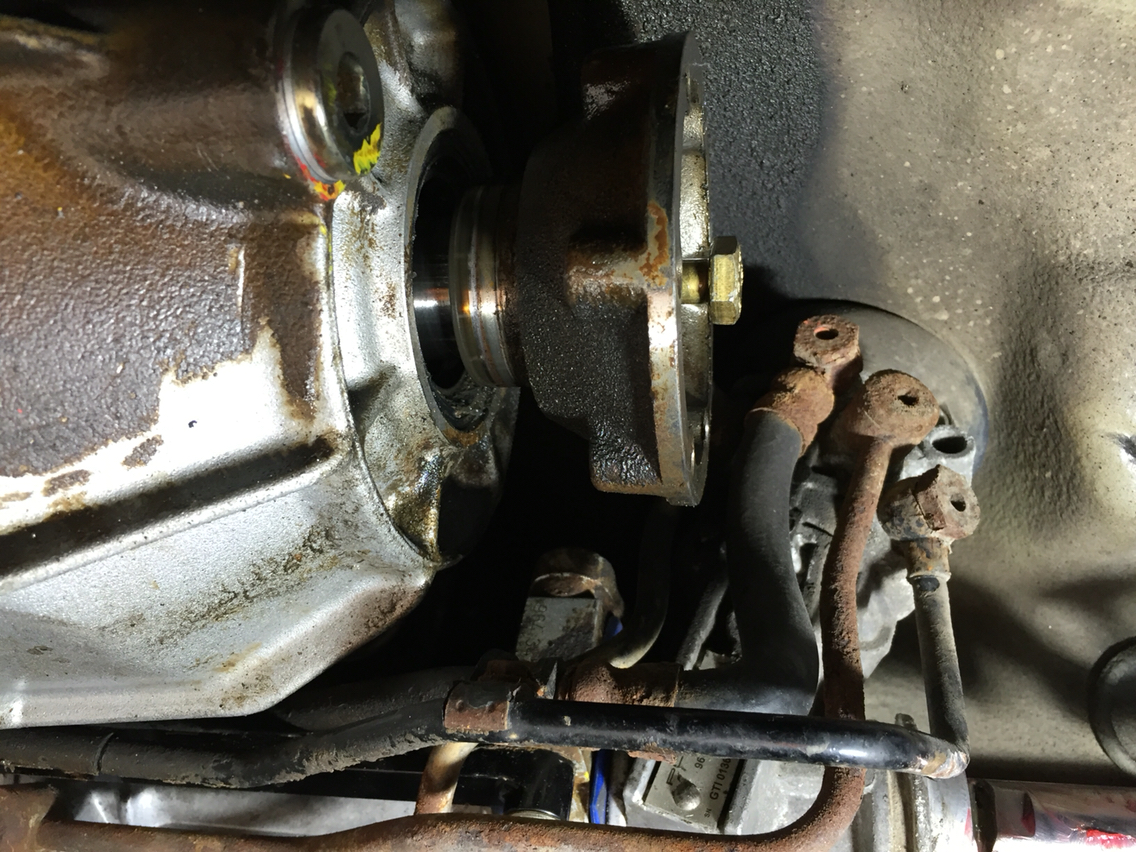
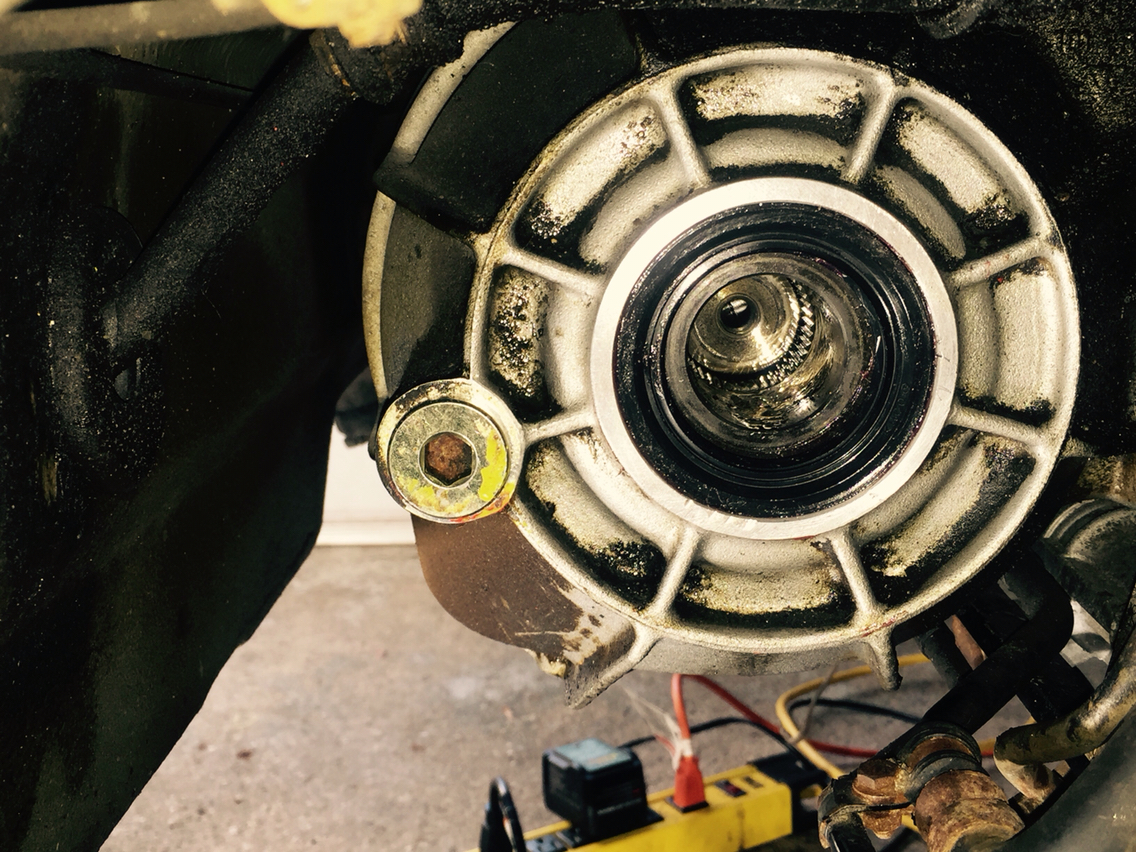
Break the 17mm bolt loose and pull it out. The flange just slides out. Clean it. Set it aside. Coat it with grade or oil if it's going to sit out. You don't need flash rust.
Clean the sides of the diff and around the seals. If you are aggressive you will introduce dirt into the diff bearings. So be careful to keep the dirt on the outside. In fact. The more cleaning you so around the area prior to starting. The happier you will be.
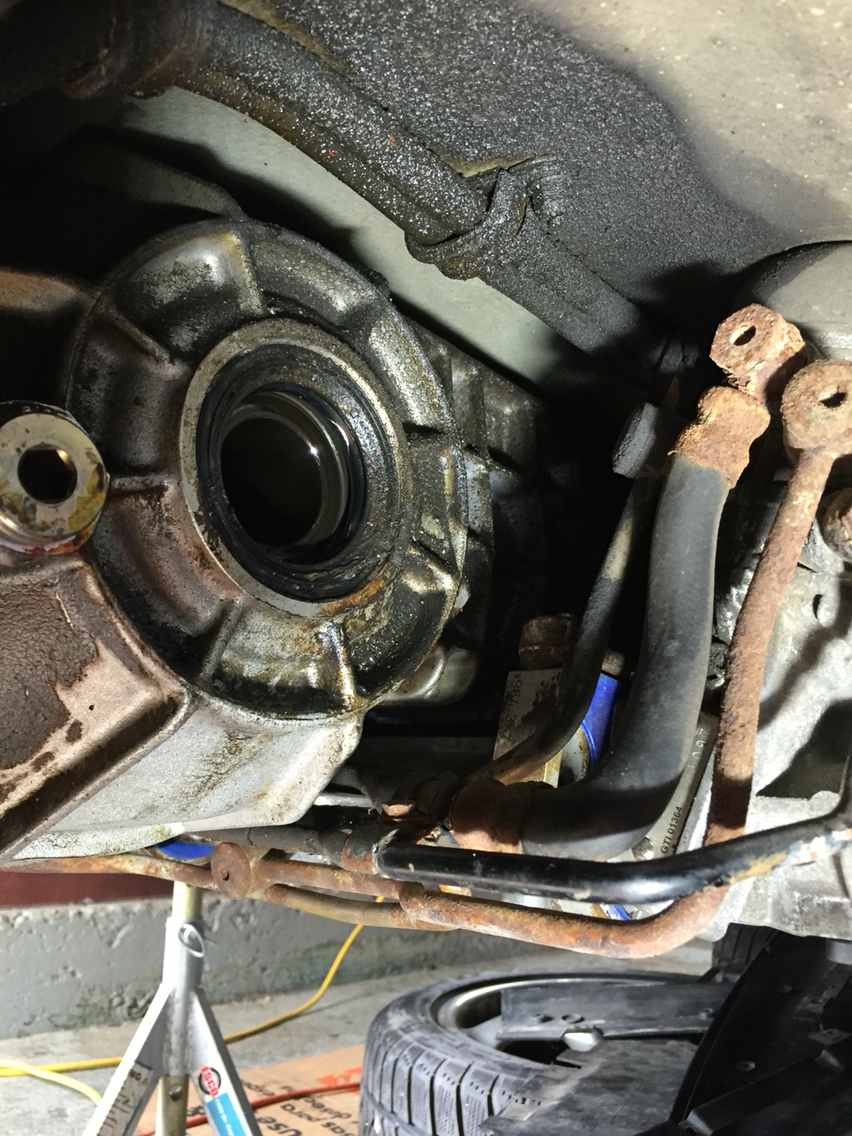
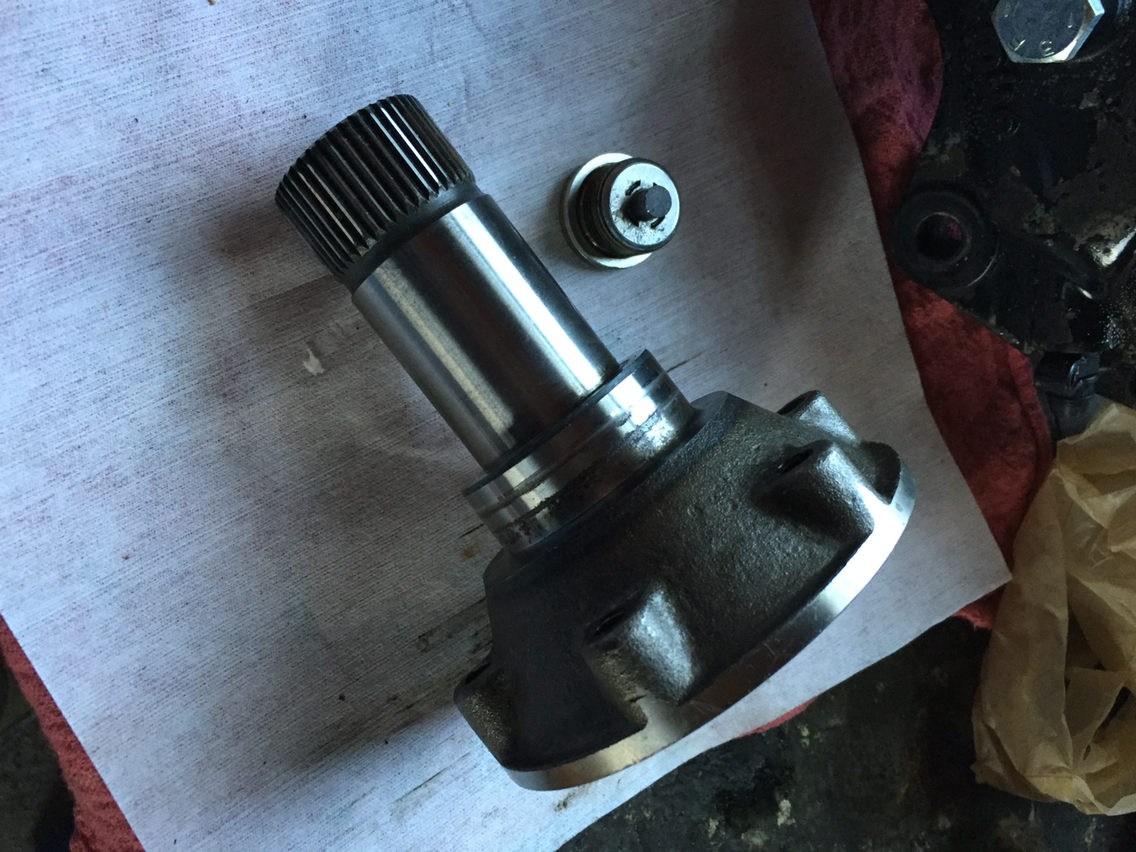
Now grab the seal and get that out of there. This is a closeup of the seal so you know what it looks like. Notice the metal inside and the spring that wraps around in there...
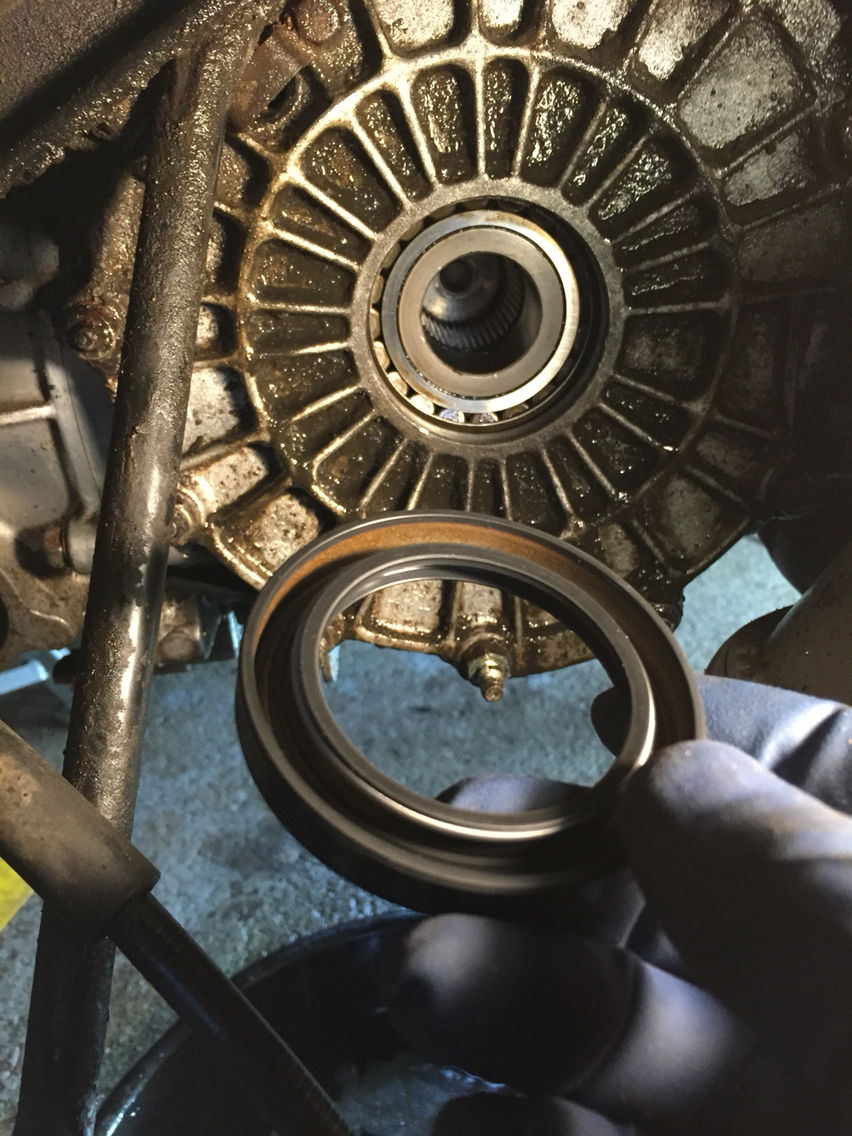
That's the inside of the seal. Fill that with grease according to the shop manual.
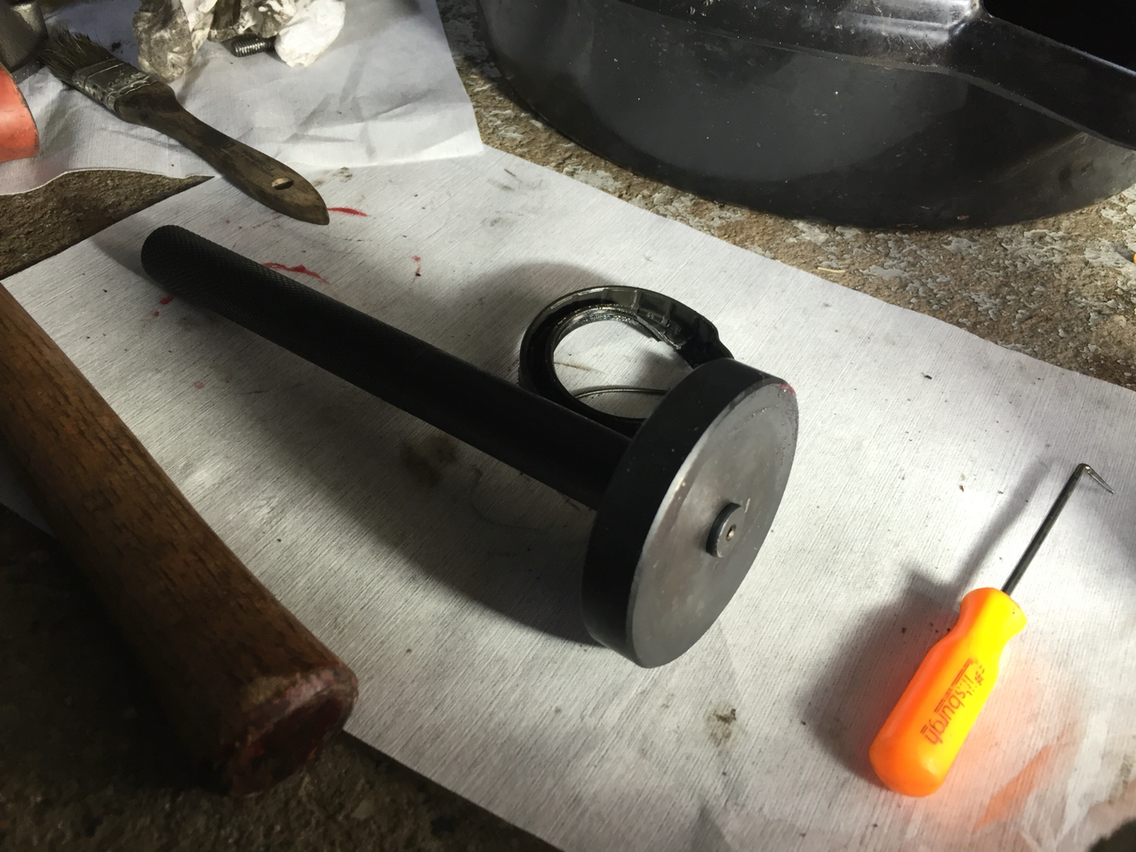
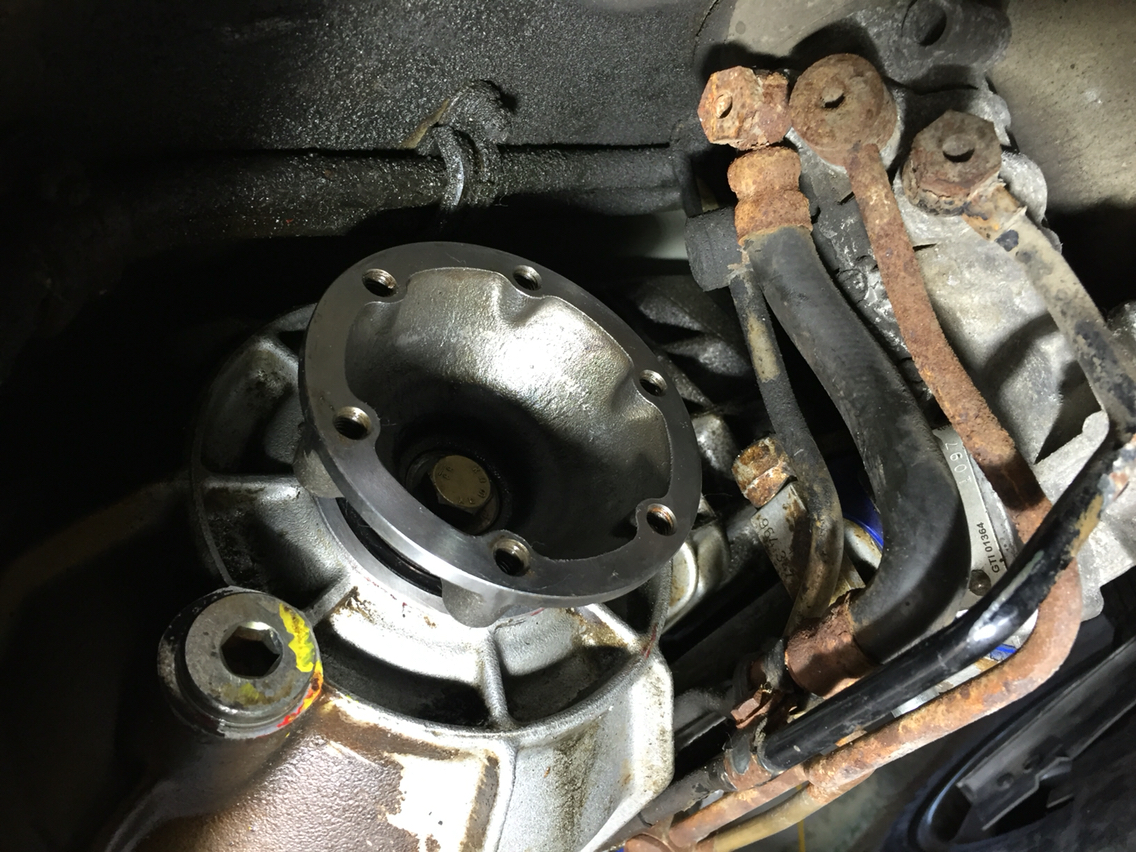
Next, tap or press the seal in. I used a 74mm press disc with a punch attached.
He it is all done.
Ok. Hard part is done. Next you slide the flange back in. Screw in your m8 bolt, screw in the 17mm flange bolt, and use the m8 to keep the flange from rotating. Torque to 32.5 ft/lbs (44nm).
This is from another side. But illustrates how the tool is used to hold the flange.
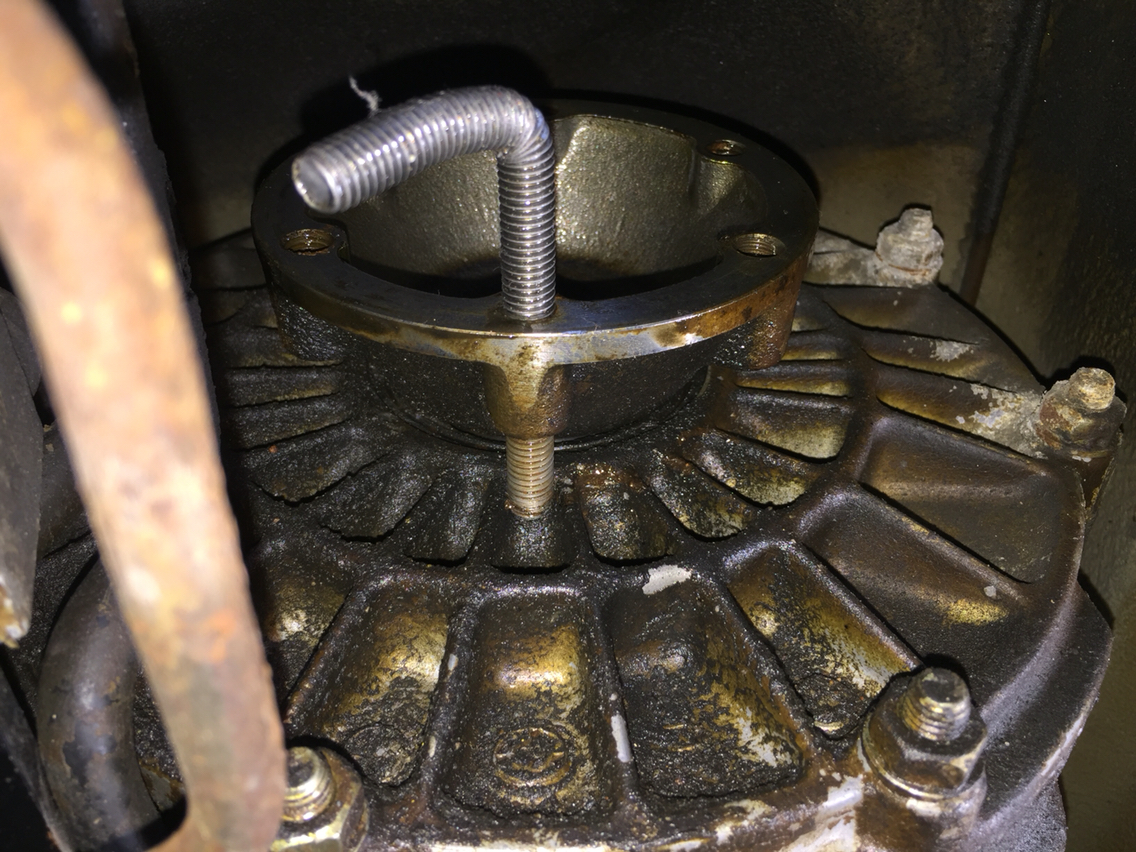
And done.
Refill the diff fluid. Transaxle is exactly the same process.
Hope this helps. This job is so easy that it's silly to not do it if your seals are 25 years old and leaking, and you have the axles out for whatever reason. Not the kind of thing you want to ask your local shop to do. I would imagine they would charge a ton of money. I did the front, never having done it before in just a few hours. Needed a second set of hands to make the refilling the diff fluid easy.
Photos were tough today. So I'll try to keep this organized as best I can. To be clear, on the front diff, we are doing part 11 in the picture. The bolt, part 5, is retorqued at the end at 32.5 ft/lbs or 44nm.
The seal is rubber with a steel insert and a small spring in the middle. It's pressed in and very tight to remove. So don't expect it to just come out. I gripped it with a pair of vise grips, and then twisted the vice grips to bend the metal away from the outer lip and then break it loose. Worked well, but there has to be an easier way.
I broke the bolt loose with an impact gun, but if you don't have one, and regardless to retorque, you will need a long m8 bolt to hold the flange from rotating. I had to make one out of rod stock.
Break the 17mm bolt loose and pull it out. The flange just slides out. Clean it. Set it aside. Coat it with grade or oil if it's going to sit out. You don't need flash rust.
Clean the sides of the diff and around the seals. If you are aggressive you will introduce dirt into the diff bearings. So be careful to keep the dirt on the outside. In fact. The more cleaning you so around the area prior to starting. The happier you will be.
Now grab the seal and get that out of there. This is a closeup of the seal so you know what it looks like. Notice the metal inside and the spring that wraps around in there...
That's the inside of the seal. Fill that with grease according to the shop manual.
Next, tap or press the seal in. I used a 74mm press disc with a punch attached.
He it is all done.
Ok. Hard part is done. Next you slide the flange back in. Screw in your m8 bolt, screw in the 17mm flange bolt, and use the m8 to keep the flange from rotating. Torque to 32.5 ft/lbs (44nm).
This is from another side. But illustrates how the tool is used to hold the flange.
And done.
Refill the diff fluid. Transaxle is exactly the same process.
Hope this helps. This job is so easy that it's silly to not do it if your seals are 25 years old and leaking, and you have the axles out for whatever reason. Not the kind of thing you want to ask your local shop to do. I would imagine they would charge a ton of money. I did the front, never having done it before in just a few hours. Needed a second set of hands to make the refilling the diff fluid easy.
12-19-2015, 11:35 PM
#326
Race Car
Thread Starter
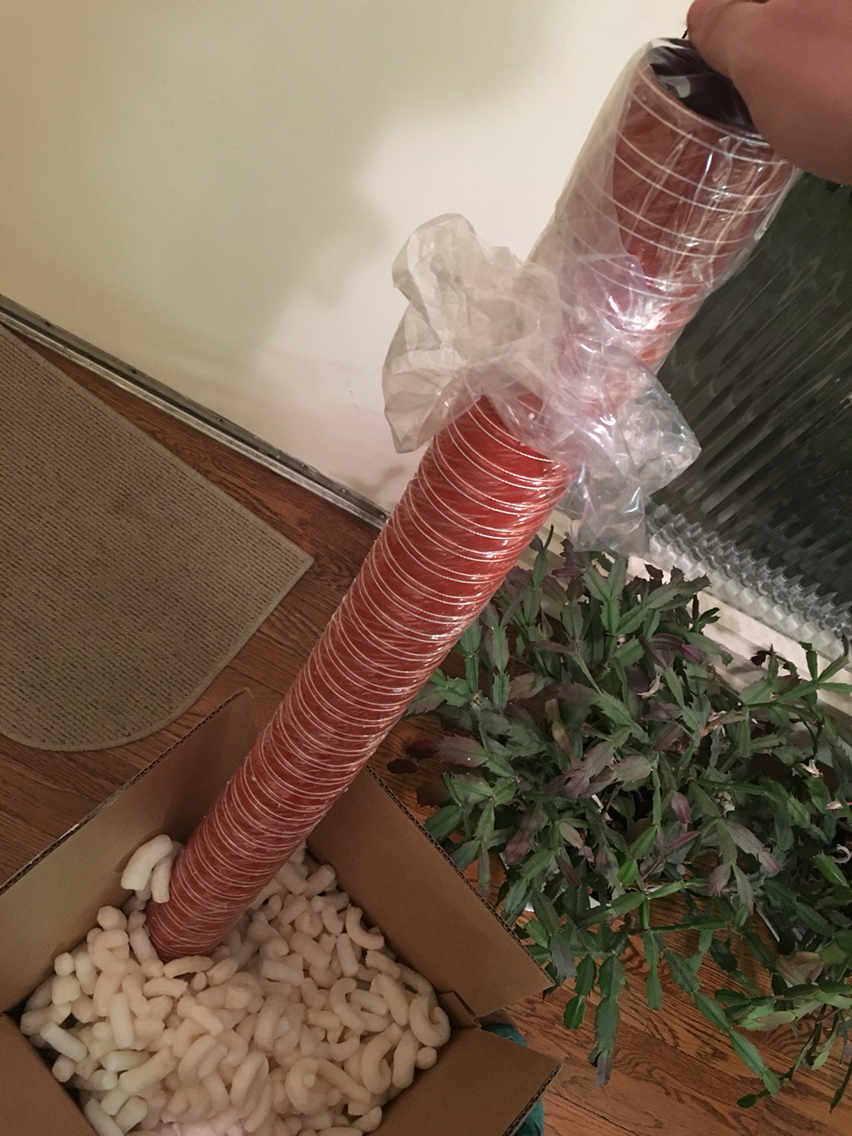
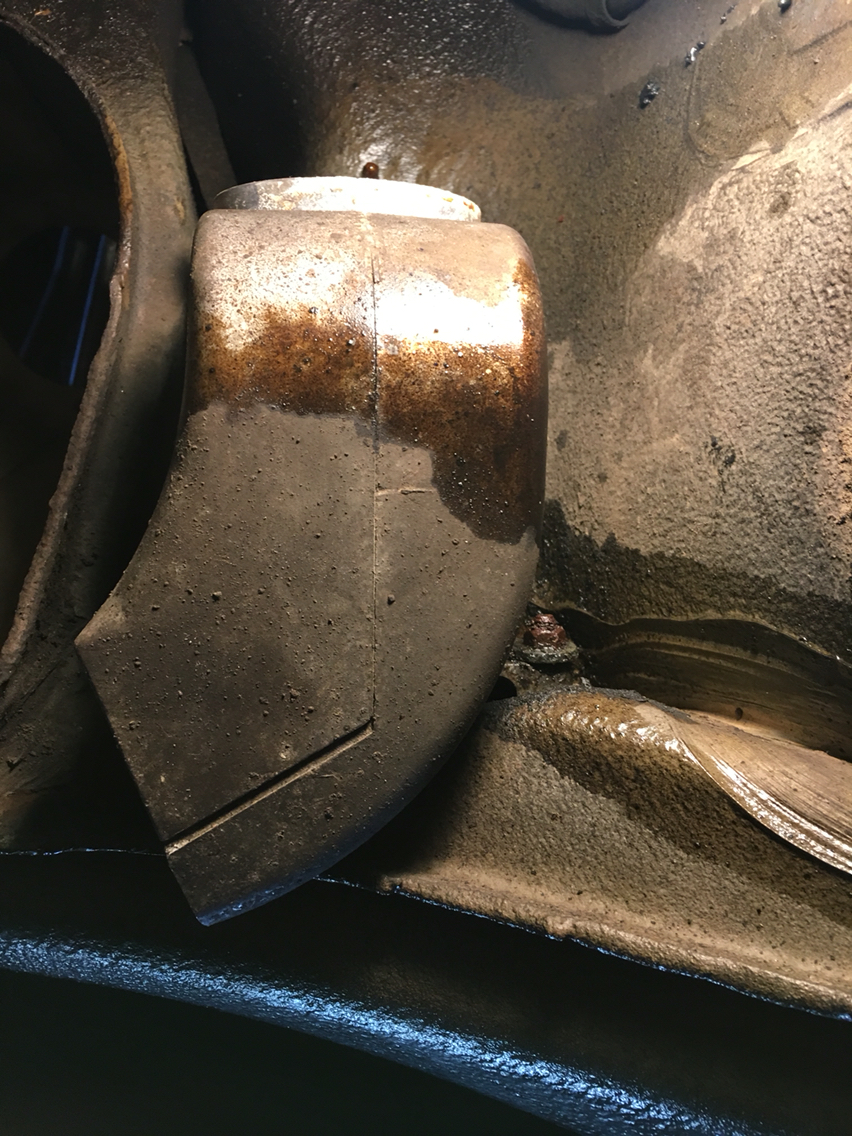
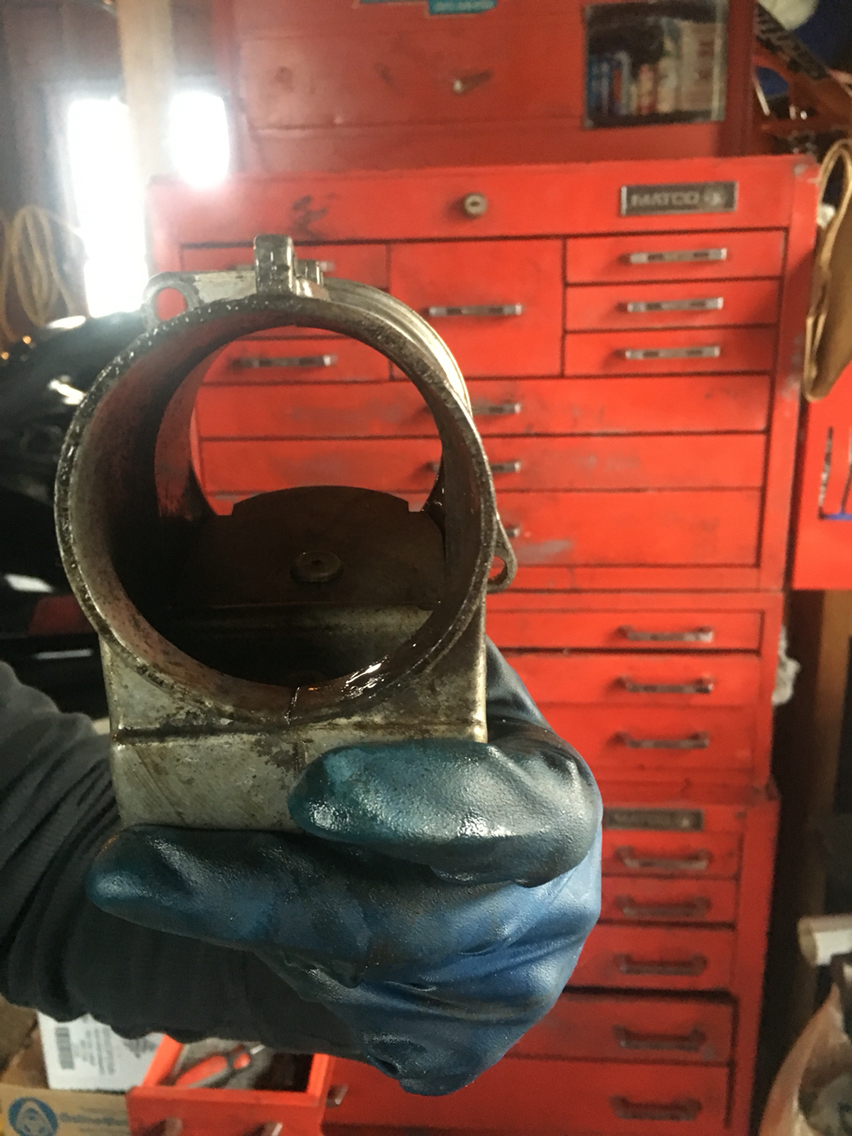
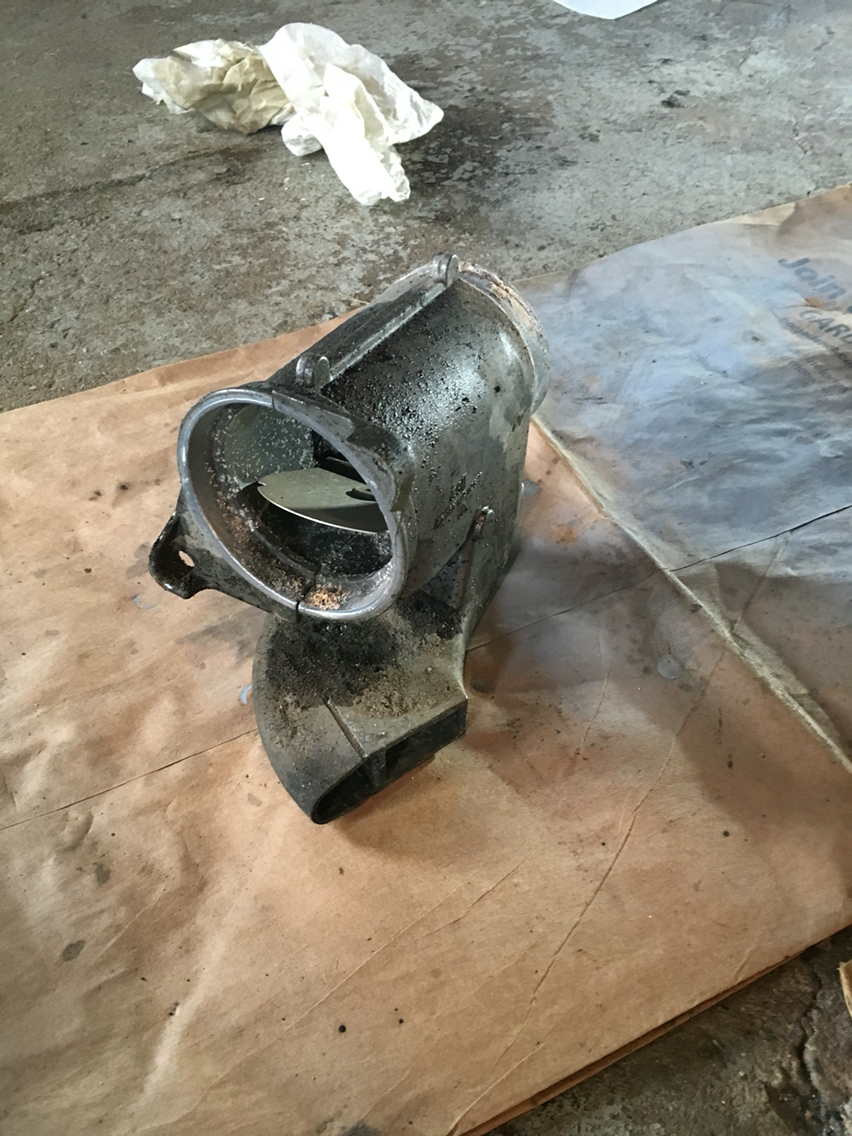
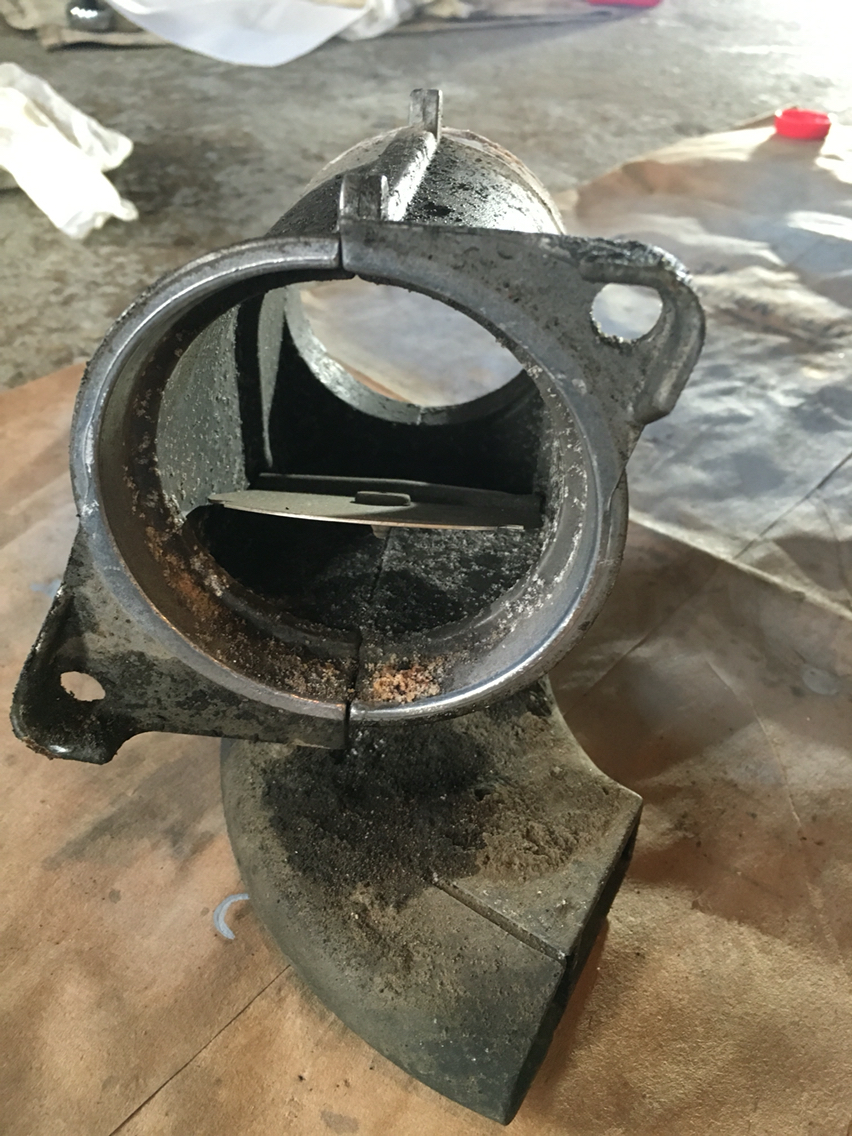
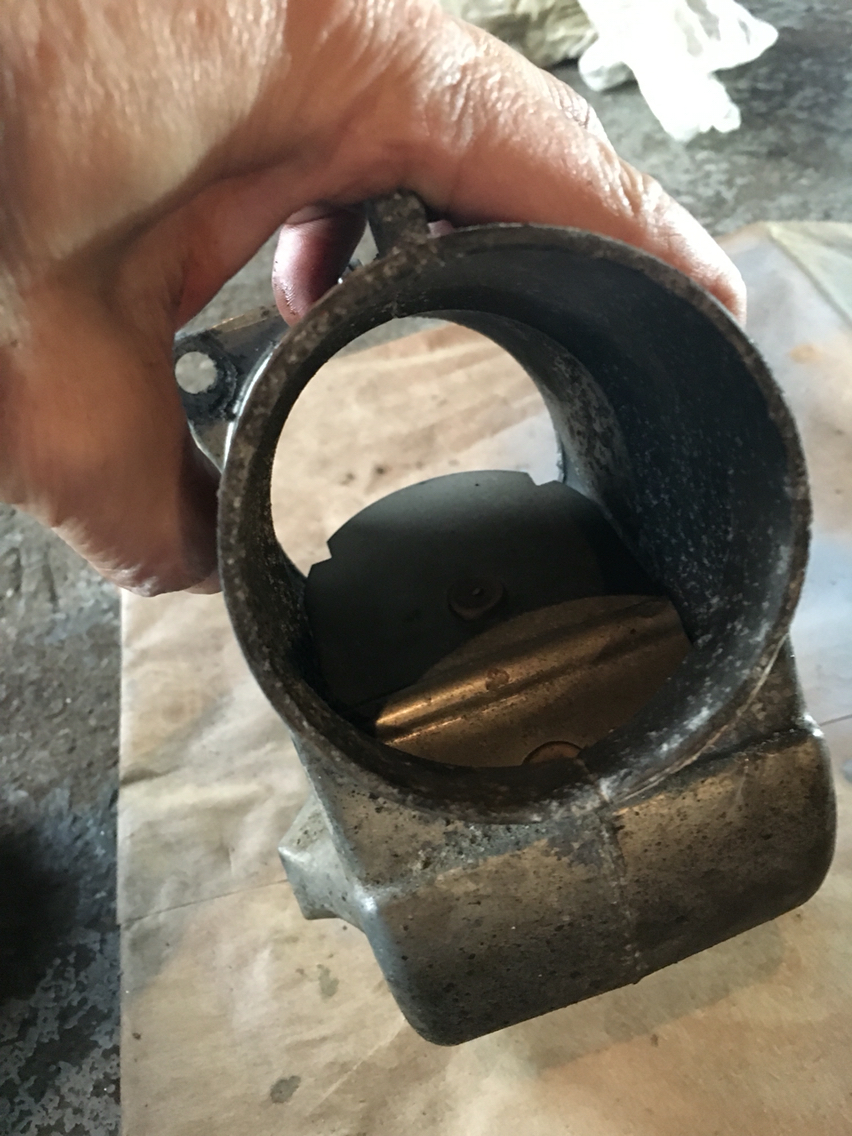
And while I was doing that...Mike took out the heater flapper boxes. With the entire rear end apart, it's pretty easy to get in there. So out they came to take a look, clean them up, and then replace the hoses.
We bought some hose for all of us to split. We will cut it into lengths.
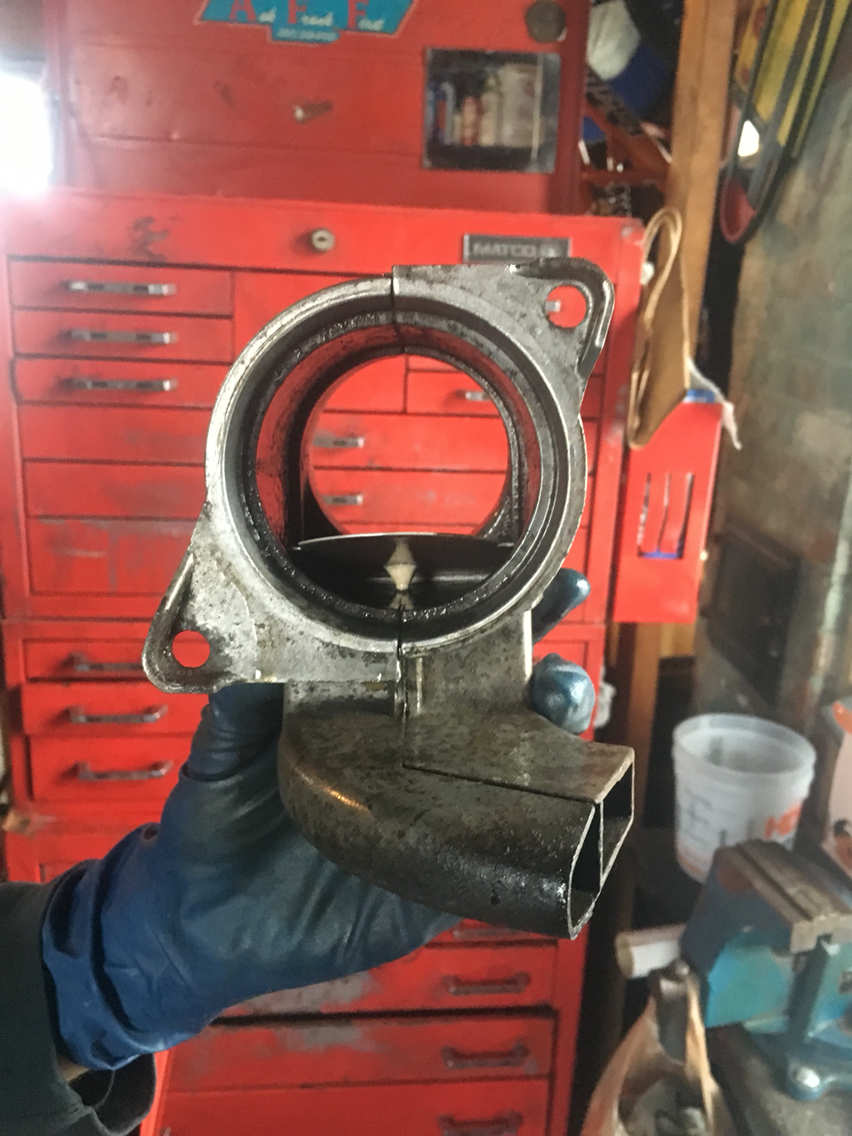
Out the flapper boxes came. Two small plastic nuts hold them on. O-rings should be replaced. And the flapper inside the flapper box should move freely. They didn't. One was practically seized and the other just wasn't good enough. So I sprayed brake clean, wd-40, and pb blaster in there and moved the flap back and forth till it came loose. Then used a clean and lube bike chain spray, since you want it to stay lubed and not dry out. Works like new now.
Though I don't 100% understand the function. Does anyone have an easy to understand explaination?
We bought some hose for all of us to split. We will cut it into lengths.
Out the flapper boxes came. Two small plastic nuts hold them on. O-rings should be replaced. And the flapper inside the flapper box should move freely. They didn't. One was practically seized and the other just wasn't good enough. So I sprayed brake clean, wd-40, and pb blaster in there and moved the flap back and forth till it came loose. Then used a clean and lube bike chain spray, since you want it to stay lubed and not dry out. Works like new now.
Though I don't 100% understand the function. Does anyone have an easy to understand explaination?
12-20-2015, 01:42 PM
#329
Race Car
Thread Starter
No idea what brand. Came from northern tool. They had them on sale back then for like 80 dollars. It's 1:3 and I'm sure it's the same as all the made in China ones, since they all seem to be exactly the same with a different brand name on each. Mine doesn't really have any markings..
That said, it works great.
That said, it works great.
12-20-2015, 10:43 PM
#330
Race Car
Thread Starter
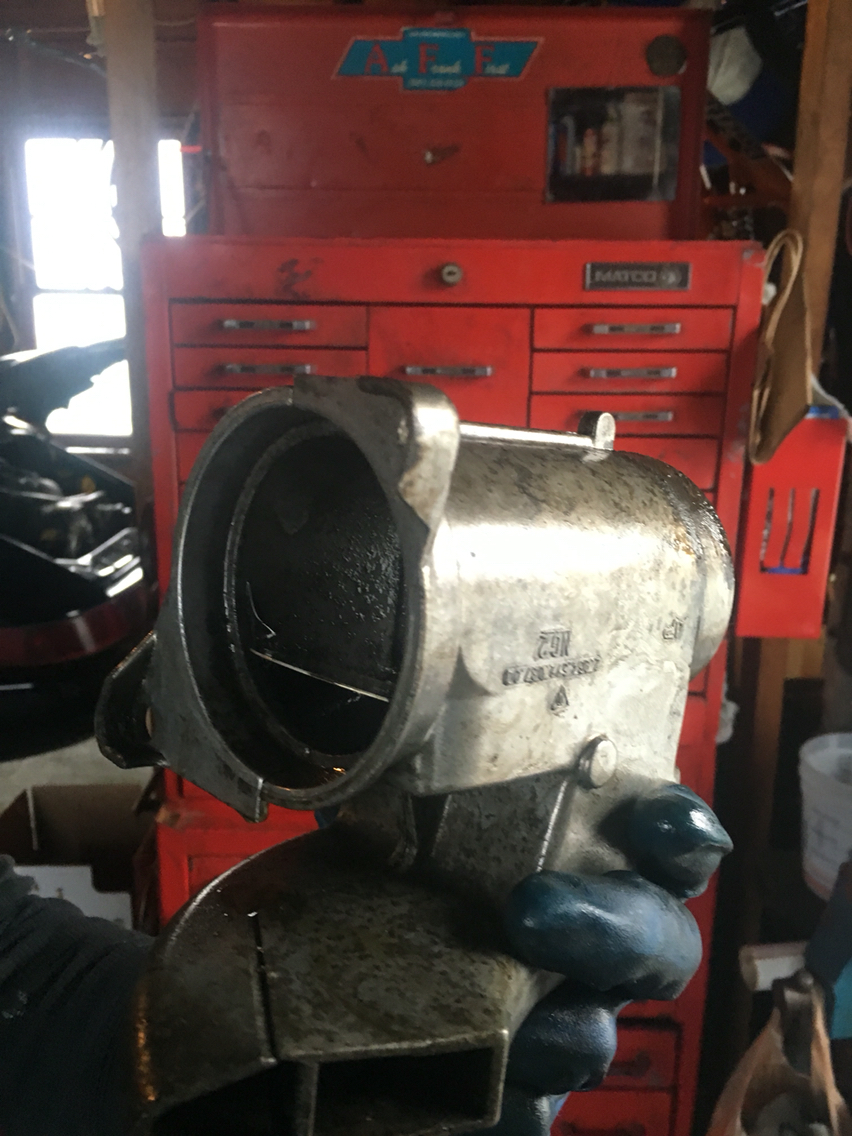
Back to dinosaur bones today. I found out I was basically doing it all wrong and was making it way too hard. I was following another DIY and it was just not happenen.
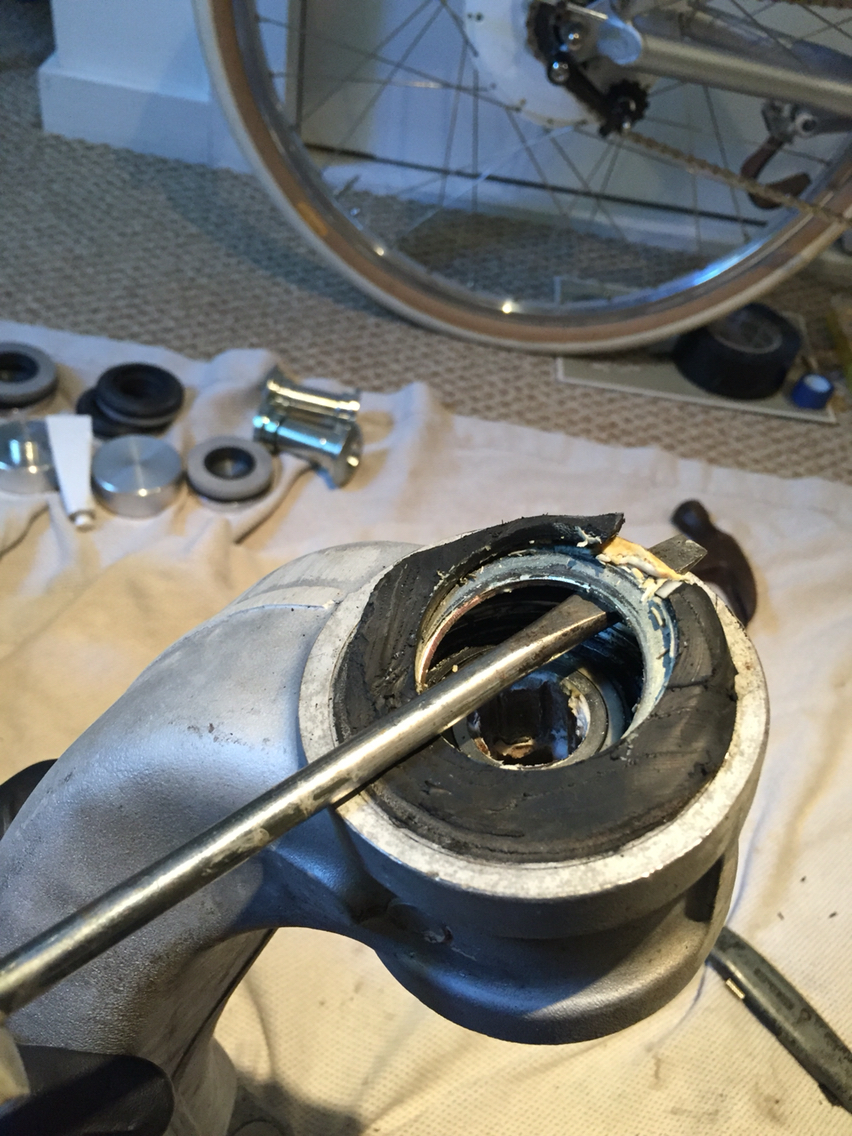
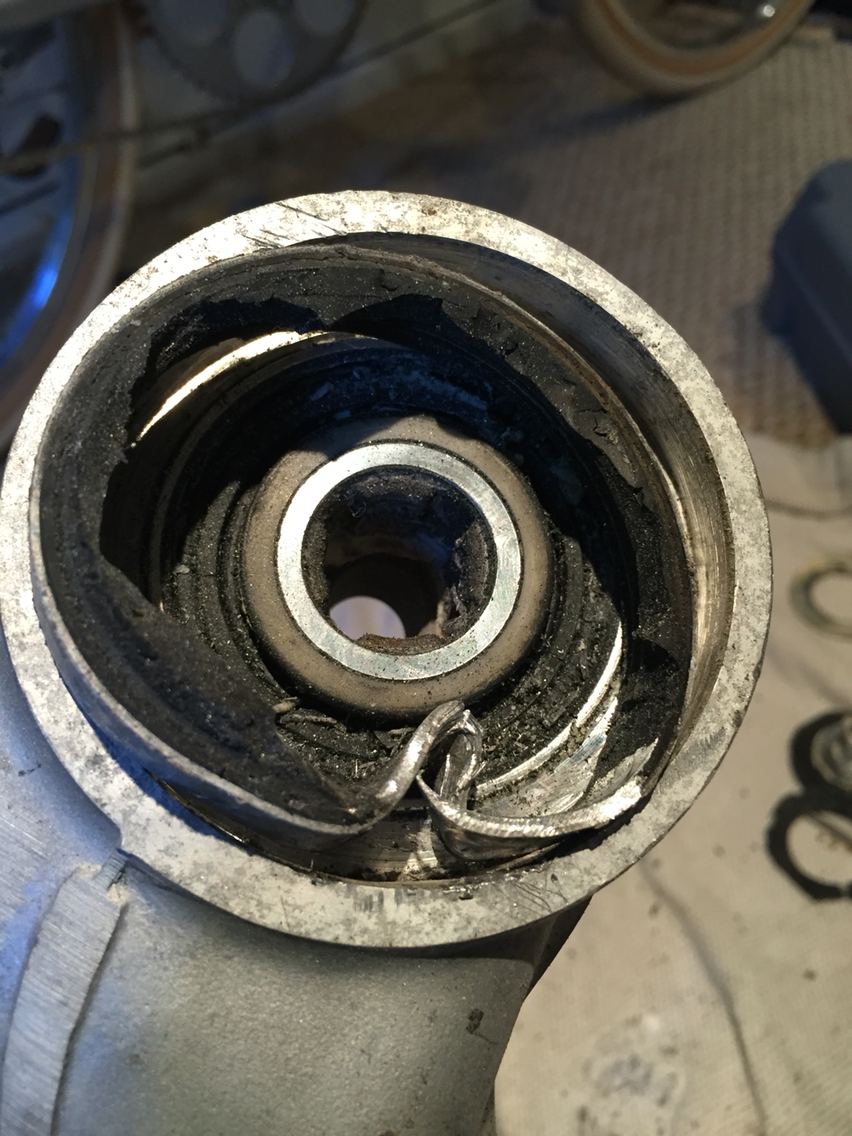
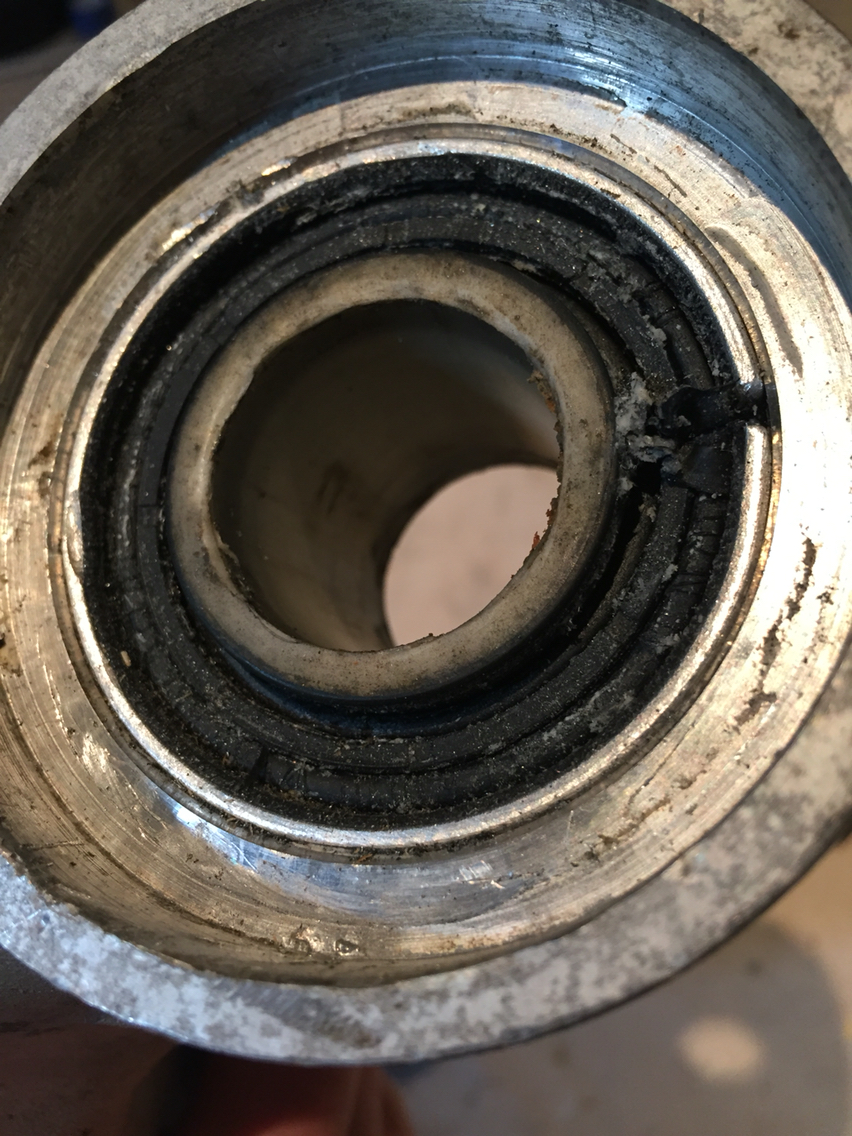
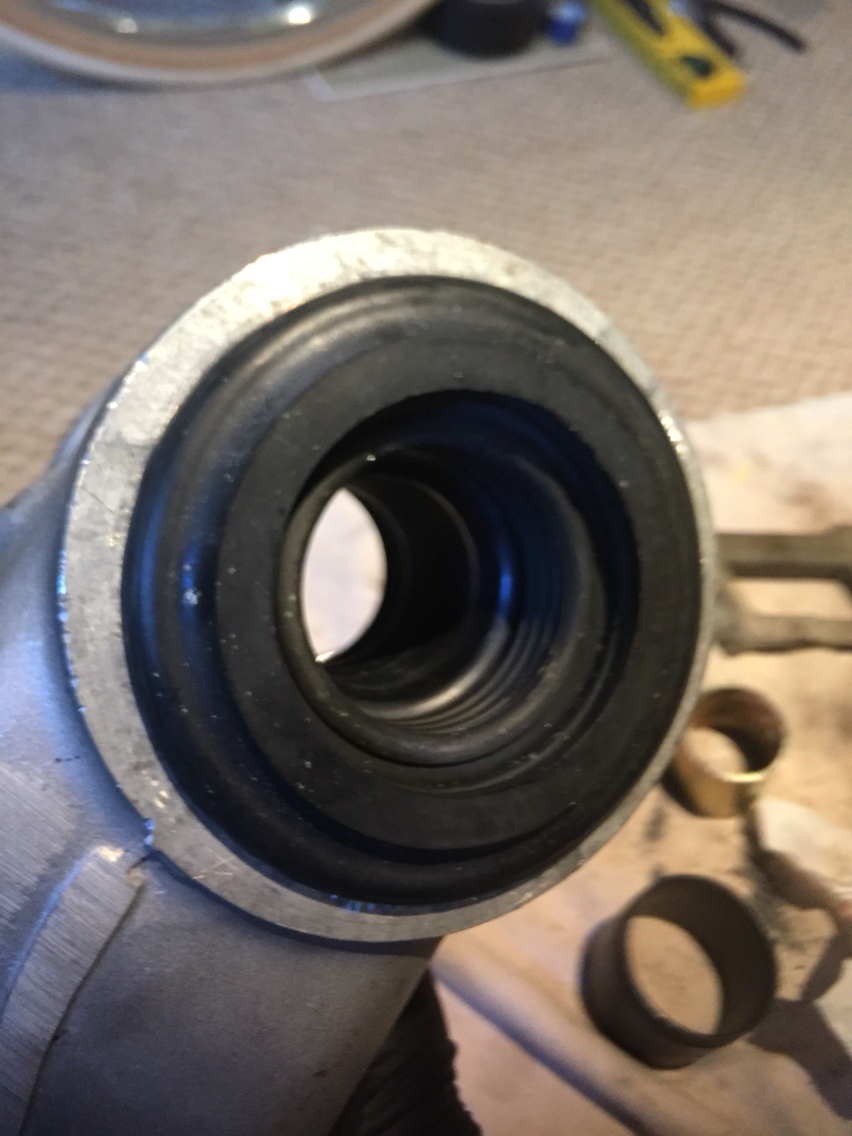
So here's the deal. This is an easy job. Way easier than control arm bushings. I was told and led to believe the opposite. All you have to do is understand the way the oem bushings are in there and understand the materials, and it all makes sense.
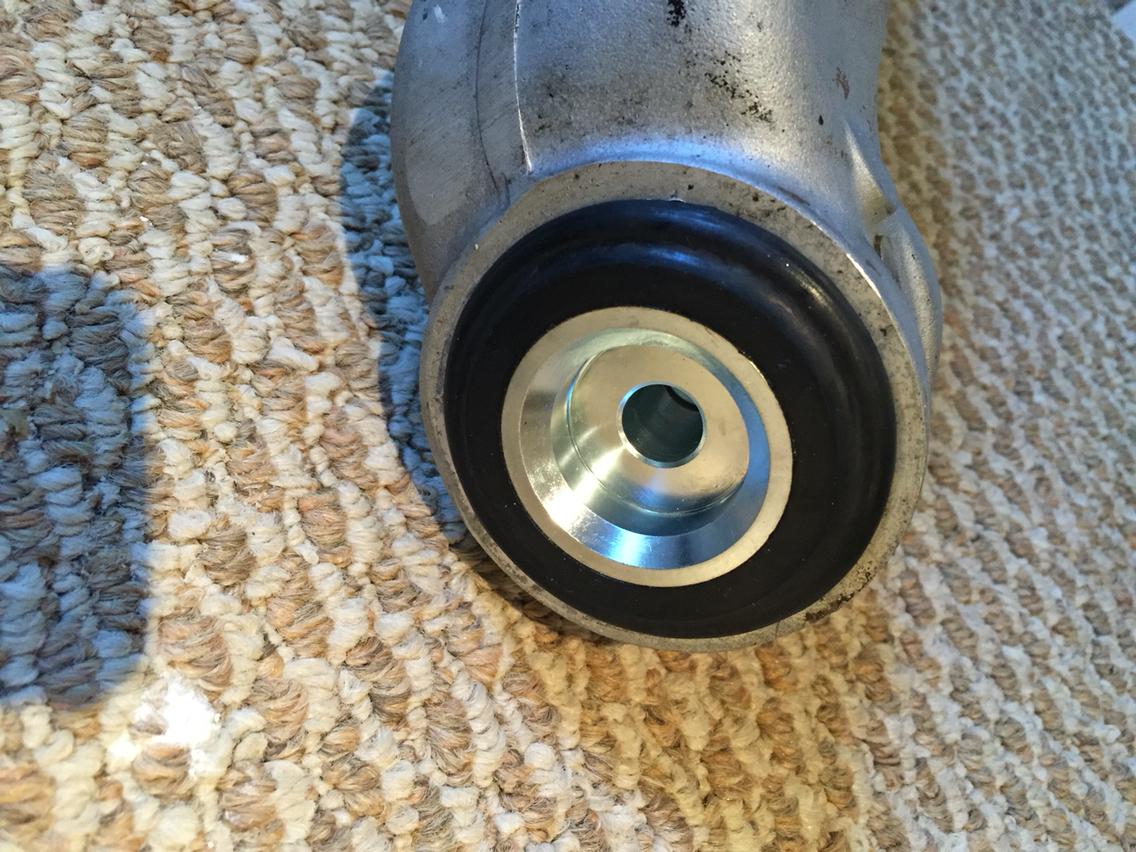
Step one, cut the outer rubber bush around the steel part. The steel part slips into the other steel part on the other side. As soon as the rubber is cut, it pops right out.
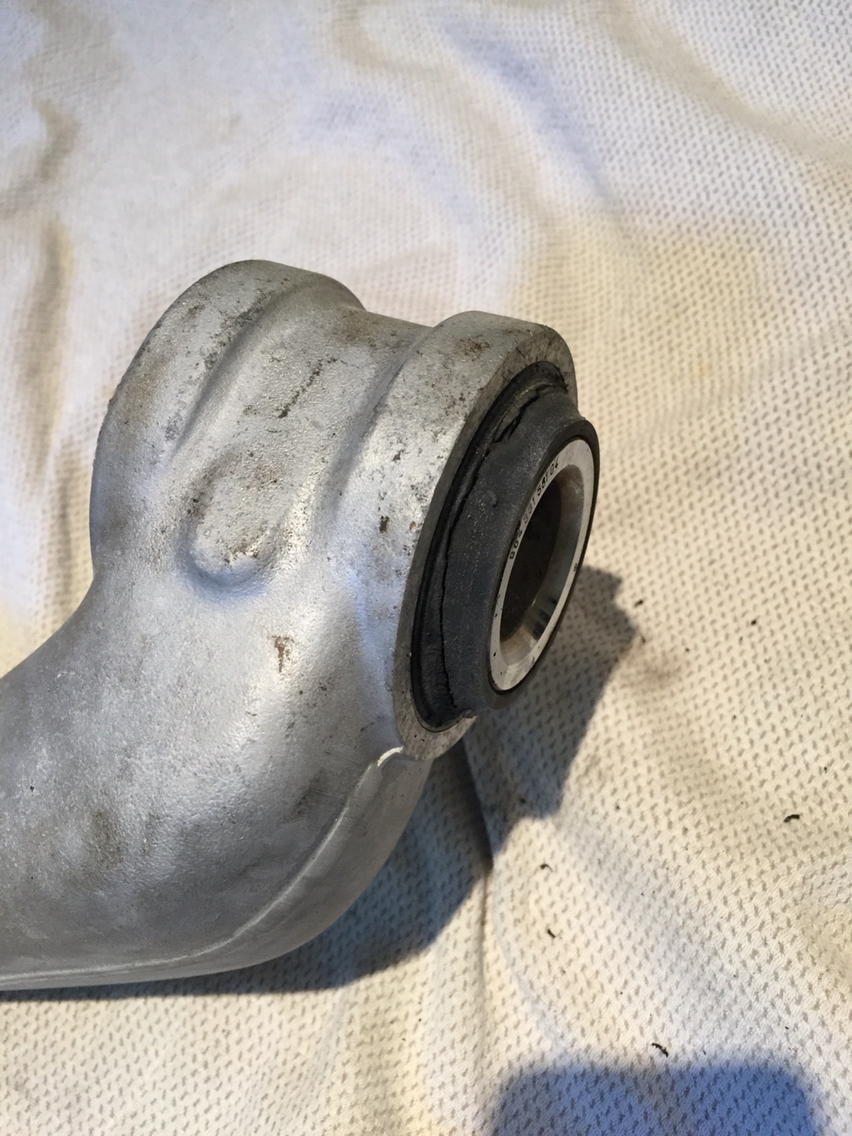
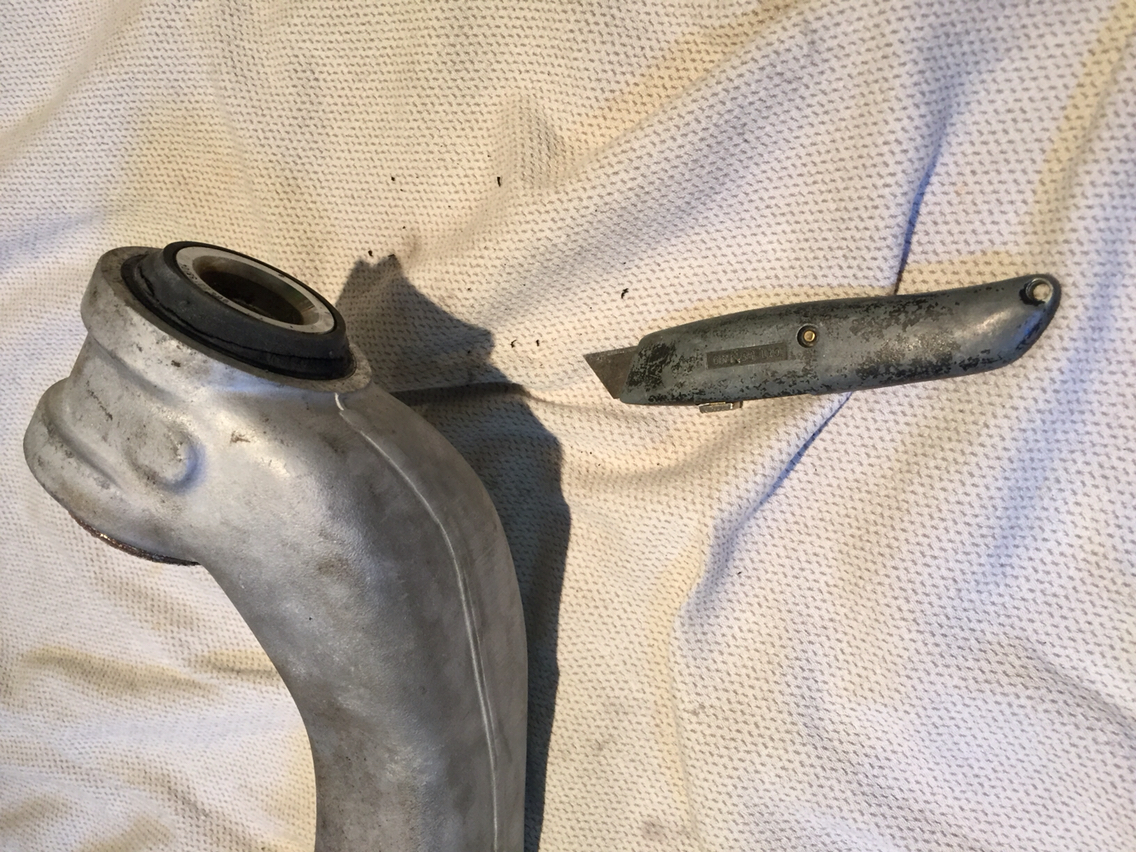
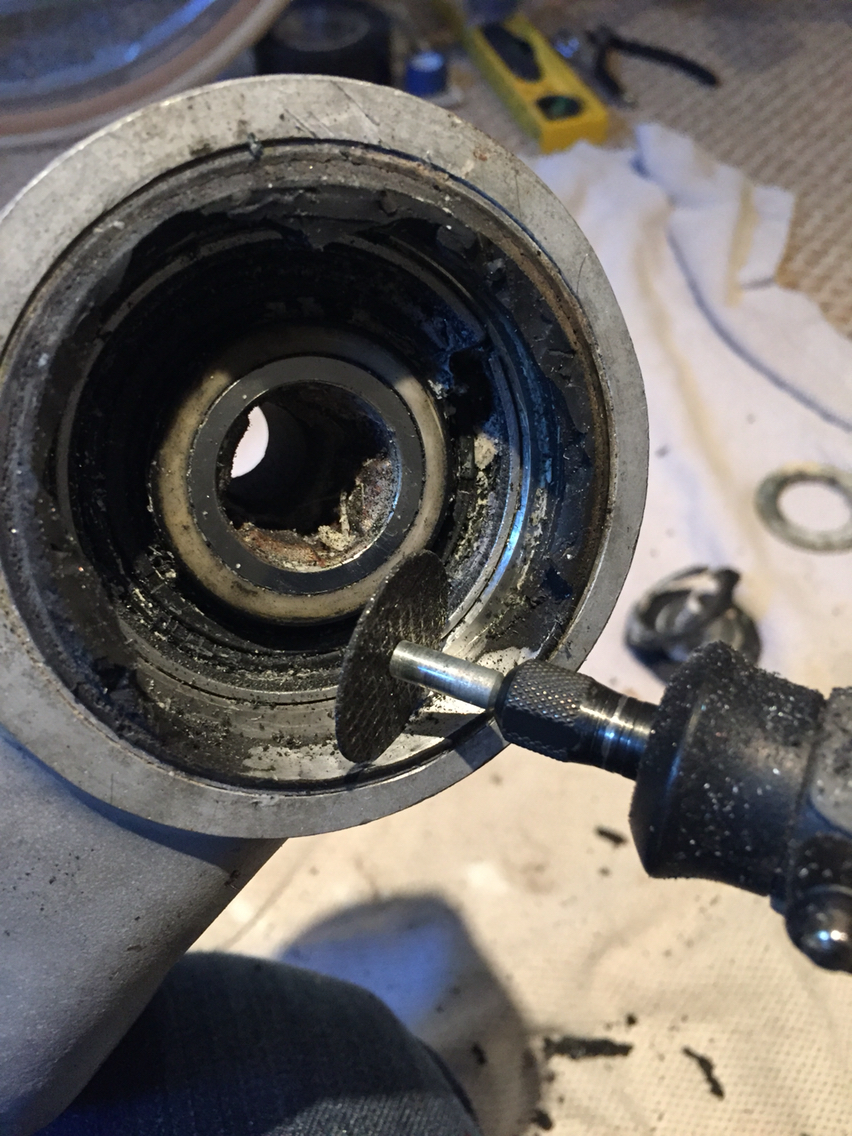
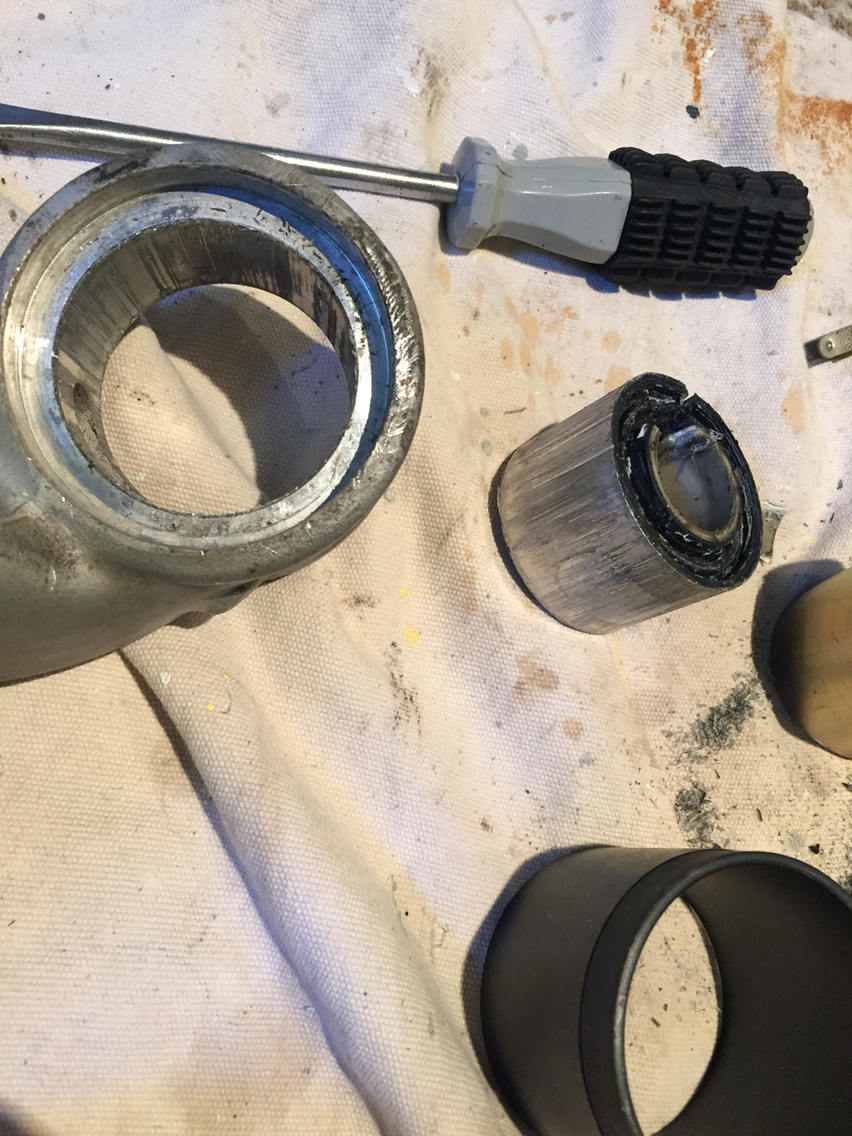
Then stick a screw driver in there and pry out the yellow zinc steel washer. Once that is out, all you have is a very soft metal sleeve with the remainder of the rubber for the outer section of the bushing. I cut this with a dremel and then started prying it out with a screwdriver, but really you can take a punch and hammer the edge inward and work it far enough to get a pair of pliers on it, twist and pop it out. The metal is soft, so this isn't hard to do. Just try not to damage the aluminum of the trailing arm.
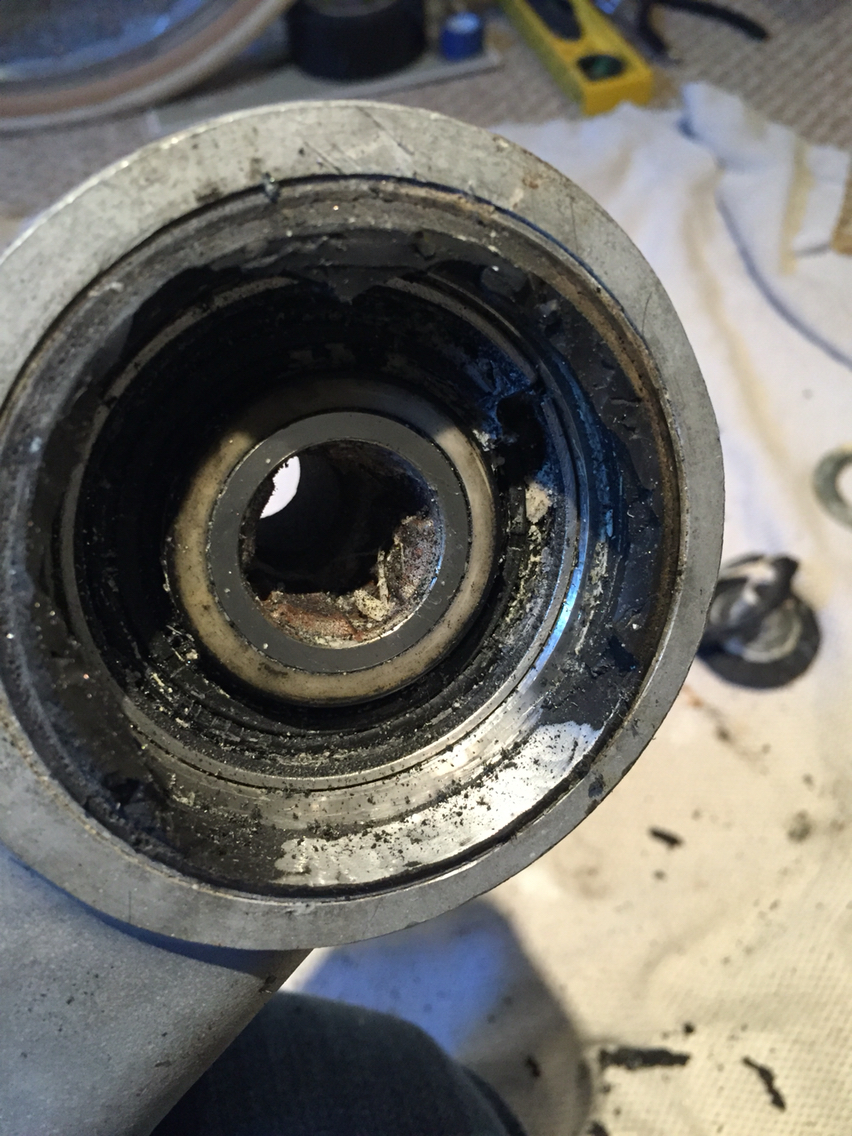
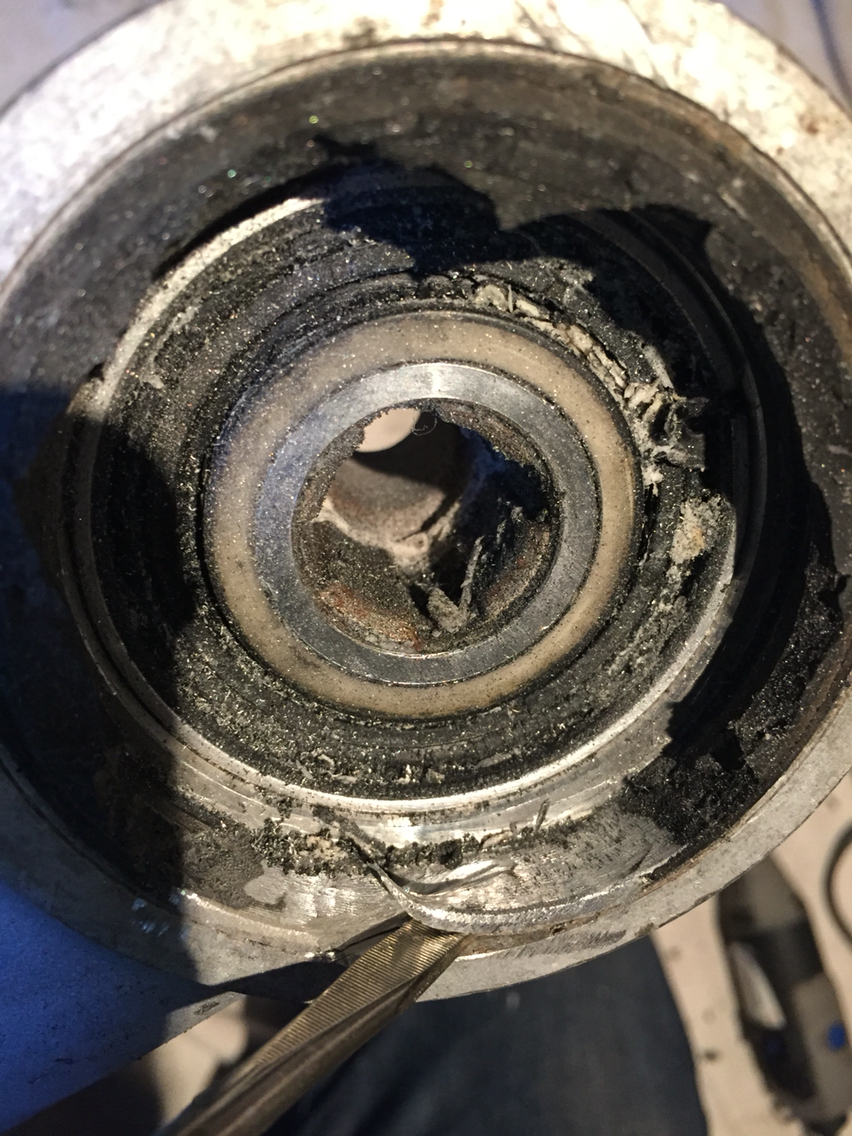
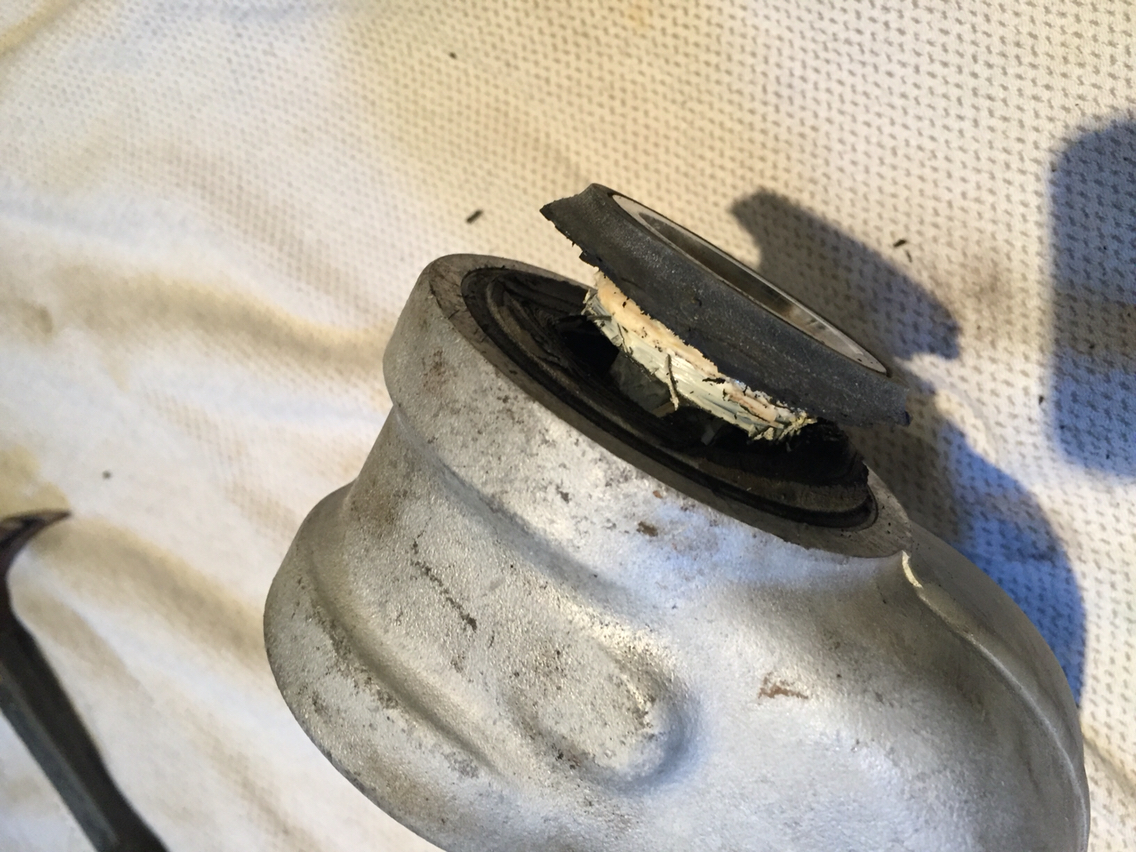
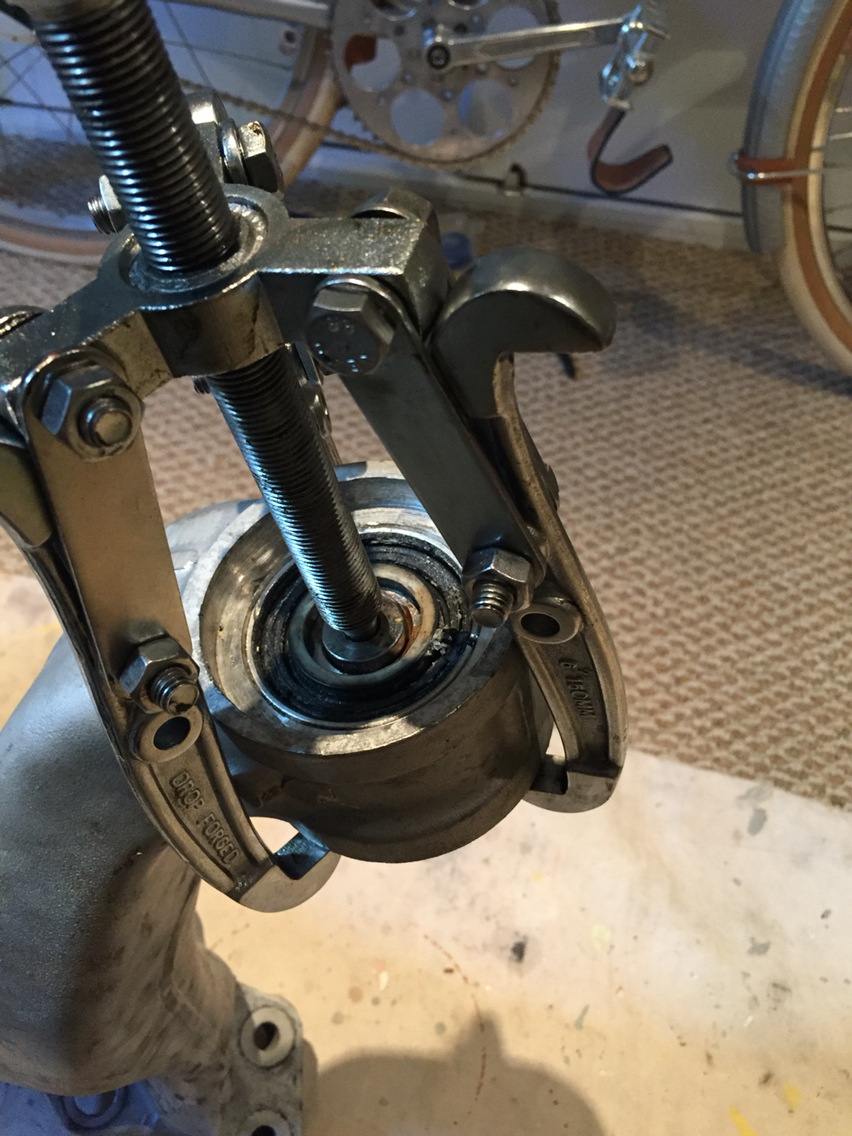
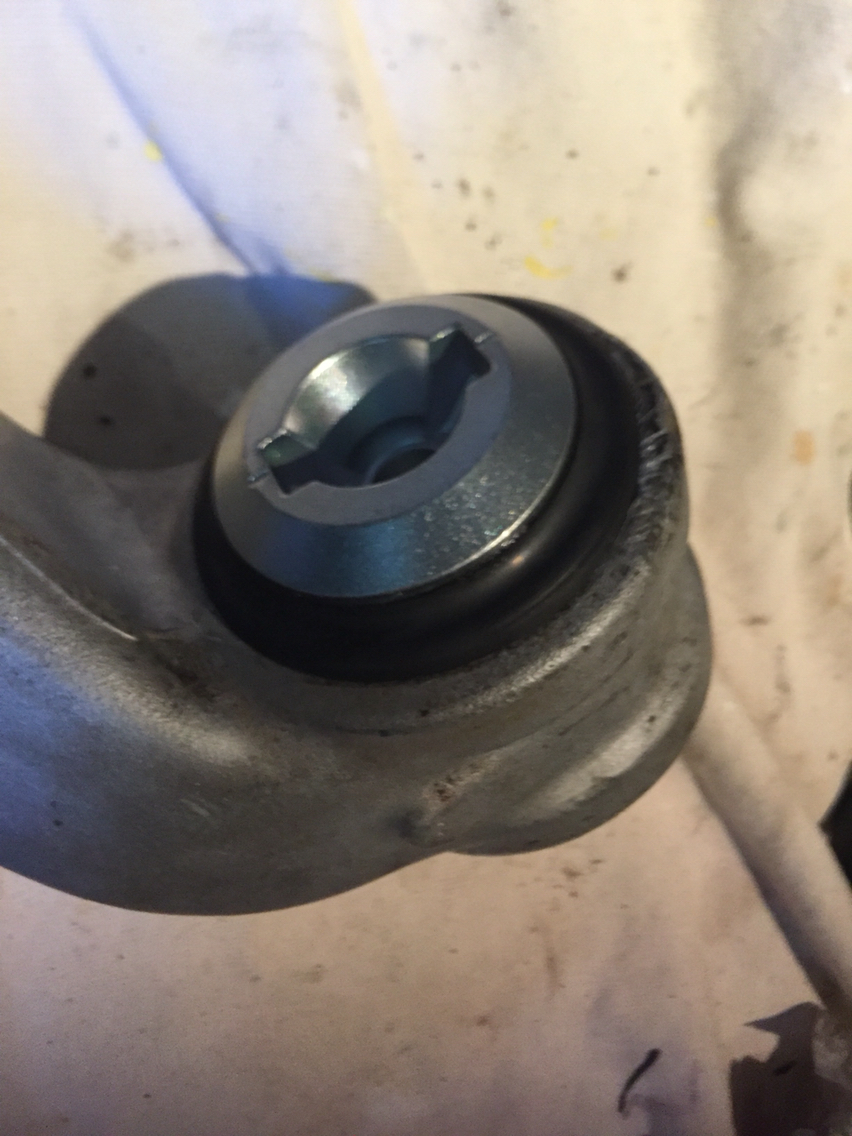
Then, cut the rubber around the other steel piece on the other side. Use a three leg puller to press that piece out of the middle. This puller is a cheepie from harbor freight. Works perfectly.
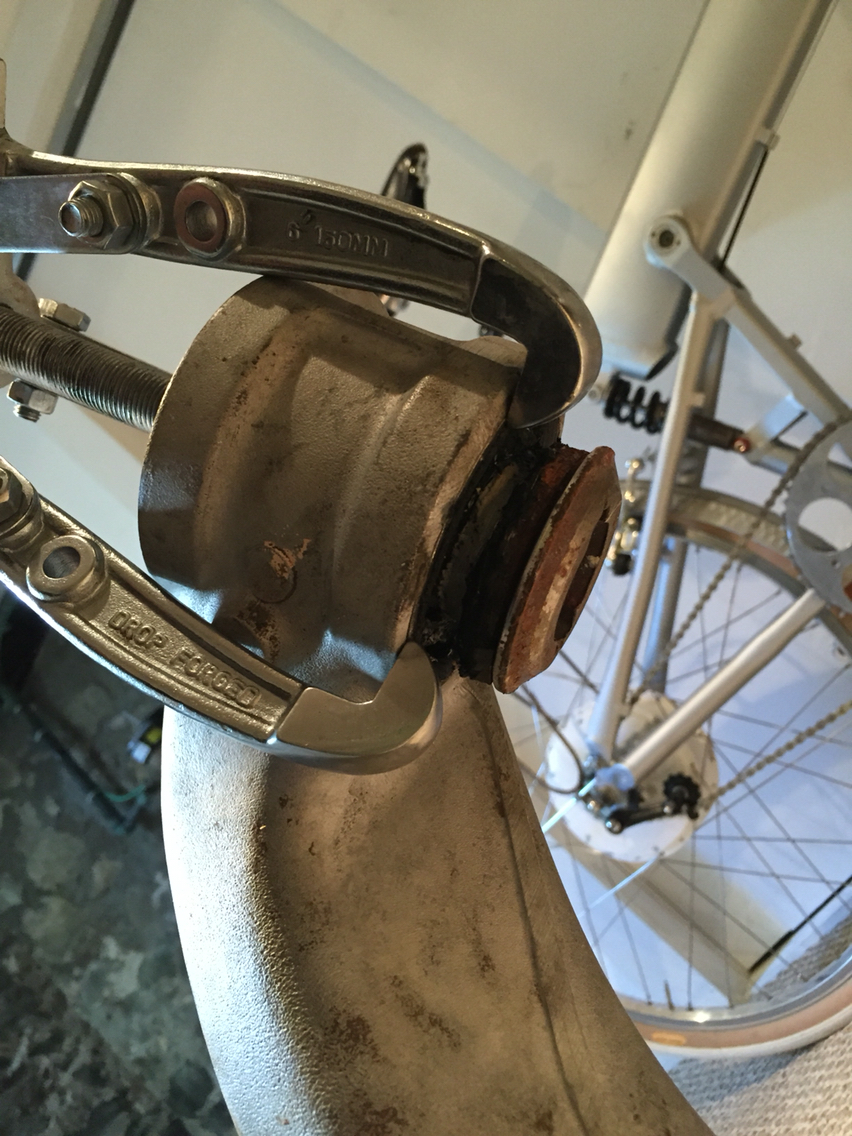
Now you have just the center bushing left to press out. This will press out without a huge amount of effort, making the remainder of the job easy.
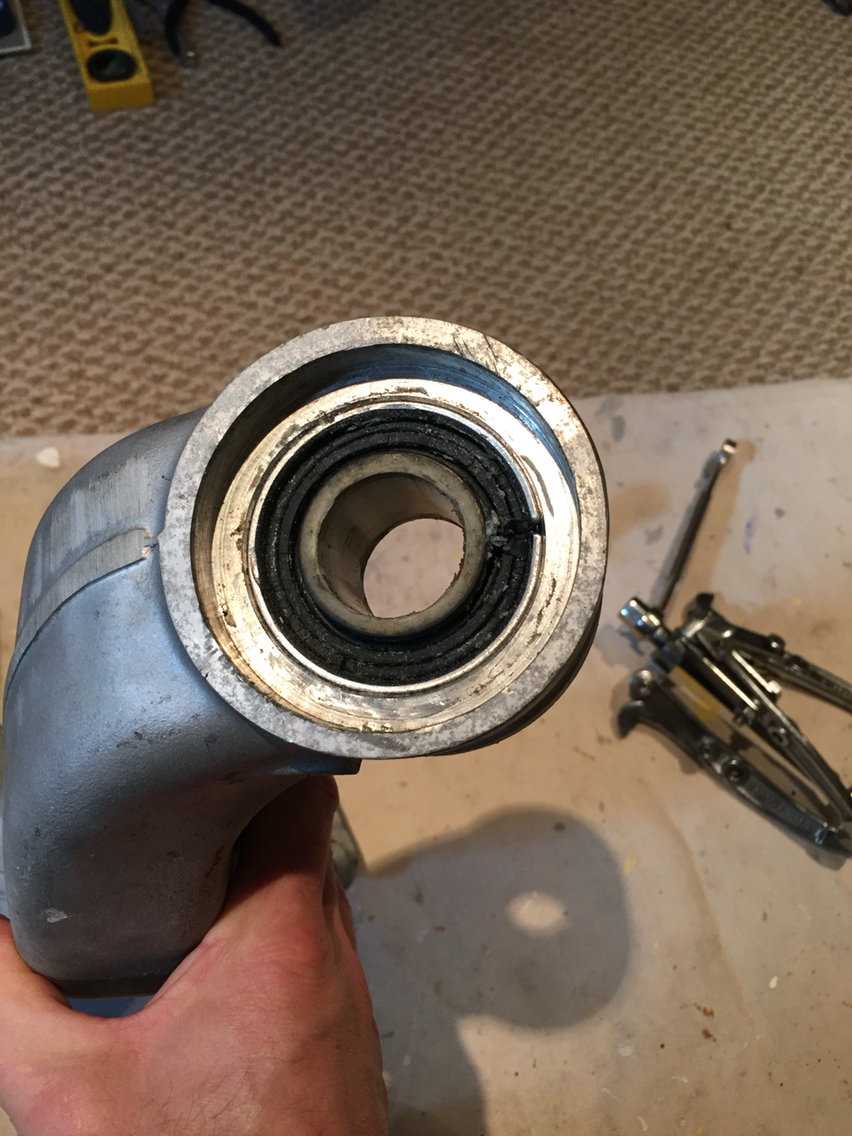
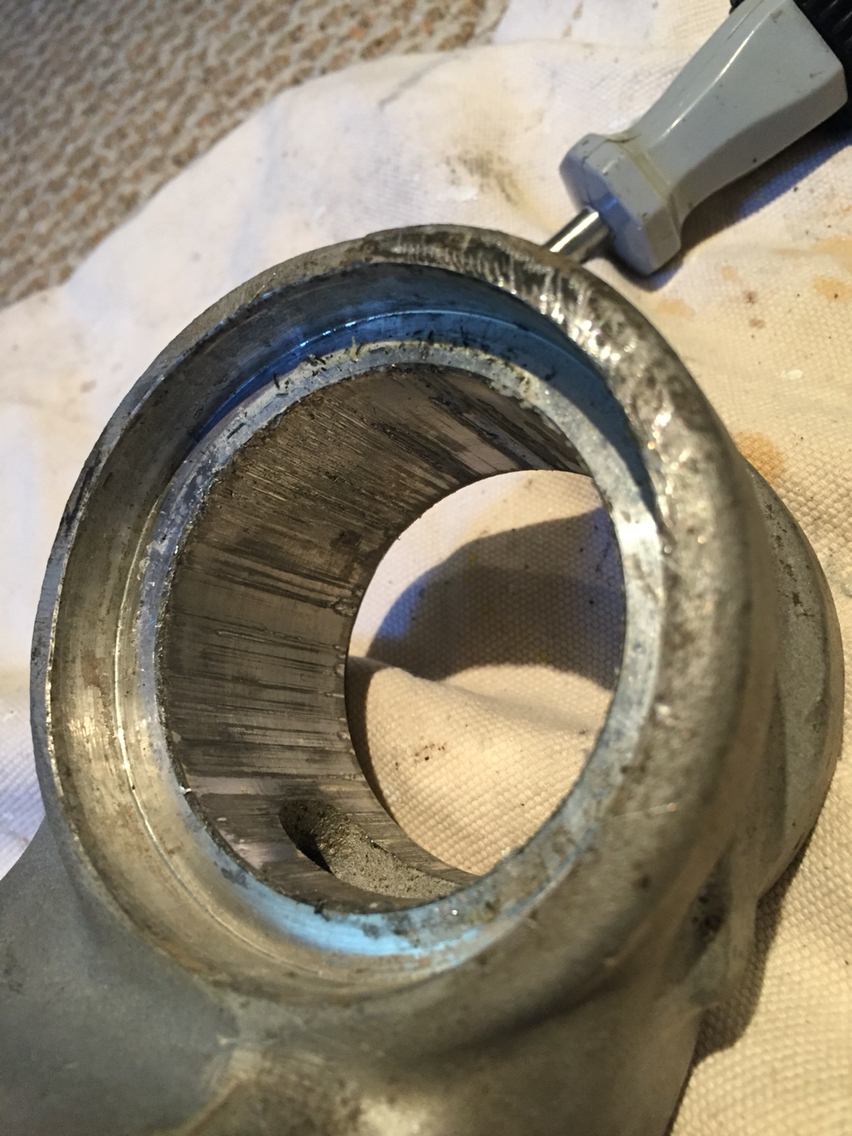
And that's it for bushing removal.
To press the new ones in, you follow the elephant racing instructions. Press in the center bushing using the tools they give you, then press in the two outer cups. Grease the inside of the bushing, and then press in the two metal pivots. Very simple.
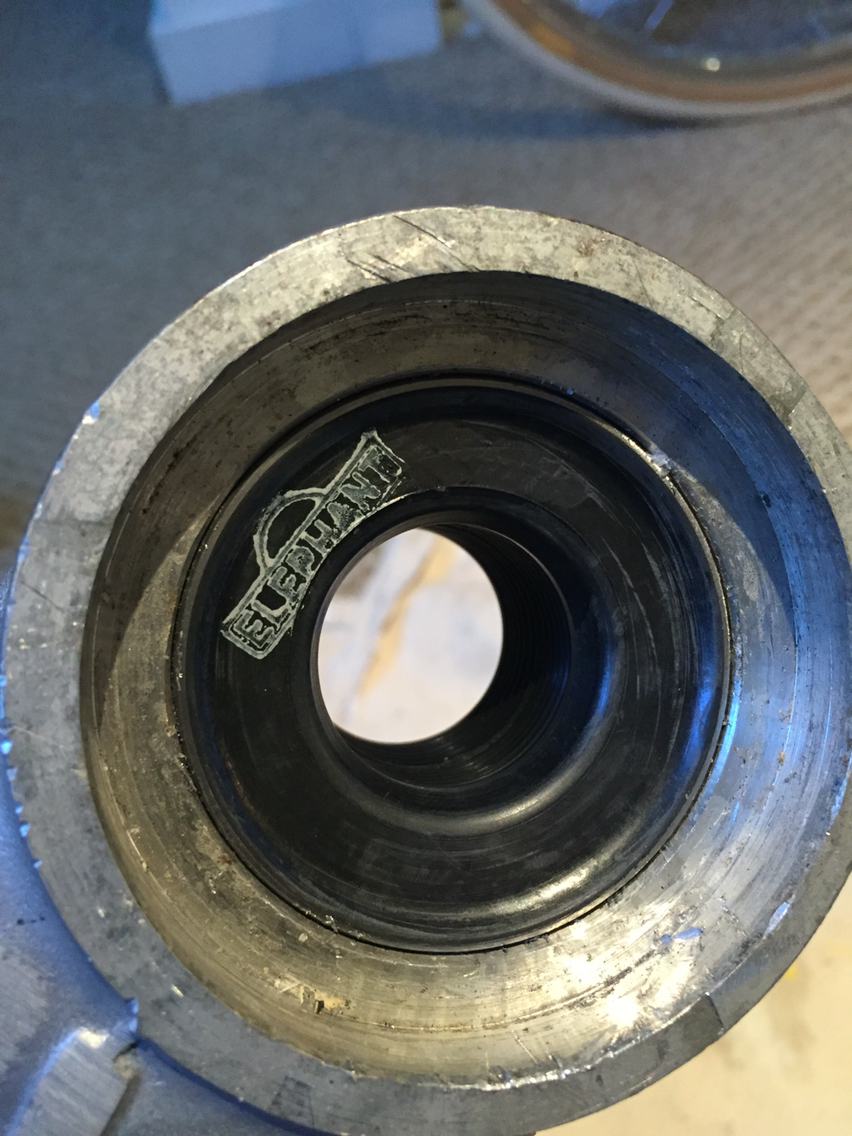
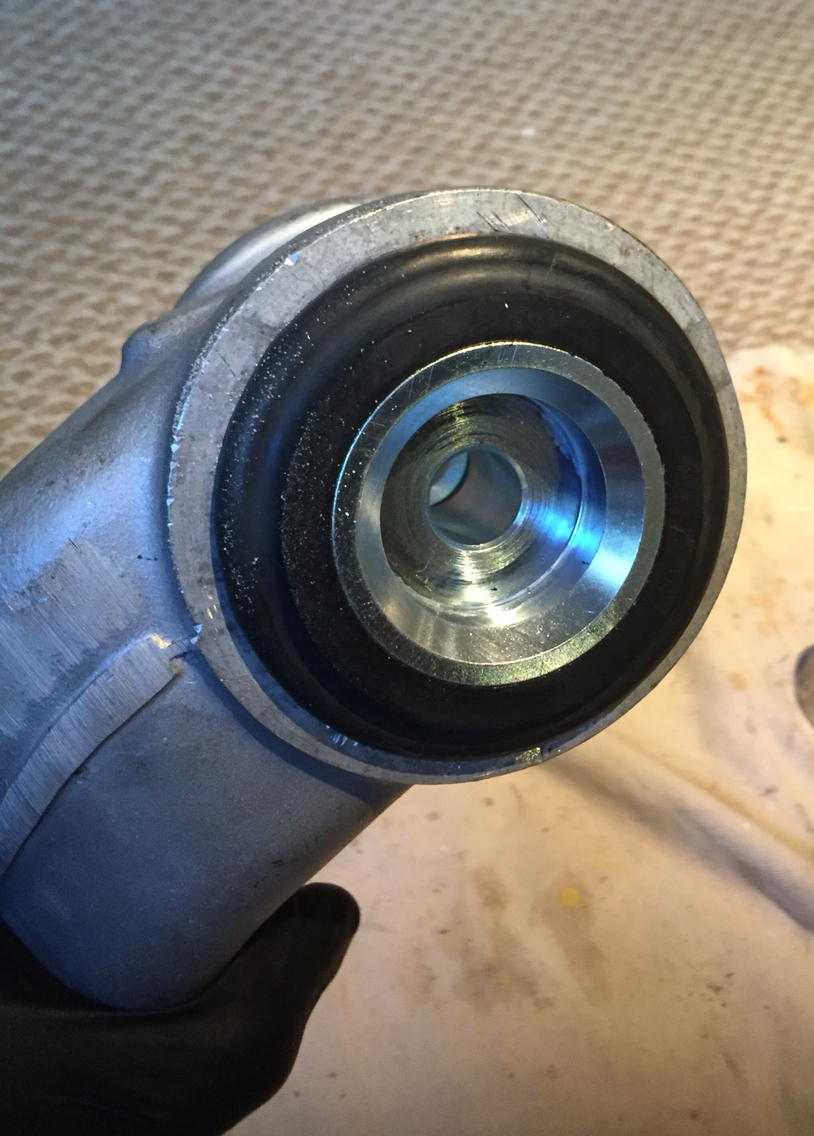
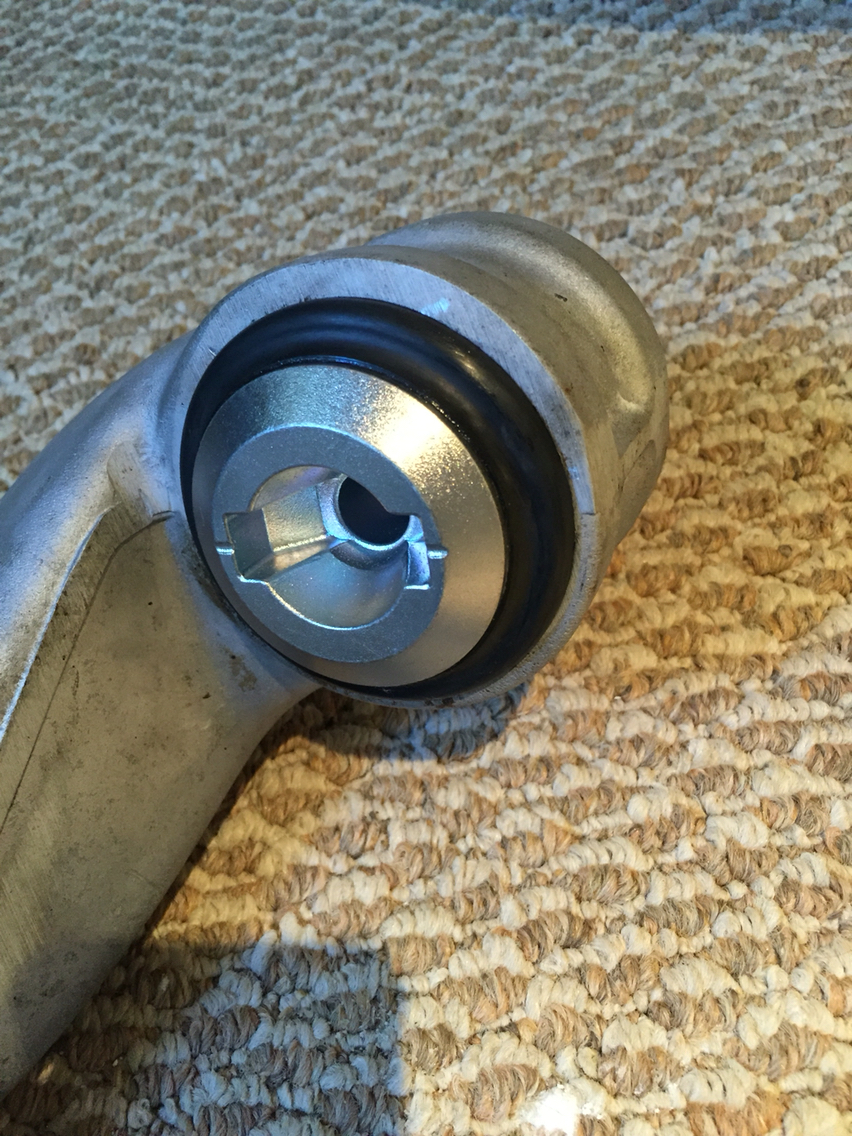
Done.
So here's the deal. This is an easy job. Way easier than control arm bushings. I was told and led to believe the opposite. All you have to do is understand the way the oem bushings are in there and understand the materials, and it all makes sense.
Step one, cut the outer rubber bush around the steel part. The steel part slips into the other steel part on the other side. As soon as the rubber is cut, it pops right out.
Then stick a screw driver in there and pry out the yellow zinc steel washer. Once that is out, all you have is a very soft metal sleeve with the remainder of the rubber for the outer section of the bushing. I cut this with a dremel and then started prying it out with a screwdriver, but really you can take a punch and hammer the edge inward and work it far enough to get a pair of pliers on it, twist and pop it out. The metal is soft, so this isn't hard to do. Just try not to damage the aluminum of the trailing arm.
Then, cut the rubber around the other steel piece on the other side. Use a three leg puller to press that piece out of the middle. This puller is a cheepie from harbor freight. Works perfectly.
Now you have just the center bushing left to press out. This will press out without a huge amount of effort, making the remainder of the job easy.
And that's it for bushing removal.
To press the new ones in, you follow the elephant racing instructions. Press in the center bushing using the tools they give you, then press in the two outer cups. Grease the inside of the bushing, and then press in the two metal pivots. Very simple.
Done.