
Some say, he should stick to driving 964s and he doesn't know how to wrench.
 01-06-2013, 05:25 PM
#31
Three Wheelin'
Thread Starter
Final bit for today as I continued to work on the RHS of the car.
Slave cylinder has to come off. I find it much easier to replace the bolts into their holes so that I don't have to ziplock bag everything.
The slave cylinder and the bracket need to come off.
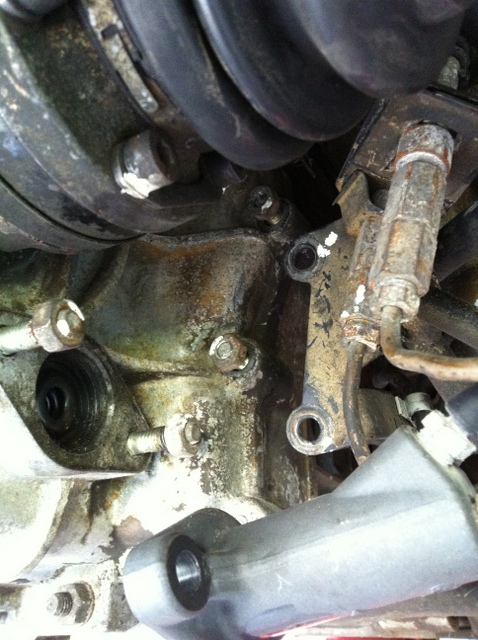
The CV boot was a bit of a bear for a couple of reasons. Firstly, access is a problem - the shape and stiffness of the boot rubber make it a bit tricky to get in there with a 3/8" ratchet and 6mm allen head socket. Second, it helps to have the parking brake on when removing the bolts as it prevents the hub from spinning as you loosen the bolts. This is a pain because you can only access the bolts from certain spots. So the process is put on parking brake, remove 2 bolts, release parking brake, rotate wheel hub to access next bolts, put on parking brake, rinse and repeat.
The boot bolts were on good and tight too. So blast them with Aerokroil, and use a cheater bar. I used a 1/2' cheater, with a 1/2" to 3/8" socket, 2 long-*** extensions and a 6mm allen head socket. This allowed lots of leverage and I could clear the fender with all the extension pieces. I had free rotation and yanking power on the cheater bar.
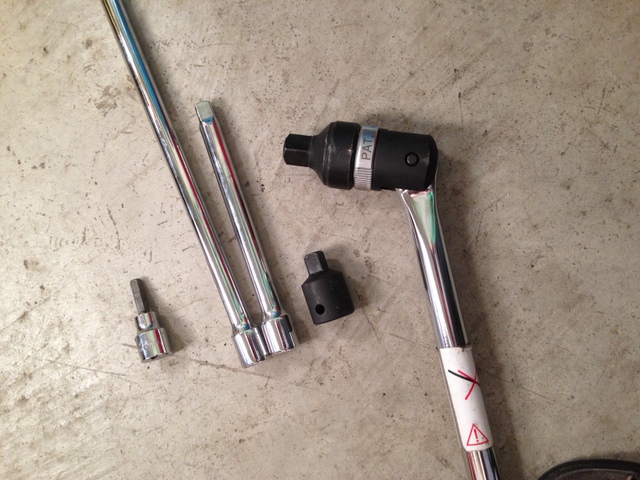
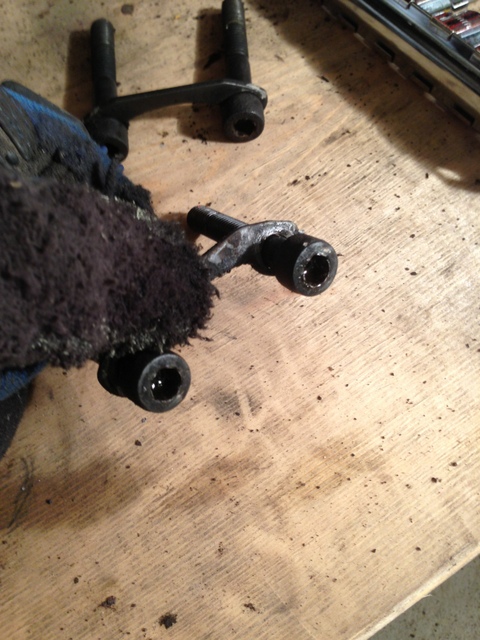
Even with all this care and precision, 2 of the bastards bolts felt the need to round themselves off. So I gave them a tap with a hammer, lots off force on the socket head and a really slow turn to get them off without fully stripping. They will need replacing but better than stripping them and having to cut them off.
Here's the right side done.
Have a good week!
Slave cylinder has to come off. I find it much easier to replace the bolts into their holes so that I don't have to ziplock bag everything.
The slave cylinder and the bracket need to come off.
The CV boot was a bit of a bear for a couple of reasons. Firstly, access is a problem - the shape and stiffness of the boot rubber make it a bit tricky to get in there with a 3/8" ratchet and 6mm allen head socket. Second, it helps to have the parking brake on when removing the bolts as it prevents the hub from spinning as you loosen the bolts. This is a pain because you can only access the bolts from certain spots. So the process is put on parking brake, remove 2 bolts, release parking brake, rotate wheel hub to access next bolts, put on parking brake, rinse and repeat.
The boot bolts were on good and tight too. So blast them with Aerokroil, and use a cheater bar. I used a 1/2' cheater, with a 1/2" to 3/8" socket, 2 long-*** extensions and a 6mm allen head socket. This allowed lots of leverage and I could clear the fender with all the extension pieces. I had free rotation and yanking power on the cheater bar.
Even with all this care and precision, 2 of the bastards bolts felt the need to round themselves off. So I gave them a tap with a hammer, lots off force on the socket head and a really slow turn to get them off without fully stripping. They will need replacing but better than stripping them and having to cut them off.
Here's the right side done.
Have a good week!

 01-06-2013, 06:47 PM
#34
Nordschleife Master

I remember the CV job, the first time I put a wrench to my car. I added a 18" 1/2" drive extension to my toolbox for the same reason you mentioned, to be able to remove those bolts from all the way out in the fenderwell.
On the return line to the filter console, I loosened mine recently to adjust the location of the line (it was touching the exhaust), and my trick to loosen it was to put the 36mm and 32mm wrenches in a way so that I could stick my breaker bar between them, and then use the breaker bar to push the wrenches in opposite directions to loosen it up.
It's so sketchy working under the rear fender because I felt like any little slip was going to translate into an outward dent on my rear quarter panel.
02-19-2013, 10:04 PM
#36
Three Wheelin'
Thread Starter
No pictures today, but I placed the "big part order" for everything I plan on changing. Should have everything by this weekend.
Decided on LWF and RS clutch set-up. Jury is still out on what chip to run - either Rennsport or Wong. Will wait and see if I have the stalling issue before I sink money into it.
I think it's only fair that I photograph the unwrapping and share with you lot.
Now here's a question - has anyone dropped the engine without the heat exchangers in place? Does it make it tricky to balance the engine on the way down? I was planning on bracing/lowering it with a platform, wood blocks, and a motorcycle jack.
Thoughts?
02-20-2013, 05:05 PM
#38
Three Wheelin'
Thread Starter
I planned on using RK's motorcycle lift. Should provide adequate balance, stability, and mobility. They are cheap when CT puts them onsale. Lots of poeple on here swear by them.
Come over and watch us drop it like it's hot, next month.
Come over and watch us drop it like it's hot, next month.
02-25-2013, 04:34 PM
#39
Burning Brakes
Join Date: Jul 2009
Location: Markham, Ontario, Canada
Posts: 883
Likes: 0
Received 0 Likes
on
0 Posts
Cliff let me know when you guys are planning to do this, I wouldn't mind being a fly on the wall. Plus I can provide an extra set of hands as useless as I am.
05-26-2013, 12:57 PM
#40
Three Wheelin'
Thread Starter
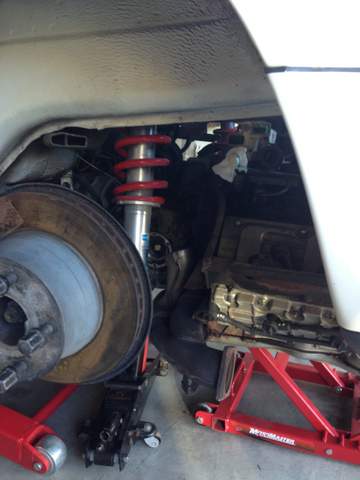
I've been making slow progress. I had initially planned to get the car back on the road for spring, but as I slip further down the rabbit hole, there are more and more little parts that could use refreshing or replacing.
I'll have to stop that nonsense at some point otherwise this car will be perpetually on the lift.
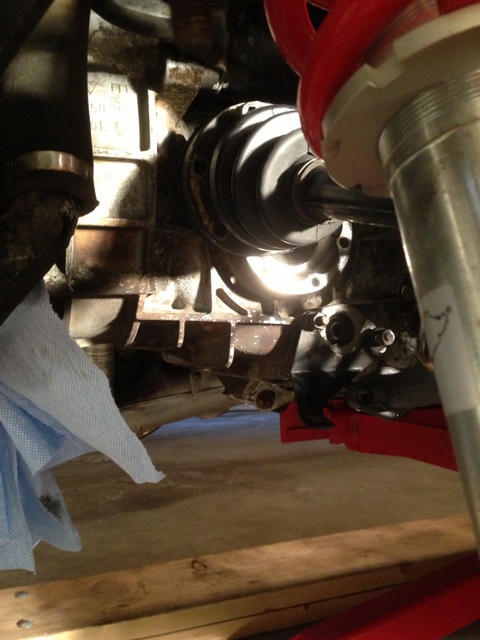
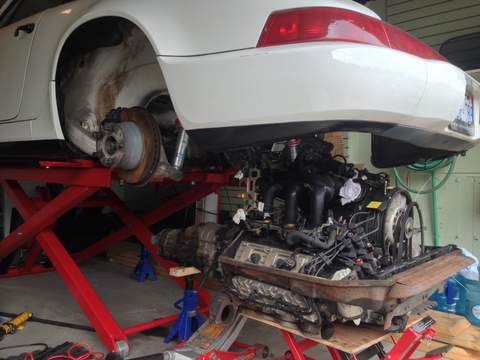
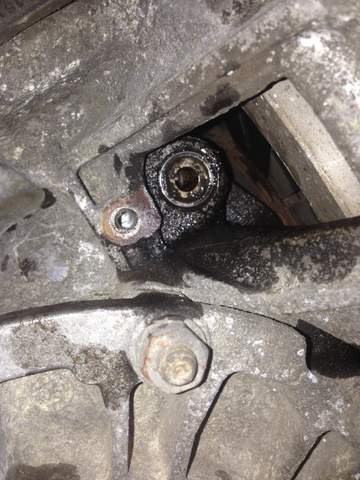
I took some time off in late April to make a dent in this. After getting the remaining bolts loose: Engine mount, tranny mount, starter, shift shaft, etc, I ended up getting snagged on the Longitudinal Slave Cylinder. I covered this in another thread, but to summarize, it was near the end of the day and my friend and I had been prying and yanking on just about everything and the damn thing would not slide out.
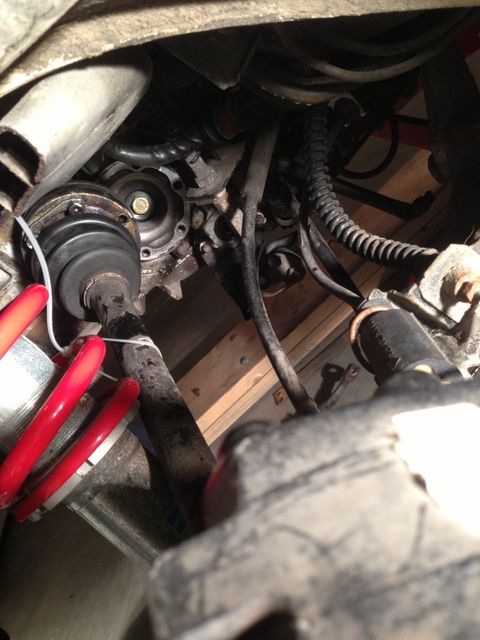
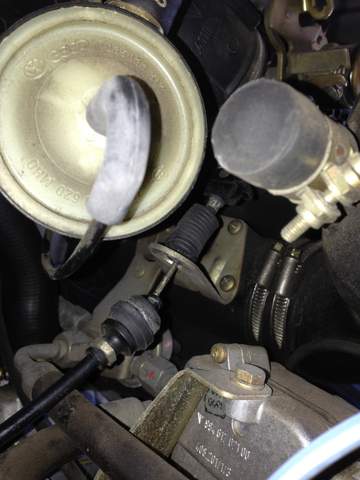
Here is the offending part:
As you can see it's nearly there, but still well stuck. In our infinite, though mis-guided wisdom, we decided to slowly drop the engine, hoping, the pull of separating the lump from the car, would encourage the slave pop out. It didn't.
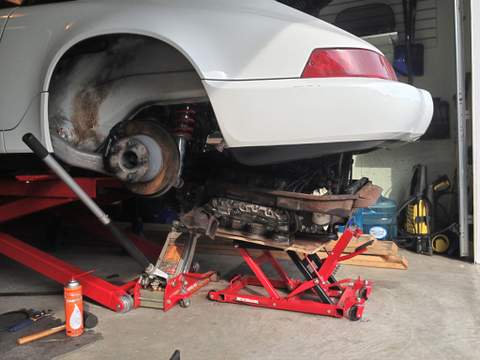
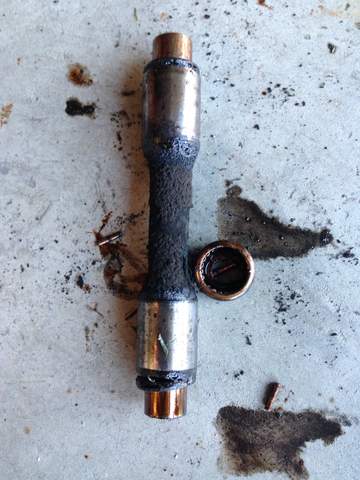
Still stuck. At this point, largely deflated, we gave up for the day. With the help of some very smart people on RL, my friend RK, a quick email to my mechanic, the consensus was to keep prying but apply a heat gun and some vice grips.
I did just that the next morning, and voila:
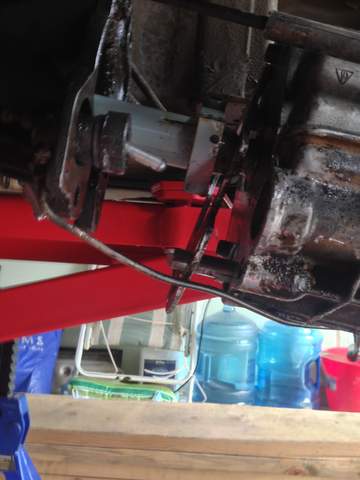
This was followed by a lot of "in your face you slave cylinder bitch" and other expletives.
I'll have to stop that nonsense at some point otherwise this car will be perpetually on the lift.
I took some time off in late April to make a dent in this. After getting the remaining bolts loose: Engine mount, tranny mount, starter, shift shaft, etc, I ended up getting snagged on the Longitudinal Slave Cylinder. I covered this in another thread, but to summarize, it was near the end of the day and my friend and I had been prying and yanking on just about everything and the damn thing would not slide out.
Here is the offending part:
As you can see it's nearly there, but still well stuck. In our infinite, though mis-guided wisdom, we decided to slowly drop the engine, hoping, the pull of separating the lump from the car, would encourage the slave pop out. It didn't.
Still stuck. At this point, largely deflated, we gave up for the day. With the help of some very smart people on RL, my friend RK, a quick email to my mechanic, the consensus was to keep prying but apply a heat gun and some vice grips.
I did just that the next morning, and voila:
This was followed by a lot of "in your face you slave cylinder bitch" and other expletives.
05-26-2013, 01:10 PM
#41
Three Wheelin'
Thread Starter
All the prying and poking on the slave cylinder left a bit of collateral damage. The intermediate plate which goes between the shift tube and the tranny lost a few corners. It's a cheap enough, the Porsche only part.
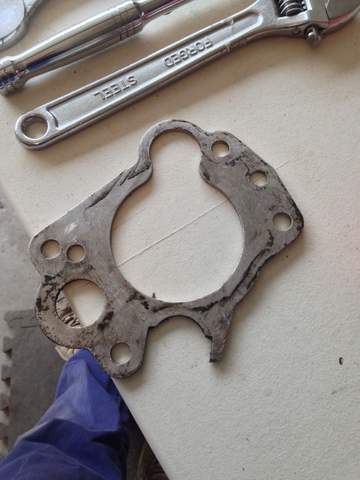
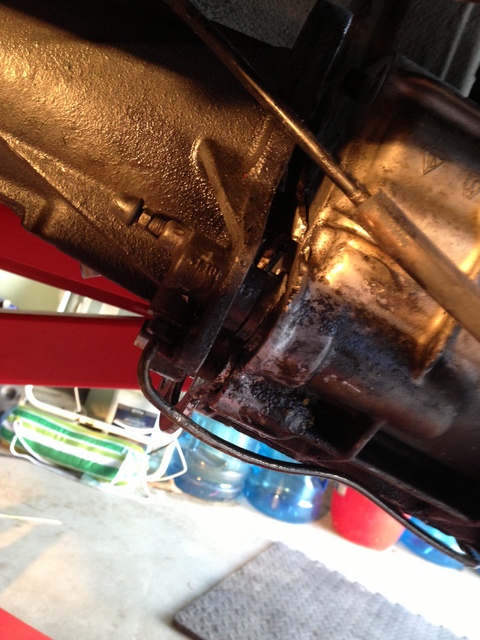
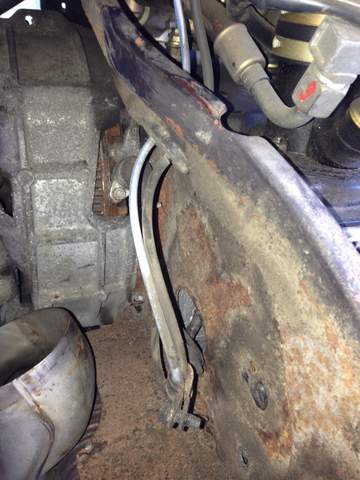
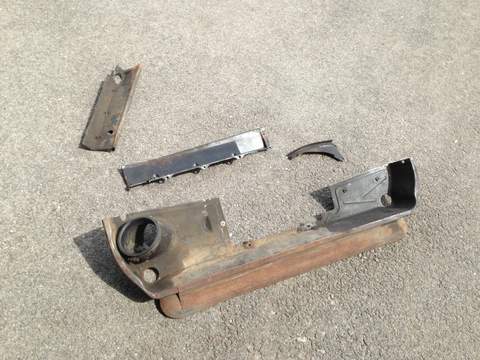
The front face to the tranny housing took quite a few nicks and dents as well. The surface is marred. That's the price of stupidity, I guess.
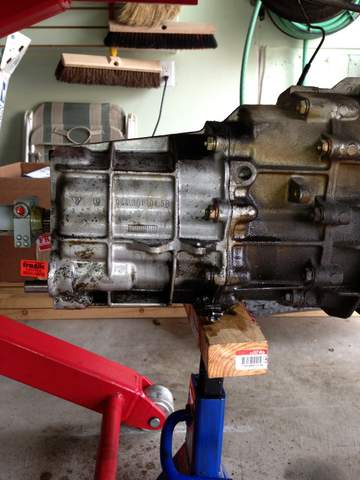
I did notice a series of seals that I'll replace with the next part run.
Here's what one can of carb cleaner can do to freshen up the tranny case:
In the middle of all this, I managed to take part in the Cayman Launch event thanks to Porsche of London. Hat tip to 9six4 for making it a great day out.
Guess which one is me!

The front face to the tranny housing took quite a few nicks and dents as well. The surface is marred. That's the price of stupidity, I guess.
I did notice a series of seals that I'll replace with the next part run.
Here's what one can of carb cleaner can do to freshen up the tranny case:
In the middle of all this, I managed to take part in the Cayman Launch event thanks to Porsche of London. Hat tip to 9six4 for making it a great day out.
Guess which one is me!
05-26-2013, 01:26 PM
#42
Three Wheelin'
Thread Starter
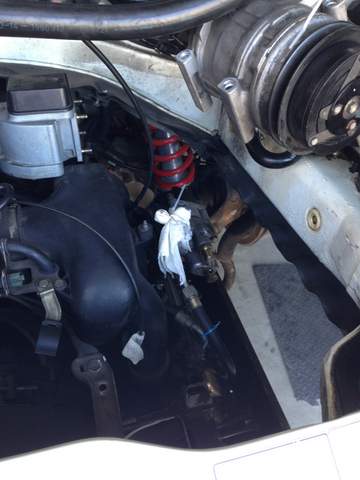
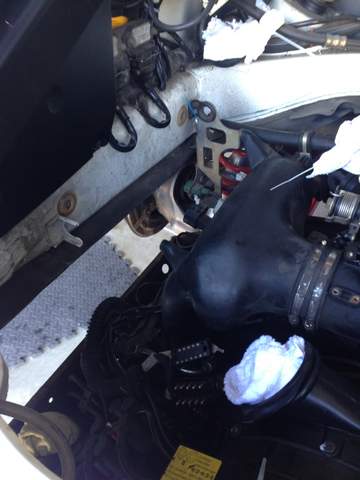
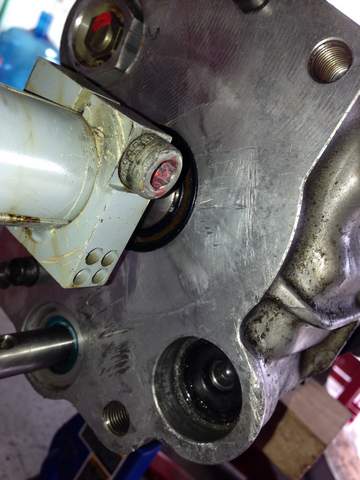
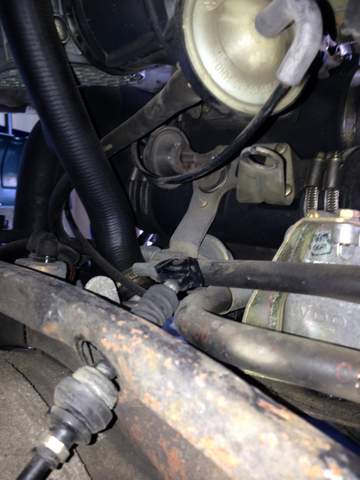
Those with a keen eye may have noticed that the throttle cable was still in place. I was reluctant to disconnect the cable from the pedal box. it was just too damn fiddly.
I noticed that there was a mounting bracket, surrounded by a grommet that held the throttle cable in place under some of the vacuum lines. I decided to pull the black plastic half-moon shaped end of the cable out of its holder (you can see it in the middle of this pic:
I took the trusty dremel and notched a tiny slot into the bracket - just wide enough to clear the cable. The grommet, when in place protects the cable against rubbing - so the notch will not be an issue later on.
I wanted to clean up some of the engine tins. Blast them with some high heat paint. I needed to pull out the RPM/Flywheel sensor (black rectangle plug), feed it through the tin, and out it comes.
Look what happened on the way out:

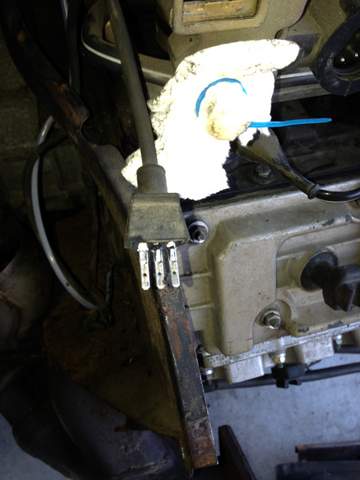
Damn thing disintegrated in my hands without even so much as a by-your-leave. Another item for the next part run.
Here are the gross tins I was able to pull out.
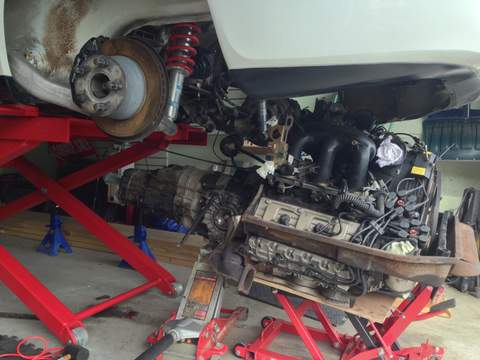
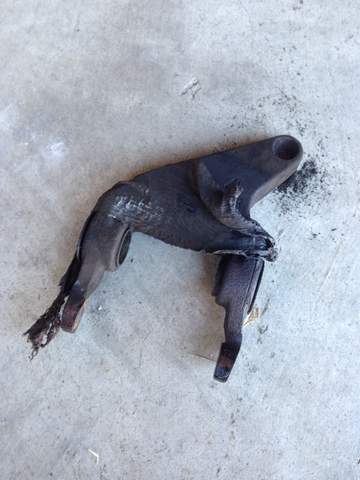
Next up was to actually get the tranny separated from the engine. As expected the release fork shaft gave me some aggro. Needed, heat, penetrant, and needle nose pliers. I got covered in needle bearing too. Will replace with EBS version.
Here's the clutch fork with old duct tape:
The tranny housing:

And the soon to be replaced with RS bits, clutch:
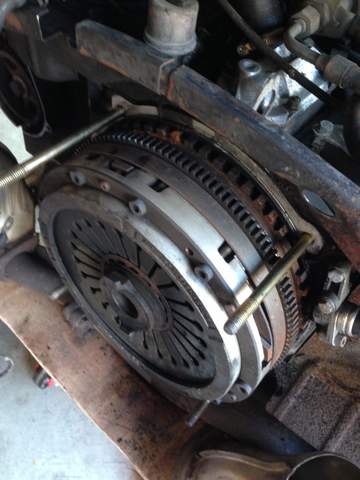
That's all for today folks. Now you're all caught up.
I noticed that there was a mounting bracket, surrounded by a grommet that held the throttle cable in place under some of the vacuum lines. I decided to pull the black plastic half-moon shaped end of the cable out of its holder (you can see it in the middle of this pic:
I took the trusty dremel and notched a tiny slot into the bracket - just wide enough to clear the cable. The grommet, when in place protects the cable against rubbing - so the notch will not be an issue later on.
I wanted to clean up some of the engine tins. Blast them with some high heat paint. I needed to pull out the RPM/Flywheel sensor (black rectangle plug), feed it through the tin, and out it comes.
Look what happened on the way out:
Damn thing disintegrated in my hands without even so much as a by-your-leave. Another item for the next part run.
Here are the gross tins I was able to pull out.
Next up was to actually get the tranny separated from the engine. As expected the release fork shaft gave me some aggro. Needed, heat, penetrant, and needle nose pliers. I got covered in needle bearing too. Will replace with EBS version.
Here's the clutch fork with old duct tape:
The tranny housing:
And the soon to be replaced with RS bits, clutch:
That's all for today folks. Now you're all caught up.
Last edited by The Stig; 05-26-2013 at 10:02 PM.
05-27-2013, 04:05 AM
#43
Instructor

Join Date: Nov 2007
Posts: 150
Likes: 0
Received 0 Likes
on
0 Posts
congrats on the project. Really like the way it started (same in here): I will fix that and then I will be back on the road. You lift up the car, inspect it really caautiously and think "Oh oh damn, the sinkhole just opened up. This is gonna take some serious time and effort...".
05-28-2013, 07:34 AM
#44
Rennlist Member
Here is a tip I learned from a friend for removing Allen/hex head bolts. If the wrench is starting to slip(rounding out the bolt) dip the end in some oil, and then in some fine sand. The sand takes up the slack. I used this to remove some very tight steering rack bolts.
05-28-2013, 01:40 PM
#45
Three Wheelin'
Thread Starter
congrats on the project. Really like the way it started (same in here): I will fix that and then I will be back on the road. You lift up the car, inspect it really caautiously and think "Oh oh damn, the sinkhole just opened up. This is gonna take some serious time and effort...".
Great tip, indeed. Thanks.