
Some say, he should stick to driving 964s and he doesn't know how to wrench.
 07-26-2012, 10:30 PM
#1
Three Wheelin'
Thread Starter
All I know is, I've got a big project on my hands.
I'd like to share the trials and tribulations of my 964 project. I started having clutch problems a while back. I priced out the job and couldn't bring myself to cut the cheque. I guess I'm a cheap-**** when all is said and down. I've grown tired of financing my mechanics summer holidays.
So I figured I'd buy a scissor lift, pick up a few extra tools and have a crack at this old beast myself. Now before you get excited, I'm no Marc Shaw. I will not tackle some of the magnificent things he's done. (Rebuilding CVs?!? That's talent.). I have a very limited skill set, but I'm feeling rather brave, so how hard could it be?
Some history first: I've had the car for 4.5 years. Been a daily driver for 3y, including 3 nasty Canadian winters. They truly do beat the snot out of old cars. I covered 40,000 hard kms and the old boot only missed a few beats along the way. But when the clutch started giving me gyp, at 173,000kms, I figured it was time for some resto and repair. I do believe the clutch is original. Given the state of the underside of the car, it does not appear that the engine has ever been out.
I'm go to try and fix as many "while-you're-in-there" bits as I can. I've found a few leaks that have started to get a bit more noticeable. I will eventually get to the clutch - which is what brung me to this dance - but I'm going to make the most of the experience. I'll share and document everything I can.
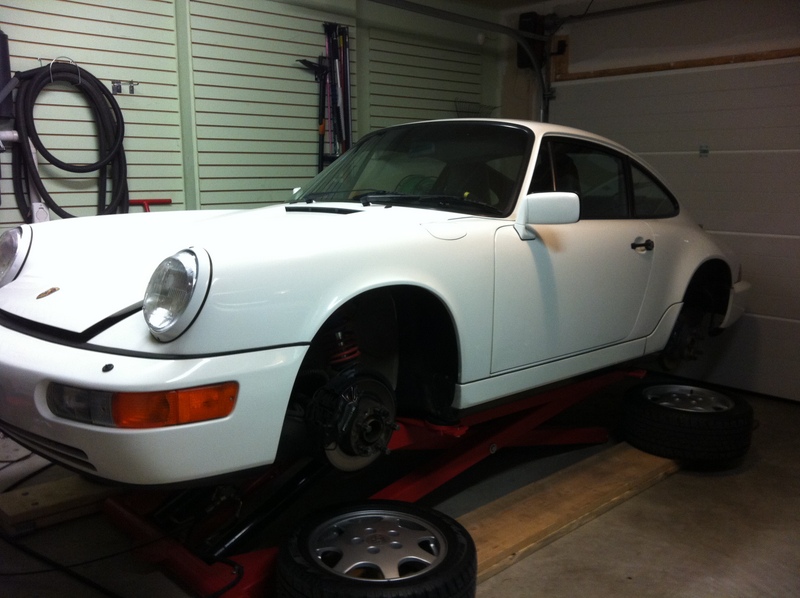
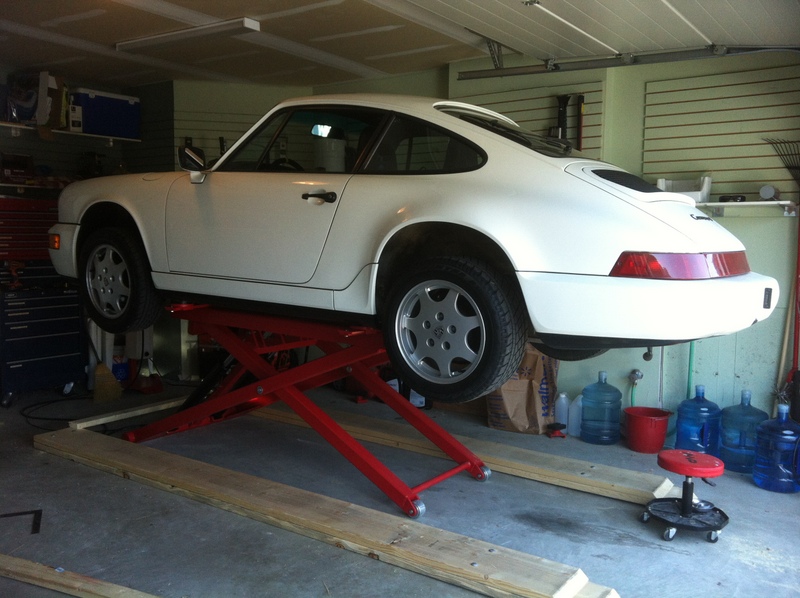
First thing was to get the car up on the lift. Which was a bit tricky given the lift points, but after a couple go's, I got it sorted.
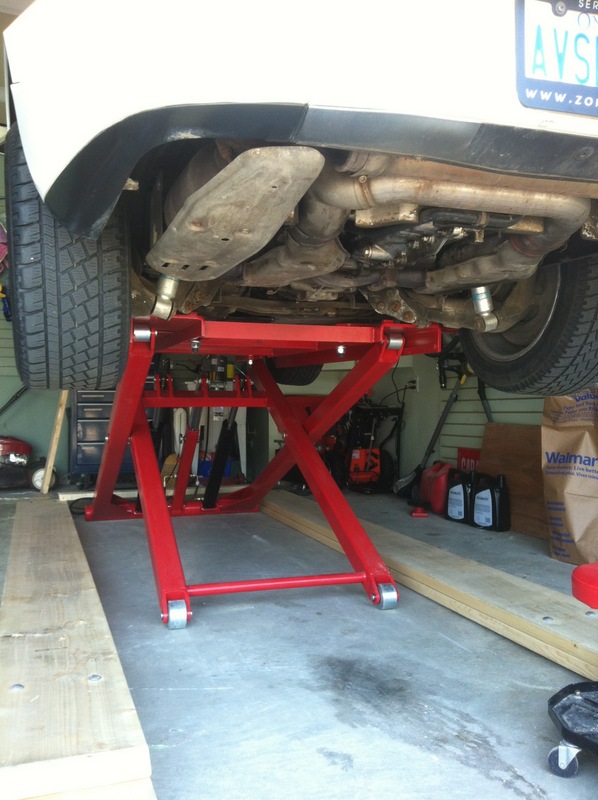
Next was to remove all the tins from the underside to expose the engine, transmission, driveline etc.
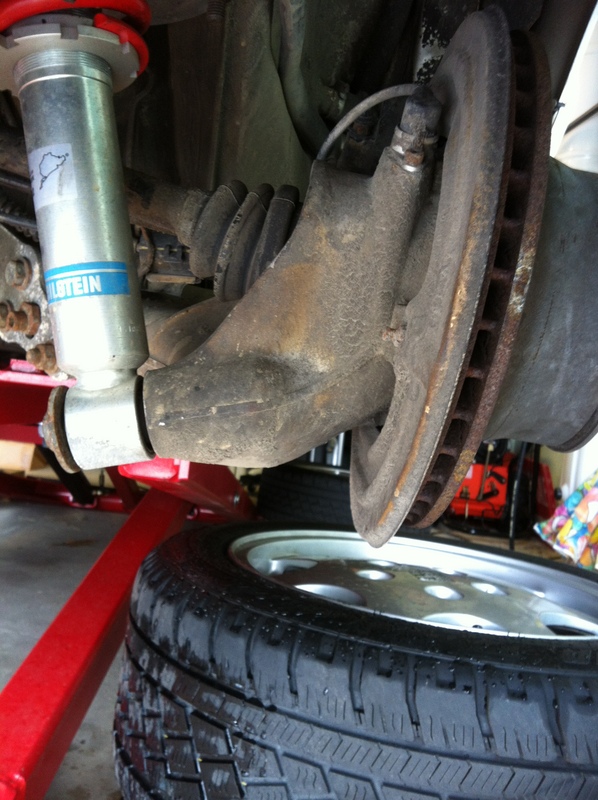
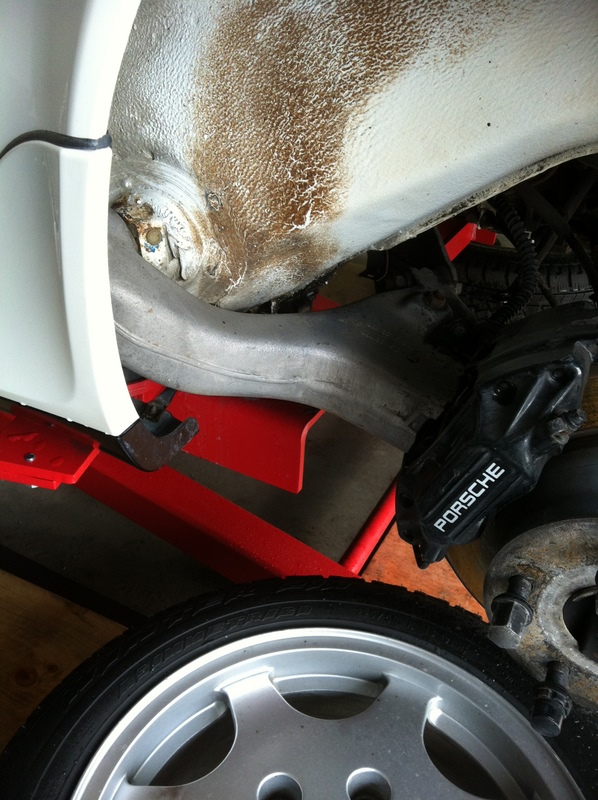
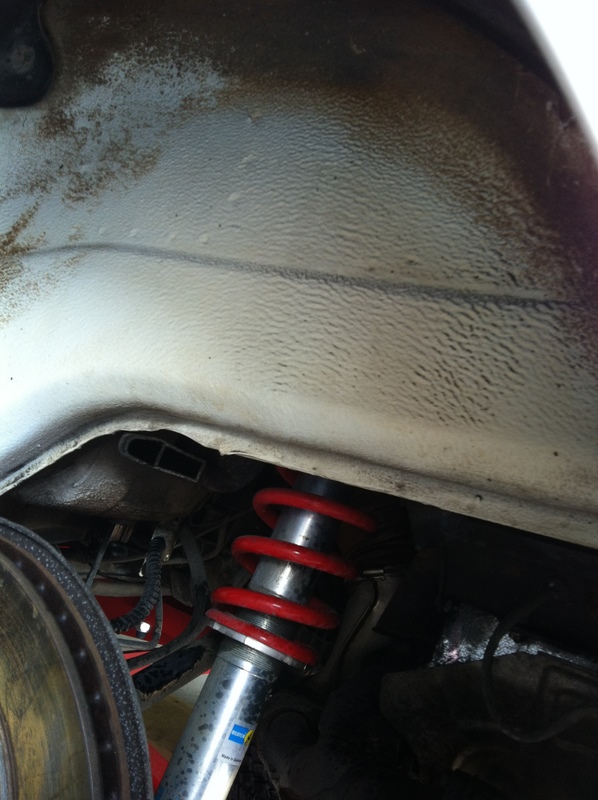
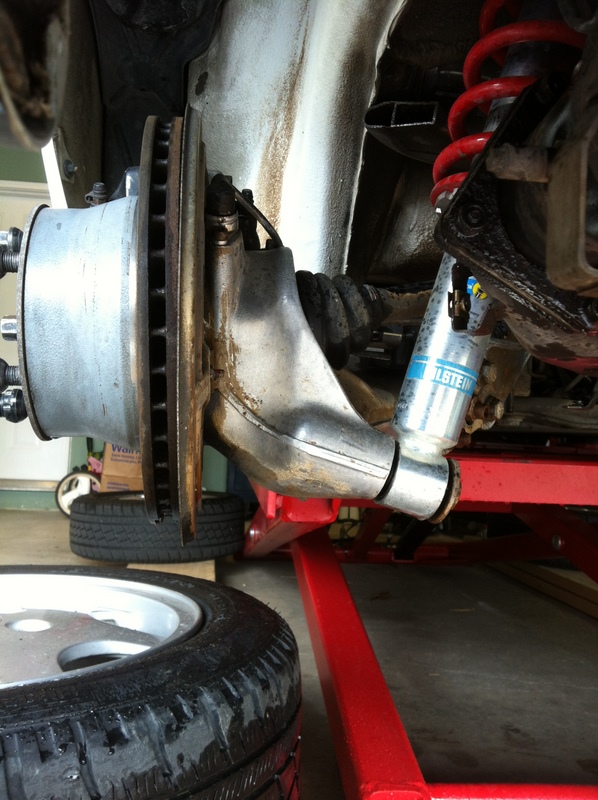
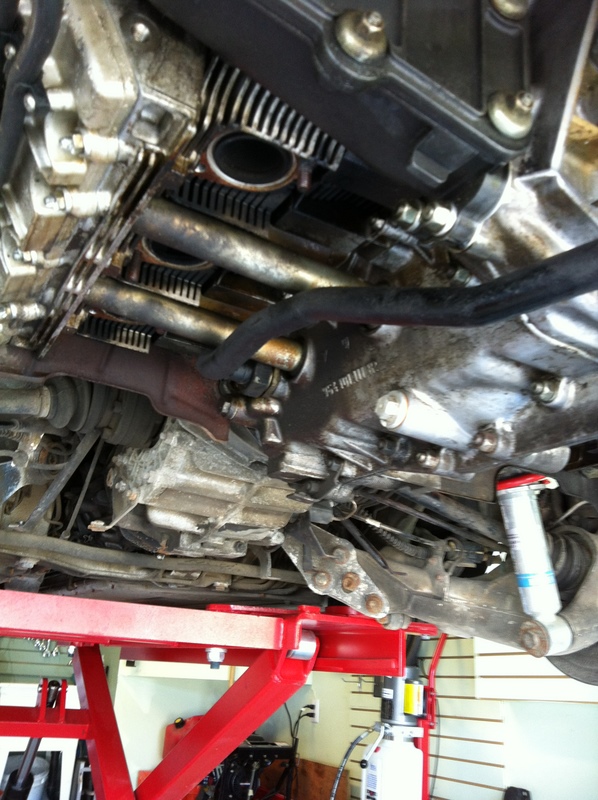
Having a hard look underneath. It made me cringe. It is so filthy and nasty. I'm almost embarrassed to show my under bits.
This is when the project turned into something else. I got to clean all this ****e. I'm not going to drive in the winter anymore - so back to the auto parts store for industrial de-greaser and steel wool.
Here are some more dirty pictures

Next instalment will include a little game called "Where's the leak?" Stay tuned....
I'd like to share the trials and tribulations of my 964 project. I started having clutch problems a while back. I priced out the job and couldn't bring myself to cut the cheque. I guess I'm a cheap-**** when all is said and down. I've grown tired of financing my mechanics summer holidays.
So I figured I'd buy a scissor lift, pick up a few extra tools and have a crack at this old beast myself. Now before you get excited, I'm no Marc Shaw. I will not tackle some of the magnificent things he's done. (Rebuilding CVs?!? That's talent.). I have a very limited skill set, but I'm feeling rather brave, so how hard could it be?
Some history first: I've had the car for 4.5 years. Been a daily driver for 3y, including 3 nasty Canadian winters. They truly do beat the snot out of old cars. I covered 40,000 hard kms and the old boot only missed a few beats along the way. But when the clutch started giving me gyp, at 173,000kms, I figured it was time for some resto and repair. I do believe the clutch is original. Given the state of the underside of the car, it does not appear that the engine has ever been out.
I'm go to try and fix as many "while-you're-in-there" bits as I can. I've found a few leaks that have started to get a bit more noticeable. I will eventually get to the clutch - which is what brung me to this dance - but I'm going to make the most of the experience. I'll share and document everything I can.
First thing was to get the car up on the lift. Which was a bit tricky given the lift points, but after a couple go's, I got it sorted.
Next was to remove all the tins from the underside to expose the engine, transmission, driveline etc.
Having a hard look underneath. It made me cringe. It is so filthy and nasty. I'm almost embarrassed to show my under bits.
This is when the project turned into something else. I got to clean all this ****e. I'm not going to drive in the winter anymore - so back to the auto parts store for industrial de-greaser and steel wool.
Here are some more dirty pictures
Next instalment will include a little game called "Where's the leak?" Stay tuned....
Last edited by The Stig; 07-26-2012 at 10:56 PM.

 I want a lift that goes on its side.


 08-02-2012, 11:25 PM
#4
Three Wheelin'
Thread Starter
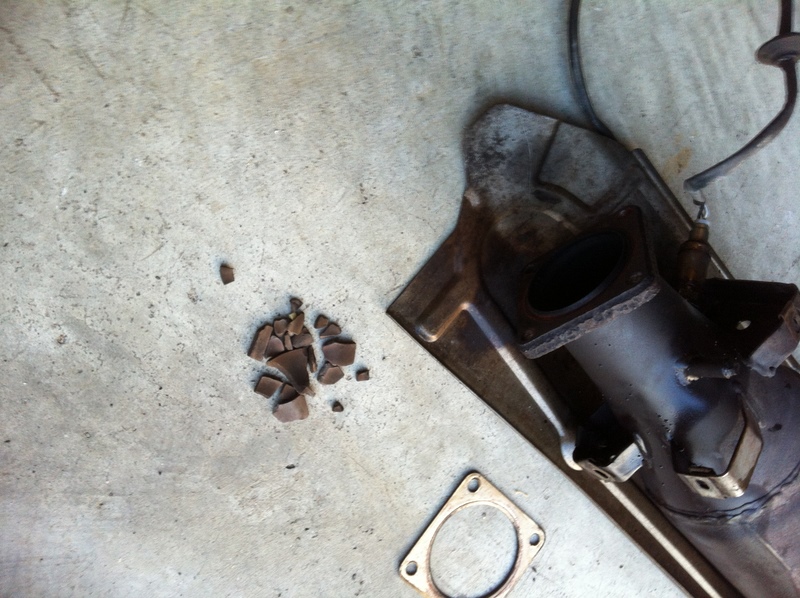
First up was the catalytic converter. It was a real pain to get off. Couldn't pull out the O2 sensor, so I may just cut the damn thing out.
I did find some interesting debris in there. Looked like ceramic. Any guesses?
Made some more progress on the cleaning front too.
I will hit the area with a power washer and industrial degreaser again. This was just my first pass it. Once the engine is out, I'll have more room to manoeuvre.
I was able to get the heat exchangers off.
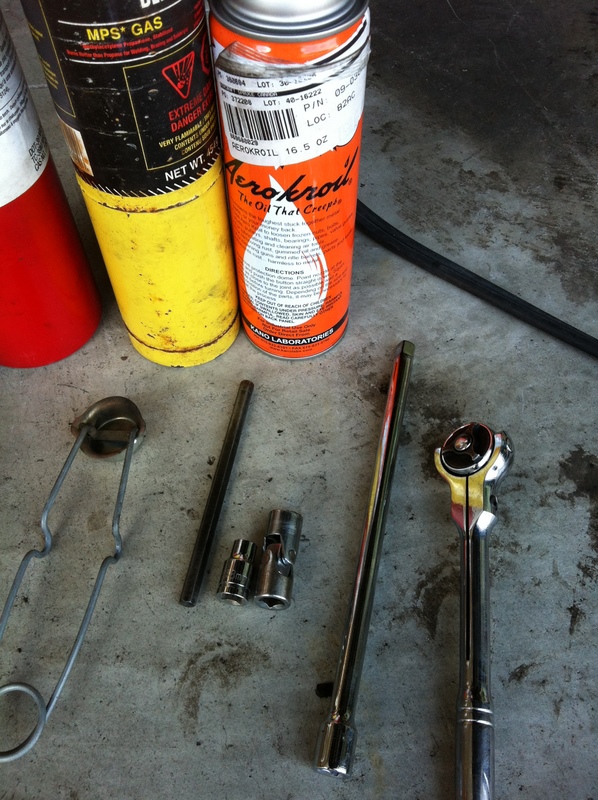
Here are the tools I used to pull the heat exchangers off. I hit the studs with AeroKroil for the better part of a week in anticipation. I was able to find it here in good old Canada from Aircraft Spruce. Damn handy that. The Allen bolts came out without heat, but the 13mm hex heads needed a dab of heat. I used the gas to get them hot (not cherry red), then gave them another splash with AeroKroil. As the heads cooled, the penetrant got sucked right up into the threads.
All the studs were intact. I couldn't believe it. Thanks to all the info on here related to heat exchangers. It was a huge help. Special thanks to Christien for lending some much needed tools.
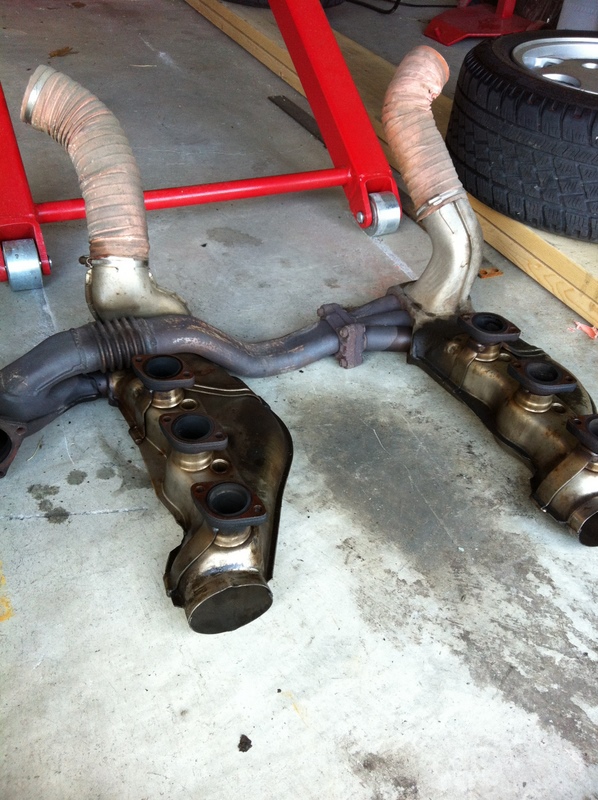
I've found a couple of holes in the heat exchangers so I'm going to get someone to weld them up. Can't afford to replace them and have no interest in doing headers at this stage.
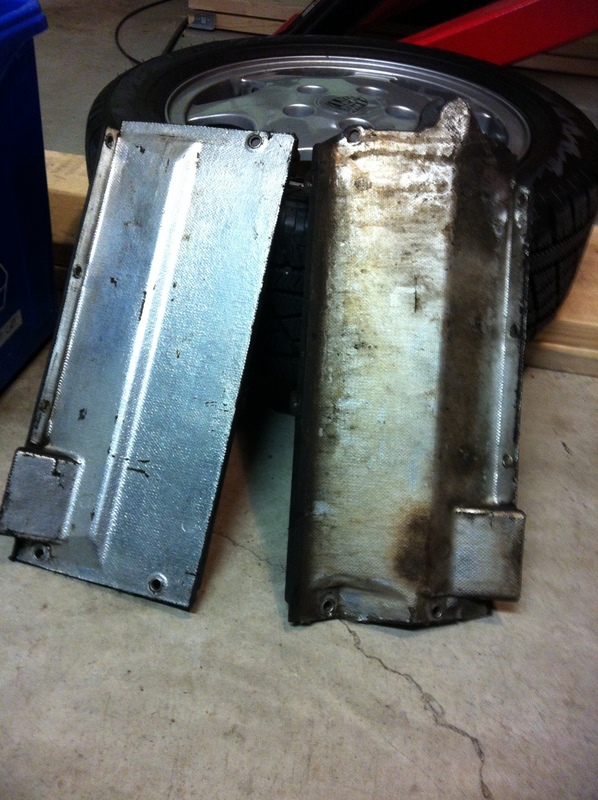
Engine tins look a right rusty mess. I don't think they are salvageable.
List of suspected leaks:
- chain covers, both sides
- IMS
- Maybe oil pressure sender
- Maybe power steering pump
- Something is terminating and puddling near the transmission in and around the transmission brace
- Something at or near the front diff.
Looks like I have my work cut out for me.
Next instalment - more cleaning and welding of the Exchangers. Then prep for the drop.
Cheers
I did find some interesting debris in there. Looked like ceramic. Any guesses?
Made some more progress on the cleaning front too.
I will hit the area with a power washer and industrial degreaser again. This was just my first pass it. Once the engine is out, I'll have more room to manoeuvre.
I was able to get the heat exchangers off.
Here are the tools I used to pull the heat exchangers off. I hit the studs with AeroKroil for the better part of a week in anticipation. I was able to find it here in good old Canada from Aircraft Spruce. Damn handy that. The Allen bolts came out without heat, but the 13mm hex heads needed a dab of heat. I used the gas to get them hot (not cherry red), then gave them another splash with AeroKroil. As the heads cooled, the penetrant got sucked right up into the threads.
All the studs were intact. I couldn't believe it. Thanks to all the info on here related to heat exchangers. It was a huge help. Special thanks to Christien for lending some much needed tools.
I've found a couple of holes in the heat exchangers so I'm going to get someone to weld them up. Can't afford to replace them and have no interest in doing headers at this stage.
Engine tins look a right rusty mess. I don't think they are salvageable.
List of suspected leaks:
- chain covers, both sides
- IMS
- Maybe oil pressure sender
- Maybe power steering pump
- Something is terminating and puddling near the transmission in and around the transmission brace
- Something at or near the front diff.
Looks like I have my work cut out for me.
Next instalment - more cleaning and welding of the Exchangers. Then prep for the drop.
Cheers
08-02-2012, 11:57 PM
#5
Rennlist Member
Oh, and great that you're tackling it. I was 18, having owned my '68 wannabe "S" only 3 months, when I holed a piston. So I dug in. 32 years later, it's been an interesting journey with everything I've tackled.
08-03-2012, 08:17 AM
#7
IHI KING!
Rennlist Member
Rennlist Member
Join Date: Aug 2001
Location: Nashua, New Hampshire, USA
Posts: 13,385
Received 222 Likes
on
176 Posts
First up was the catalytic converter. It was a real pain to get off. Couldn't pull out the O2 sensor, so I may just cut the damn thing out.
Trending Topics
08-03-2012, 08:34 AM
#8
Rennlist Member
I had to use a pick to clean out residual threads from the O2 sensor. And then used an 18mm spark plug tap from Autozone to clean the threads. And then a dab of antiseize (if not already on the new sensor).
Ceramic bits are from exhaust ports?
Can you show pictures of holes in heat exchangers? leaking on the exhaust side or hot air side?
Keep up the good work, and continue posting pictures. I am learning/absorbing every day. The older I get, the more I realize how little I know.
Ceramic bits are from exhaust ports?
Can you show pictures of holes in heat exchangers? leaking on the exhaust side or hot air side?
Keep up the good work, and continue posting pictures. I am learning/absorbing every day. The older I get, the more I realize how little I know.
08-03-2012, 08:49 AM
#9
Three Wheelin'
Thread Starter
I'll post some pics of the holes. I think they can be closed up, but I don't know enough about welding. If they're pooched, I'll reach out to you to search your warehouse for me.
I had to use a pick to clean out residual threads from the O2 sensor. And then used an 18mm spark plug tap from Autozone to clean the threads. And then a dab of antiseize (if not already on the new sensor).
Ceramic bits are from exhaust ports?
Can you show pictures of holes in heat exchangers? leaking on the exhaust side or hot air side?
Keep up the good work, and continue posting pictures. I am learning/absorbing every day. The older I get, the more I realize how little I know.
Ceramic bits are from exhaust ports?
Can you show pictures of holes in heat exchangers? leaking on the exhaust side or hot air side?
Keep up the good work, and continue posting pictures. I am learning/absorbing every day. The older I get, the more I realize how little I know.
The h/e holes are on the driverside - is that considered the exhaust side?
Thanks for watching, Darrell. So many RL'ers have inspired me. I have a small accountant's brain, so if I can manage some of this wrenching maybe others will try too.
08-03-2012, 11:24 AM
#12
Three Wheelin'
Thread Starter
Thanks Kyle. I bought it locally after much research. It's called a Hemi Roadrunner, purchased from The Lift Superstore. Really well made. Huge pistons and excellent construction. The hydraulic pump is US/Canadian made and so are the pistons. Lifts are constructed in China, just like every other one on the market.
It is a total game changer. I've reached a certain age (*ahem* not 40 yet) and I can't be arsed crawling around under 12" of ground clearance while this beast is teetering around on jack stands. Eff that for a laugh. Thanks for the luck, I'll need a bit of that.
It is a total game changer. I've reached a certain age (*ahem* not 40 yet) and I can't be arsed crawling around under 12" of ground clearance while this beast is teetering around on jack stands. Eff that for a laugh. Thanks for the luck, I'll need a bit of that.