
Some say, he should stick to driving 964s and he doesn't know how to wrench.
 08-03-2012, 10:29 PM
#16
Three Wheelin'
Thread Starter
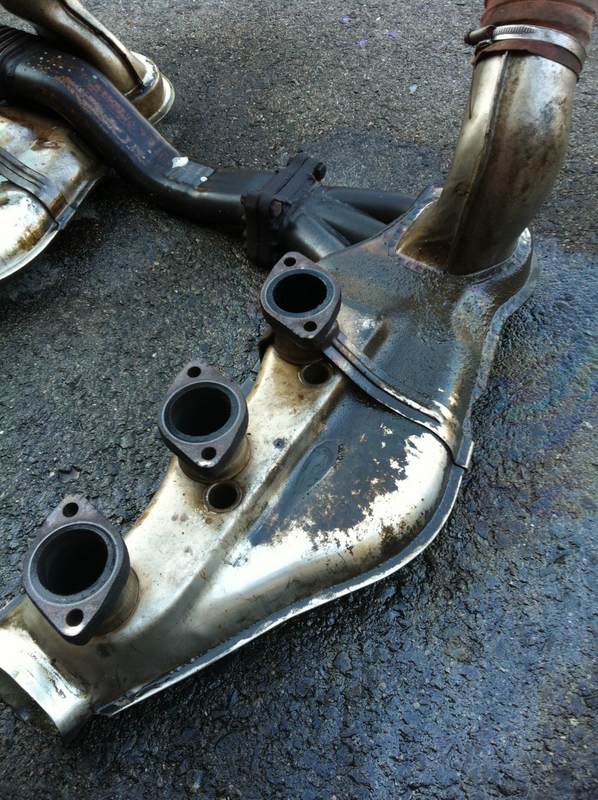
I had 15 minutes to play with the car. So I tried to spruce up the H/Es.
Before:
After:
Still a few more spots that could use some TLC, but not too shabby for 15 mins. I used industrial degreaser, steel wool and a power washer. Will let the degreaser dwell for a while longer next round.
Before:
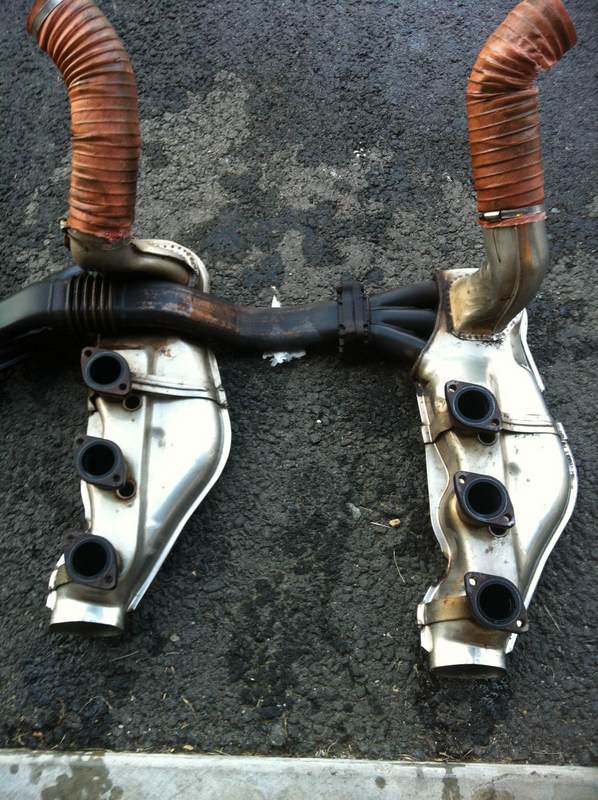
After:
Still a few more spots that could use some TLC, but not too shabby for 15 mins. I used industrial degreaser, steel wool and a power washer. Will let the degreaser dwell for a while longer next round.

 08-04-2012, 10:21 AM
#18
Drifting
08-04-2012, 01:07 PM
#19
Three Wheelin'
Thread Starter
Fairly generic blue stuff from Princess Auto. Don't think you have that store in the US. Can be diluted or used full strength. Comes with many skeletons and warnings on the label.
08-05-2012, 11:04 AM
#20
Race Car
I had similar holes in my heat exchangers when I had my engine out. He'd them welded. All is fine and I have no exhaust fumes in the car. So i think vandit is correct. But if someone else has another idea, let me know...make sure it's safe...
Question on your lift- what safeguard is there for the hydraulics... Does it lock in place? Or are you dependent on the hydraulics not failing? And do you have a link so we can explore?
Question on your lift- what safeguard is there for the hydraulics... Does it lock in place? Or are you dependent on the hydraulics not failing? And do you have a link so we can explore?
08-05-2012, 11:34 AM
#21
Three Wheelin'
Thread Starter
Goughary - here's a link to the lift
http://www.liftsuperstore.com/produc...unner-6000-lbs
There are 2 large hydraulic cylinders and a locking pin mechanism. So if the cylinders fail, the centre locking post will hold things in place. Oce the lift is at the correct height, I lower it on tote locking pin to keep hold of things. Very similar to the BendPak lift.
08-05-2012, 02:39 PM
#22
Three Wheelin'
Join Date: Jul 2007
Location: Helotes, TX
Posts: 1,307
Likes: 0
Received 0 Likes
on
0 Posts
Attachment 653273
...............Here are the tools I used to pull the heat exchangers off........Attachment 653266
Great thread.
I used a power washer on mine last time I droped the engine, and your car is not so dirty by comparison!
Do yourself a favor before going back on with the heat exchangers. Go to Sears (do you have them? If not, contact a fellow Rennlister in the States. I'll help if you want.) and buy their combination socket with U-joint swivel. Since the joint is built in, it's a much shorter connection than a standard socket and separate swivel. Makes all the difference in getting the socket in and out of such close quarters around the exhaust hex nuts.
08-05-2012, 06:13 PM
#23
Three Wheelin'
Thread Starter
Thanks Altarchsa. We do have a Sears up here. In fact, the one I used is a wobbly head/swivel socket as you describe. However, the one you've pictured has a shorter head which would defo come in handy. I'll look for the one you've got for CQB.
08-06-2012, 08:47 PM
#25
Burning Brakes
Join Date: Jul 2009
Location: Markham, Ontario, Canada
Posts: 883
Likes: 0
Received 0 Likes
on
0 Posts
Cliff, props to you, you got some cojones to try this, I'm sure you'll be fine. I can't add much value other then offering you a 964 fix. If your car isn't ready by the fall drive, you can ride with me and pilot part of it if you want.
08-06-2012, 09:13 PM
#26
Three Wheelin'
Thread Starter
Thanks Sultan. Not sure if it's cojones or being a cheap bastard that will get me through.
I'll let you know when it's close to engine drop time. Close to the time of the 964 GTG, I expect.
If I can go to the fall run, I'll let you know. Cheers.
I'll let you know when it's close to engine drop time. Close to the time of the 964 GTG, I expect.
If I can go to the fall run, I'll let you know. Cheers.
 08-06-2012, 10:45 PM
#28
Great Pics and details. Thanks for the posts. How much did this lift cost as I can nort find the price on the link/ website. Thanks.
08-06-2012, 11:34 PM
#29
Three Wheelin'
Thread Starter


It's under the promotions sections - $1,795 currently + delivery
01-06-2013, 05:11 PM
#30
Three Wheelin'
Thread Starter
So I've neglected posting stuff for quite a few months. This may well be the world's longest engine drop. Family, work, all kinds of stuff have taken priority. So goes life.
I'm back at it in earnest now and should be making some meaningful progress through the winter in the hopes of getting the car back on the road this spring.
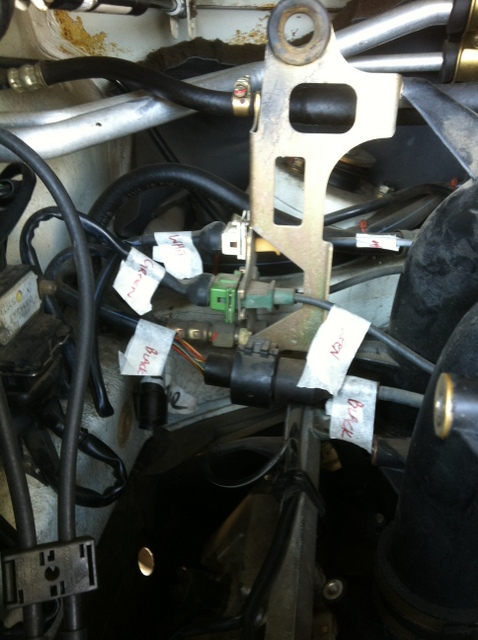
Since this is taking a month of Sundays, I'm trying to label everything I can, so that putting humpty dumpty back together again will be easy.
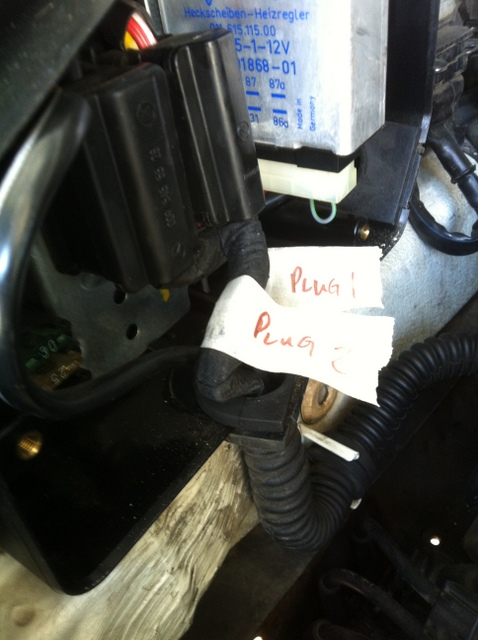
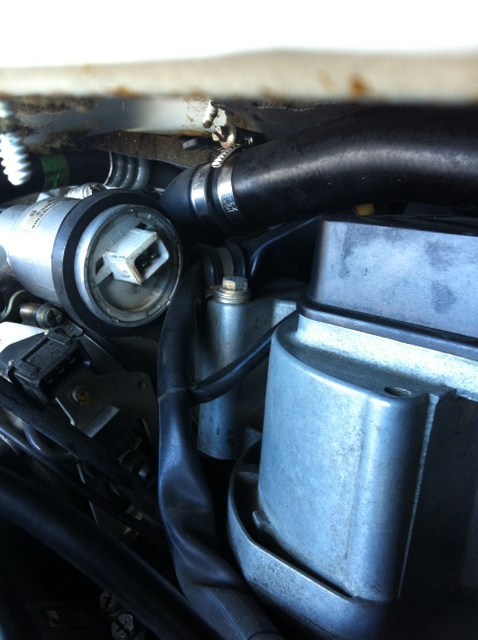
Here are the connections behind the blower motor.
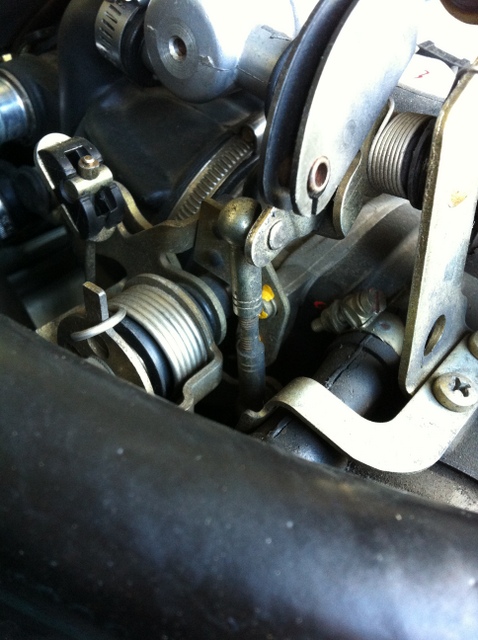
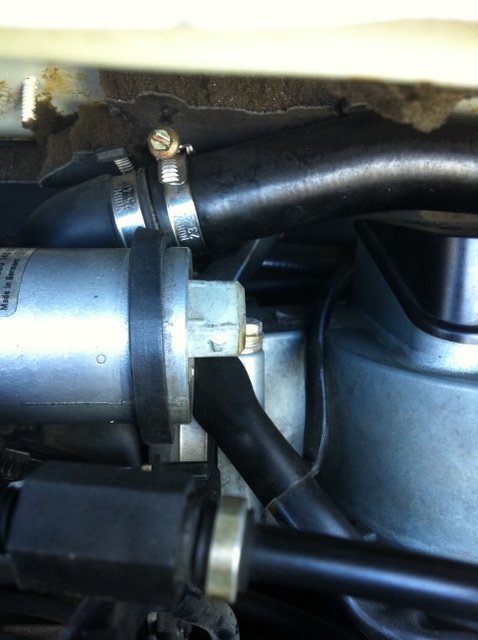
Here are the connections near the throttle.
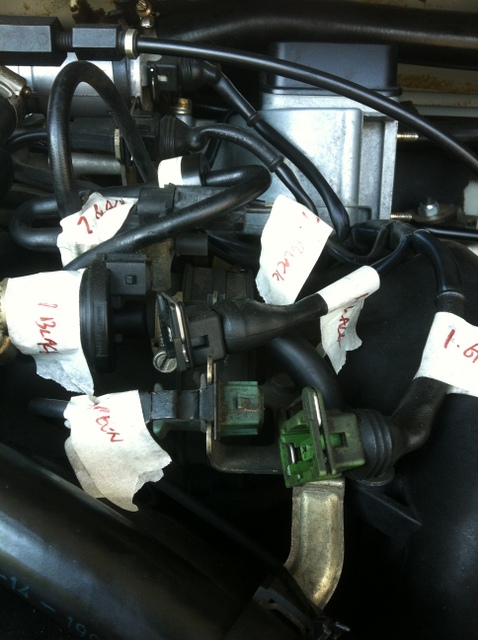
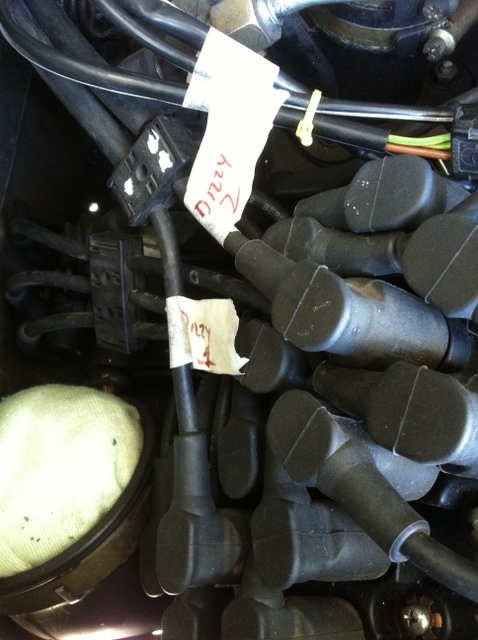
In the rear fuse box and the dizzy.
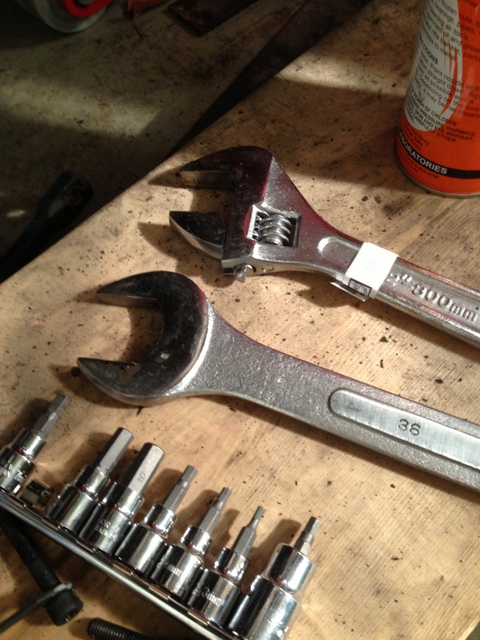
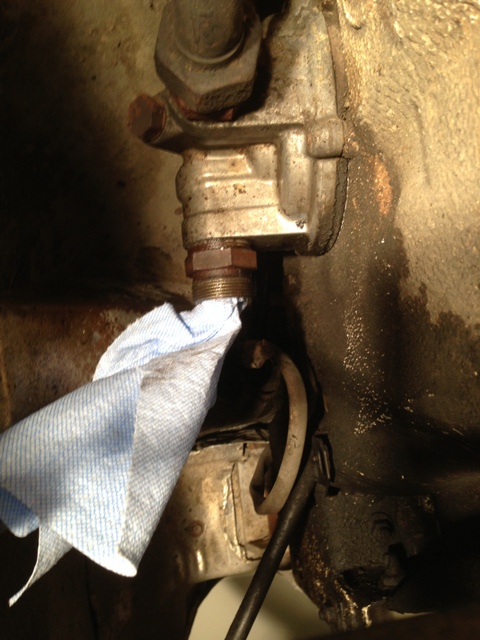
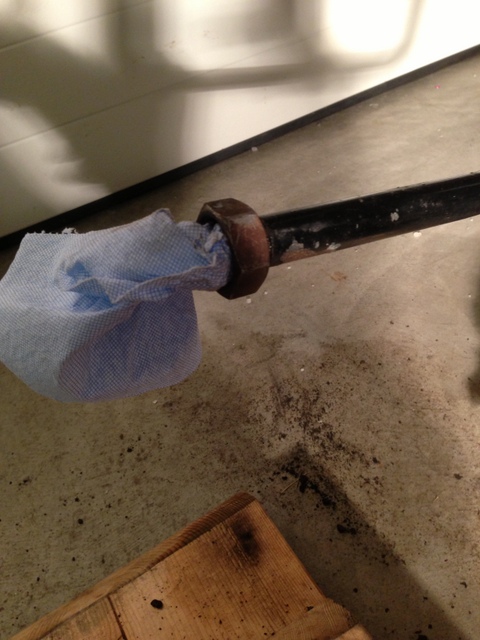
The big oil line was an absolute monster to get off. A liberal soak with Aerokroil and some patience got the lines off. Needed a 36mm wrench and a 32mm adjustable.
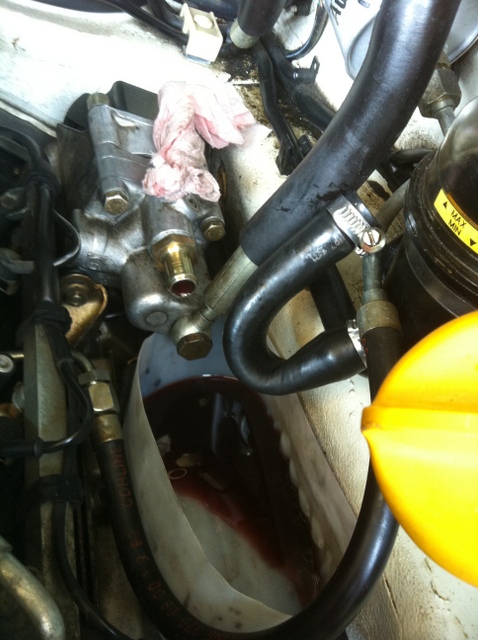
Drained the power steering pump and MacGyver'd up a little catch basin out of an old windshield washer bottle.
Next up is the little hose that runs behind the throttle cable bracket. It's a little flat head number that needs to come out. There is a round access hole on the vertical bracket (bottom right) that you can use. Or a screwdriver with an offset head.
There is a wiring harness that needs disconnecting. You must remove the bolt behind the MAF.
A couple of hose clamps behind the ISV as well.
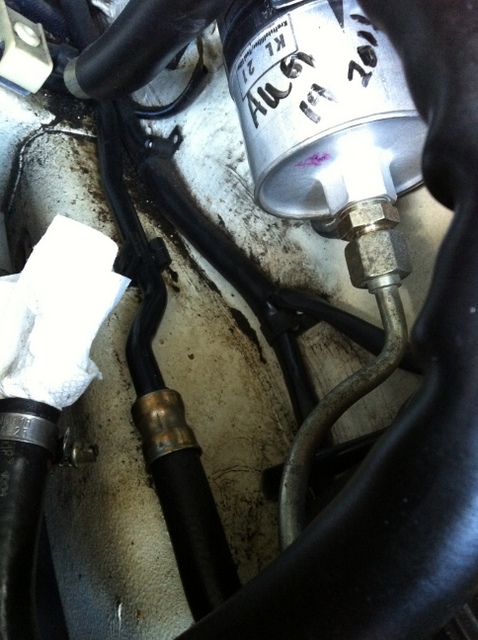
Fuel filter needs to come out. Use two small wrenches in tandem to loosen the nuts. A small amount of fuel will drain. Use MacGyver's Catch Basin from PS pump to trap the fuel. It's a good idea to plug the holes with a rag as well.
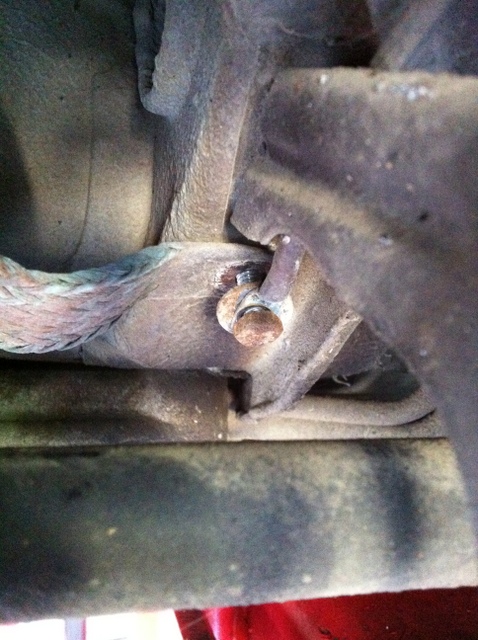
Back under the car and the nasty ground strap comes off. I will replace this with a new shiny one.
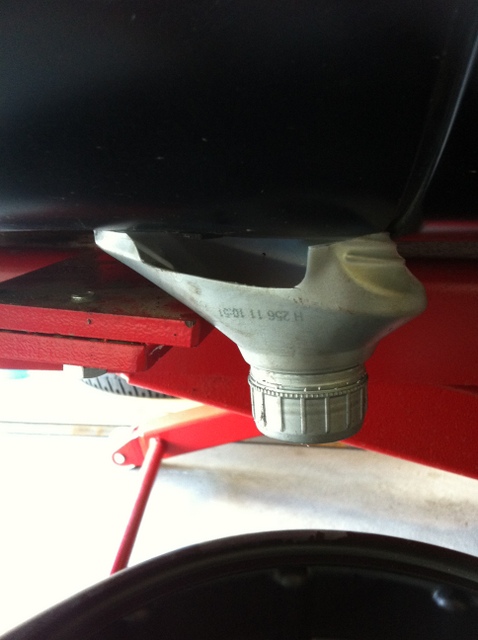
Decided to drain all the oil out of the car. But since the support arms for the lift partially block the oil drain plug under the shark fin, I had to come up with a solution to get the oil out without making a mess all over the lift or the floor. Once again, our intrepid '80s action hero to the rescue. I cut the top off a bottle of motor oil and created a little access slot for the wrench to loosen the oil drain plug while the funnel is in place. Worked well.
I'm back at it in earnest now and should be making some meaningful progress through the winter in the hopes of getting the car back on the road this spring.
Since this is taking a month of Sundays, I'm trying to label everything I can, so that putting humpty dumpty back together again will be easy.
Here are the connections behind the blower motor.
Here are the connections near the throttle.
In the rear fuse box and the dizzy.
The big oil line was an absolute monster to get off. A liberal soak with Aerokroil and some patience got the lines off. Needed a 36mm wrench and a 32mm adjustable.
Drained the power steering pump and MacGyver'd up a little catch basin out of an old windshield washer bottle.
Next up is the little hose that runs behind the throttle cable bracket. It's a little flat head number that needs to come out. There is a round access hole on the vertical bracket (bottom right) that you can use. Or a screwdriver with an offset head.
There is a wiring harness that needs disconnecting. You must remove the bolt behind the MAF.
A couple of hose clamps behind the ISV as well.
Fuel filter needs to come out. Use two small wrenches in tandem to loosen the nuts. A small amount of fuel will drain. Use MacGyver's Catch Basin from PS pump to trap the fuel. It's a good idea to plug the holes with a rag as well.
Back under the car and the nasty ground strap comes off. I will replace this with a new shiny one.
Decided to drain all the oil out of the car. But since the support arms for the lift partially block the oil drain plug under the shark fin, I had to come up with a solution to get the oil out without making a mess all over the lift or the floor. Once again, our intrepid '80s action hero to the rescue. I cut the top off a bottle of motor oil and created a little access slot for the wrench to loosen the oil drain plug while the funnel is in place. Worked well.