

Aussie 964C2 Maintenance Diary (pic heavy!)
 09-13-2012, 10:32 AM
#241
Burning Brakes
Thread Starter

Tonight, we take another step on the path of gradual RS-ification 
A nice little upgrade I've wanted to fit for some time, are 964RS engine mounts. Last year, while the transmission was out, I had the trans mount upgraded to the RS item, which looks the same, but is made out of stiffer rubber. So I figured it would be nice to complete the set one day

It's a nice easy DIY, so I ordered a kit of parts from Type 911UK. All of the parts are oem Porsche, except for the long bolts, which came in an unmarked ziploc bag (this part is quite important to the story, as we shall see)
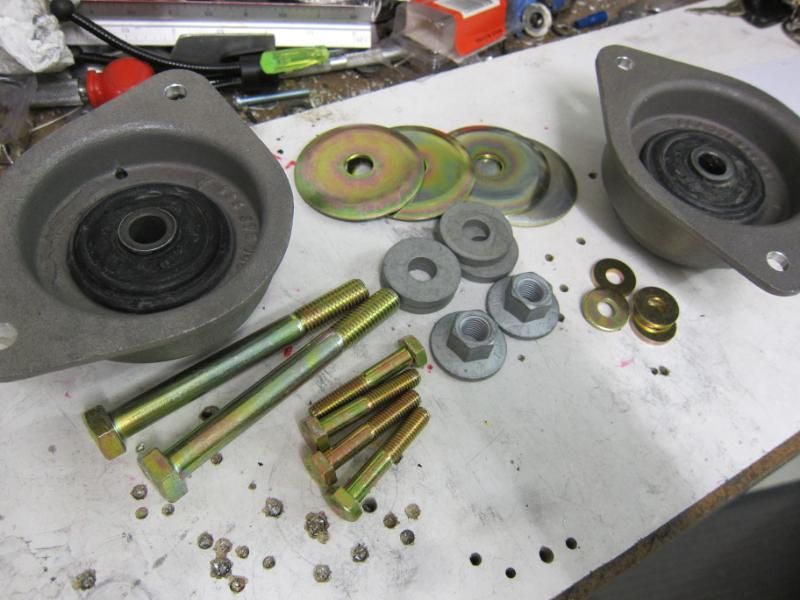
The kit comes with large and small washers, as well as the long bolt and comedy-sized nut that goes down the middle of the mount. From the top, it all goes together in this order:

And on the bottom, it's like this:

Now before you begin, the first step is to remove the skidplate that hand underneath the cat. It blocks access to one of the nuts you need to undo. Now, this seemingly-innocent little job can be a bit of a dealbreaker, since the plate is attached to the cat via these horrible little stainless speednuts, which seize up and take a lot of fiddling around with long nose pliers, etc to remove. If the captive nuts on your skidplate are seized, then on the swearing/difficulty scale, this job is rated as "drunken sailor".
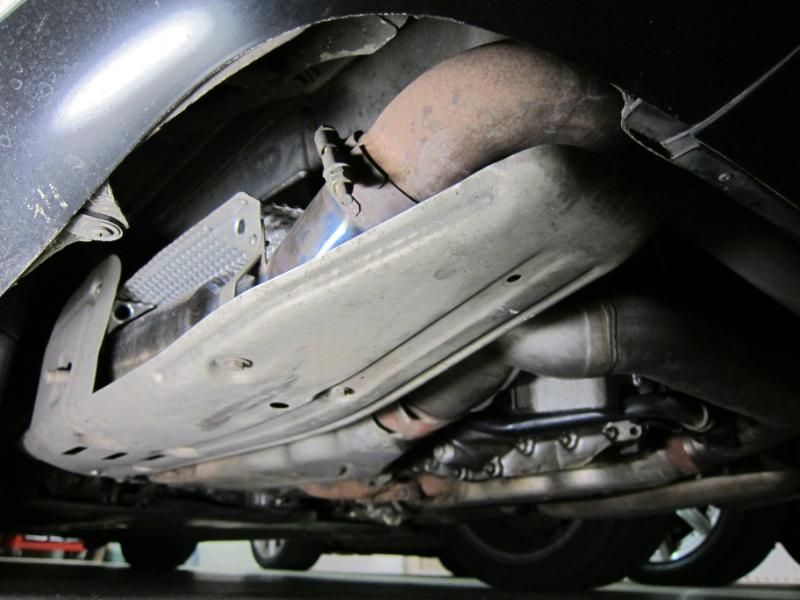
Edit: it might be possible that the skidplate is only in the way in my case, because the non-standard cat places it in a slightly different spot. If you have a stock cat, you might not have to remove the skidplate for access. If this is the case, open another frosty beverage and proceed to the next step
Swapping the mounts is quite easy, but it is a job for two ppl as you will see. So before you invite your mates over to give you a hand, it's worth spending some time the weekend before in removing that skidplate. Otherwise, your mates will be sitting around and drinking your beer, while you struggle to get past Step One with the skidplate. You have been warned
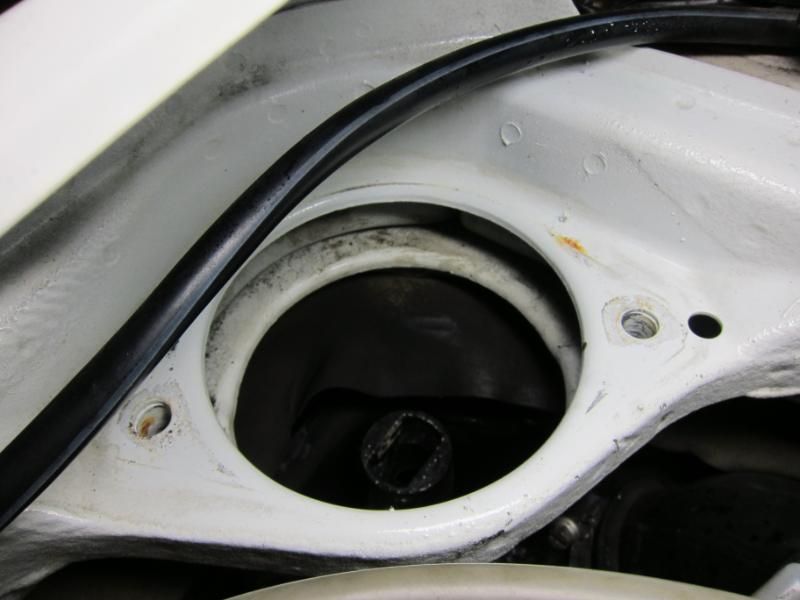
Step Two is to remove the stock mounts. They are bolted to the chassis at two spots.

And also from the top, you can see the pressed-metal beam that support the engine. The mounts bolt up to the ends of this.
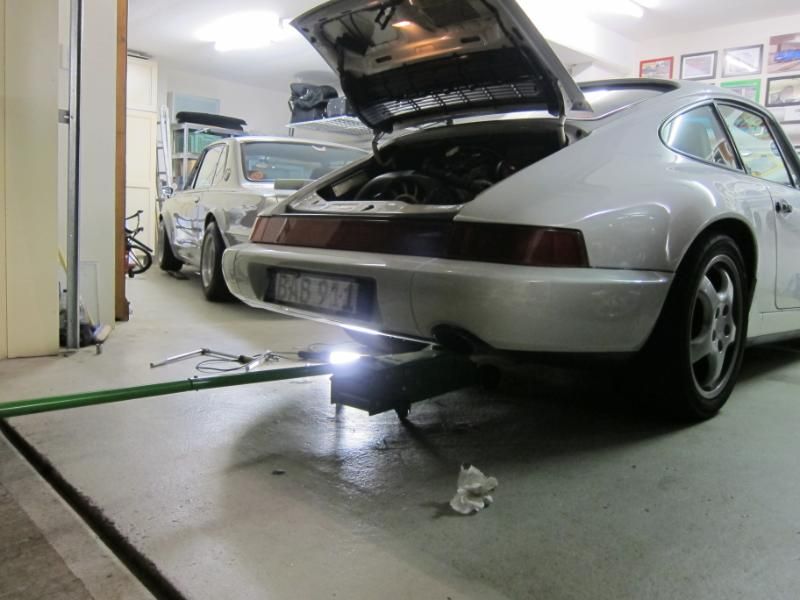
Now I don't think you really need to put the back of the car on stands to do this swap, but you do need a jack to support the engine when the mounts are out. So first I jack up the car a couple of inches, not enough to lift the wheels, just to take the slack out of the suspension.
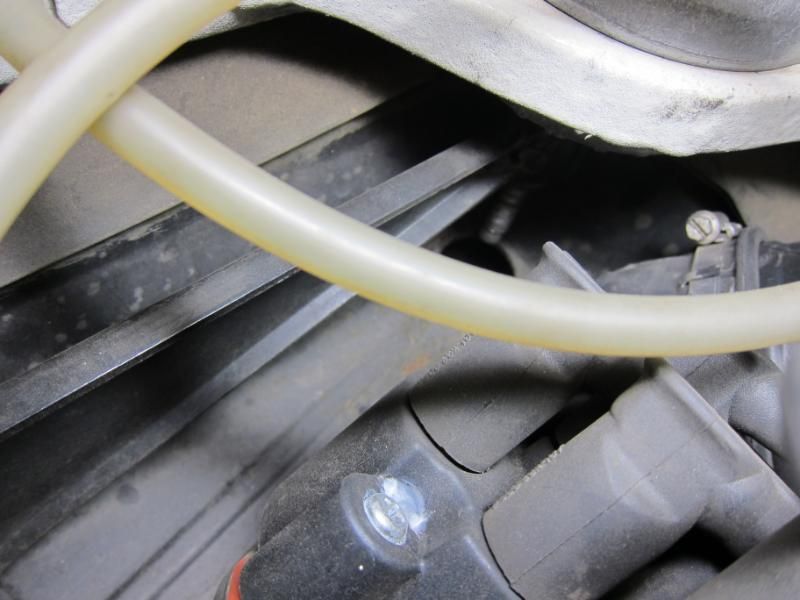
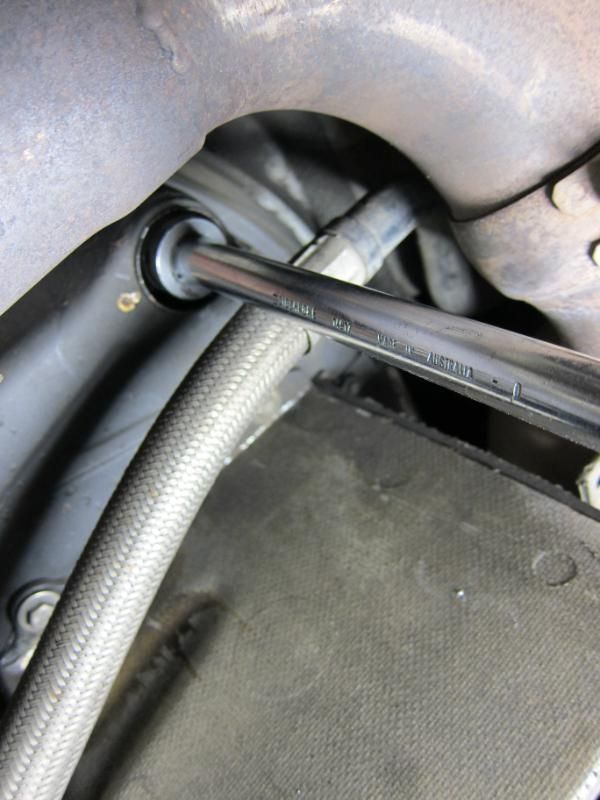
This takes the weight off the lower nut, which will make it much easier to undo, which you do via this access hole from below. Before you start, it's a very good idea to go crazy with some sort of penetrating oil. I use Wurth RostOff Plus, because I figure German corrosion deserves German oil.
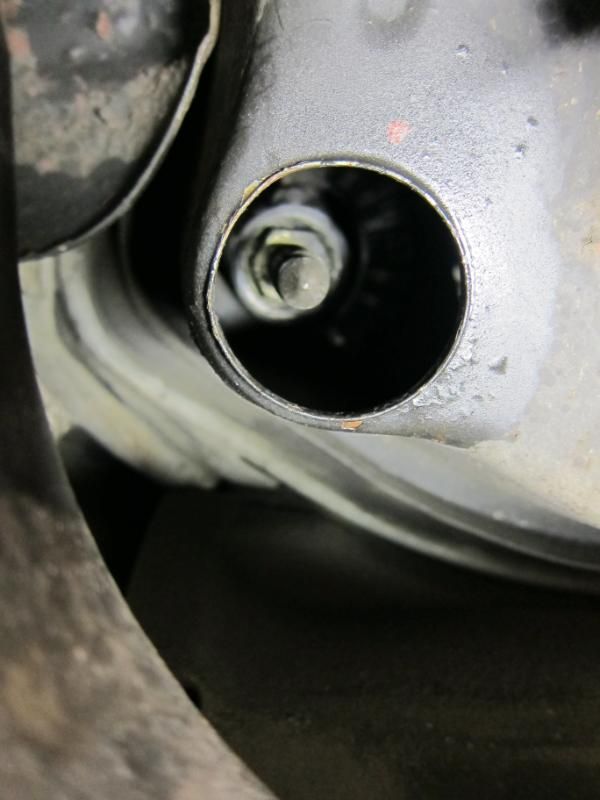
Oh by the way, because the bolt on the stock mounts is very long, you will need a 19mm deep socket like this one (and an 18mm too for the RS nuts):

Loosen the nuts two full turns.
Now lower the jack, so that the weight of the engine rests on those lower nuts again.

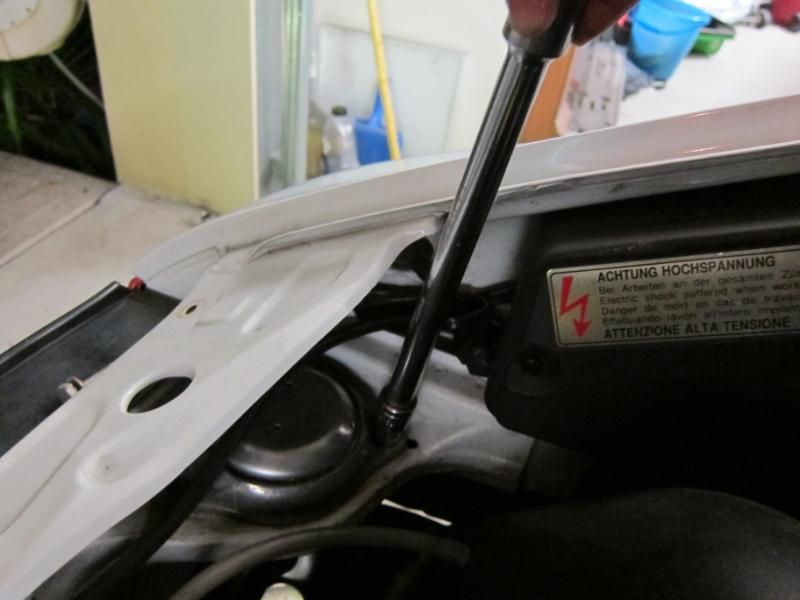
Now you can loosen (but not remove...not yet) the two 13mm bolts that secure the mounts to the chassis.
Raise the jack a little, so that the weight of the engine is off the bottom nuts again, and now you can loosen the nuts all the way and remove them. The mounts can now come off. This is the left side, which is easy, the right side will take a little wiggling and manouvering to get past the aircon plumbing, but it's very doable.
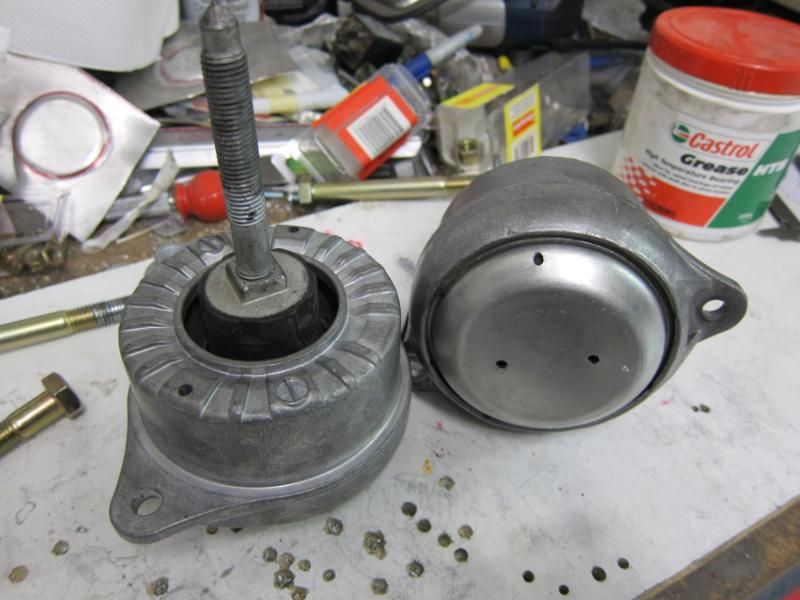
With the stock mounts on the bench, you can see that they are actually quite complex. Inside the canister are hydraulic fluid and various rubber gubbins to provide some damping and insulation, but you can actually grab the shaft that comes out of it and wiggle it from side to side a little, so the stock mounts do allow a certain amount of movement, which the RS mounts are designed to eliminate. In contrast, the RS mounts are basically a hard rubber hockey puck bonded to a metal housing.
The RS mounts can now go in, and as a little trick to keep the stack together while it's upside down, I smeared a little thick grease on the washers, as a temporary glue, so that the washers don't fall out when I'm putting the mounts in place.
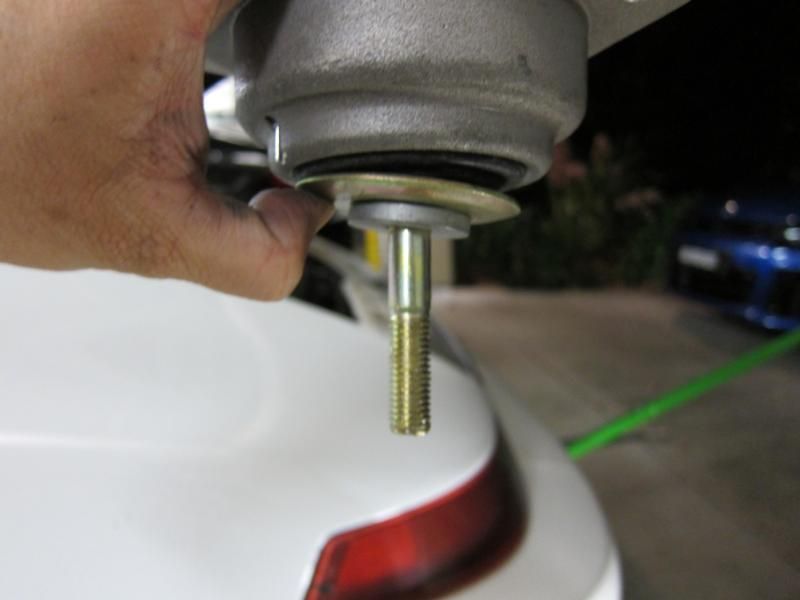
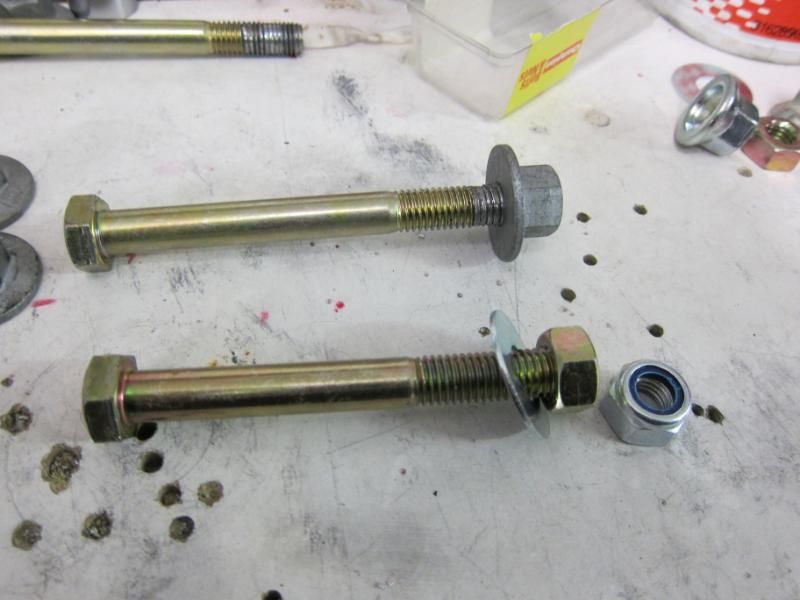
But as I was buttoning everything up...we had a problem. The nut felt like it was cross threading, and when I removed it all, the bolt was pretty ruined.
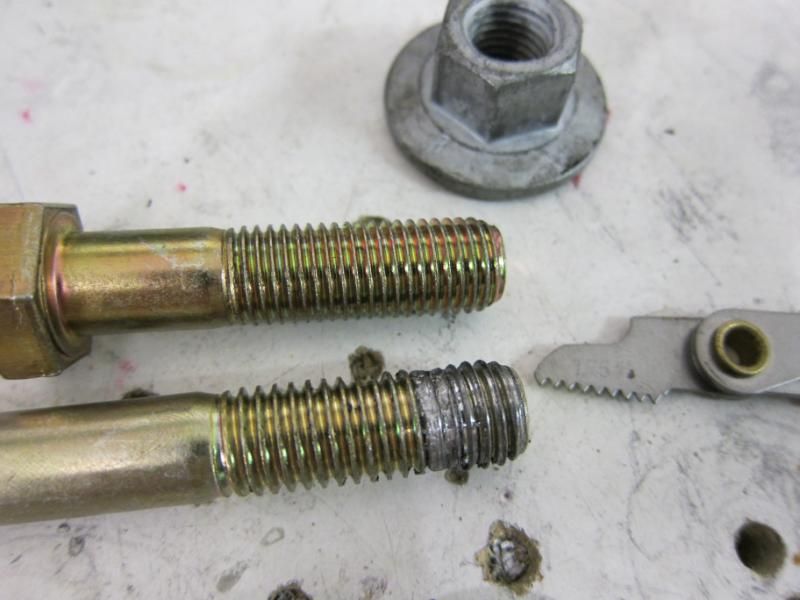
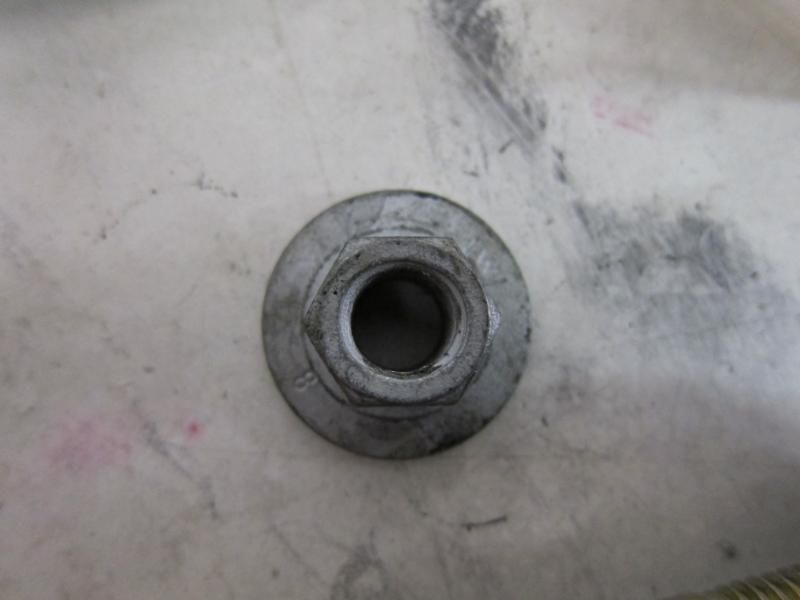
The bolt that was supplied with the kit wasn't an oem bolt, and while it was the right M12 size, the thread pitch was M12x1.75, whereas the Porsche nut has a finer thread pitch of M12x1.5. The nut actually is pinched to an oval section, so that some of the threads go on tight as an anti-loosening measure, so it will be a little tight anyway....but there's no way a 1.5 nut will go onto 1.75 threads and ruined nuts and bolts were the result.
Type 911 was very apologetic, and is arranging for oem bolts to be shipped to me asap, but for the time being I thought I'd improvise a solution. The M12 bolt that Type 911 supplied, is grade 8.8 hi-tensile.
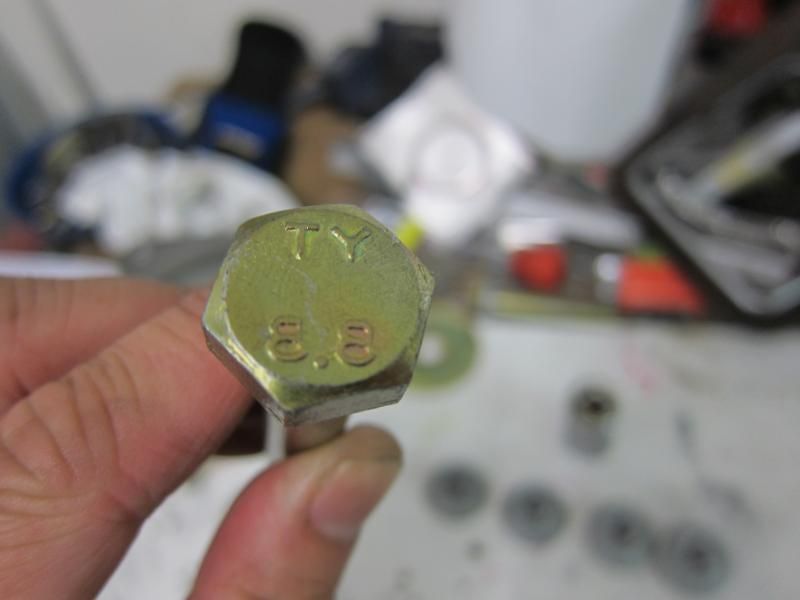
When you tighten a bolt, it stretches slightly, and the grading tells you how much stretching it will take before it goes ker-ping and snaps. Given that things like engine mounts and suspension parts tend to be done up very tight, grade 8.8 is the usual standard, and so this is the appropriate bolt for this heavy duty application. I went to an industrial fastener supplier, but they couldn't supply an M12x1.5 bolt as it's quite a weird size (Because Porsche). But they could supply a slightly shorter grade 8.8 bolt in M12x1.75 thread, and with a matching nyloc nut too. So this is what I'll be using, and when the oem bolts come in, they'll be easy enough to swap over.
The RS mounts go on much more easily than the stock ones come off, and the first step is to torque up the two 13mm bolts to 20ft-lbs....before long it looks like this:

The bottom nut is torqued up to 60ft-lbs (which is quite tight), and you'll need a strong helper to brace the bolt from the topside while you tighten from the bottom.
And how does it work?
Well from a quick drive around the neighbourhood, I can't say that I'm noticing a massive increase in noise or vibration, There is maybe a bit more of a whine/grumble/rumble at various points of the rev range, but it's not objectionable. But it's the sort of thing where, unless I pointed it out, I don't think you'd notice. But the big difference I did notice straight away, is the gearchange. The shift on my car's generally quite good, but sometimes the shift seems to have a bit of an obstruction for no random reason. Well the RS mounts seem to have made the shift a lot more consistent, and the best part is that at high rpm, the 1-2 shift is much cleaner and faster. So that part I'm *very* happy about.
The other benefit which I'm dying to try out, is that when I exit a corner hard in the wet and get some wheelspin, I get some axle tramp when the LSD kicks in and does its thing. By rights, the RS mounts should eliminate, or at least reduce this, but I guess I'll have to wait for a rainy day to test this out
I'll report back after driving the car for a few more days.
A nice little upgrade I've wanted to fit for some time, are 964RS engine mounts. Last year, while the transmission was out, I had the trans mount upgraded to the RS item, which looks the same, but is made out of stiffer rubber. So I figured it would be nice to complete the set one day
It's a nice easy DIY, so I ordered a kit of parts from Type 911UK. All of the parts are oem Porsche, except for the long bolts, which came in an unmarked ziploc bag (this part is quite important to the story, as we shall see)
The kit comes with large and small washers, as well as the long bolt and comedy-sized nut that goes down the middle of the mount. From the top, it all goes together in this order:
And on the bottom, it's like this:
Now before you begin, the first step is to remove the skidplate that hand underneath the cat. It blocks access to one of the nuts you need to undo. Now, this seemingly-innocent little job can be a bit of a dealbreaker, since the plate is attached to the cat via these horrible little stainless speednuts, which seize up and take a lot of fiddling around with long nose pliers, etc to remove. If the captive nuts on your skidplate are seized, then on the swearing/difficulty scale, this job is rated as "drunken sailor".
Edit: it might be possible that the skidplate is only in the way in my case, because the non-standard cat places it in a slightly different spot. If you have a stock cat, you might not have to remove the skidplate for access. If this is the case, open another frosty beverage and proceed to the next step
Swapping the mounts is quite easy, but it is a job for two ppl as you will see. So before you invite your mates over to give you a hand, it's worth spending some time the weekend before in removing that skidplate. Otherwise, your mates will be sitting around and drinking your beer, while you struggle to get past Step One with the skidplate. You have been warned
Step Two is to remove the stock mounts. They are bolted to the chassis at two spots.
And also from the top, you can see the pressed-metal beam that support the engine. The mounts bolt up to the ends of this.
Now I don't think you really need to put the back of the car on stands to do this swap, but you do need a jack to support the engine when the mounts are out. So first I jack up the car a couple of inches, not enough to lift the wheels, just to take the slack out of the suspension.
This takes the weight off the lower nut, which will make it much easier to undo, which you do via this access hole from below. Before you start, it's a very good idea to go crazy with some sort of penetrating oil. I use Wurth RostOff Plus, because I figure German corrosion deserves German oil.
Oh by the way, because the bolt on the stock mounts is very long, you will need a 19mm deep socket like this one (and an 18mm too for the RS nuts):
Loosen the nuts two full turns.
Now lower the jack, so that the weight of the engine rests on those lower nuts again.
Now you can loosen (but not remove...not yet) the two 13mm bolts that secure the mounts to the chassis.
Raise the jack a little, so that the weight of the engine is off the bottom nuts again, and now you can loosen the nuts all the way and remove them. The mounts can now come off. This is the left side, which is easy, the right side will take a little wiggling and manouvering to get past the aircon plumbing, but it's very doable.
With the stock mounts on the bench, you can see that they are actually quite complex. Inside the canister are hydraulic fluid and various rubber gubbins to provide some damping and insulation, but you can actually grab the shaft that comes out of it and wiggle it from side to side a little, so the stock mounts do allow a certain amount of movement, which the RS mounts are designed to eliminate. In contrast, the RS mounts are basically a hard rubber hockey puck bonded to a metal housing.
The RS mounts can now go in, and as a little trick to keep the stack together while it's upside down, I smeared a little thick grease on the washers, as a temporary glue, so that the washers don't fall out when I'm putting the mounts in place.
But as I was buttoning everything up...we had a problem. The nut felt like it was cross threading, and when I removed it all, the bolt was pretty ruined.
The bolt that was supplied with the kit wasn't an oem bolt, and while it was the right M12 size, the thread pitch was M12x1.75, whereas the Porsche nut has a finer thread pitch of M12x1.5. The nut actually is pinched to an oval section, so that some of the threads go on tight as an anti-loosening measure, so it will be a little tight anyway....but there's no way a 1.5 nut will go onto 1.75 threads and ruined nuts and bolts were the result.
Type 911 was very apologetic, and is arranging for oem bolts to be shipped to me asap, but for the time being I thought I'd improvise a solution. The M12 bolt that Type 911 supplied, is grade 8.8 hi-tensile.
When you tighten a bolt, it stretches slightly, and the grading tells you how much stretching it will take before it goes ker-ping and snaps. Given that things like engine mounts and suspension parts tend to be done up very tight, grade 8.8 is the usual standard, and so this is the appropriate bolt for this heavy duty application. I went to an industrial fastener supplier, but they couldn't supply an M12x1.5 bolt as it's quite a weird size (Because Porsche). But they could supply a slightly shorter grade 8.8 bolt in M12x1.75 thread, and with a matching nyloc nut too. So this is what I'll be using, and when the oem bolts come in, they'll be easy enough to swap over.
The RS mounts go on much more easily than the stock ones come off, and the first step is to torque up the two 13mm bolts to 20ft-lbs....before long it looks like this:
The bottom nut is torqued up to 60ft-lbs (which is quite tight), and you'll need a strong helper to brace the bolt from the topside while you tighten from the bottom.
And how does it work?
Well from a quick drive around the neighbourhood, I can't say that I'm noticing a massive increase in noise or vibration, There is maybe a bit more of a whine/grumble/rumble at various points of the rev range, but it's not objectionable. But it's the sort of thing where, unless I pointed it out, I don't think you'd notice. But the big difference I did notice straight away, is the gearchange. The shift on my car's generally quite good, but sometimes the shift seems to have a bit of an obstruction for no random reason. Well the RS mounts seem to have made the shift a lot more consistent, and the best part is that at high rpm, the 1-2 shift is much cleaner and faster. So that part I'm *very* happy about.
The other benefit which I'm dying to try out, is that when I exit a corner hard in the wet and get some wheelspin, I get some axle tramp when the LSD kicks in and does its thing. By rights, the RS mounts should eliminate, or at least reduce this, but I guess I'll have to wait for a rainy day to test this out
I'll report back after driving the car for a few more days.
Last edited by Babalouie; 09-13-2012 at 08:40 PM.


 09-13-2012, 11:14 AM
#245
Burning Brakes
Thread Starter
 09-13-2012, 11:19 AM
#246
Rennlist Member

...Now before you begin, the first step is to remove the skidplate that hand underneath the cat. It blocks access to one of the nuts you need to undo. Now, this seemingly-innocent little job can be a bit of a dealbreaker, since the plate is attached to the cat via these horrible little stainless speednuts, which seize up and take a lot of fiddling around with long nose pliers, etc to remove. If the captive nuts on your skidplate are seized, then on the swearing/difficulty scale, this job is rated as "drunken sailor".
...
...I thought I had easy access to both engine carrier bolts from below...
Regardless, if you have sagging mounts, it's a wonderful upgrade!
09-13-2012, 12:01 PM
#247
Burning Brakes
Thread Starter
The back corner of the skidplate just about snagged the long extension on the socket in my case, so I figured it would be best to get it out of the way, since you would later be putting quite a lot of force into the re-tightening process, and having all that sharp metal close to your knuckles...
09-13-2012, 01:24 PM
#248
Rennlist Member
You just like playing with your fancy cat shield! I forgot you made a custom design when you installed the cat bypass.
As always, your projects are well thought out and excuted.
As always, your projects are well thought out and excuted.
09-13-2012, 08:38 PM
#249
Burning Brakes
Thread Starter
Ah of course, the cat! 
I suppose the new cat might have moved the skidplate over to the middle a little, and this be covering the hole, when a stock one would not. I didn't think it would, but I guess it's quite possible.
I'll update the post to point this out.
I suppose the new cat might have moved the skidplate over to the middle a little, and this be covering the hole, when a stock one would not. I didn't think it would, but I guess it's quite possible.
I'll update the post to point this out.
09-14-2012, 03:48 AM
#250
Kevin, now, if I were you, I would consider upgrading the engine carrier with this: http://www.rennline.com/Rennline-Eng...oductinfo/M04/
Ciao
Ciao
09-14-2012, 06:35 AM
#252
Three Wheelin'
Great write up!!
seams not so hard, + one on the Wurth Rostoff plus oil, really the best penetrating oil from far, much superior than WD.....(use it to protect aluminium)
seams not so hard, + one on the Wurth Rostoff plus oil, really the best penetrating oil from far, much superior than WD.....(use it to protect aluminium)
09-16-2012, 08:39 PM
#253
Burning Brakes
Thread Starter
Observations after a few days' driving:
The gearchange is still notceably improved, especially the 2nd to 3rd upshift and the 1st to 2nd shift under full throttle.
A few of the older threads about RS/Wevo mounts mention that the back end of the car feels "tighter" in cornering, and I have to agree. Normally as I turn in, the car takes a bit of a heartbeat to settle on its haunches and as it does so, rotates a little into the apex. It's most noticeable in two corners on my commute: one is an off camber tight right hander that you take in second gear, and as the tail settles, it steps out ever so slightly under power. And another corner is banked on the entry, but just after the apex, it flattens out and goes over a bit of a crest. Normally the car "unloads and resettles" a bit as it goes over the crest, not enough to actually oversteer, tho.
In both cases, the tail feels much more locked-down now and I think this would be a good thing on the track (where I had a lot of corner entry oversteer on fast sweepers). But for the road, I think this will take a little re-acclimatisation, as I'm mentally expecting the car to tighten its line slightly as it settles going into a corner, and it no longer does that.
It's certainly very interesting how sensitive the 964 is to setup changes...
