When you click on links to various merchants on this site and make a purchase, this can result in this site earning a commission. Affiliate programs and affiliations include, but are not limited to, the eBay Partner Network.
I just finished installing the headlamp relay kit this morning. Thanks to Rus for putting this together for us. After going over the instructions the first time I thought, "I don't think I want to do this." After looking over the pictures and instructions a second time I realized by going slow and doing it step-by-step as directed, I could install it. I'm sure I took longer than most. I made a couple dumb mistakes that caused me more work (don't forget the jumper wires to be installed when the fuse panel's apart)--in the end though, it's installed and working properly. I like that it's an integrated kit with no extraneous wires and connectors. If you're using your trunk carpet, there's nothing showing.
I just finished installing the headlamp relay kit this morning. Thanks to Rus for putting this together for us. After going over the instructions the first time I thought, "I don't think I want to do this." After looking over the pictures and instructions a second time I realized by going slow and doing it step-by-step as directed, I could install it. I'm sure I took longer than most. I made a couple dumb mistakes that caused me more work (don't forget the jumper wires to be installed when the fuse panel's apart)--in the end though, it's installed and working properly. I like that it's an integrated kit with no extraneous wires and connectors. If you're using your trunk carpet, there's nothing showing.
Good to hear that your install went well. I haven't started my installation, decided to hookup the city lights on the h4's at the same time. Gathered up the pieces that I am going to use for the city lights and decided to pull the bumper cover to route all of the lighting wires. The kit looks very professional and after reading the instructions several times and emailing Rus I am positive I can install without any issues. Wish I had a larger garage. I will report back when completed.
Good to hear that your install went well. I haven't started my installation, decided to hookup the city lights on the h4's at the same time. Gathered up the pieces that I am going to use for the city lights and decided to pull the bumper cover to route all of the lighting wires. The kit looks very professional and after reading the instructions several times and emailing Rus I am positive I can install without any issues. Wish I had a larger garage. I will report back when completed.
actually super interested in this. If you can share some pics when you're done (of the install and the finished product) that would be awesome.
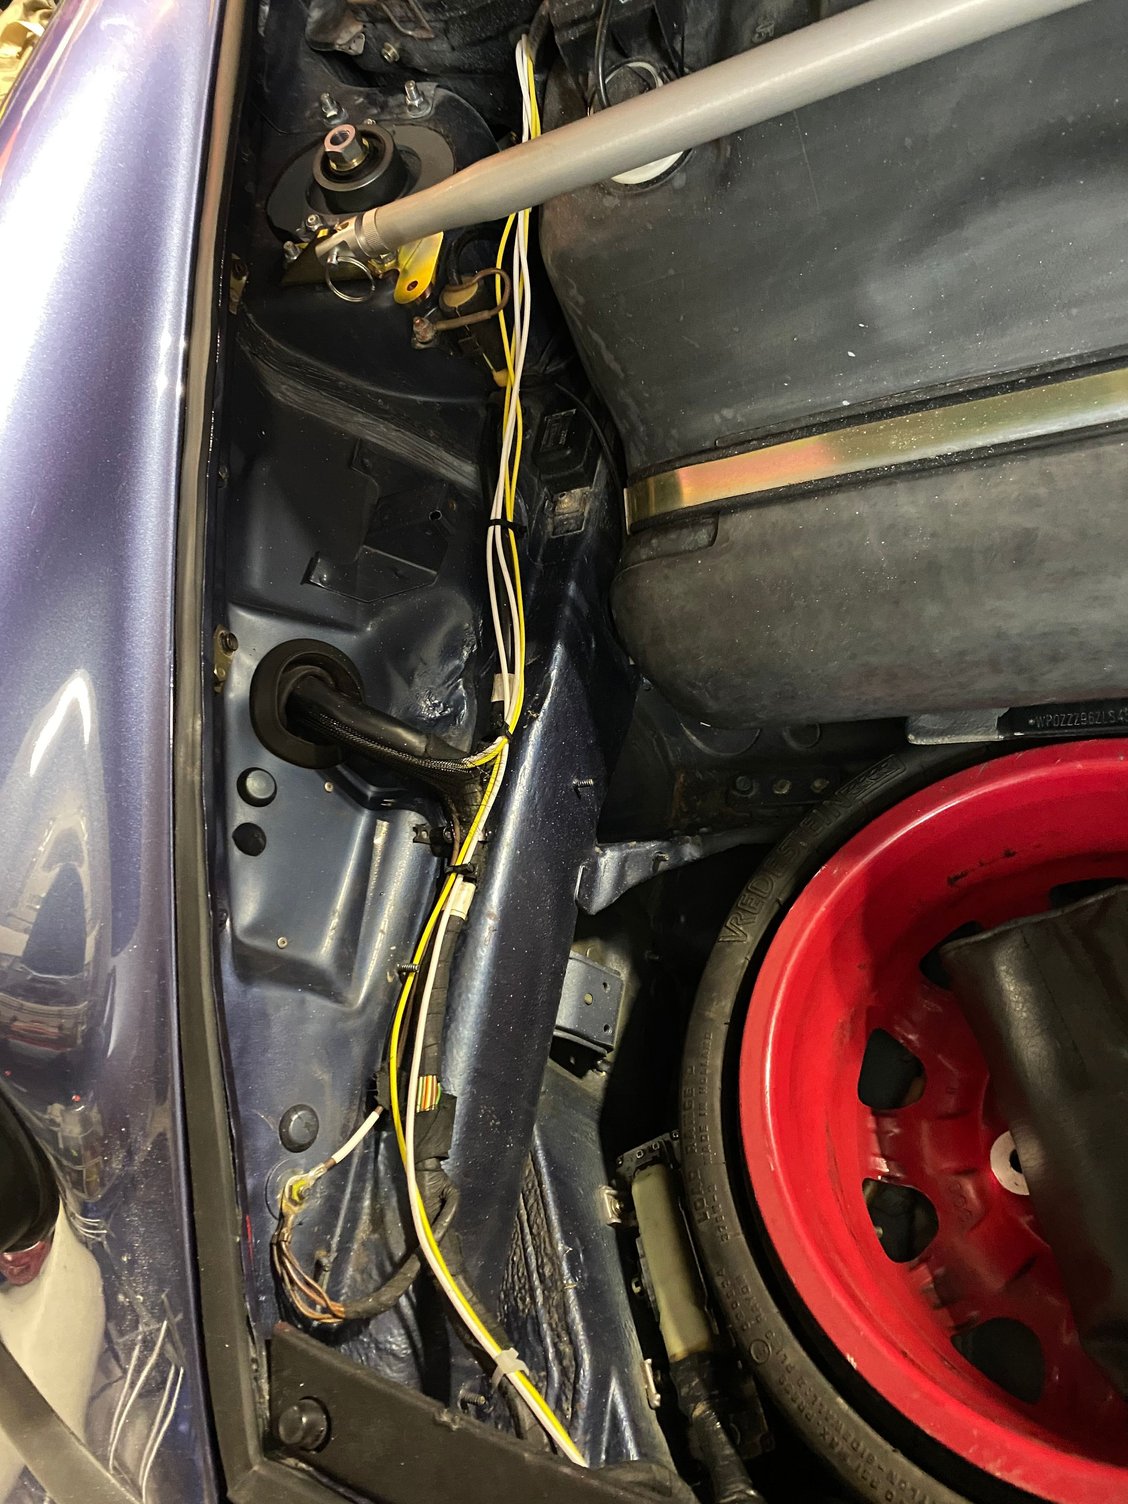
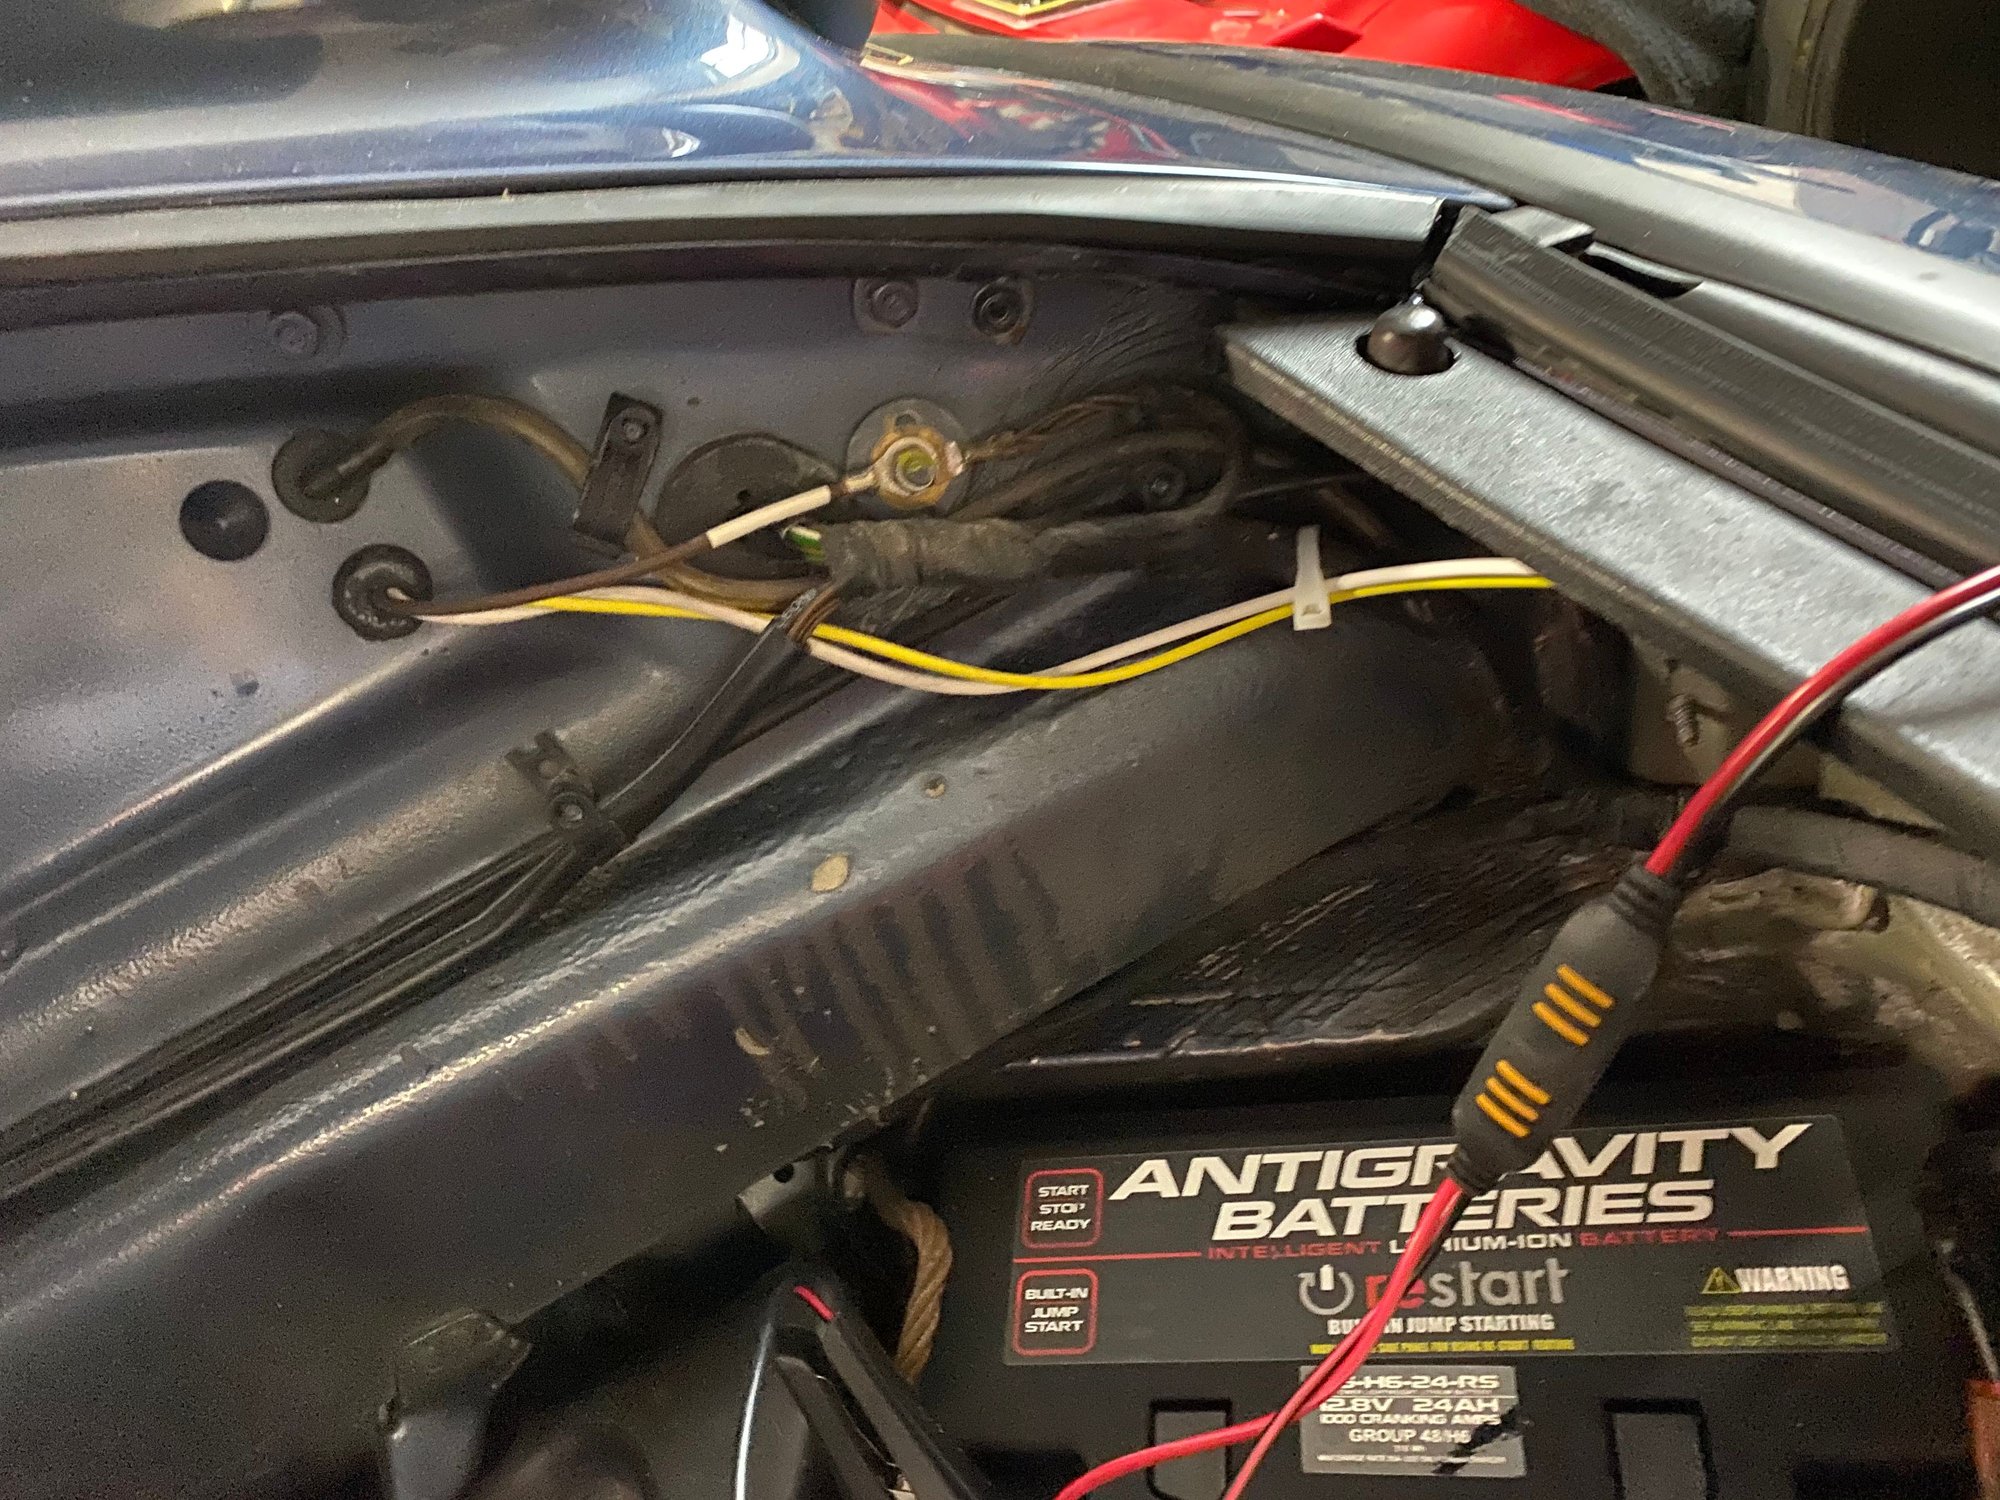
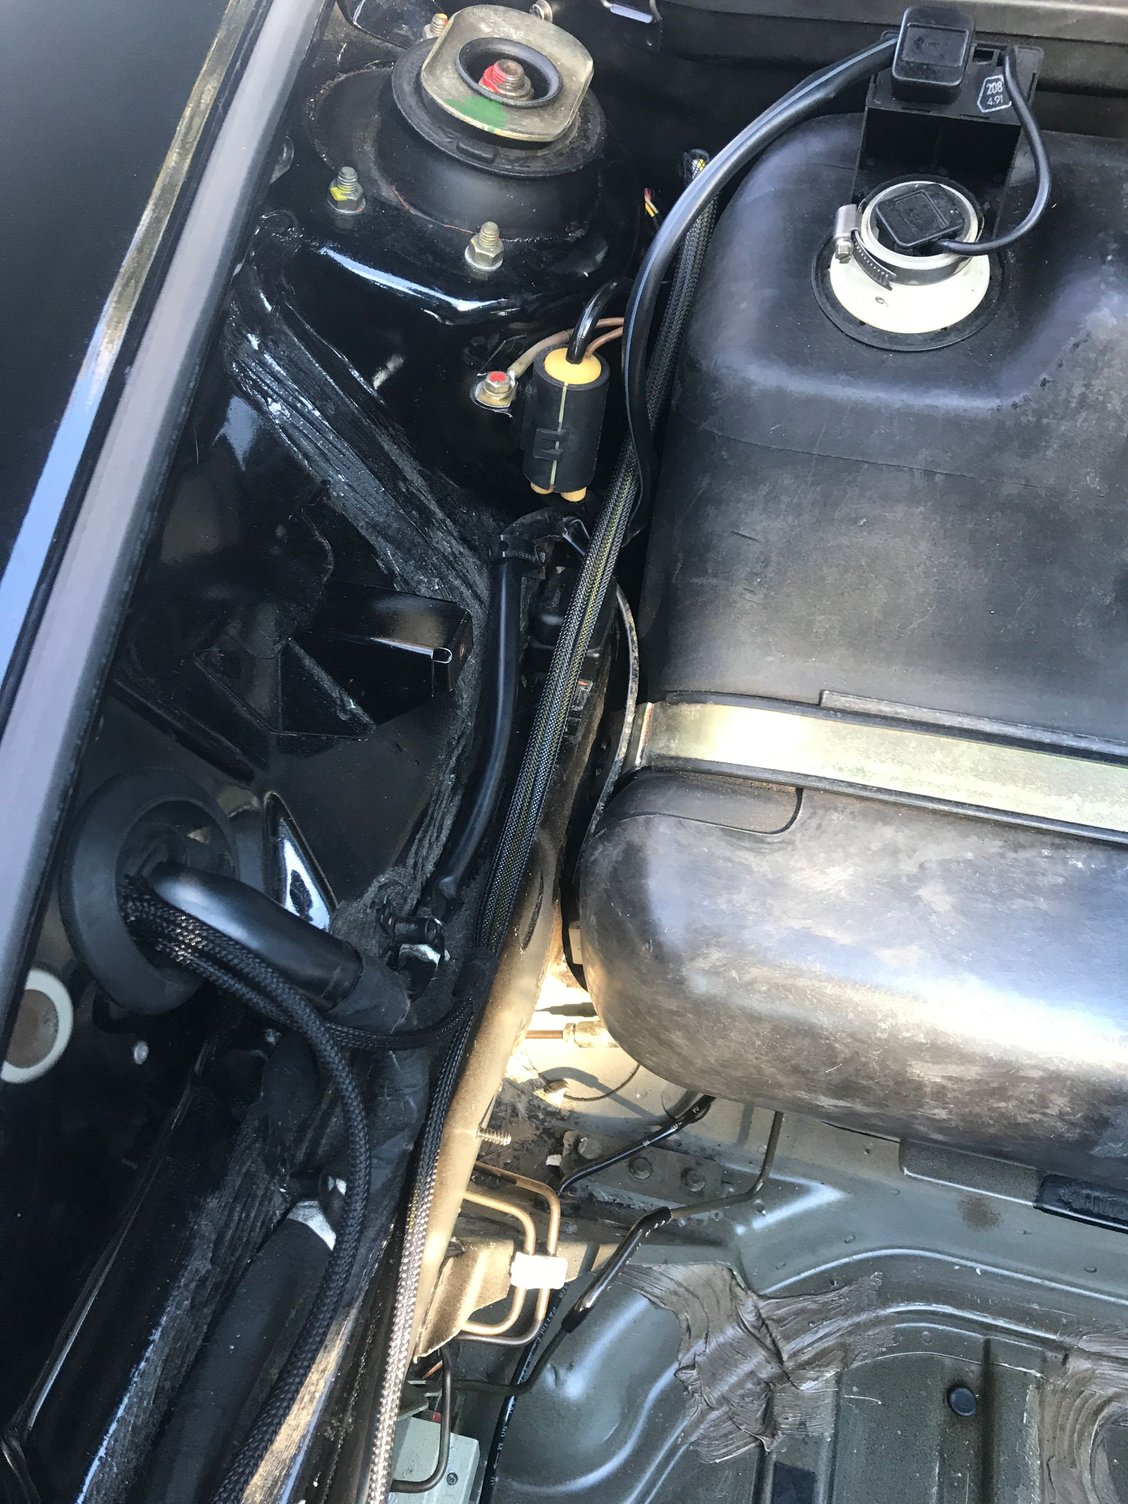
I didn't take pictures of the install--the instructions include a good set of installation pictures. The finished product is integrated so the only thing showing are the wires coming from the fuse box down along the passenger side of the frunk. The passenger side wires go through an existing grommet into the wheel well. The driver side wires continue around the front and under the support beneath hood latch and through another existing grommet into the wheel well. Below are pictures of the wires in the frunk after completion. Again, once the carpet is back in, there's nothing to see.
Also, all the wires in the kit are labeled, which is particularly important in the fuse box phase of the installation. Rus has made a very nice product here.
Thanks for sharing! Did you see the abrasion resistant sheathing included? It further disguises the install and provides some, well, abrasion resistance.
Happy to say parts are in from Porsche Germany and on their way to me. I'll be in touch to invoice all on my list as soon as the parts are in hand. I believe I'll have parts to make a handful more than are currently spoken for so be in touch if interested.
Using the PP adapter (which I used for a year) means the factory wiring scheme with no relays remains. Porsche used relays for most high amp circuits but not the headlights. Stock, headlight power runs unfused from the battery to the ignition switch to the headlight switch to the fuse box to the headlight buckets, all using 1.5mm2 aka approx 16ga wiring. This means the full amperage of your headlights runs thru all those components and that the wiring is more or less at its limit and wattage can not be increased safely.
Common practice for high amp circuits is to use a relay thereby keeping current out of the switches, reducing the length of the wiring and allowing you to pick the size of the wire from the relay to the headlights. My kit adds relays and uses 14ga and 12ga wiring for low/high beams and a ceramic socket.
Net result is less stress on expensive switches and more safety margin should you choose to increase headlight wattage. I myself am running 80/100w H4s.
Thanks for this reply. Would love to go on the list if its still available!

 02-15-2021, 04:10 PM