When you click on links to various merchants on this site and make a purchase, this can result in this site earning a commission. Affiliate programs and affiliations include, but are not limited to, the eBay Partner Network.
You have come this far...I would definitely do the planetary gear mod. I almost didn’t do it when I had my engine out (175K km). Goughary convinced me to do it. I had one pin slightly loose.
You have come this far...I would definitely do the planetary gear mod. I almost didn�t do it when I had my engine out (175K km). Goughary convinced me to do it. I had one pin slightly loose.
I was thinking about that today. I couldn't find a tutorial on getting to it. Where in the case is it?
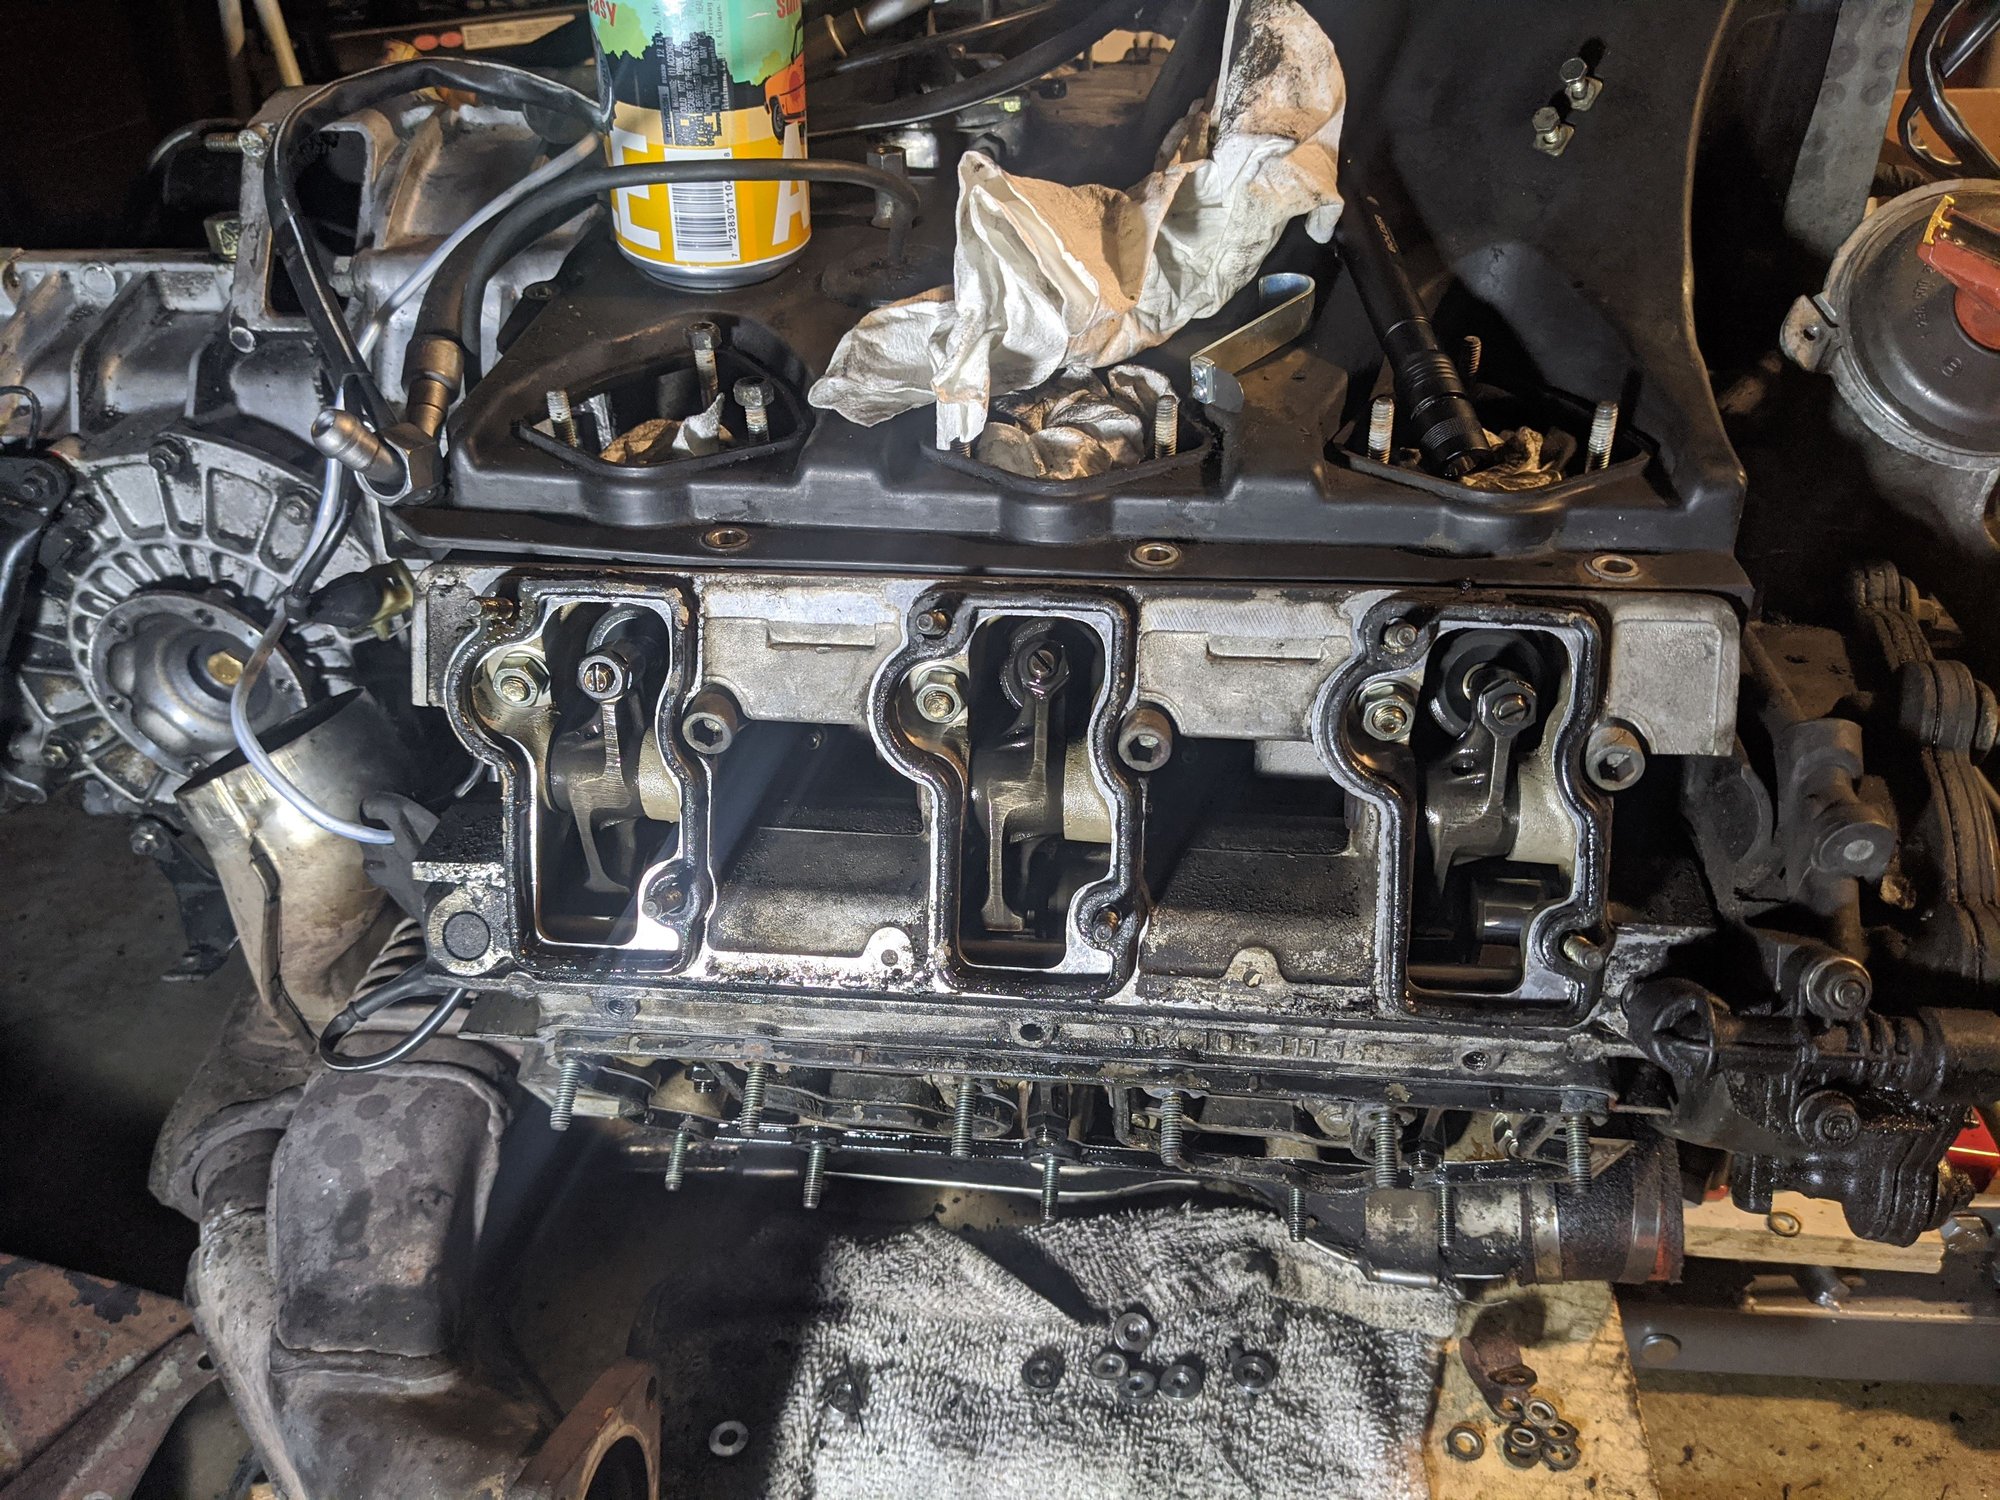
Last night I tackled the valve adjustment using the Kirk tool and a feeler gauge to confirm. Having the engine out and using the Kirk tool made this process a breeze. It was getting late last night so I'm going to double check my work this morning but it took about an hour to do the valve adjustments.
When doing this job for the first time, it helps tremendously to see what you're doing. Even seeing what you're doing, getting the feeler gauge in the right spot took awhile (it didn't help my 1st cylinder valves were over tightened).
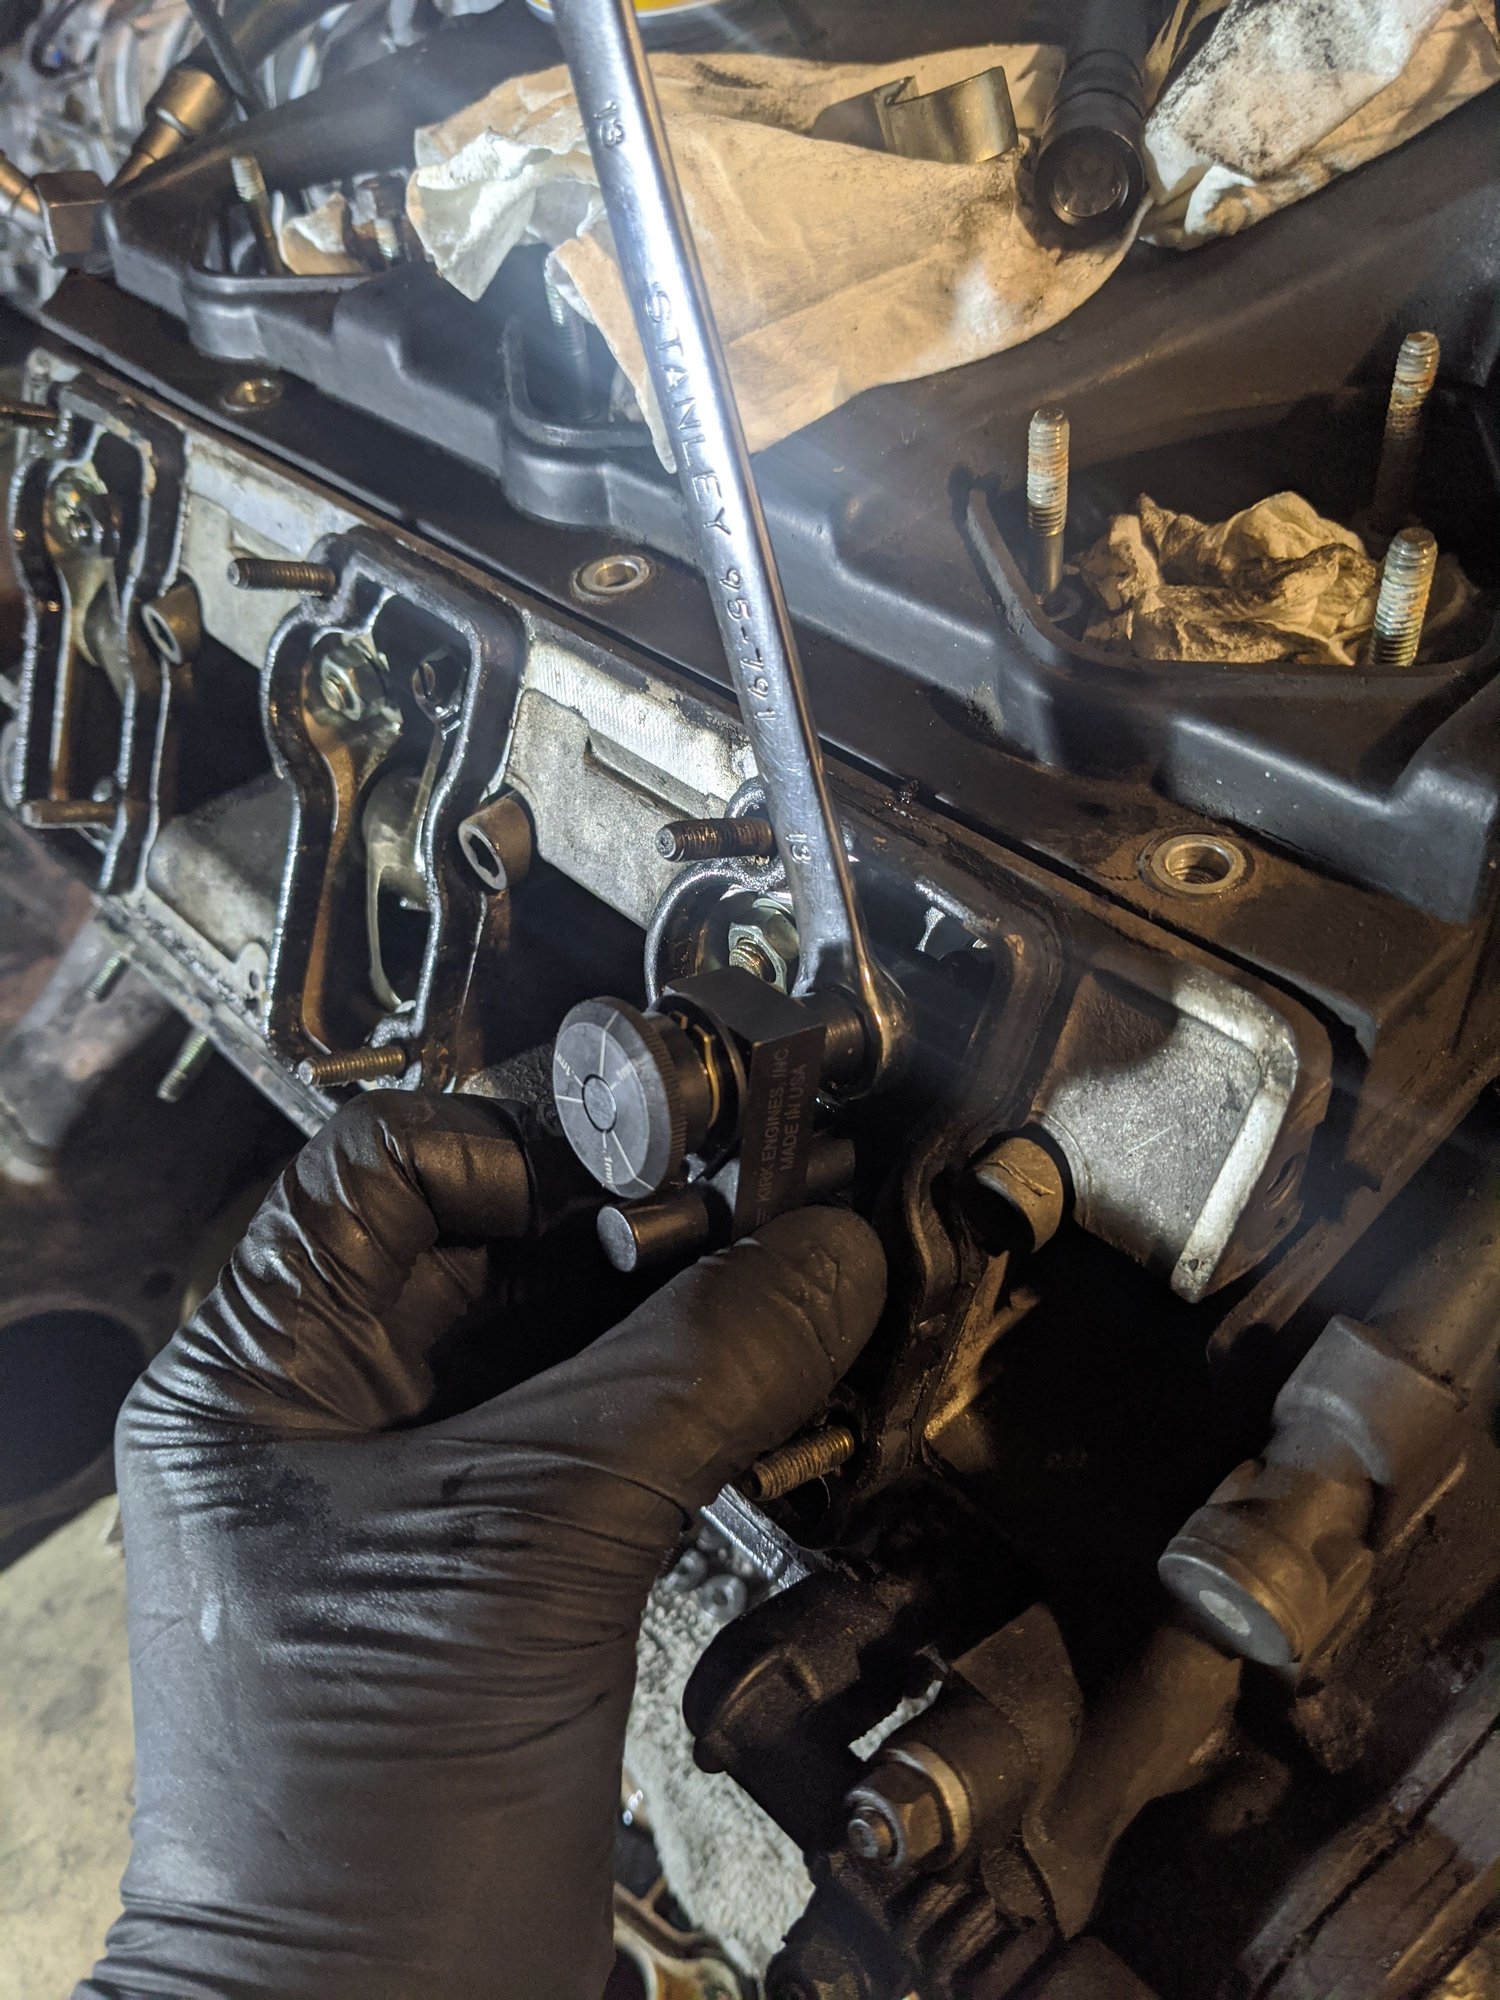
The Kirk tool has the 36* marks on it to get the adjustment right around where it should be.
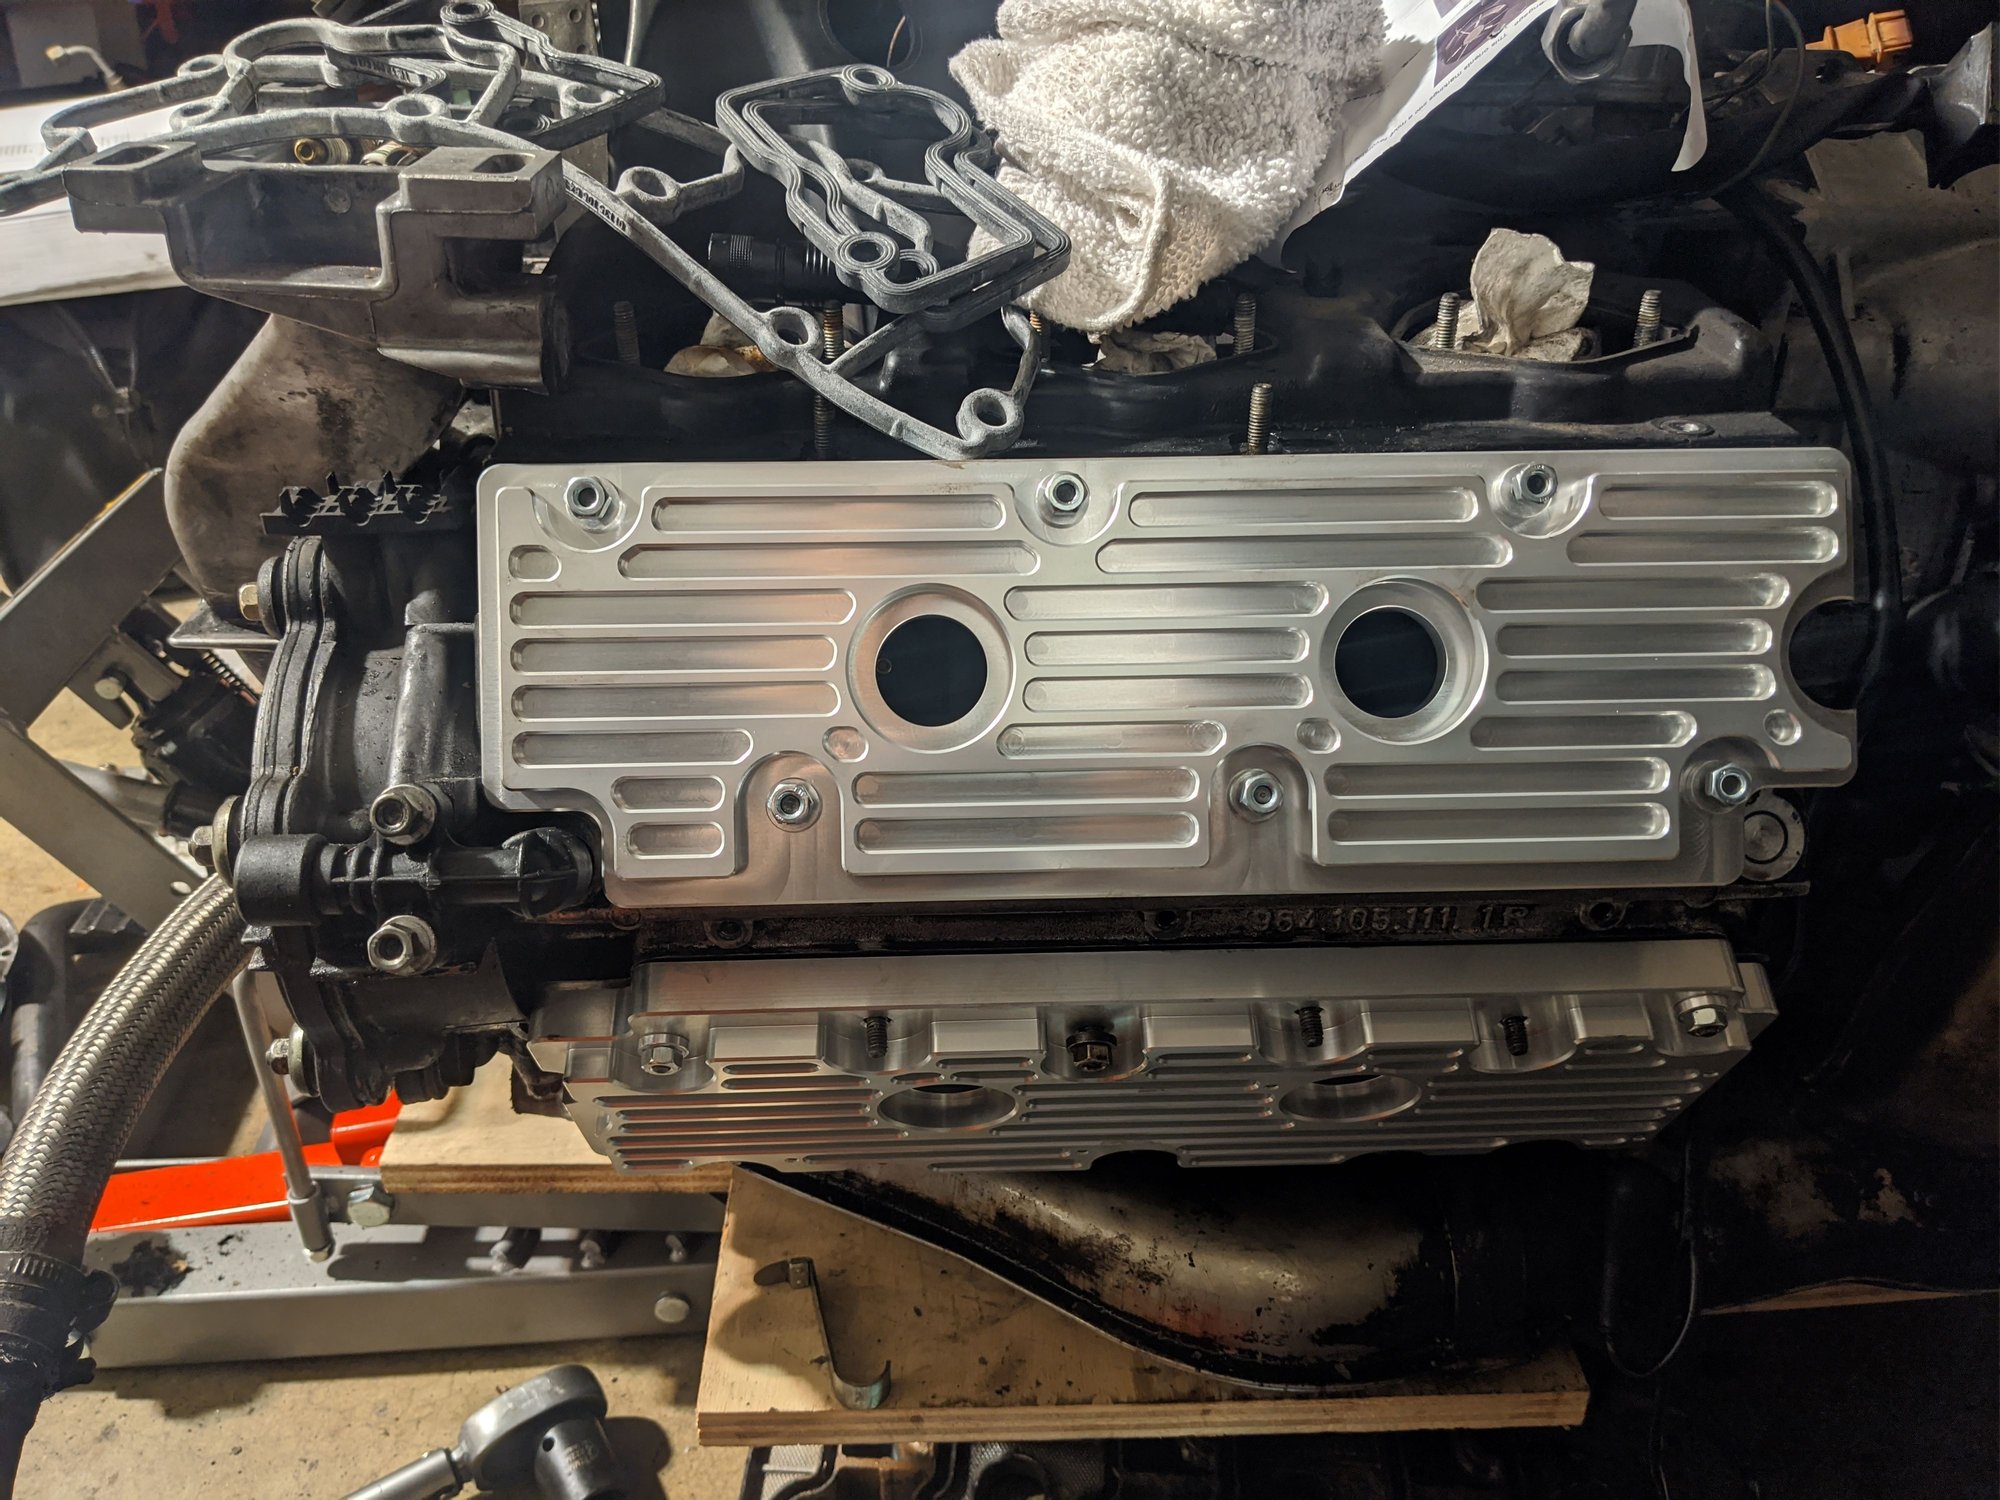
New billet valve covers fitted:
Here's a breakdown of what I found prior to adjusting:
Valves
1U - too tight
1L - same
6U/L -good
2U/L - slightly too tight
4U - too tight
4L - good
3U - good
3L - slightly loose
5U - slightly too tight
5L - good
I was thinking about that today. I couldn't find a tutorial on getting to it. Where in the case is it?
Only the manual describes the process, albeit a bit vague. Simple to access the planetary gear by removing the transfer box (front housing). Here are some pics..
@Spokes thanks, I was trying to find it in the parts catalog and couldn't locate it under "planetary". So, it looks like I don't have have to separate the gear box from the engine to get to that.
@JasonAndreas Yeah, I still need to put them on, they're sitting on my counter. I need to figure out which threadlocker is going to be suitable for the Temps.
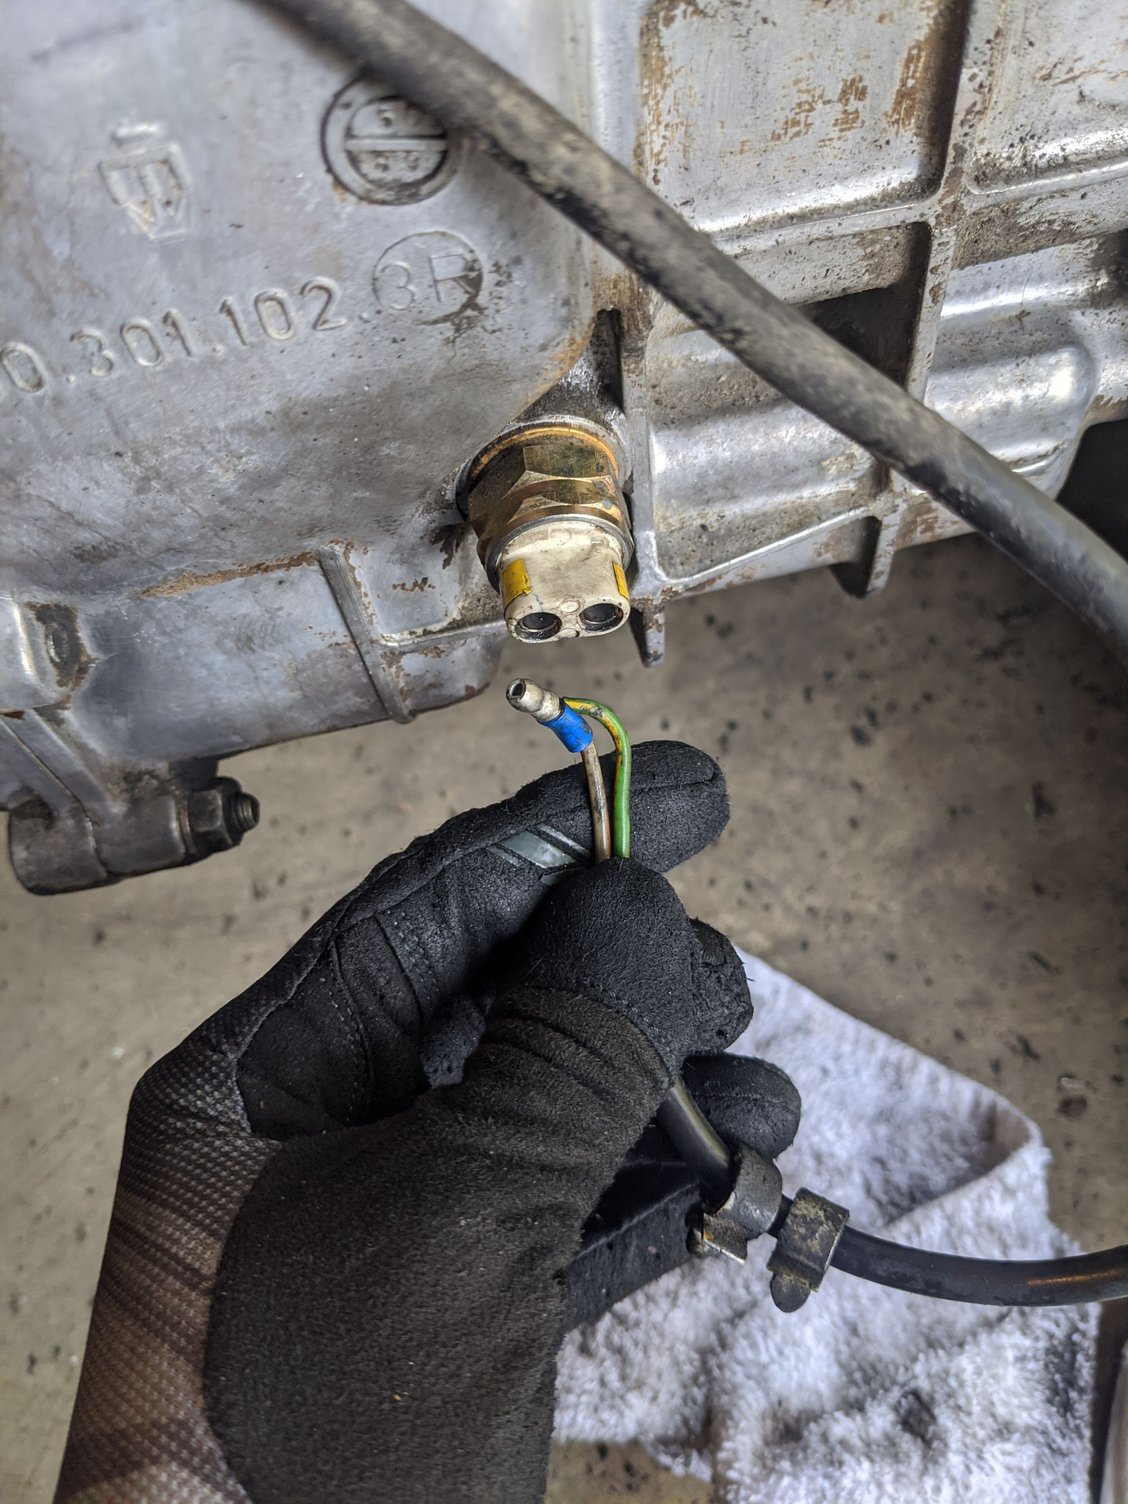
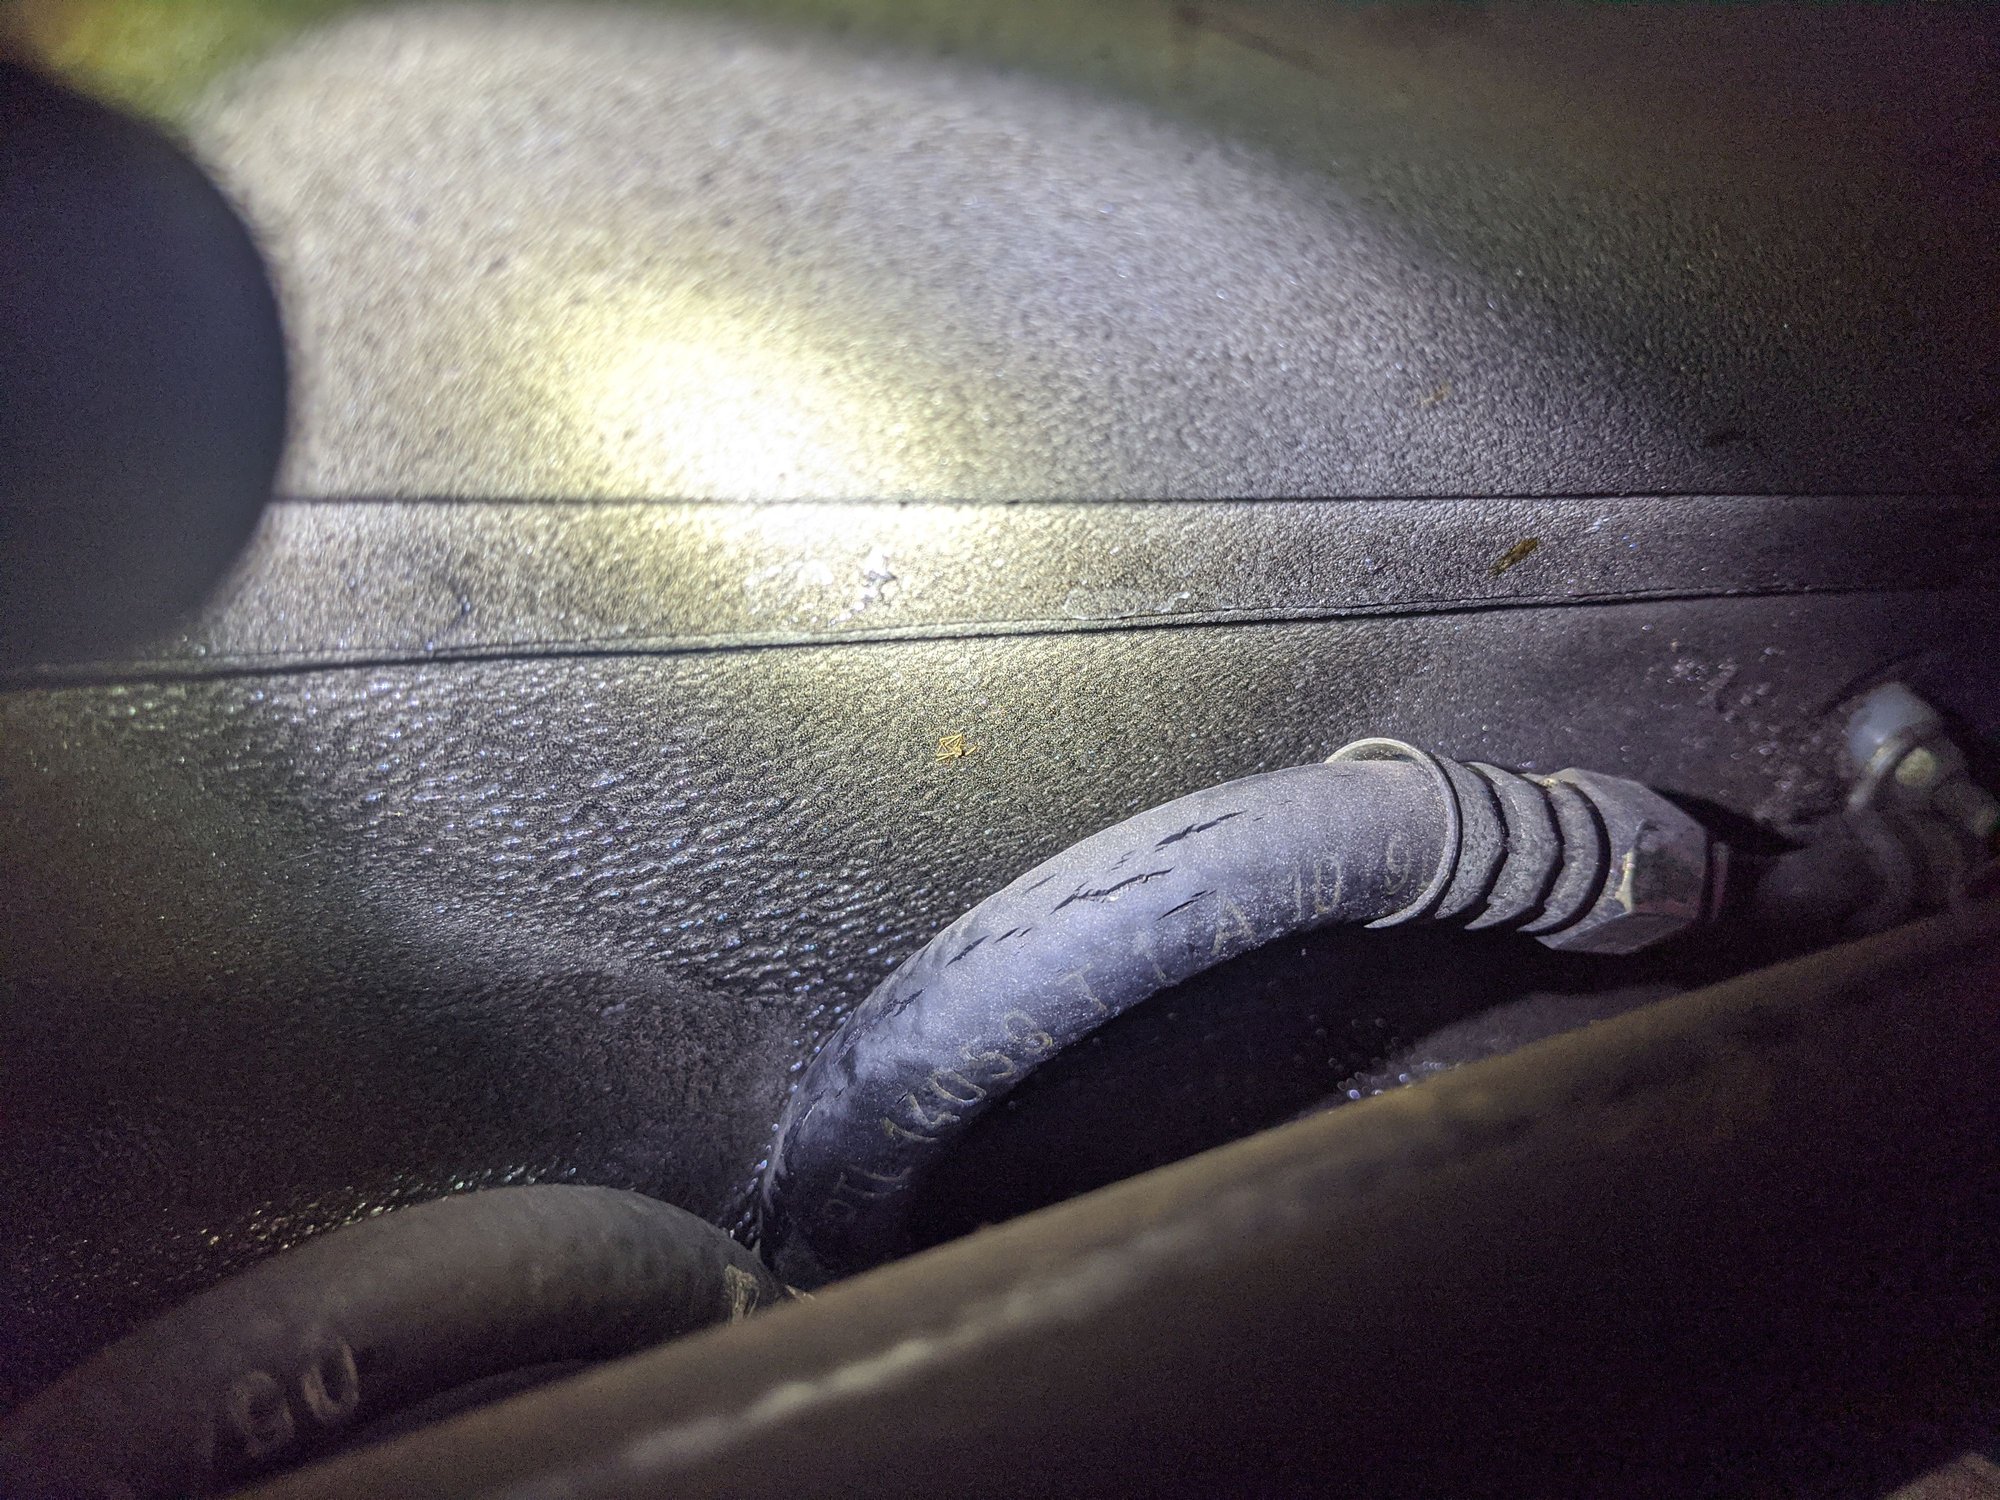
Hmmm... I need to fix this connection. Is the white part supposed to come out of the transmission? What are the metal pieces called so I can crimp new ones onto the wires?
@Spokes thanks, I was trying to find it in the parts catalog and couldn't locate it under "planetary". So, it looks like I don't have have to separate the gear box from the engine to get to that.
You could do it without seperating the transmission from the engine. the benefit of separating the transmission from the engine is that you can stand up the transmission and easily work down towards the planetary gear. There are seven pairs of clutches plates and the sun wheel which dissemble or build up better if gravity is on your side.
I don't feel like I made much progress yesterday. I got interrupted a few times by neighbors gawking at what's going on in the garage and had to pick up my tins from the powder coated.
In the AM, I triple (and quadruple) checked my valve adjustments. I'm glad I did as I found a few that were slightly too tight. I skipped using the Kirk tool this time around. It was a lot faster getting the correct tension on the nuts and keeping things in place with a wrench and screw driver.
After that, I did the chain cover gaskets and oil bridges. I'm not going to tackle the seals behind the cam sprockets. I'm slowly beginning to adopt the idea of "if it's not truly broken, don't f*&king touch it". I also removed the distributor and cleaned the massive amount of gunk behind it. I began putting spark plug wires back into place as well.
Next up was getting the crankshaft pulley off. I had to improvise to get the appropriate leverage. Using the jack to stabilize the bar helped significantly. Engine didn't rock at all. Tackled the main seal and realized like a dolt, I forgot to order the IMS seal. I still need to clean up in here. The pulley assembly is pretty hefty, really makes me want to order the single pulley assembly.
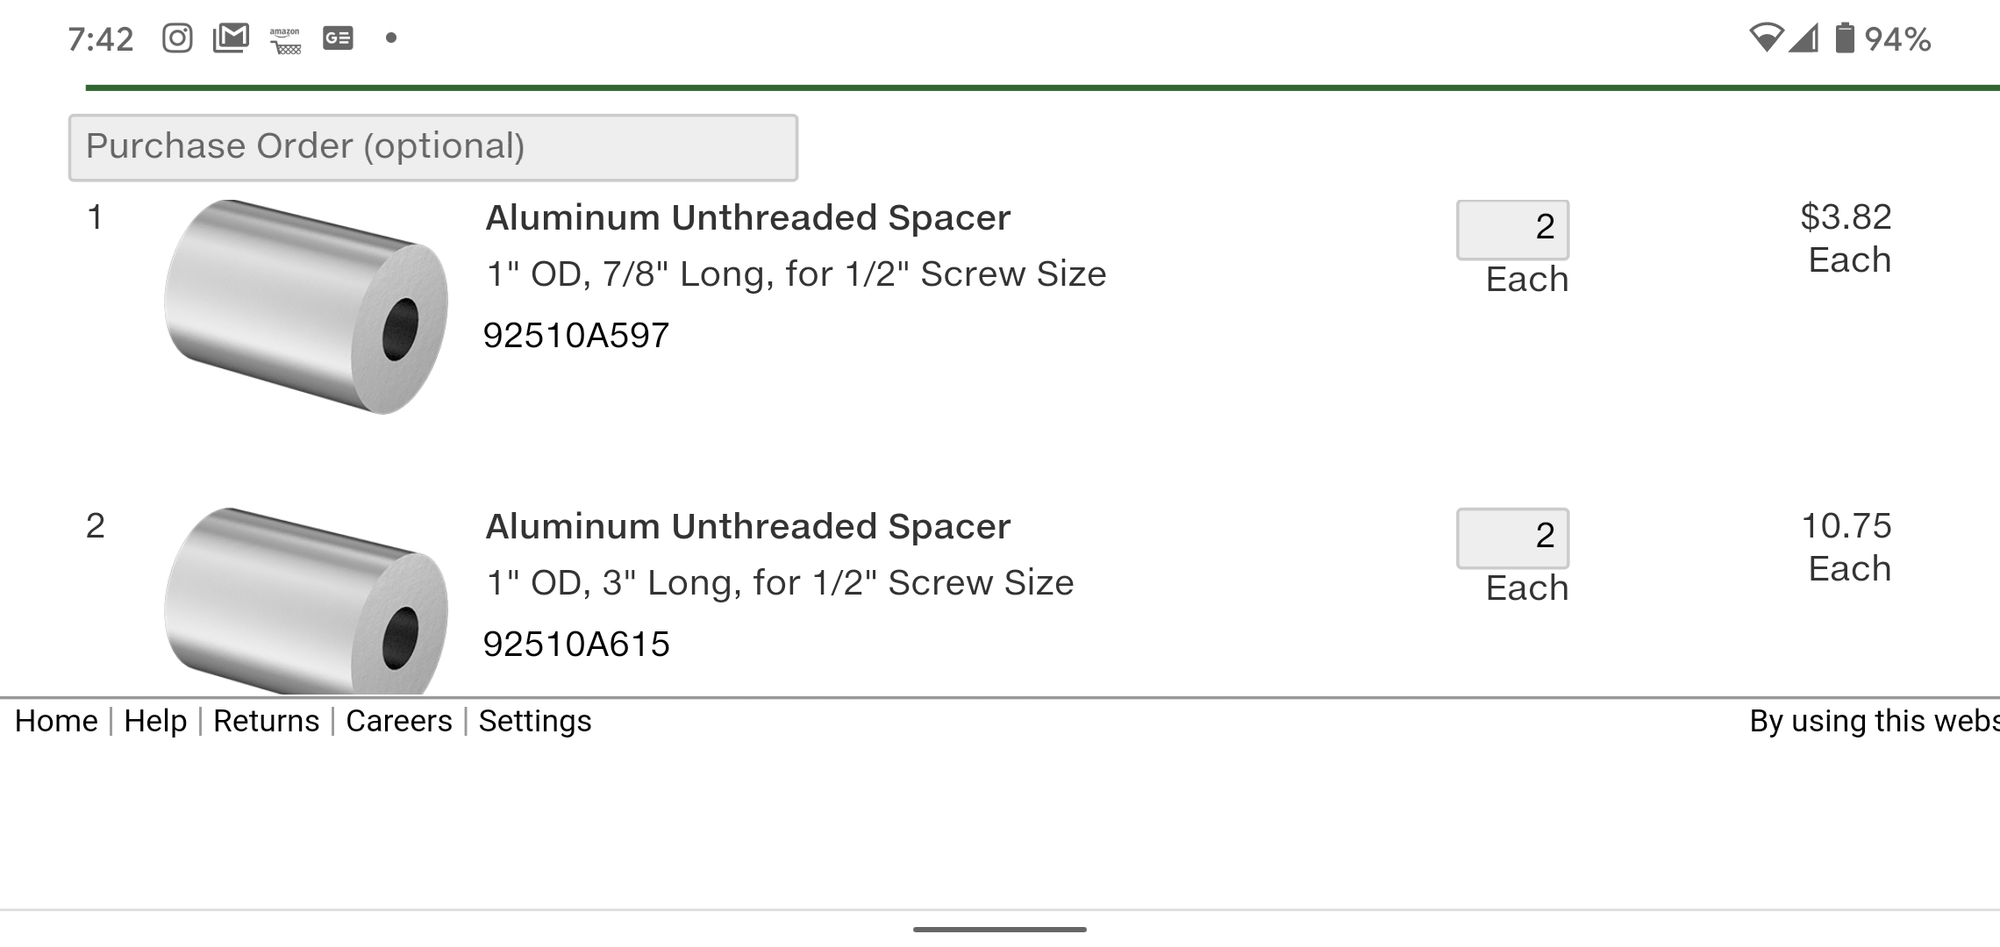
I also found the correct size spacers online to replace the A/C bracket without cutting. Measuring the bracket shows 2x 76mm x M12 x ~22mm OD and 2x 22mm. These are within a fraction of a mm from McMaster-Carr while being a little beefier. Any concerns with running alloy on either? I found steel versions but they're obviously heavier.
I'm going to split the transmission. I'm on the fence now about replacing the clutch. I have a LWF, does anyone have a link for the LWF kit?
In retrospect, I wish I just did that for all the lines rather than OEM. I would've saved probably $800 or so, they look pretty and should be better suited for all the crap in our CA fuel. I think this should cover the main back to front line, I'll just need to order a couple adapters:


 12-21-2019, 01:09 AM