

Intake madness. Teardown begins....
 07-30-2018, 04:47 PM
#121
Race Car
Thread Starter
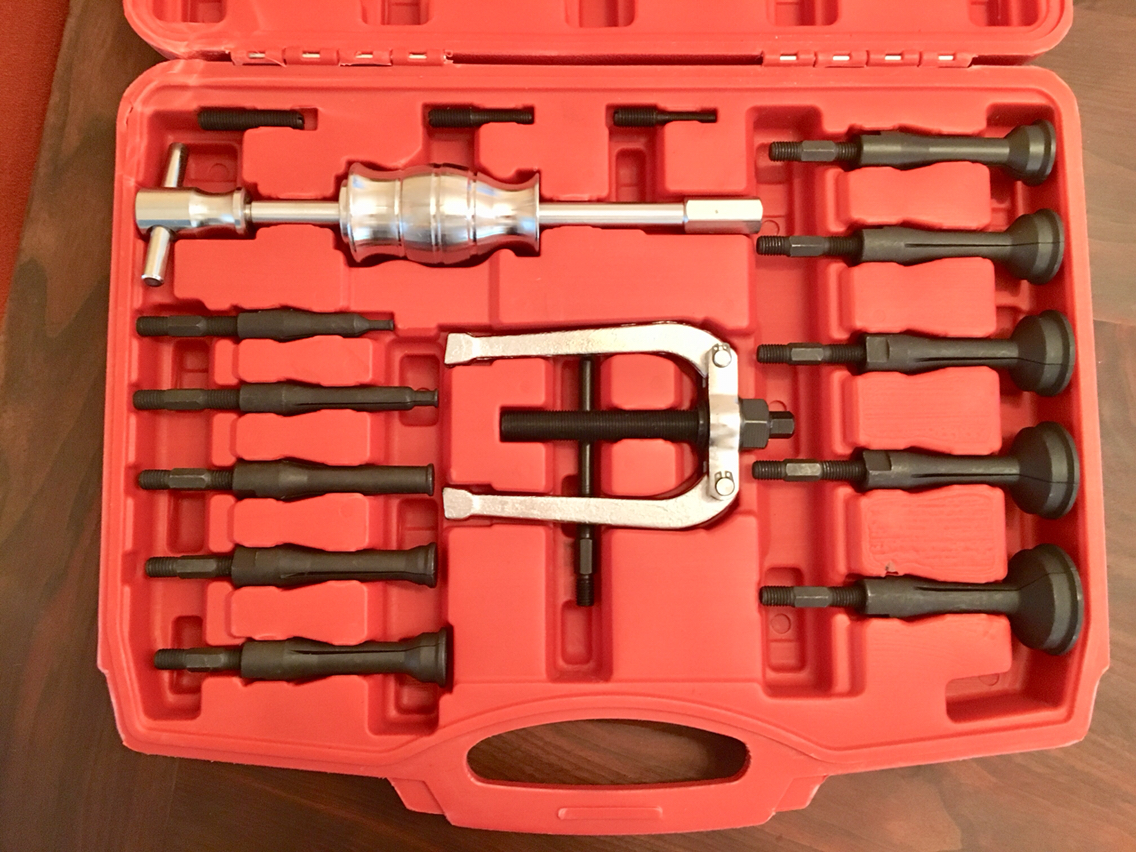
The bearing puller kit came today.
So even though it was my turn w the baby...

He's a Porsche guy...so he fully understands...
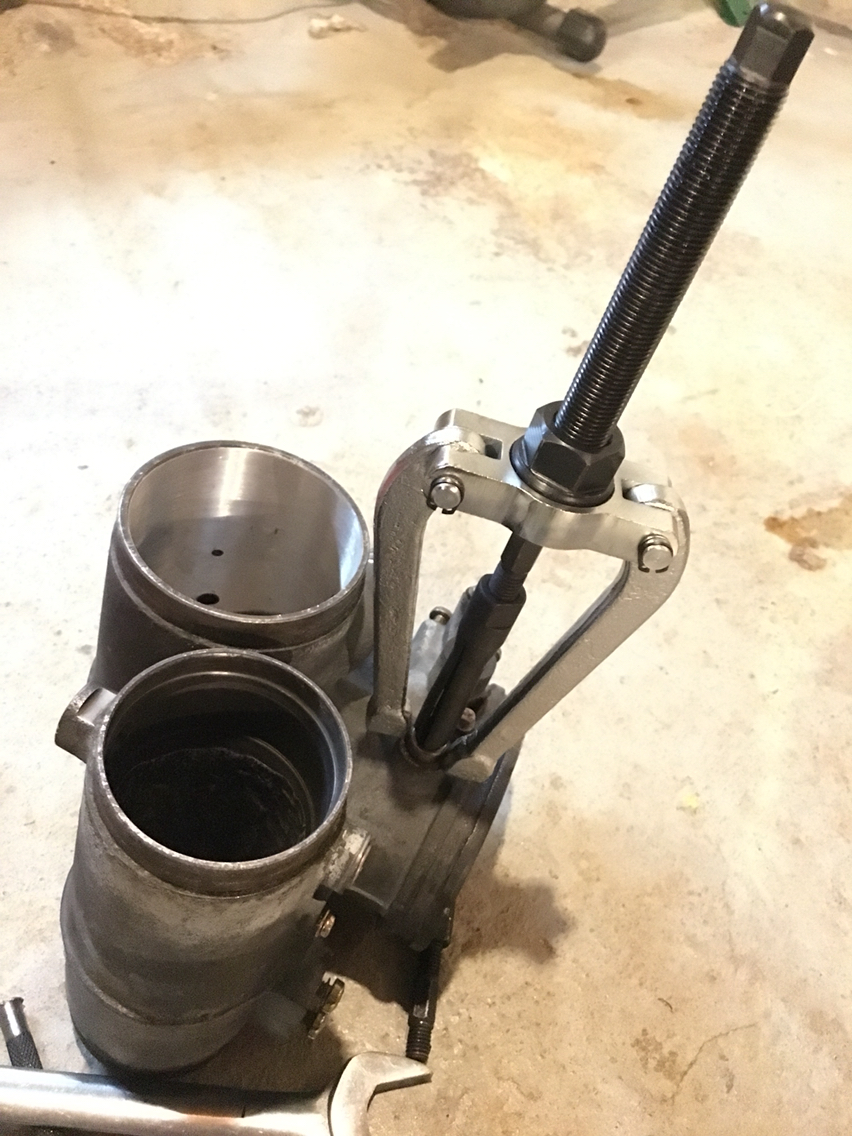
So i grabbed the throttle body and stuck the 8mm blind hole puller inside and gave it a shot
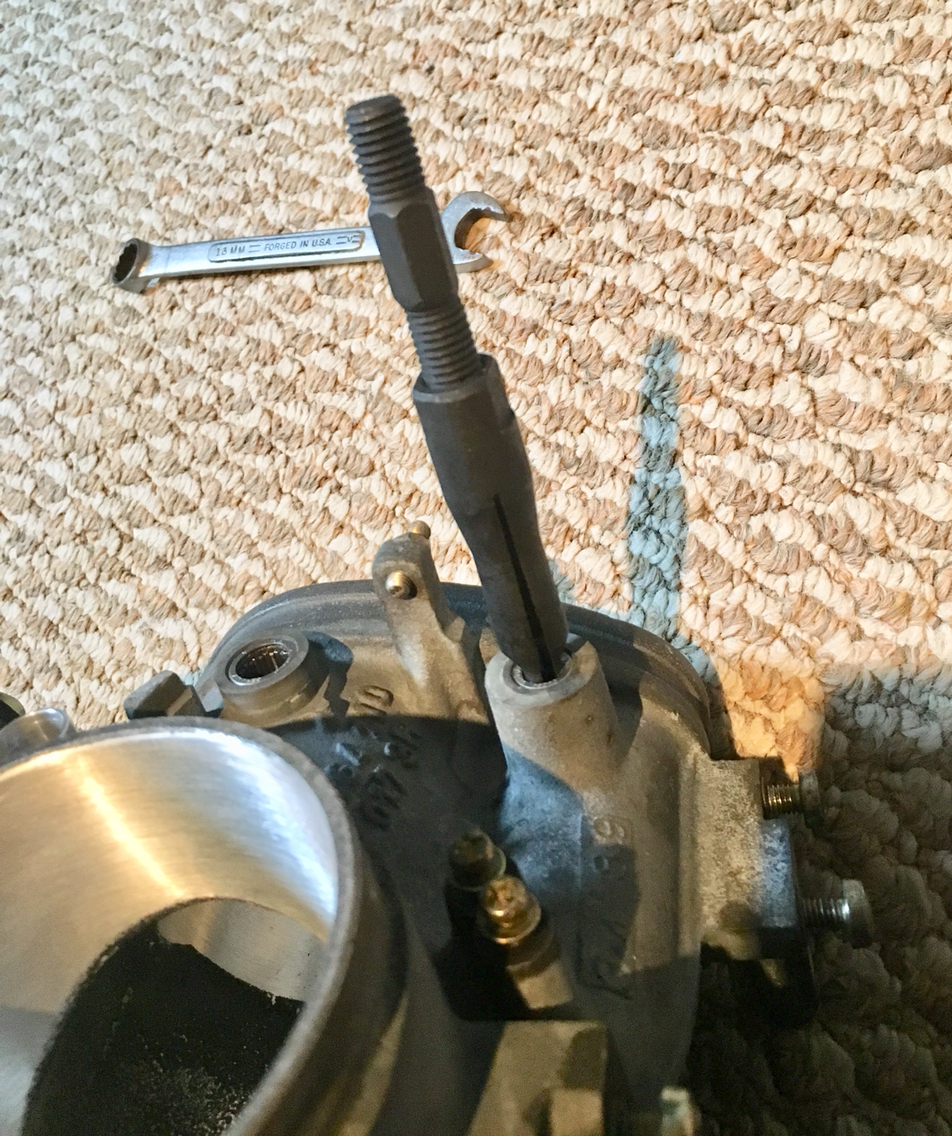
No dice. Wasn't going to budge. Not with the puller and not with the slide hammer. So next up is add heat. I'll heat the aluminum around the bearing and hopefully that will give it enough room to break loose. But that won't be today, unfortunately...you'll have to wait.
So even though it was my turn w the baby...
He's a Porsche guy...so he fully understands...
So i grabbed the throttle body and stuck the 8mm blind hole puller inside and gave it a shot
No dice. Wasn't going to budge. Not with the puller and not with the slide hammer. So next up is add heat. I'll heat the aluminum around the bearing and hopefully that will give it enough room to break loose. But that won't be today, unfortunately...you'll have to wait.
 07-31-2018, 12:03 AM
#122
Race Car
Thread Starter
Well so the wait is over. I couldn't wait.
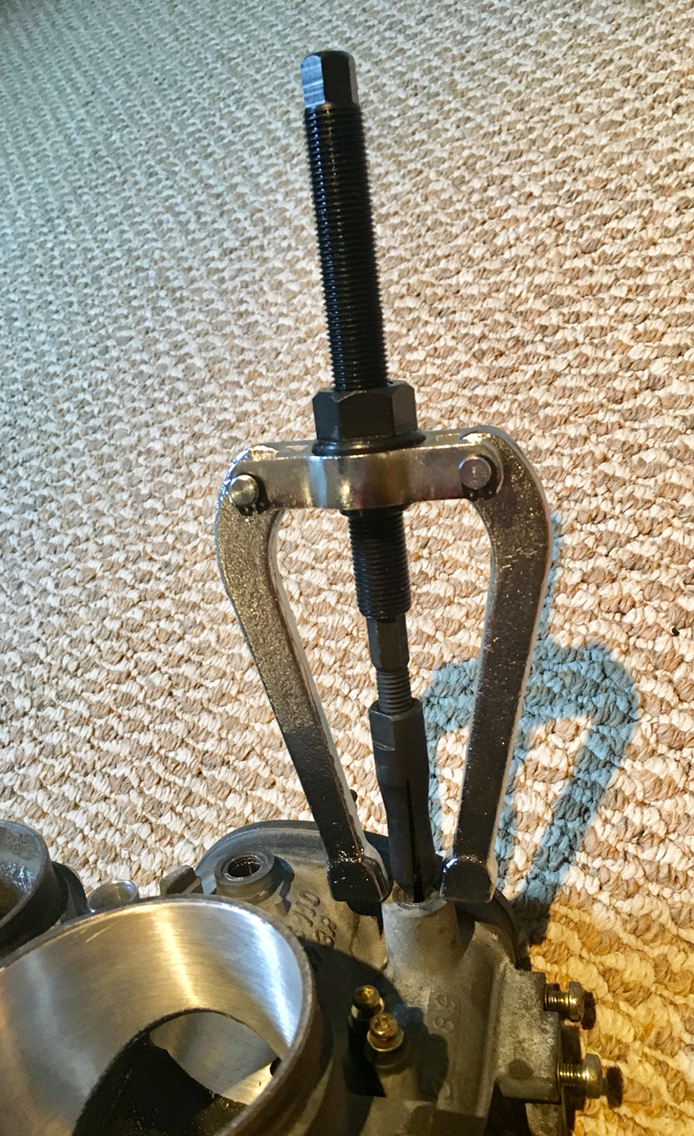
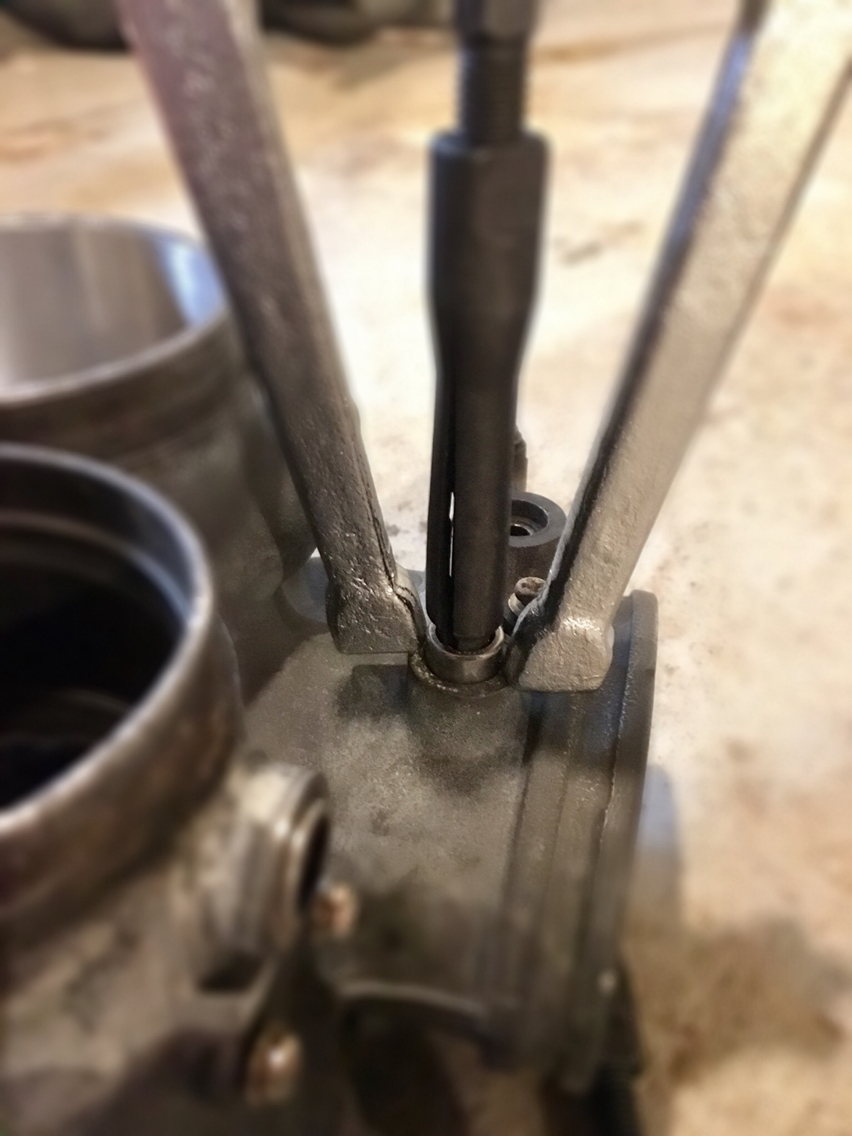
I had been trying earlier to pull the smaller bearings with the 8mm ID. And they weren't budging - so i hit that area with heat. And got the aluminum nice and hot with a torch. And then gave it another shot with the puller - nothing. Slipped right out, again.
So i gave it a shot with the slide hammer. Nothing - popped right out.
Frustration.
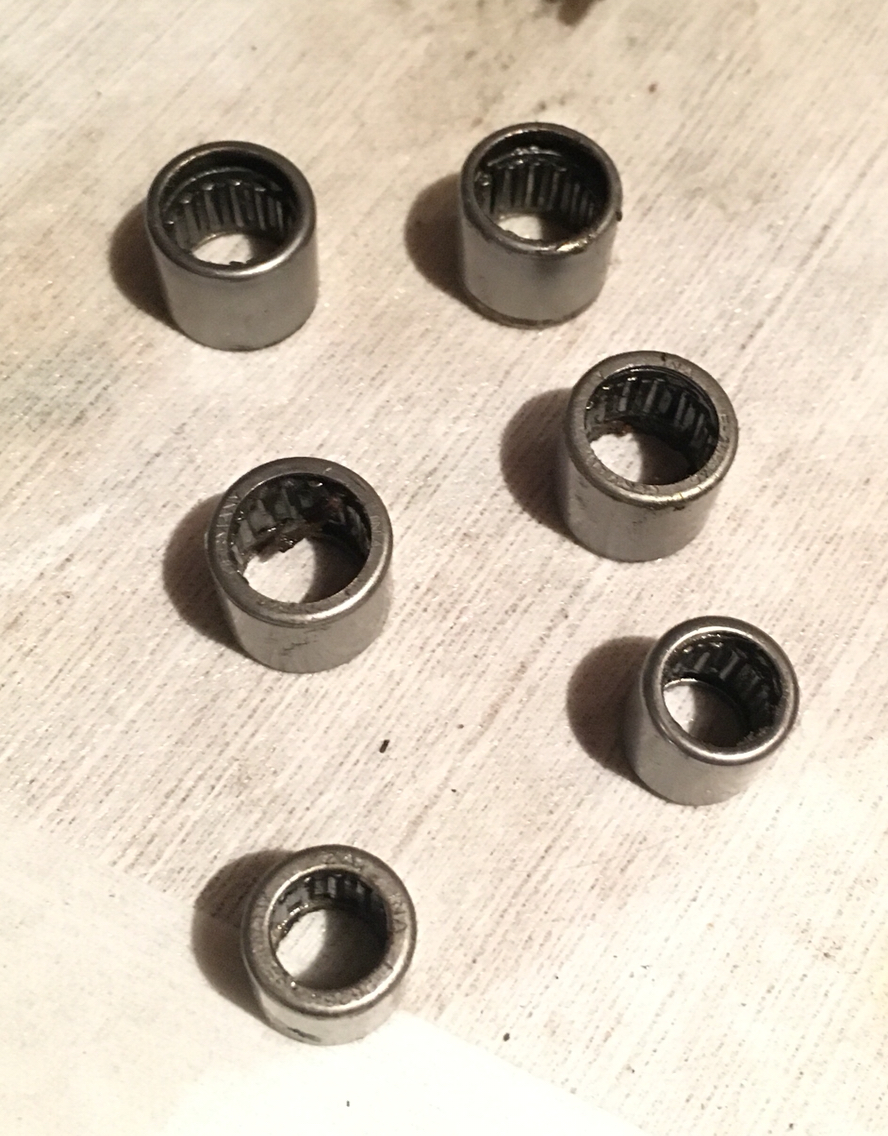
So i decided to give the larger bearings a go.
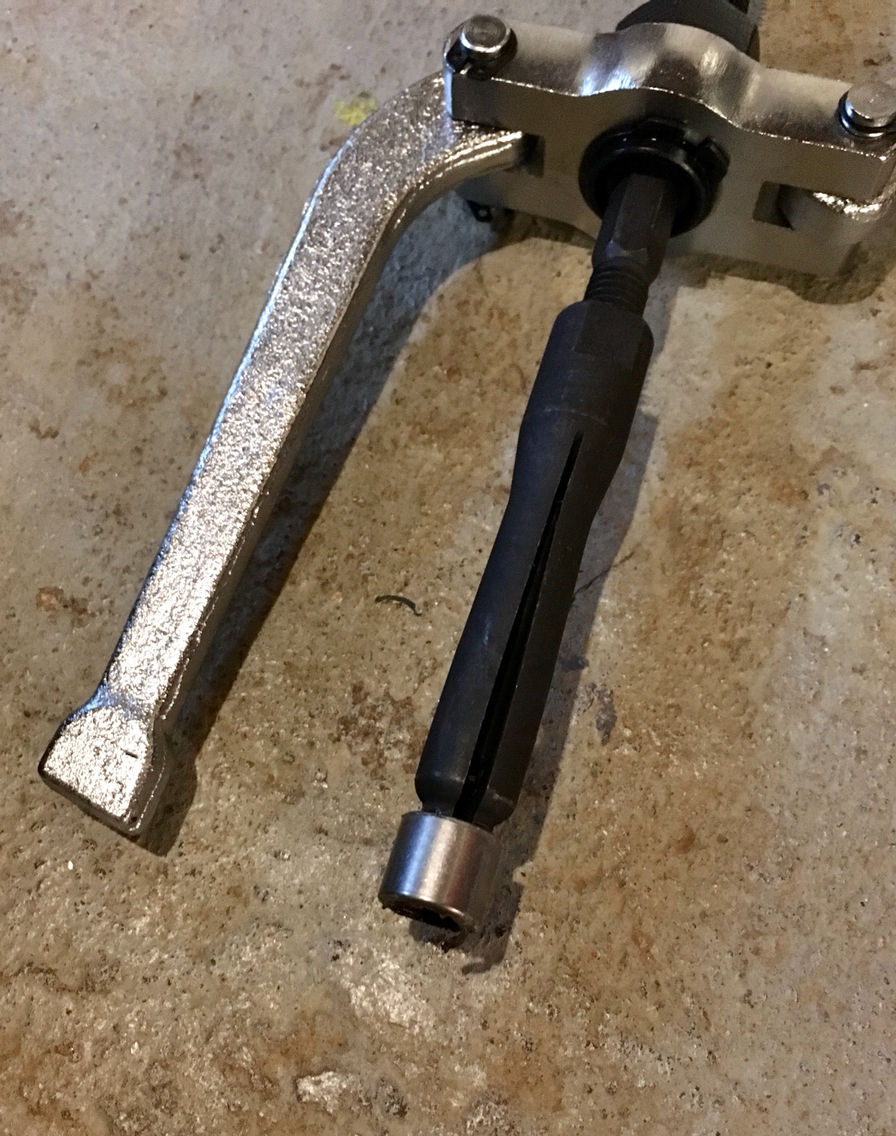
Here are the tool ends for the 8mm ID and the 10mm ID
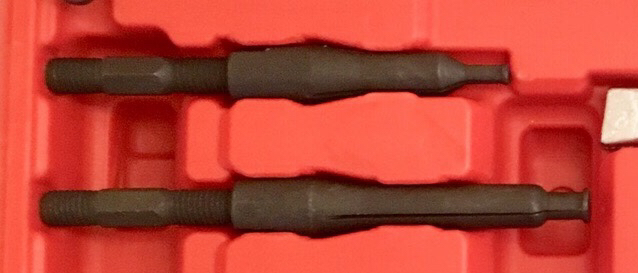
You notice the 10mm is significantly more robust. It became apparent that the tool itself was flexing inside the 8mm hole. More on that later.
Here we go for the big ones:


So that went well!
Feeling a bit less frustrated, i had to figure something out for the little guys cuz that tool wasn't having any of it. So i found a mini screw driver set with mini Philips bits and thought to install the tool, wedge the mini screw driver bit in from the other side and tap it out with a hammer from the other side...this pressed the tool at the end where it was trying to hold...and kept it from slipping...
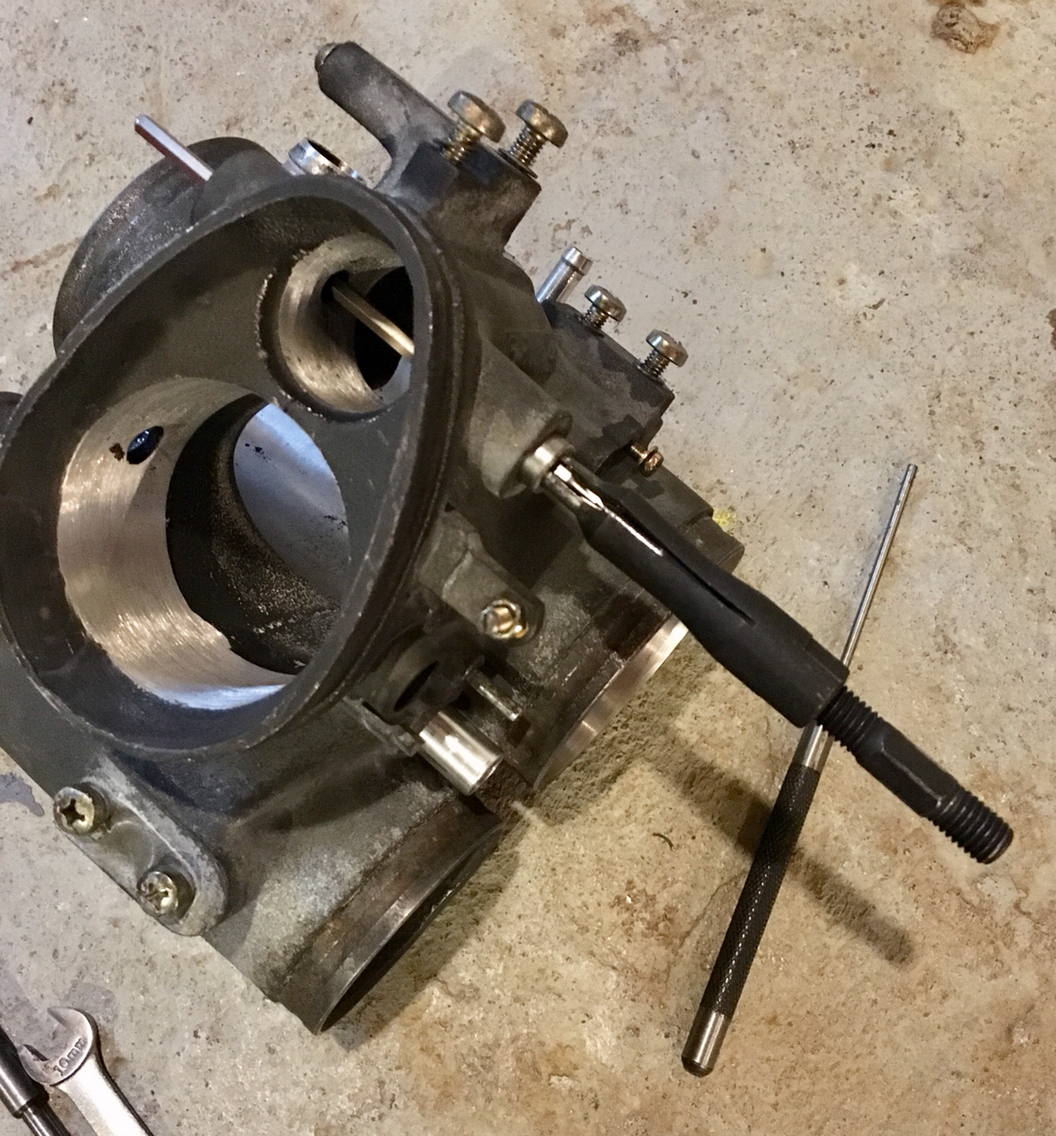
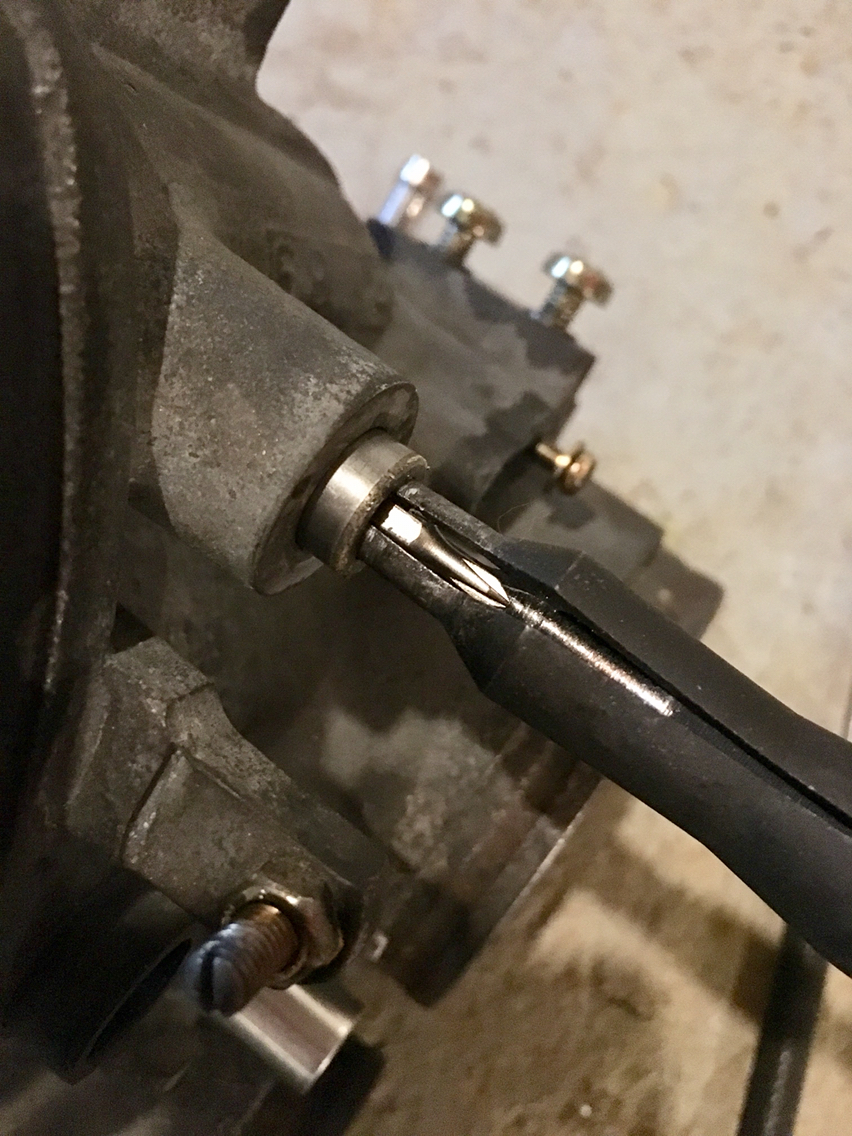
Success! Got them all out w no problems once i figured that out.
Attachment 1
And that's it for today. Didn't do much else, though i did get a chance to wash my car and go for a drive. Hadn't driven it in a week. Felt great!
I had been trying earlier to pull the smaller bearings with the 8mm ID. And they weren't budging - so i hit that area with heat. And got the aluminum nice and hot with a torch. And then gave it another shot with the puller - nothing. Slipped right out, again.
So i gave it a shot with the slide hammer. Nothing - popped right out.
Frustration.
So i decided to give the larger bearings a go.
Here are the tool ends for the 8mm ID and the 10mm ID
You notice the 10mm is significantly more robust. It became apparent that the tool itself was flexing inside the 8mm hole. More on that later.
Here we go for the big ones:
So that went well!
Feeling a bit less frustrated, i had to figure something out for the little guys cuz that tool wasn't having any of it. So i found a mini screw driver set with mini Philips bits and thought to install the tool, wedge the mini screw driver bit in from the other side and tap it out with a hammer from the other side...this pressed the tool at the end where it was trying to hold...and kept it from slipping...
Success! Got them all out w no problems once i figured that out.
Attachment 1
And that's it for today. Didn't do much else, though i did get a chance to wash my car and go for a drive. Hadn't driven it in a week. Felt great!
 07-31-2018, 12:24 AM
#124
Race Car
Thread Starter
Pete- if you box yours up- you can't drive your car!...
That's kind the problem with this type of project, you gotta kinda do it on another intake and then install after it's all done...
That's kind the problem with this type of project, you gotta kinda do it on another intake and then install after it's all done...
08-02-2018, 09:18 PM
#125
Race Car
Thread Starter
So I've not been able to do any work. Of any kind...but i have been gathering. Bought some high temp primer, some paint, some stainless oetiker clamps, etc...
And while i was at it, and since fuel lines kind of go with the whole intake thing...as most of the lines that i am working on are fuel related...and also since if you happen to take your intake out to do some refurb or cleaning....you end up with the perfect opportunity to deal with most, if not all, of your fuel lines. Fuel lines, in your 30 year old car, if they haven't been done, are a fire waiting to happen. And judging from the 10 or so 911 fires I've seen in the past ten years, likelihood's are high...so get them done. Or get to them. Particularly the one NoOne changes, which is the one that runs from the trunk to the fuel pump. Has a little bitty five inch soft line after a long length of hardline to the pump. That little bugger is the only one not done in my car, and I'm bummed i didn't make it a point when the motor was out, cuz duhhhhhh, the motor was out! Easy access.
Anyway. I am fire paranoid, but I'm also crazy about certain other things, like having no passenger foot well area due to a hulking fire extinguisher. Or just the thought of having a big dumb industrial looking fire extinguisher in my interior. It's not a race car - but...
We all need a fire extinguisher. So what where and how? There are many ways. And honestly, throw a 20 dollar cheepie in the frunk if you don't want to really spend. Just have one.
And back to me. I'm great at telling all the dbfd guys "you gotta do this, and you gotta do that", but here i am 10 years later still with no fire extinguisher. Like a dummy. All that money spent and how many times did i say "i can't afford it" when it came to 100 dollars - or 200 for a fire extinguisher (the cool one). Again. 20 bucks and you have one. It'll leave all kinds of residue, but at least you will have one.
And then...i came across this:
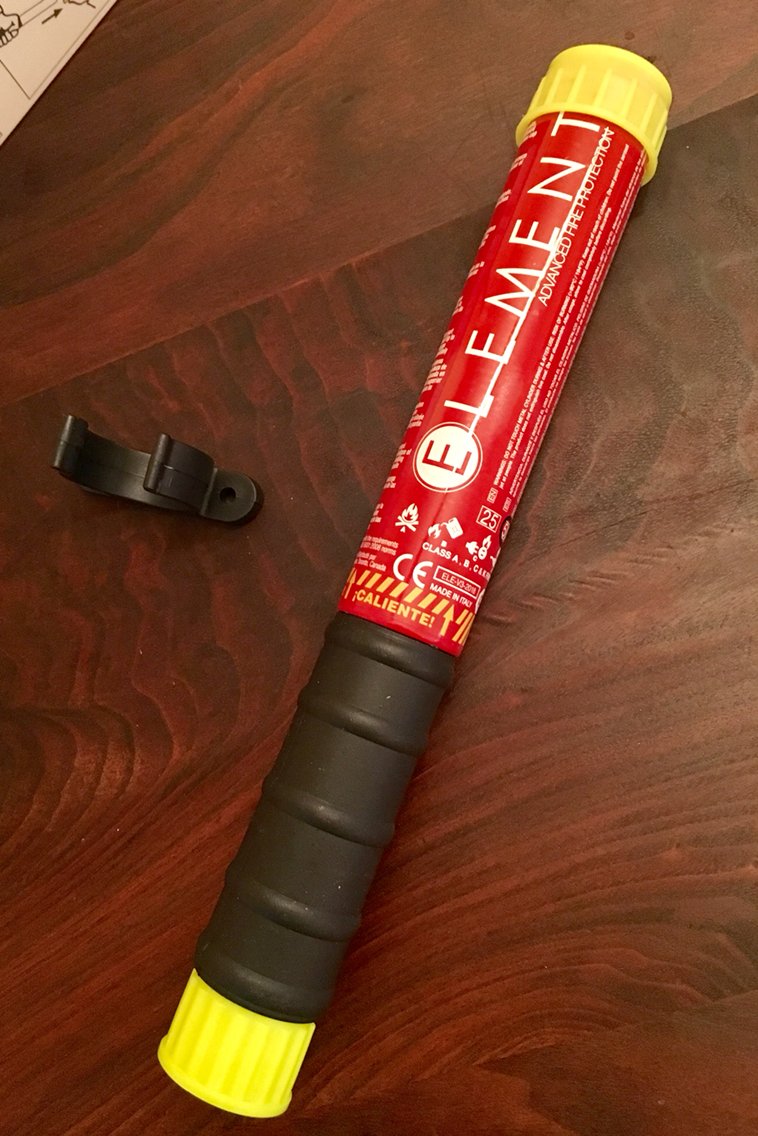
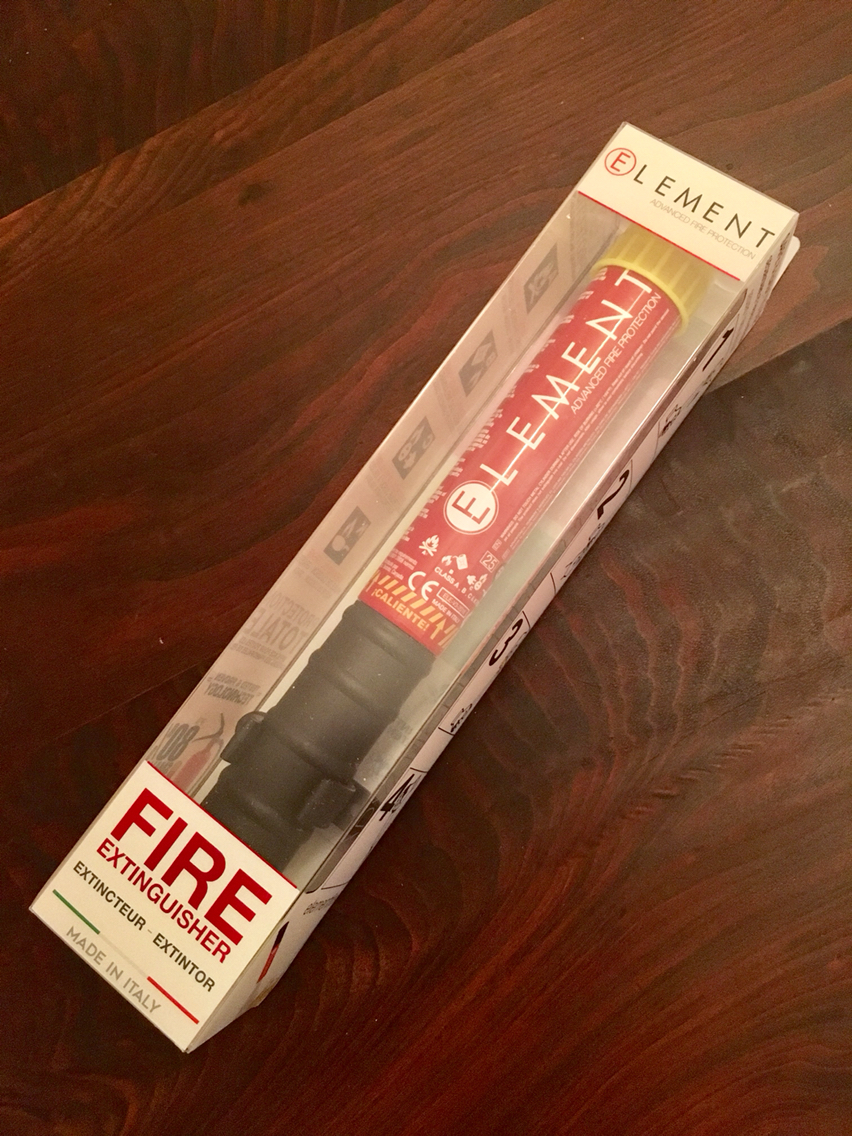
It's a little more than a foot long. Once you start it - it has 50 seconds. And it'll fit up under the dash. Or in the pouch in the frunk.
So until i bite the bullet on the super uber chrome thing with the cnc billet majiggy with the one handed latch release that is so well designed that the very act of holding it puts out fires...this Element extinguisher is just what the doctor ordered. And it doesn't cost all that much.
Oh. And one more thing....
If you don't have a fire extinguisher- and you haven't replaced your fuel lines. Your car will become a fireball. It's just a matter of time.
So get on it. And make sure you aren't under insured. Uhmmmmmm, once again, like me. But I'll get into my lack of insurance coverage at a later date. I'm feeling stupid enough for admitting I've been driving my car for 10 years with no way to put out an engine fire.
And while i was at it, and since fuel lines kind of go with the whole intake thing...as most of the lines that i am working on are fuel related...and also since if you happen to take your intake out to do some refurb or cleaning....you end up with the perfect opportunity to deal with most, if not all, of your fuel lines. Fuel lines, in your 30 year old car, if they haven't been done, are a fire waiting to happen. And judging from the 10 or so 911 fires I've seen in the past ten years, likelihood's are high...so get them done. Or get to them. Particularly the one NoOne changes, which is the one that runs from the trunk to the fuel pump. Has a little bitty five inch soft line after a long length of hardline to the pump. That little bugger is the only one not done in my car, and I'm bummed i didn't make it a point when the motor was out, cuz duhhhhhh, the motor was out! Easy access.
Anyway. I am fire paranoid, but I'm also crazy about certain other things, like having no passenger foot well area due to a hulking fire extinguisher. Or just the thought of having a big dumb industrial looking fire extinguisher in my interior. It's not a race car - but...
We all need a fire extinguisher. So what where and how? There are many ways. And honestly, throw a 20 dollar cheepie in the frunk if you don't want to really spend. Just have one.
And back to me. I'm great at telling all the dbfd guys "you gotta do this, and you gotta do that", but here i am 10 years later still with no fire extinguisher. Like a dummy. All that money spent and how many times did i say "i can't afford it" when it came to 100 dollars - or 200 for a fire extinguisher (the cool one). Again. 20 bucks and you have one. It'll leave all kinds of residue, but at least you will have one.
And then...i came across this:
It's a little more than a foot long. Once you start it - it has 50 seconds. And it'll fit up under the dash. Or in the pouch in the frunk.
So until i bite the bullet on the super uber chrome thing with the cnc billet majiggy with the one handed latch release that is so well designed that the very act of holding it puts out fires...this Element extinguisher is just what the doctor ordered. And it doesn't cost all that much.
Oh. And one more thing....
If you don't have a fire extinguisher- and you haven't replaced your fuel lines. Your car will become a fireball. It's just a matter of time.
So get on it. And make sure you aren't under insured. Uhmmmmmm, once again, like me. But I'll get into my lack of insurance coverage at a later date. I'm feeling stupid enough for admitting I've been driving my car for 10 years with no way to put out an engine fire.
08-04-2018, 03:55 PM
#126
Race Car
Thread Starter
Two more hoses done. These are the hard ones due to the radii...but i think I'm getting this down. Not 100% perfect, but eh...in another 20 years...I'll redo them.
Next up, which should have been first up, is the soften the runner on the inside of the holes. And then to figure out some way to seal the fabric so they either stay clean, or stay cleanable, or both.
Then, i start prepping the throttle body and little parts for paint. And then hopefully on to sanding and polishing and painting the manifolds...and then...on and on...it's a bit of a bigger project than i had anticipated...
But- everything i do ends up being a bigger project than anticipated.
08-05-2018, 07:30 PM
#127
Race Car
Thread Starter
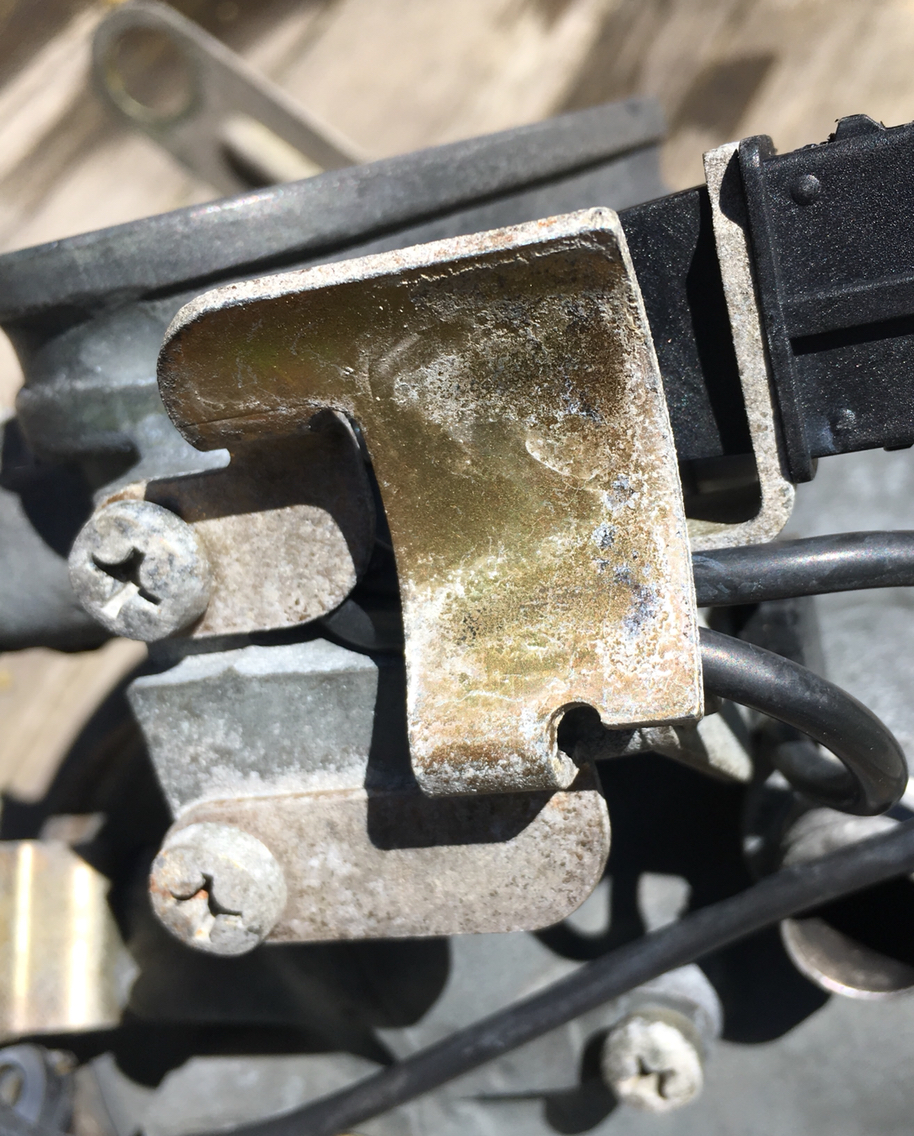
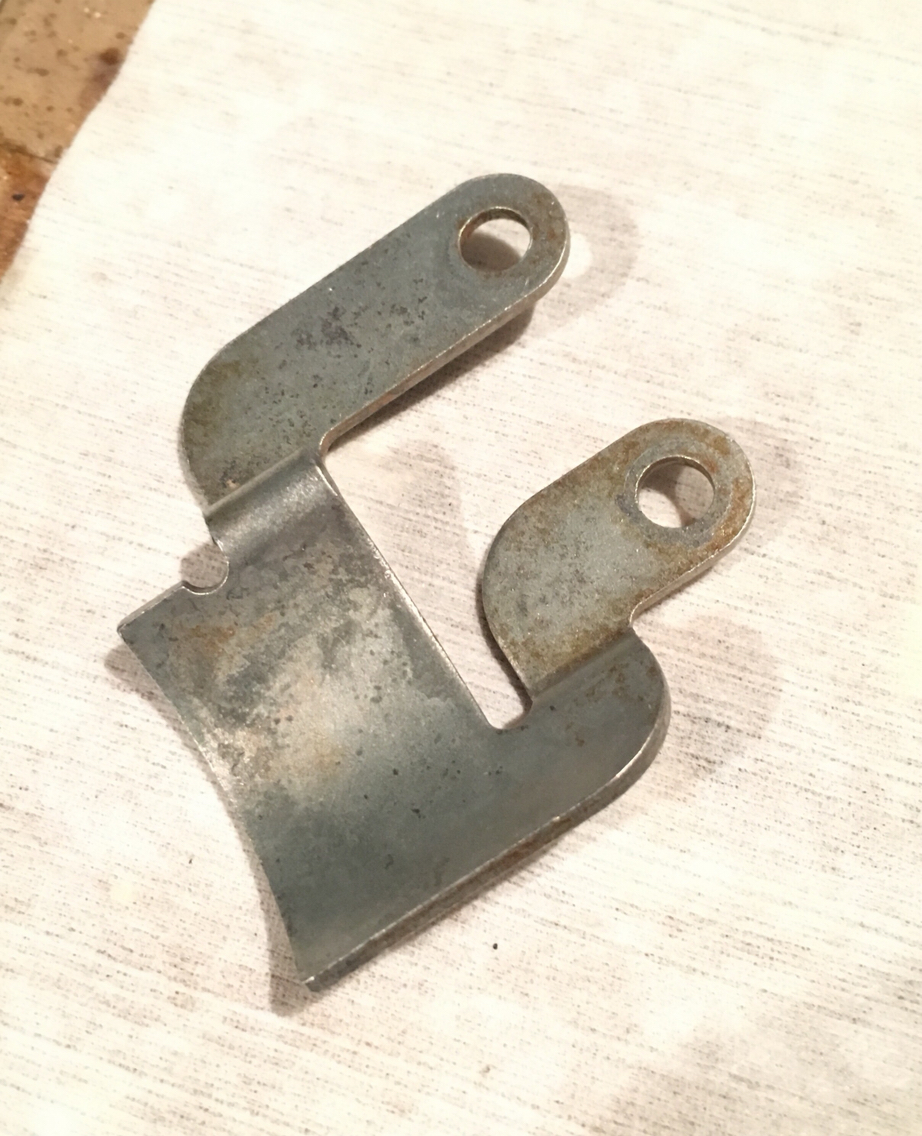
So the plated parts had a little crusty white stuff on them. Not really rust, but a little crust. So i took some CLR and a paint brush and dusted them off. The crusty and the yellow chromate both came right off. So now i have zinc, but no chromate.

So I've not done this before, but looking at the process to do the plating, the chromate step seems to be to just dunk the zinc plated part into the chromate solution and out it comes yellow.
I wonder if since the zinc is still there, if i can just dunk this into the same solution and re-chromate?
It obviously wouldn't look as shiny and perfect as new, but wouldn't it just give a bit of protection and be done?
08-07-2018, 08:51 PM
#128
Race Car
Thread Starter
A little side track, some fun stuff arrived today.
Diff lock seals!
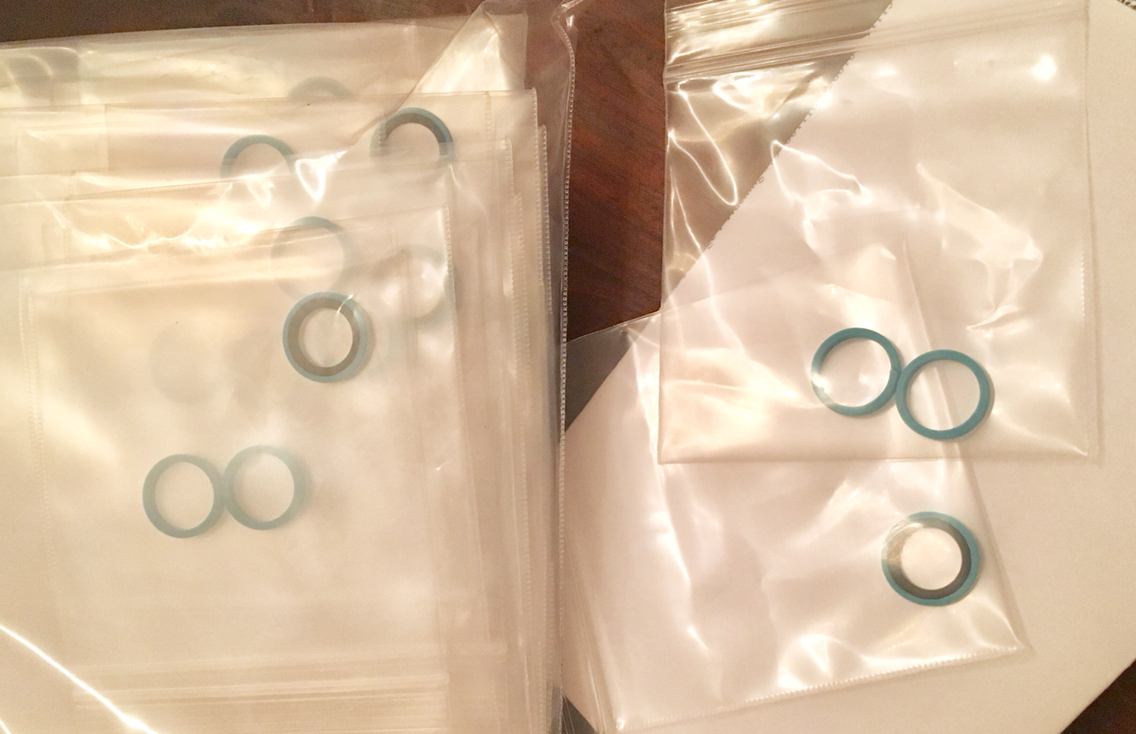
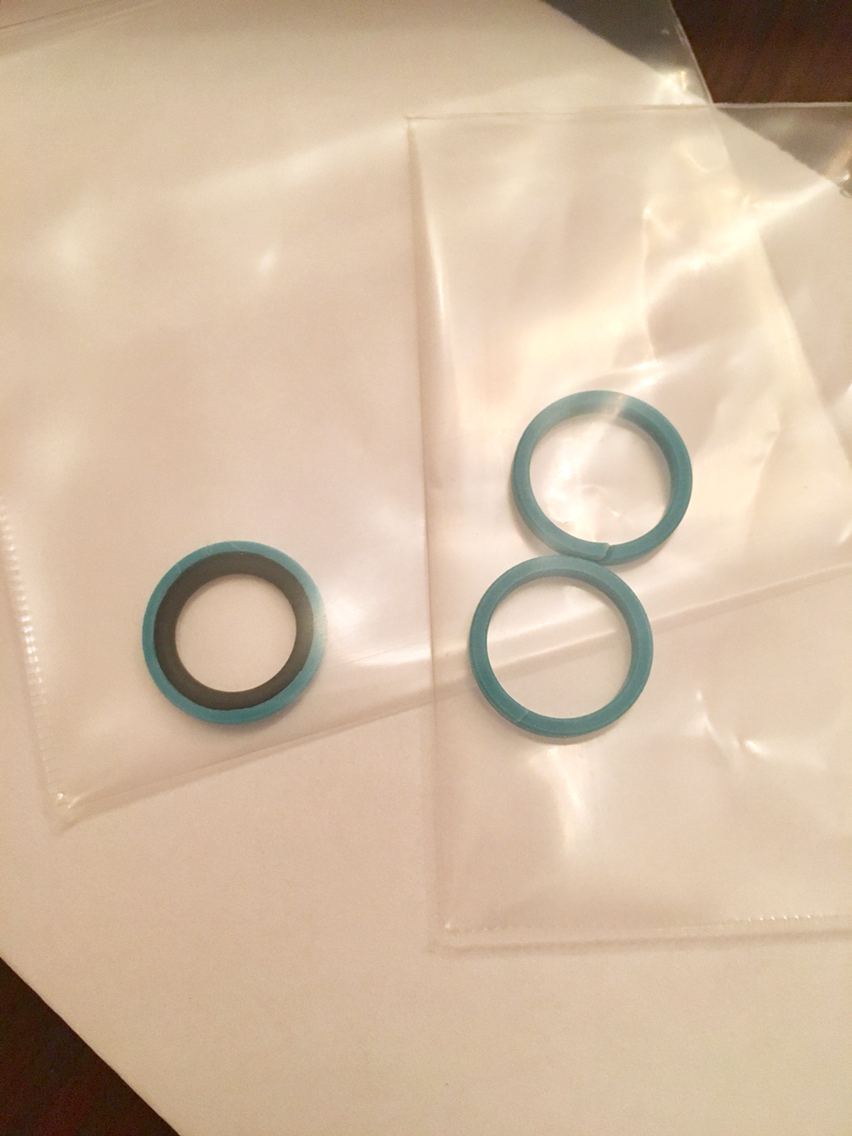
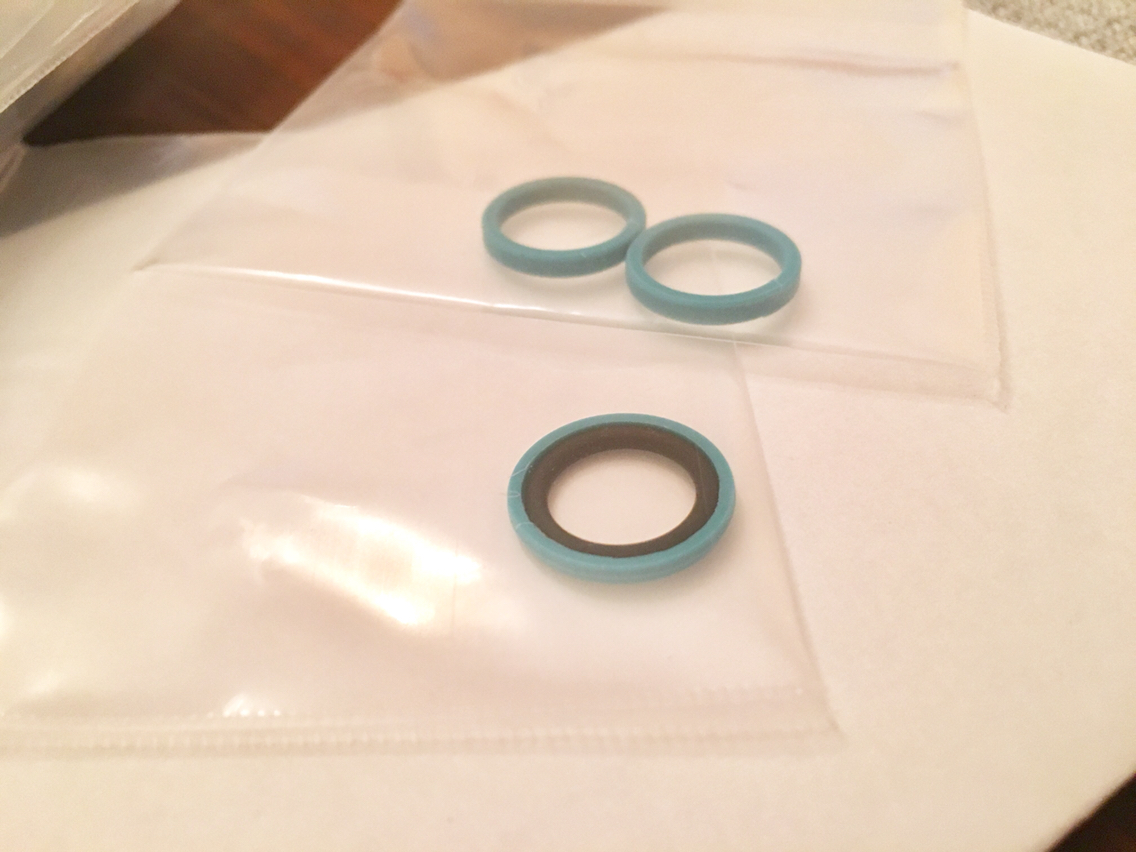
When i was looking into the bearing seals, i decided to get off my butt and have sets of these made up at the same time. I've been meaning to do it forever. I didn't make many, just 20 sets, so essentially 10 C4's since there are two lock slaves per. But, over the years I've found that every C4 that's passed through my hands has needed them. So now we have them. Done.
Once i have done an install and trial run to make sure they work as they should, I'll be happy to sell them. I can make more if i run out. They aren't cheep, but much better than buying a new diff lock which comes at a ridiculous price.
And the reseal job is super easy.
Diff lock seals!
When i was looking into the bearing seals, i decided to get off my butt and have sets of these made up at the same time. I've been meaning to do it forever. I didn't make many, just 20 sets, so essentially 10 C4's since there are two lock slaves per. But, over the years I've found that every C4 that's passed through my hands has needed them. So now we have them. Done.
Once i have done an install and trial run to make sure they work as they should, I'll be happy to sell them. I can make more if i run out. They aren't cheep, but much better than buying a new diff lock which comes at a ridiculous price.
And the reseal job is super easy.
 08-09-2018, 11:10 PM
#130
Race Car
Thread Starter
I have many. Send me a pm and we will work it out and I'll mail one to you.
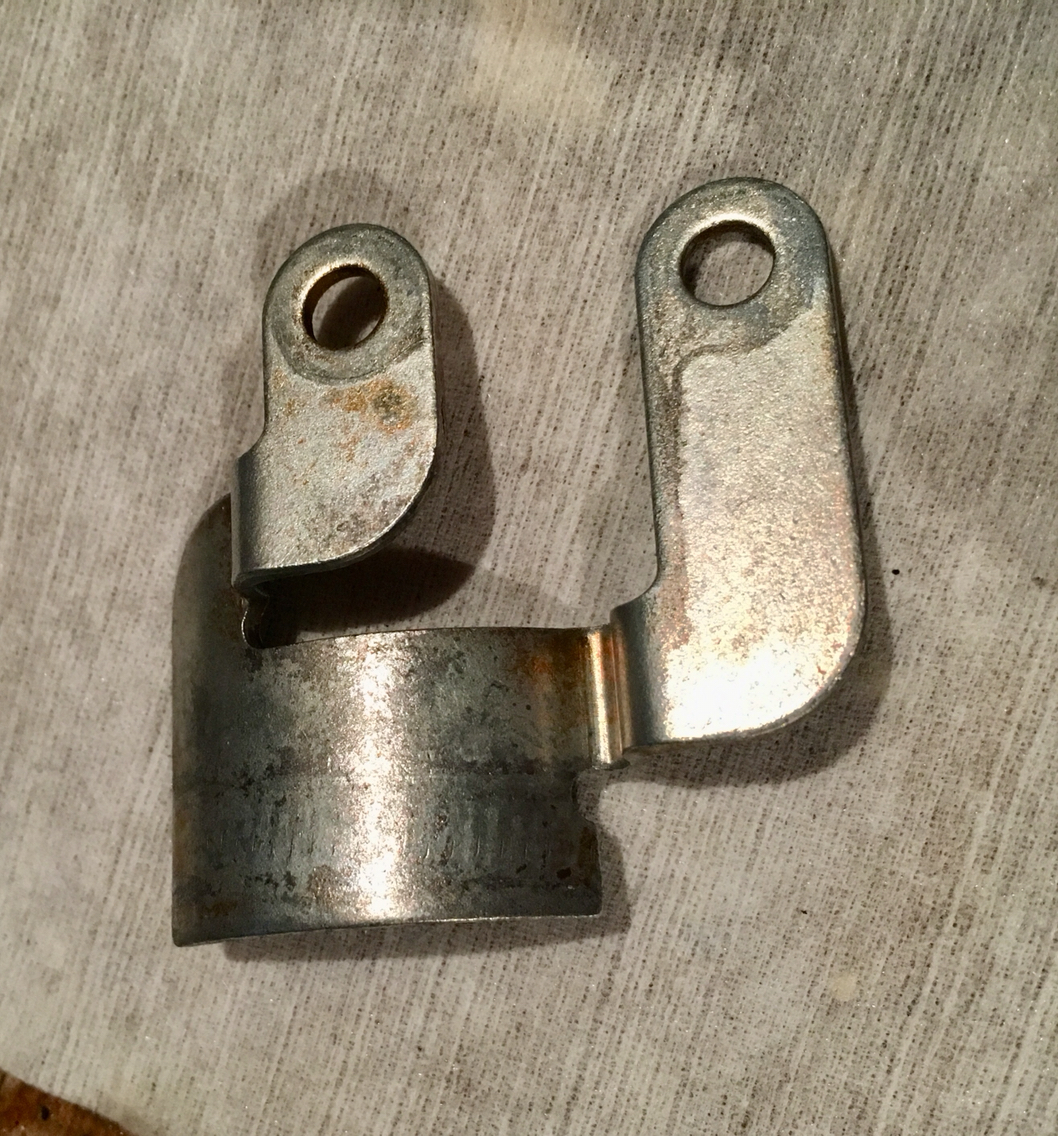
I'm now debating whether to sell them on eBay or amazon. Cuz i have the diff lock seals and the Uber awesome but hard to mount idler wheel for the belt tension sensor.
So maybe I'll make a dbfd store and just focus exclusively on stuff that we all need.
Sounds like a good idea to me...right?
I'm now debating whether to sell them on eBay or amazon. Cuz i have the diff lock seals and the Uber awesome but hard to mount idler wheel for the belt tension sensor.
So maybe I'll make a dbfd store and just focus exclusively on stuff that we all need.
Sounds like a good idea to me...right?
08-10-2018, 12:20 AM
#131
Pro
Awesome idea! A handful resourceful Rennlisters like yourself have done the hard yards in sourcing and collating hard to find and previously unavailable parts for these older cars. Tearing down and refurbishing what most of us would just replace. It makes my job of DIY that much easier so I'm happy to support it!
Nel
Nel
08-10-2018, 09:43 PM
#132
Race Car
Thread Starter
Ok so i have a few things to add tonight. One is a little bone to pick...but I'll get there in a moment after i finish expounding about making awesome happen. You may notice along the way that I'm actually in a good mood. I got an hour of time to work on the throttle body and it's put me in a good mood. Later when i explain about the other thing...my mood will temporarily change as i explain, and then i will subsequently let it go and forget that I'm pissed about it and move right along...
Back to the days activities...
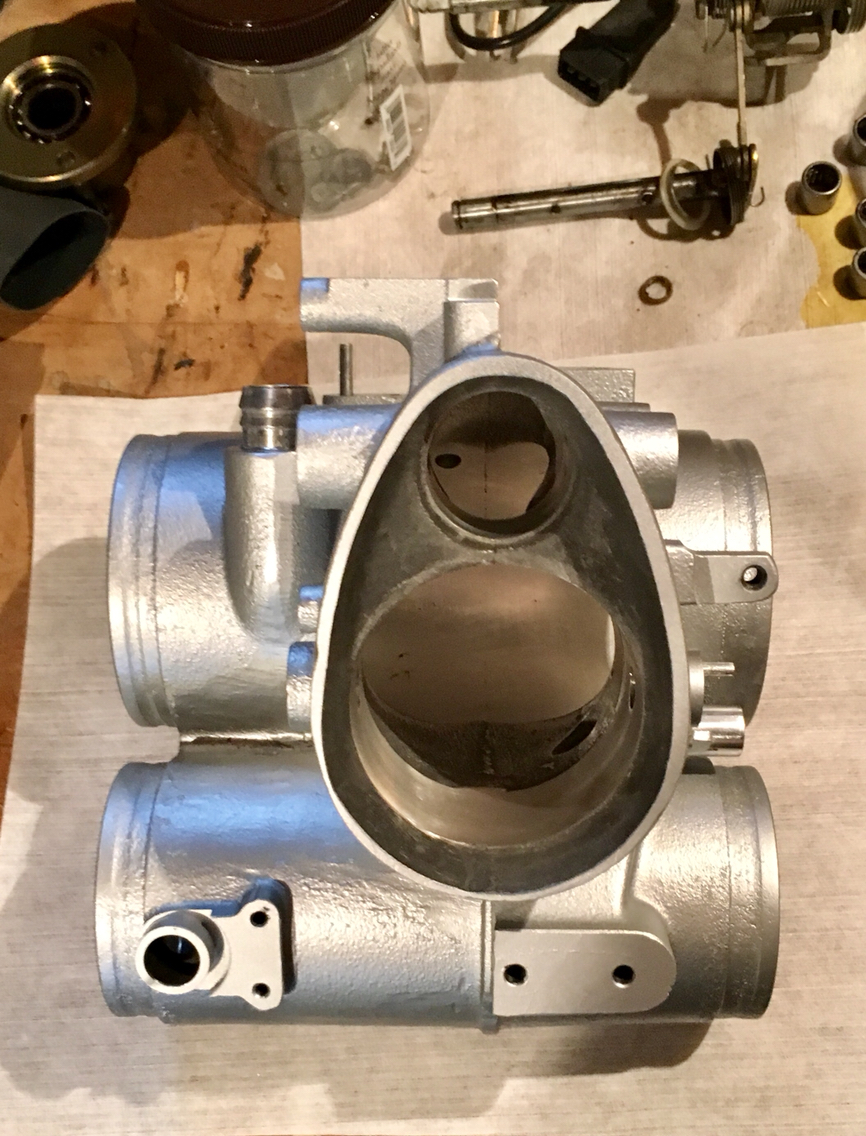
I finally got to spend some time finishing the internals on the throttle body. I left the lower tube alone, since it's sole purpose is to regulate pressure between the sides. There is no high speed airflow through that section. It holds only the resonance flap, and when that's open, there is a huge volume of open space shared by both sides of the intake. That's all.
Someone else can chime in with a more professional and informed idea of what that all does. But for all intents and purposes, there is no reason to make that tube smooth inside. And since it's carefully machined where the flap closes, i left it alone.
That said - take a look at the difference. The upper tube where there is a high flow of air, in stock form, is equally as rough a casting as the lower. Here is a before and after:
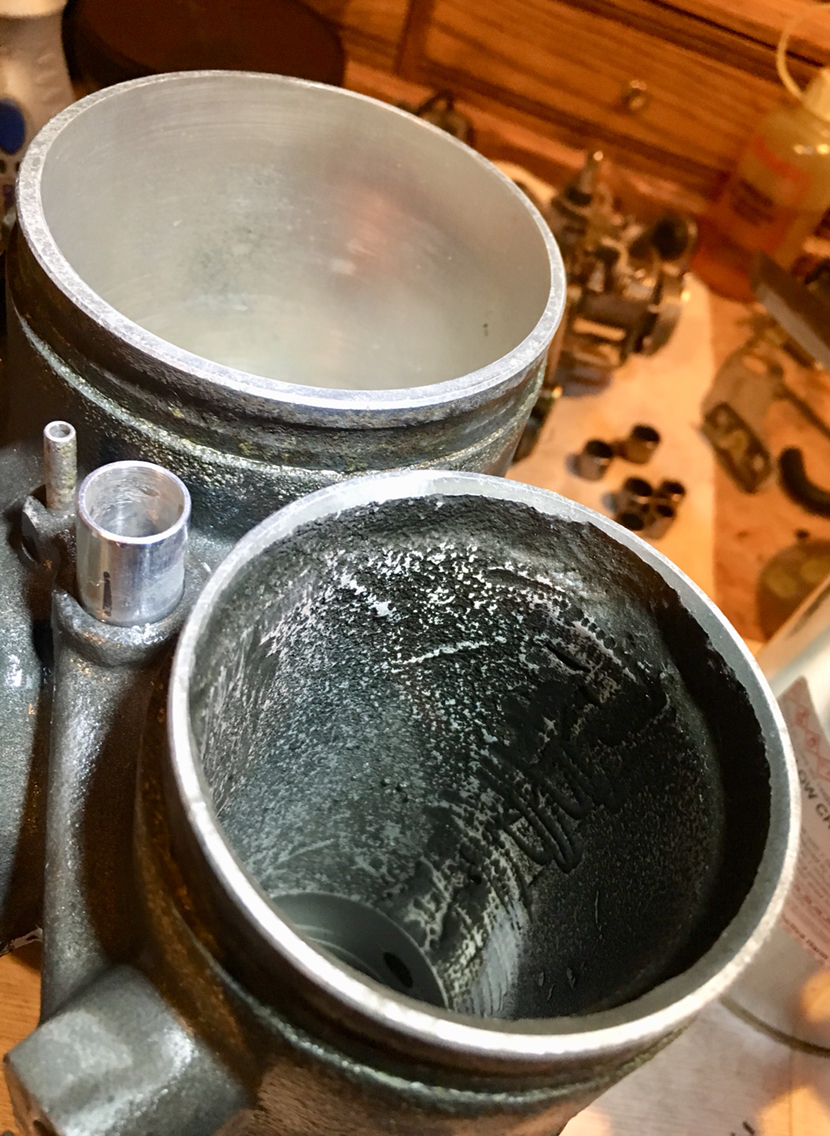
Nice and smooth. All of this is going to be ceramic coated so nothing will stick to it btw...can't remember if i told you all that yet.
This is the state of the body at the moment:
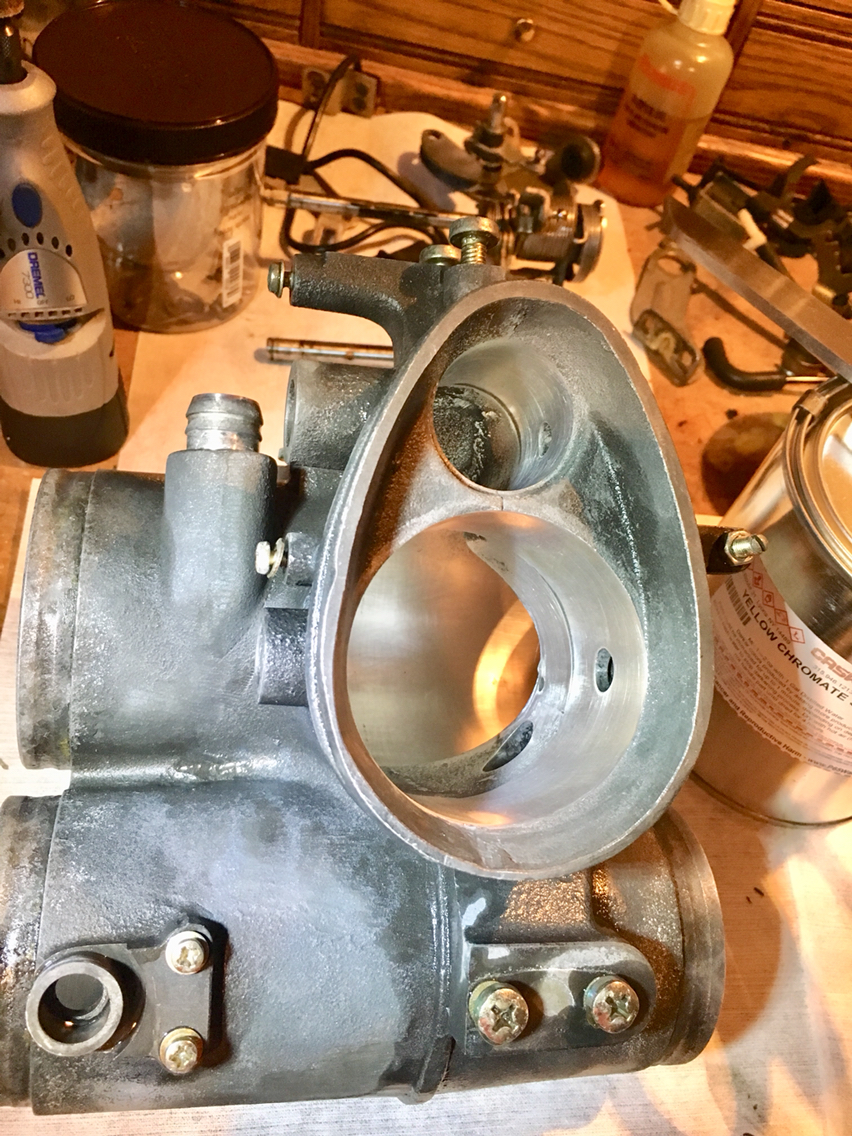
Super clean inside. Not perfect. Just a lot better than it was. I don't want to reinvent the wheel, nor do i want to mess anything up. Soooo minimal intervention.
Next up is a little wire brushing on the outside, then mask it all off and prime. Then i have to figure out what I'm doing for paint. I may just do all silver. Just haven't decided- seems sooooo boring.
Now. On to rehashing my picking bone...
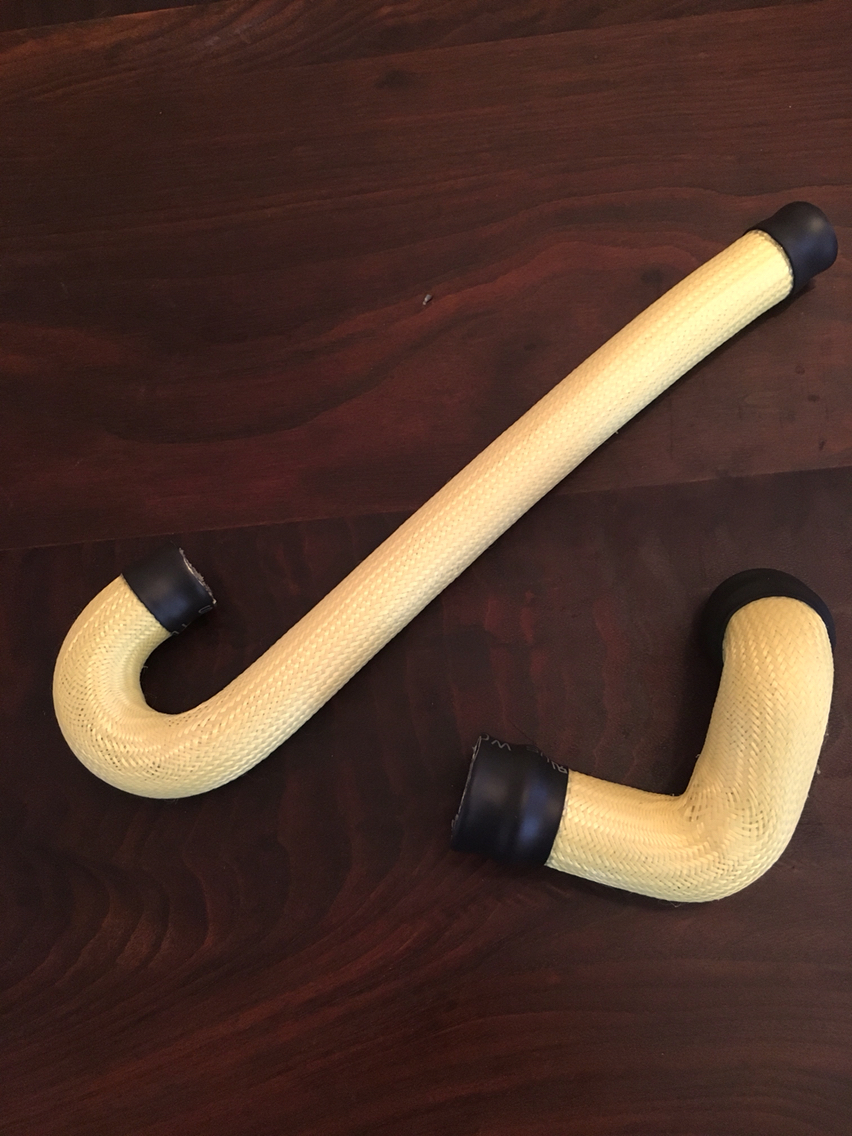
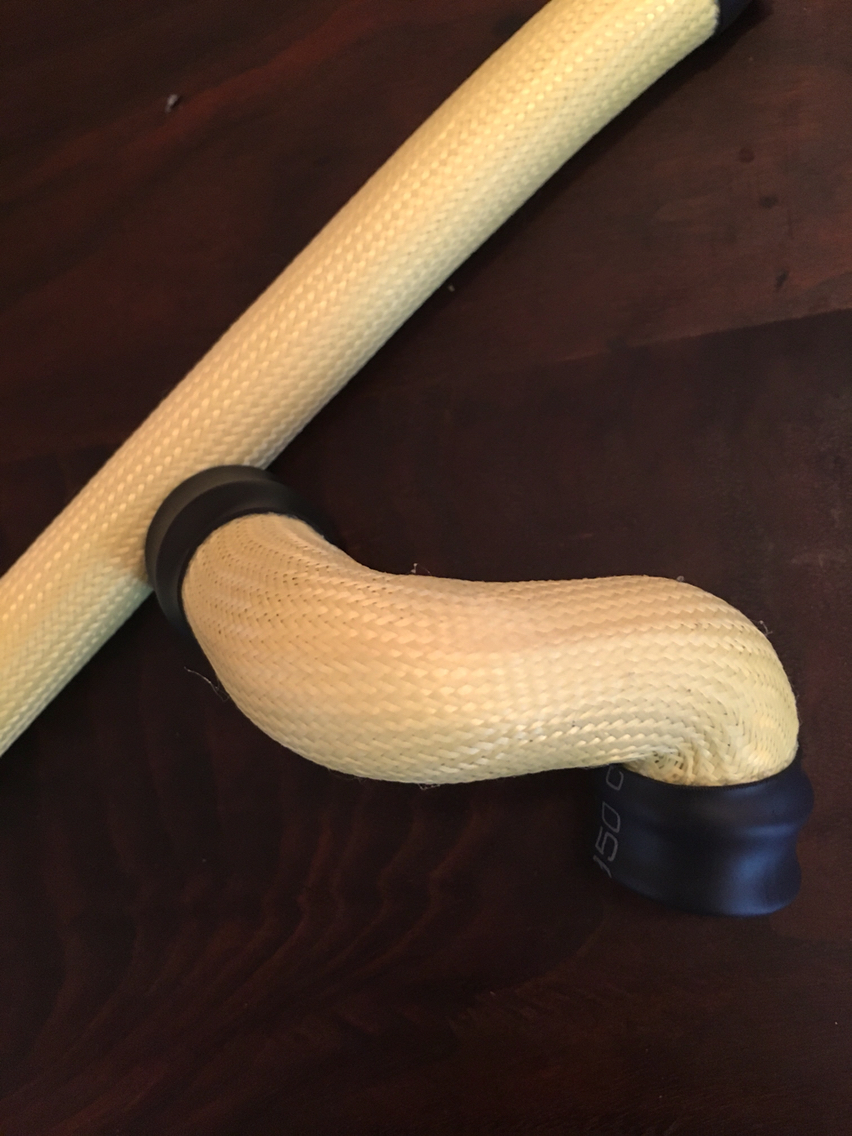
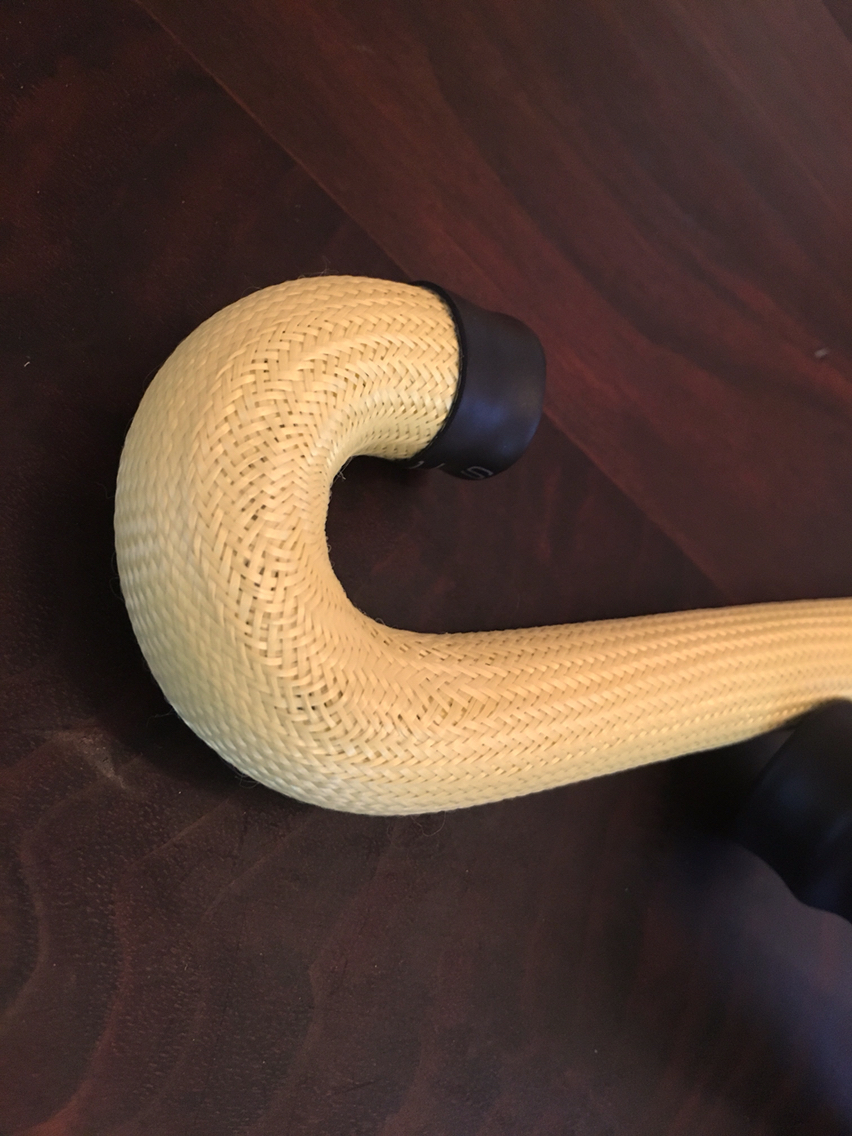
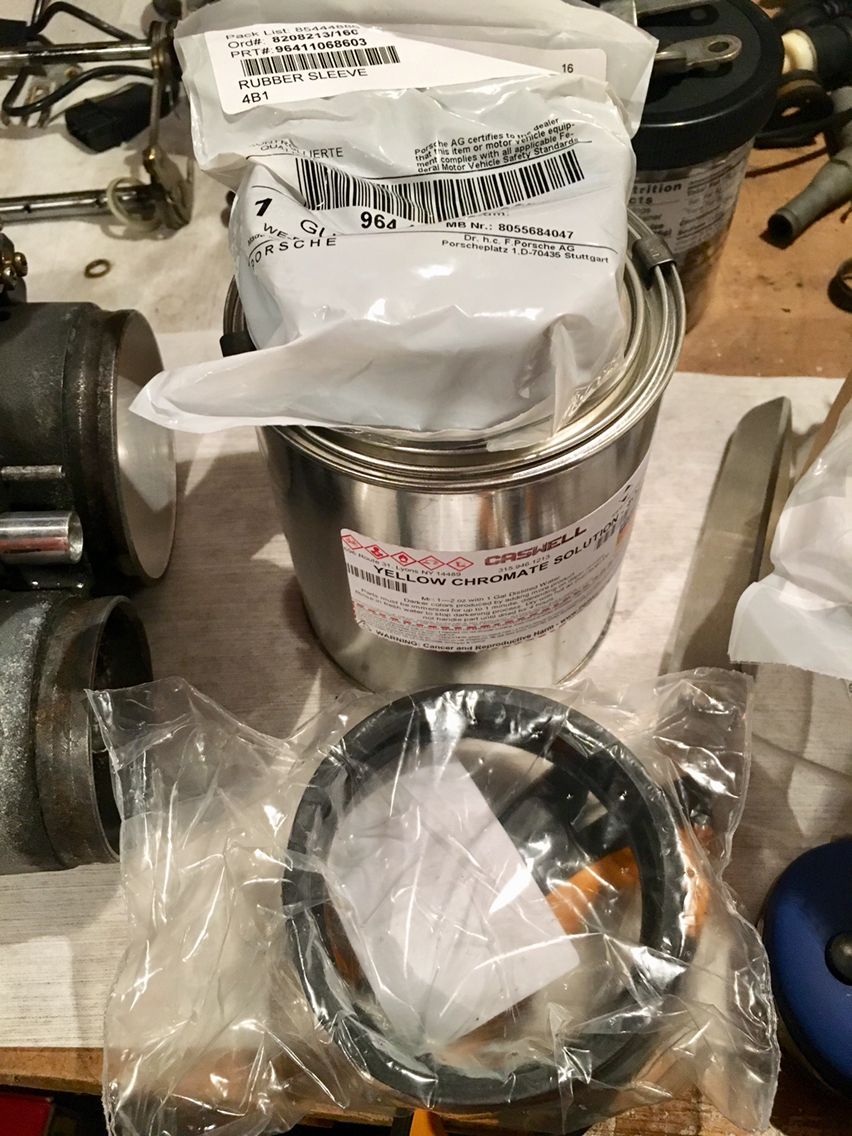
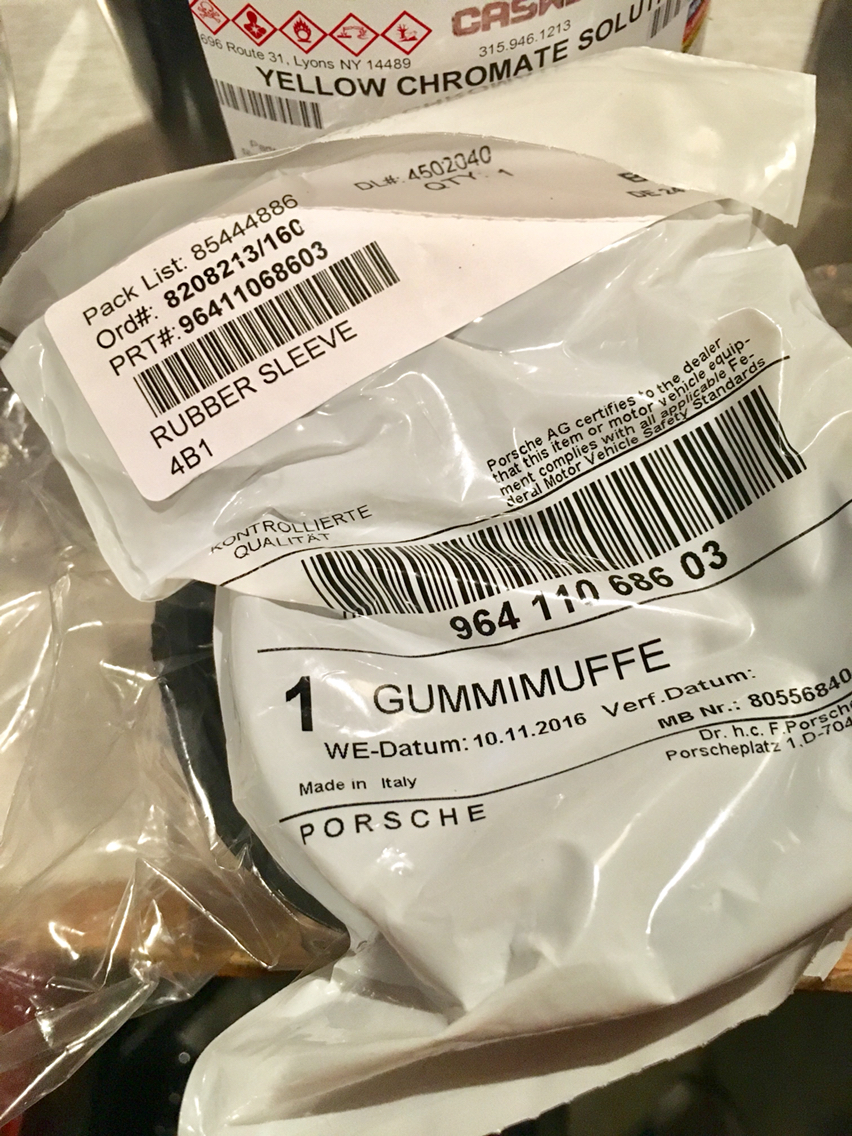
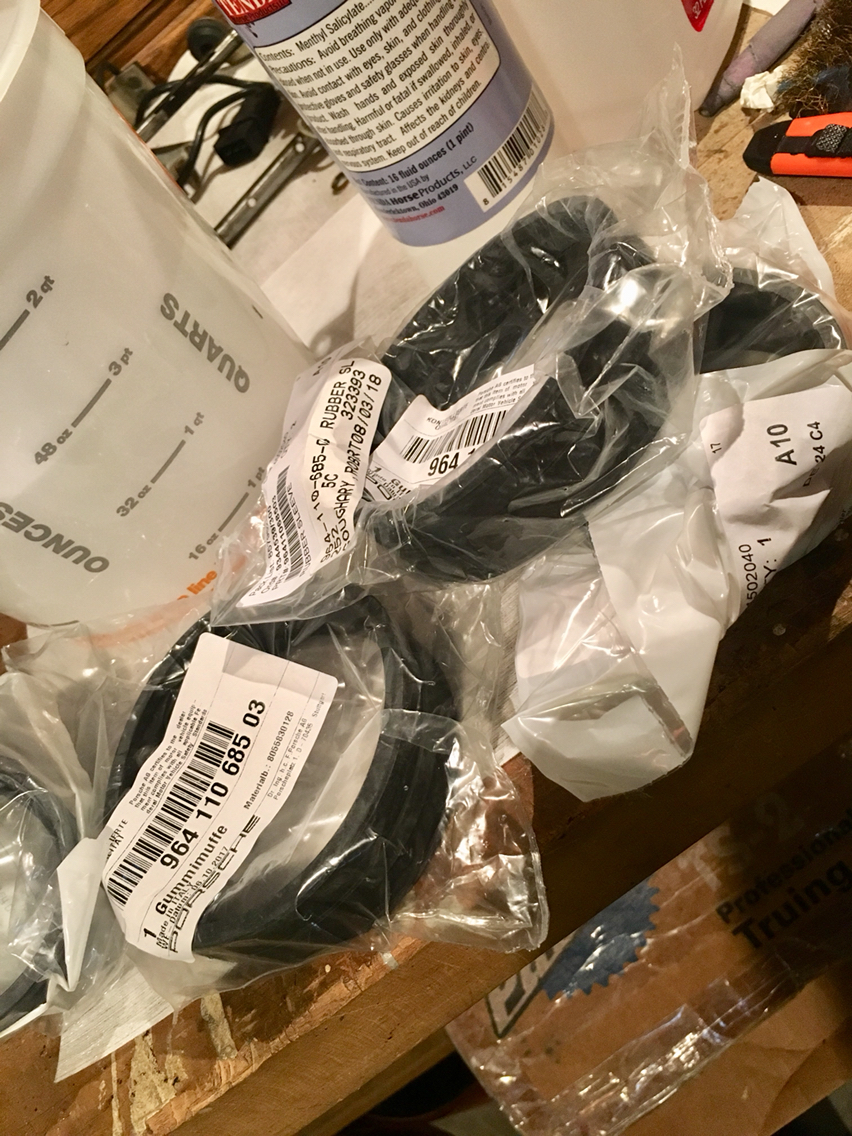
I bought new intake seals- the big ones...cuz as you may remember from the beginning - the ones that were on the intake were terrible. The corrosion has eaten into the rubber, and they were hard. So i figured rather than polishing a turd...they aren't expensive. So buy new.
Well turned out they weren't currently in stock, so they were ordered from Germany and came from Porsche directly.
HARD AS ROCKS.
Well...not as rocks...but definitely have been sitting on their shelf for 30 years.
Which adds time and expense to my project. Thankfully a bunch of you guys have bought wot switch arms - the dodad - and that has offset a little of the cost of this project (very expensive)....so i thank you all for that and hope that little dodad does you well.
Anyway- the good news, now that the bone has been picked- is that i now get to buy some wintergreen oil and alcohol and show you all how to soften old rubber and save old parts from the scrap heap...which will be fun!
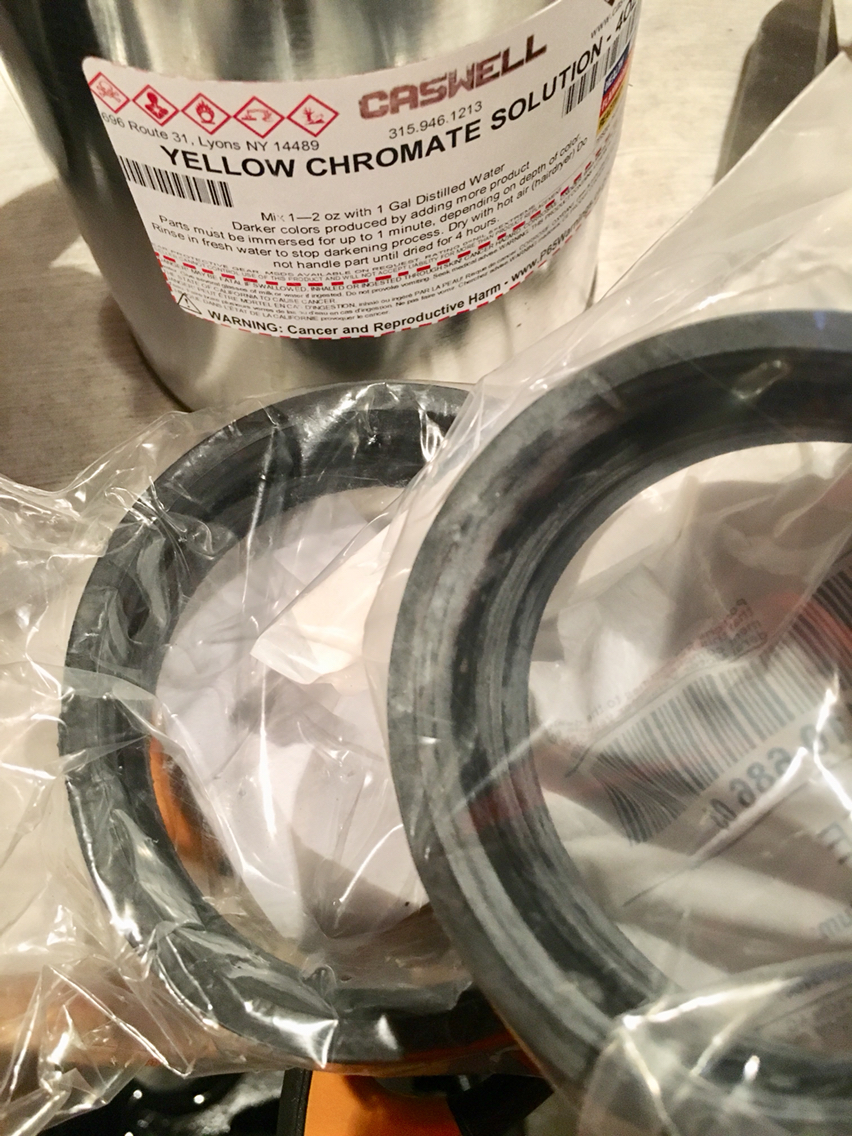
(If you notice there in the background, the yellow chromate solution arrived as well. But that i will get to another day all together- and really only if it works, lol)
Back to the days activities...
I finally got to spend some time finishing the internals on the throttle body. I left the lower tube alone, since it's sole purpose is to regulate pressure between the sides. There is no high speed airflow through that section. It holds only the resonance flap, and when that's open, there is a huge volume of open space shared by both sides of the intake. That's all.
Someone else can chime in with a more professional and informed idea of what that all does. But for all intents and purposes, there is no reason to make that tube smooth inside. And since it's carefully machined where the flap closes, i left it alone.
That said - take a look at the difference. The upper tube where there is a high flow of air, in stock form, is equally as rough a casting as the lower. Here is a before and after:
Nice and smooth. All of this is going to be ceramic coated so nothing will stick to it btw...can't remember if i told you all that yet.
This is the state of the body at the moment:
Super clean inside. Not perfect. Just a lot better than it was. I don't want to reinvent the wheel, nor do i want to mess anything up. Soooo minimal intervention.
Next up is a little wire brushing on the outside, then mask it all off and prime. Then i have to figure out what I'm doing for paint. I may just do all silver. Just haven't decided- seems sooooo boring.
Now. On to rehashing my picking bone...
I bought new intake seals- the big ones...cuz as you may remember from the beginning - the ones that were on the intake were terrible. The corrosion has eaten into the rubber, and they were hard. So i figured rather than polishing a turd...they aren't expensive. So buy new.
Well turned out they weren't currently in stock, so they were ordered from Germany and came from Porsche directly.
HARD AS ROCKS.
Well...not as rocks...but definitely have been sitting on their shelf for 30 years.
Which adds time and expense to my project. Thankfully a bunch of you guys have bought wot switch arms - the dodad - and that has offset a little of the cost of this project (very expensive)....so i thank you all for that and hope that little dodad does you well.
Anyway- the good news, now that the bone has been picked- is that i now get to buy some wintergreen oil and alcohol and show you all how to soften old rubber and save old parts from the scrap heap...which will be fun!
(If you notice there in the background, the yellow chromate solution arrived as well. But that i will get to another day all together- and really only if it works, lol)
08-18-2018, 05:09 PM
#133
Race Car
Thread Starter
Fun day today.
Here's the first fun thing...
Before:
Then i grabbed some CLR and a paint brush and took off the yellow and the crusty stuff. They aren't very oxidized, so the zinc underneath is still good. So therefore, reapplying the chromate should be fine, although not perfect. But if you are just looking for yellow and some protection...all good in the hood.
After the brushing with CLR:
And then a few drops of chromate in a pint jar (talenti gelato)- and some hottish water. One minute swishing around in the solution, then dip in fresh water and blow with a hair dyer. Don't touch it with your hands for at least four hours after. Hang to dry. Let cure for a day or so.
Final product:
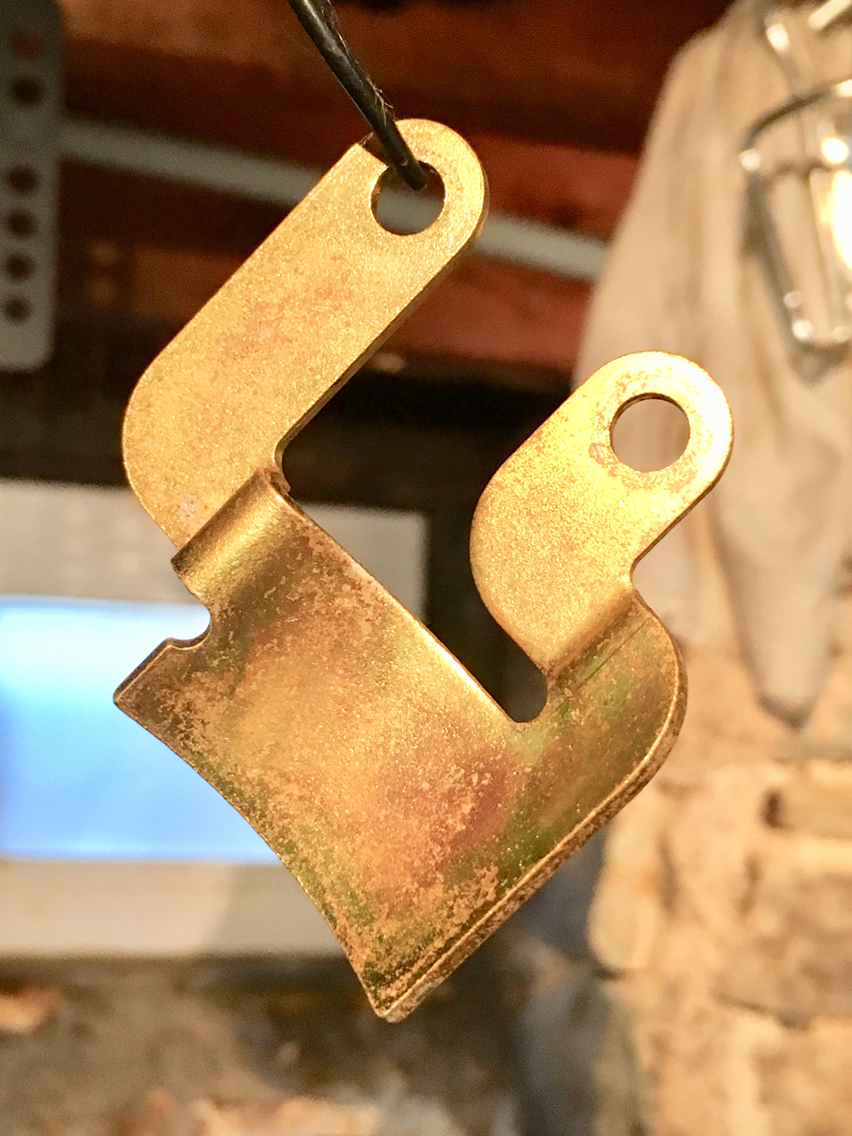
So cool!
Make Awesome Happen
Here's the first fun thing...
Before:
Then i grabbed some CLR and a paint brush and took off the yellow and the crusty stuff. They aren't very oxidized, so the zinc underneath is still good. So therefore, reapplying the chromate should be fine, although not perfect. But if you are just looking for yellow and some protection...all good in the hood.
After the brushing with CLR:
And then a few drops of chromate in a pint jar (talenti gelato)- and some hottish water. One minute swishing around in the solution, then dip in fresh water and blow with a hair dyer. Don't touch it with your hands for at least four hours after. Hang to dry. Let cure for a day or so.
Final product:
So cool!
Make Awesome Happen
08-18-2018, 05:23 PM
#134
Race Car
Thread Starter
And then...i finally got a chance to prime and paint the throttle body. I'll spare you before pics since they have been posted so many times up above...but it's looking good. I went with a basic silver, using a high temp, chemically resistant caliper paint so over time, any cleaning chemicals are less likely to do anything to the paint...like when someone sprays brake cleaner in the engine bay...won't be me...but who knows who's going to be in there...
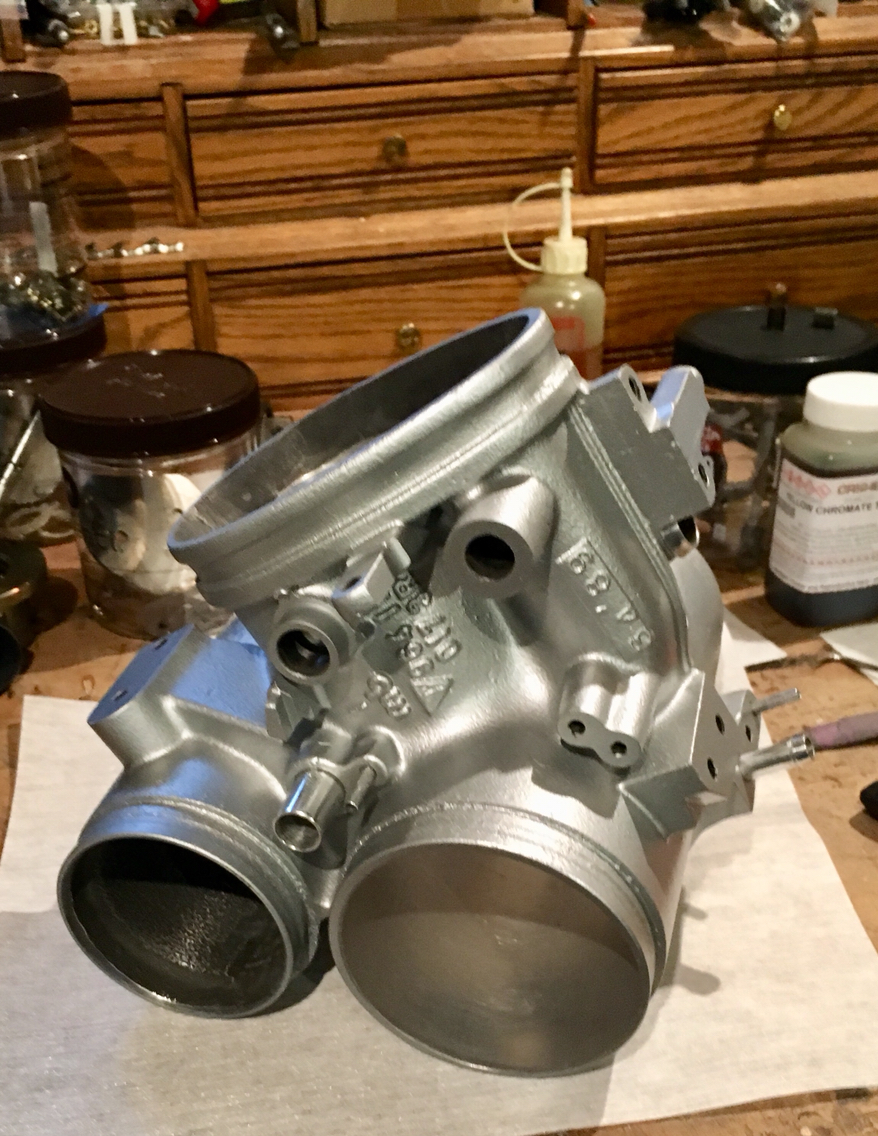
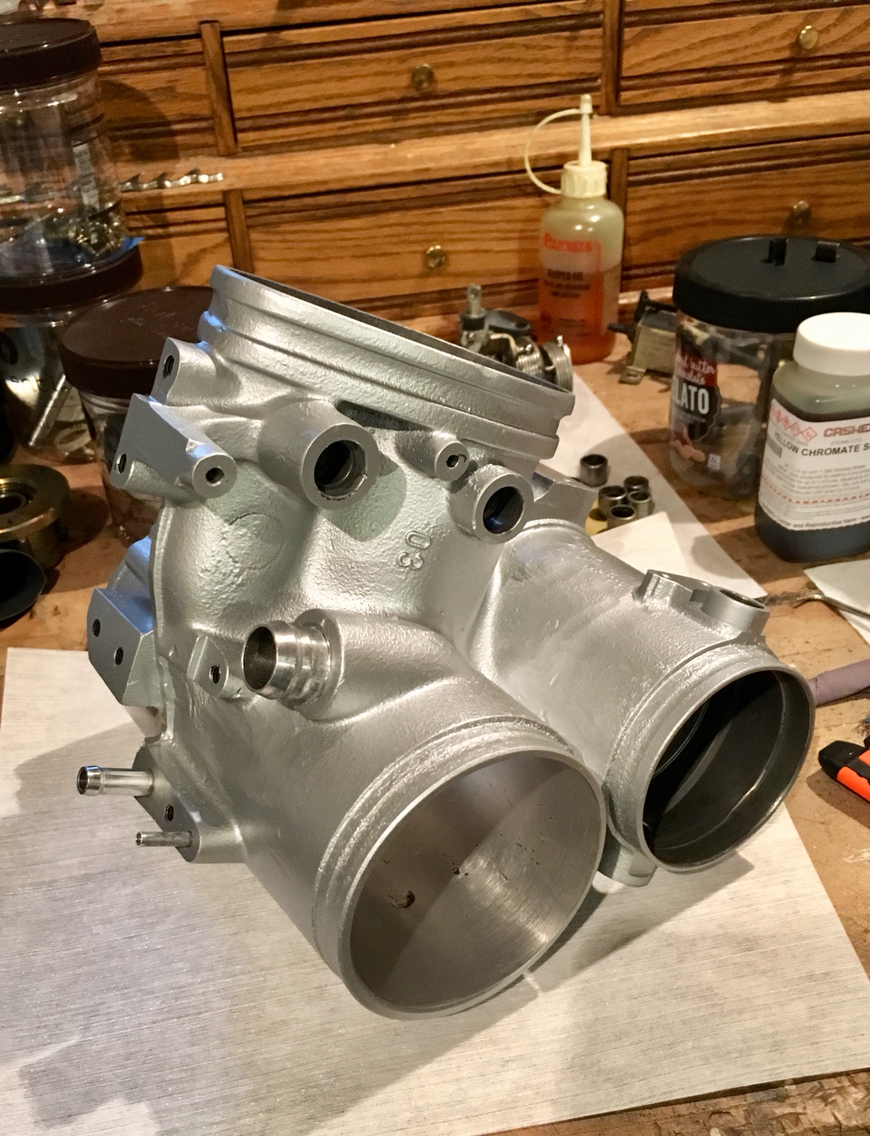

I have some more finish work to do, particularly around the areas where the seals are never going to seal - notice how corroded that area was. So those will become better. No need to go too far, but more smooth would not be out of the question.
Next up...gotta soften the rubber bits while this throttle body cures. You should always let enamel sit and harden before doing anything with it. And when you don't have an oven, it'll take two weeks or so to reach full hardness.
Patience is a virtue.
But i am itching to install bearings and get this thing together....more to come.
08-18-2018, 08:20 PM
#135
Race Car
Thread Starter
Last but not least....and this is the fun one, cuz now my entire house smells like a Wint-O-Green Lifesaver. And it's going to stay that way for a week.
So as i stated above, the seals came from Porsche and they are hard. Cuz they have likely sat on a shelf for 30 years. These things don't really go bad (they get hard and continually reused anyway) or get changed much, so I'm sure the entire stock of these in the world of Porsche parts shelves, are all old production at this point.
Anyway, wintergreen oil is Menthyl salicylate. And if you mix it 3 parts rubbing alcohol and 1 part Menthyl salicylate, you make a nice smelling rubber softener/renewer.
I've not done this before. Just seen it done. So you get to see my first ever attempt and trial run.
The one thing i get concerned about is expansion. But long and short- i can buy another set of seals if this doesn't work out.
First - the oil:
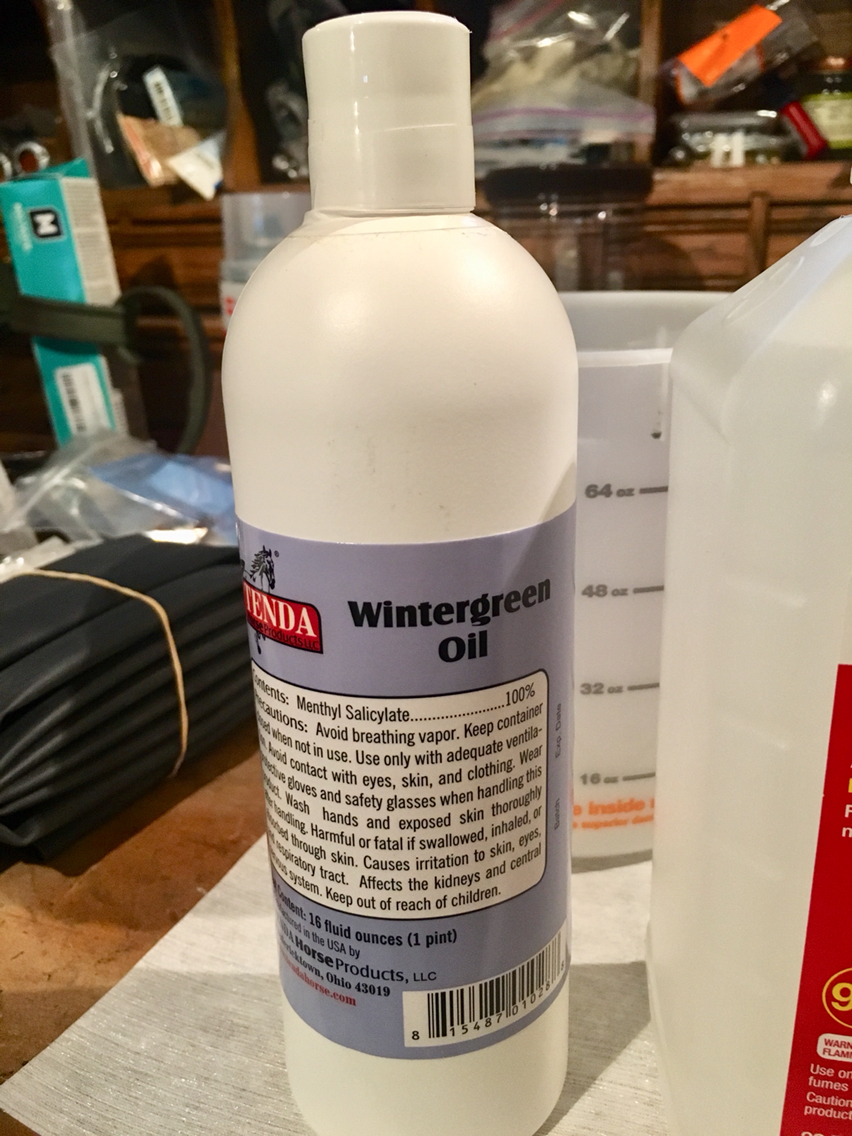
When you go online, everyone says wintergreen oil is expensive. And that's true, if you are looking for essential oils and want to buy it at your local upscale apothecary. 4oz is around 20-30 dollars. Which is crazy, cuz you are going to have to make a big bucket for a lot of the larger parts. So out i went looking and found 16oz at Big Dee's tak and vet supply, for 12.95...now we are talkin...
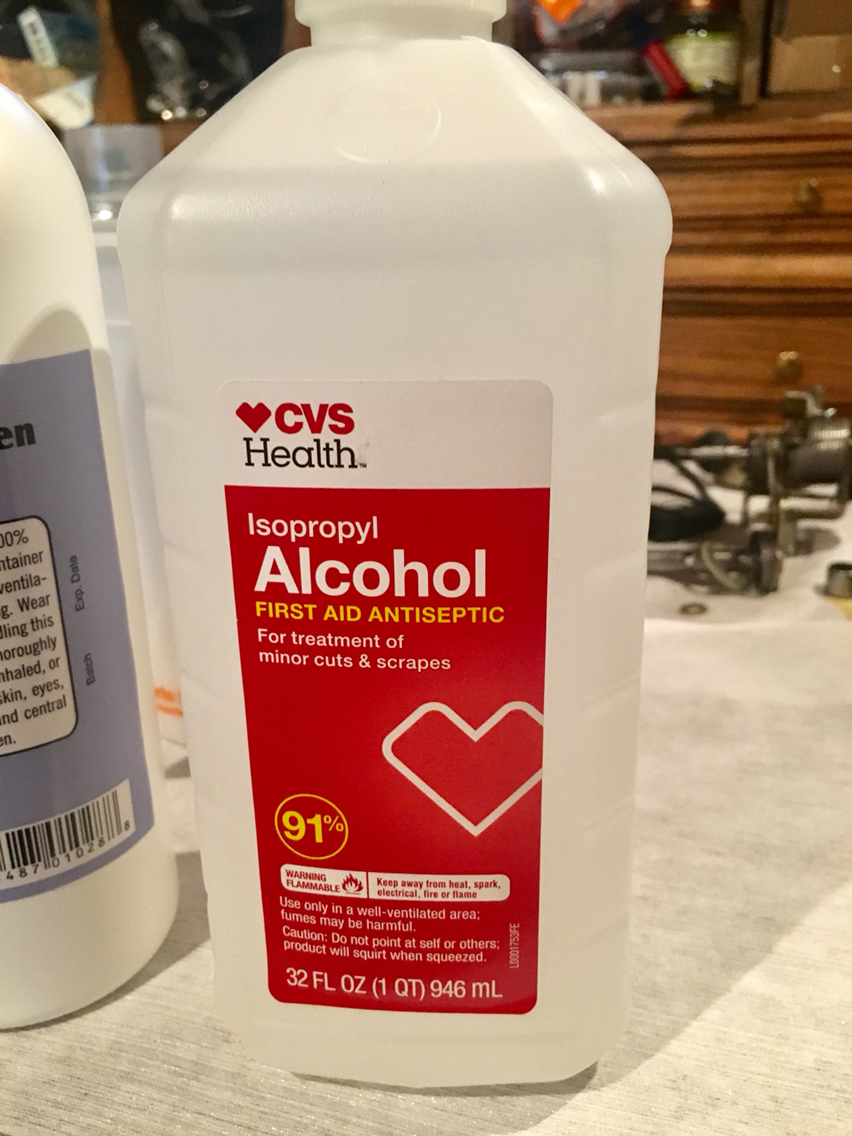
Off to cvs for 32oz bottles of 91% isopropyl alchohol:
I probably overpaid there. Penny wise, pound foolish?
Take care of the pence and the pounds will take care of themselves....
So a bottle and a half of that and the 16oz bottle of wintergreen oil, and you have it.
So i washed up the new rubber seals to take anything off them.
And tossed them in. I threw in a couple of other things as well. Just for good measure.
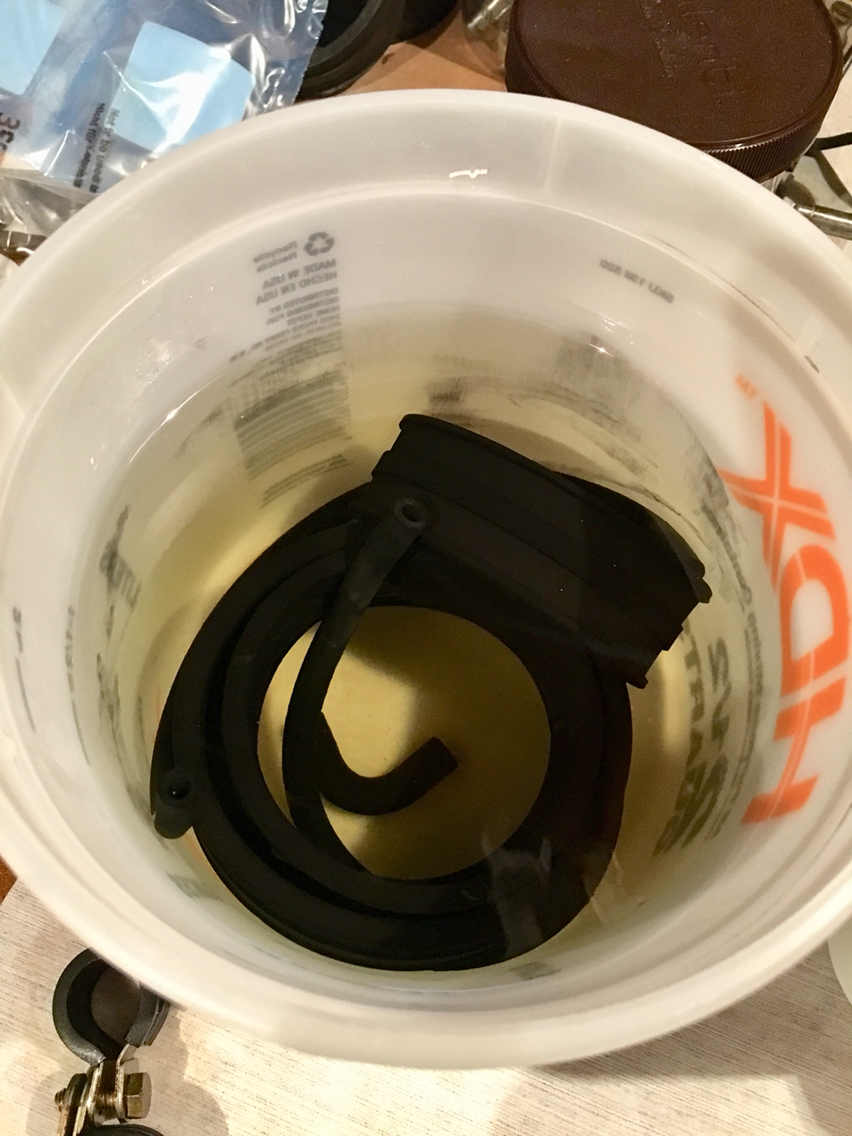
In a week or so, out they come. I'll check on them every so often. But that should do it.
Side note, as an ode to Louis Carrol now that I'm thinking about it:
Take care of the sense, and the sounds will take care of themselves...
So as i stated above, the seals came from Porsche and they are hard. Cuz they have likely sat on a shelf for 30 years. These things don't really go bad (they get hard and continually reused anyway) or get changed much, so I'm sure the entire stock of these in the world of Porsche parts shelves, are all old production at this point.
Anyway, wintergreen oil is Menthyl salicylate. And if you mix it 3 parts rubbing alcohol and 1 part Menthyl salicylate, you make a nice smelling rubber softener/renewer.
I've not done this before. Just seen it done. So you get to see my first ever attempt and trial run.
The one thing i get concerned about is expansion. But long and short- i can buy another set of seals if this doesn't work out.
First - the oil:
When you go online, everyone says wintergreen oil is expensive. And that's true, if you are looking for essential oils and want to buy it at your local upscale apothecary. 4oz is around 20-30 dollars. Which is crazy, cuz you are going to have to make a big bucket for a lot of the larger parts. So out i went looking and found 16oz at Big Dee's tak and vet supply, for 12.95...now we are talkin...
Off to cvs for 32oz bottles of 91% isopropyl alchohol:
I probably overpaid there. Penny wise, pound foolish?
Take care of the pence and the pounds will take care of themselves....
So a bottle and a half of that and the 16oz bottle of wintergreen oil, and you have it.
So i washed up the new rubber seals to take anything off them.
And tossed them in. I threw in a couple of other things as well. Just for good measure.
In a week or so, out they come. I'll check on them every so often. But that should do it.
Side note, as an ode to Louis Carrol now that I'm thinking about it:
Take care of the sense, and the sounds will take care of themselves...