
Intake madness. Teardown begins....


 08-24-2018, 08:17 AM
#153
Last edited by JohnK964; 08-24-2018 at 09:16 PM.
08-24-2018, 09:25 PM
#154
Should have added at my work we use lasers to engrave a lot of jewelry I know that�s on a small scale but I would think a similar process would work well on the not quit flat manifold
08-26-2018, 02:19 PM
#155
Race Car
Thread Starter
Big day so far today. I've had a few hours of "free time" and so i jumped on the throttle body...not litteraly...of course.
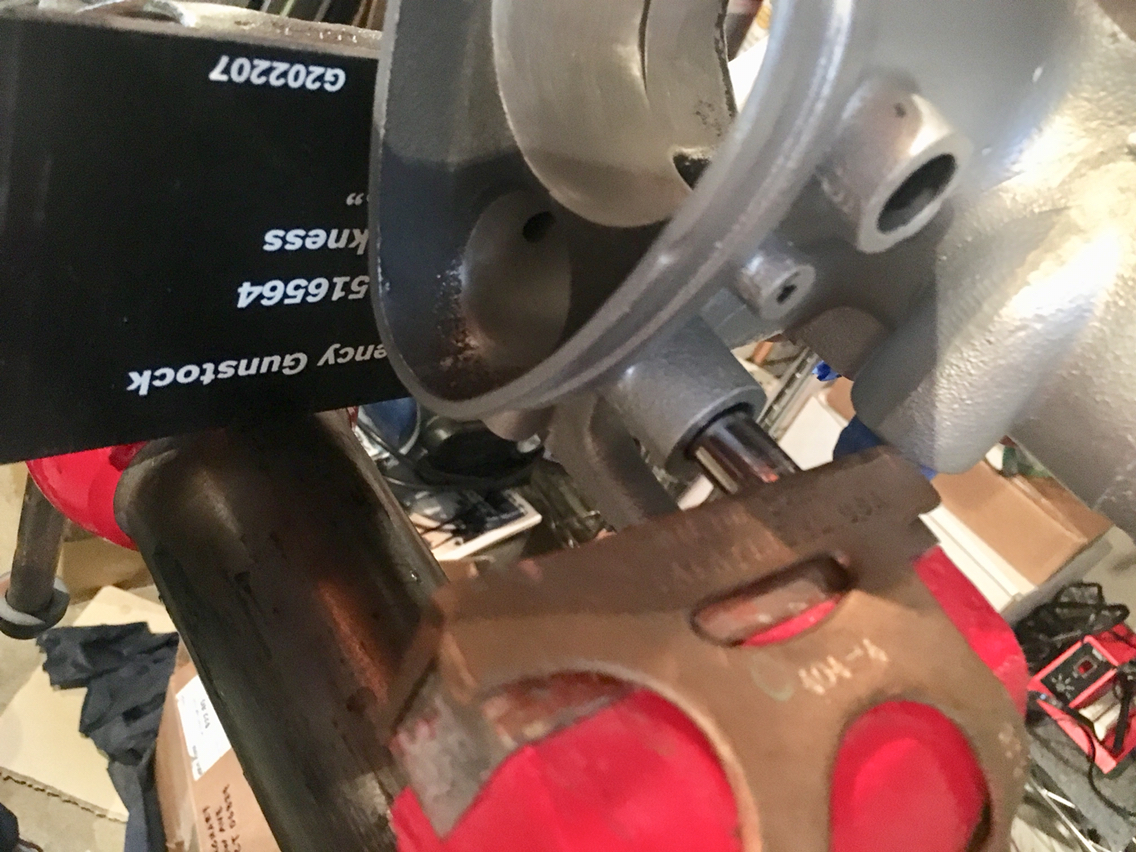
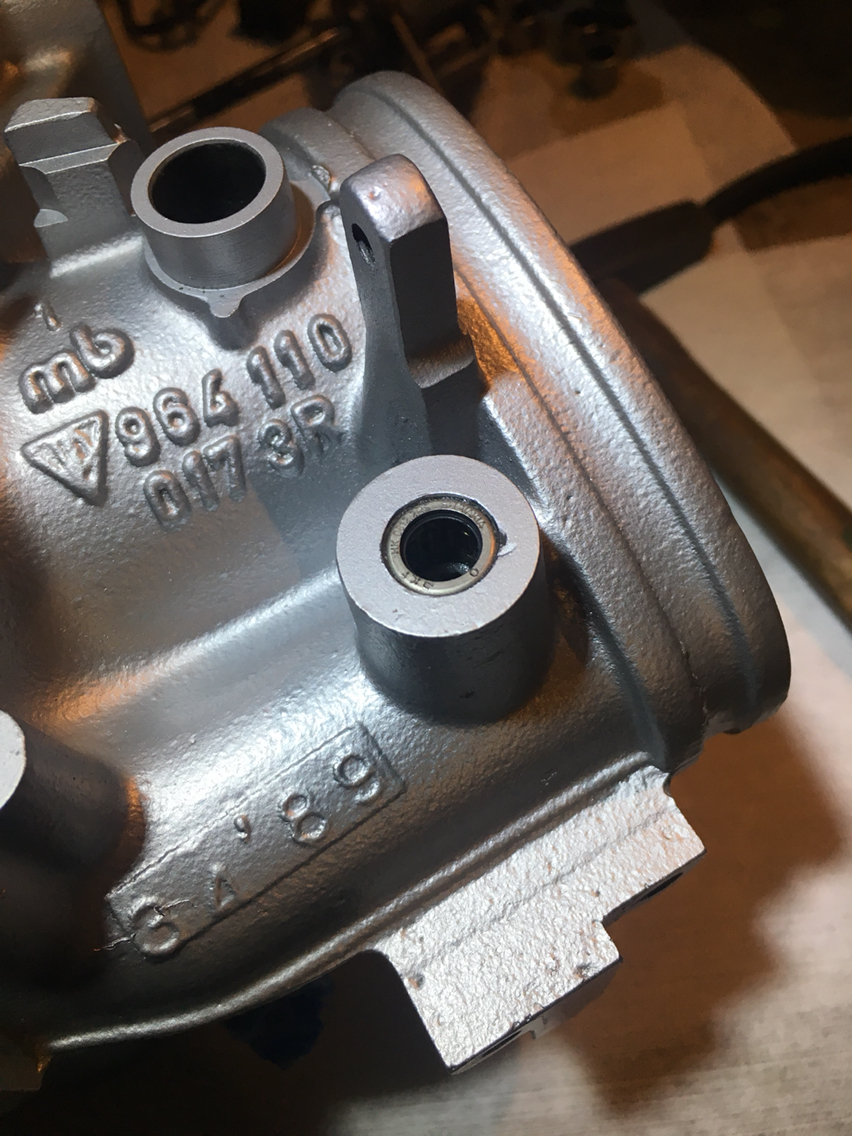
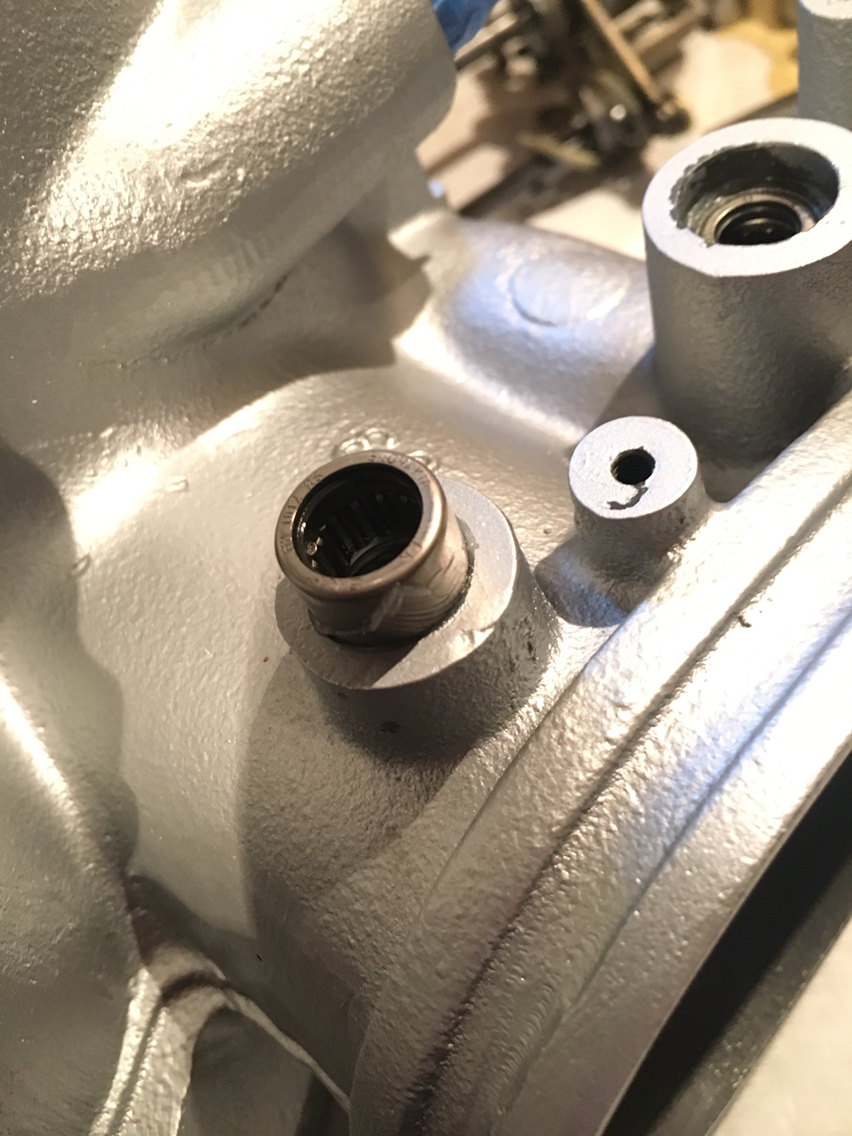
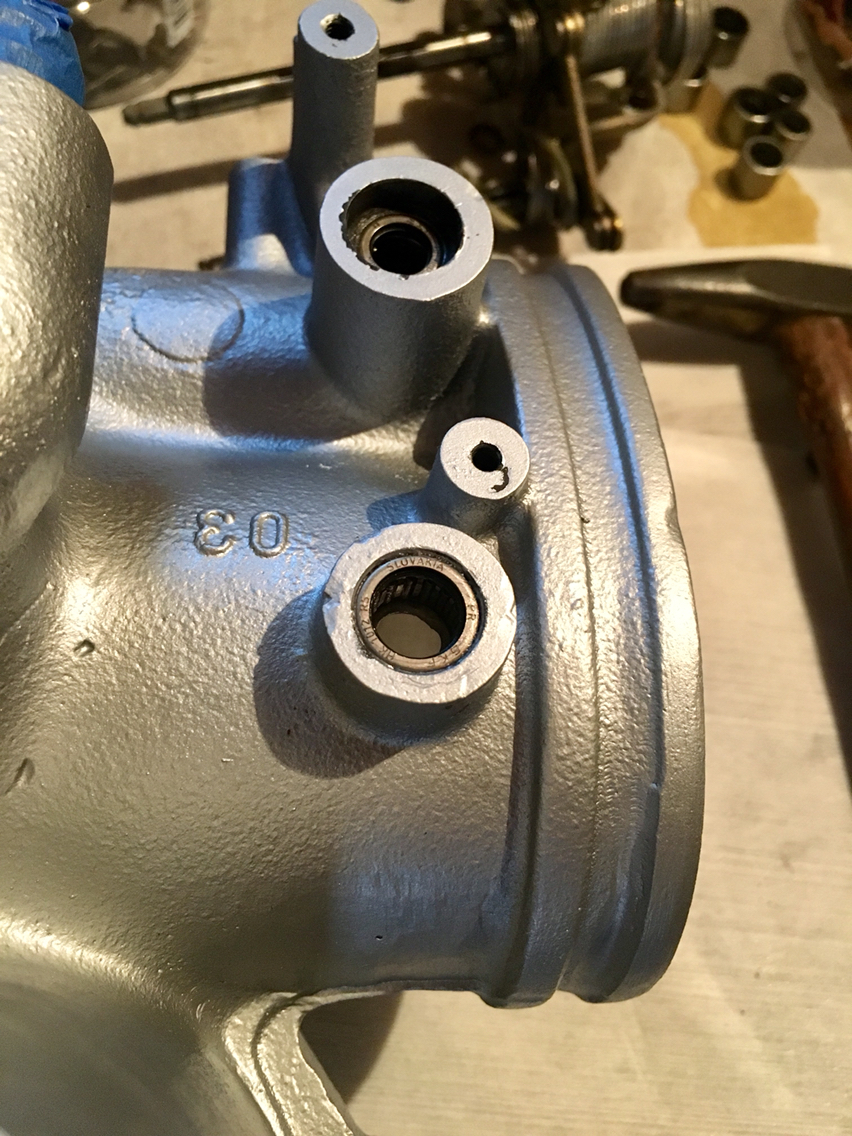
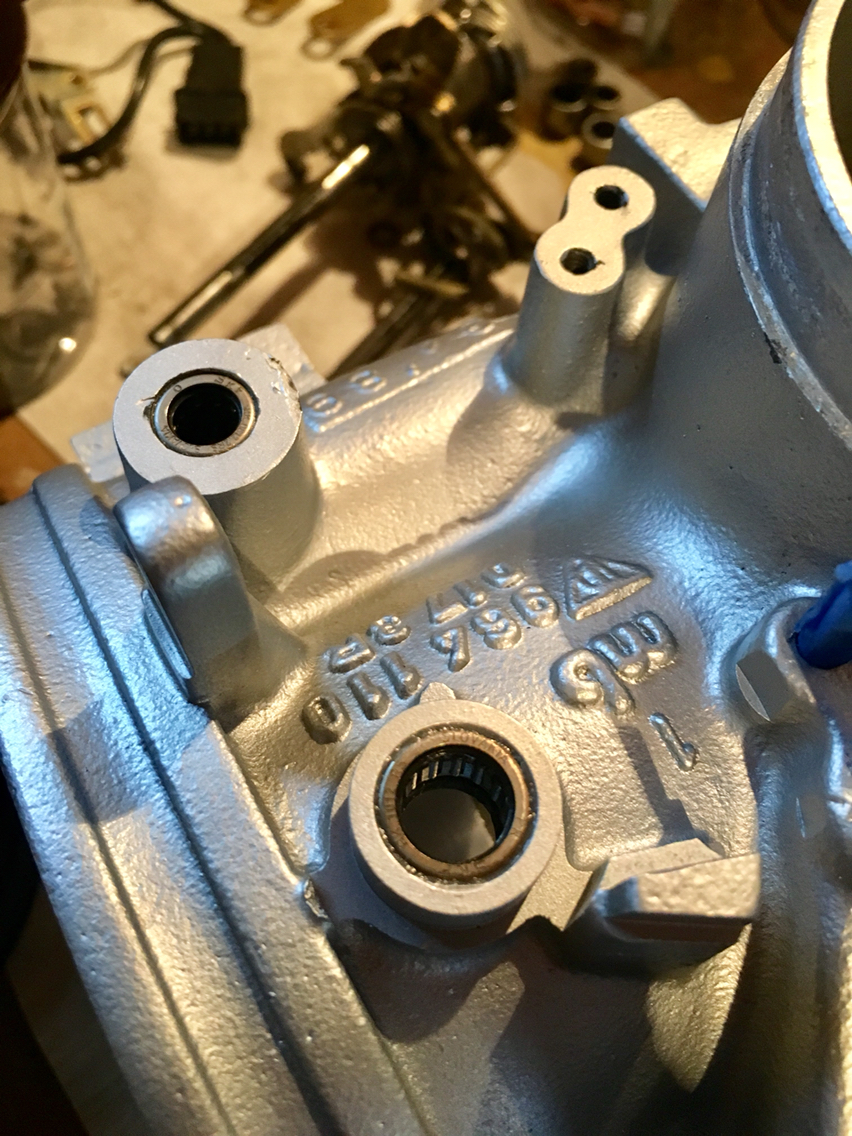
However. I was able to install the bearings. I used my handy dandy must have Wilton super vise. If you go looking for a good bench vise, these really cant be beat. If you are like me and don't want to pay up, you'll buy an old crappy one that someone wanted to throw away, and renovate it. These are so good that you can easily press bearings and bushings (small ones) with it. Zero play side to side. Super precise. Post-renovation....
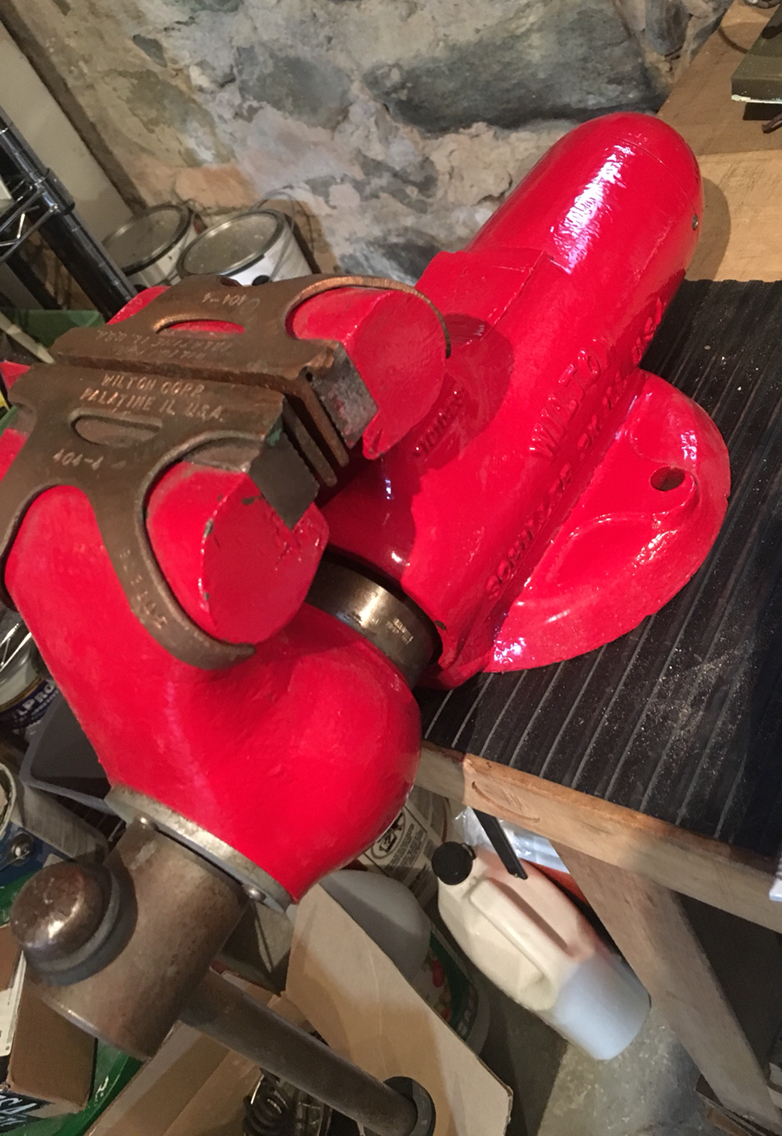
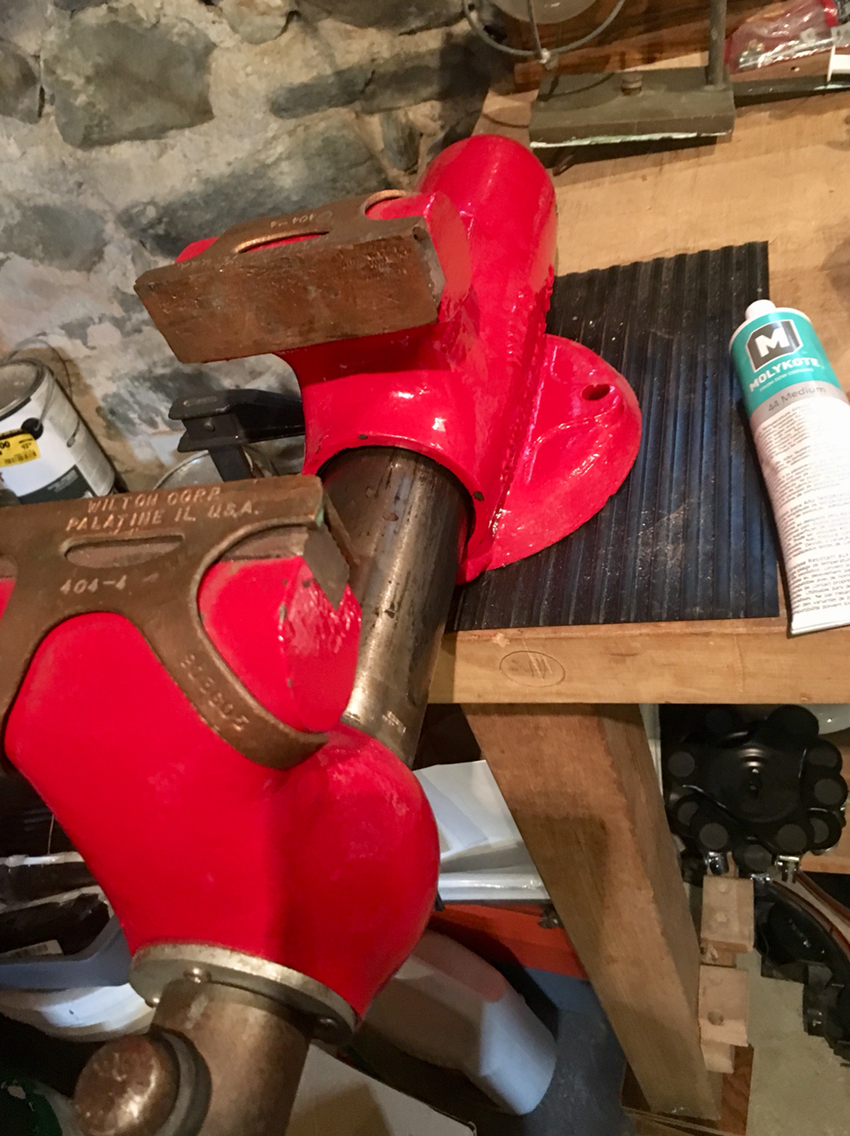
And on to the pressing. Doing this with a bench vice in a messy basement with boxes and parts everywhere...not ideal. Needed a second set of hands...but got it done.


However. I was able to install the bearings. I used my handy dandy must have Wilton super vise. If you go looking for a good bench vise, these really cant be beat. If you are like me and don't want to pay up, you'll buy an old crappy one that someone wanted to throw away, and renovate it. These are so good that you can easily press bearings and bushings (small ones) with it. Zero play side to side. Super precise. Post-renovation....
And on to the pressing. Doing this with a bench vice in a messy basement with boxes and parts everywhere...not ideal. Needed a second set of hands...but got it done.
08-26-2018, 02:48 PM
#156
Race Car
Thread Starter
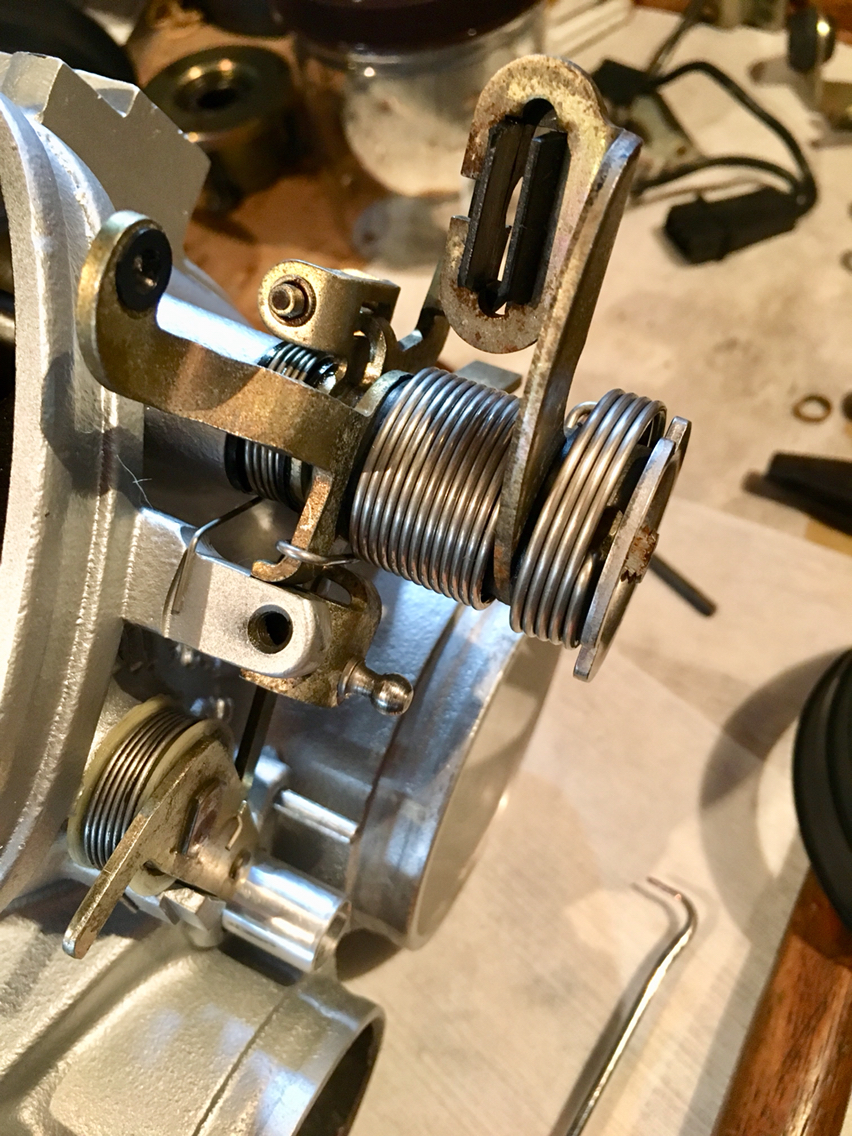
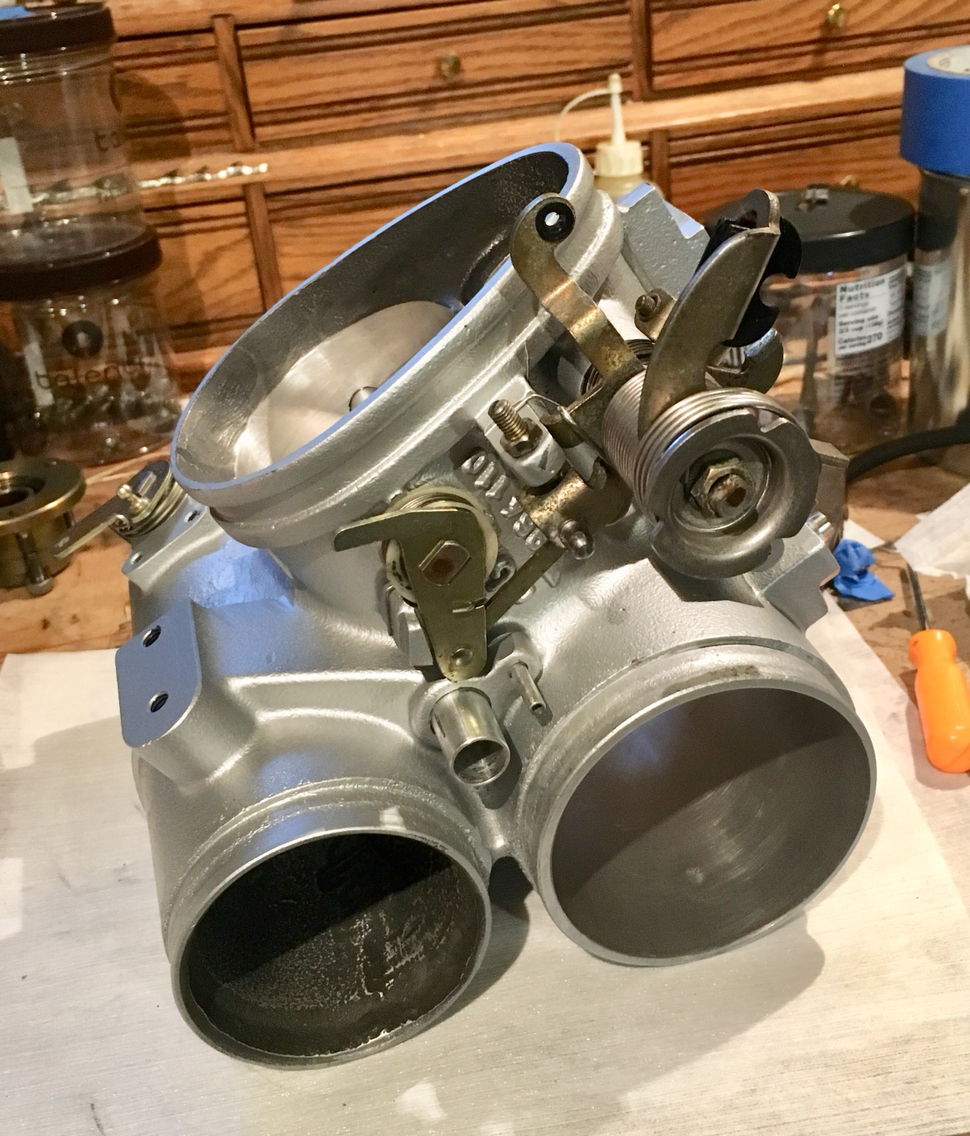
And then...it was time to reassemble the do-hickies, thingamagiggers, and springs, seals, clips, etc...i haven't finished. But here's what's been done. I'm going to try to explain this but don't know if I'll be clear, so feel free to ask questions...
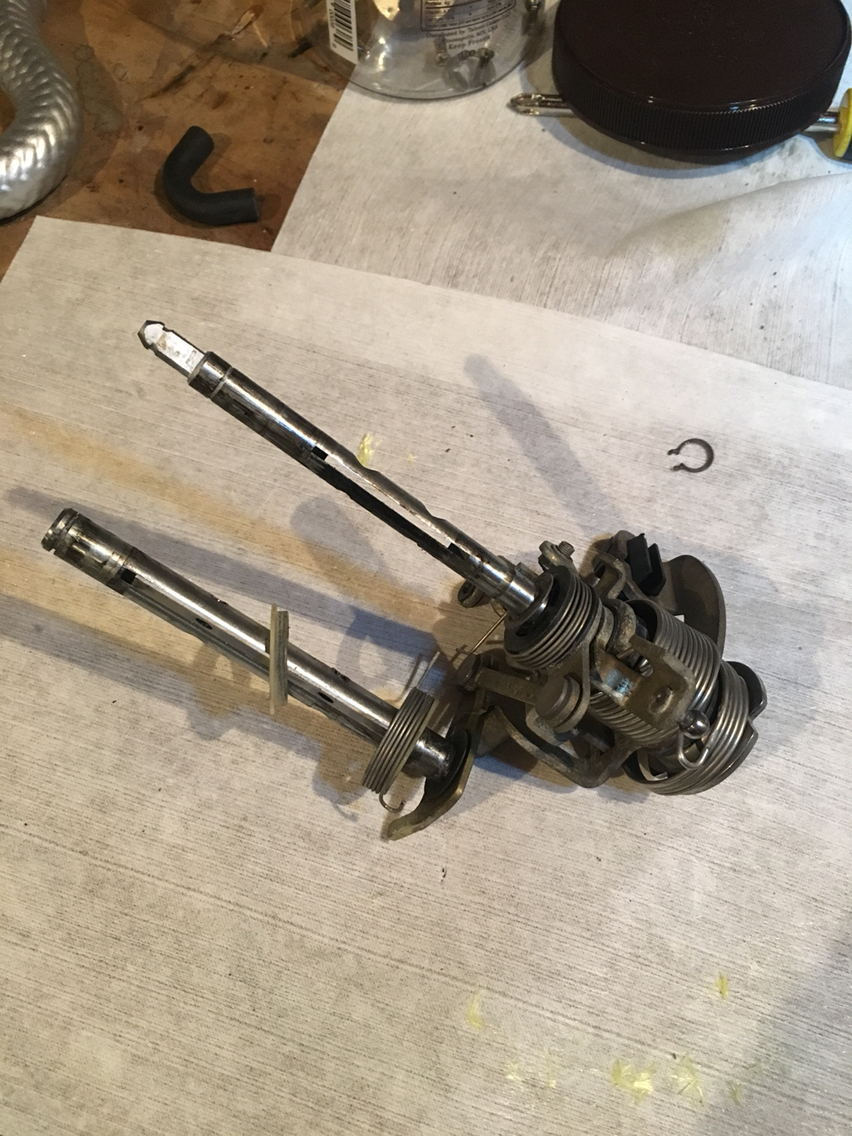
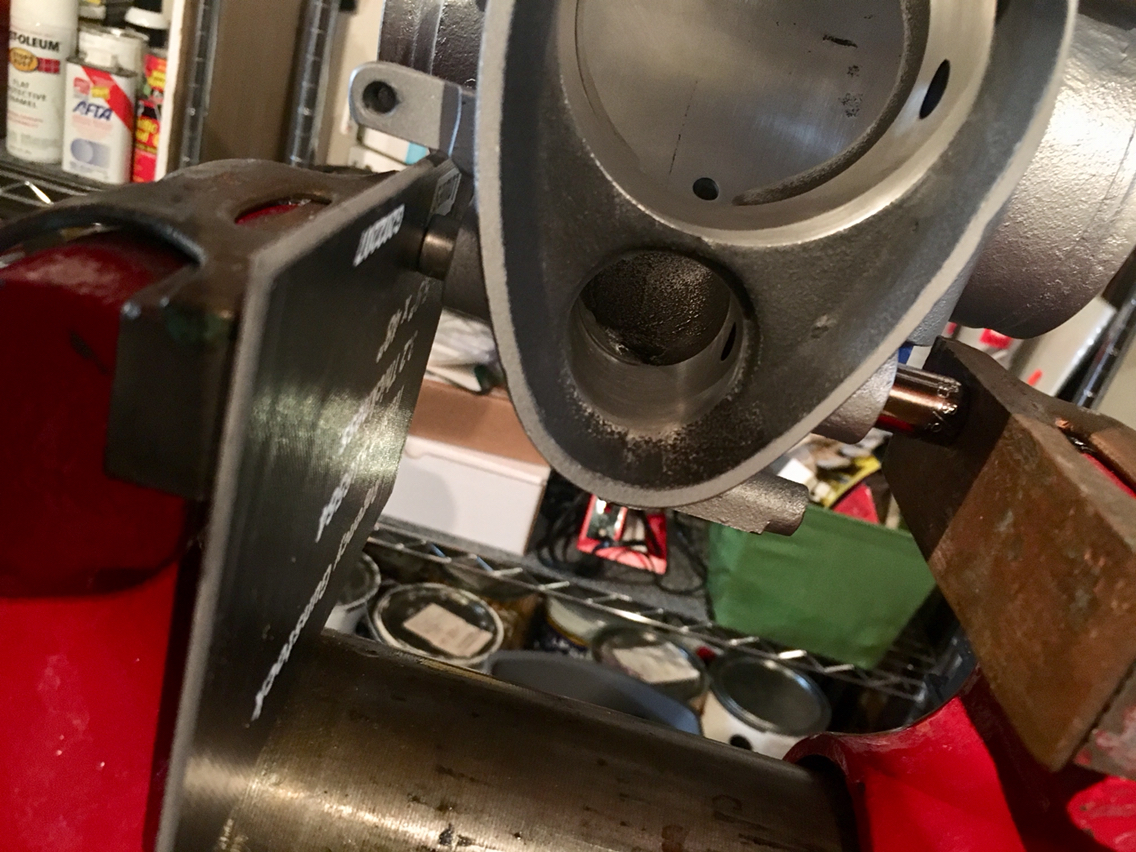
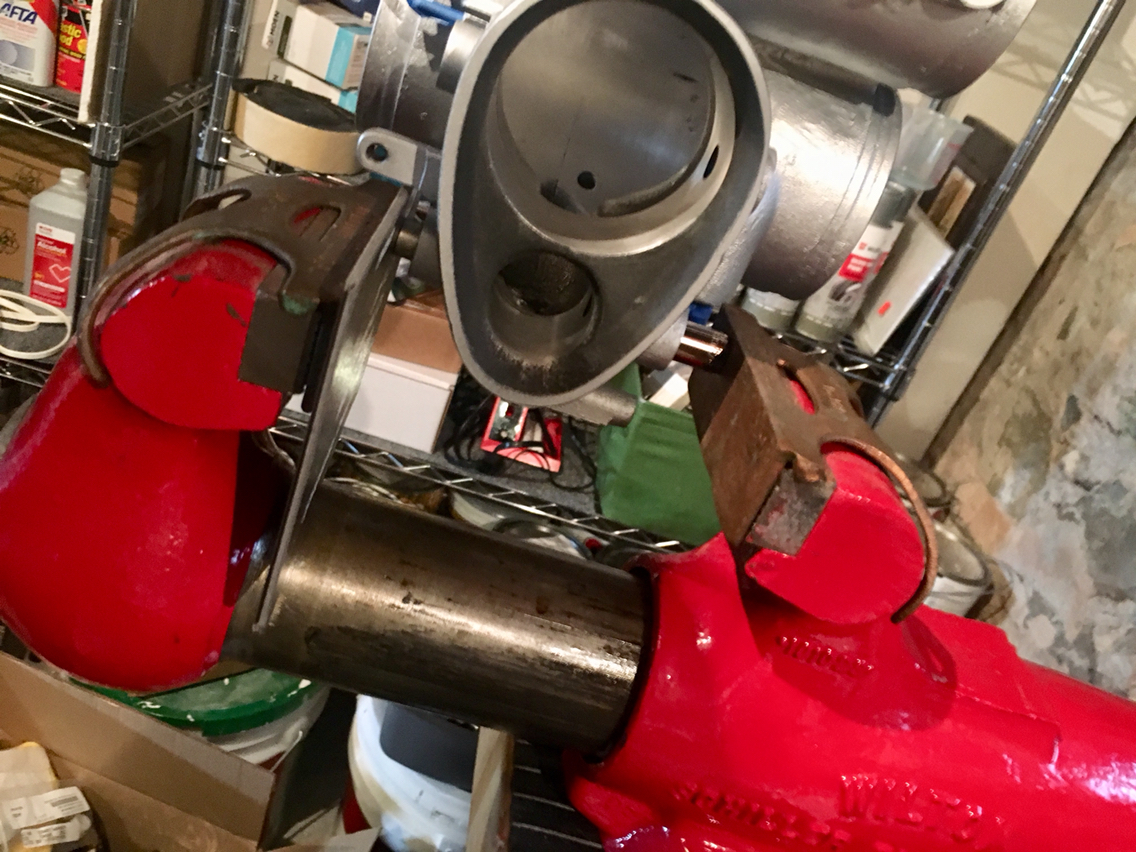
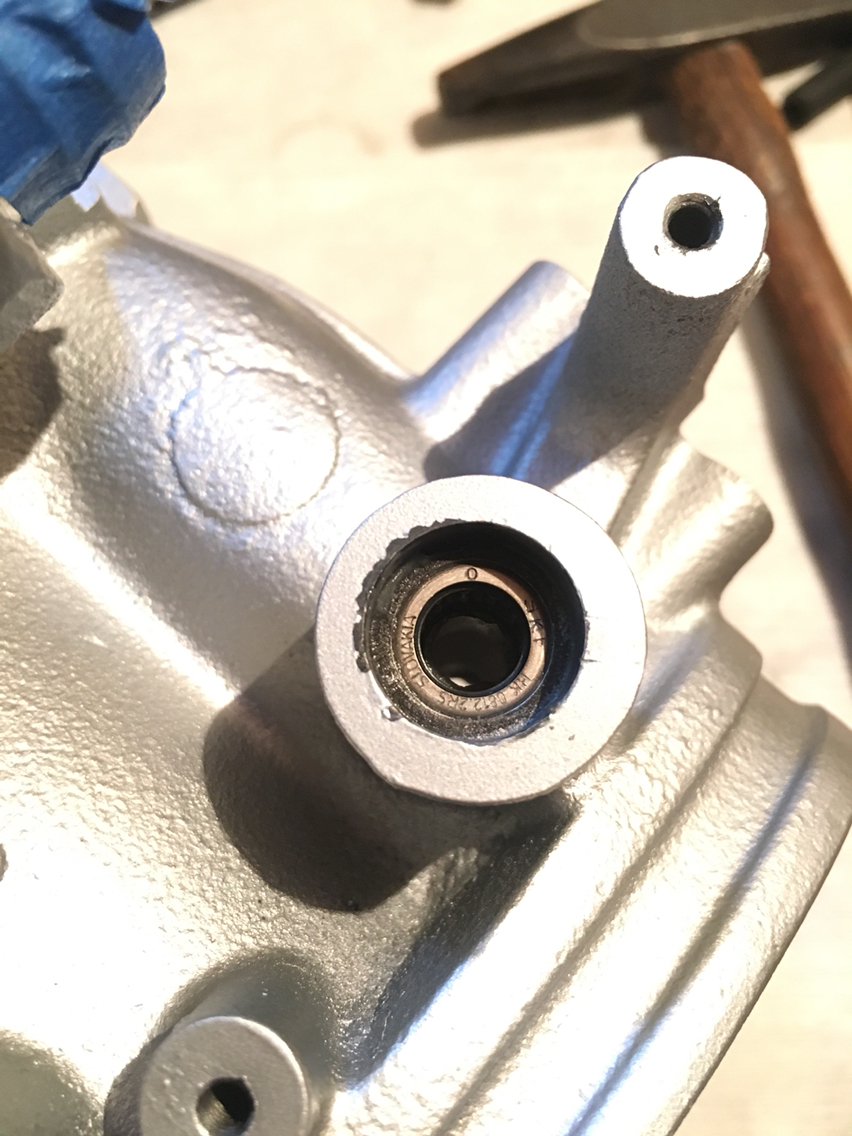
This guy slips in. You have to be careful to not tear the seals in the bearings when this gets inserted. There are very fine lips on the seals, which is the failure point for the vacuum, btw...and the channels cut for the retainer clips can grab on those lips and you've got a problem.
And in she went.
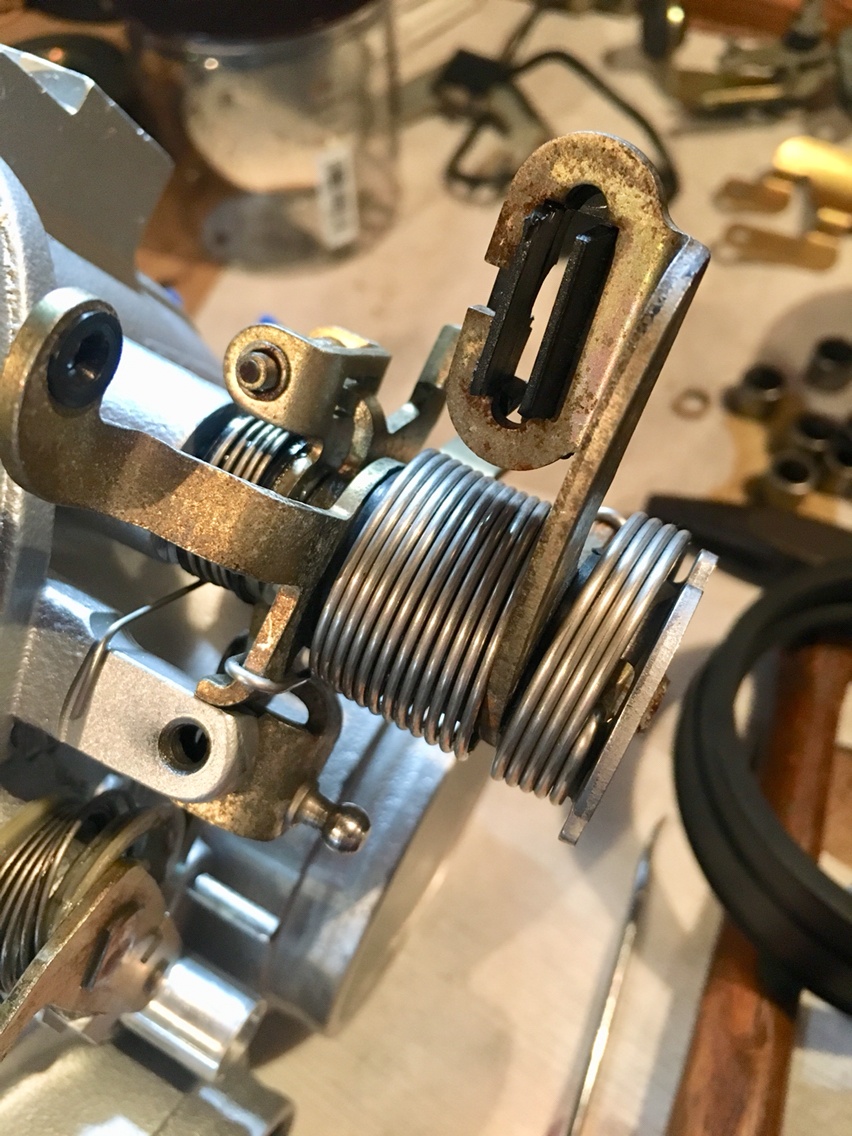
Next up is the tricky part. And the only part where you can get hurt. So be careful. I typically don't do anything with springs under tension. I don't like the idea of losing fingers, arms, or other appendages. However, these are relatively captive unless they break. And they are small enough where you are only going to lose an eye, but will likely retain fingers. So we are good to go...
Had one taken pictures prior to starting , one would have an idea of where the springs were attached. That said, the photos don't tell you how much spring windup there is. You will have had to have taken notes. Go back to the previous picture. The outer heavy looking spring goes around and snaps into place. Easy enough. The spring in the middle...the one that is the wide one with a lot of spring...that's your main throttle return spring. And if that's not wound properly, you will have a stuck throttle at some point. So that one needs to go around once until it hooks under tension...and then all the way around once more, so it's under A LOT more tension. Which is a real pain in the ***...
Anyone that has a better way to do this, please chime in. But in my case, what i did, was improvise a solution.
I have seal picks, that i used to hook onto the spring, but then you can't really wind the thing around and then under itself with a big tool, so. You need a way to hold it....
So out comes my favorite material, and how fitting for this project...Kevlar.
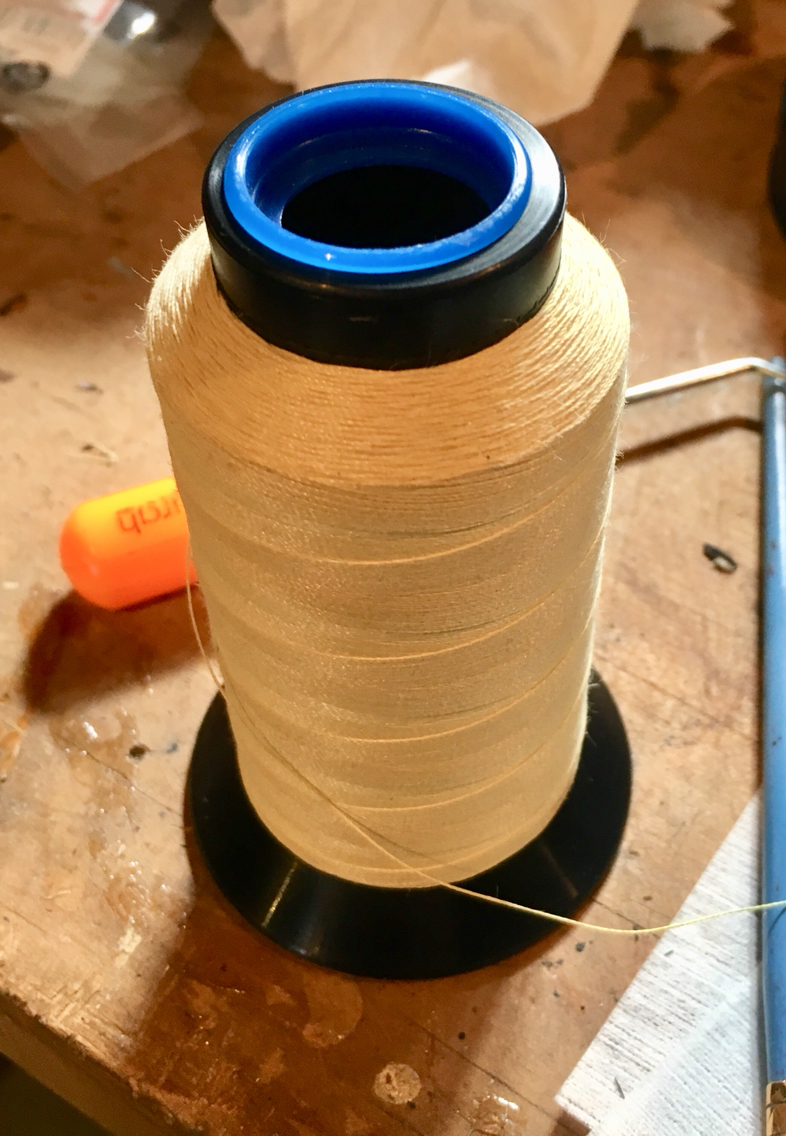
And i made up a spring wind up tool w the Kevlar. This stuff comes in really handy when you need a thin thread that is virtually unbreakable.
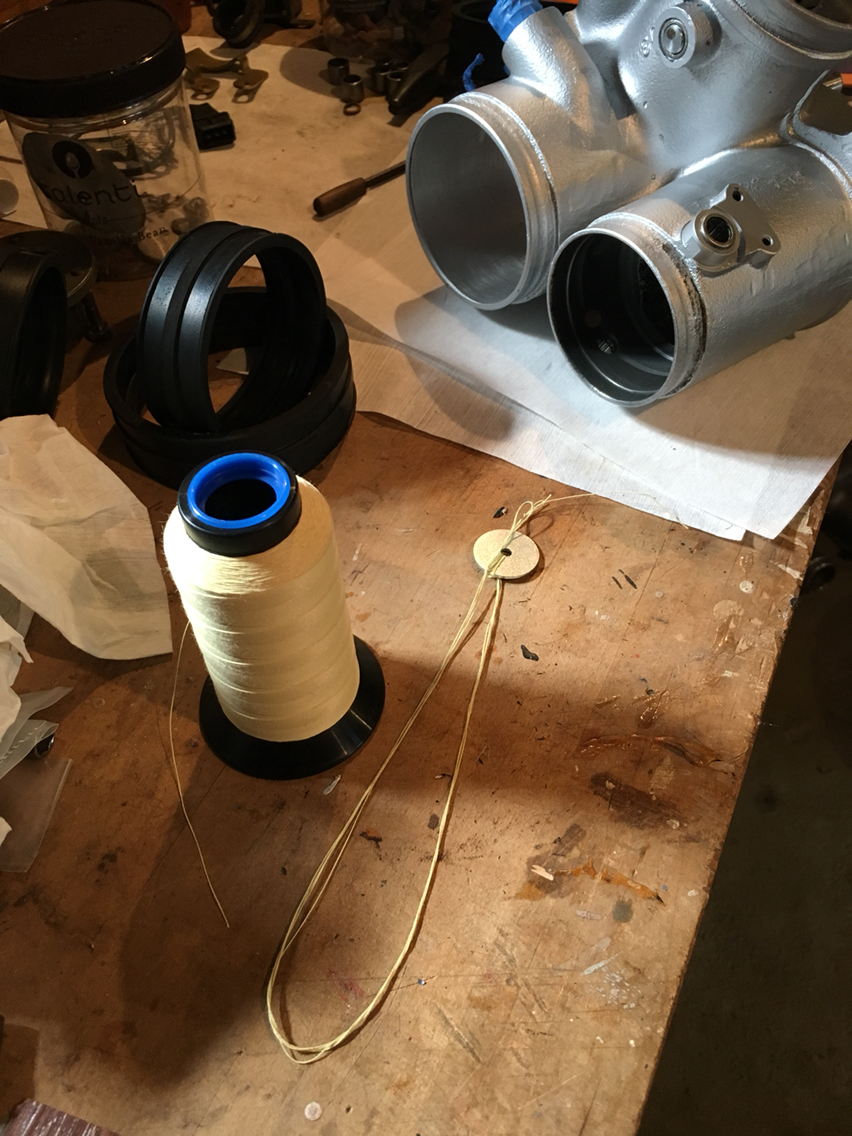
And then wound it around and hooked it to the spring...
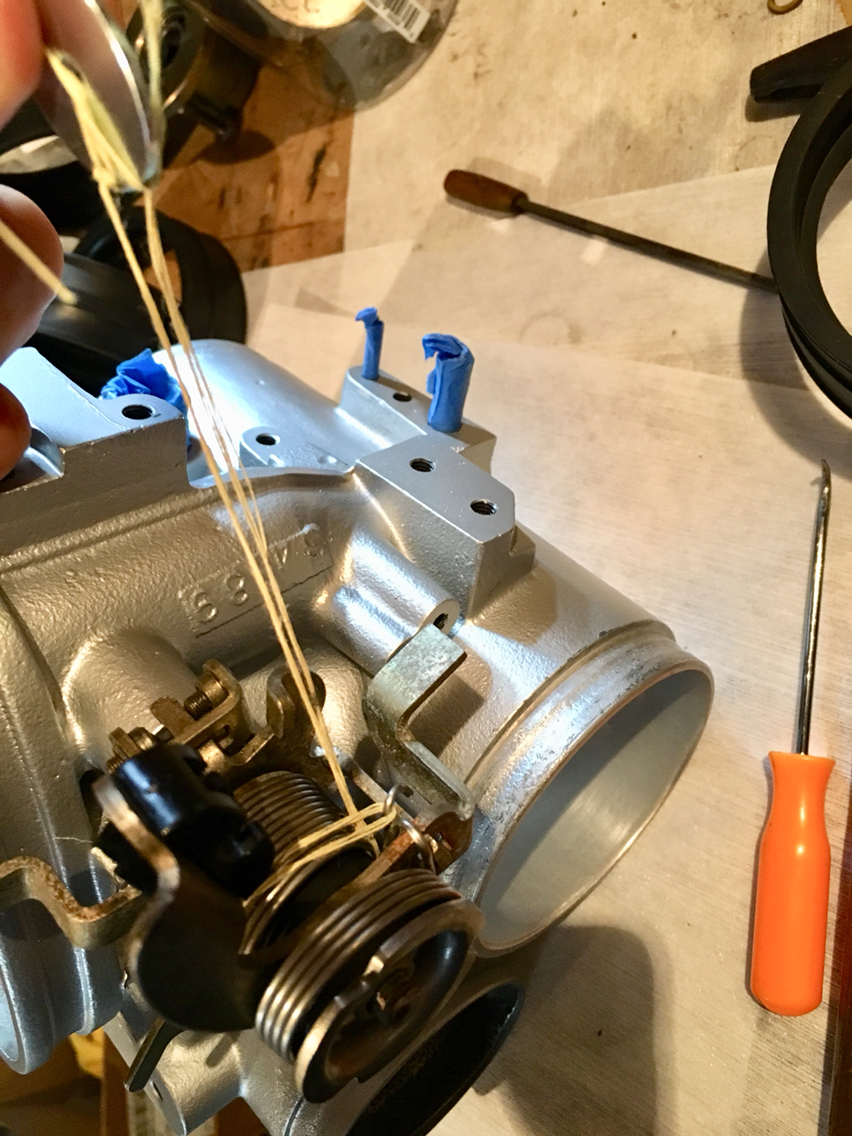
And then with my seal pick, i ran the spring around to the end, where the spring needs to go under the assembly, held it tight with the thread, and the was able to grab it again with the pick from underneath and pop...into place.
I checked the tension against another throttle body that i have...and we are all good in the hood.
This guy slips in. You have to be careful to not tear the seals in the bearings when this gets inserted. There are very fine lips on the seals, which is the failure point for the vacuum, btw...and the channels cut for the retainer clips can grab on those lips and you've got a problem.
And in she went.
Next up is the tricky part. And the only part where you can get hurt. So be careful. I typically don't do anything with springs under tension. I don't like the idea of losing fingers, arms, or other appendages. However, these are relatively captive unless they break. And they are small enough where you are only going to lose an eye, but will likely retain fingers. So we are good to go...
Had one taken pictures prior to starting , one would have an idea of where the springs were attached. That said, the photos don't tell you how much spring windup there is. You will have had to have taken notes. Go back to the previous picture. The outer heavy looking spring goes around and snaps into place. Easy enough. The spring in the middle...the one that is the wide one with a lot of spring...that's your main throttle return spring. And if that's not wound properly, you will have a stuck throttle at some point. So that one needs to go around once until it hooks under tension...and then all the way around once more, so it's under A LOT more tension. Which is a real pain in the ***...
Anyone that has a better way to do this, please chime in. But in my case, what i did, was improvise a solution.
I have seal picks, that i used to hook onto the spring, but then you can't really wind the thing around and then under itself with a big tool, so. You need a way to hold it....
So out comes my favorite material, and how fitting for this project...Kevlar.
And i made up a spring wind up tool w the Kevlar. This stuff comes in really handy when you need a thin thread that is virtually unbreakable.
And then wound it around and hooked it to the spring...
And then with my seal pick, i ran the spring around to the end, where the spring needs to go under the assembly, held it tight with the thread, and the was able to grab it again with the pick from underneath and pop...into place.
I checked the tension against another throttle body that i have...and we are all good in the hood.
08-26-2018, 03:16 PM
#158
Race Car
Thread Starter
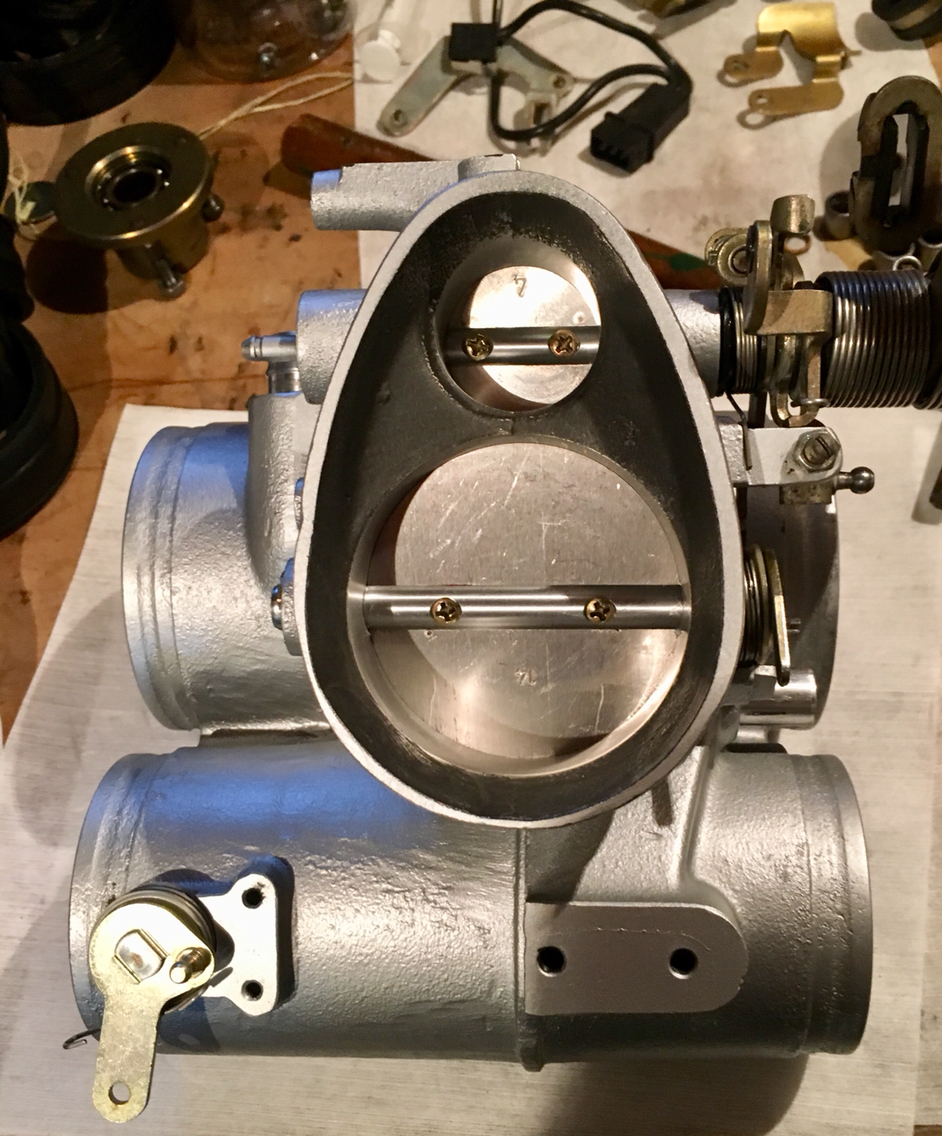
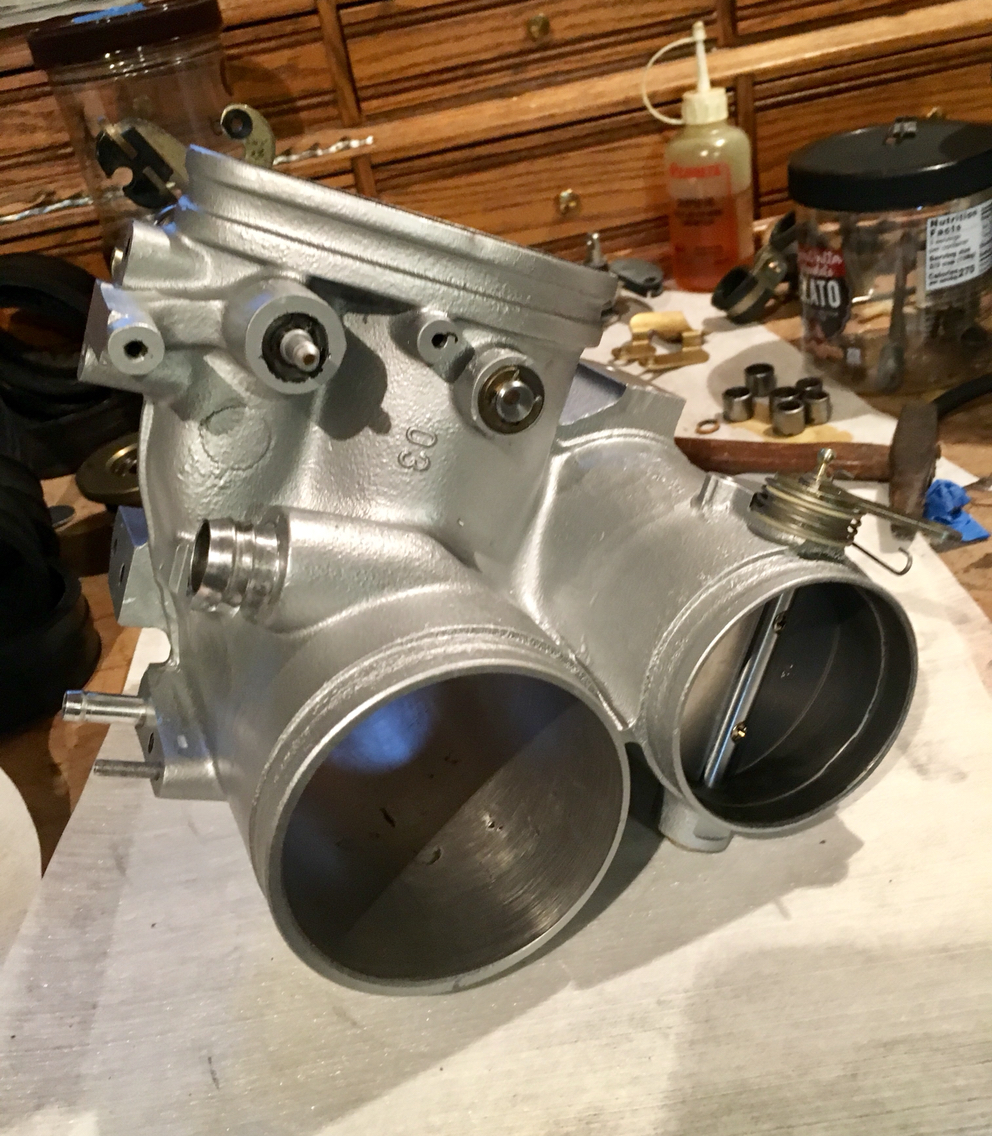
I then did the resonance flap assembly, and on to the plenum flaps...
First off...the flap slips into a slot on the shaft, and then secondly, you screw in the screws...and the trick here is two-fold. You want to get the screws in, tighten them up, loosen them, wiggle the flap into place, tighten again, etc, till you have it right. Then you want to pull one screw at a time, and give them some red lock tight. And then, since I'm paranoid, i don't want to rely on lock tight to hold these in, cuz if one comes out, there goes the motor. So later, I'll pinch them in the same way Porsche did at the factory. And there won't be any way for them to back out.
But first, should anyone decide to replace the screws. You'll need the right size. I had read an aweful lot of stuff in other forums that stated the thread size to be m4x0.75 and therefore impossible to find etc. not true on either count. First off, if you can't find an m4x0.75 screw, you are looking in the wrong place. But really, for our purposes...this is moot. Because our plenum flap screws are m4x0.7
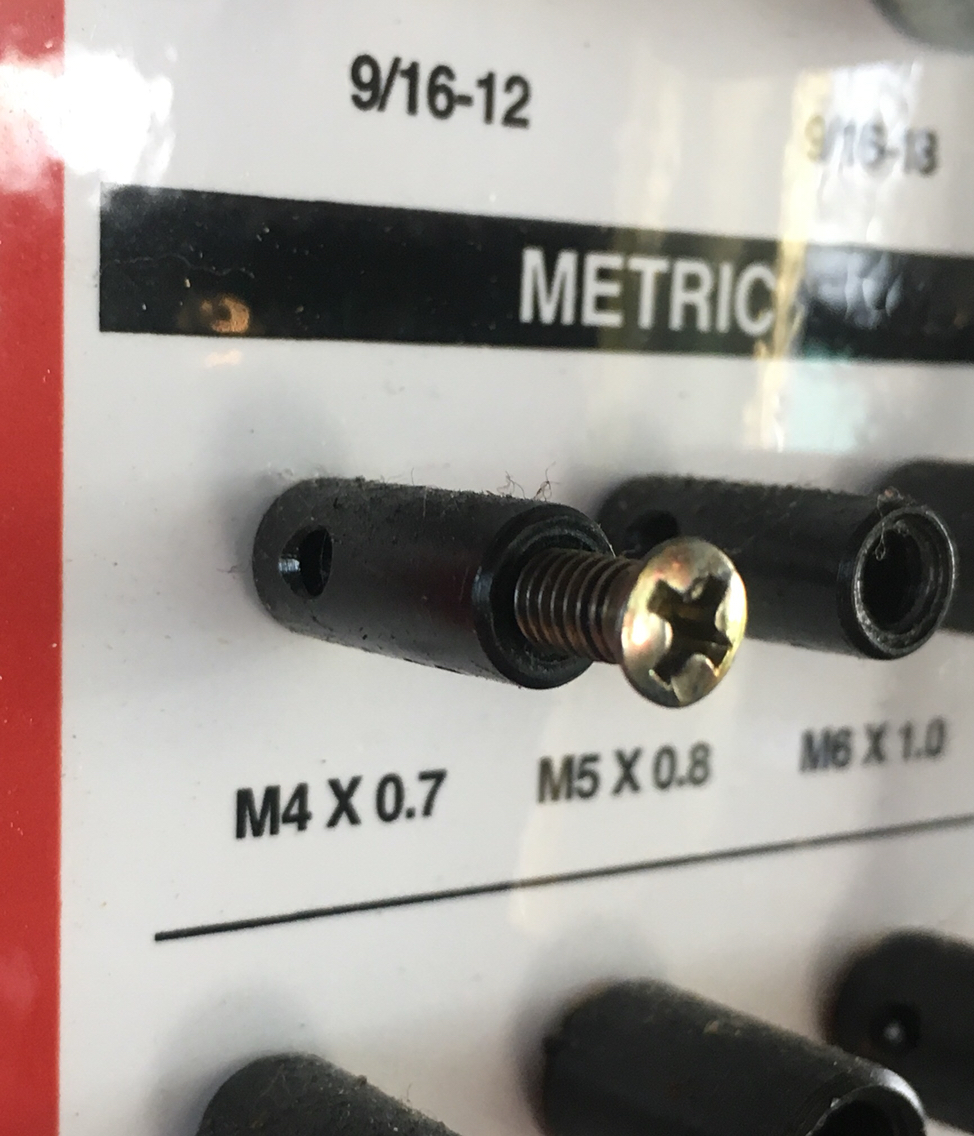
To illustrate...this is m4x0.75
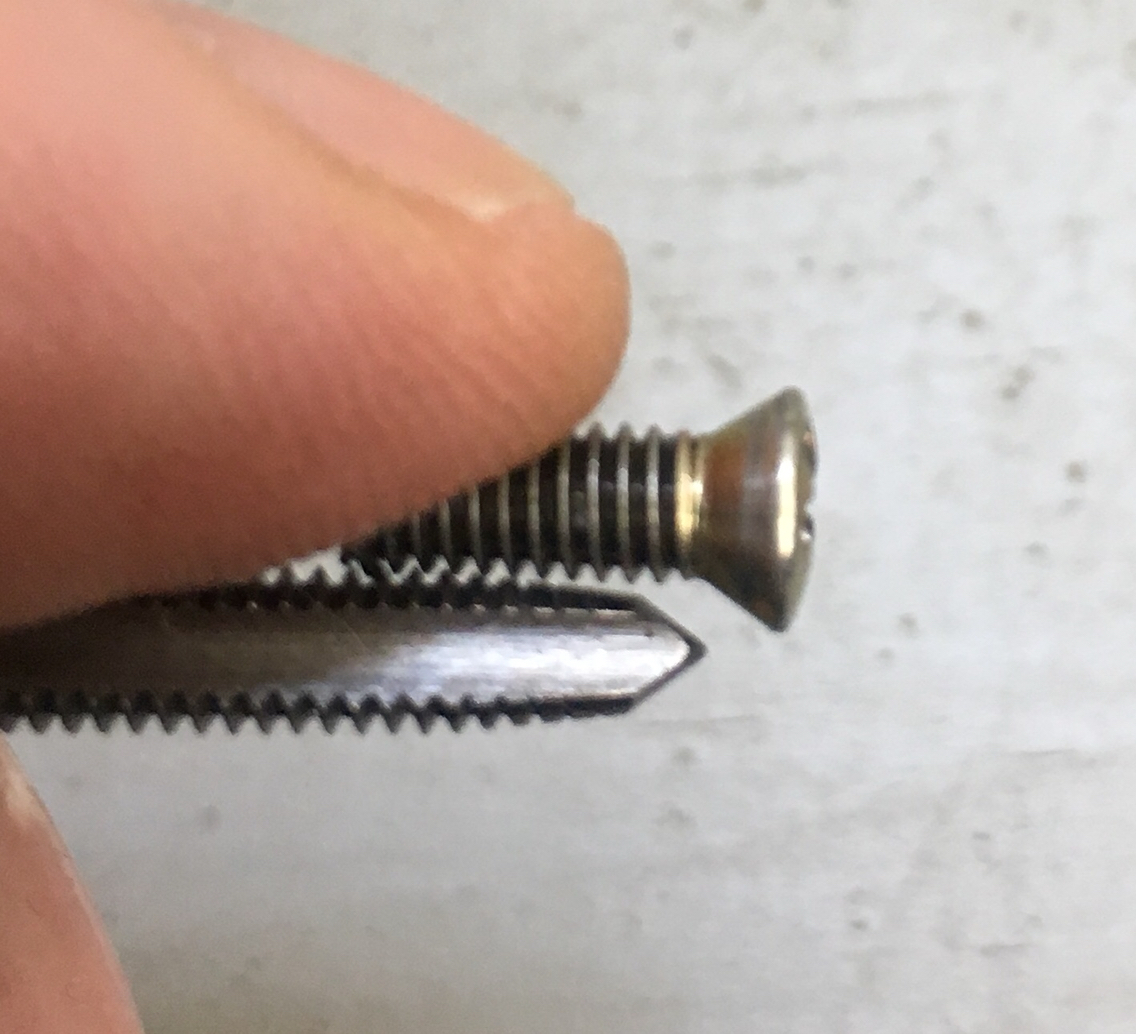
And this is m4x0.7
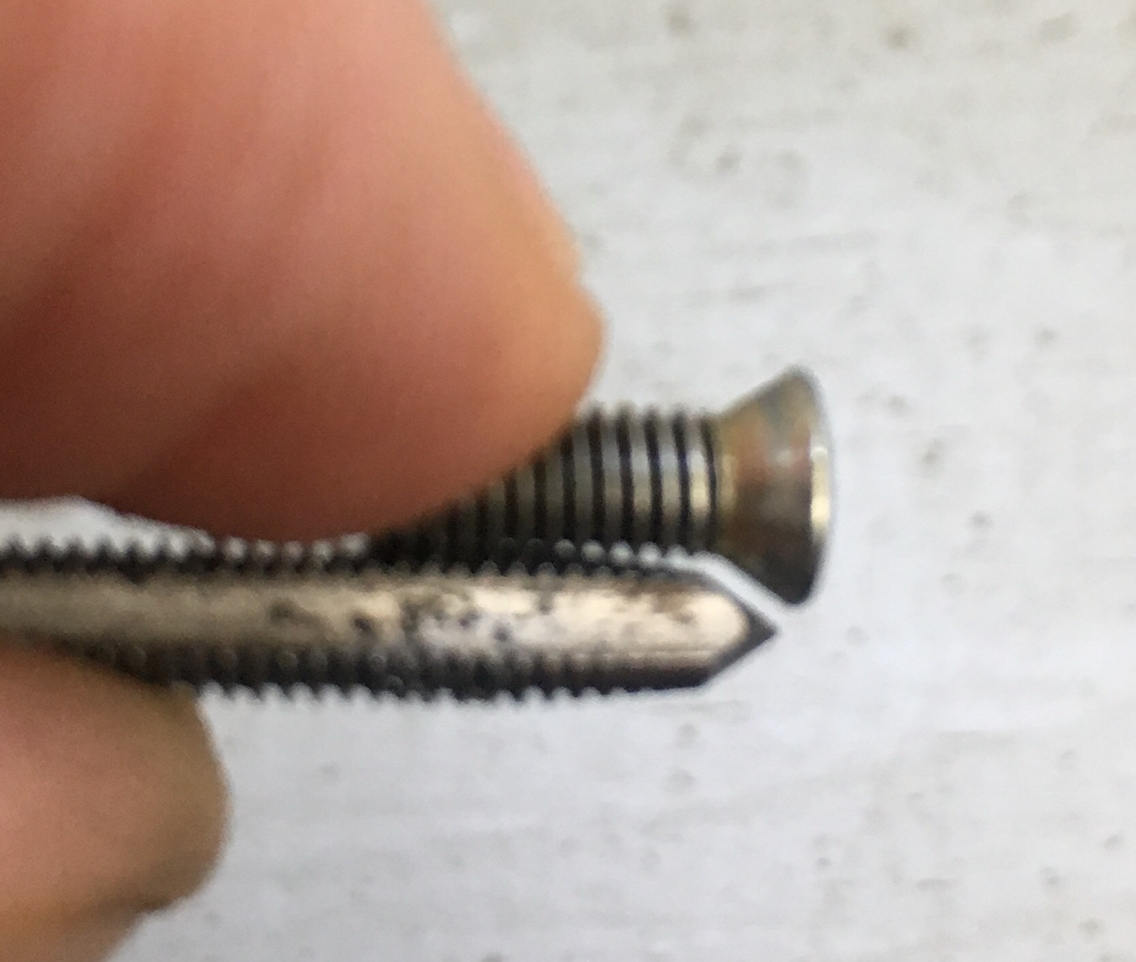
Sorry for the blurr...doing this with my phone and limited time.
On to the resonance flap...

Easy enough. Just make sure it seats well and is not sticky. And tighten it up.
I have not made the pinch tool yet for the screws. I wish someone sold one. And id just do that. But I'll have to be the maverick here and getterdunn...
That's it for today.
Many thanks to Pete for pushing me down the road of replacing the bearings. Important work and discovery....and wouldn't have been done without the push.
That said. I understand why no one does this. Unless you do it yourself, a shop would charge way way way too much to do this type of thing.
I guess maybe if it was just repacking the bearings it'd be ok. But this throttle body is now polished out, and entirely ceramic coated. You wouldn't believe how slippery it is in your hands. Nothing will stick to it. So the insides should stay clean, and the outside will repel dirt grime and water etc...which is fun.
I didn't do a post on the ceramic coating process...my apologies. I didn't even take any pics. It was all done in a clean environment with fresh clean gloves, fresh applicators, etc, and i didn't touch my phone or anything else.
First off...the flap slips into a slot on the shaft, and then secondly, you screw in the screws...and the trick here is two-fold. You want to get the screws in, tighten them up, loosen them, wiggle the flap into place, tighten again, etc, till you have it right. Then you want to pull one screw at a time, and give them some red lock tight. And then, since I'm paranoid, i don't want to rely on lock tight to hold these in, cuz if one comes out, there goes the motor. So later, I'll pinch them in the same way Porsche did at the factory. And there won't be any way for them to back out.
But first, should anyone decide to replace the screws. You'll need the right size. I had read an aweful lot of stuff in other forums that stated the thread size to be m4x0.75 and therefore impossible to find etc. not true on either count. First off, if you can't find an m4x0.75 screw, you are looking in the wrong place. But really, for our purposes...this is moot. Because our plenum flap screws are m4x0.7
To illustrate...this is m4x0.75
And this is m4x0.7
Sorry for the blurr...doing this with my phone and limited time.
On to the resonance flap...
Easy enough. Just make sure it seats well and is not sticky. And tighten it up.
I have not made the pinch tool yet for the screws. I wish someone sold one. And id just do that. But I'll have to be the maverick here and getterdunn...
That's it for today.
Many thanks to Pete for pushing me down the road of replacing the bearings. Important work and discovery....and wouldn't have been done without the push.
That said. I understand why no one does this. Unless you do it yourself, a shop would charge way way way too much to do this type of thing.
I guess maybe if it was just repacking the bearings it'd be ok. But this throttle body is now polished out, and entirely ceramic coated. You wouldn't believe how slippery it is in your hands. Nothing will stick to it. So the insides should stay clean, and the outside will repel dirt grime and water etc...which is fun.
I didn't do a post on the ceramic coating process...my apologies. I didn't even take any pics. It was all done in a clean environment with fresh clean gloves, fresh applicators, etc, and i didn't touch my phone or anything else.
08-26-2018, 03:18 PM
#159
Race Car
Thread Starter
Originally Posted by JohnK964
How do you cut the Kevlar string razor blade?
slick trick in using it though
slick trick in using it though
But the string can be cut with regular scissors...just not as clean a cut.
08-26-2018, 06:51 PM
#160
Race Car
Thread Starter
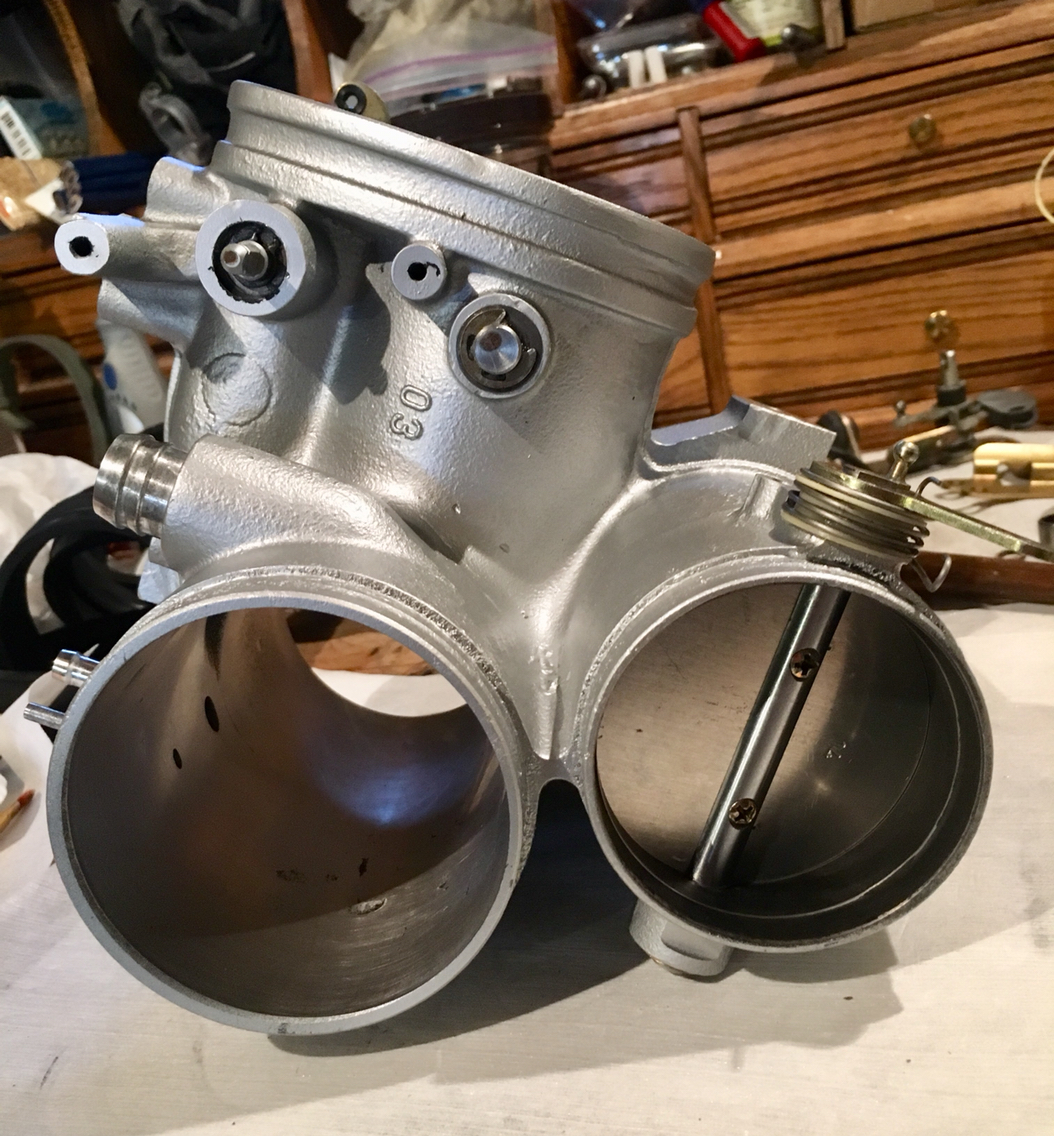
Got back to it and put the plenum flaps in...
Here is where old pics come in handy. Cuz which way were they in???

See the numbers? I would have never known...cuz the male now sense.
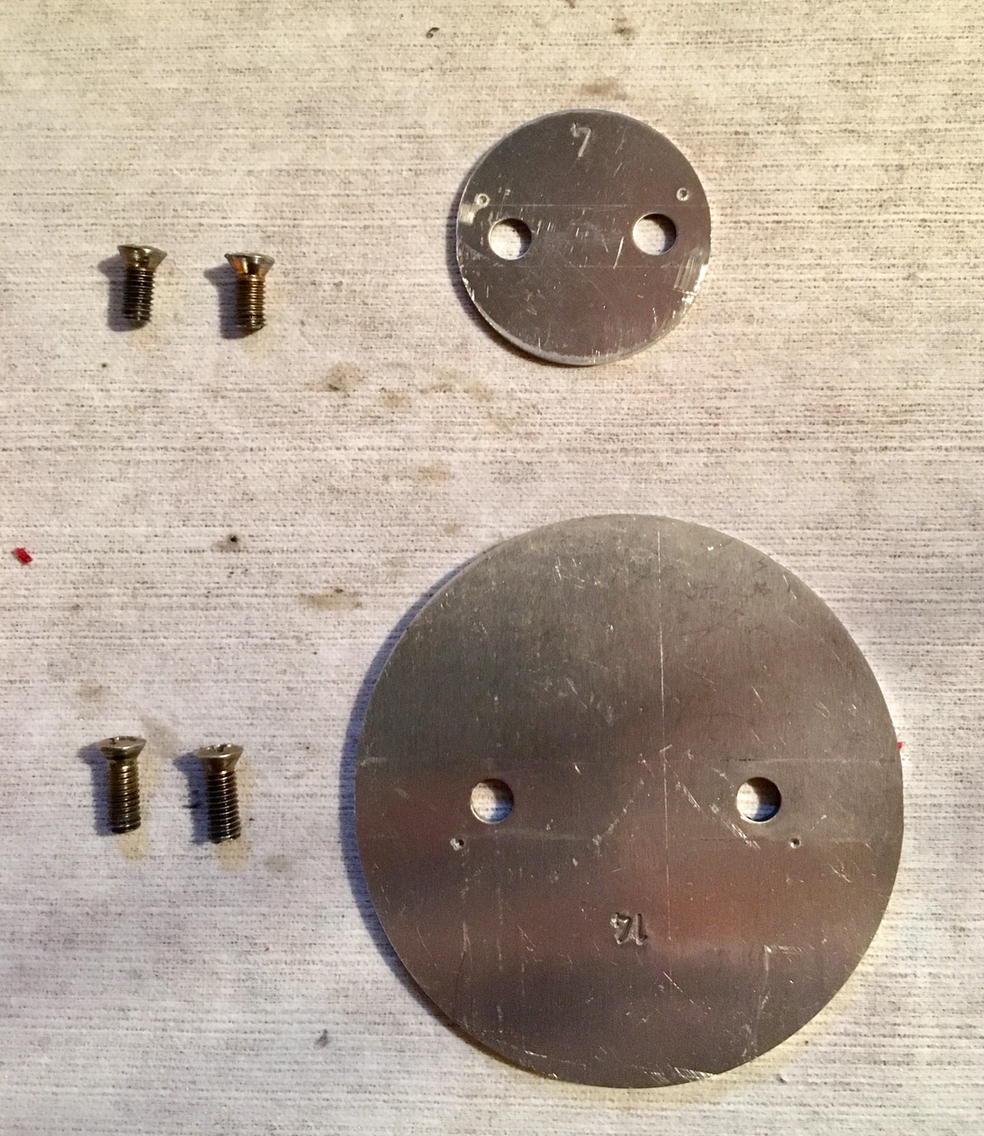
And in they went:
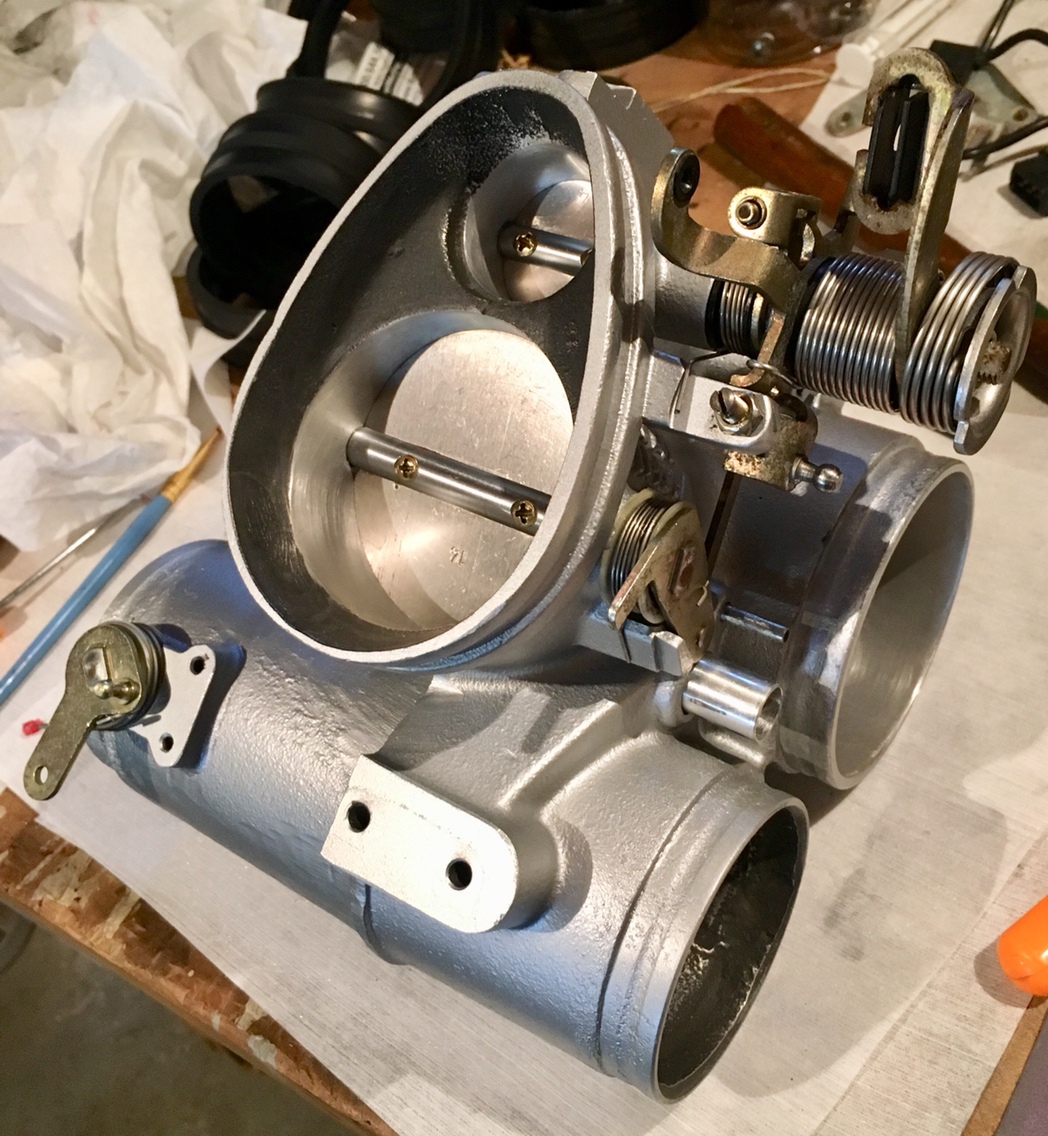
Next up is to make a peening pliar, or rig something up so i can peen the plenum flap screws. I bought a deep jaw pliar today..so I'm either going to modify them to become a peening pliar, or I'll find a small triangle to clamp down against, which should have the same effect...
Then- i took my other throttle body outside and cleaned it. Cuz you know I'm going to do another...Ive thought about selling this intake once it's done and doing it again...we will see.
Here is where old pics come in handy. Cuz which way were they in???
See the numbers? I would have never known...cuz the male now sense.
And in they went:
Next up is to make a peening pliar, or rig something up so i can peen the plenum flap screws. I bought a deep jaw pliar today..so I'm either going to modify them to become a peening pliar, or I'll find a small triangle to clamp down against, which should have the same effect...
Then- i took my other throttle body outside and cleaned it. Cuz you know I'm going to do another...Ive thought about selling this intake once it's done and doing it again...we will see.
08-26-2018, 10:11 PM
#161
All the Thanks goes to you for not only taking the unknown but properly documenting it as well! Great result. Might just have to buy it if you do sell it cause I�ll never have the time to do it myself.
Goid trick with the string as well.
Keep it up.
Pete
Goid trick with the string as well.
Keep it up.
Pete
08-26-2018, 11:58 PM
#162
Burning Brakes
I for one would be interested in seeing this process on a composite intake. 
Think I’ll work on getting prepped for that then.
Think I’ll work on getting prepped for that then.
08-27-2018, 12:08 AM
#163
Race Car
Thread Starter
When i eventually get mine out of my car...I'll be tearing into that one as well. I definitely want to see what the differences are btw the early and late throttle bodies.
If anyone does it before me, feel free to hijack this thread and toss it in!
If anyone does it before me, feel free to hijack this thread and toss it in!
08-28-2018, 12:10 AM
#164
Race Car
Thread Starter
I just came across Jeff's video of the Run to Marblehead 2017...
So while I'm tinkering in the basement...this should entertain a bit. My car got a little play..it's the one w the yellow headlights...
Enjoy. I'll be back at it soon.
Need to ceramic coat the hoses and get the rearward mess back together. Tool for peening - or rather, the one I'll use for peening, arrives tomorrow. Not quite sure if it'll get into the little plenum...but we will see.
08-28-2018, 08:30 PM
#165
Race Car
Thread Starter
New tool arrived today. I figured i could peen the plenum screws with a pair of vice grips, but the ones i have don't have the right shaped jaws...sooooo
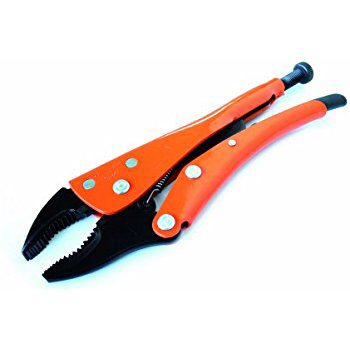
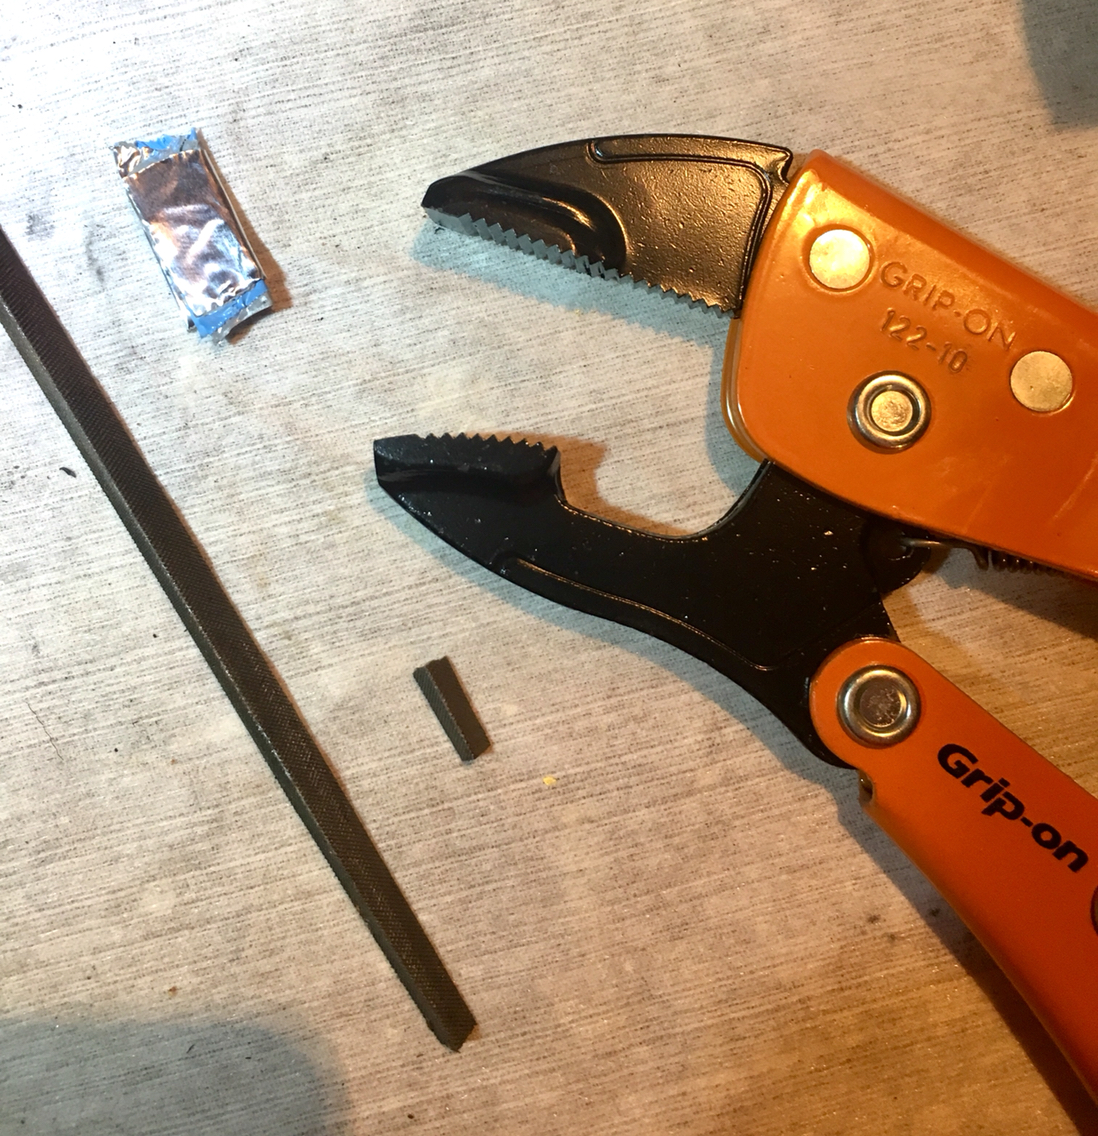
Grip-on pliers are very good. Don't cost much. And....they are orange. How much cooler could they get.
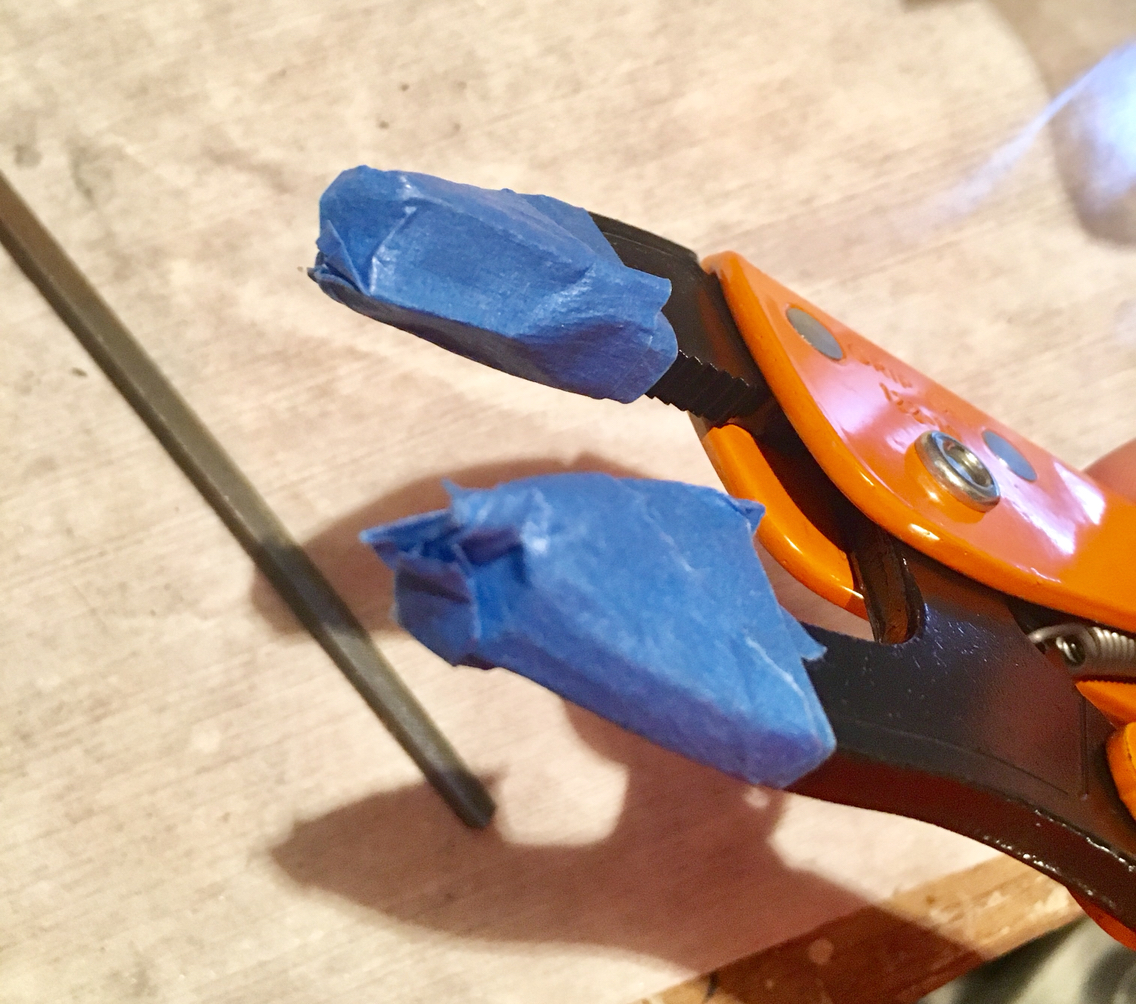
So as to not have to destroy a brand new set of vise grips, i figured what i would do, is protect the one jaw and the head of the screw, by padding it with aluminum tape held on by blue tape...
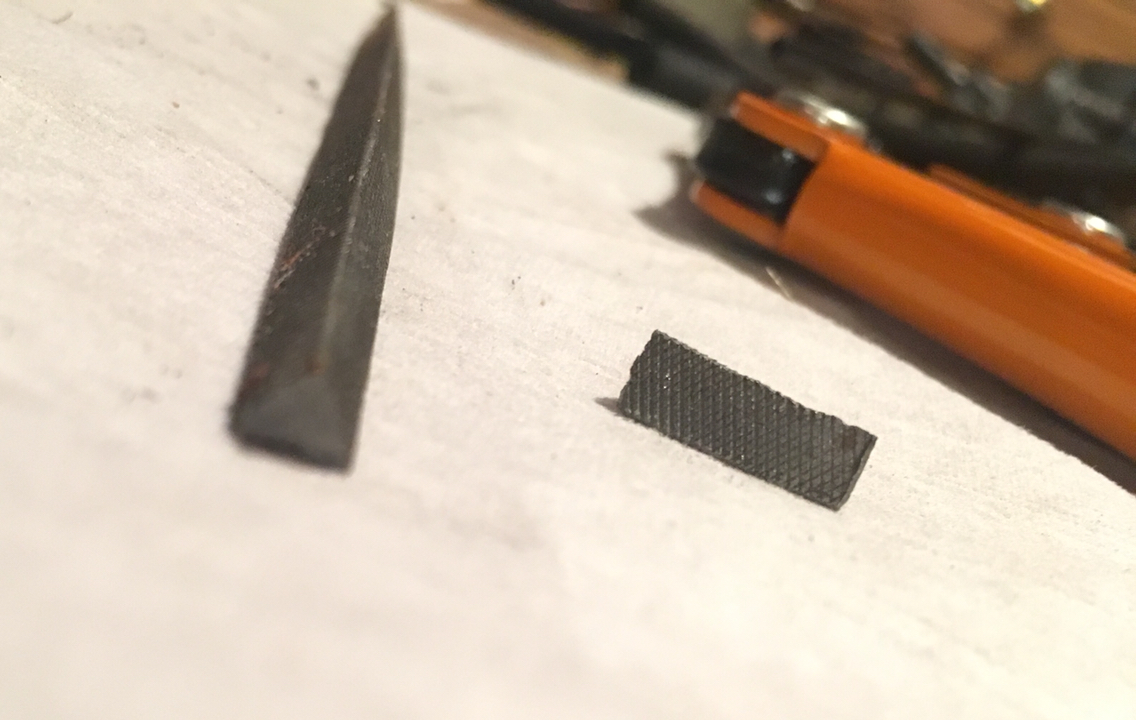
And then for the peening side, i took a triangular profiled file, and broke off the small end. The file metal, being extremely hard, is incredibly brittle. So i clamped the file in a vice, tapped it with a ball-peen hammer, and crack. I have my bit.
Then i taped the pad to one side and the triangle bit to the other...
Carefully lined it up on the screw...
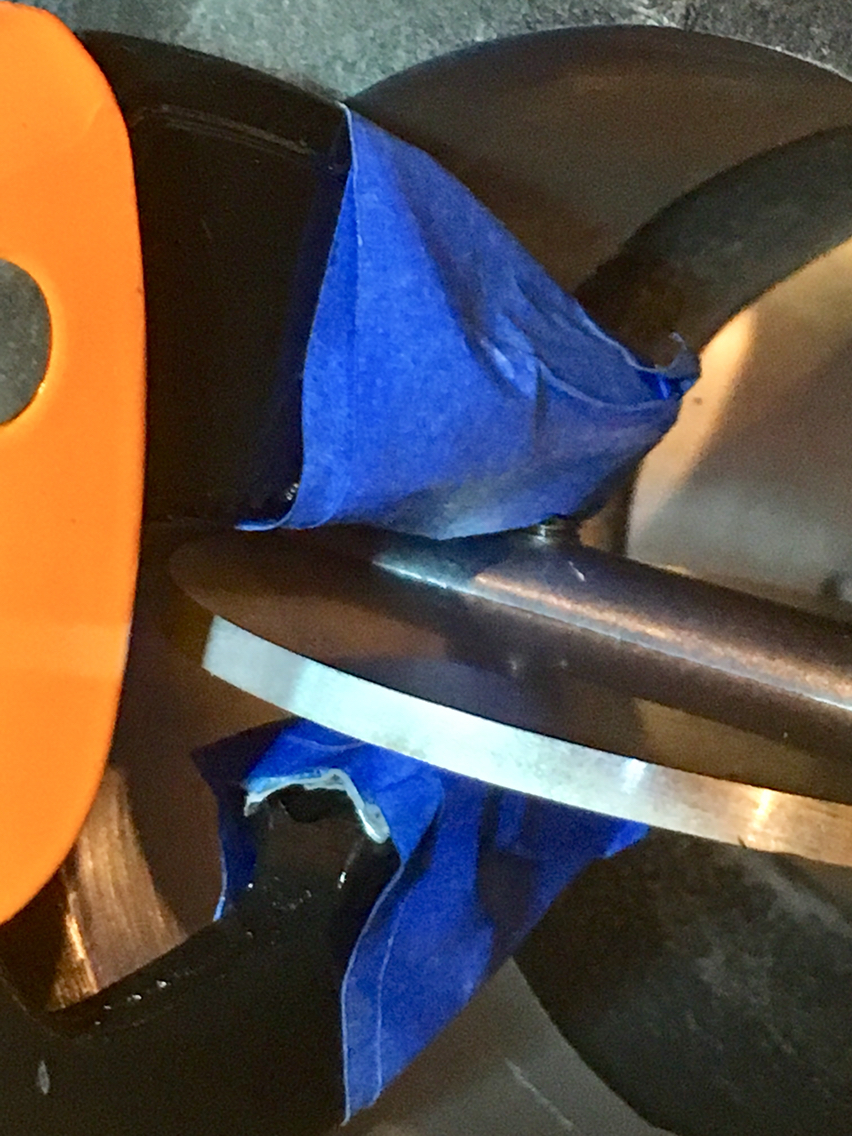
Squooooooze....
And done.
I then repeated on the remaining.
But the little plenum, the jaws of the pliers don't fit in the hole...so i tried a pair of needle nose vice grips, which seemed to work, but my eye sight is failing fast as i age...so after the peening, i tapped a screw driver blade into the threads, just on the little plenum. For good measure. Must be careful to not hammer on the threads here. It's not necessary, and you don't want to damage the bearings. The metal of the screw is very soft. So a light tap is all you need.
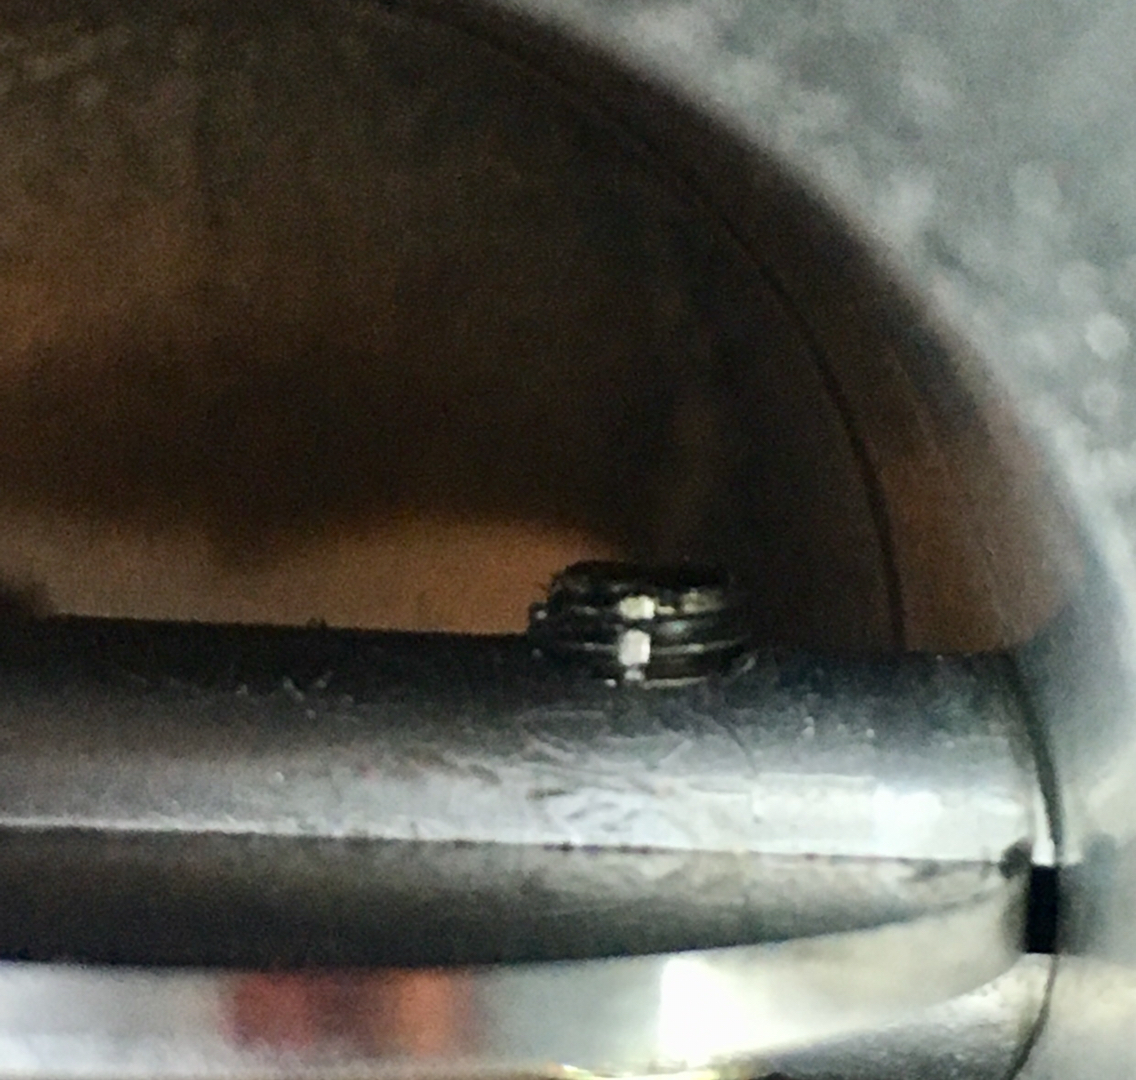
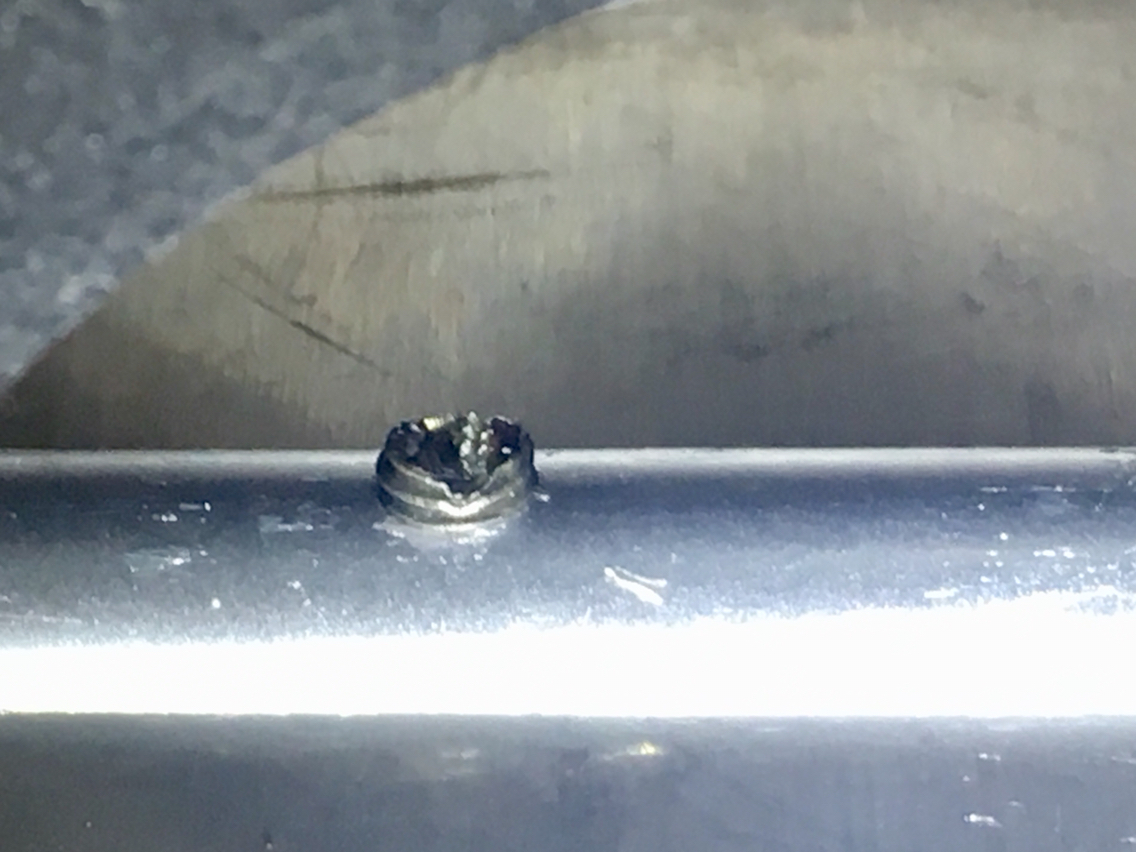
So we are good. The screws are in with red lock tite, and for good measure, properly peened as per the way Porsche installed them.
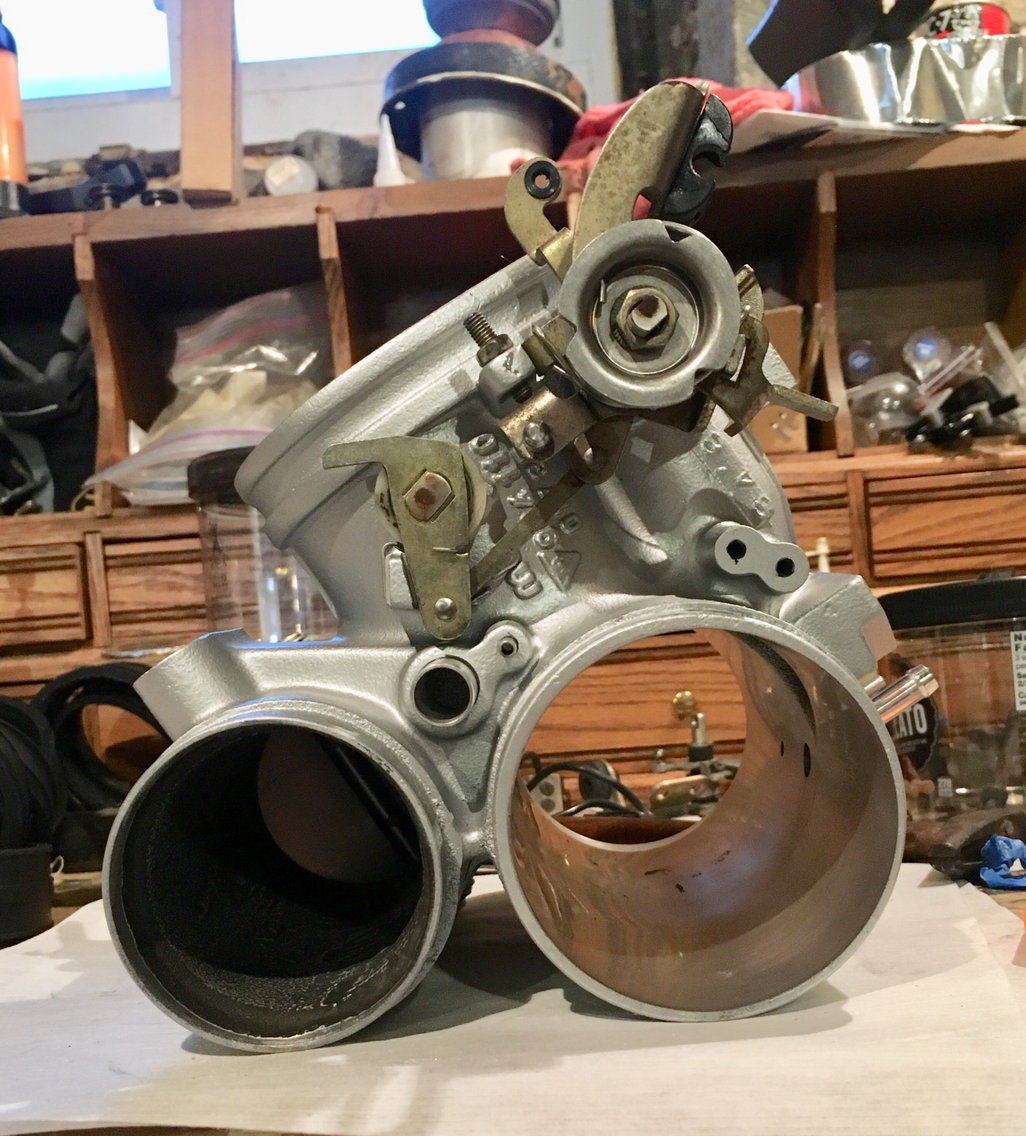
And the throttle body is done. Time to move on to the manifolds and i am almost ready to reassemble the hoses.
Doing something no one has ever done, is kinda fun. Learning a lot and making good progress.
Grip-on pliers are very good. Don't cost much. And....they are orange. How much cooler could they get.
So as to not have to destroy a brand new set of vise grips, i figured what i would do, is protect the one jaw and the head of the screw, by padding it with aluminum tape held on by blue tape...
And then for the peening side, i took a triangular profiled file, and broke off the small end. The file metal, being extremely hard, is incredibly brittle. So i clamped the file in a vice, tapped it with a ball-peen hammer, and crack. I have my bit.
Then i taped the pad to one side and the triangle bit to the other...
Carefully lined it up on the screw...
Squooooooze....
And done.
I then repeated on the remaining.
But the little plenum, the jaws of the pliers don't fit in the hole...so i tried a pair of needle nose vice grips, which seemed to work, but my eye sight is failing fast as i age...so after the peening, i tapped a screw driver blade into the threads, just on the little plenum. For good measure. Must be careful to not hammer on the threads here. It's not necessary, and you don't want to damage the bearings. The metal of the screw is very soft. So a light tap is all you need.
So we are good. The screws are in with red lock tite, and for good measure, properly peened as per the way Porsche installed them.
And the throttle body is done. Time to move on to the manifolds and i am almost ready to reassemble the hoses.
Doing something no one has ever done, is kinda fun. Learning a lot and making good progress.