When you click on links to various merchants on this site and make a purchase, this can result in this site earning a commission. Affiliate programs and affiliations include, but are not limited to, the eBay Partner Network.
The last time my car broke, the CV joint shattered as I backed out my own driveway. Yesterday, my car wouldn't start in the garage due to frayed injector wires. At least it has the courtesy to break down at home.
The injector connectors are just like the speed/ref connectors. They both have wires encased in hard epoxy under the boots, which causes the wires to eventually fray. And since all 4 injectors are driven off the same basic signals, a short on any one connector effectively shorts out all 4 connectors (when the DME is connected) -- like one bad Christmas tree bulb taking out the whole string.
I was able to patch the bad one for now using connectors from an old group buy on RL, but am mulling options for replacing them all. I actually have the LR injector/knock sensor harness, but am mulling making my own by just cutting off and replacing the injector section where it branches out of the main harness under the hood. Open to ideas and suggestions, including for a good sleeve/sheath that can take the heat without looking terrible...
I'd say install the LR harness. But if you either wanted to make your own or need to cover other wires..etc you can use high temperature coated fiberglass sleeving from Mcmaster Carr. Rated to 1200F. It has some expandability making it easy to work with and is black so it doesn't stick out like a sore thumb. Then for the ends use heat shrink to ensure you have a tidy setup.
If you need new connectors and pins they are AMP junior timer series which are technically also compatible with junior power timer series plug except power timer uses a weather tight plug in for the back pin.
Definitely post up the part info. I actually have everything I need a couple times over though. There was a group buy on rennlist several years ago with all the connectors on the harness, which I've used sparingly over the years on things like this. I also bought the LR injector/knock sub-harness a while ago, knowing my injector wires were brittle. As for crimpers, I have a good collection of crimpers designed for specific pins and, as Spencer says, the .093 Molex worked perfectly. Made a factory-looking crimp for my patch repair this morning. I just need to find a functional sleeve that also looks inconspicuous. Will check out McMaster for sure, that's for that suggestion.
Those plugs are generic bosch injector plugs. I replaced mine last year same problem.
Should mention, when they touch while running, it actually shuts the car off. and if they're touching while starting, it won't start.
You got that right. Even though the DME uses one pin to pulse injectors 1 and 2, and another pin to pulse injectors 3 and 4, those two pins (i.e., DME14 and DME15) are connected together inside the DME. So, if you short any of the injector connectors, they are all get shorted at the same time, and none of the injectors work. If you unplug the main connector at the DME, however, a short on one connector will only short its paired connector(i.e., 1 and 2 will short as a pair, and 3 and 4 will short as a pair). Doing that actually helped me isolate the bad connector.
I imagine they used two pins for one signal like that to reduce the current on each wire, though that's just a guess.
I did the LED test. un plugged 1 wire and put an LED in the pins. I noticed it would pulse but so faint.
Then i wondered, why is it so faint? there's power? not enough?
Then i happened to jiggle the harness a little and it pulsed brightly. Thats when i got my knife and cut the harness near the plug and saw all the frayed wires. That night i ordered new plugs, got some harness shielding ect and and re built it.
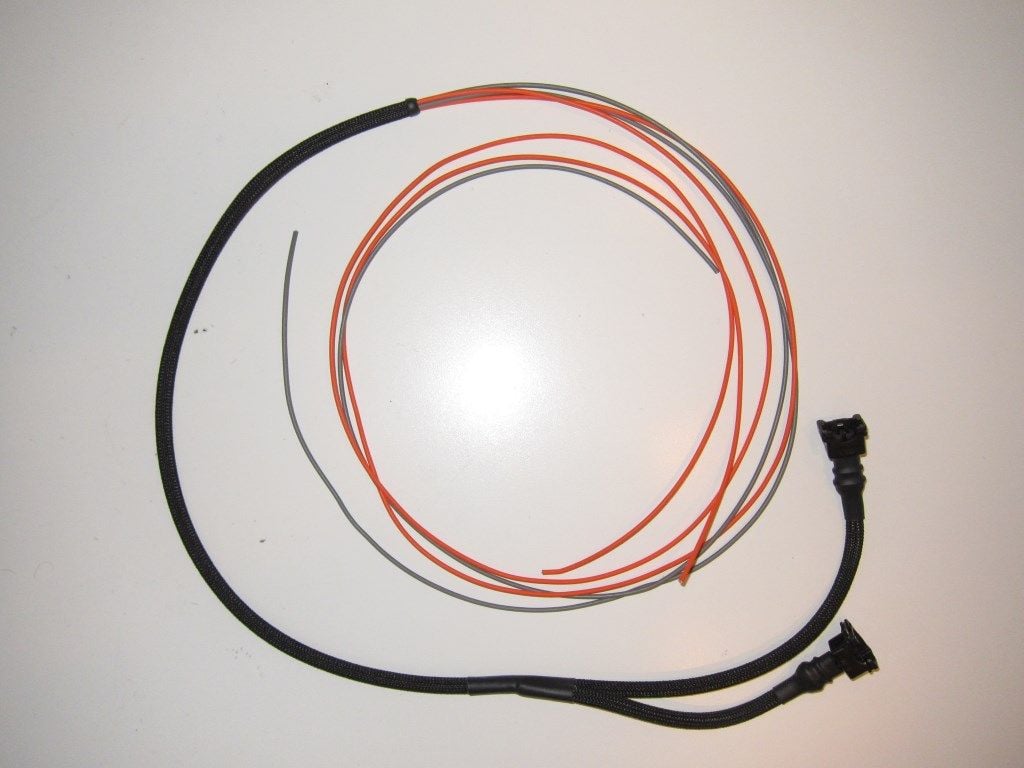
For the sleeving I used Techflex Insultherm Fiberglass (1/4" size) and double-walled adhesive heat shrink tubing. I used the latter to make "boots" that provide strain relief between the sleeving and the connector bodies.
Also, the crimp tools I referenced in my post were all too expensive for my liking, so I ended up using the Waytek 560 with the 4300-3146 die set.
You're welcome to borrow my crimpers if you like. I probably also have some extra wire and sleeving laying around.
Great info, thanks! I order from Mouser all the time. They must ship from nearby, since I get just about everything the next day. For what it's worth, I used HTR 1031E crimpers, made for the .093 Molex, and got a factory-looking crimp on those pins. My crimper is apparently obsolete now though...
Will "B Style" crimpers like these give a factory like crimp?
Hard to tell from the picture, but unlikely. The JT contacts have two sets of tabs, one for the wire strands and one for the insulation and/or wire seal. These types of crimpers are designed to crimp a single set of tabs at a time--meaning you crimp the wire strands using one size and then crimp the insulation/seal using another. The trick is, the tool is frequently wider than the tabs for the wire strands, which causes the contact to buckle when you apply enough pressure to crimp the strands.
Most of the tools I've had success with crimp both the wire and insulation at the same time. That said, it is frequently handy to have a tool like this around to cinch up the insulation crimp in the case where the dual crimpers don't quite get it tight enough.

 07-05-2016, 03:58 PM