When you click on links to various merchants on this site and make a purchase, this can result in this site earning a commission. Affiliate programs and affiliations include, but are not limited to, the eBay Partner Network.
TIAL updated their Garrett mount to clear the steering knuckle. This looks just like TIAL's turbo/engine mount? Either way, this is easier than the OE fab work.
Originally Posted by gpr8er
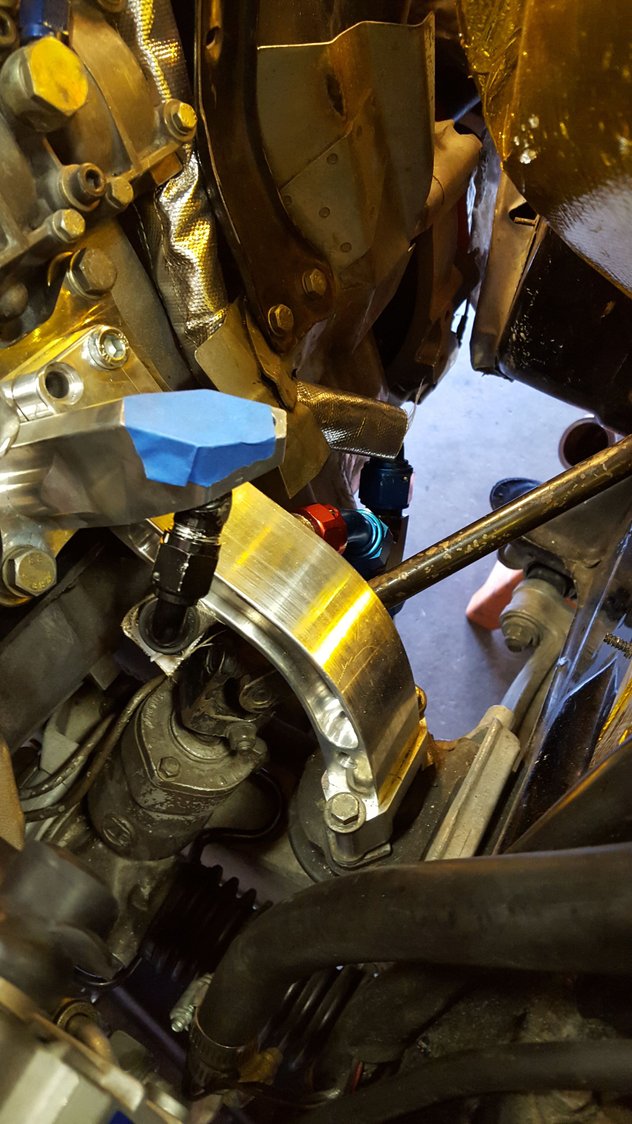
I went with the Broadfoot mount which has a few issues sorry to say first it didn't clear the steering shaft so I had to space it up and out on the motor with 4 millimeter washers second the drain was quite an improvisation basically I use McLarenos drain setup with some mods
I went with the Broadfoot mount which has a few issues sorry to say first it didn't clear the steering shaft so I had to space it up and out on the motor with 4 millimeter washers second the drain was quite an improvisation basically I use McLarenos drain setup with some mods
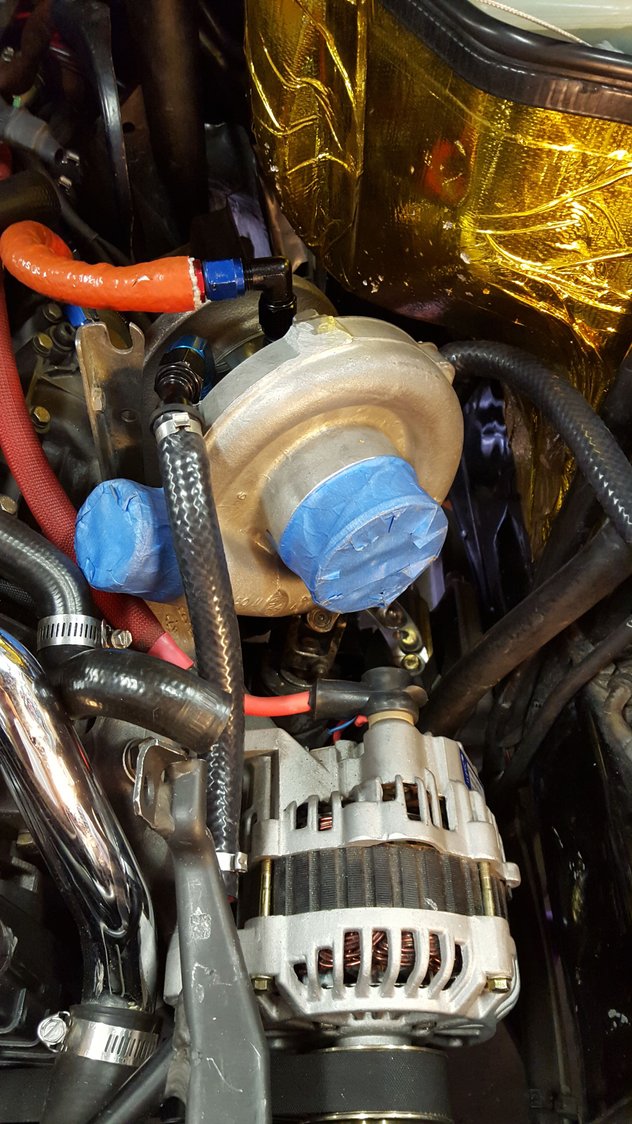
I can't help but notice the wear mark/hole on your AOS heat shield. Mine did the same, courtesy of the 3" down pipe. See picture below. Mine wore clean through the shield. I ended up just modifying the shield by cutting out the corner that sticks out so far and tacking in a patch. It buys a lot of extra space. The shield is now closer to the AOS so maybe a little hotter, but I figure it has to be better than a shield with a big hole in it.
TIAL updated their Garrett mount to clear the steering knuckle. This looks just like TIAL's turbo/engine mount? Either way, this is easier than the OE fab work.
Hard to understand why you would prototype a piece like this see that it doesn't fit and not make corrections
I can't help but notice the wear mark/hole on your AOS heat shield. Mine did the same, courtesy of the 3" down pipe. See picture below. Mine wore clean through the shield. I ended up just modifying the shield by cutting out the corner that sticks out so far and tacking in a patch. It buys a lot of extra space. The shield is now closer to the AOS so maybe a little hotter, but I figure it has to be better than a shield with a big hole in it.
Hadn't really noticed that here's a close up of mine
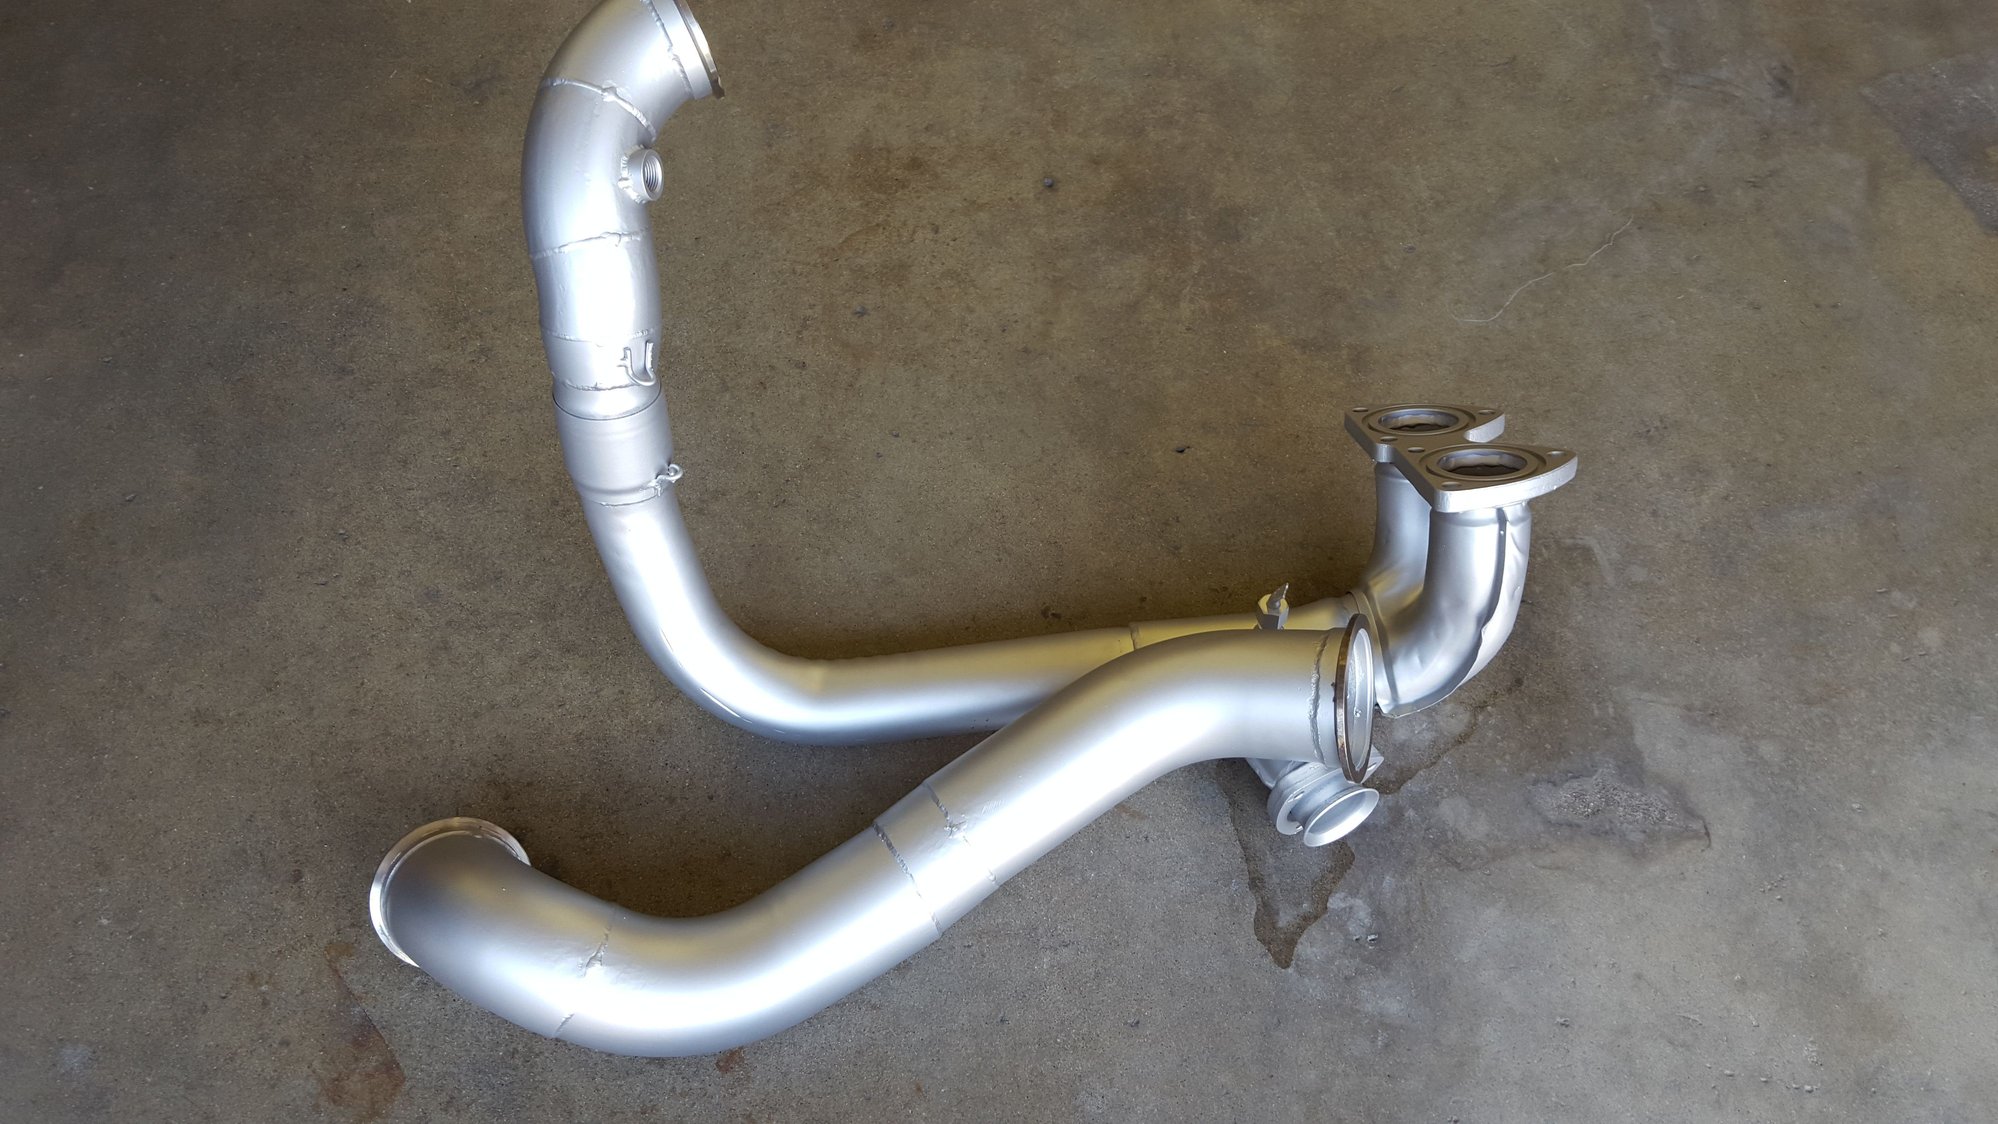
Still waiting for my crossover and downpipe to come back from ceramic coating I doubt I'll use these guys again its been a week and a half
I can't help but notice the wear mark/hole on your AOS heat shield. Mine did the same, courtesy of the 3" down pipe. See picture below. Mine wore clean through the shield. I ended up just modifying the shield by cutting out the corner that sticks out so far and tacking in a patch. It buys a lot of extra space. The shield is now closer to the AOS so maybe a little hotter, but I figure it has to be better than a shield with a big hole in it.
that turned out great! nice job.
Originally Posted by gpr8er
Hard to understand why you would prototype a piece like this see that it doesn't fit and not make corrections
i wonder if maybe the prototype was made with brand new engine mounts of whatever brand, at full height the arm perhaps clears but with settled/collapsed mounts perhaps that is where it contacts?
i wonder if maybe the prototype was made with brand new engine mounts of whatever brand, at full height the arm perhaps clears but with settled/collapsed mounts perhaps that is where it contacts?
Interesting theory but it worked fine with the OE mount, no issues
Back from ceramic coating apparently one thing I didn't know is that this particular coating is an air dry I always thought that these coatings were baked on like powder coating

 08-28-2015, 12:38 AM