
Any DIY for the transmission mount?
 03-25-2014, 06:33 PM
#31
Rennlist Member
3M window quick set polyurethane in tube for standard caulking gun works great. You can buy it at nearly any car parts store. Bought an old mount and cleaned up, applied 3M product and let sit for a few days in the sun. Install as above. Mike
 03-25-2014, 06:40 PM
#32
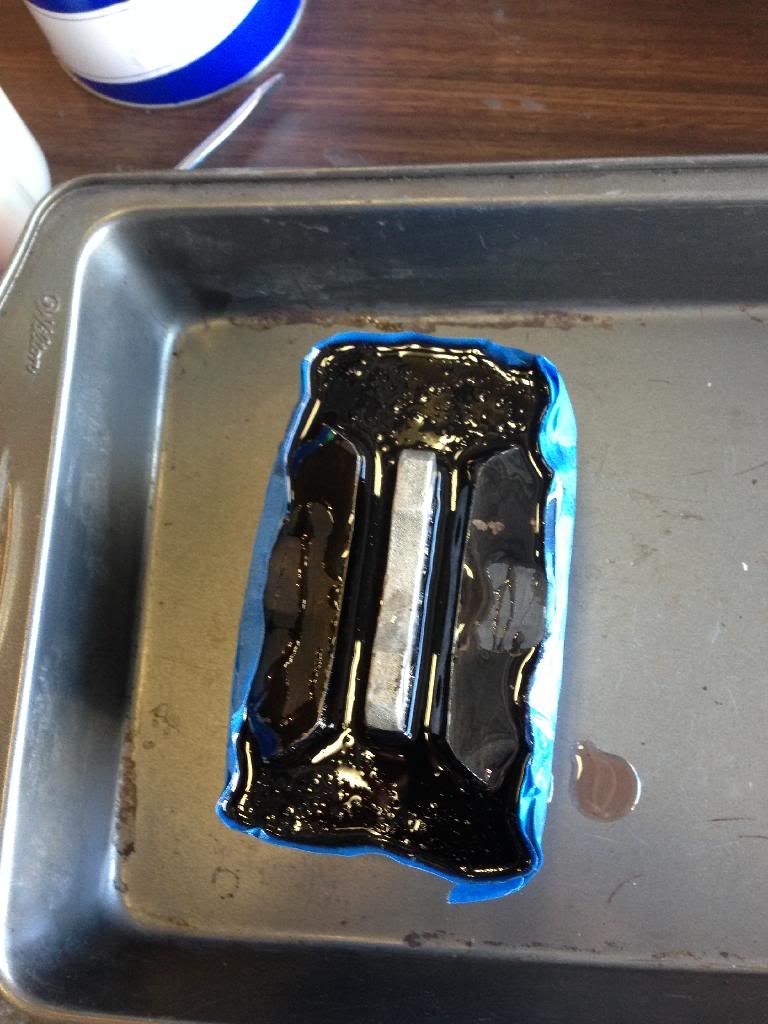
Just did mine using Polyurethane from McMaster-Carr and a spare transaxle mount I picked up online (so I wouldn't have my car down while I waited for the poly to cure):

Now I just have to install it, hopefully the rain will stop so I can get out to the car and finish the task.
Now I just have to install it, hopefully the rain will stop so I can get out to the car and finish the task.
 01-06-2016, 07:21 PM
#35
Rennlist Member
Just did this a few days ago...
Put the back of the car on stands/blocks, as you will remove both rear wheels.
Remove 10mm nuts that hold the fuel filter to the trans x-member.
Put your jack under the transmission and lift slightly to take the weight off the hanger mount.
Using a bunch of extensions and a 13mm socket you can loosen the trans mount hanger nuts from the passenger wheel well.
Use a 1/4" extension or a thin long shank allen key to drive the bolts out of the mount, they can stay in the transmission. Lower the trans all the way, the trans will hang on the torque tube.
17mm socket removes the bolt on either side that holds the transmission crossmember to the car.
Put the jack under the passenger side rear arm/disc/hub and take the strain off the shock. Use 22mm socket to remove lower shock bolt, let the arm down and hang as low as it will go. You can now slide the whole crossmember out through the wheel well.
If you are doing the urethane "mod"...use a LOT of tape on the bottom and sides of the mount, as the urethane WILL leak its way out if you run short.

The following users liked this post:
vacuumnoise (06-13-2023)
01-06-2016, 08:35 PM
#37
Rennlist Member
01-07-2016, 10:03 PM
#38
Rennlist Member
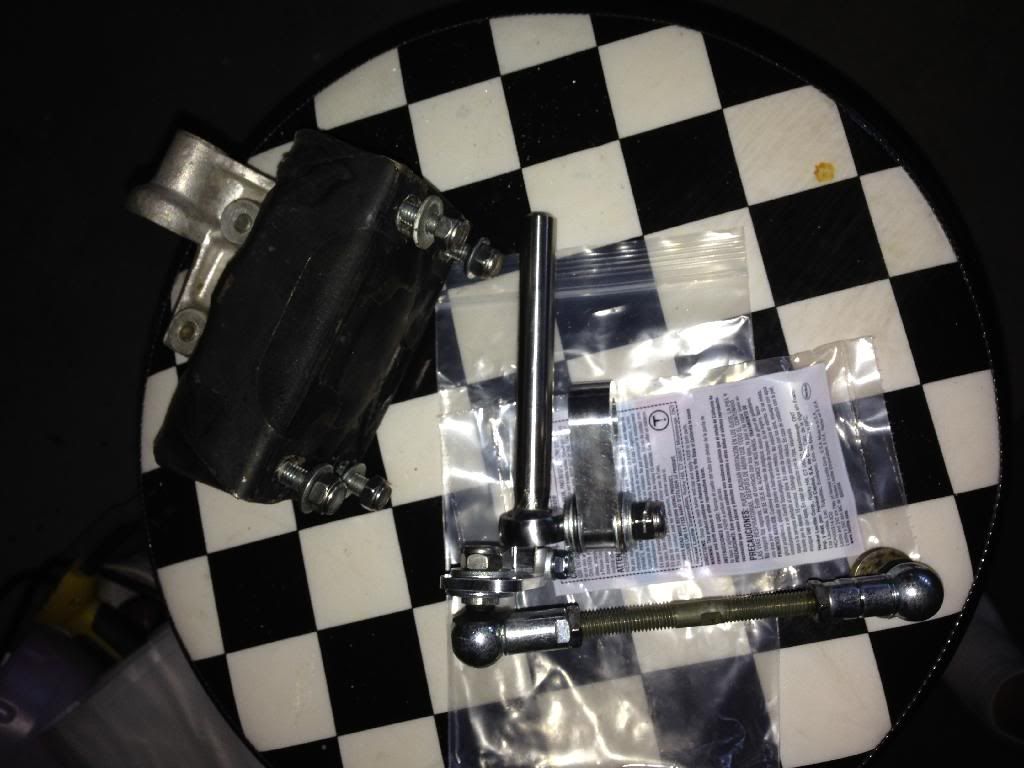
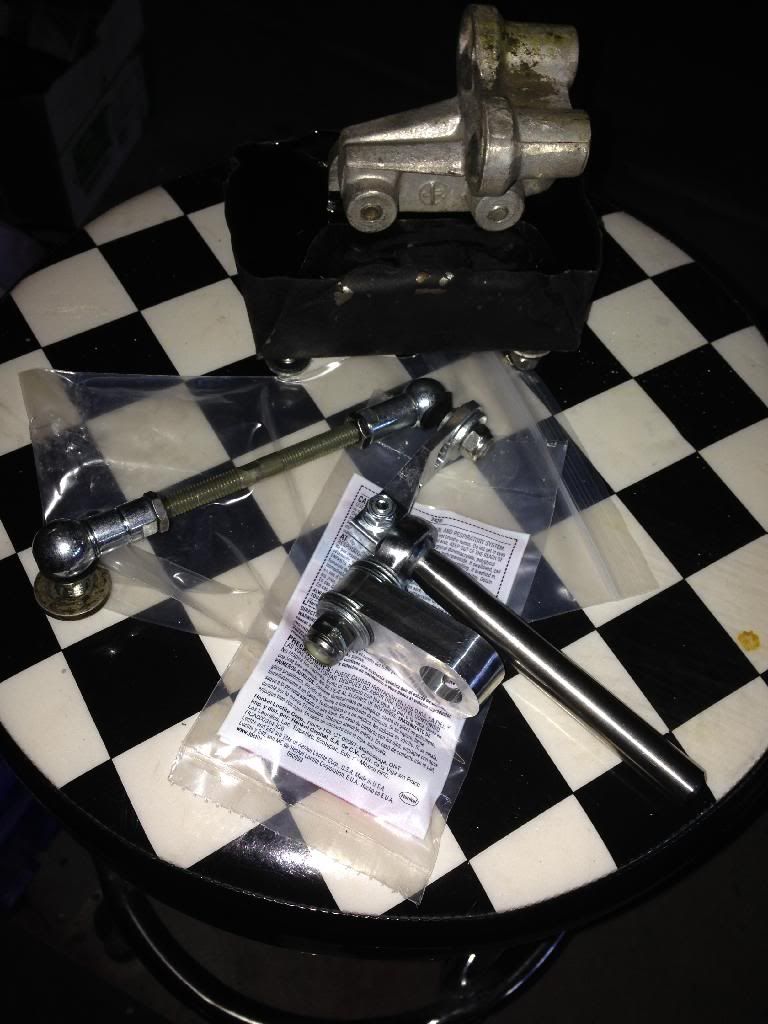
Thanks again. Came right out without much of a fight. Undoing the shock mount was genius. God knows how long it would have taken me to think of that. About the only thing I had to do that you didn't list was remove the pinch bolt that holds the shifter rod to the tranny linkage (the one that's safety-wired in place). I couldn't get one of the long M8 bolts out of the mount otherwise, and the tranny would hang up on it.
About the only thing I had to do that you didn't list was remove the pinch bolt that holds the shifter rod to the tranny linkage (the one that's safety-wired in place). I couldn't get one of the long M8 bolts out of the mount otherwise, and the tranny would hang up on it.
01-03-2017, 11:31 AM
#40
Addict
Rennlist Member
Rennlist Member
Getting ready to do this myself, thanks for the excellent pictures V2.
Two questions:
1) It looks like the mounting holes are going to get filled with urethane, how did you deal with that?
2) How hard/easy is the urethane to work with once it's dried? Can I trim it easily?
Two questions:
1) It looks like the mounting holes are going to get filled with urethane, how did you deal with that?
2) How hard/easy is the urethane to work with once it's dried? Can I trim it easily?
01-03-2017, 12:18 PM
#41
Rainman
Rennlist Member
Rennlist Member
I greased the threads of the 4 mount-to-crossmember bolts and threaded them into the mount before applying the urethane.
This way the bolt holes/threads stay clean.
I didn't have to cut anything but it is firm enough that probably a hacksaw would do the trick.
You'd be there all day with a utility knife.
This way the bolt holes/threads stay clean.
I didn't have to cut anything but it is firm enough that probably a hacksaw would do the trick.
You'd be there all day with a utility knife.
01-03-2017, 12:30 PM
#42
Addict
Rennlist Member
Rennlist Member
Ah ha!
My challenge is that I bought a spare mount to do this offline from Lart but didn't realize that it didn't include the side mounting brackets (my fault/ignorance, not Luis's). I'm not looking to make the mount extremely firm, just tighten it up.
I can apply plenty of urethane for that purpose without the brackets but haven't quite worked out how to get them in place after the fact...
01-03-2017, 03:30 PM
#43
Rennlist Member
Hey Greg, you've probably read all the posts, but in case you haven't, see my video of the 60 vs 80 hardness urethane from McMaster in the thread below:
https://rennlist.com/forums/944-turb...arisons-2.html
I'd do the 60 again without hesitation. The firmer the mount, the louder it is and the more vibration it transmits to the cabin. I did end up trimming it a big with a straight razor blade so it would sit flat against the cross member -- not sure it would have been so easy with the 80. Better masking/planning could have avoided the need for trimming though...
Lart sent me the side brackets when I got my mount from him, so wonder if that was just a mistake... I'm sure he can get you a pair either way. I wouldn't try to fill it without the side brackets in place. By having them in place when you fill it, you'll fill the entire void, which is what you want to avoid the side to side movement. Speaking of which, see posts 88-91 in the thread below, and consider boxing in the brackets. I assume the urethane would distribute the lateral force and reduce the chance of cracking, but better safe than sorry.
https://rennlist.com/forums/944-turb...rvation-7.html
01-03-2017, 03:45 PM
#44
Addict
Rennlist Member
Rennlist Member
Thanks Tom, I ordered the 60 based on your experience.
I'll check with Lart and see about the brackets, that would greatly simplify things. Interesting thought on boxing in the brackets, I do have a welder but I don't know if I even qualify for Leap Day status, never mind weekend welder status...
I'll check with Lart and see about the brackets, that would greatly simplify things. Interesting thought on boxing in the brackets, I do have a welder but I don't know if I even qualify for Leap Day status, never mind weekend welder status...
01-03-2017, 11:59 PM
#45
Addict
Rennlist Member
Rennlist Member
And here's why I make sure 944 parts I buy on ebay say "Lart's Porsche Parts" if at all possible: I pinged Luis on ebay today to see if he had the brackets that I could buy and he's sending them to me tomorrow, no charge. Above and beyond as always.
To top it off, Tom offered to weld up the brackets for me, also very generous.
Couldn't do it without the Rennlist community.
To top it off, Tom offered to weld up the brackets for me, also very generous.
Couldn't do it without the Rennlist community.