
Crackership's build thread - TURBO install starts on page 12
 08-05-2011, 02:18 PM
#46
Rennlist Member
Thread Starter
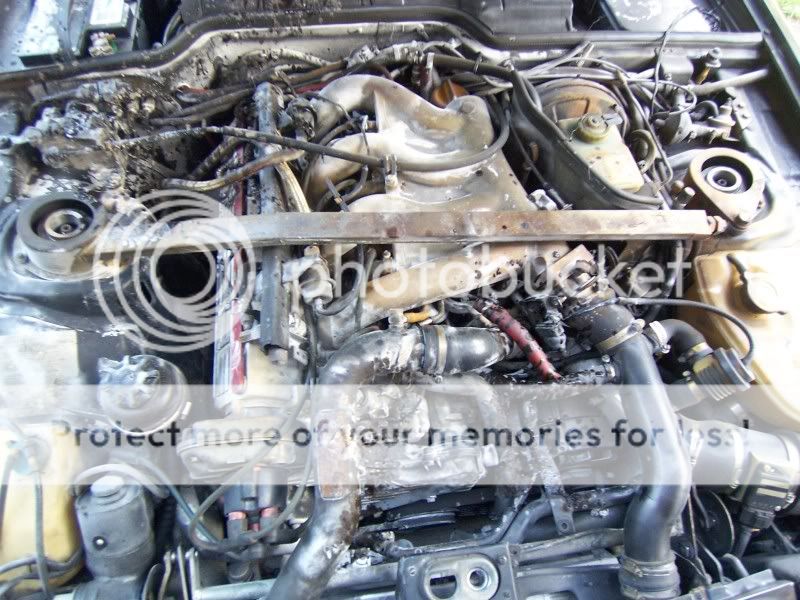
Made some progress over the last couple of days. Day before yesterday, I replaced the o-rings and gaskets in the oil cooler plate. I did learn a couple of interesting things while doing that... first off, I have the updated 1-piece '86 OPRV. That's cool. 'Cause now I don't have to buy one. Also, I had a major leak at the oil pressure sending unit (there's a pic a few posts up)... why? because it was FINGER TIGHT!!! WTH?!?, I've never touched it, but someone apparently did... after tracing the lines of oil 'n crap on my engine, I think that particular leak may well have been largely responsible for the fire. But who does that?? I mean, I know you need a thin 24mm to really crank it down, but who says "well, I don't have the right tool, so I'll just finger tight it... it'll be fine"?? I mean, I suppose it could have walked out over time... but I find it hard to believe... at least, if it was installed properly.
I also replaced the o-rings on the AOS and the turbo drain vent hose. Not really all that difficult, once you have that heat shield out of the way. The seals are easy, the vent hose is a bit of a pain, the original is crimped on (poorly in my case) and you have to cut the collar.
Yesterday, I rebuilt my ball joints with the Rennbay kit. It's really pretty easy, and extremely well made... you can find dozens of posts here raving about them, so I'll spare you... but they really are great. The only thing that really sucks is getting that circlip off the original ones... but it just takes getting a method down and then it's not so hard... first one took about an hour.. second one took about 5 mins.
Today, PS rack reseal... I've done a few before, but I can't remember how much of a PITA it is... all I can remember is that one rebuild I did went very smoothly, and the other... didn't... long story short, that rack was rebuilt using a Rennbay kit, a pipe bushing and a pipe cap from Home Depot and a rod bearing from a 455. That was an interesting one. But it did work when we were done... and it didn't leak..
Maybe if I have time, I'll get to the TB reseal as well.
 08-06-2011, 02:01 PM
#48
Addict
Lifetime Rennlist
Member
Lifetime Rennlist
Member
Made a little bit more progress this afternoon/evening... lots of little stuff. It doesn't really look any different, otherwise I'd post a pic..
Question, though... I need to drain the radiator, but from looking at the location of the drain plug, relative to the core support, it kind of looks like coolant is going to go everywhere when I pull the plug... any tricks for draining coolant IN to a container?
Question, though... I need to drain the radiator, but from looking at the location of the drain plug, relative to the core support, it kind of looks like coolant is going to go everywhere when I pull the plug... any tricks for draining coolant IN to a container?
08-06-2011, 02:03 PM
#49
Addict
Lifetime Rennlist
Member
Lifetime Rennlist
Member
DOOOOOD! Why ya gotta go showing me that? That's just wrong!
 08-06-2011, 02:05 PM
#50
Addict
Lifetime Rennlist
Member
Lifetime Rennlist
Member
Made some progress over the last couple of days. Day before yesterday, I replaced the o-rings and gaskets in the oil cooler plate. I did learn a couple of interesting things while doing that... first off, I have the updated 1-piece '86 OPRV. That's cool. 'Cause now I don't have to buy one. Also, I had a major leak at the oil pressure sending unit (there's a pic a few posts up)... why? because it was FINGER TIGHT!!! WTH?!?, I've never touched it, but someone apparently did... after tracing the lines of oil 'n crap on my engine, I think that particular leak may well have been largely responsible for the fire. But who does that?? I mean, I know you need a thin 24mm to really crank it down, but who says "well, I don't have the right tool, so I'll just finger tight it... it'll be fine"?? I mean, I suppose it could have walked out over time... but I find it hard to believe... at least, if it was installed properly.
I also replaced the o-rings on the AOS and the turbo drain vent hose. Not really all that difficult, once you have that heat shield out of the way. The seals are easy, the vent hose is a bit of a pain, the original is crimped on (poorly in my case) and you have to cut the collar.
Yesterday, I rebuilt my ball joints with the Rennbay kit. It's really pretty easy, and extremely well made... you can find dozens of posts here raving about them, so I'll spare you... but they really are great. The only thing that really sucks is getting that circlip off the original ones... but it just takes getting a method down and then it's not so hard... first one took about an hour.. second one took about 5 mins.
Today, PS rack reseal... I've done a few before, but I can't remember how much of a PITA it is... all I can remember is that one rebuild I did went very smoothly, and the other... didn't... long story short, that rack was rebuilt using a Rennbay kit, a pipe bushing and a pipe cap from Home Depot and a rod bearing from a 455. That was an interesting one. But it did work when we were done... and it didn't leak..
Maybe if I have time, I'll get to the TB reseal as well.
I also replaced the o-rings on the AOS and the turbo drain vent hose. Not really all that difficult, once you have that heat shield out of the way. The seals are easy, the vent hose is a bit of a pain, the original is crimped on (poorly in my case) and you have to cut the collar.
Yesterday, I rebuilt my ball joints with the Rennbay kit. It's really pretty easy, and extremely well made... you can find dozens of posts here raving about them, so I'll spare you... but they really are great. The only thing that really sucks is getting that circlip off the original ones... but it just takes getting a method down and then it's not so hard... first one took about an hour.. second one took about 5 mins.
Today, PS rack reseal... I've done a few before, but I can't remember how much of a PITA it is... all I can remember is that one rebuild I did went very smoothly, and the other... didn't... long story short, that rack was rebuilt using a Rennbay kit, a pipe bushing and a pipe cap from Home Depot and a rod bearing from a 455. That was an interesting one. But it did work when we were done... and it didn't leak..
Maybe if I have time, I'll get to the TB reseal as well.
08-06-2011, 04:44 PM
#51
Rennlist Member
Thread Starter
um... pulled the turbo. the bottom bolt on the AOS is just too long to pull with the heat shield in place, and the only way I could see to get the shield off was to either pull the downpipe, or the turbo. Turbo has less bolts than the downpipe, so I pulled the turbo.
08-06-2011, 05:50 PM
#53
Rennlist Member
Thread Starter
If you find a way, let me know, but I spent hours trying everything else I could think of... the only other option I could think of was cutting the mounting bracket to the block off of the DP... but I didn't want to do that. But I'm so making sure that whatever turbo I upgrade to is v-banded!
08-07-2011, 12:24 AM
#54
Addict
Lifetime Rennlist
Member
Lifetime Rennlist
Member
V-band down pipe is definitely the way to go. Whenever I upgrade the turbo, it will be a v-band. Just having a v-band on the crossover pipe made installation of the turbo was a huge help because I was able to slide the turbo into place with both pipes already bolted up. Getting that DP to block bolt in place took some patience (swapping between 2 different box-end wrenches for 1/24th of a turn per wrench), but I wanted it tight. Whoever installed that bolt last time didn't get it tight and it was half-way out before I pulled the turbo... same for one motor mount bolt (lower), and both steering knuckle bolts were loose. They are all tight now!!
08-08-2011, 04:55 AM
#55
Rennlist Member
Thread Starter
Didn't get around to the PS rack the other day... I vaguely remember that having another set of hands around was very helpful when I last resealed one, so I elected to wait till the weekend so I could get a hand while my buddy was over helping me do rod bearings. So, instead, I rebuilt the throttle body with the Arnnworx kit. Great kit, went together well. Only problem I had was getting the throttle plate to sit properly in the bore.... after a lot of f-ing around with it, I called John Wood, and he set me straight on that, and a few questions I had about the rod bearing procedure.
This last weekend, my buddy, my girlfriend and I spent freaking forever replacing the rod bearings. Every one of the bearing caps required quite a bit of "coaxing" to come off, and my big hands don't fit well into the block. Plus, this was my first time (giggle), and I wanted to take it slow. Got the pan back on and torqued at about 1am. I guess the PS rack will have to wait until another day.
The list of stuff to do is getting shorter though... still waiting on a few parts, and I still need to rebuild the PS rack and the wiring harness, but other than that, it's just about ready to start putting stuff back where it goes.
I kinda need to get a move on... my buddy is (temporarily) moving into our spare bedroom at the end of the month, and he's bringing 2 more cars with him... gonna need the garage back.
 08-08-2011, 02:02 PM
#57
Rennlist Member
Thread Starter
Yeah, she's pretty awesome. The first time I took her out, she asked if I could meet her at her parents' house (because they have a garage) a couple of hours early so I could help her do an oil change and tune up on her car. I said sure, but I assumed she meant "will you please come do an oil change and tune up on my car", but no... I handed her tools, and she did it all.
That was over three years ago now...
That was over three years ago now...
 08-09-2011, 01:30 AM
#59
Rennlist Member
Thread Starter
Plan to!
yeah, did the new gasket when I put the pan back on. I don't know if this is the normal experience, but I had to go around the pan at least a dozen times on the 3 lb/ft step before the gasket fully compressed. I think I only had to do the last step 3 times but it took sooo long to torque it down.
One thing I would recommend, and I'll be getting one before attempting this again, but get a 10mm wobble socket. the two bolts above the right side of the pan (4 & 8 in the torque sequence) are very difficult to get at with a socket and a universal joint.
08-16-2011, 02:02 AM
#60
Rennlist Member
Thread Starter
Wow, apparently it's been a week since I updated this thread.. I guess I've been too busy fixin' stuff 
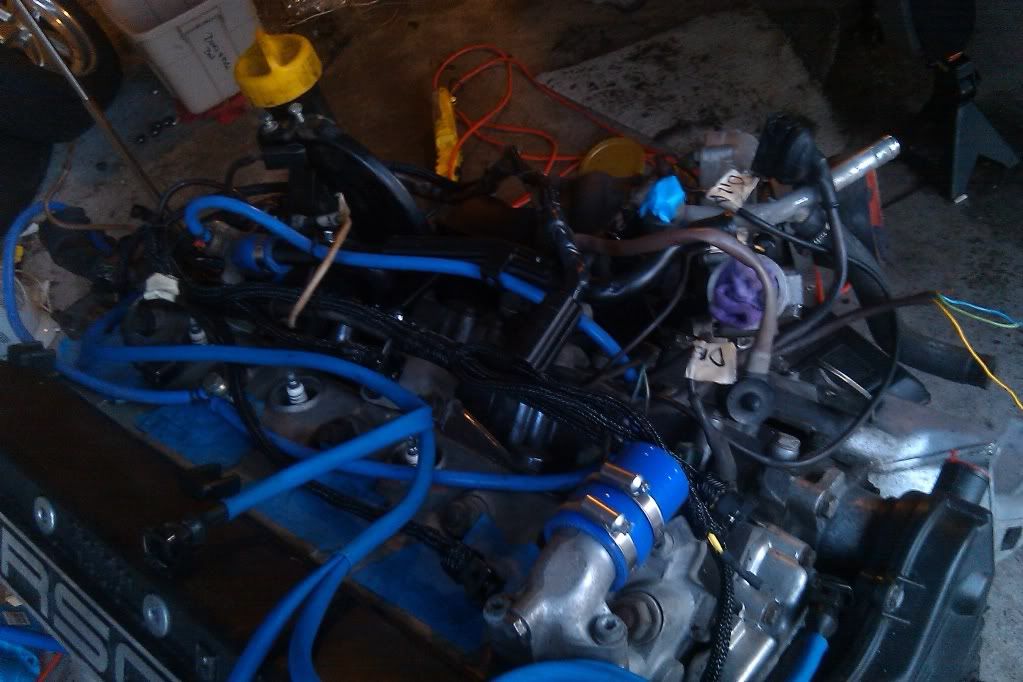
This last weekend, by buddy, Shabby, my girlfriend and I resealed my PS rack after swapping in a test pipe on Shabby's 928, which actually took hours. I love the look and the drive of 928's, but every time I work on one, I become more and more sure that I don't want one... at least not until I'm wealthy enough to pay someone else to fix it. Earlier in the week, I started putting various things back on (brackets and heat shields and stuff). And then, today, I pretty much finished rebuilding the wiring harness with the LR harnesses.
Here's a brief mock-up of the wiring harness (just to make sure everything can land where it needs to)
Another shot of the engine, mostly back together:

And one of the engine bay... I think it cleaned up pretty well:
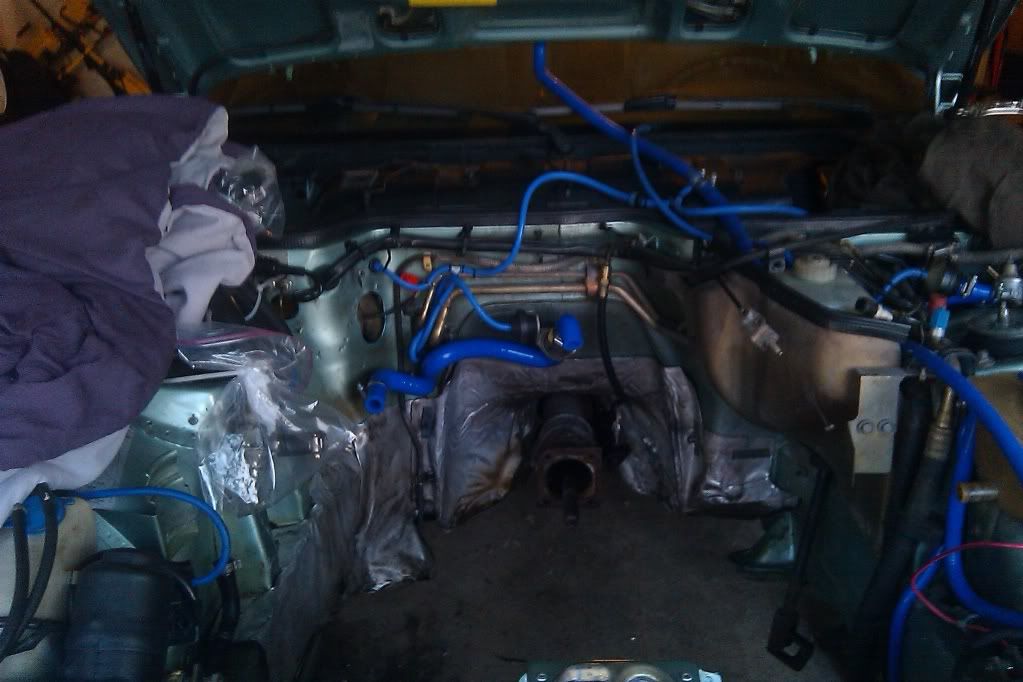
So, unless I'm forgetting something (which is possible), all I need to do now is the rear main and the clutch and then I should be ready to put the engine back in the hole... Here's hoping that happens next weekend.
This last weekend, by buddy, Shabby, my girlfriend and I resealed my PS rack after swapping in a test pipe on Shabby's 928, which actually took hours. I love the look and the drive of 928's, but every time I work on one, I become more and more sure that I don't want one... at least not until I'm wealthy enough to pay someone else to fix it. Earlier in the week, I started putting various things back on (brackets and heat shields and stuff). And then, today, I pretty much finished rebuilding the wiring harness with the LR harnesses.
Here's a brief mock-up of the wiring harness (just to make sure everything can land where it needs to)
Another shot of the engine, mostly back together:
And one of the engine bay... I think it cleaned up pretty well:
So, unless I'm forgetting something (which is possible), all I need to do now is the rear main and the clutch and then I should be ready to put the engine back in the hole... Here's hoping that happens next weekend.