

S3 Intake Tube Repair
 03-20-2014, 11:54 AM
#1
Drifting
Thread Starter
Like many S3 owners I have been eagerly watching Jerry Feather's progress on the intake tube replacement project
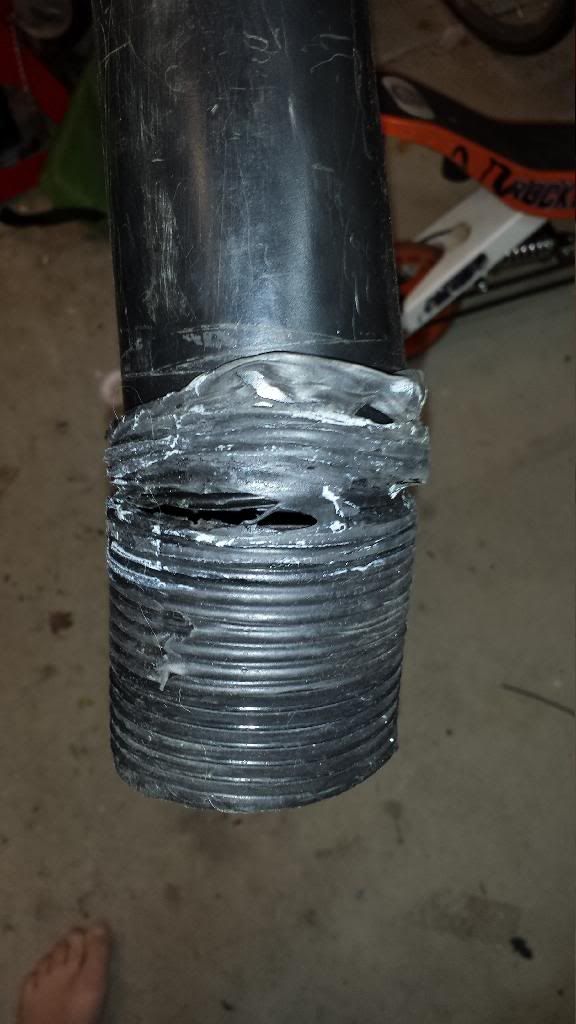
But in the mean time, my tubes are cracked, ugly and tended to whistle at certain RPM's. The ugly Gorilla tape and silicon tape repairs bugged me every time I opened the hood.

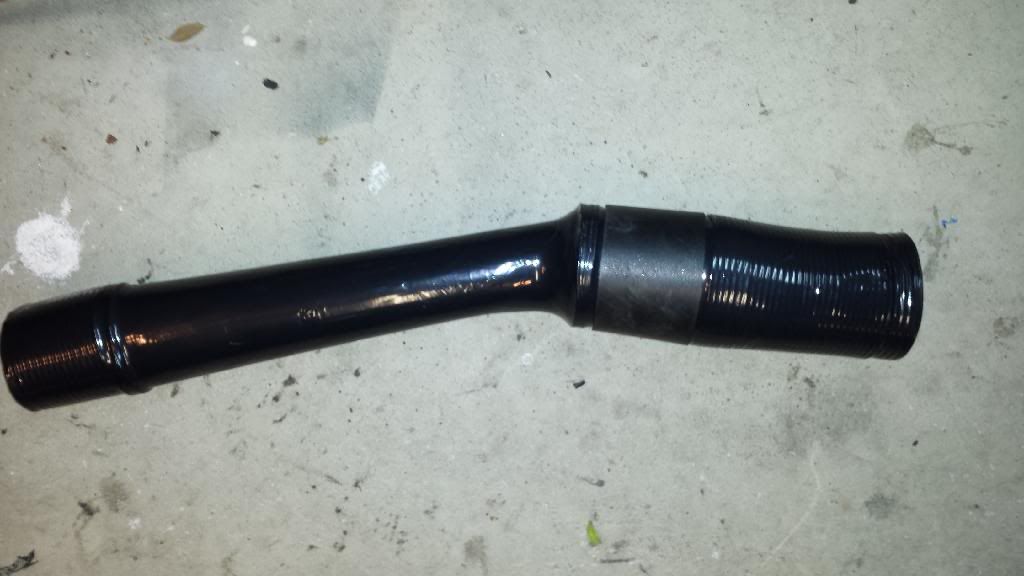
So, while cleaning up my work bench, I was sorting out my heat shrink tubing selection and realized big enough tubing may go over the intake tubes and look okay.
Quick measurement shows you need about 90mm diameter tubing to slide over the intakes. I found such tubing on ebay. In truth I went with slightly larger ( 105mm) because I wanted a gloss finish and I could not find gloss in the ~90mm size at that time. The drawback to 105mm is that it did not fully shrink around the smallest necked down part of the tube. It is _ok_ but not great, so I suggest going smaller.
You can easily find the matte finish:

Get a lot more than you think you will need. You have to have it stick past the ends 4 or 5 inches before shrinking to allow for the shrink long-ways, and you may want to re-do a tube if it does not look right. You can also add double layers in high wear or high stress points.
Once you have the tube, its really easy to just remove the rubber bushing for the belt cover vent, slide the heat shrink over the intake tube and hit it with your heat gun. Be careful not to over heat or it will melt. The good news is you can cut it right off and try again.
But in the mean time, my tubes are cracked, ugly and tended to whistle at certain RPM's. The ugly Gorilla tape and silicon tape repairs bugged me every time I opened the hood.
So, while cleaning up my work bench, I was sorting out my heat shrink tubing selection and realized big enough tubing may go over the intake tubes and look okay.
Quick measurement shows you need about 90mm diameter tubing to slide over the intakes. I found such tubing on ebay. In truth I went with slightly larger ( 105mm) because I wanted a gloss finish and I could not find gloss in the ~90mm size at that time. The drawback to 105mm is that it did not fully shrink around the smallest necked down part of the tube. It is _ok_ but not great, so I suggest going smaller.
You can easily find the matte finish:
Get a lot more than you think you will need. You have to have it stick past the ends 4 or 5 inches before shrinking to allow for the shrink long-ways, and you may want to re-do a tube if it does not look right. You can also add double layers in high wear or high stress points.
Once you have the tube, its really easy to just remove the rubber bushing for the belt cover vent, slide the heat shrink over the intake tube and hit it with your heat gun. Be careful not to over heat or it will melt. The good news is you can cut it right off and try again.
Last edited by KenRudd; 03-20-2014 at 12:15 PM.
 03-20-2014, 11:56 AM
#2
Drifting
Thread Starter
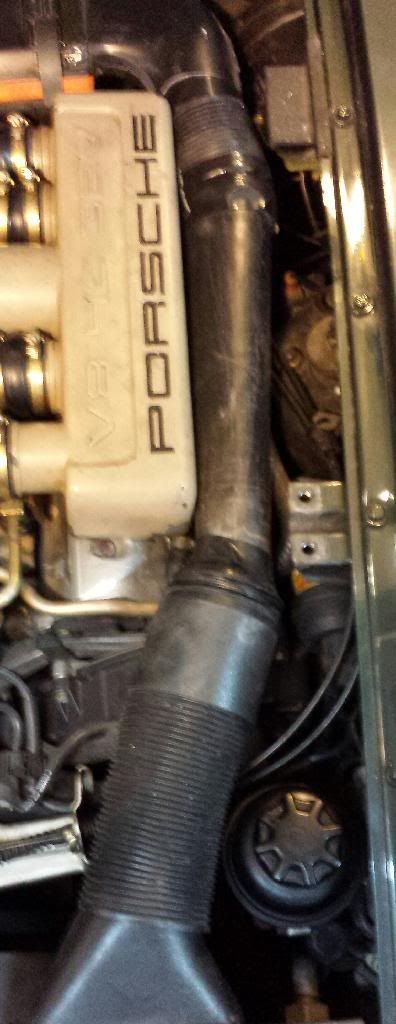
When you are done it will look something like this:
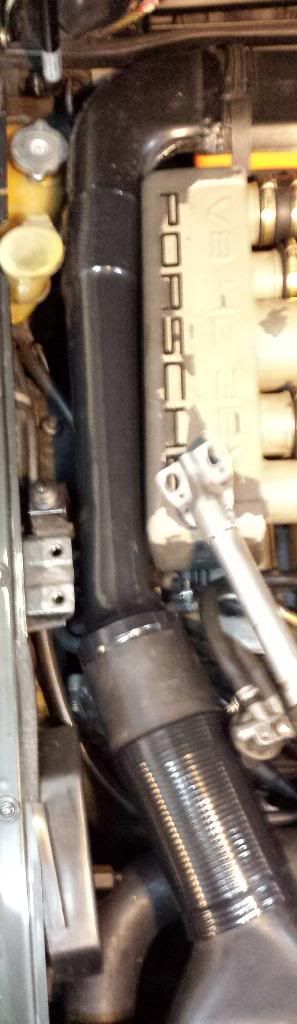
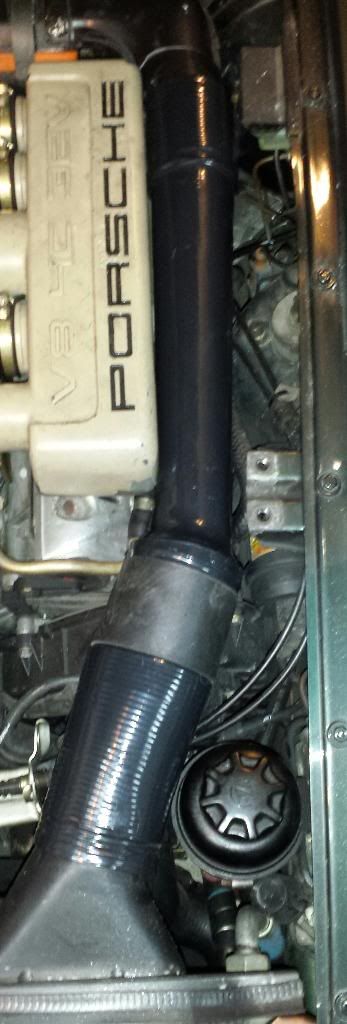
I have no idea how long it will last, but shrink-wrapped wiring under the hood seems to do okay in that environment, and its cheap/easy to reapply as necessary while waiting for the new tubes.
I have no idea how long it will last, but shrink-wrapped wiring under the hood seems to do okay in that environment, and its cheap/easy to reapply as necessary while waiting for the new tubes.
03-20-2014, 12:10 PM
#4
Administrator - "Tyson"
Lifetime Rennlist
Member
Lifetime Rennlist
Member
 03-20-2014, 01:16 PM
#7
Instructor
Excellent!! Thanks!!
Not seen these rubber bushings over the belt cover vents. Will search
Not seen these rubber bushings over the belt cover vents. Will search
Trending Topics
03-20-2014, 09:37 PM
#10
Nordschleife Master
03-21-2014, 07:41 AM
#13
Rennlist Member
Brilliant! Thanks for the idea. BTW, to protect mine when I remove/replace them, I wrap them in the bottom insert from one of those cheap plastic save-the-trees grocery store bags. They are slick on one side and textured on the other. I wrap it around the air tube rough side out where it passes under the cross brace- it forms sort of a funnel, and then very carefully slide the tube in/out through it. The textured side keeps it in place, the smooth side lets it slide. I understand some remove the cross brace which might be easier.