
A 86.5 Intake Refresh Picture Thread from a first-timer
 11-19-2013, 04:24 PM
#91
Burning Brakes
Thread Starter
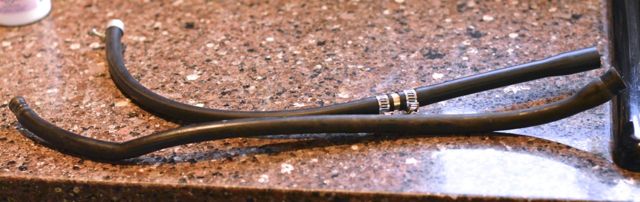
My fuel vapor hose 928 110 652 02 was ripped, and I needed to replace it. And unfortunately, "02" was discontinued.
Roger sent me 928 110 652 01, which features the same swaged end as "02" but is much shorter.
I went to O'Reilly's and they found a vapor hose with the same inside diameter. I bought a length of it and cut it to size, then bought a metal fitting and two hose clamps to "recreate" the broken, discontinued part.
Last edited by syoo8; 11-19-2013 at 07:48 PM.
 11-19-2013, 07:34 PM
#92
Burning Brakes
Thread Starter
The driver's side is supposed to be even more annoying than the passenger side.
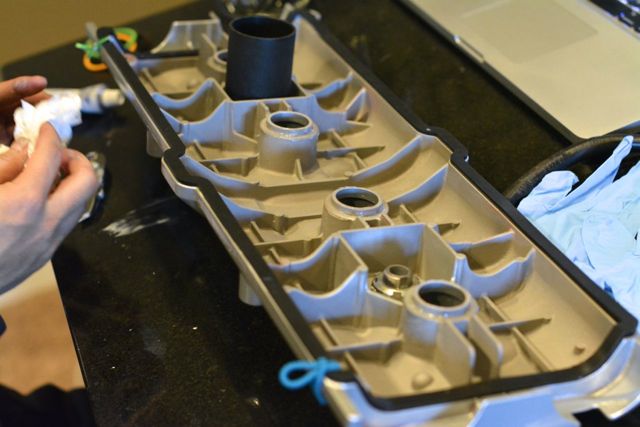
I applied Hondabond 4 to the valve cover gasket groove. (I bought a cheap tube of RTV so that I could use the applicator tip with the Hondabond.)

3/4 of the way through, the Hondabond tube sprung a leak at the end opposite the applicator. That was a lot of fun.
I carefully put the valve cover gasket into the groove. A tiny amount of Hondabond leaked out, so I wiped it off.
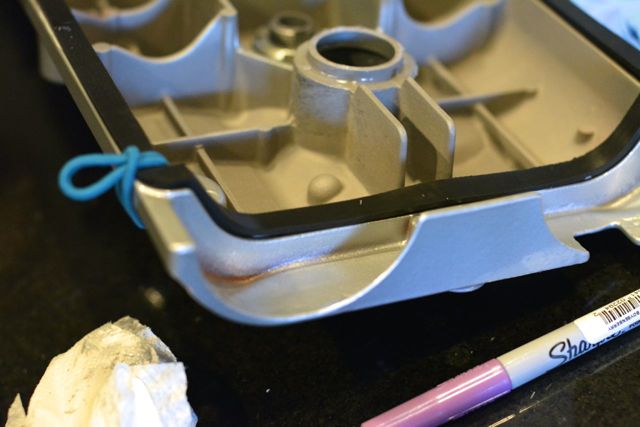
I tied the corners of the gasket down with my fianc�e's hair things.
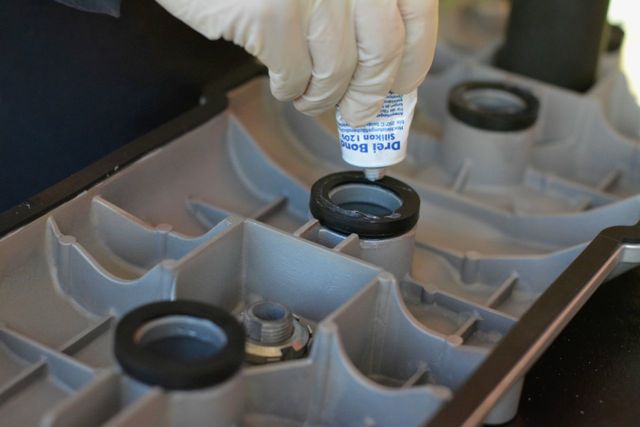
Some people (SeanR, Dr Bob, Dwayne) used sealant on the spark plug gaskets, so I applied a thin film of Drei Bond 1209 to each side of the spark plug gasket.
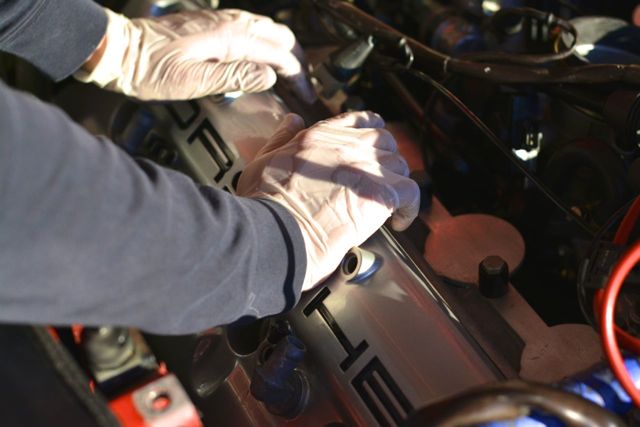
Getting the valve cover into the passenger side was a bit of a struggle. It took about seven minutes, but felt like an hour.
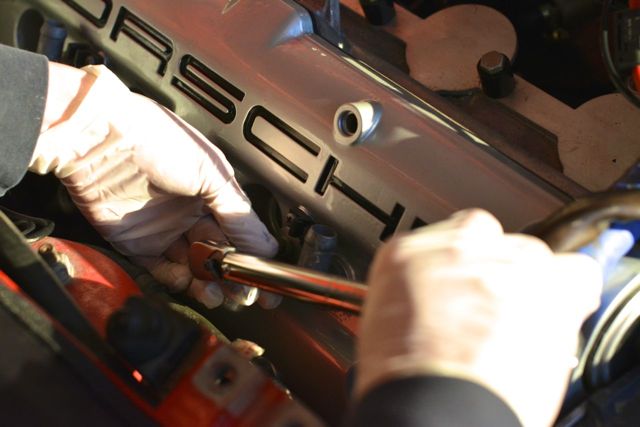
I torqued each bolt that I could reach to 7 ft-lbs (84 inch-lbs.)
I applied Hondabond 4 to the valve cover gasket groove. (I bought a cheap tube of RTV so that I could use the applicator tip with the Hondabond.)
3/4 of the way through, the Hondabond tube sprung a leak at the end opposite the applicator. That was a lot of fun.
I carefully put the valve cover gasket into the groove. A tiny amount of Hondabond leaked out, so I wiped it off.
I tied the corners of the gasket down with my fianc�e's hair things.
Some people (SeanR, Dr Bob, Dwayne) used sealant on the spark plug gaskets, so I applied a thin film of Drei Bond 1209 to each side of the spark plug gasket.
Getting the valve cover into the passenger side was a bit of a struggle. It took about seven minutes, but felt like an hour.
I torqued each bolt that I could reach to 7 ft-lbs (84 inch-lbs.)
Last edited by syoo8; 01-15-2014 at 10:00 PM.
11-19-2013, 07:43 PM
#93
Burning Brakes
Thread Starter
QUESTIONS
1) I used the rubberized washers shown below:
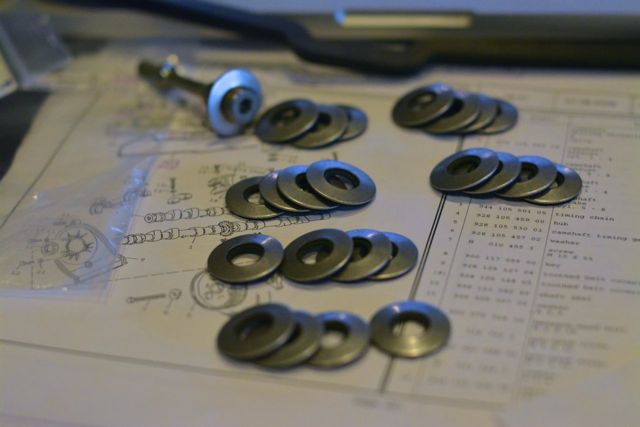
As pictured below, I put the rubberized washer between the bracket and the cam cover. This looks fishy to me but I am not sure what to do here.
2) Even though this is an '86 engine, I am using the "new-style" (i.e. one-piece) bolts. Just to confirm, I did not use spacers in the setup below. Is this okay?
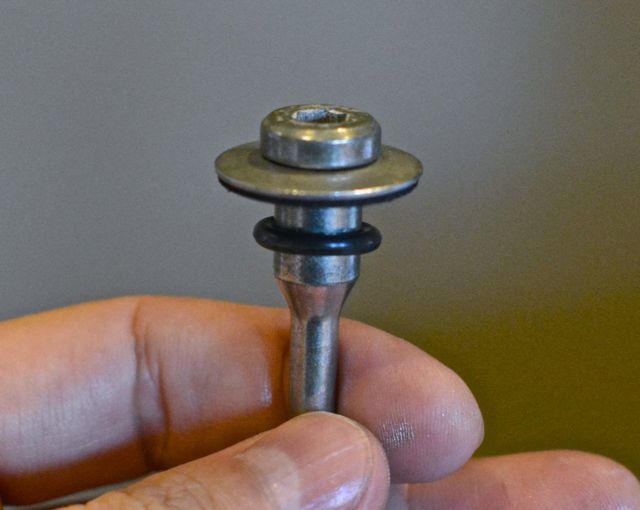
1) I used the rubberized washers shown below:
As pictured below, I put the rubberized washer between the bracket and the cam cover. This looks fishy to me but I am not sure what to do here.
2) Even though this is an '86 engine, I am using the "new-style" (i.e. one-piece) bolts. Just to confirm, I did not use spacers in the setup below. Is this okay?
 11-20-2013, 11:38 AM
#96
Basic Sponsor
Rennlist
Site Sponsor
Rennlist
Site Sponsor
If you are using the 87+ cam bolts in place of the earlier hex bolts you should use the later spacer washer, thrust washer and thrust ring.
__________________

Does it have the "Do It Yourself" manual transmission, or the superior "Fully Equipped by Porsche" Automatic Transmission? George Layton March 2014
928 Owners are ".....a secret sect of quietly assured Porsche pragmatists who in near anonymity appreciate the prodigious, easy going prowess of the 928."
Does it have the "Do It Yourself" manual transmission, or the superior "Fully Equipped by Porsche" Automatic Transmission?
George Layton March 2014928 Owners are ".....a secret sect of quietly assured Porsche pragmatists who in near anonymity appreciate the prodigious, easy going prowess of the 928."
11-20-2013, 01:46 PM
#97

That Evaporust - looks like its a wonder drug. I will get some and try it.
11-20-2013, 03:21 PM
#98
Burning Brakes
Thread Starter
Observations, November 20
1) The Driver's side cam cover was much easier than the passenger side.
2) As Roger mentioned above (in post 96), the rubberized washers and O-rings that are pictured at the bottom of post 93 were meant for the "old-style" two-piece valve cover bolts. Roger is sending me the appropriate hardware for the "new-style" valve cover bolts that I am using.
11-20-2013, 03:25 PM
#99
Burning Brakes
Thread Starter
Yes, BC- it is. I am using it as a substitute for the brass brush- it is far more gentle, and in some way, more effective. The best thing about Evapo-Rust is that after you are done soaking a part, you can pour it back into the container. I strain it through a paper towel so it is not too dirty.
I wish I used it from day 1- it would have made plating parts much easier.
BTW I bought it from Harborfreight- pretty cheap there.
I wish I used it from day 1- it would have made plating parts much easier.
BTW I bought it from Harborfreight- pretty cheap there.
11-20-2013, 06:48 PM
#100
Gonna go check out hf
11-21-2013, 11:53 AM
#102
Craic Head
Lifetime Rennlist
Member
Lifetime Rennlist
Member
11-23-2013, 01:37 AM
#103
Burning Brakes
Thread Starter
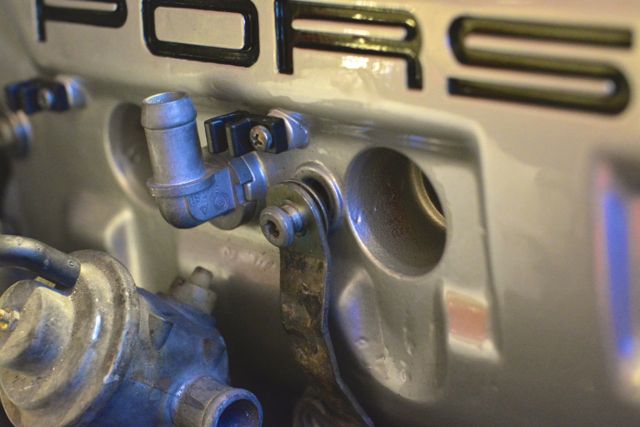
I snapped some pictures of where I'm at. The PCV "safety valve" that resides in one of the two oil filler neck hose ports is broken. It lets in air in both directions. Roger told me not to worry too much about it.
I'm hoping that the substantial collective wisdom of Rennlist will let me know if everything else looks ok before I proceed with the fuel line, intake runner, injector, and fuel rail installation.
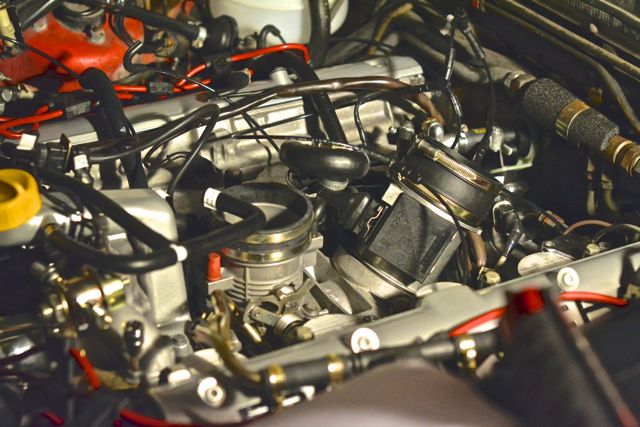
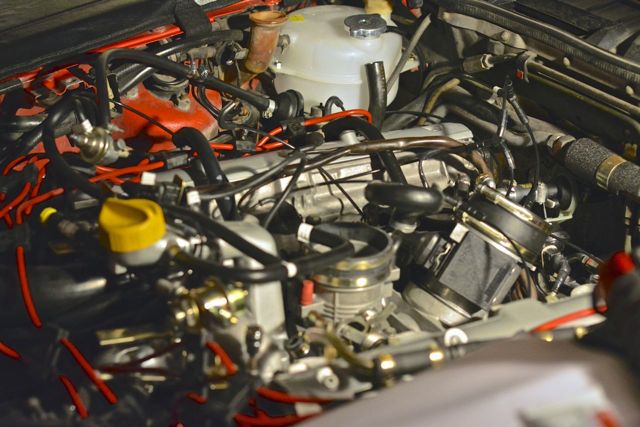

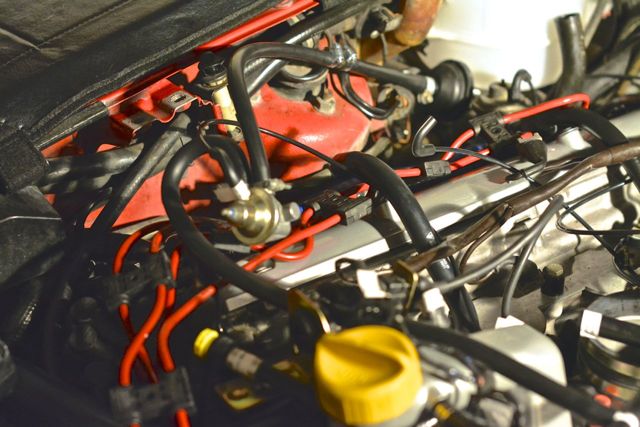
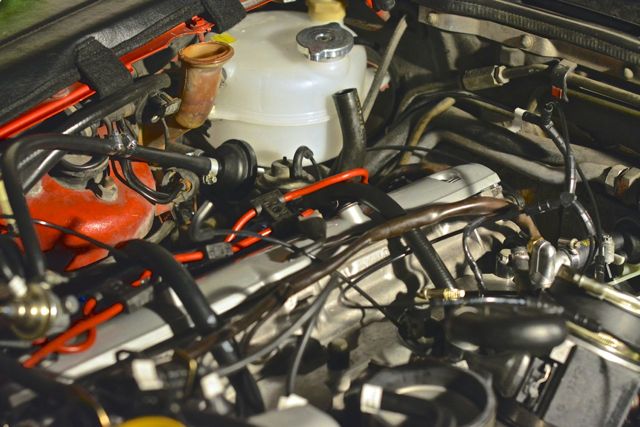
I'm hoping that the substantial collective wisdom of Rennlist will let me know if everything else looks ok before I proceed with the fuel line, intake runner, injector, and fuel rail installation.
11-23-2013, 07:02 AM
#104
Team Owner
now is a good time to replace the filler tube for the washer tank ,
and remove the metal collar in the tube and the tank
drain your tank and clean it out also replace the 3 way connector under RF fender.
Please post a picture of the PCV valve IIRC it should only flow one way.
and remove the metal collar in the tube and the tank
drain your tank and clean it out also replace the 3 way connector under RF fender.
Please post a picture of the PCV valve IIRC it should only flow one way.
11-23-2013, 10:48 AM
#105
Rennlist Member
Join Date: Oct 2005
Location: Gatineau, Qu�bec, Canada
Posts: 5,136
Received 1,207 Likes
on
467 Posts
Beautiful clean engine bay Scott. 
Did you do the zinc plating yourself or a shop did it for you?
Unless it's all new parts!
I will be looking a small plating kit in a near future.
Did you do the zinc plating yourself or a shop did it for you?
Unless it's all new parts!
I will be looking a small plating kit in a near future.
