

A 86.5 Intake Refresh Picture Thread from a first-timer
 10-14-2013, 05:16 PM
#76

For your year, yes.
There are different ones for S4 years.
There are different ones for S4 years.
 11-10-2013, 10:24 AM
#77
Burning Brakes
Thread Starter
Hi everyone.
Back from a business trip, decided to snap some pictures. I am waiting for a new coolant reservoir tank from Roger. Once I install that, I'll be reassembling.
In the meantime, decided to replace the MAF connector, which looked very ratty:
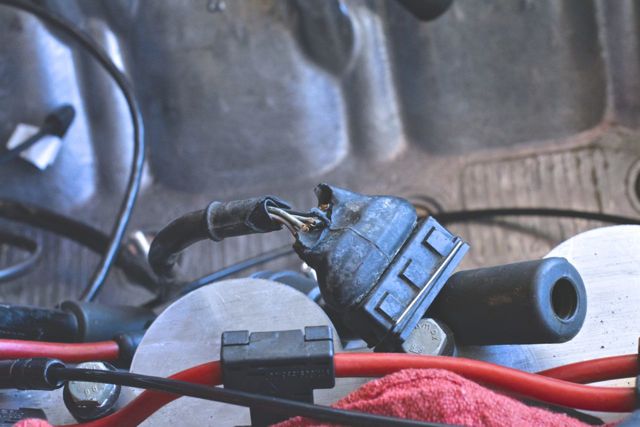
Using an open-barrel crimper and a kit that Roger sent me, it turned out like this:
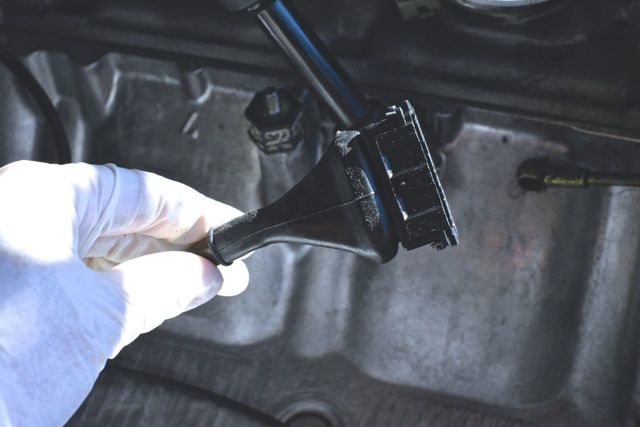
It is very important when crimping these Bosch-style terminals to make sure that you have the correct sized die, otherwise you will crush the terminal, not crimp it. Ask me how I know this.
----
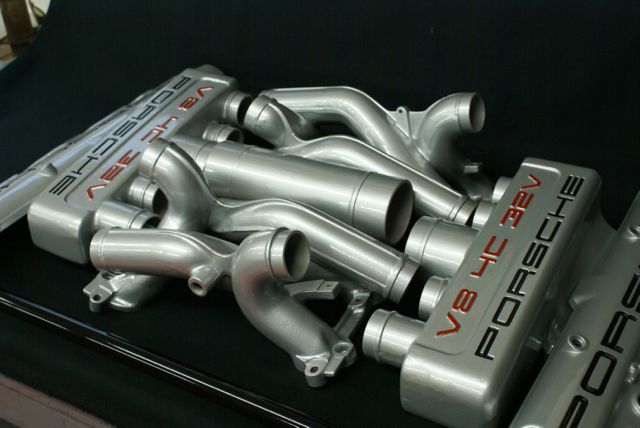
Ben Genovese from Legend Garage in Austin had my powder coated intake runners, side-plenums, cross brace, and valve covers waiting for me in a gigantic box when I returned home. It was like... Christmas.
Following his directions, I put them in a bathtub and washed them.

My cat likes the spot where they dried.
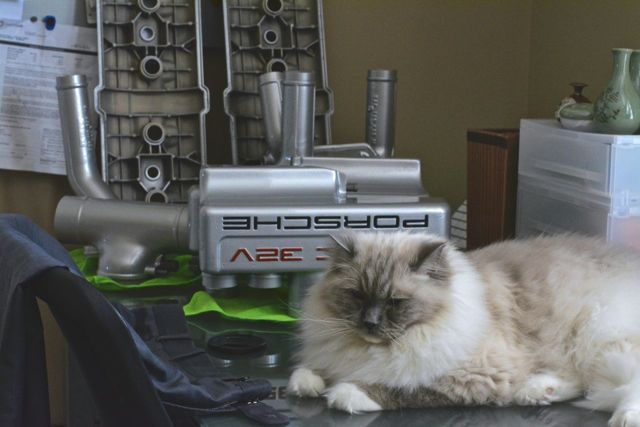
I will wash them several more times, until the bottom of the bathtub doesn't have blast media on it.
Back from a business trip, decided to snap some pictures. I am waiting for a new coolant reservoir tank from Roger. Once I install that, I'll be reassembling.
In the meantime, decided to replace the MAF connector, which looked very ratty:
Using an open-barrel crimper and a kit that Roger sent me, it turned out like this:
It is very important when crimping these Bosch-style terminals to make sure that you have the correct sized die, otherwise you will crush the terminal, not crimp it. Ask me how I know this.
----
Ben Genovese from Legend Garage in Austin had my powder coated intake runners, side-plenums, cross brace, and valve covers waiting for me in a gigantic box when I returned home. It was like... Christmas.
Following his directions, I put them in a bathtub and washed them.
My cat likes the spot where they dried.
I will wash them several more times, until the bottom of the bathtub doesn't have blast media on it.
11-11-2013, 10:14 AM
#79
Burning Brakes
Thread Starter
Thank you, Ben.
After experiencing your work first-hand, I wouldn't think of powdercoating anywhere else. It is first-rate all the way.
After experiencing your work first-hand, I wouldn't think of powdercoating anywhere else. It is first-rate all the way.
11-11-2013, 10:50 AM
#80
Team Owner
use compressed air to blow out the water and media wear glasses
11-11-2013, 05:56 PM
#81
Scott - what die and tool did you use?
11-11-2013, 08:01 PM
#82
Burning Brakes
Thread Starter
Hi BC,
I used the S&G Tool Aid 18920 Ratcheting Terminal Crimping Kit. I bought it on
What I like about the kit is that it comes with five dies, and the price was pretty low ($75.)
What I did was select the die that would snugly fit an individual Bosch terminal. If there is any "play" then the crimp won't come out properly- it will be "flattened" as opposed to crimped. Sometimes I would bend the terminal slightly to 'help it along' before crimping.
Hope this helps.
11-11-2013, 08:20 PM
#83
Burning Brakes
Thread Starter
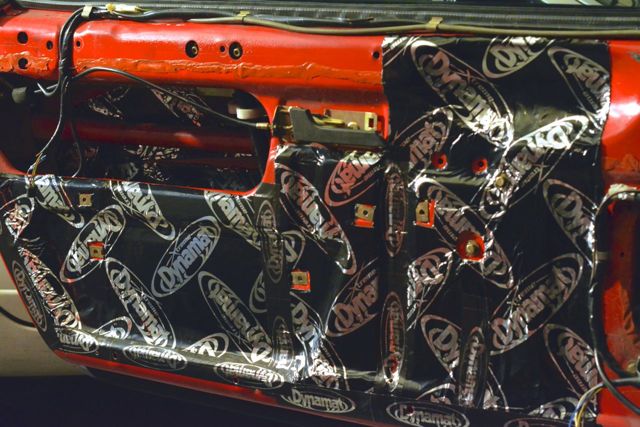
Concurrently with the intake project, I repaired the broken ground wire in the door harness that disabled my central locking. The ground wire developed a break in the area where the door hinge moves. Since the door panel was off, I decided to take a stab at some sound deadening. I chose Dynamat Extreme because it got good reviews on Rennlist, and unlike some other sound deadening material, it does not contain asphalt (and thus, does not smell.)
First, I cleaned the door with some denatured alcohol. Then, I cut a section of Dynamat, then placed it on the door.
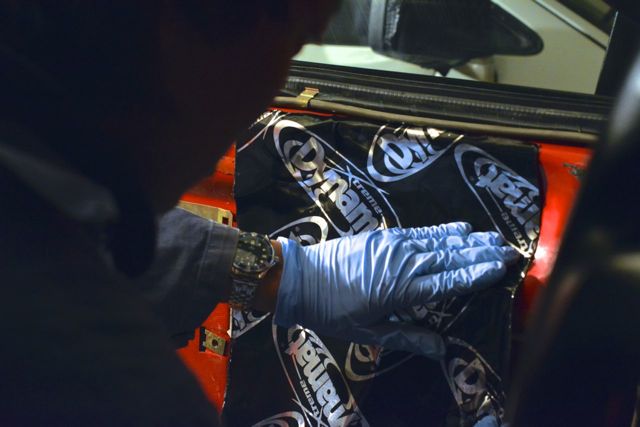
I used a roller I bought to smooth the Dynamat.
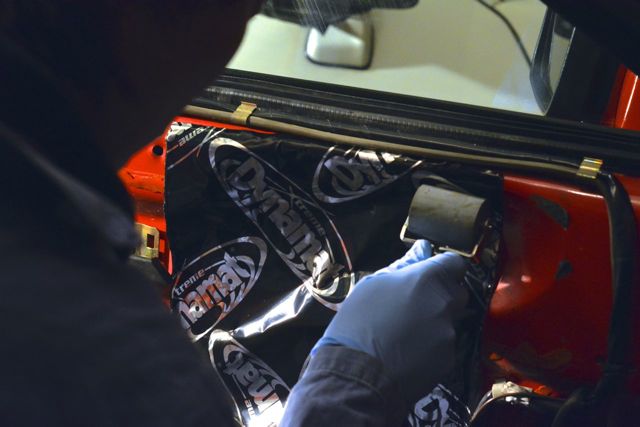
For particularly 'curvy' surfaces, I used the wooden handle of the roller. At the seams, I used some metal tape that Dynamat sells, ostensibly to keep the rubber from weeping in hot weather. I used a box cutter to expose any holes that are needed for the door panels.
I am pleased with the results. Once I reinstall the lock cylinders I will finish applying Dynamat.
First, I cleaned the door with some denatured alcohol. Then, I cut a section of Dynamat, then placed it on the door.
I used a roller I bought to smooth the Dynamat.
For particularly 'curvy' surfaces, I used the wooden handle of the roller. At the seams, I used some metal tape that Dynamat sells, ostensibly to keep the rubber from weeping in hot weather. I used a box cutter to expose any holes that are needed for the door panels.
I am pleased with the results. Once I reinstall the lock cylinders I will finish applying Dynamat.
Last edited by syoo8; 01-15-2014 at 09:57 PM.
11-11-2013, 08:24 PM
#84
Burning Brakes
Thread Starter
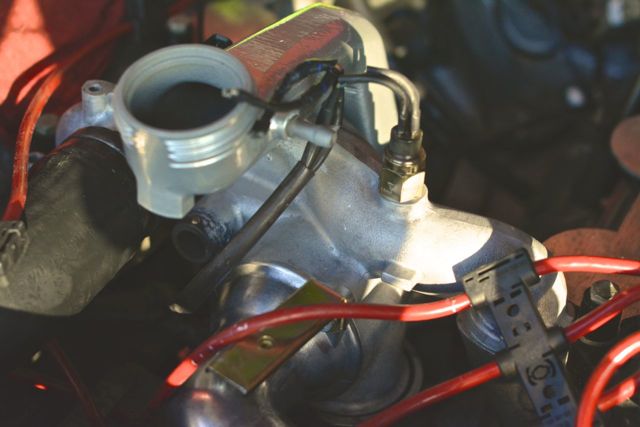
This afternoon I decided to remove the coolant reservoir and water bridge. These, as Dwayne, Mike Frye, and others have documented on Rennlist, are WYAIT items when undergoing an intake refresh.
The coolant reservoir came out easily by virtue of the fact that none of the three bolts that are supposed to hold the reservoir in were attached.
A mouse apparently used my coolant reservoir as a restroom.
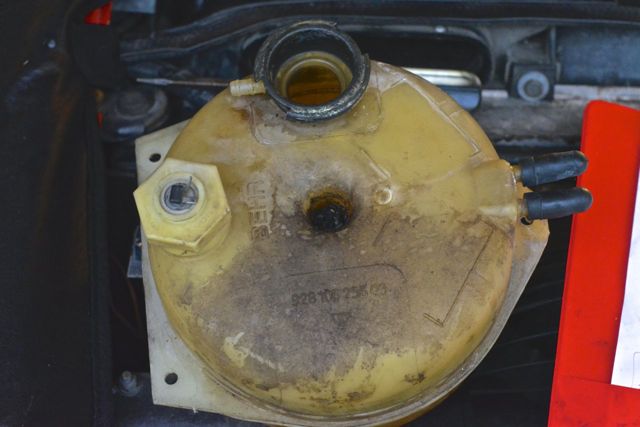
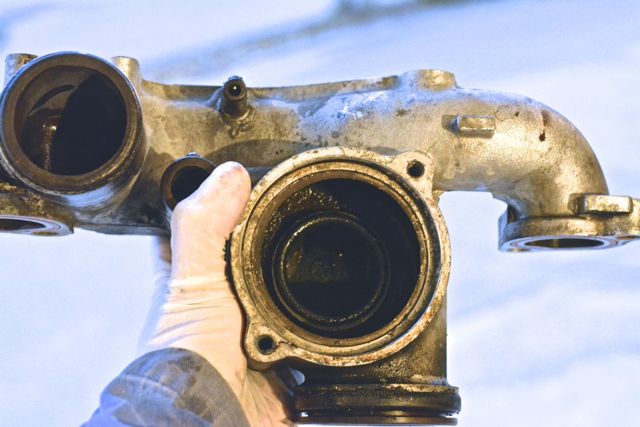
After removing the radiator, fan, and coolant reservoir hoses, and carefully unscrewing allen bolts, the water bridge popped off. It looked dirty inside. Is this normal?
The coolant reservoir came out easily by virtue of the fact that none of the three bolts that are supposed to hold the reservoir in were attached.
A mouse apparently used my coolant reservoir as a restroom.
After removing the radiator, fan, and coolant reservoir hoses, and carefully unscrewing allen bolts, the water bridge popped off. It looked dirty inside. Is this normal?
11-11-2013, 10:12 PM
#85
Hi BC,
I used the S&G Tool Aid 18920 Ratcheting Terminal Crimping Kit. I bought it on Amazon.
What I like about the kit is that it comes with five dies, and the price was pretty low ($75.)
What I did was select the die that would snugly fit an individual Bosch terminal. If there is any "play" then the crimp won't come out properly- it will be "flattened" as opposed to crimped. Sometimes I would bend the terminal slightly to 'help it along' before crimping.
Hope this helps.
11-12-2013, 12:54 AM
#86
Burning Brakes
Thread Starter
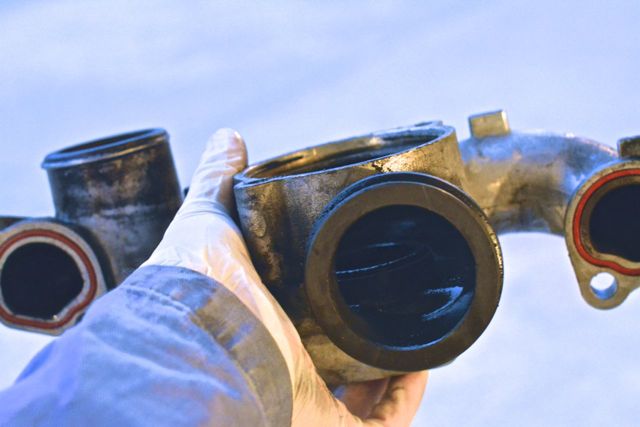
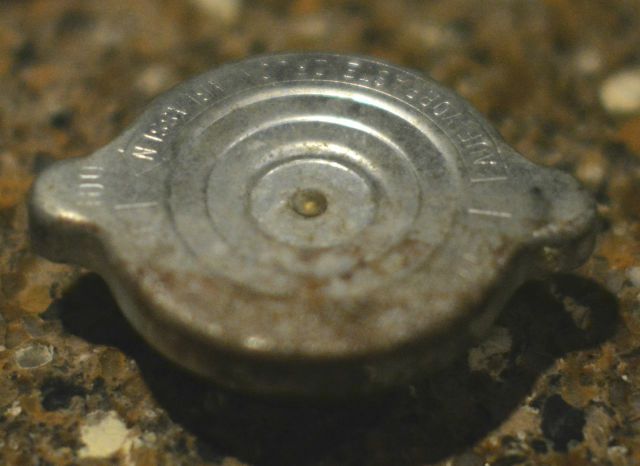
After disassembling and cleaning the water bridge, I noticed that the thermostat elbow was badly pitted.
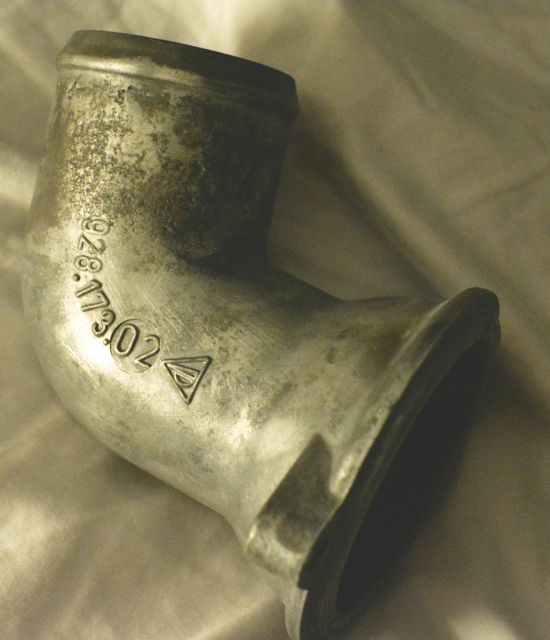
When I bought the car, I noticed that the area around the lower radiator hose clamp had a lot of dried coolant on it, and was leaking. I tightened the connection to stop the leak, but it looks like the coolant did a number on the elbow.
When I bought the car, I noticed that the area around the lower radiator hose clamp had a lot of dried coolant on it, and was leaking. I tightened the connection to stop the leak, but it looks like the coolant did a number on the elbow.
11-12-2013, 08:40 AM
#87
Burning Brakes
Scott, I've an elbow off an 85 car right now that actually has a thru-hole in it from corrosion! Yours definitely still looks usable, but Mark Anderson sells them for very reasonable if you want another one.
11-17-2013, 02:25 PM
#88
Burning Brakes
Thread Starter
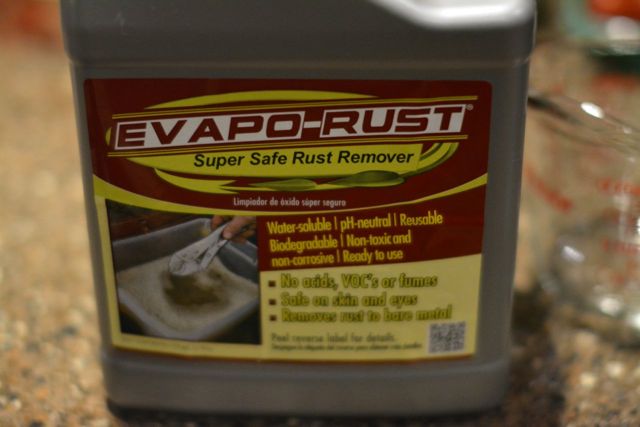
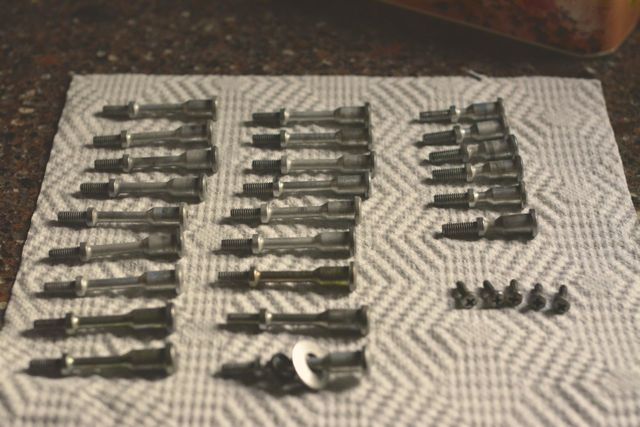
I picked up some Evapo-Rust from HarborFreight the other day, and have been amazed by how they've cleaned up parts. The directions say to use in room temperature, which means that I store the jug inside (much to my fianc�e's delight.)
Before Evapo-Rust:
After Evapo-Rust:

Valve cover bolts, after Evapo-Rust:
Before Evapo-Rust:
After Evapo-Rust:
Valve cover bolts, after Evapo-Rust:
Last edited by syoo8; 01-15-2014 at 09:58 PM.
11-17-2013, 02:31 PM
#89
Burning Brakes
Thread Starter
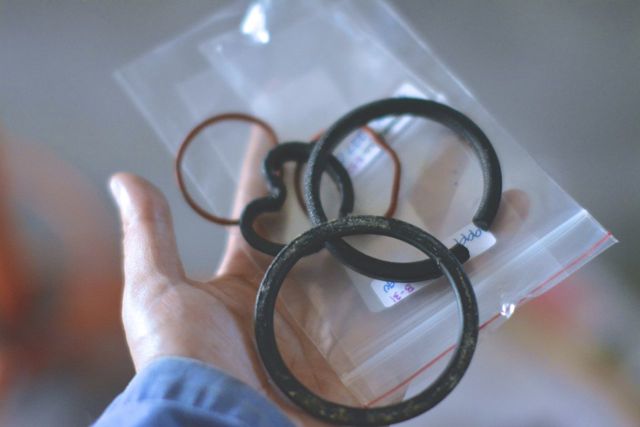
I also replaced all of the O-rings in and around the water bridge.
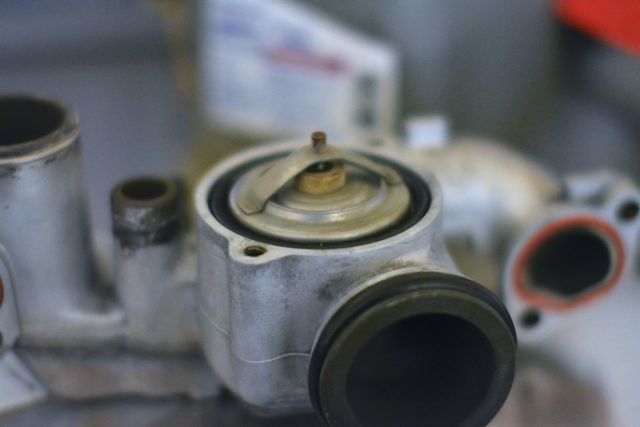
I used Dow-Corning 111 for the O-rings, to keep them soft and pliable. These are the old O-rings:
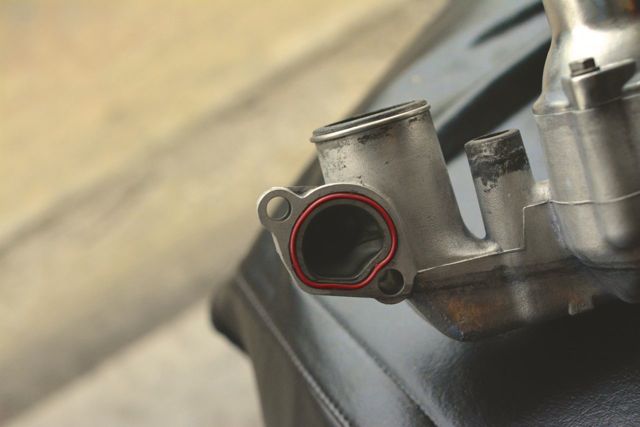
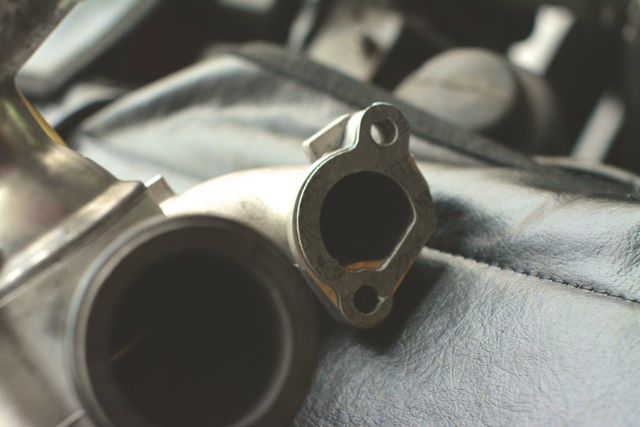
As per Greg Brown's instructions, I replaced the red gaskets:
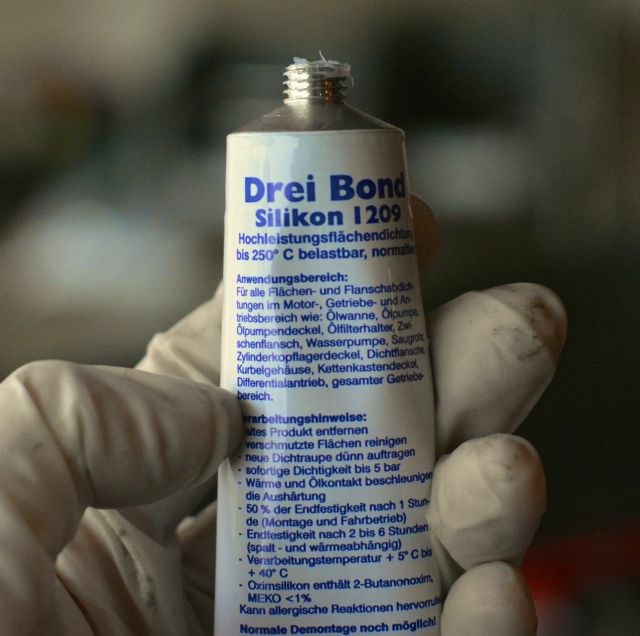
And then applied some Drei Bond to both sides of the paper gasket and put the paper gasket on top of the red gasket:
I used Dow-Corning 111 for the O-rings, to keep them soft and pliable. These are the old O-rings:
As per Greg Brown's instructions, I replaced the red gaskets:
And then applied some Drei Bond to both sides of the paper gasket and put the paper gasket on top of the red gasket:
Last edited by syoo8; 12-05-2013 at 12:25 PM.
11-17-2013, 02:35 PM
#90
Burning Brakes
Thread Starter
After reinstalling the water bridge, I cleaned out the newly-powdercoated oil filler neck with water. I did so for nearly a half an hour, using a toothbrush and dish soap. There were dark oily flakes that fell out of the oil filler neck (even though it looked clean.) Then, I installed a new Temp II sensor and reinstalled the temperature gauge sender.
I used silver optimoly for everything except for the sensors- I installed those "dry."
I used silver optimoly for everything except for the sensors- I installed those "dry."