


A 86.5 Intake Refresh Picture Thread from a first-timer
Nordschleife Master
Joined: Jul 2011
Posts: 5,662
Likes: 26
From: North Country
The Loctite 574 is really amazing. I'm very experienced at lining up the ball/cup joints in the fuel lines while manipulating the brackets, etc.. I had damage to the ball surface at the rear dampener joint. Sanded down with 1000 grit till under magnification the defect could not be seen. Still had a leak though. I had a thread for help on this and Greg said use the Loctite. I did, and in 15 minutes leak was absent. I applied it to all other mating surfaces on the fuel line ring. Not a leak in the house.
Nordschleife Master
Joined: Jul 2011
Posts: 5,662
Likes: 26
From: North Country
Mrmerlin- thanks for reading my thread. I've read many of your posts on RL and have taken notes.
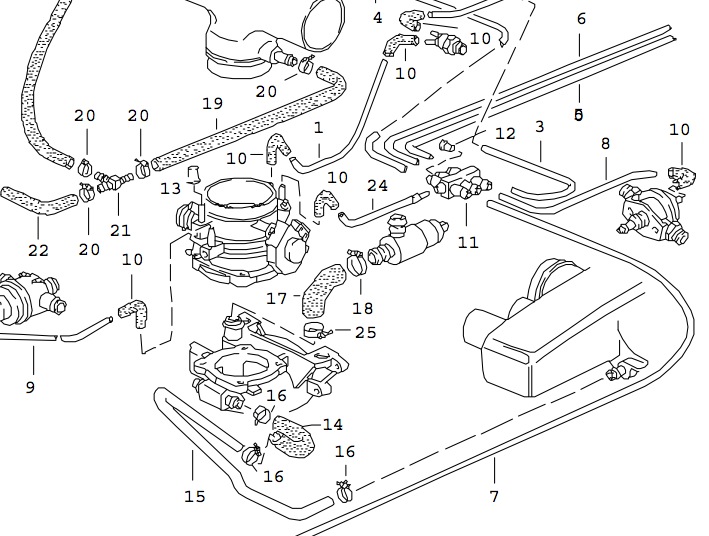
By "3 of these units" I assume you are referring to the two fuel diaphragm dampers (928 110 202 00) and the fuel pressure regulator (928 110 198 01)?
I've read (I believe) every thread on the fuel injection system on RL and replacing these units haven't come up outside of smelling gasoline when fuel is going through it� Is this a common thing to change (on a 27 year-old car)?
By the way, PET is WRONG about these, I believe. The driver's side rear "fuel pressure regulator" should actually be a fuel diaphragm damper, correct?
I can speak with comfort about the S4 fuel layout. The driver's side rear unit is a dampener on my MY. It is probably not far off from the 86.5. If you call Mark or Roger for these pieces, they will confirm. And yes, it is not uncommon or these units to fault after 27 years. The diaphragms in these units are being constantly challenged.
Also it is not smelling fuel as it goes through the unit. It is having, or smelling, fuel in its vacuum line that indicates a problem. This would mean the diaphragm has faulted allowing fuel to cross it into its vacuum source. Therefore the unit will not function properly, and its indicator is fuel in the vacuum line.
Best Wishes with the rest of your Good work.
Craig
Thread Starter
Burning Brakes
Joined: Jul 2007
Posts: 946
Likes: 5
From: Columbia, MO / San Luis Obispo, CA
Update, September 25.
Spent a couple of hours in the garage late this afternoon, after ordering 3 new fuel pressure dampers and regulator from Roger (at a very good price, I might add.) Unpacked Greg Brown's fuel line kit. They are beautiful items. I am nervous to install them- "tight but not too tight" is what makes me nervous.
I cleaned up a few parts:
130925 Before Plating.jpg
And then plated them:
130925 After Plating 1.jpg
130925 Plating 2.jpg
The passenger side cam cover I've removed 10 of the 12 allen bolts, but the one at the lower left and the one at the lower right are difficult to access, and my fianc� was cooking stew. I will try to deal with that tomorrow.
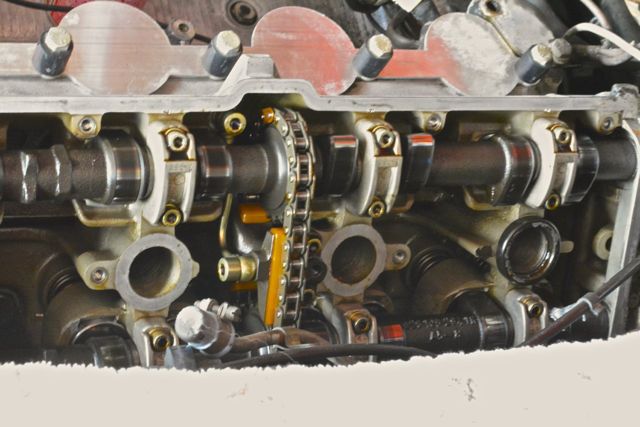
I took off the cam cover on the driver's side, which was tedious but easy:
130925 Cam Chains 1.jpg
I am not sure if I should touch the cam tensioner. I need to read up on Rennlist how to change the cam tensioner pads. I'll do that tonight.
https://rennlist.com/forums/928-foru...placement.html
https://rennlist.com/forums/928-foru...alve-only.html
https://rennlist.com/forums/928-foru...placement.html
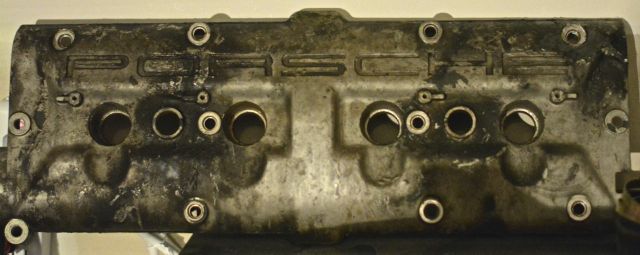
The driver's side cam cover looks like it needs a good media blasting and powder coating.
130925 Cam Cover.jpg
I'm going to be carefully reading the thread below to gain insight into powder coating. (I've powder coated interior items like the ashtray, surround for window switches, and the like, but nothing with a critical mating surface.)
https://rennlist.com/forums/928-foru...onth-time.html
I carefully arranged the cam cover bolts on a piece of paper, and I noticed that I only had three short cam cover bolts at the corners, not four. I sent Roger a picture and he informed me that I had the 'new style' cam cover bolts. He furnished me with the washers that have a rubberized backing. They were inexpensive.
130925 DS Valve cover bolts.jpg
Last, I visited a local Porsche guy (he was busy cleaning out the damage from an IMS bearing failure on a 996- pretty ugly) and he agreed to help me with my throttle body. I am going to give him a couple of spare O-rings for the cam cover bolts (Roger sent me some extra) and he's going to change them out for me.
I explained to him that I was slightly terrified of anything having entered the cylinders via the intake port. He advised me to blow air through the spark plug hole and let it vent through the intake port, and then blow air through the intake port and let it vent through the spark plug hole.
Questions:
1) The air blowing: does this sound like good advice?
2) It sounds like the chain tensioner pad replacement is too difficult for me, yes?
Roger says that there are no pad replacements available for the '85-'86 engines at this time. I decided to leave them.
3) Should I change that long bolt on the driver's side cam cover to a short bolt?
Roger says that this configuration is correct. 9 long bolts, 3 short bolts per side.
4) The book says to use cam cover bolt O-rings only on the ten bolts on the perimeter of the cam cover, and NOT on the two interior bolts. Since I am using 87+ bolts on my 86.5, does this still hold?
Spent a couple of hours in the garage late this afternoon, after ordering 3 new fuel pressure dampers and regulator from Roger (at a very good price, I might add.) Unpacked Greg Brown's fuel line kit. They are beautiful items. I am nervous to install them- "tight but not too tight" is what makes me nervous.
I cleaned up a few parts:
130925 Before Plating.jpg
And then plated them:
130925 After Plating 1.jpg
130925 Plating 2.jpg
The passenger side cam cover I've removed 10 of the 12 allen bolts, but the one at the lower left and the one at the lower right are difficult to access, and my fianc� was cooking stew. I will try to deal with that tomorrow.
I took off the cam cover on the driver's side, which was tedious but easy:
130925 Cam Chains 1.jpg
I am not sure if I should touch the cam tensioner. I need to read up on Rennlist how to change the cam tensioner pads. I'll do that tonight.
https://rennlist.com/forums/928-foru...placement.html
https://rennlist.com/forums/928-foru...alve-only.html
https://rennlist.com/forums/928-foru...placement.html
The driver's side cam cover looks like it needs a good media blasting and powder coating.
130925 Cam Cover.jpg
I'm going to be carefully reading the thread below to gain insight into powder coating. (I've powder coated interior items like the ashtray, surround for window switches, and the like, but nothing with a critical mating surface.)
https://rennlist.com/forums/928-foru...onth-time.html
I carefully arranged the cam cover bolts on a piece of paper, and I noticed that I only had three short cam cover bolts at the corners, not four. I sent Roger a picture and he informed me that I had the 'new style' cam cover bolts. He furnished me with the washers that have a rubberized backing. They were inexpensive.
130925 DS Valve cover bolts.jpg
Last, I visited a local Porsche guy (he was busy cleaning out the damage from an IMS bearing failure on a 996- pretty ugly) and he agreed to help me with my throttle body. I am going to give him a couple of spare O-rings for the cam cover bolts (Roger sent me some extra) and he's going to change them out for me.
I explained to him that I was slightly terrified of anything having entered the cylinders via the intake port. He advised me to blow air through the spark plug hole and let it vent through the intake port, and then blow air through the intake port and let it vent through the spark plug hole.
Questions:
1) The air blowing: does this sound like good advice?
2) It sounds like the chain tensioner pad replacement is too difficult for me, yes?
Roger says that there are no pad replacements available for the '85-'86 engines at this time. I decided to leave them.
3) Should I change that long bolt on the driver's side cam cover to a short bolt?
Roger says that this configuration is correct. 9 long bolts, 3 short bolts per side.
4) The book says to use cam cover bolt O-rings only on the ten bolts on the perimeter of the cam cover, and NOT on the two interior bolts. Since I am using 87+ bolts on my 86.5, does this still hold?
Last edited by syoo8; Oct 13, 2013 at 12:26 PM. Reason: Found Answers to questions
Thread Starter
Burning Brakes
Joined: Jul 2007
Posts: 946
Likes: 5
From: Columbia, MO / San Luis Obispo, CA
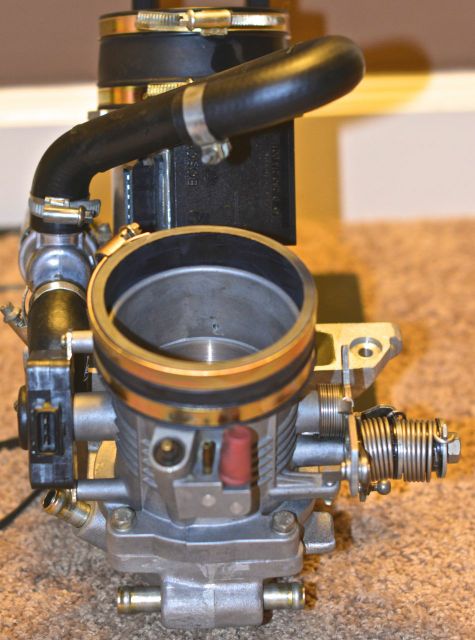
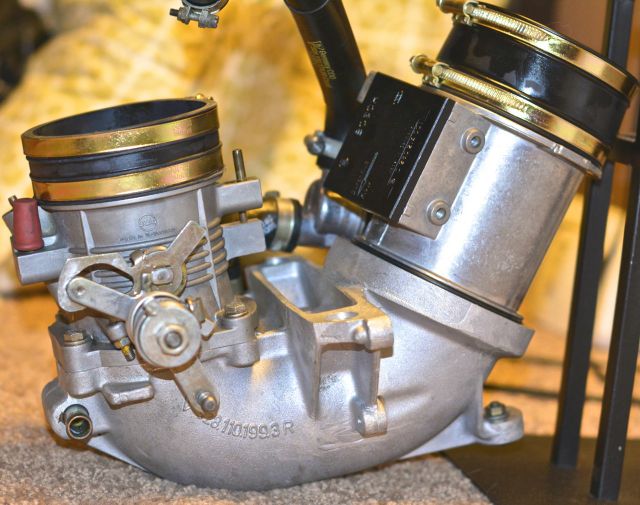
I reassembled the throttle body and air guide with new rubber bits. I was stuck on the throttle body (it leaked air) and I paid a local mechanic $40 to fix it- money well spent in my book.
I reassembled the unit exactly as it had come out of the car (scrupulously copying photos that I had taken when removing the TB) and the weird thing is that the throttle body seems rotated 180 degrees from the diagrams on PET.
Can you guys look a my TB and see if everything is in the right place?
Added note on December 9: Make sure that the hoses on the throttle body are nice and tight. Two of mine weren't and I had to twist myself into a pretzel to get at them. I knew they weren't tight because the car was whistling like crazy after everything was reassembled.
130929 Throttle Body 1.jpg
130929 Throttle Body 2.jpg
130929 Throttle Body 3.jpg
Last edited by syoo8; Jan 15, 2014 at 09:52 PM.
Inventor
Rennlist Member
Rennlist Member

Joined: Sep 2002
Posts: 10,219
Likes: 469
TB orientation is good.
MAF rotation is incorrect. The ridge down the MAF lines up with a nub cast on the housing.
MAF hose clamps should to be flipped over (face forward, passenger side).
Note the red vacuum cap should be on the port next to it for California, only.
(WSM incorrectly shows a 16V TB, so it's hard to tell from there.)
IIRC, all the 49 state engines I've seen look like the pic above.
(California cars had their own hood sticker, '85, '86.)
The remains of a broken rubber mount is still attached to the (third) mount point in the valley.
Rennlist Member
Joined: May 2001
Posts: 2,640
Likes: 117
From: Cypress (Houston), TX
Scott,
Nice work. I finished this same job on my 86.5 earlier in the year.
The FPR is in a different place on the S3's vs the S4's. I believe the rear driver's side unit is the FPR and I've never heard that PET is wrong about this. We have a local that just has his FPR changed for Ken's chips, and this is the unit that was replaced by the shop.
Thread Starter
Burning Brakes
Joined: Jul 2007
Posts: 946
Likes: 5
From: Columbia, MO / San Luis Obispo, CA
TB orientation is good.
Note the red vacuum cap should be on the port next to it for California, only.
(WSM incorrectly shows a 16V TB, so it's hard to tell from there.)
IIRC, all the 49 state engines I've seen look like the pic above.
(California cars had their own hood sticker, '85, '86.)
Note the red vacuum cap should be on the port next to it for California, only.
(WSM incorrectly shows a 16V TB, so it's hard to tell from there.)
IIRC, all the 49 state engines I've seen look like the pic above.
(California cars had their own hood sticker, '85, '86.)
What is really screwing me up is this diagram (below) in PET which is telling me that
a) my TB is rotated 180 degrees
b) The California/49 other states red plug is 180 degrees in the wrong place.
Is this PET diagram incorrect?
Screen Shot 2013-09-30 at September 30, 2013 9.07.02 AM .jpg
Rennlist Stories
The Best Porsche Posts for Porsche Enthusiasts

Every Era of 911 Owner Explained in One Sentence
Verdad Gallardo
Thinking of Buying a Porsche? Do These 10 Things First
Joe Kucinski
Pixar Pals Turned Into 1-of-1 Porsches!
Michael S. Palmer
Theon Goes Full Carbon Fiber With Stunning New Build
Verdad Gallardo
Genius Porsche-Themed Gifts That'll Make Any Dad or Grad Smile
Joe Kucinski
10 Used Porsches Are Selling for Way Too Cheap
Joe Kucinski
Tuner Is Converting Porsche 911s Into Shooting Brakes
Verdad Gallardo
This Coachbuilt Creation Is A Modern Take on the Legendary Porsche 917
Verdad Gallardo
Is This Convertible Cayenne A Steal, Or A Returnless Investment?
Verdad Gallardo
Thread Starter
Burning Brakes
Joined: Jul 2007
Posts: 946
Likes: 5
From: Columbia, MO / San Luis Obispo, CA
Update, September 30
I've been frustrated all weekend by a stripped cam cover bolt on the passenger side. I had removed 23 of them successfully, without incident, but it was the last one�
I applied Kroil to the bolt, to help matters.
First, I tried bolt extractor flute (Snap-On.) I tried two sizes. The smaller size stripped the inside of the allen socket, and then "bottomed out." The larger size was just a little too large.
Second, I cut grooves in the bolt, and tried to turn it by using a screwdriver and gently tapping the screw out with a hammer. No go.
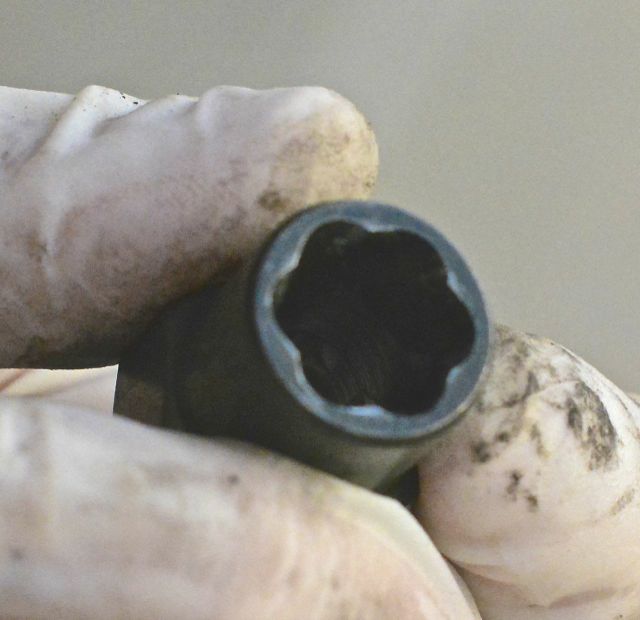
Finally, I used another type of bolt extractor that I bought from Sears.
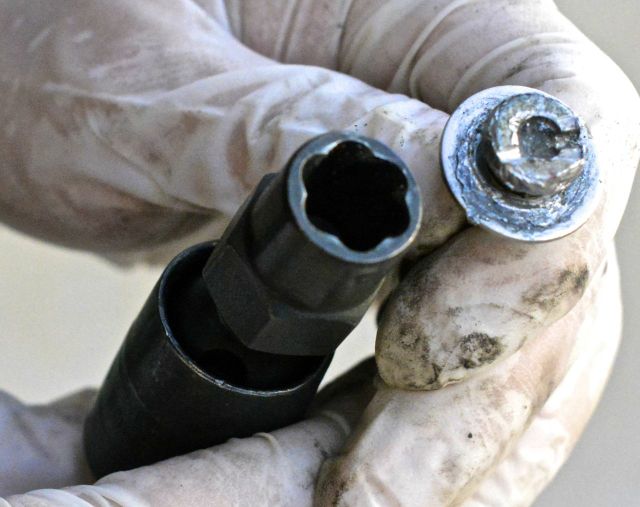
130930 Bolt Extractor 1.jpg
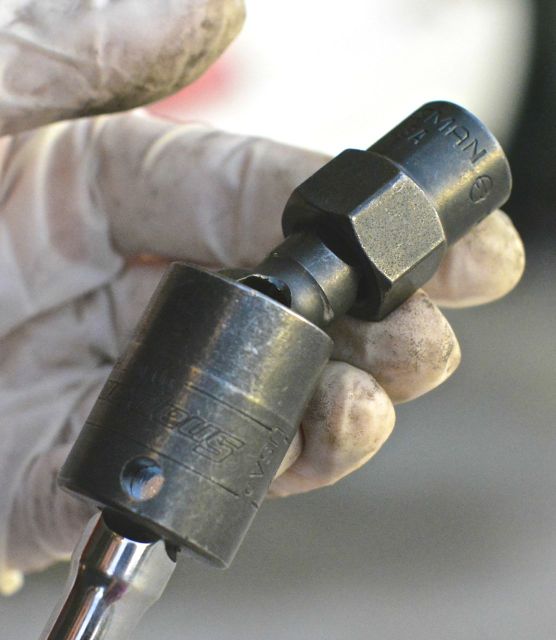
I attached it to a nifty ball & socket joint that I got from Snap-On ($$$) and an extension.
130930 Bolt Extractor 2.jpg
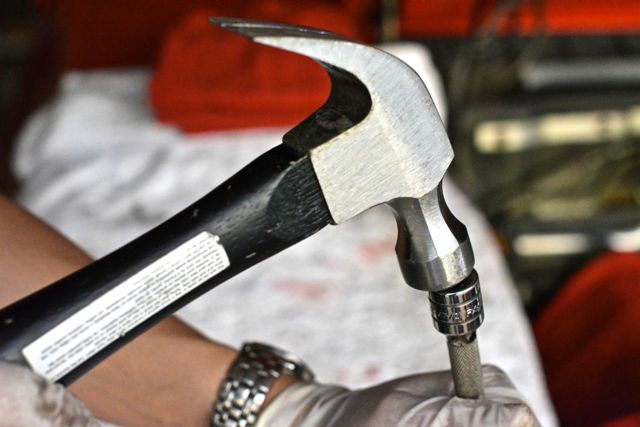
Then, I seated the extractor over the problem bolt and gently tapped the extension with a hammer.
130930 Bolt Extractor 4.jpg
Finally, I gave it a turn, and surprisingly, it worked. The bolt that came out was not pretty.
130930 Bolt Extractor 3.jpg
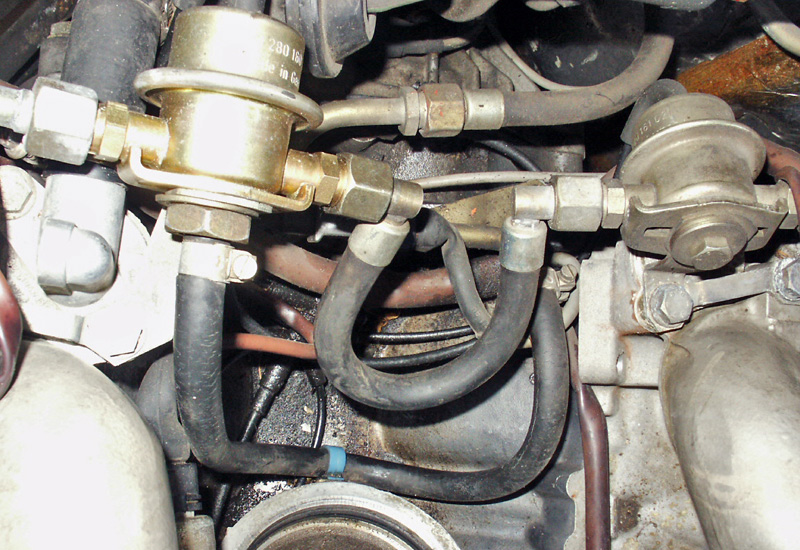
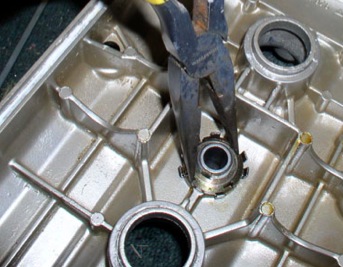
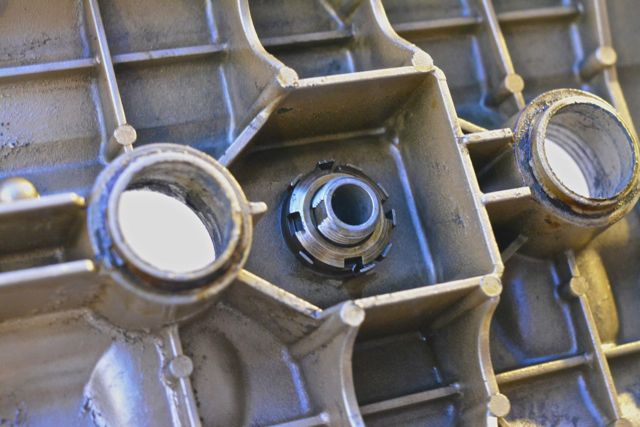
With a moderate amount of difficulty (had to remove a wire harness at the firewall side of the passenger side cam cover) I removed the passenger side cam cover. There are two oil breather elbows that need to be removed before i can get the cam covers powder coated.
In reading Dwayne's write-up on intake refresh for his '87 S4, he writes that the he uses a pair of pliers to remove the nut after bending up the tab on the washer.
Screen Shot 2013-09-30 at September 30, 2013 10.11.02 PM .jpg
I bent up the tab on the washer, but it seems to me that I'm not going to be able to remove the nut because the breather elbows are threaded, and attached to the nut.
130930 PS Cam Cover4.jpg
Anyone have any ideas?
I've been frustrated all weekend by a stripped cam cover bolt on the passenger side. I had removed 23 of them successfully, without incident, but it was the last one�
I applied Kroil to the bolt, to help matters.
First, I tried bolt extractor flute (Snap-On.) I tried two sizes. The smaller size stripped the inside of the allen socket, and then "bottomed out." The larger size was just a little too large.
Second, I cut grooves in the bolt, and tried to turn it by using a screwdriver and gently tapping the screw out with a hammer. No go.
Finally, I used another type of bolt extractor that I bought from Sears.
130930 Bolt Extractor 1.jpg
I attached it to a nifty ball & socket joint that I got from Snap-On ($$$) and an extension.
130930 Bolt Extractor 2.jpg
Then, I seated the extractor over the problem bolt and gently tapped the extension with a hammer.
130930 Bolt Extractor 4.jpg
Finally, I gave it a turn, and surprisingly, it worked. The bolt that came out was not pretty.
130930 Bolt Extractor 3.jpg
With a moderate amount of difficulty (had to remove a wire harness at the firewall side of the passenger side cam cover) I removed the passenger side cam cover. There are two oil breather elbows that need to be removed before i can get the cam covers powder coated.
In reading Dwayne's write-up on intake refresh for his '87 S4, he writes that the he uses a pair of pliers to remove the nut after bending up the tab on the washer.
Screen Shot 2013-09-30 at September 30, 2013 10.11.02 PM .jpg
I bent up the tab on the washer, but it seems to me that I'm not going to be able to remove the nut because the breather elbows are threaded, and attached to the nut.
130930 PS Cam Cover4.jpg
Anyone have any ideas?
Nordschleife Master
Joined: Jul 2011
Posts: 5,662
Likes: 26
From: North Country
Scott,
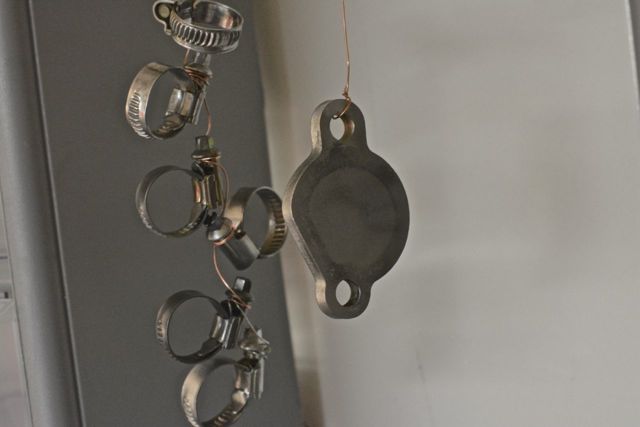
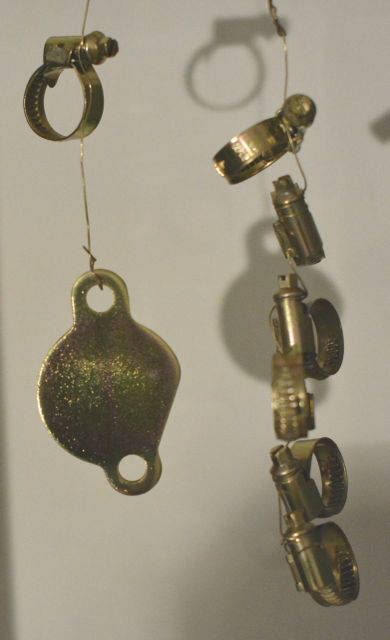
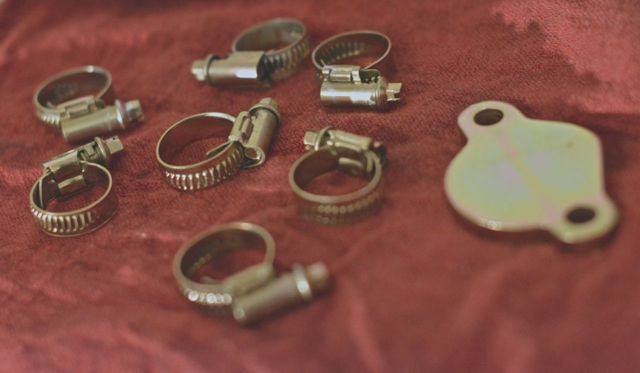
Here's a few pics of Dwayne getting it off. See one of his epic write ups here.
http://dwaynesgarage.norcal928.org/1...%20Refresh.htm
Add: My bad. I read over where you had already referred to this.
After bending up the tines add a little PB penetrant. Use a good sized needle nose to get into the slots of the nut to wind it off.
Craic Head
Lifetime Rennlist
Member
Lifetime Rennlist
Member

Joined: Sep 2006
Posts: 8,795
Likes: 7
From: Jersey Shore, USA
Hi Scott,
Got your PM. The diagram does appear to be 180 degrees of for the orientation of the TB. The TPS switch should be on the passenger side of a US 928 S3. The throttle linkages and springs are on the driver's side. Yours is set up as you took it out, and the right way.
For the cam cover bolts, someone must have had them out before and really did a job on the one that you had trouble with. I had a couple that didn't match as well and ended up replace about a half dozen total during my refresh. I'd make that one match the other three corners of the same cam cover. If you have the write-up of the arrangement of the washers, it's correct. Before that TSB there were no washers in the original job description.
For the chain tensioners: I wish I had done that job when I was in there. I'm sure it's probably in my future. The pads are a wear item and as long as you're organized and patient (which it looks like you are) I'm sure you can get through it. That's your call and most would probably not consider it necessarily a part of the 'top end refresh' but since you've got the cam covers off and it's right there, you should really consider it.
Finally- on the cam covers: beware! You mentioned media blasting them and redoing them. They are built up from some serious amounts of whatever filler material they used underneath the primer and paint. If you go down to bare metal you WILL have to build it up again. The casting they used is crap and has a huge longitudinal imperfection down one side of it that they grinded and filled. It's on every one I've seen so far and if you go down to bare metal you'll have some work to do on it. The end result will look incredible, but it's not just a strip and prep job.
Good luck and keep us posted!
Inventor
Rennlist Member
Rennlist Member
Joined: Sep 2002
Posts: 10,219
Likes: 469
The FPR is in a different place on the S3's vs the S4's. I believe the rear driver's side unit is the FPR and I've never heard that PET is wrong about this. We have a local that just has his FPR changed for Ken's chips, and this is the unit that was replaced by the shop.
Not sure why, exactly, but it runs oddly when the FPR is on the 5-8 side.
Prototype '85 engines had the FPR on the 5-8 side. (You can see photos of it there in the LH/EZF Service Bulletin.)
Production '85 engines have the FPR on the 1-4. The return hard line is still on the 5-8 side, though.
This necessitates a long return hose and a wee bracket and blue clip attached to the isolator stud under the MAF.
Rennlist Member
Joined: May 2001
Posts: 2,640
Likes: 117
From: Cypress (Houston), TX
Ken,
PET shows the S4 FPR on the passenger side unless I'm reading it wrong.
(p47, item 4)
http://www.porsche.com/all/media/pdf...91_KATALOG.pdf
PET shows the S4 FPR on the passenger side unless I'm reading it wrong.
(p47, item 4)
http://www.porsche.com/all/media/pdf...91_KATALOG.pdf
