When you click on links to various merchants on this site and make a purchase, this can result in this site earning a commission. Affiliate programs and affiliations include, but are not limited to, the eBay Partner Network.
I promised myself I wouldn't fiddle with the tune until I logged more miles but I couldn't help myself. A small 1/8 turn lean on the A/F and a 1/8 turn clockwise on the idle bypass smoothed it out quite a bit.
Been busy working on the 928 but haven't posted lately. First up, on the "fun" project list was installing my euro H4 headlights. Half the fun is the hunt and I managed to pick a set up for under 180 the pair shipped (whole assemblies) BEFORE AND AFTER:
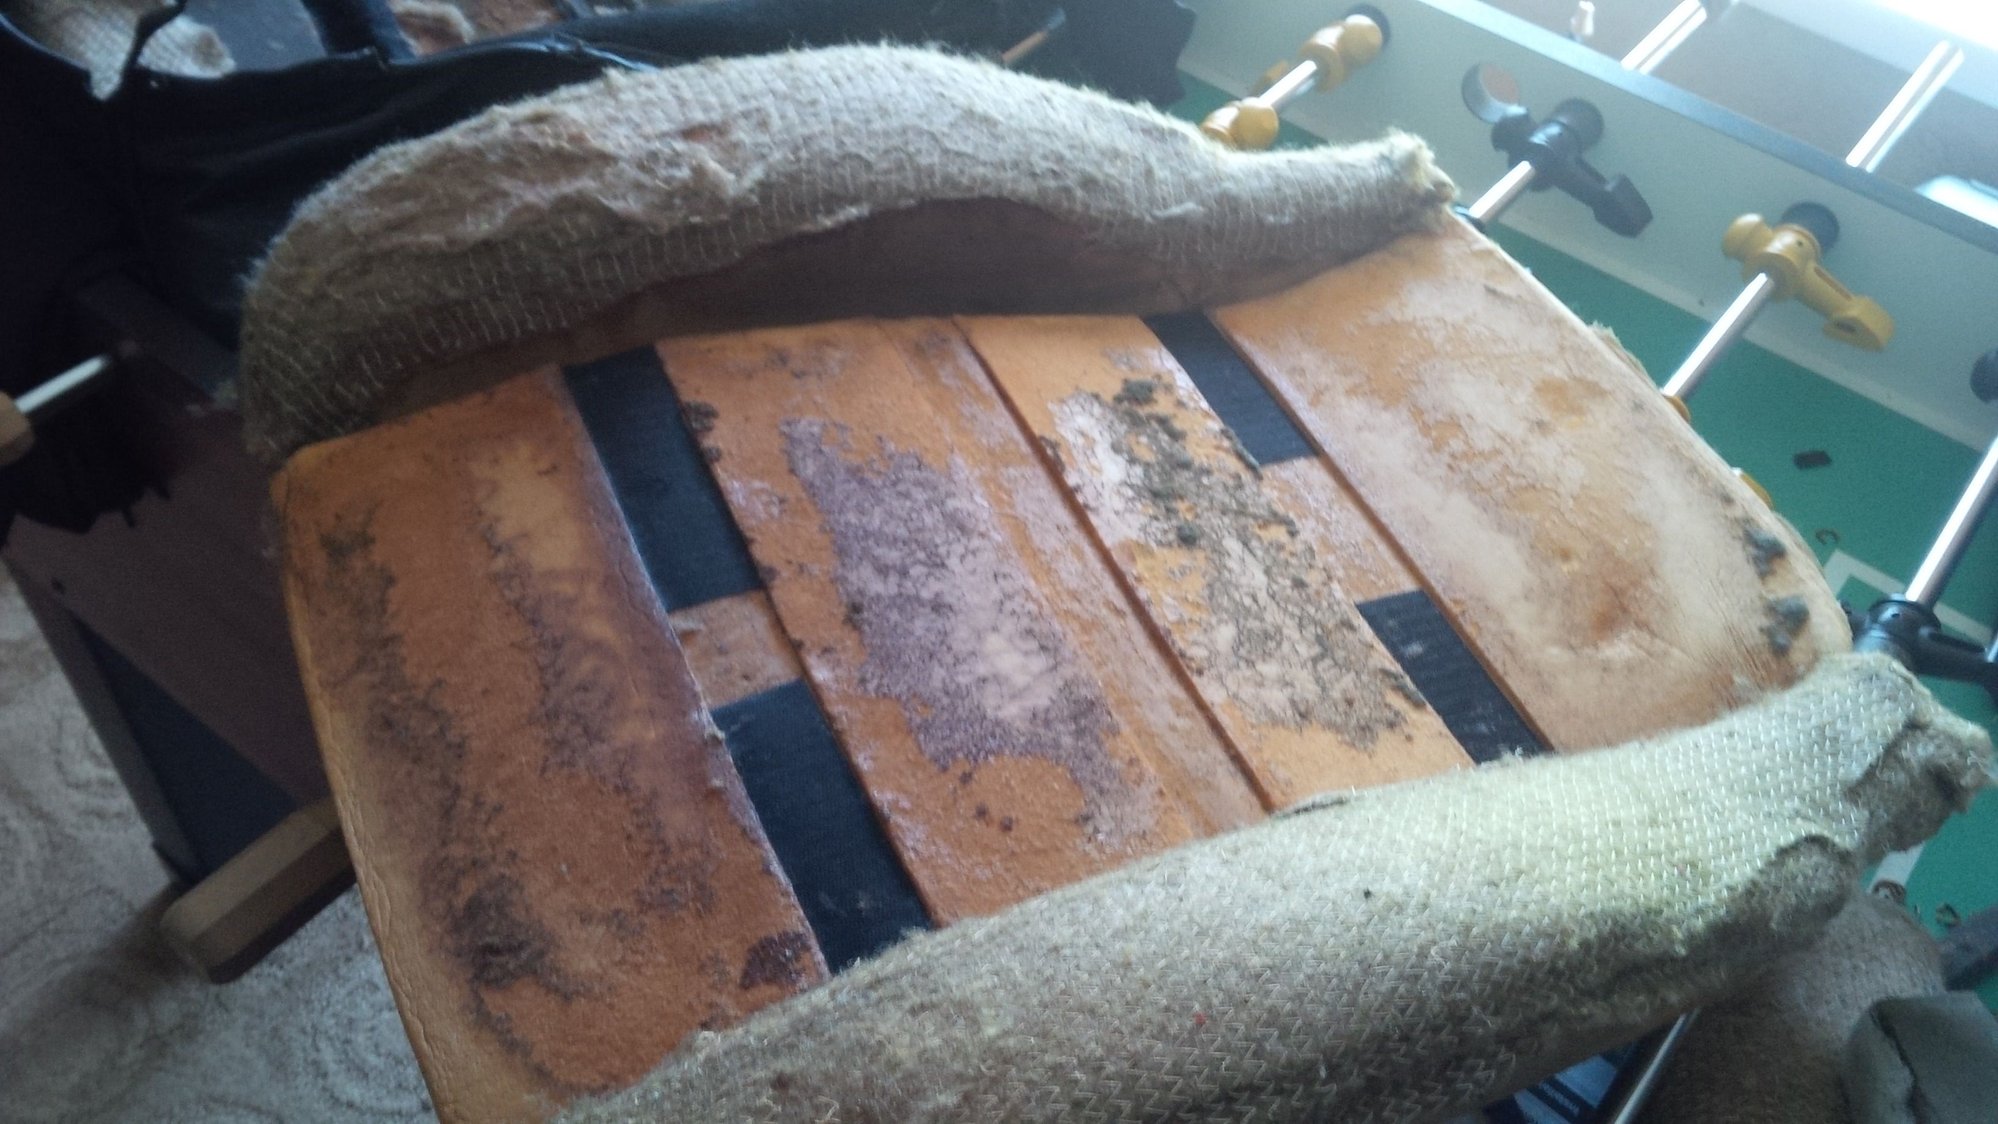
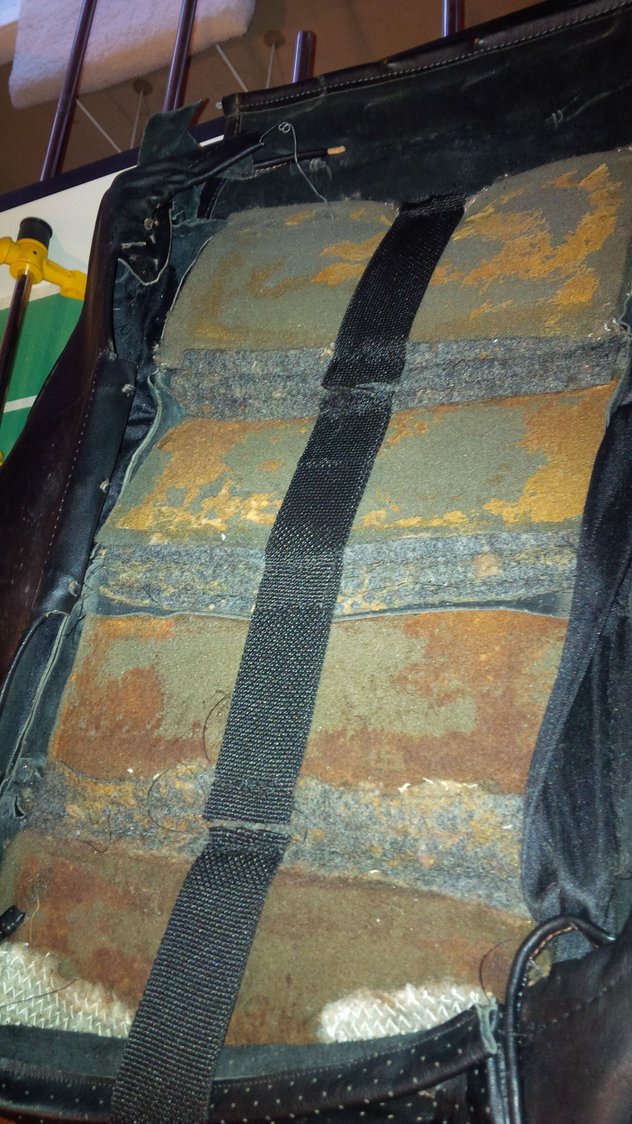
On another front.......My seats are actually not too bad. I am looking to "restore" rather than replace. So I broke out the sewing machine and scavenged some original leather from some rear seats I had lying around. This is for the passenger side bottom as you see in the BEFORE pic (the before pic is about 4 months old, progress has been made on other items).
This is about 80 percent done and it is NOT installed in the image. Will post more when it is finished (unless I am horribly embarassed). BEFORE AND AFTER:
I also been logging miles on nearly every other day. I am currently at 320 miles since resurrection. I am still working on restoring my passenger seat and plan to have that done shortly.
Here is what I did to the underside. I used web strapping to maintain pleat position and contains the foam. I am also go to add VELCRO at each pleat to hold it to the foam. I will forgo gluing the foam to make dis-assembly a little easier in the future.
I am also still stockpiling parts. Scored a super nice and rare cargo cover....
Gotta keep some secrets Just kidding, I got it thru an ebay seller who had some odd and ends listed. I threw a hail mary and asked him. Less than 30 dollars shipped
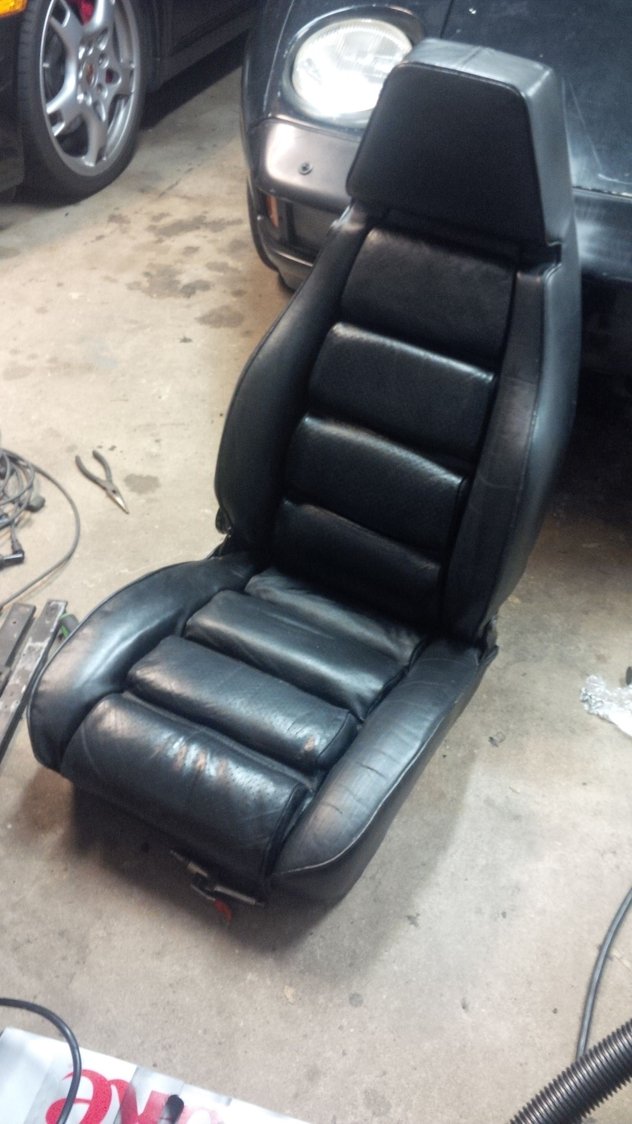
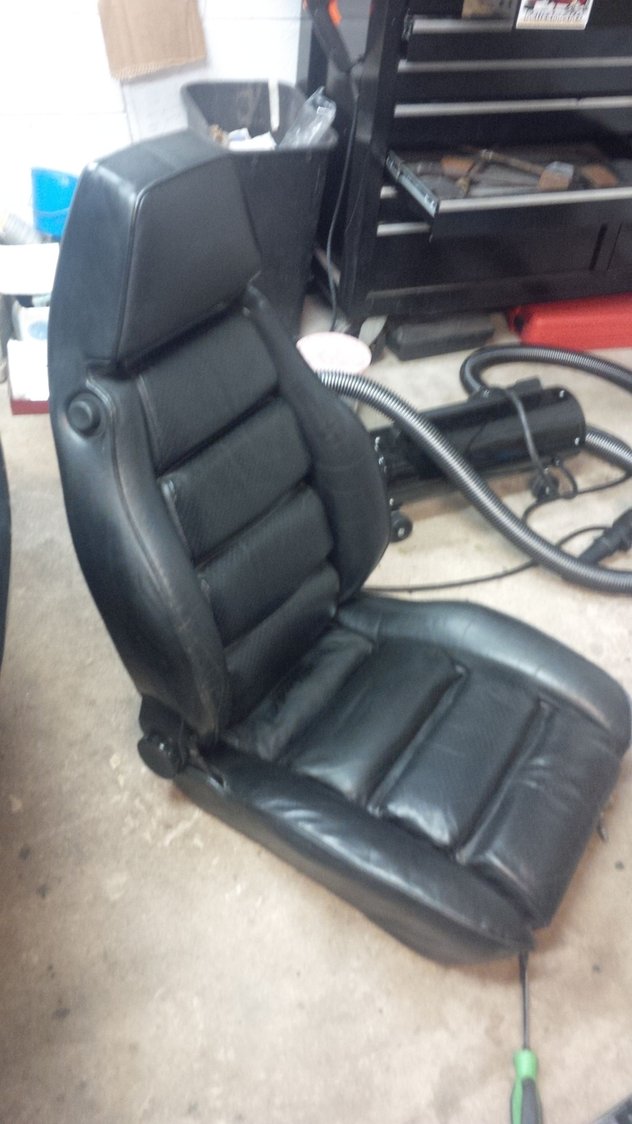
Seat is done and assembled. I used Velcro to affix the seams to the foam and was very pleased with how that worked out. This would have been MUCH EASIER if I used new leather but I wanted to keep the "patina". While I have done lots of seat cover installs, this was my first time sewing! I am very pleased overall and learned so much for the next time!
Velcro cut to fit in recesses on foam
Velcro attached to bottom of seams
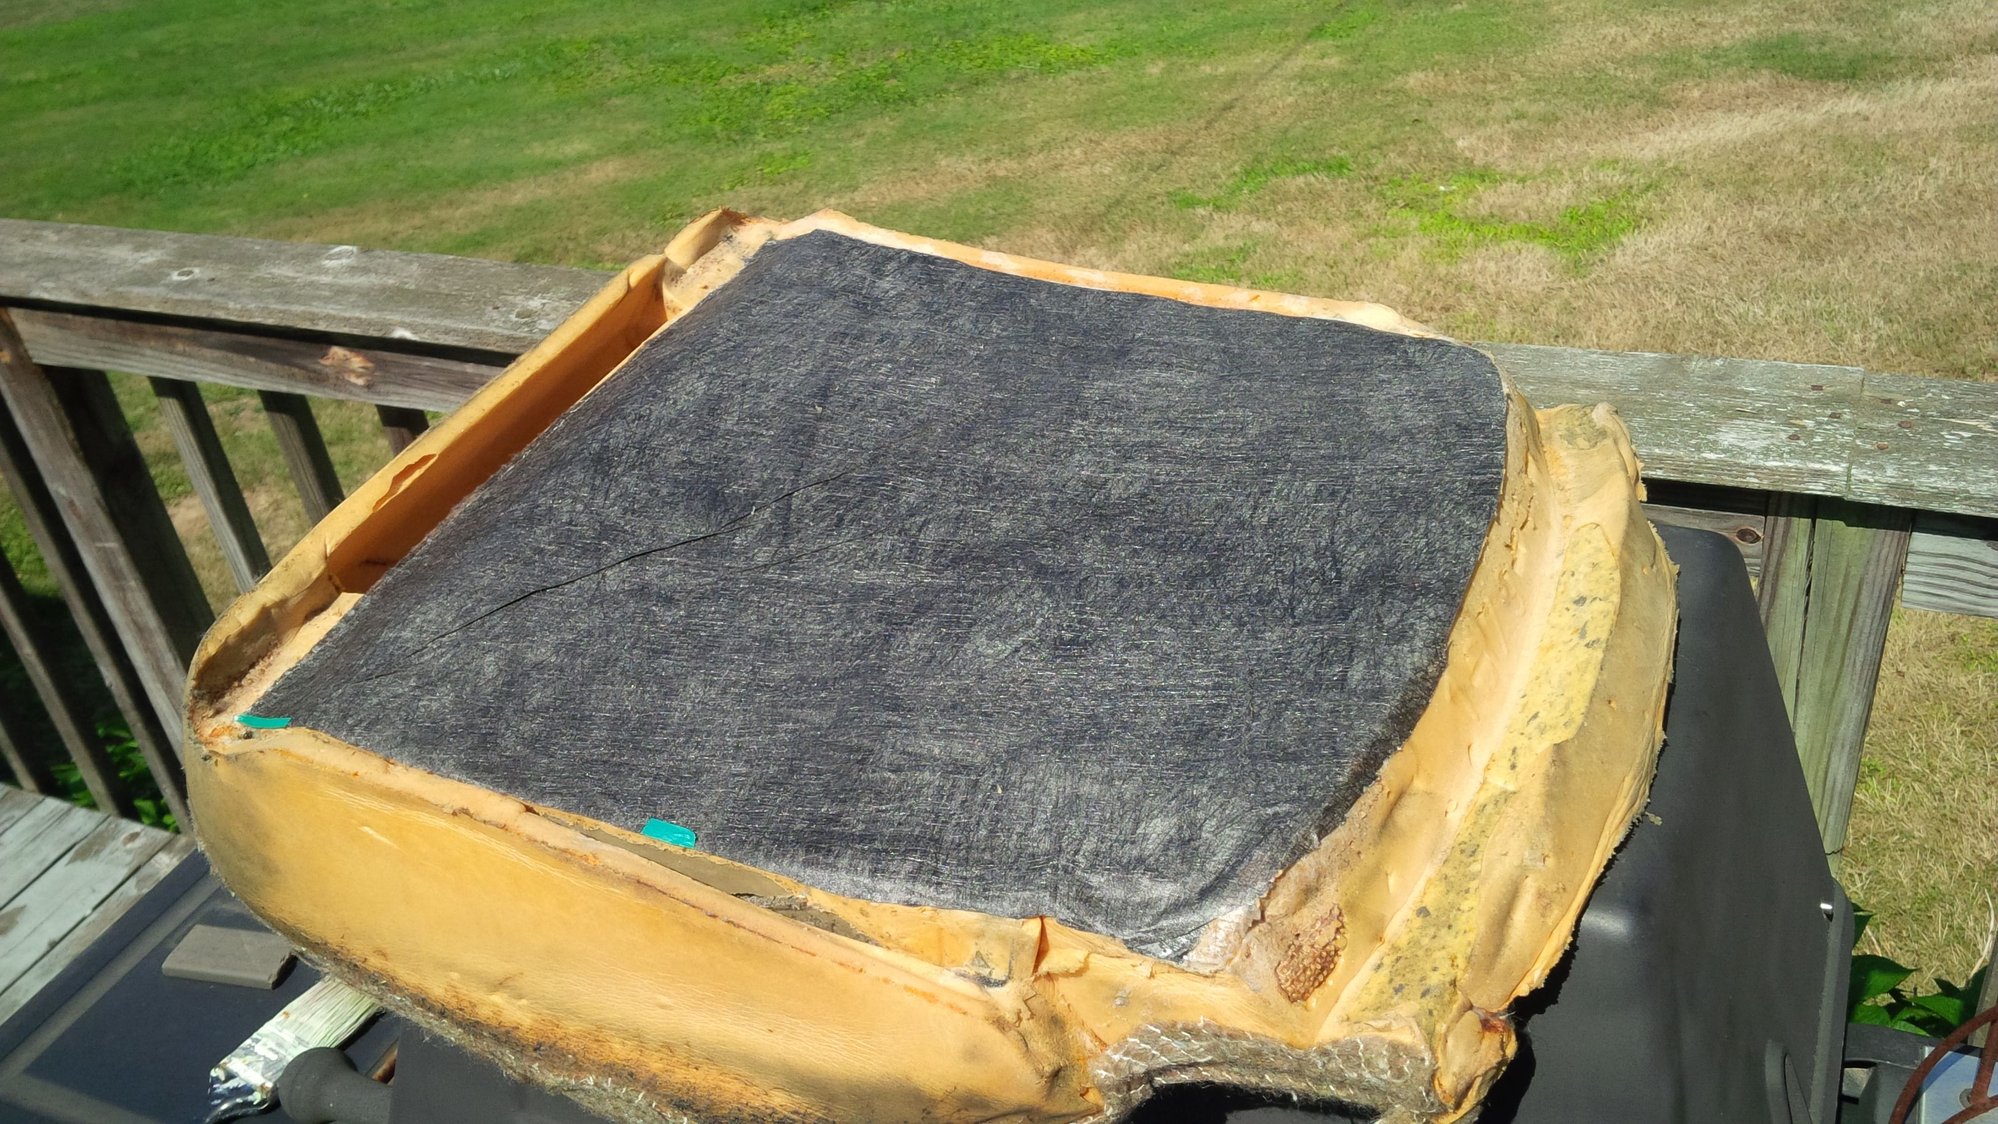
Landscape fabric laminated on to reinforce seat bottom
Finished seat- entire bottom except sides reworked with vintage leather
What a great project! A MAJOR thumbs up to you saving this beauty!! Excellent work thus far! I look forward to seeing the car evolve back into her former self. Nice work!
Great project and save. I did not notice any mention of replacing the fuel lines which can be a disaster waiting to happen. Roger at 928srus sells the Greg Brown replacements that are the best.
Great project and save. I did not notice any mention of replacing the fuel lines which can be a disaster waiting to happen. Roger at 928srus sells the Greg Brown replacements that are the best.
You are a very astute observer! Most of my lines are not original but with that said since I don't have a replacement date, I will be doing them anyway. I sent an email to Roger but I have to get the time to get on the phone with him to get them ordered. Timing belt was done prior to its hibernation but it too is on the list!
Just read all eleven pages (thus far) of this thread.
I am in awe.
What a great project! A MAJOR thumbs up to you saving this beauty!! Excellent work thus far! I look forward to seeing the car evolve back into her former self. Nice work!
Thank you both! So much left to do but I am still having tons of fun!!
I did stop posting the $$ count but for those keeping score it's just over 5g total including car. I did pre-purchase tons of parts on the shelves for brakes, engine mounts etc.

 06-08-2014, 06:07 PM

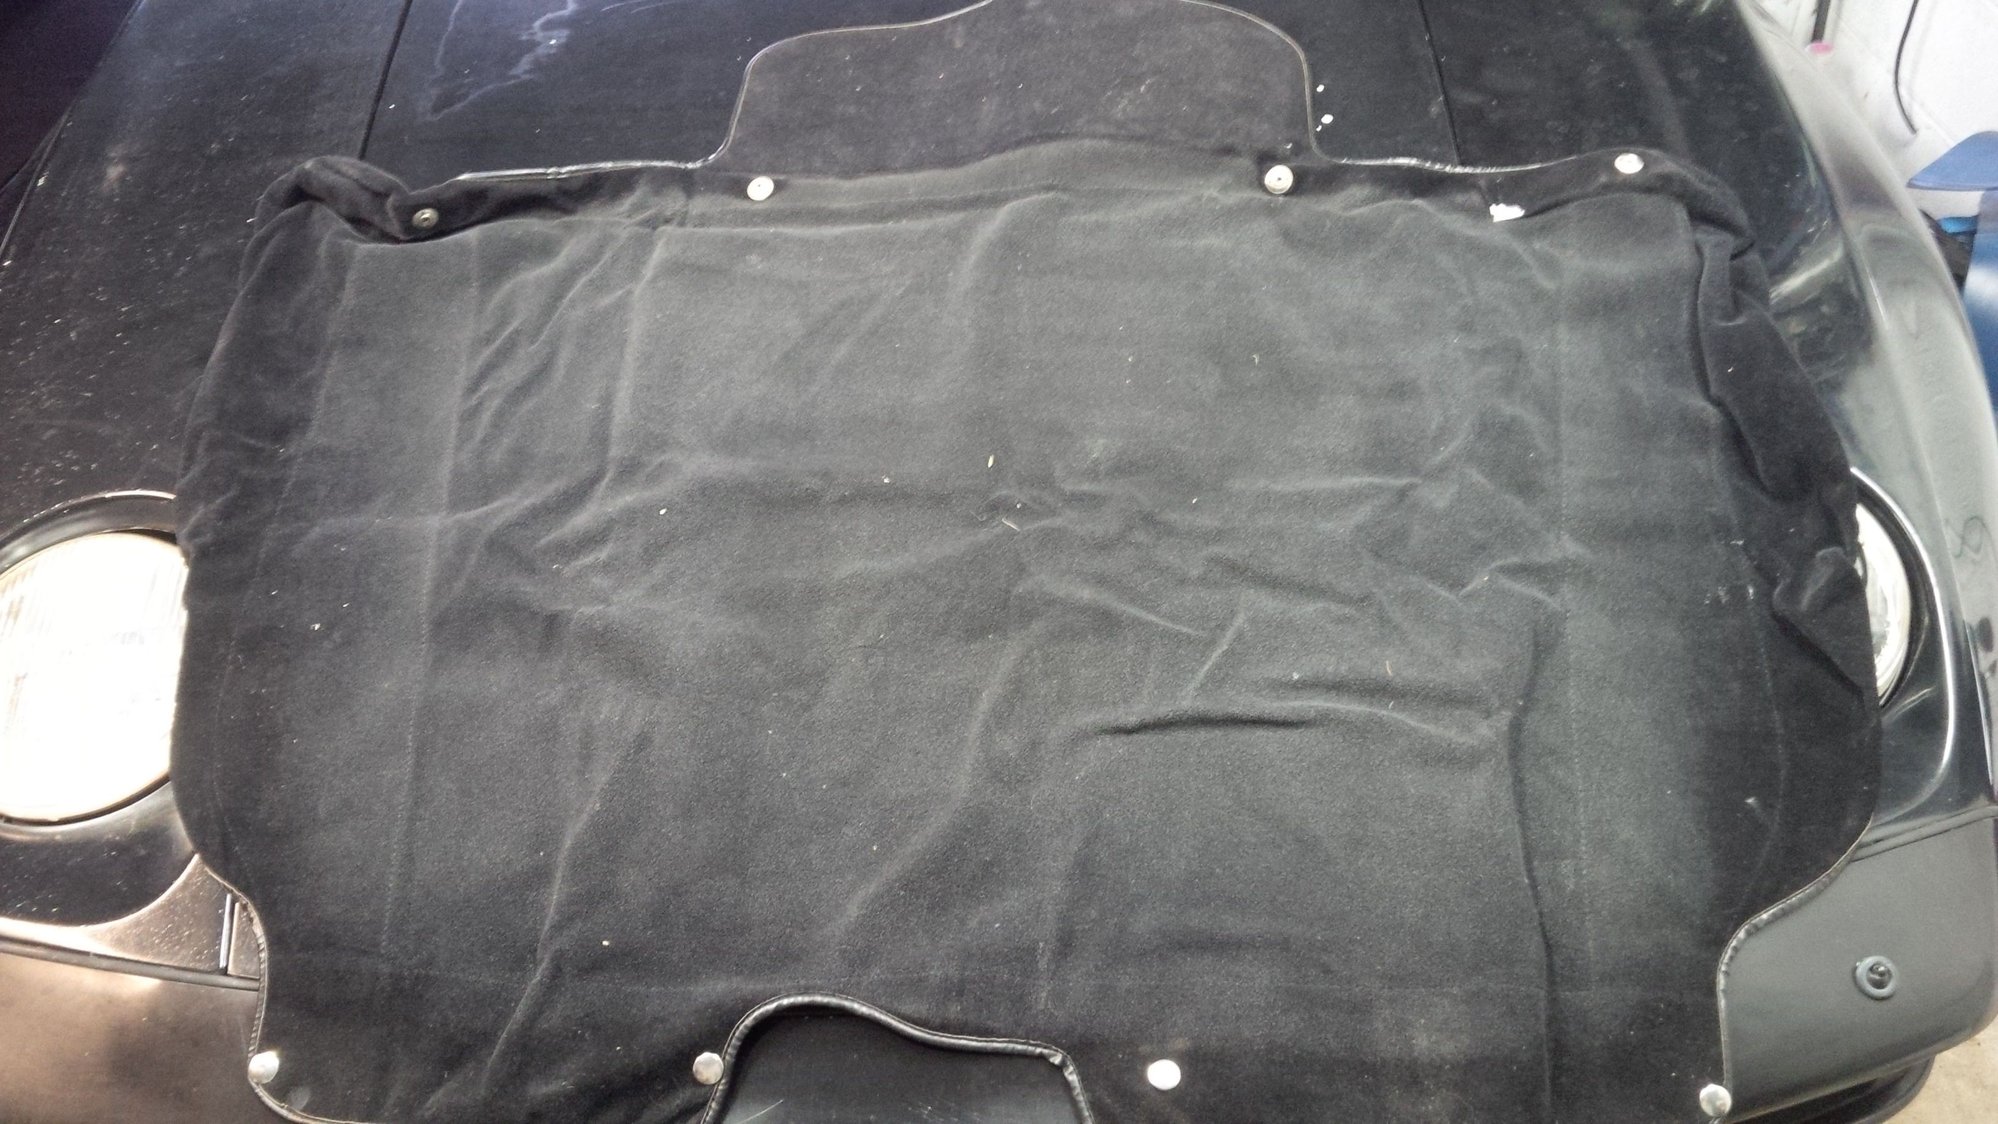


 Just kidding, I got it thru an ebay seller who had some odd and ends listed. I threw a hail mary and asked him. Less than 30 dollars shipped