
CV Axle Assy Rebuild for S4/GT/GTS
 08-18-2010, 02:25 PM
#1
Drifting
Thread Starter

Anyone have experience with rebuilding the later model axle assemblies? I am wondering how does one remove the end caps and inner boot mating pieces?
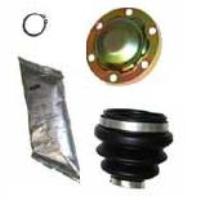
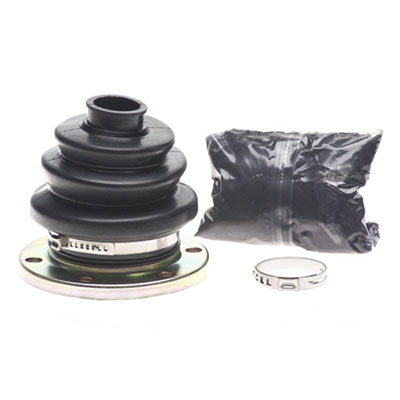
The WSM does not cover this later axle assembly. This Porsche kit comes with the end cap, but not the inner mating piece.
Can't these pieces be reinstalled after disassembly or do they need to be replaced?
I've rebuilt the earlier non-ABS cars, but not the later ones like on my 90' S4. Dyane's posted a how-to CV axle & boot rebuild ...
https://rennlist.com/forums/928-foru...-the-pics.html
... on this, but his car was an early version of the ABS axles which has different parts. The axle assemblies on my car have end caps and the inner boot attaches to a similar end cap.
The PET does not list the metal inner boot mating piece, but I found Autozone sells what looks like an aftermarket one that comes with a boot...
Thanks
 08-18-2010, 04:12 PM
#2
Under the Lift
Lifetime Rennlist
Member
Lifetime Rennlist
Member
I've done this on '90 axles. These inner end parts do not need to be replaced, just cleaned up, but might as well use the new end caps . I don't remember any issue with removal - they just come off.
08-18-2010, 08:15 PM
#4
Drifting
No, there is no glue. The cap basically presses on. The old one can be knocked off with a hammer and punch and minimal effort. To install the new one get a few nuts that fit on the axle bolts and tighten them down until the cap seats. The fit is tight enough to not leak.
10-23-2011, 02:03 PM
#5
Rennlist Member
I am in the middle of doing this job also and I had a few questions:
1) Can anyone explain how to get the CV joint off the shaft (at the differential side of course) without having to take it into a shop for use of their press (as others have mentioned)? I don't know of any shops nearby that I would trust to pull this apart without damage of the some of the sensitive surfaces (bearings, cage, etc)?
2) With the car in park why does the shaft rotate on the driver's side when trying to remove the nut at the wheel/hub? I elevated the car on jack stands and removed the wheels previously (to do another job, fuel related) before realizing I had a CV boot problem. I expected to be able to break the nut loose (as I did the passenger side) with the e-brake on and the car in park.
3) Just to make absolutely certain that I've studied this project properly; I will only be able to remove the boot (not the joint) on the wheel side of the shaft, correct? I'll have to clean it as best I can, apply lubricant into the joint from the boot side, place my fingers over the shaft ends and retract the joint to "suck" in the lubricant. Nothing else comes apart on that end, right?
4) I need to keep the bearings with the correct cage slots when disassembling the other end, correct? Is it necessary to also keep the bearings/cage slots married to the same slots where they travel in - on the inside piece and the outer collar?
5) I've read elsewhere that the joints take about 2 tubes of the provided lubricant (per joint) for a total of 4 tubes of lubricant per axle. However, judging solely by the pictures from various vendors, the kits are supplied with only 1 tube of lubricant per joint kit. Do I need to buy more lubricant to supplement?
Thanks for any help you guys can be.
10-23-2011, 02:11 PM
#6
Nordschleife Master
Nicholas,
1) get and use a small 3 jaw puller.
2) the pawl locks the pinion gear, not the diff, if both wheels are off the ground they will be able to rotate.
3) Correct, I take solvent and slosh it around inside the outer joint to clean.
4) no, the ***** can be moved around without affect so long as they are in good condition, ie no pitting.
5) I always use between 1.5-2 tubes of the supplied grease per joint. I have never had a joint I rebuilt fail.
10-23-2011, 03:39 PM
#7
Rennlist Member
The easiest way I've found to get the wheel end joint clean is to submerge the whole joint sans boot in a container of mineral spirits and run a small flow of compressed air down the inside of the axle shaft. Just enough air to bubble the mineral spirits helps agitate the grease enough to dissolve in the spirits. After an hour or two the joint is squeaky clean. A quick flush with brake cleaner to remove the mineral spirits and it is ready to re-pack.
Mike
Mike
Trending Topics
10-23-2011, 03:56 PM
#8
Archive Gatekeeper
Rennlist Member
Rennlist Member
The easiest way I've found to get the wheel end joint clean is to submerge the whole joint sans boot in a container of mineral spirits and run a small flow of compressed air down the inside of the axle shaft. Just enough air to bubble the mineral spirits helps agitate the grease enough to dissolve in the spirits.
 10-23-2011, 05:33 PM
#9
Rennlist Member
Nicholas - I just did this job 2 weeks ago. To your first question, I didn't have access to a press either AND mine were on there tight--none of this "it will slide off" crap like I saw on U-tube videos. I got the inside joints off by clamping the shaft of the axle in a vice and using a brass drift and a BFH to bang it off the shaft�taking care not to hit any bearings or mar the shaft splines. The outside CVs (closest to the wheel) stay on the axle.
I don't know if you could remove the nut from the wheel with it off the ground. That mother's on there; ~ 330 ft-pounds. I would guess your e-brake isn't as tight on that rotor(?) Maybe you could put another floor jack under that tire to put some resistance on it...
For the outside CV, as other's have said, you only need to remove the boot and clean and suck--so to speak I love the idea of getting a piece of PVC pipe with a cap and put mineral spirits in it and then using the compressed air bubbles down the shaft. I cleaned mine with a spray bottle and a 1/2 gallon of mineral spirits and let it drain into an old bucket (similar to Dwayne�s website). Then a final cleaning with brake cleaner.
I went overboard keeping the bearings/cage, lined up and put paint-pen markings on mine (see pic below) just to make sure they were oriented the same when I put it all back together. I then wiped off the paint with brake cleaner before greasing the joint.
My kits from 928 Intl had 2 tubes of grease with each kit. FWIW - I would consider packing the bearings only and then putting the boot on and then use an injector between the shaft and boot to "top off" the rest of the grease. I found it impossible to slide the boot down over the lip of the CV and keep a clean surface for clamping--especially if both tubes were used.
My only other piece of advice is consider how you're going to clamp the boot. See pic below for how I ended up doing mine. There are special pliers you can buy but I didn�t have access to a store that sold them here.
IMO - Have plenty of paper towels, don't wear white and for God's sake, don't do it in the wife's kitchen!
I don't know if you could remove the nut from the wheel with it off the ground. That mother's on there; ~ 330 ft-pounds. I would guess your e-brake isn't as tight on that rotor(?) Maybe you could put another floor jack under that tire to put some resistance on it...
For the outside CV, as other's have said, you only need to remove the boot and clean and suck--so to speak
I love the idea of getting a piece of PVC pipe with a cap and put mineral spirits in it and then using the compressed air bubbles down the shaft. I cleaned mine with a spray bottle and a 1/2 gallon of mineral spirits and let it drain into an old bucket (similar to Dwayne�s website). Then a final cleaning with brake cleaner. I went overboard keeping the bearings/cage, lined up and put paint-pen markings on mine (see pic below) just to make sure they were oriented the same when I put it all back together. I then wiped off the paint with brake cleaner before greasing the joint.
My kits from 928 Intl had 2 tubes of grease with each kit. FWIW - I would consider packing the bearings only and then putting the boot on and then use an injector between the shaft and boot to "top off" the rest of the grease. I found it impossible to slide the boot down over the lip of the CV and keep a clean surface for clamping--especially if both tubes were used.
My only other piece of advice is consider how you're going to clamp the boot. See pic below for how I ended up doing mine. There are special pliers you can buy but I didn�t have access to a store that sold them here.
IMO - Have plenty of paper towels, don't wear white and for God's sake, don't do it in the wife's kitchen!
Last edited by NoVector; 09-09-2018 at 12:48 AM.
10-23-2011, 08:37 PM
#10
Rennlist Member
"BRILLIANT" as another member put it. Thank you all so much for your advice and direction. This was EXACTLY what I needed to understand the details of the project and as it applied to the later cars.
After posting, I went outside and looked at it some more...got my Dad involved. My method for removing the bolt was unconventional (wedged a heavy screwdriver in the rotor fins and against the caliper to prevent movement). It finally broke loose, but it was definitely on there tighter than the passenger side....I'm suspecting greater than 350-400lbs torque.
Luckily the joint come off the shaft easily on the passenger side. The driver's side required yet another unconventional method....though I'm too embarrassed to admit how me Dad got it off. It definitely took some convincing.
I initially used the fuel emptied from my gas tank (also in the middle of doing fuel repairs) and submerged the joint in it while sloshing it around whilst moving the joints in/out/around/etc. I finished with some spray brake parts cleaner (lots of it) with the straw that directed higher pressure into the crevices that was good at driving out remaining dirt/grease.
Against conventional wisdom, I've decided to keep the inner joints together instead of breaking them down for a few reasons. One, the grease was still in there and plentiful with no s/s of dirt/water. Two, there is no play in the joints at all and they cleaned up looking like new - even the bearings are shiny with no scoring visible. I paid close attention to the components and inspected them well while rotating the cleaned unit. Three, if it's OK not to disassemble the other end then I feel OK with this one...especially since that boot had not deteriorated any and was sealed up well. I know, you guys are gonna eat me alive for not going the extra step, but all this talk about maintaining the cage/bearing/race/etc married to their existing surfaces had me worried that I would get it apart and screw up the arrangement...even with paint/markings. Instead, I cleaned the heck out of them.
I oiled up the joints temporarily to protect against corrosion that may set in while I wait on my CV repair kits to come in. I'll re-clean with more Brake Cleaner to flush out the oil before repacking with the correct lubricant.
Thanks again guys for all your help. Thanks Dwayne for posting a terrific write-up with pics on this project (even if it was curtailed to the older cars).
Respectfully,
10-24-2011, 11:01 AM
#11
Under the Lift
Lifetime Rennlist
Member
Lifetime Rennlist
Member
Against conventional wisdom, I've decided to keep the inner joints together instead of breaking them down for a few reasons. One, the grease was still in there and plentiful with no s/s of dirt/water. Two, there is no play in the joints at all and they cleaned up looking like new - even the bearings are shiny with no scoring visible. I paid close attention to the components and inspected them well while rotating the cleaned unit. Three, if it's OK not to disassemble the other end then I feel OK with this one...especially since that boot had not deteriorated any and was sealed up well. I know, you guys are gonna eat me alive for not going the extra step, but all this talk about maintaining the cage/bearing/race/etc married to their existing surfaces had me worried that I would get it apart and screw up the arrangement...even with paint/markings. Instead, I cleaned the heck out of them.
10-24-2011, 11:29 AM
#12
Rennlist Member
I've got this job on my to do list, and this may be the best tip I've heard in a long time. If I understand right, hook up an air source, walk away and let it bubble for an hour or two... what a great idea!
BTW, last time I did this job on my 86.5, the diff side bearing refused to come off and I broke the bearing cage pulling on it too hard, so be careful, that part is very hard to find and expensive when you do find it.
BTW, last time I did this job on my 86.5, the diff side bearing refused to come off and I broke the bearing cage pulling on it too hard, so be careful, that part is very hard to find and expensive when you do find it.
The easiest way I've found to get the wheel end joint clean is to submerge the whole joint sans boot in a container of mineral spirits and run a small flow of compressed air down the inside of the axle shaft. Just enough air to bubble the mineral spirits helps agitate the grease enough to dissolve in the spirits. After an hour or two the joint is squeaky clean. A quick flush with brake cleaner to remove the mineral spirits and it is ready to re-pack.
Mike
Mike
10-24-2011, 12:34 PM
#13
Rennlist Member
Rennlist Site Sponsor

Remember that when you bubble air thru mineral spirits, you are pumping large quantities of flammable vapors into the area...
(English is an odd language...
flammable - will burn
inflammable - will burn
combustible - will burn
incombustible - won't burn)
(English is an odd language...
flammable - will burn
inflammable - will burn
combustible - will burn
incombustible - won't burn)
10-24-2011, 12:55 PM
#14
Rennlist Member
...
Last edited by NoVector; 09-09-2018 at 12:48 AM.
10-24-2011, 02:11 PM
#15
Basic Sponsor
Rennlist
Site Sponsor
Rennlist
Site Sponsor
GKN kits come with two tubes of grease per joint kit - 85 to 95 - we sell for $11.95 each.
__________________

Does it have the "Do It Yourself" manual transmission, or the superior "Fully Equipped by Porsche" Automatic Transmission? George Layton March 2014
928 Owners are ".....a secret sect of quietly assured Porsche pragmatists who in near anonymity appreciate the prodigious, easy going prowess of the 928."
Does it have the "Do It Yourself" manual transmission, or the superior "Fully Equipped by Porsche" Automatic Transmission?
George Layton March 2014928 Owners are ".....a secret sect of quietly assured Porsche pragmatists who in near anonymity appreciate the prodigious, easy going prowess of the 928."