
TB/WP R&R, Intake & Cam cover refurb, and Murf Stage One installed (Pictures & Video)
 04-28-2010, 01:28 PM
#61
Nordschleife Master
I have one. Leave it on the bedroom dresser and your date knows you're into special tools.
Not sure why, but always thought it would be cool to have one of these:
http://www.amazon.com/exec/obidos/tg...X0DER&v=glance
The prices have come down a lot lately.
Does anyone know if these will fit through the valves in the open position?
It might be worth it just for the peace on mind... and for checking the ATF levels!
http://www.amazon.com/exec/obidos/tg...X0DER&v=glance
The prices have come down a lot lately.
Does anyone know if these will fit through the valves in the open position?
It might be worth it just for the peace on mind... and for checking the ATF levels!
 04-29-2010, 11:12 PM
#64
Drifting
Thread Starter
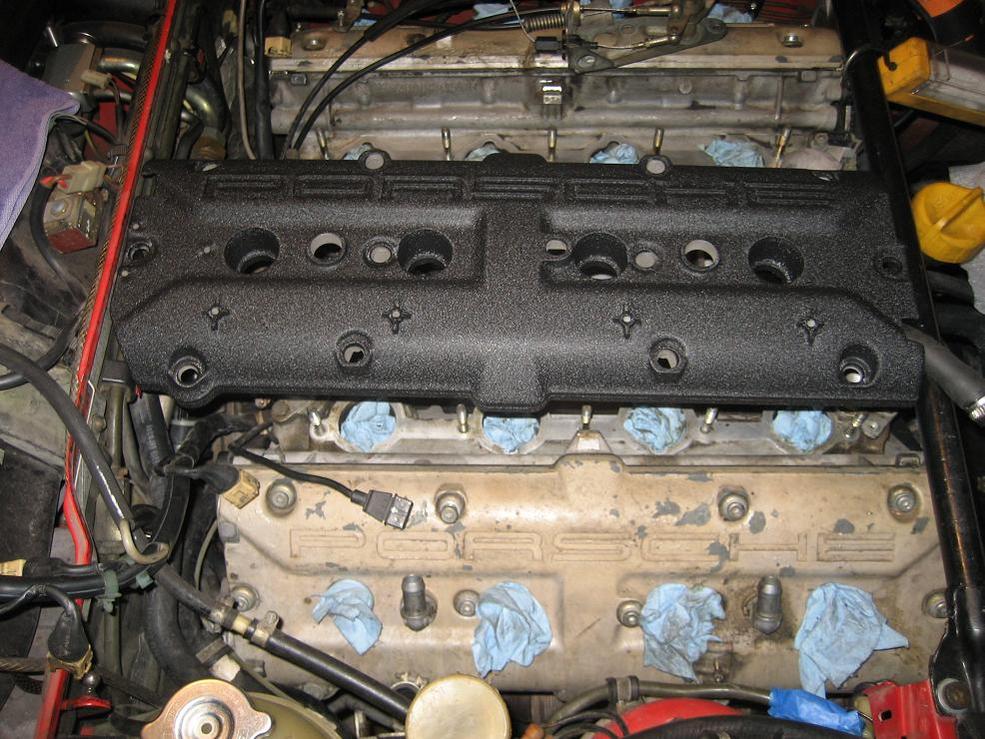
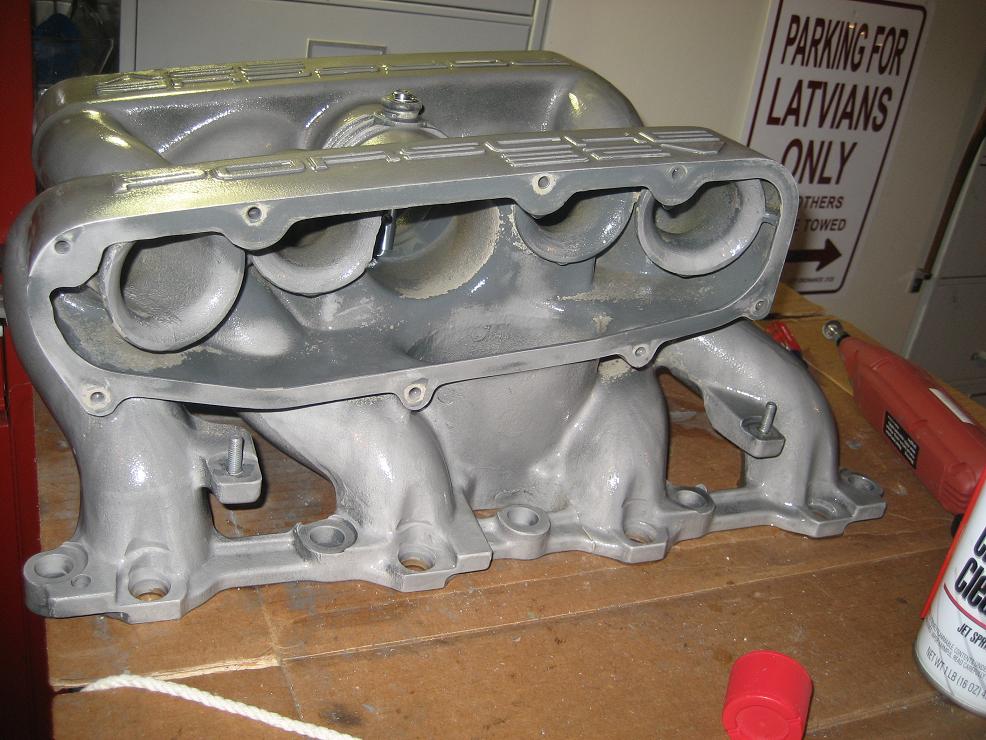
Cracked open the intake and sure enough, it’s flaking all over the place.
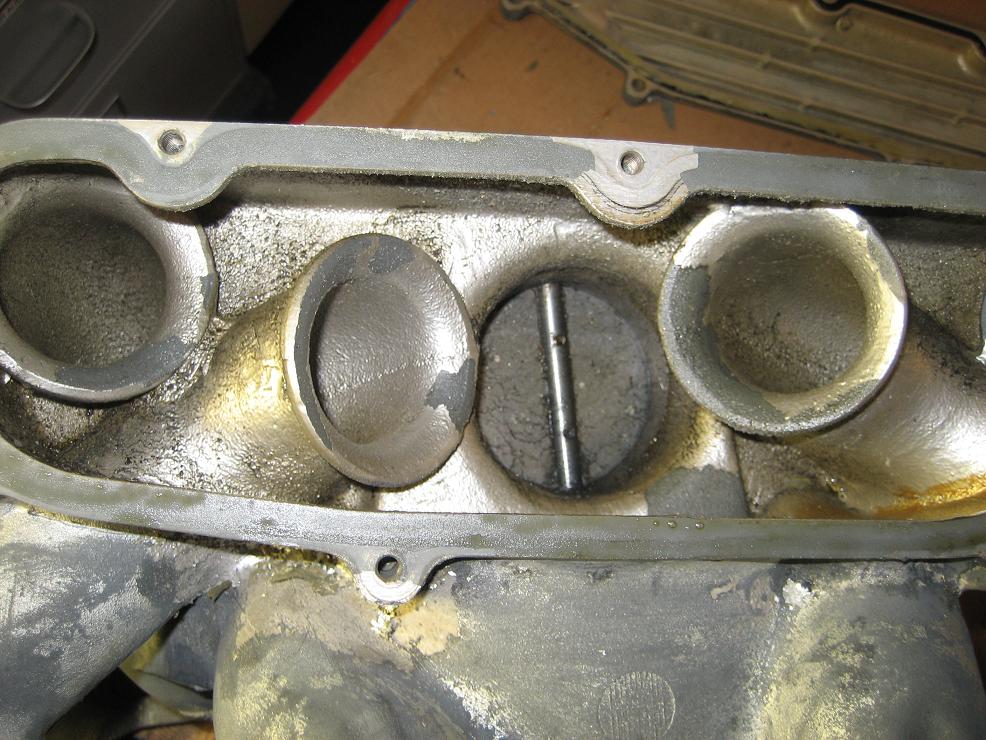
At first I thought it was going to be manageable
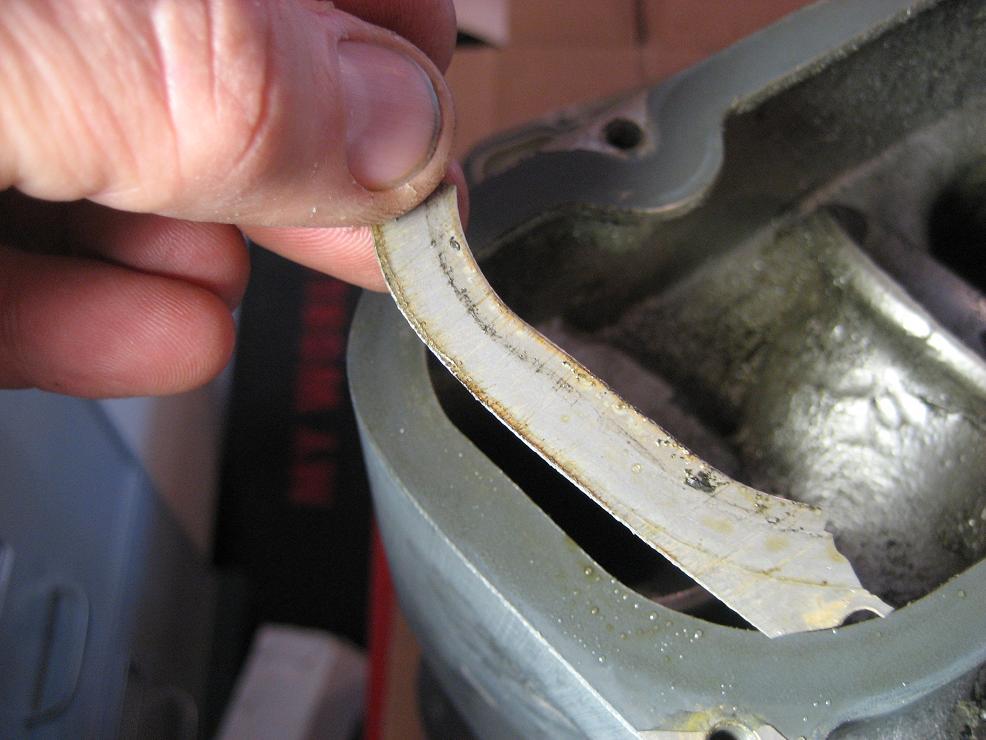
until this stuff started literally coming off in sheets… off to a blaster it goes.
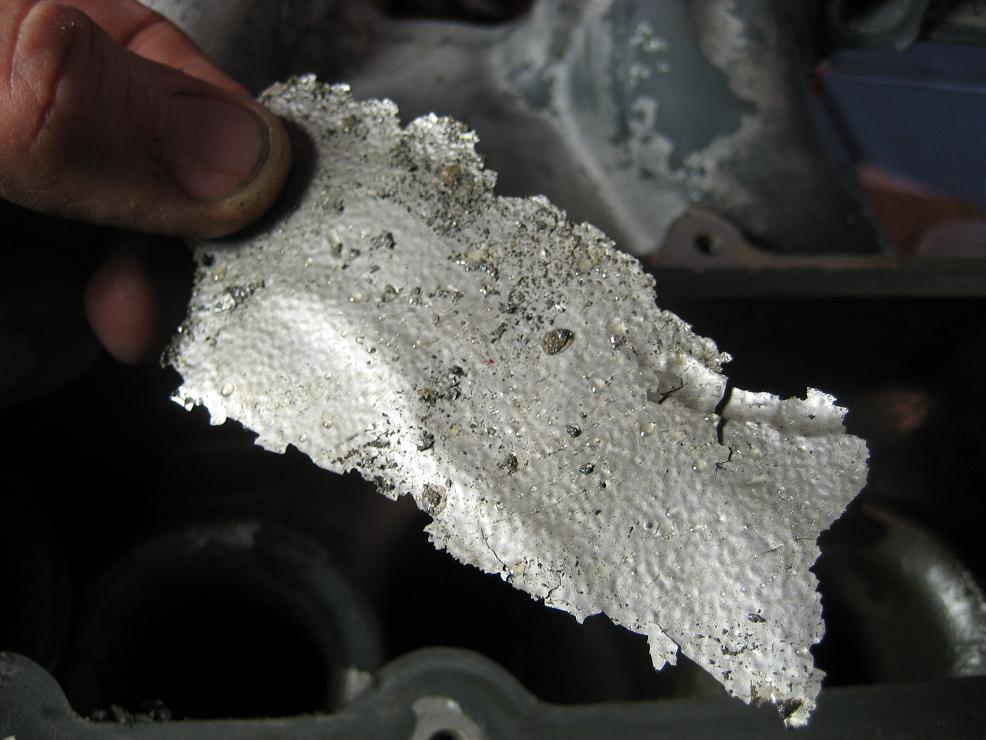
The casting on these intakes is horrendous. At first I thought this was covered with goo until I hit it with a wire wheel.
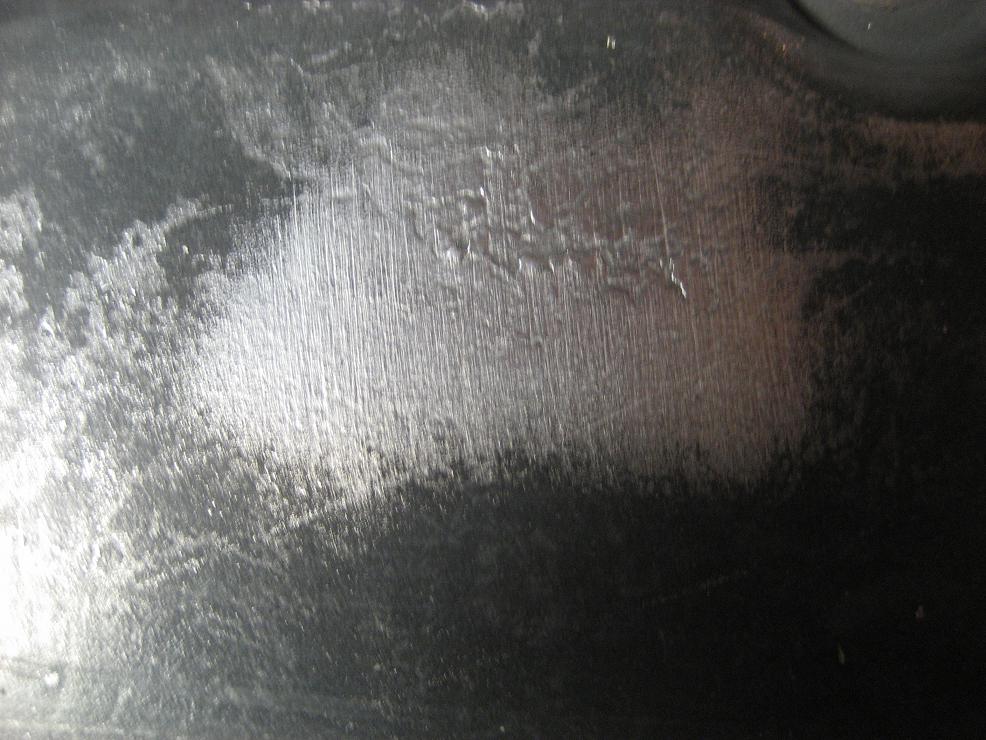
I don’t think this isn’t will smooth out without some sort of filler. Rumor has it these were cast out of savaged engine blocks and I’m beginning to believing it.
At first I thought it was going to be manageable
until this stuff started literally coming off in sheets… off to a blaster it goes.
The casting on these intakes is horrendous. At first I thought this was covered with goo until I hit it with a wire wheel.
I don’t think this isn’t will smooth out without some sort of filler. Rumor has it these were cast out of savaged engine blocks and I’m beginning to believing it.
05-03-2010, 10:35 AM
#65
Drifting
Thread Starter
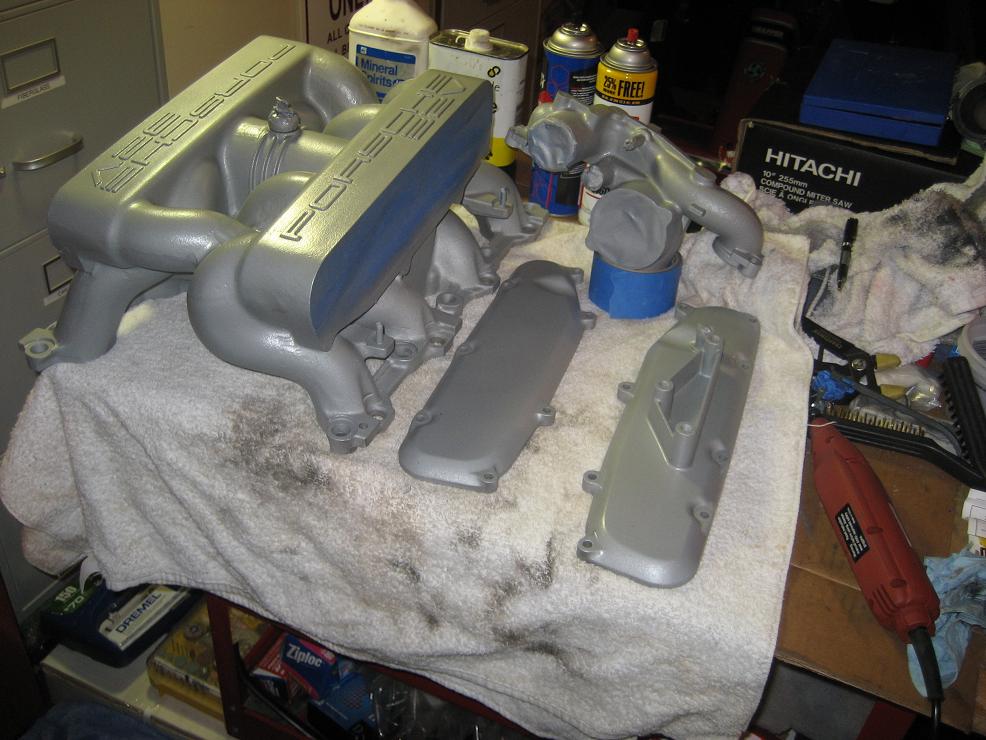
Thanks to Hans, the cam covers are back from the powder coater. These will make a huge improvement in the looks department wouldn’t say?
Thanks to Troy, the intake has been blasted (he has a blast cabinet where he works). Even though he sent it through a parts washers and power blew it twice, I was a little paranoid about remaining media in the intakes.
So first I pulled rags soaked with carb clean through the ports:
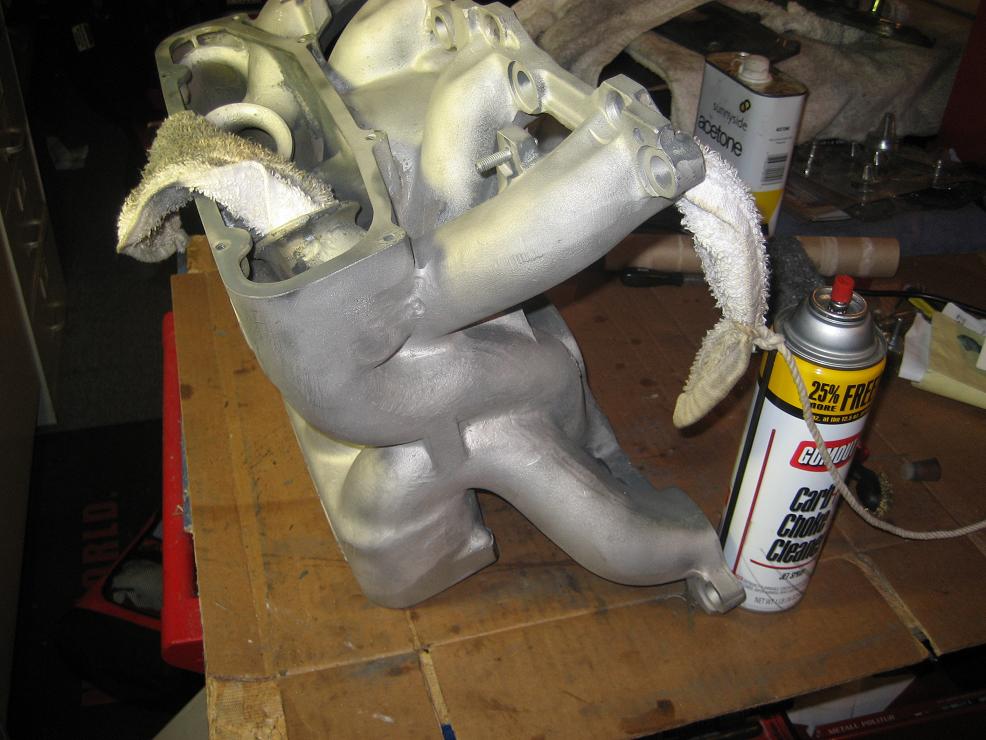
Scrubbed them with straight simple geen and a long flexible brush:
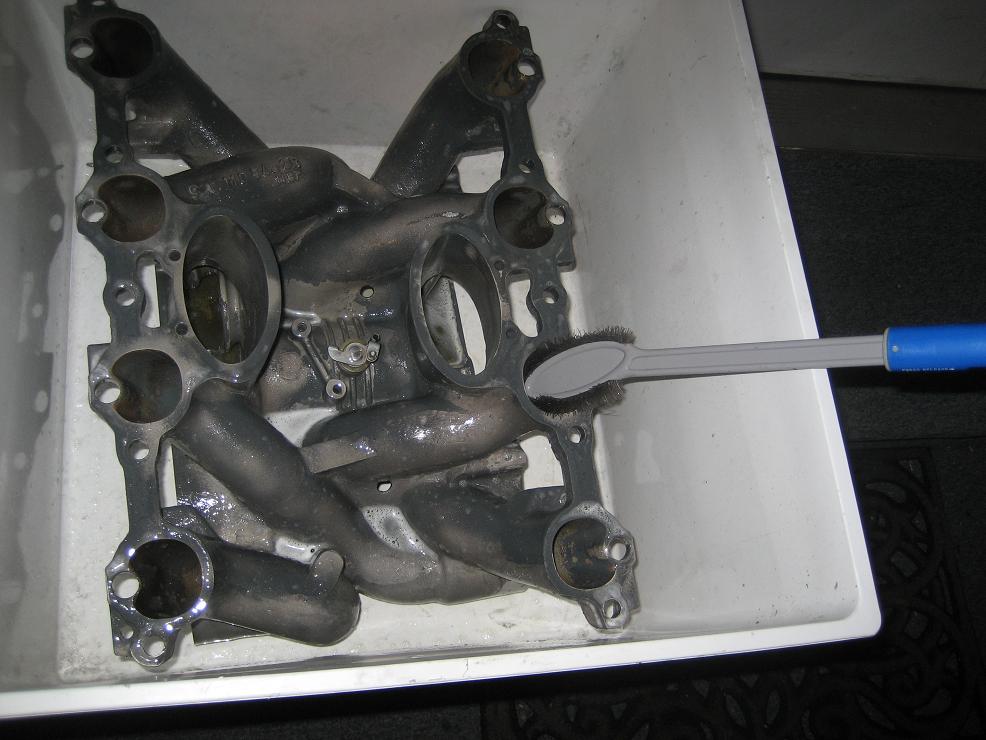
Washed with piping hot water and simple green twice. Repeatedly dunking the intake from every conceivable angle both upside down and right side up.
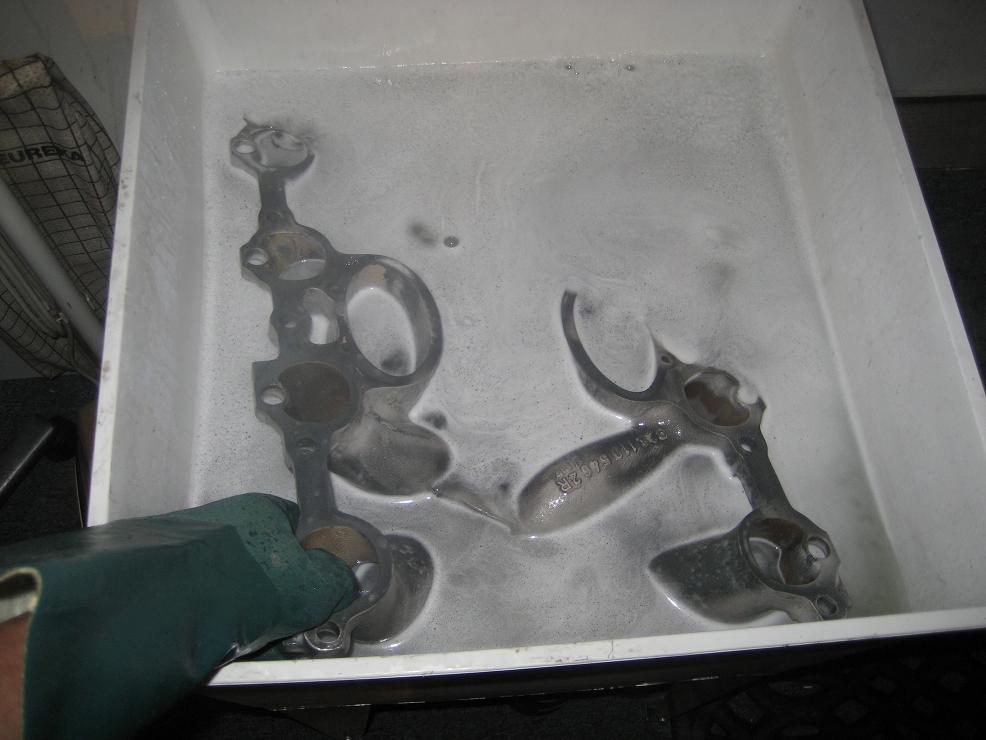
Double rinses until all the water was clean.
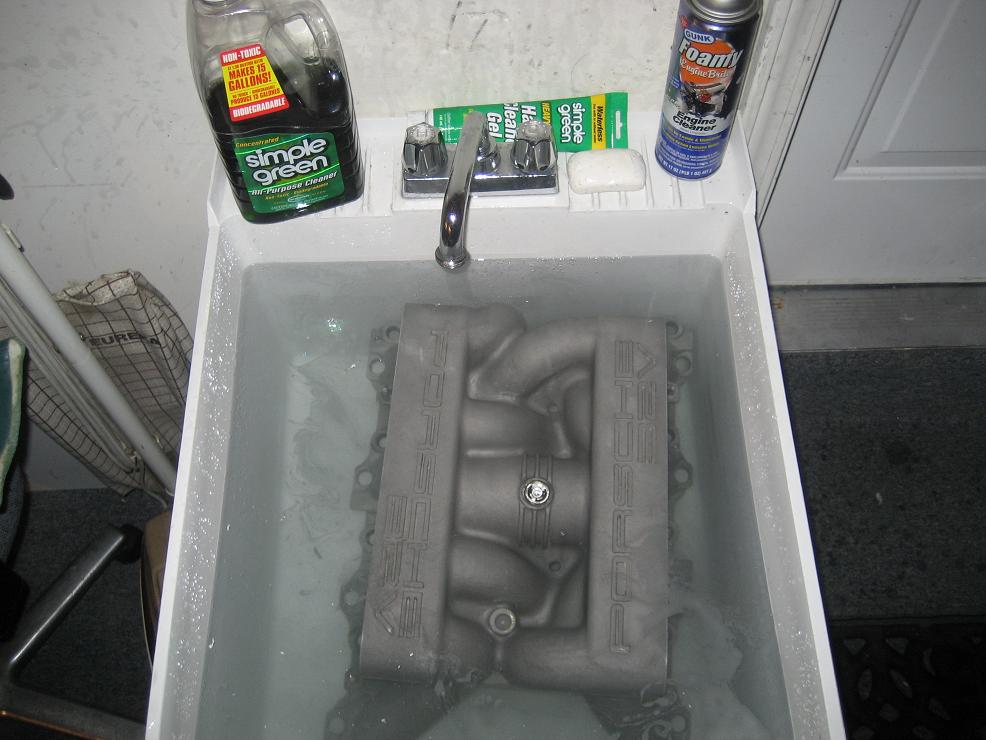
I hope this is clean enough
Thanks to Troy, the intake has been blasted (he has a blast cabinet where he works). Even though he sent it through a parts washers and power blew it twice, I was a little paranoid about remaining media in the intakes.
So first I pulled rags soaked with carb clean through the ports:
Scrubbed them with straight simple geen and a long flexible brush:
Washed with piping hot water and simple green twice. Repeatedly dunking the intake from every conceivable angle both upside down and right side up.
Double rinses until all the water was clean.
I hope this is clean enough
05-03-2010, 11:10 AM
#66
Burning Brakes
blasted intake looks CLEAN! Nice work. Question for Troy. What media did you use to blast the intake? Just curious. Kurt, awesome job scrubbing the intake out. You won't have any issues with contamination.
05-04-2010, 09:57 AM
#67
Drifting
Thread Starter
Another great thread on intake R&R with real life examples of challenges one might face:
https://rennlist.com/forums/928-foru...on-intake.html
If I was a little better about reading, I could have learned a few things before jumping into my project. However, I’ve read enough now to feel comfortable about finishing this project.
Although like this guy, I’m too am guilty of spending more time cleaning and polishing parts, than removing and replacing… something about it I find therapeutic.
05-04-2010, 10:05 AM
#68
Supercharged
Rennlist Member
Rennlist Member
Join Date: May 2002
Location: Back in Michigan - Full time!
Posts: 18,925
Likes: 0
Received 60 Likes
on
34 Posts
You left the flappy bearing in place? 
You better work that thing back and forth a whole bunch, and lube it up good. Not sure what type of lube to use, but otherwise you may end up with a sticky flappy especially if any blasing media got in there.
You better work that thing back and forth a whole bunch, and lube it up good. Not sure what type of lube to use, but otherwise you may end up with a sticky flappy especially if any blasing media got in there.
05-04-2010, 10:35 AM
#69
Drifting
Thread Starter
Just about replacing everything… all sensors (hall, crank, throttle, knock, temp2), gaskets, rubber hoses and pieces, vacuum lines and connectors, plugs (one range cooler), and ISV.
Items not be replaced, upgraded, or overhauled that will need attention down the road are injectors and MAF. Those will be addressed with the next stage
 05-04-2010, 11:15 AM
#70
Supercharged
Rennlist Member
Rennlist Member
Join Date: May 2002
Location: Back in Michigan - Full time!
Posts: 18,925
Likes: 0
Received 60 Likes
on
34 Posts
Good. There was a thread some time ago on the best way to pull the flappy bearings. It used a wall anchor available from Lowes, Home Depot, etc. I used this method myself and was amazed at how easy it was to pull them. I'll see if I can pull up that post.
Edit: Found it. Cheap Flappy Bearing removal
Edit: Found it. Cheap Flappy Bearing removal
05-05-2010, 12:06 AM
#71
Drifting
Thread Starter
Great post, thanks AO. I’ll definitely use this technique.
Intake prepped for painting
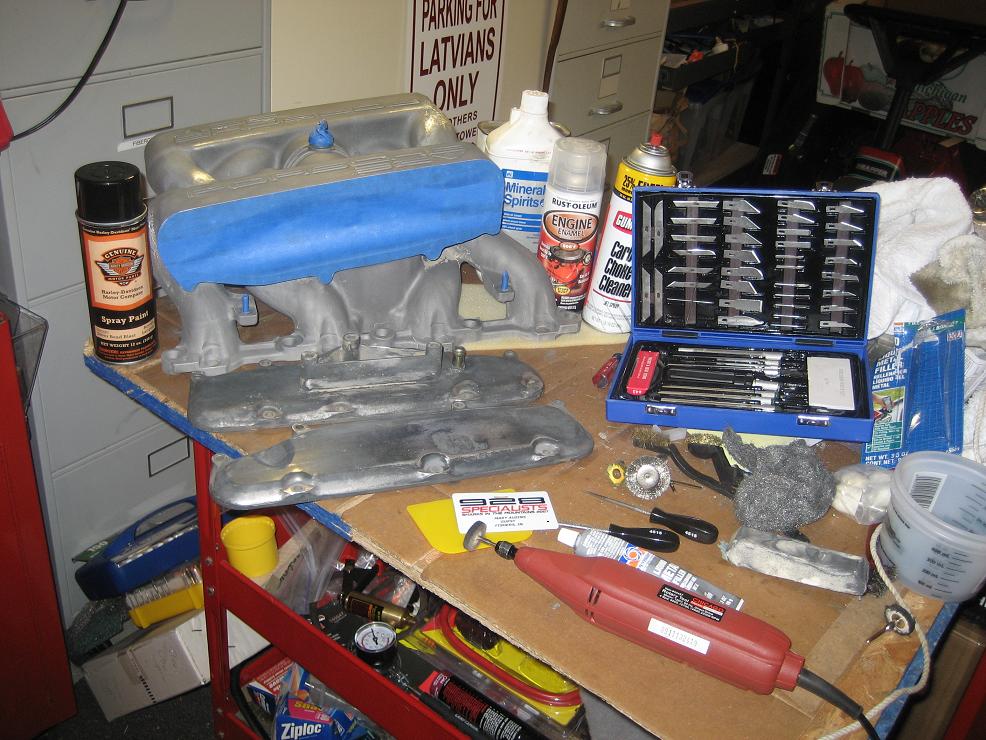
Bridge taped up too
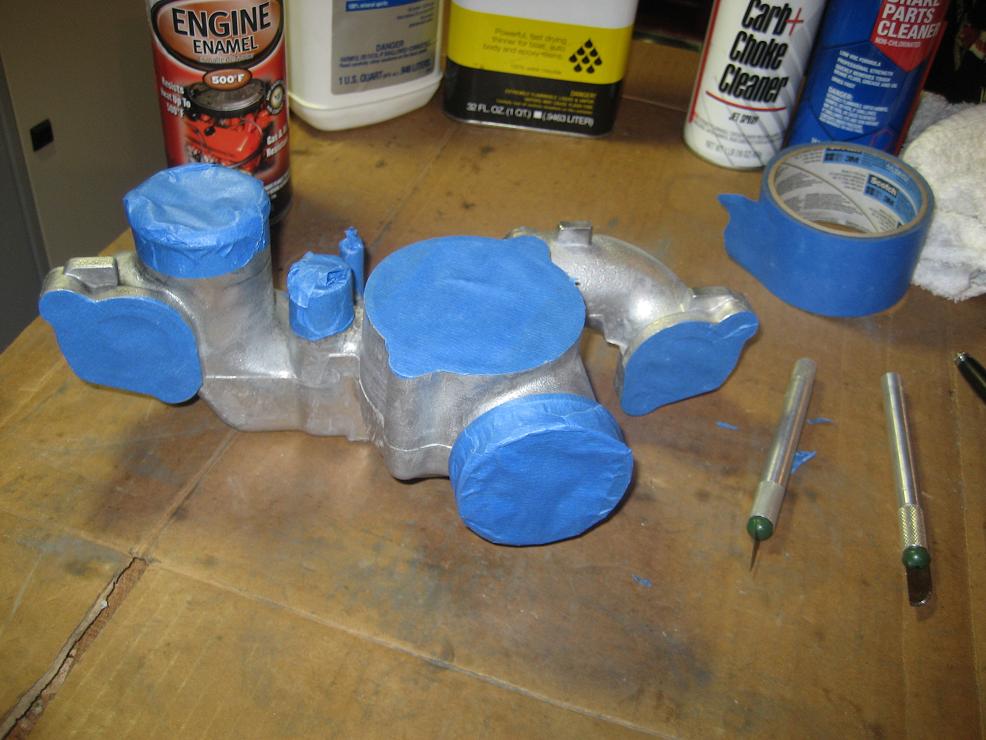
Painting
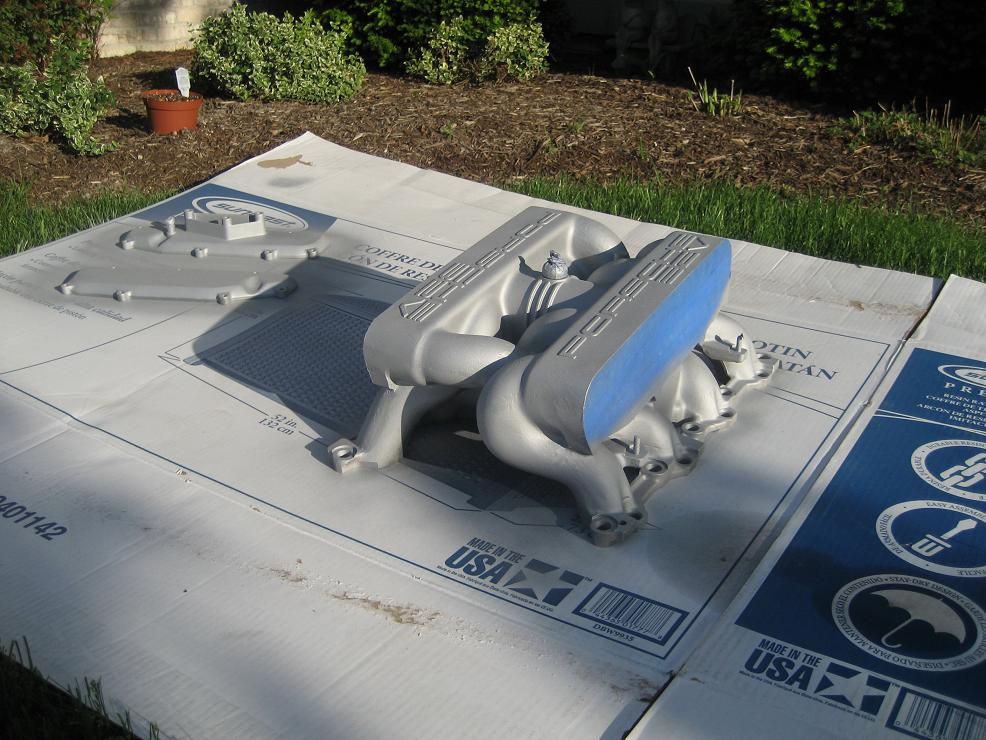
Painted (3 color, 1 clear)… Not the greatest, but they’ll do for know. Way to many imperfections in the casts to get decent results.
Some sort of tiny bugs were evidently attracted to the smell of the clear coat. Now I have Jurassic park intakes. I’ll lightly sand and add a couple more thin layers of clean (while in the garage).
Intake prepped for painting
Bridge taped up too
Painting
Painted (3 color, 1 clear)… Not the greatest, but they’ll do for know. Way to many imperfections in the casts to get decent results.
Some sort of tiny bugs were evidently attracted to the smell of the clear coat. Now I have Jurassic park intakes. I’ll lightly sand and add a couple more thin layers of clean (while in the garage).
05-05-2010, 01:15 PM
#72
Drifting
Thread Starter
I have all the parts now to finish the timing belt and water pump this weekend.
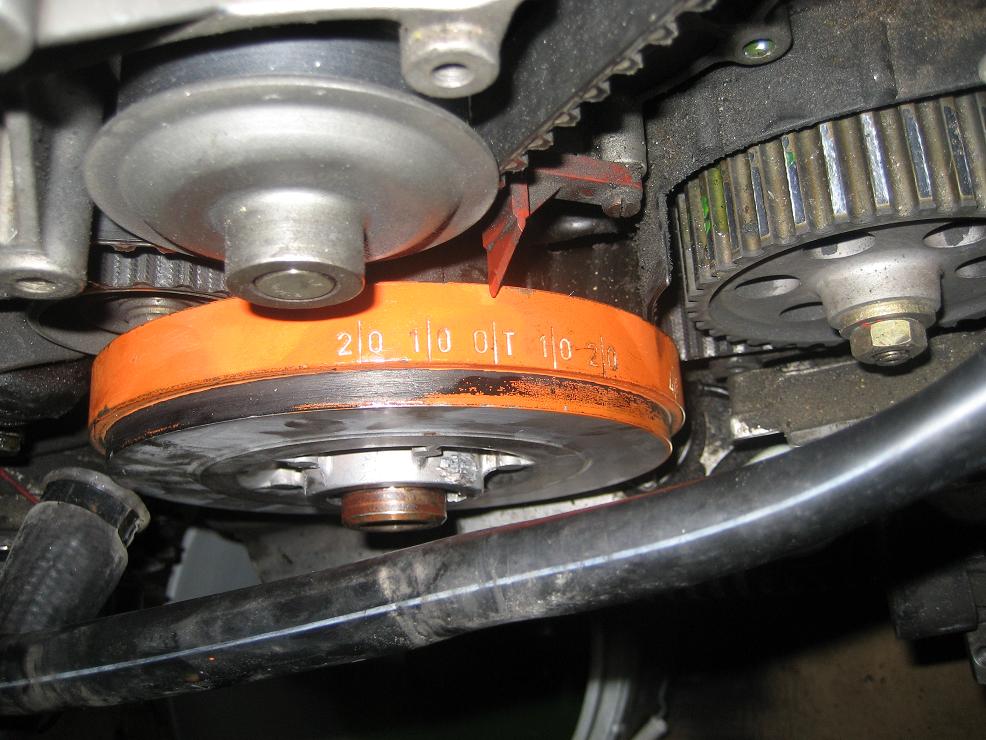
Right now, I’m at TDC and I think the cam gear positions looks about right. Do these look right?
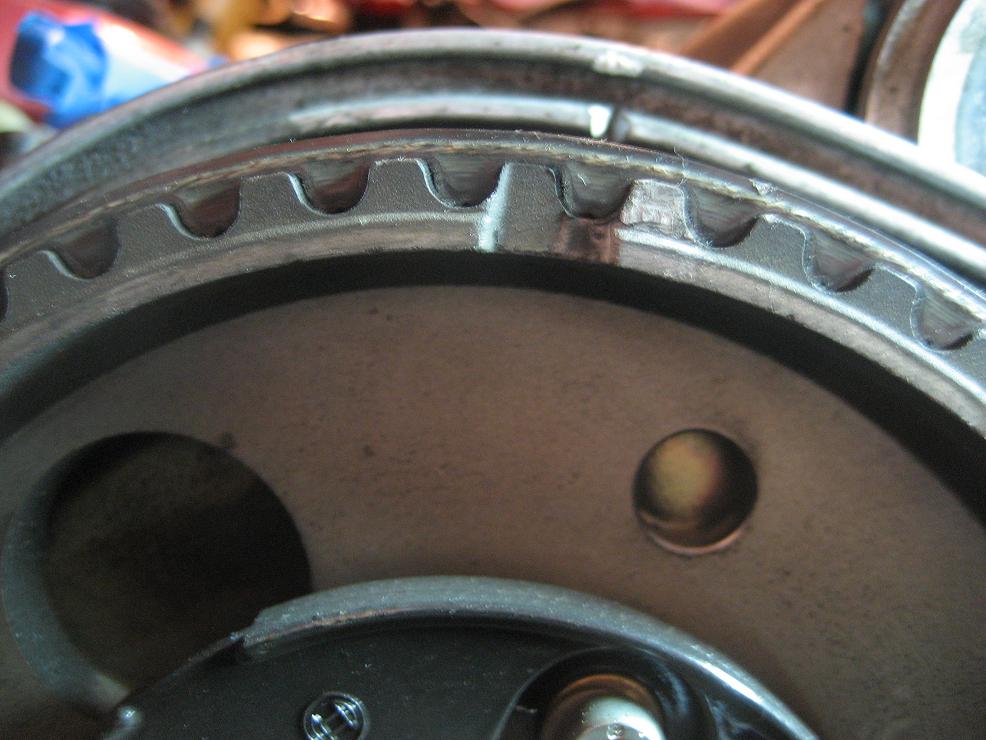
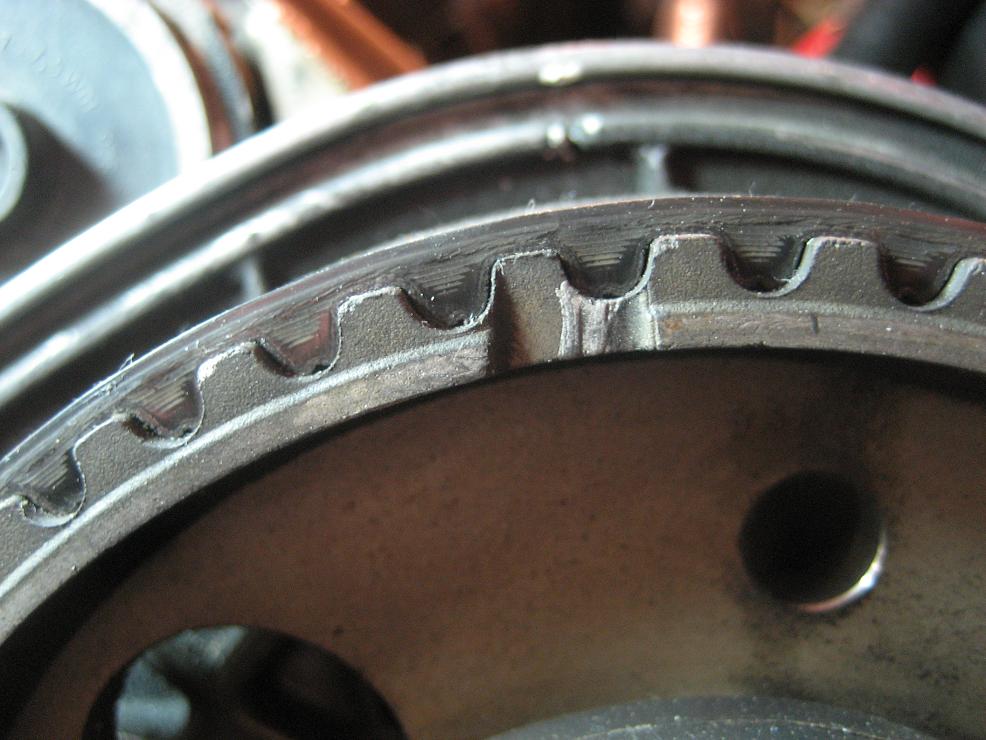
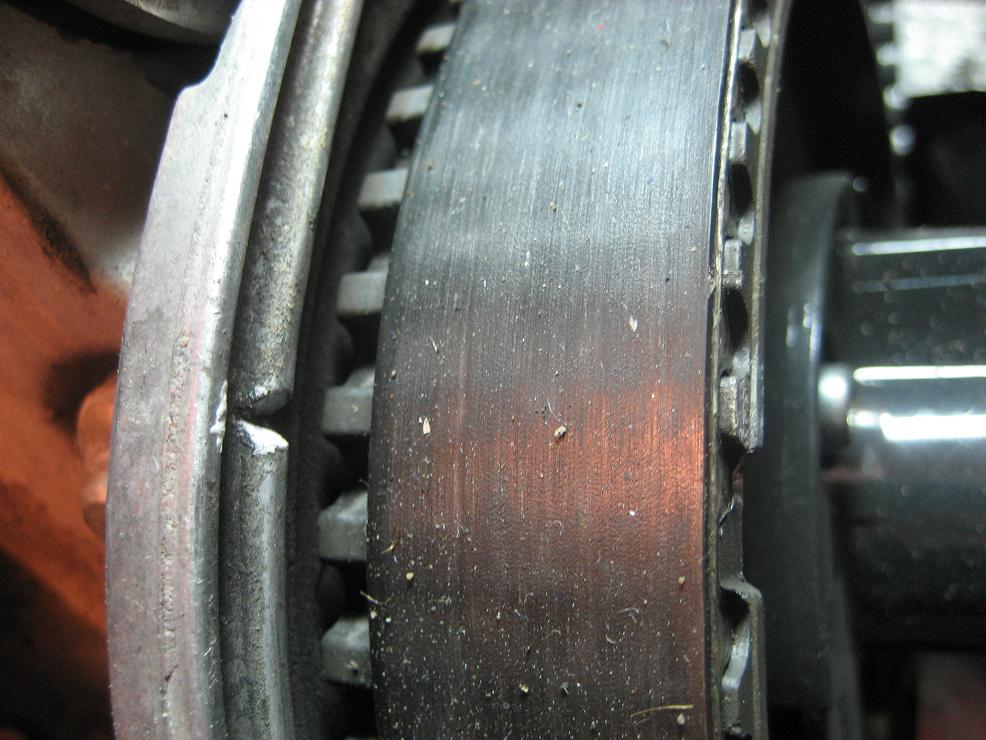

I sprayed some Kroil on the WP bolts after tapping them with a hammer; hopefully no surprises there. Getting ready to remove lock, crank forward to 45, reset lock, mark gears, and remove belt.
Question, since I’m changing cam sprockets, do I just transfer the marks from one gear to the other… or since I have a VR32 on hand, that won’t be necessary?
Right now, I’m at TDC and I think the cam gear positions looks about right. Do these look right?
I sprayed some Kroil on the WP bolts after tapping them with a hammer; hopefully no surprises there. Getting ready to remove lock, crank forward to 45, reset lock, mark gears, and remove belt.
Question, since I’m changing cam sprockets, do I just transfer the marks from one gear to the other… or since I have a VR32 on hand, that won’t be necessary?
05-05-2010, 01:38 PM
#73
Under the Lift
Lifetime Rennlist
Member
Lifetime Rennlist
Member
I mark the position of the three small bolts relative to the adjustment slots in the gear. On the right side, you can outline an edge of one of the round cutouts on the Hall plate behind the gear. That will get things very close, but, if you have Porken's tool, use it.
05-05-2010, 02:09 PM
#74
Looks really good, nice job on the intake! One thing to consider since you have it all apart is timing your cams with Ken's PK32VR tool. I had 6 deg of separation between the two banks on my 85! Cam timing is very important when you start adding boost.
05-05-2010, 04:11 PM
#75
Addict
Lifetime Rennlist
Member
Lifetime Rennlist
Member
Stopped on my way home and picked up a cheap stripper. Told the old lady not to bother coming out to the garage because I had some really nasty work to do. Of course I used protection, but the stink was so bad it required a gas mask. I must admit the stripper did take almost everything off in relatively little time. The rest is history.
Full Body protection
.................
Full Body protection
.................

Ive been living in Vegas tooooo long and visiting OT section too much! Thats "Tempest Storm"..Vegas's oldest sttripper..born in '28..you do the math!