
=0) Just got my 928 (with pics)

 04-02-2010, 09:24 PM
#138
Instructor
Thread Starter

Orange cleaner, super soaker, clothed tipped flat head screwdriver hahahah (for some odd reason I ether keep misplacing my wire brushes or someone keeps taking them >=0(
Oh hopefully the problem is the starter for sure. When i took the starter out It was brittle and some small cracks. Plus the gear was somewhat stuck I pushed it in and it looked like it snapped back in place.
Oh hopefully the problem is the starter for sure. When i took the starter out It was brittle and some small cracks. Plus the gear was somewhat stuck I pushed it in and it looked like it snapped back in place.
04-02-2010, 10:28 PM
#139
Team Owner
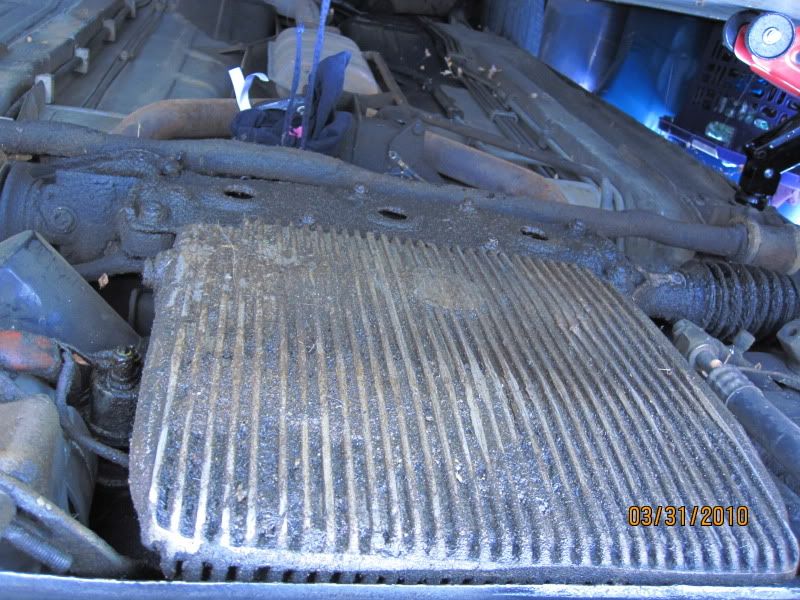
from the picture you need motor mounts.
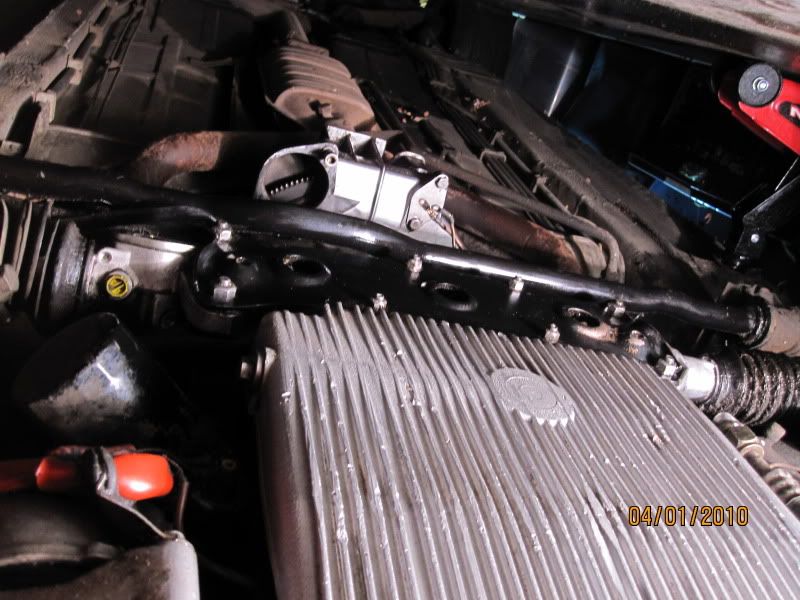
Nice cleaning job your car will appreciate it, so will you when you remove the cross member
Nice cleaning job your car will appreciate it, so will you when you remove the cross member
04-02-2010, 10:58 PM
#140
Instructor
Thread Starter
Thanks! mmm interesting. I am also sure it needs motor mounts because of age and I do not trust the PO at all. But how can you tell from the pics? Is it sitting to low? I'm also going to get new bellows boots and hopefully just new rod ends.
04-13-2010, 12:49 AM
#143
Instructor
Thread Starter

new starter in...
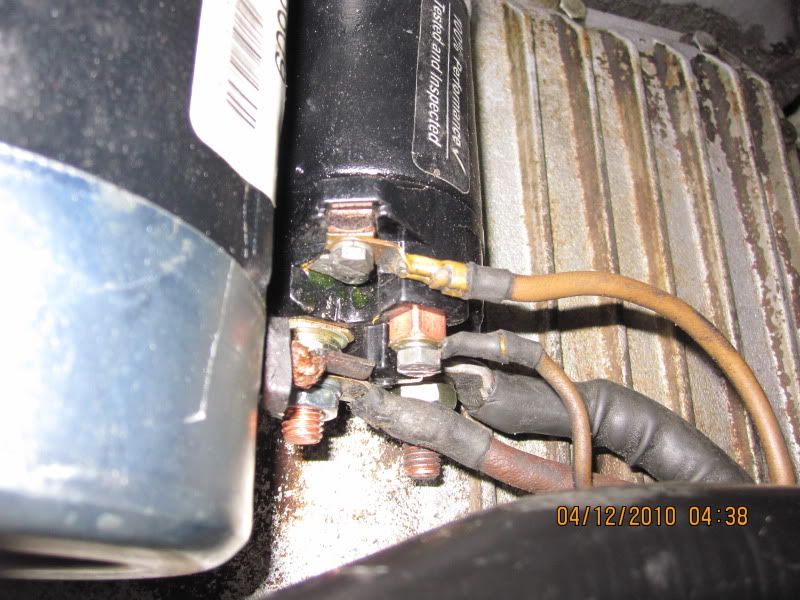
Only had 15 min to fiddle around today. I think The wiring is wrong =0( I switched the thick black and red cables because I wasn't getting any power the way they were in the pics. When I went back to connect the neg battery terminal the starter turned on and I think I herd the flywheel about to turn or turn a little then i immediately swung the battery cable away. Should I switch the smaller wires? Is my starter backwards or something? >.<
also it seemed like there was no way the new starter was going in unless I loosened one side of the sway bar. (even though the old starter came out without moving the sway bar hahaha)
04-13-2010, 12:57 AM
#144
Team Owner
you have the wire installed wrong on the starter both of the thick wires connect to the same stud . in the picture you have the alternator wire connecting to the other side of the solenoid you wont be getting any charge but you might be running the starter after the engine starts, disconnect the battery and reconnect these wires.
'
The hint about the MMs is that the engine is sitting below the crossmember what will happen is the pan will hit the crossmember and the exhaust manifolds will rub on the side braces
'
The hint about the MMs is that the engine is sitting below the crossmember what will happen is the pan will hit the crossmember and the exhaust manifolds will rub on the side braces
04-13-2010, 01:00 AM
#145
Instructor
Thread Starter
Yea! about the MMs! I checked one side and im not sure if the MMs on these cars look like the hood dampers? because I noticed the other side is missing the shock damper looking mount. Is that the motor mount? Thanks for the advice about the starter! It probably would've taken me an hour or so to figure out hahah. I'll take pics tomorrow of the missing mount I'm talking about. I also noticed the compressor (which is next to the missing mount) seems like it's missing brackets or something.
04-13-2010, 01:02 AM
#146
Rennlist Member
I can't answer your specific question, but some pointers - always take digi pics of an assembly and its hook up config before you take it apart, that way you'll be able to quickly see how the wires go, the orientation of the thing you removed, etc. as you put it back together.
Also, for any electrical stuff, be sure to clean all contact points with very fine sandpaper or pink eraser, or 000 or finer steel wool - you want the contacts nice and bright and shiney - dry too - then assemble, than after the item is hooked up and tightened in, add dialectric grease to cover and protect the connection (it's non-conductive - add only after everything is tightened down). From your pic, it looks like a few drops of simple green are on the contact points - that stuff is very bad for electrical connections - it must be thoroughly rinsed after you use it to clean the various parts.
Also, for any electrical stuff, be sure to clean all contact points with very fine sandpaper or pink eraser, or 000 or finer steel wool - you want the contacts nice and bright and shiney - dry too - then assemble, than after the item is hooked up and tightened in, add dialectric grease to cover and protect the connection (it's non-conductive - add only after everything is tightened down). From your pic, it looks like a few drops of simple green are on the contact points - that stuff is very bad for electrical connections - it must be thoroughly rinsed after you use it to clean the various parts.
04-13-2010, 01:10 AM
#147
Instructor
Thread Starter
yea I got to excited hahah I only had 15 min today at my garage =0( I'll completely sand the connectors and use dielectric grease on them tomorrow. I should have also waited to take pics before but I got excited once again and just went along while my camera was charging. Figured I'd remember how everything went because I thought the starter I was going to buy would be in stock. Had to wait a few days hahaha. Thanks for the tips! =0)
04-13-2010, 01:11 AM
#148
Three Wheelin'
Join Date: Mar 2010
Location: Colorado Springs, CO USA
Posts: 1,307
Likes: 0
Received 3 Likes
on
3 Posts
If you look up, behind the oil filter, you'll see one of the motor mounts. The other one is up and behind the compressor. They look like rubber pads about 4" in diameter, and look like this when new: 
OE are $280 - $400 a piece. There are some alternatives that are considerably cheaper, though. A number of people have used Ford 2698 mounts made by Anchor instead (as low as $17 a piece).
The mounts are mounted in carriers and bolt to the cross brace, and to the bottom of the engine - four bolts (2 x 17mm, 2 x 13mm, for the brace to engine), one 19mm nut for bottom of the mount to the cross brace.
Removal requires dropping the rack, sway bar, and cross brace, at a minimum. This is a really nice writeup on the process: http://members.rennlist.com/v1uhoh/motor.htm
Cheers,
Paul
04-13-2010, 06:41 PM
#150
If your car has the early style mounts and you wish to convert to the newer style I think you will need to replace the cross member and mount perch if you wish to use the "Ford" mounts. You mentioned the little shock absorber looking unit so it sounds like you have the early style.