

Port and Polish by Comiittee thread (Cool pics throughout)

The following users liked this post:
PK68 (03-21-2024)
 03-30-2008, 03:59 PM
#167
Rennlist Member
Thread Starter

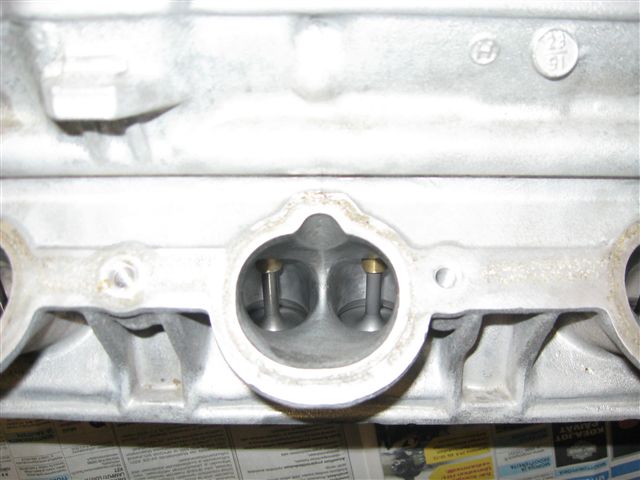
Thanks Erkka - Great pictures. Do you have any pics of what your short side (bottom) of the exhaust port just after the seat looks like? There is a sharp angled ridge on my heads.
Thanks
Thanks
03-30-2008, 04:58 PM
#168
Addict
Rennlist Member
Rennlist Member
No pics as they are little hard to get when valves are in. Don' want to remove them for better view as seals are installed. There is still ridge there as shop which installed 39mm intake valves did only milds porting. Basically they made sure there are any step between head and valve seats. They also removed some uneveness left from casting but thats it.
After looking several different 4 valve 928 heads it seems factory wasn't too picky about that ridge. Some have more while others have less. For mass produced head 928 is very good for 25 year old design. In home garage cleanup I would remove too pronounced uneveness from ports but likely would not try to remove ridge completely. Removing it might damage flow more than leaving it there.
After looking several different 4 valve 928 heads it seems factory wasn't too picky about that ridge. Some have more while others have less. For mass produced head 928 is very good for 25 year old design. In home garage cleanup I would remove too pronounced uneveness from ports but likely would not try to remove ridge completely. Removing it might damage flow more than leaving it there.
03-31-2008, 10:22 AM
#169
Rennlist Member
No pics as they are little hard to get when valves are in. Don' want to remove them for better view as seals are installed. There is still ridge there as shop which installed 39mm intake valves did only milds porting. Basically they made sure there are any step between head and valve seats. They also removed some uneveness left from casting but thats it.
After looking several different 4 valve 928 heads it seems factory wasn't too picky about that ridge. Some have more while others have less. For mass produced head 928 is very good for 25 year old design. In home garage cleanup I would remove too pronounced uneveness from ports but likely would not try to remove ridge completely. Removing it might damage flow more than leaving it there.
After looking several different 4 valve 928 heads it seems factory wasn't too picky about that ridge. Some have more while others have less. For mass produced head 928 is very good for 25 year old design. In home garage cleanup I would remove too pronounced uneveness from ports but likely would not try to remove ridge completely. Removing it might damage flow more than leaving it there.
04-20-2008, 01:44 PM
#170
Rennlist Member
Thread Starter
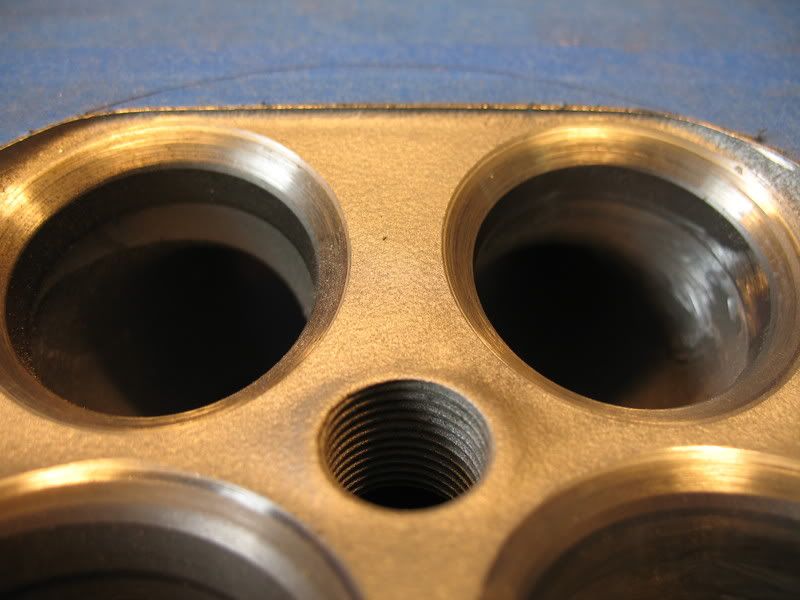
I have sat down finally and done some blending for the transition from valve seat to port/bowl.
It was:
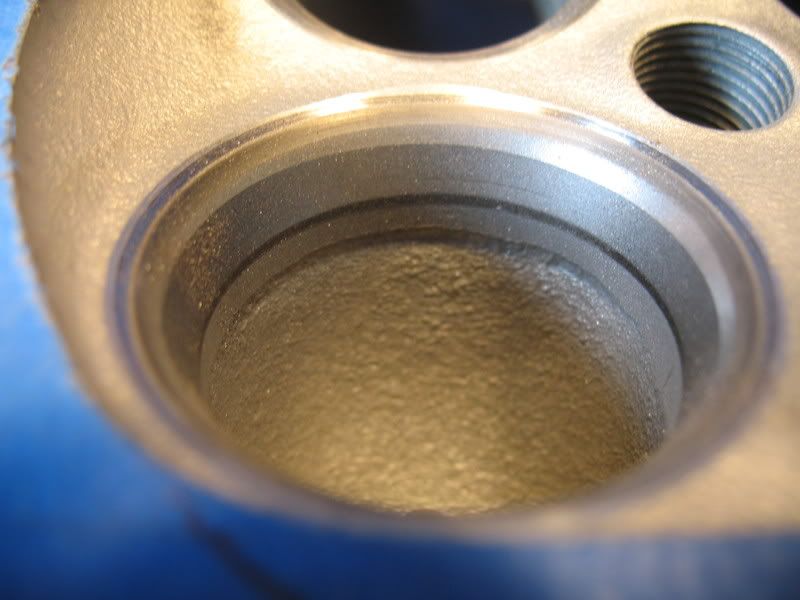
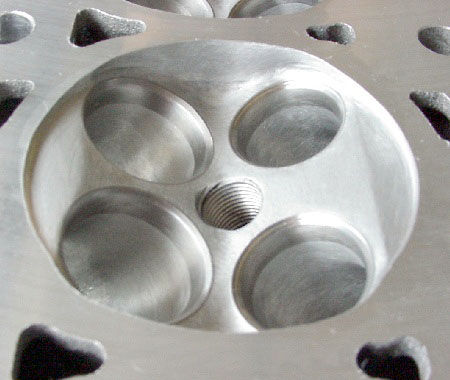
And now its (innitial work, obviously needs some blending):

I have radiused the exhaust port entry as little as possible without removing material on the short side except to round that cliff.
It was:
And now its (innitial work, obviously needs some blending):
I have radiused the exhaust port entry as little as possible without removing material on the short side except to round that cliff.
04-20-2008, 01:46 PM
#171
Rennlist Member
Thread Starter
Another interesting study/example from the honda-tuner people endyn:
04-20-2008, 11:33 PM
#173
Rennlist Member
Thread Starter
A dremel with the sanding cylinders. I am using low speed, and going from rough to medium.
I have basically reached my goal on the first head - no more ledges or ridges from the port to the valve seats, except for the long-side under the exhaust seat, which have very large ridges - and I am not sure I should remove those.
Just so everyone knows (I know you do hammer) these heads are for boost and ethanol. So the mass of the fuel going in and burning will be nearly double the normal amount, and I am concerned over being able to get it out efficiently from the exhaust ports with their current size. I already know the intake runners are huge for the valve size, which I am not changing.
Since I have no experience in this process, nor do I have any way to study the effects, I have not planned on any actual shape changes on the ports, either widening or changing their size. I just wanted to take the opportunity to get the low-hanging fruit. I am sure heads work with the 80/20 rule - you get 80% of the change with 20% of the work, and the last 20% of improvement is gotten with 80% of the work. I won't be doing the 80% of the work.
04-26-2008, 08:05 PM
#174
Rennlist Member
Thread Starter
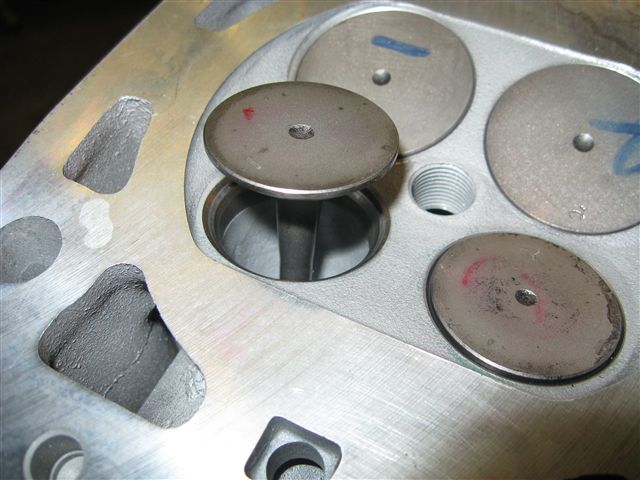
Doing some more work this weekend. Trying to finish the one head so I can use it as kind of a template. I am taking some of the squish area from just around the valves to unshroud them.
Also, smoothing the entire exhaust port. I am leaving the intake ports nearly untouched other than just around the bowl.
Also, smoothing the entire exhaust port. I am leaving the intake ports nearly untouched other than just around the bowl.
04-27-2008, 11:10 PM
#175
Racer
Join Date: Sep 2005
Location: Clarkston Mi
Posts: 474
Likes: 0
Received 0 Likes
on
0 Posts
Hello Brendan, these are the tool I use the grinder is 5600 thousand RPM and the red one is a cheap harbor freight model.
Last edited by backnblack; 06-22-2009 at 10:29 PM.
04-27-2008, 11:19 PM
#176
Racer
Join Date: Sep 2005
Location: Clarkston Mi
Posts: 474
Likes: 0
Received 0 Likes
on
0 Posts
The good grinder is about 250.00 the harbor freight model is 20.00 bucks you get what you pay for. The grinding wheels depend on the surface you are working on.
I have listed a few of the most common grinding wheels that work with aluminums.
Cheers
Matt
I have listed a few of the most common grinding wheels that work with aluminums.
Cheers
Matt
Last edited by backnblack; 06-22-2009 at 10:29 PM.
04-27-2008, 11:28 PM
#177
Racer
Join Date: Sep 2005
Location: Clarkston Mi
Posts: 474
Likes: 0
Received 0 Likes
on
0 Posts
The carbide burr is going to take off the most material then you will want to move to the rolled papers , they come in deferent grits , maybe to a rubber wheel to smooth out the surface . if you want to polish to a fine surface you will need to start to use a paper by hand and use home made hand tools and two way tape to polish the selected areas.
Last edited by backnblack; 06-22-2009 at 10:29 PM.
04-28-2008, 12:00 AM
#178
Rennlist Member
Thread Starter
Thanks. I finished up the first head today. I will get some pics this week possibly.
Basically, I removed any ridges and blended the transitions between the port and the valve seat. I only really touched the first inch of the intake port going out from the valve seat.
As others mentioned, I have no idea what I am doing, and have no flow bench. And as I said, I just wanted the low-hanging fruit.
On the intake, I touched the entire path. I left a step on the long-side seat-to-bowl transition because there was so much of one. But the short side was bended - but I did not change its shape other than the lending and transition. I used only sand scrolls. I tried out the carbide cutter, but its just to risky, and I was not interested in making any real shape change. I smoothed the entire exhaust port, as its dry-air instead of the wet-air the intake port will see.
As the exhaust side was most important to me (I will be ramming up to 25psi into the intake ports - I need it to get out efficiently) - I spent more time on them. I took a sand and rubber polishing wheel to the entire port x4. Its very smooth now.
I also radiused the face of the exhaust valves into the margin. Just slightly. Oh, and I took some area from the exhaust side squish are that I felt may have been shrouding the exhaust valves at lower lifts.
Thats it. I will do this to the other head in the same way. And then I will put the heads together and be done with it, move onto other stuff on the car. I think I will do the elgin cam grind that Dennis K and a couple others have done. Dema said it would be good for my plans.
Thanks for the pics. Those tools look way more serious than mine.
04-28-2008, 09:48 AM
#179
Rennlist Member
I don't have any pictures. However, if your going to use a deburing tool (carbide bit) You should use a lubricant, we use a product called talo which is primarily pig fat. It helps cut cleanly and prevents the bit from jumping and clogging. You can also buy different stones of varying coarseness. We find the gray stones are good for smoothing out the the high spots while the white stones usually are best at smoothing out the entire surface. I can give you specific info if you would like.
Although you might prefer a cable driven tool like you pictured they have a tendency to jump. An air grinder is cheap and gives better control. You can buy a Husky from HD for around $30, small, fits in the palm of your hand and allows you to have firm controlled grip vs the cable drives.
Although you might prefer a cable driven tool like you pictured they have a tendency to jump. An air grinder is cheap and gives better control. You can buy a Husky from HD for around $30, small, fits in the palm of your hand and allows you to have firm controlled grip vs the cable drives.
08-30-2008, 05:28 AM
#180
Former Vendor

Wow. Time flys. Got stupid busy there for a few months.
Still uber busy, but not stupid busy. Anyone still want to go down this road?
Still uber busy, but not stupid busy. Anyone still want to go down this road?