When you click on links to various merchants on this site and make a purchase, this can result in this site earning a commission. Affiliate programs and affiliations include, but are not limited to, the eBay Partner Network.
By evaluating and working with the leather that I have already woven in my mind I have discovered a major drawback in this whole idea. That is that since the woven leather is going to end up in two layers and I will be sitting on the exposed layer, it will be very loose from the layer under it in each color block. That is going to cause or at least allow for the exposed blocks of leather to be displace in various ways from the weave that is intended to be pretty well fixed. I think what I am going to have to do is figure out some kind of adhesive that I can put onto the back of all the leather, maybe before it is even cut into strips, and such that will be activated by heat or maybe steam. The leather can then be woven with dry adhesive and then probably when I am gluing the backing onto it the whole thing can be glued together with heat including the exposed finish surface. Go figure.
Last edited by Jerry Feather; 02-07-2023 at 02:30 PM.
I think your last post addresses the major challenge.
I had a car, in my shop, which had woven leather (black and white) on the seats.
This was not done in a Pasha pattern, but strictly equal sized squares.
While may have looked good, before the first person sat in the seat, it was not very good looking, when I saw it. (And the car was a project car, which had obviously not been driven much.
Because the leather stretched and moved around, there were gaps, stretched portions, and very unequal random shapes....definitely not desirable.
Thanks Greg. What you observed is just about exactly what I have envisioned as the problem with this woven leather.
However, I have found on Amazon a heat activated adhesive that I think will be just about perfect to solve the problem. It is a contact cement that I think I can spray onto the back of all the leather then let it dry then cut the strips then weave the strips then spray some of the adhesive onto the backing I am going to use and then lay it up and with some heat and pressure I think the whole thing will become one. It takes 140 degrees F to activate the adhesive and it is good for leather so I don't think I will be burning or shrinking the leather with the heat.
Last edited by Jerry Feather; 01-18-2023 at 09:38 AM.
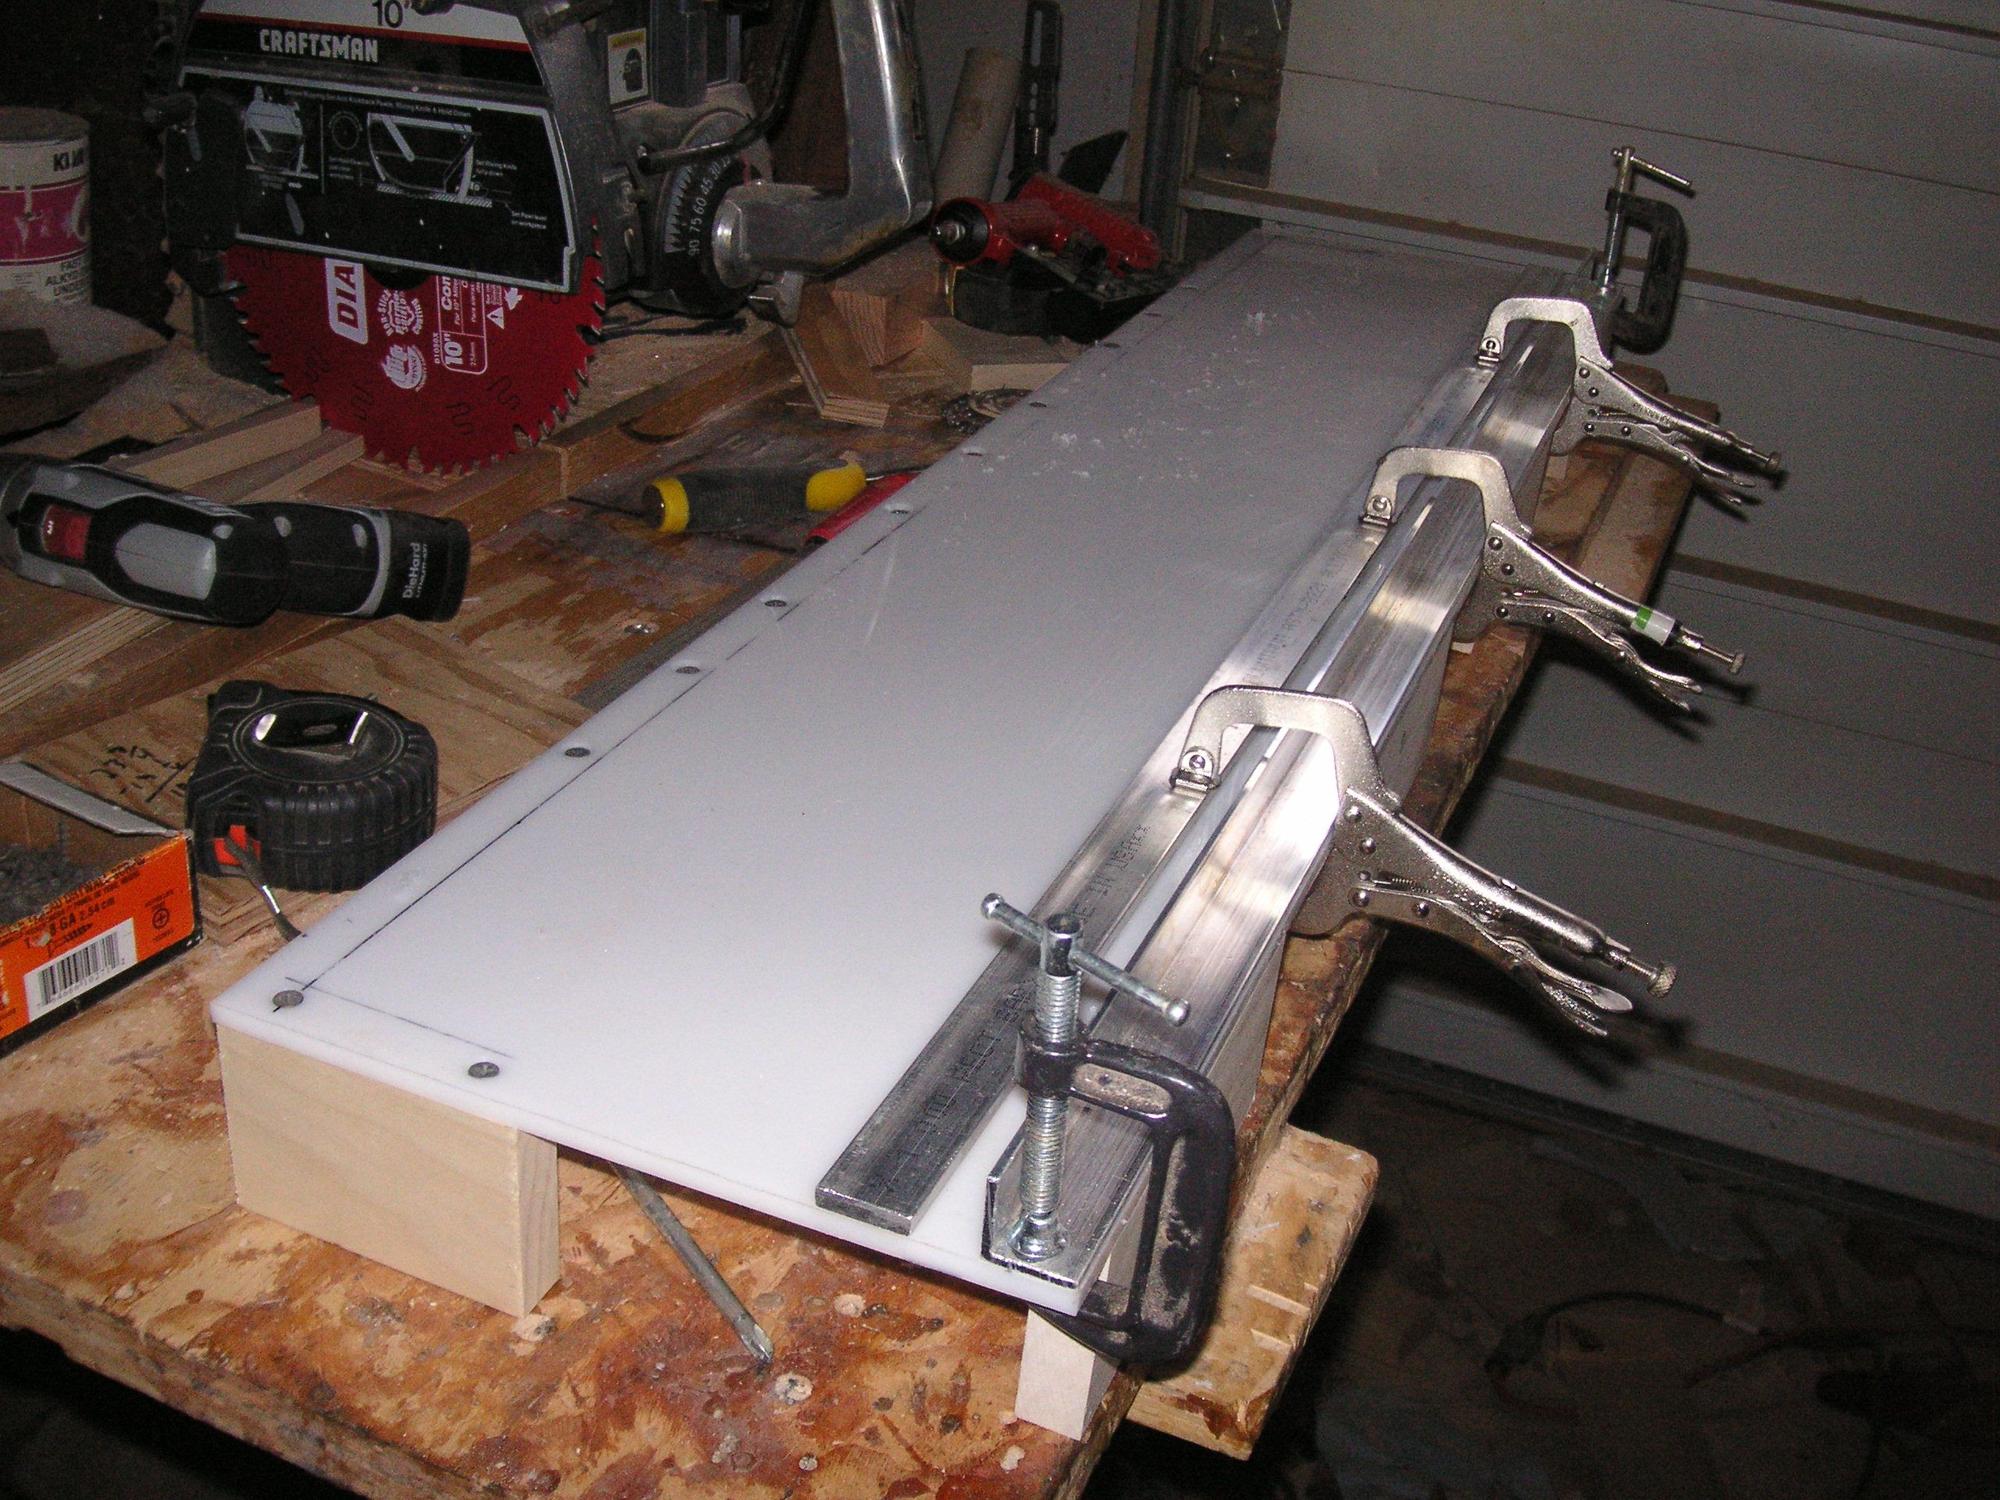
AH! Finally a little bit of progress. The Heat Sensitive Contact Adhesive from Amazon showed up in the mail today; and I was also able to complete the leather strip-cutting board apparatus.
Last edited by Jerry Feather; 02-07-2023 at 10:41 AM.
Another step back! Based on my intuition about the problems with woven leather in the seats of a 928 and Greg's astute observations about the same thing; and even given my thoughts about the solution to the issue of displacement in various way of the woven strips of leather, I have continued to be concerned about the problem. I have the glue to perhaps solve the problem but I am also continuing to think about this and am concerned that even with some glue to hold the strips of leather in place, over time they are still going to be prone to displacement.
The major concern about that is not so much the smaller strips and/or blocks, but rather the larger ones, and in particuar the long and narrow strips that result from the pattern I have designed. Then it ooccurs to me that the long and narrow strips result simply from the relation of the small strips and the large blocks. From that I seem to observe that the large blocks in the pattern do not really add much to the visual effect of the pattern.
So I decided to eliminate many of the larger blocks and end up with mostly smaller ones.
Then, since I had originally decided to have small blocks in one of my cushion sections and large ones in the alternate ones, I decided to change the design so that each cushion section has small blocks centered in it. That puts what is left of the large blocks buried in the valleys of the cushion sections.
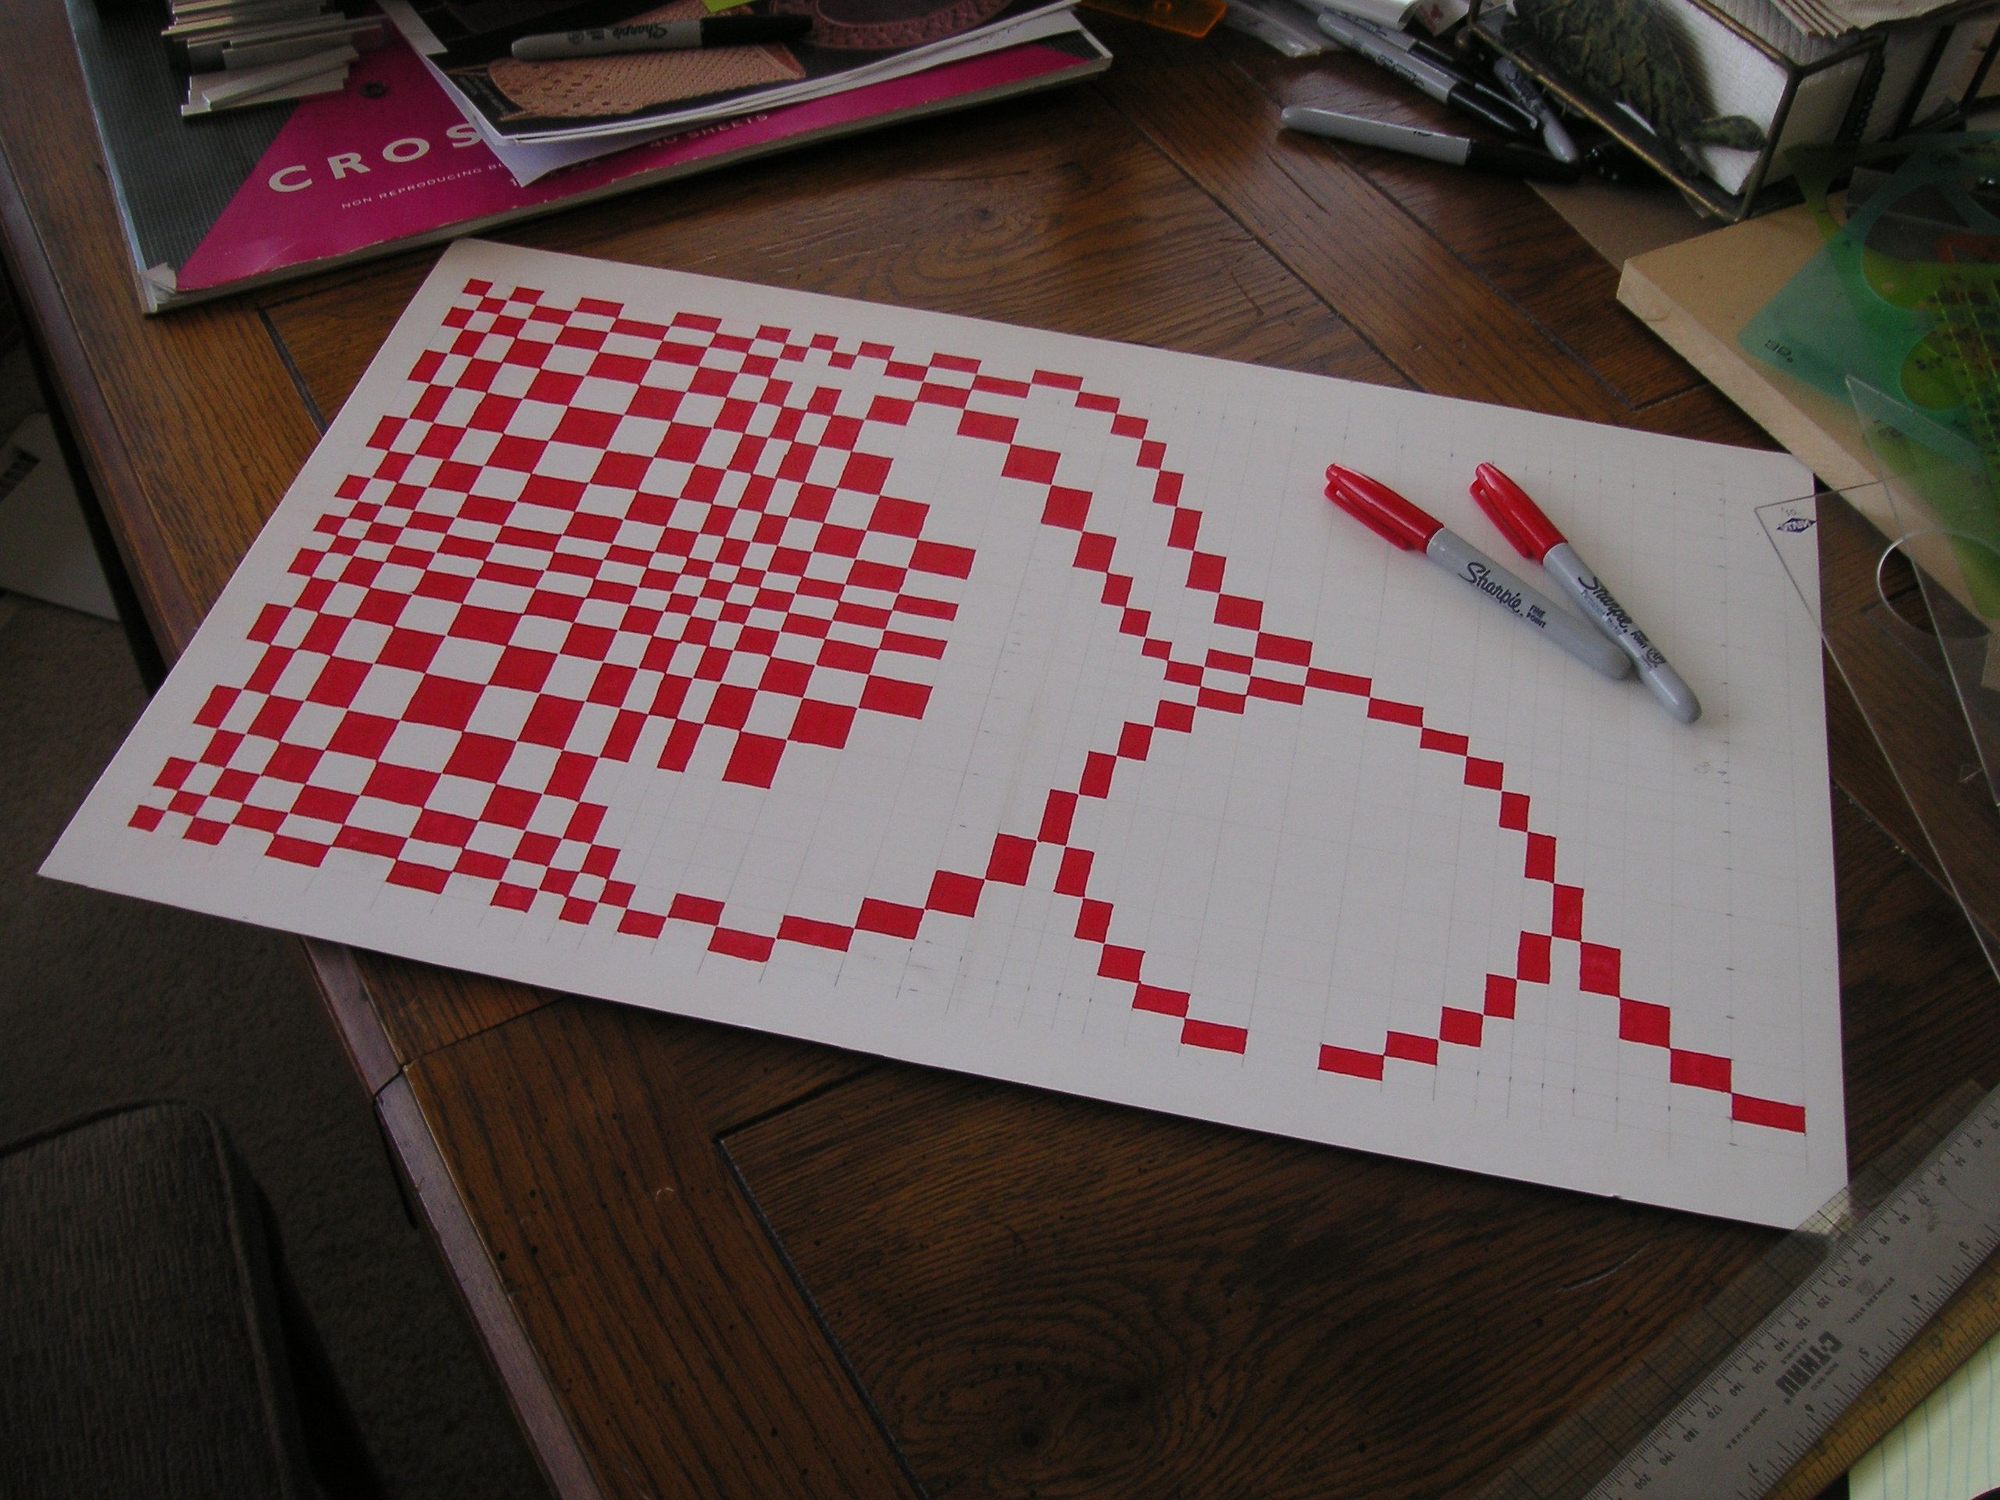
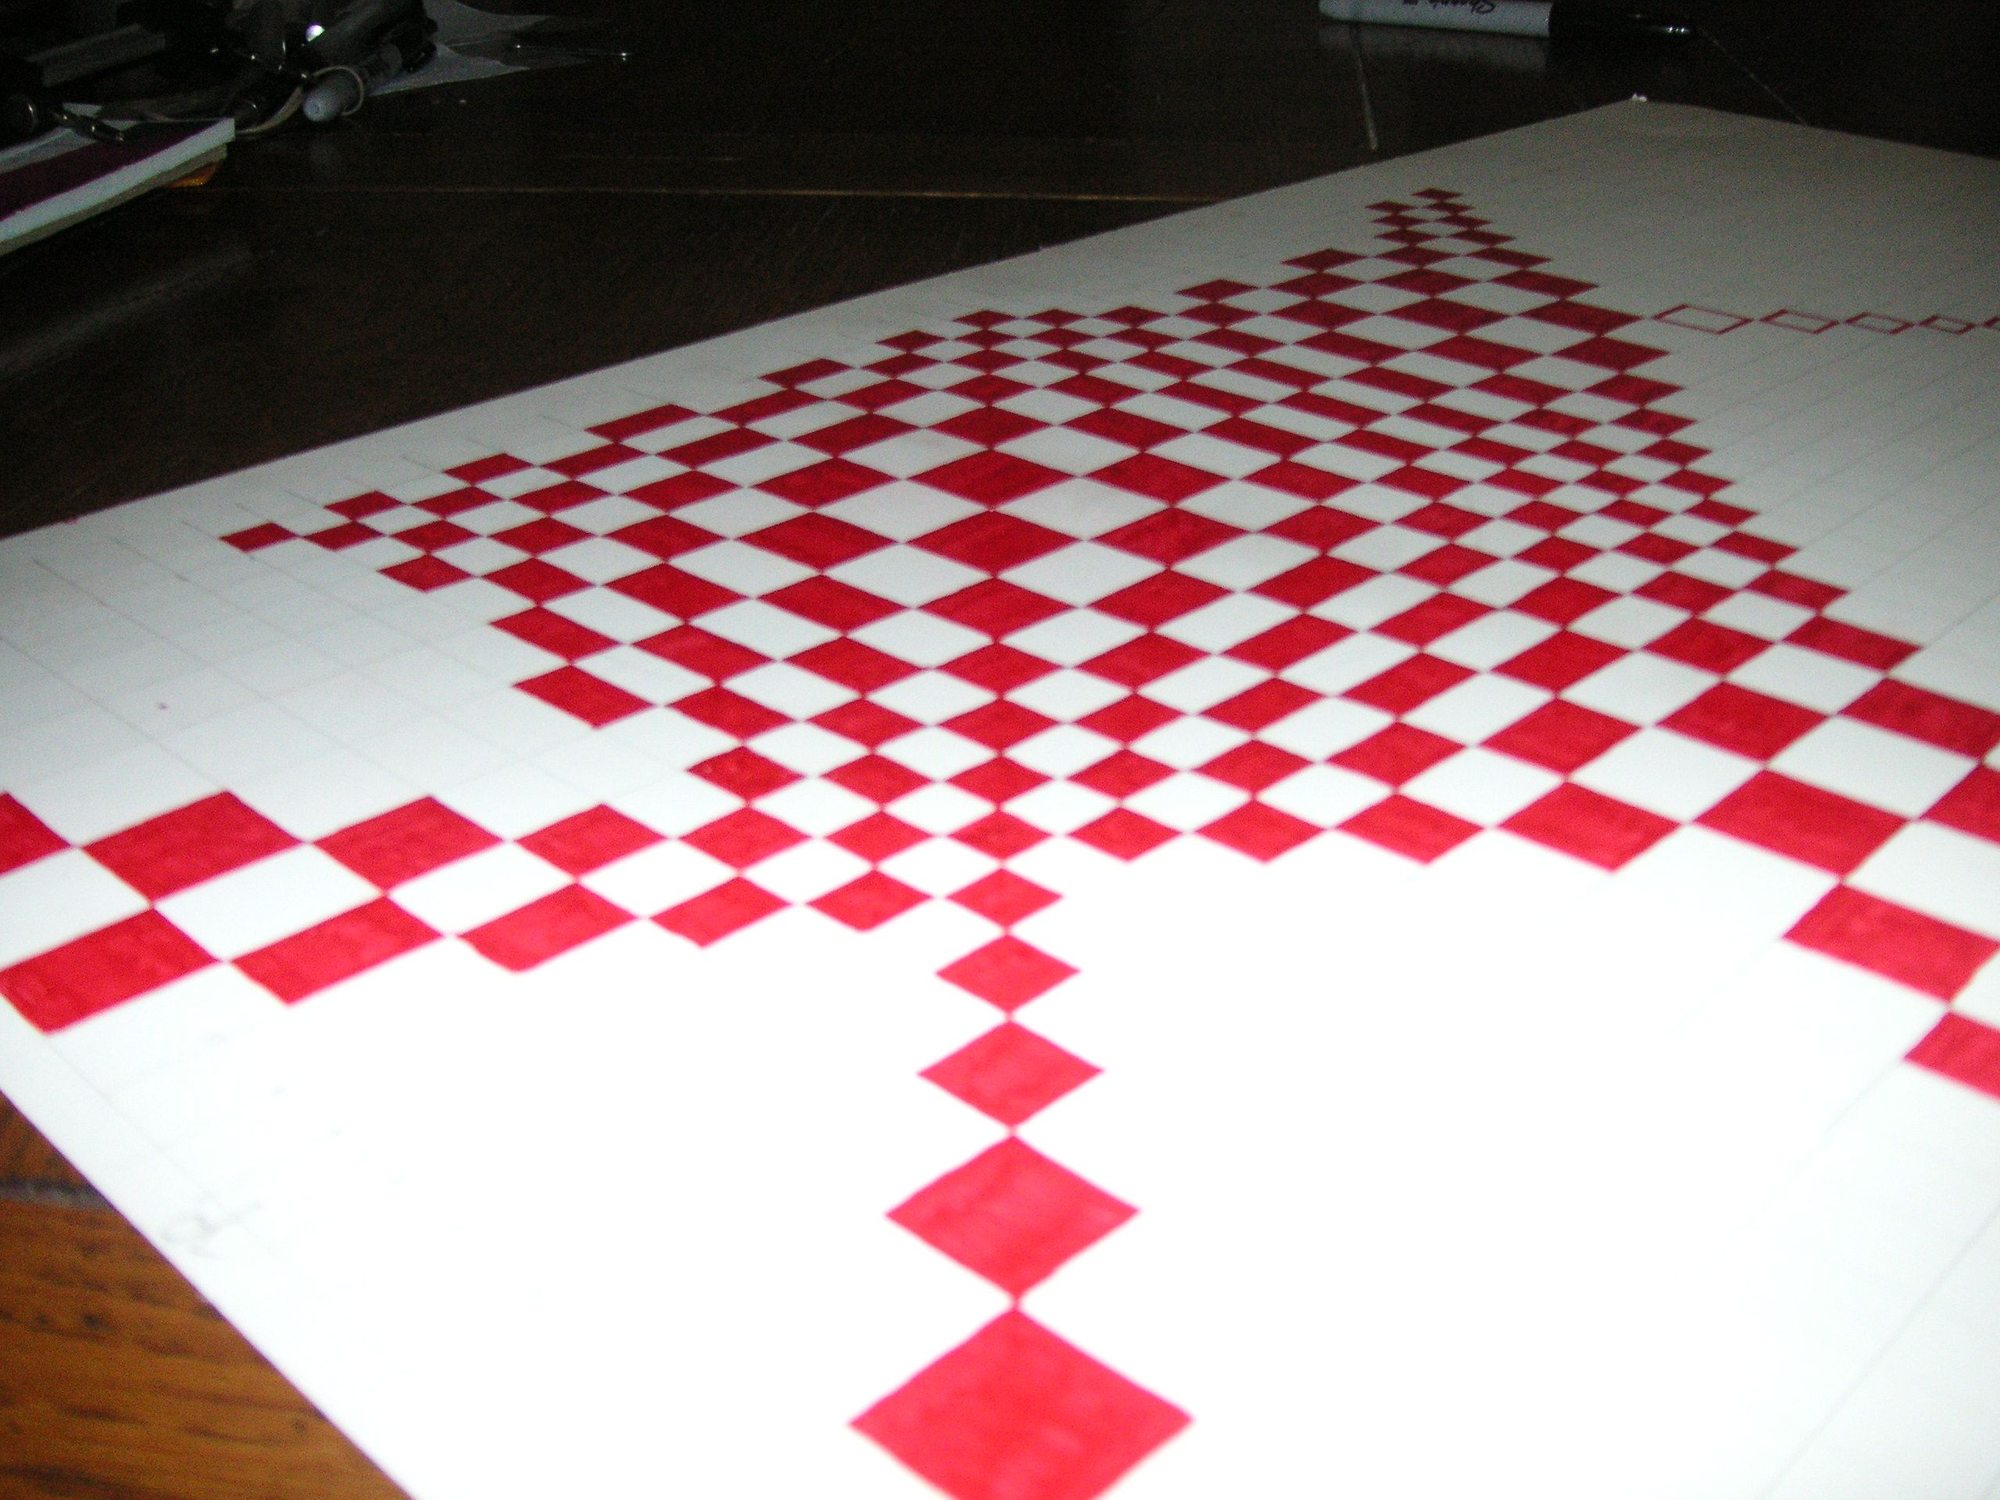
Here is what the new design might look like in leather.
Last edited by Jerry Feather; 02-06-2023 at 11:17 PM.
This new pattern is turning out better than I had originally thought or planned. It is going to lend itself to having two complete clusters of the small blocks in each cushion section rather that one in the center and haves at each end. That is as to the five cushion section design for my seats. That will put the larger blocks at the ends and in the middle of the pattern and also mostly in the valley between the cushions, with small blocks in every cushion section. I think that will keep the busy aspect of the design most prominent.
I am thinking that before I finalize my weaving pattern I ought to try one more design change. I reduced the width of some more of the small strips and then upon spacing that out I found that it eliminates the larges block in the center of the circle of large blocks. That also puts the center of that part of the pattern at the common corner of four large squares rather than the center of only one of them. That then caused the alternation of contrast to the blocks overall to change from block to block. I don't know yet how that is going to look.
Last edited by Jerry Feather; 02-03-2023 at 09:37 AM.
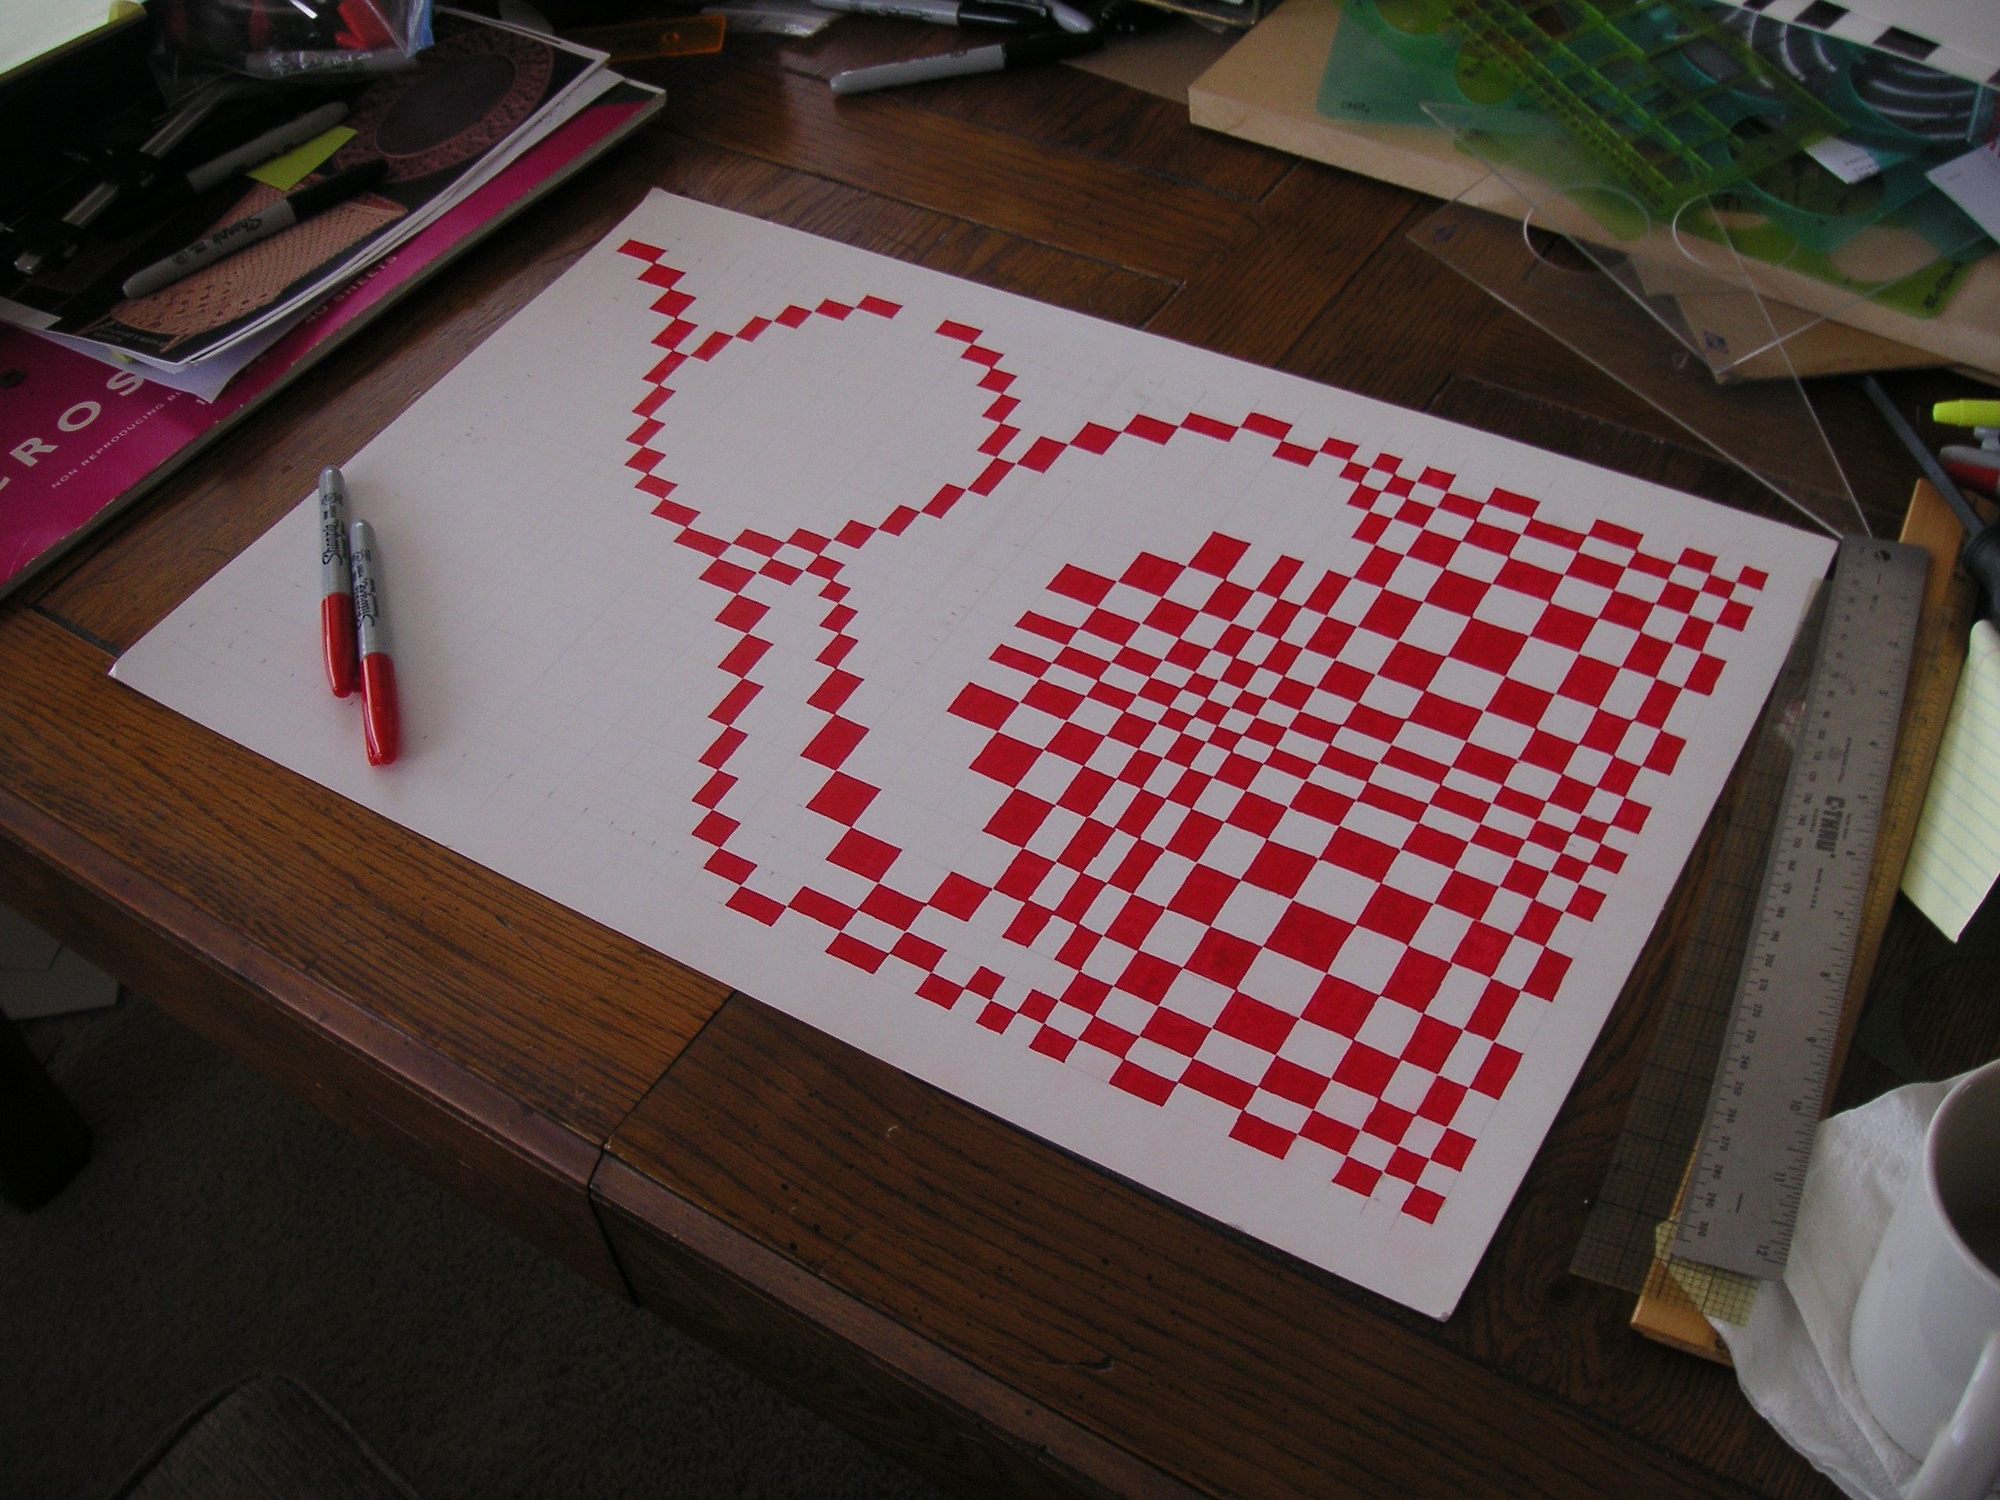
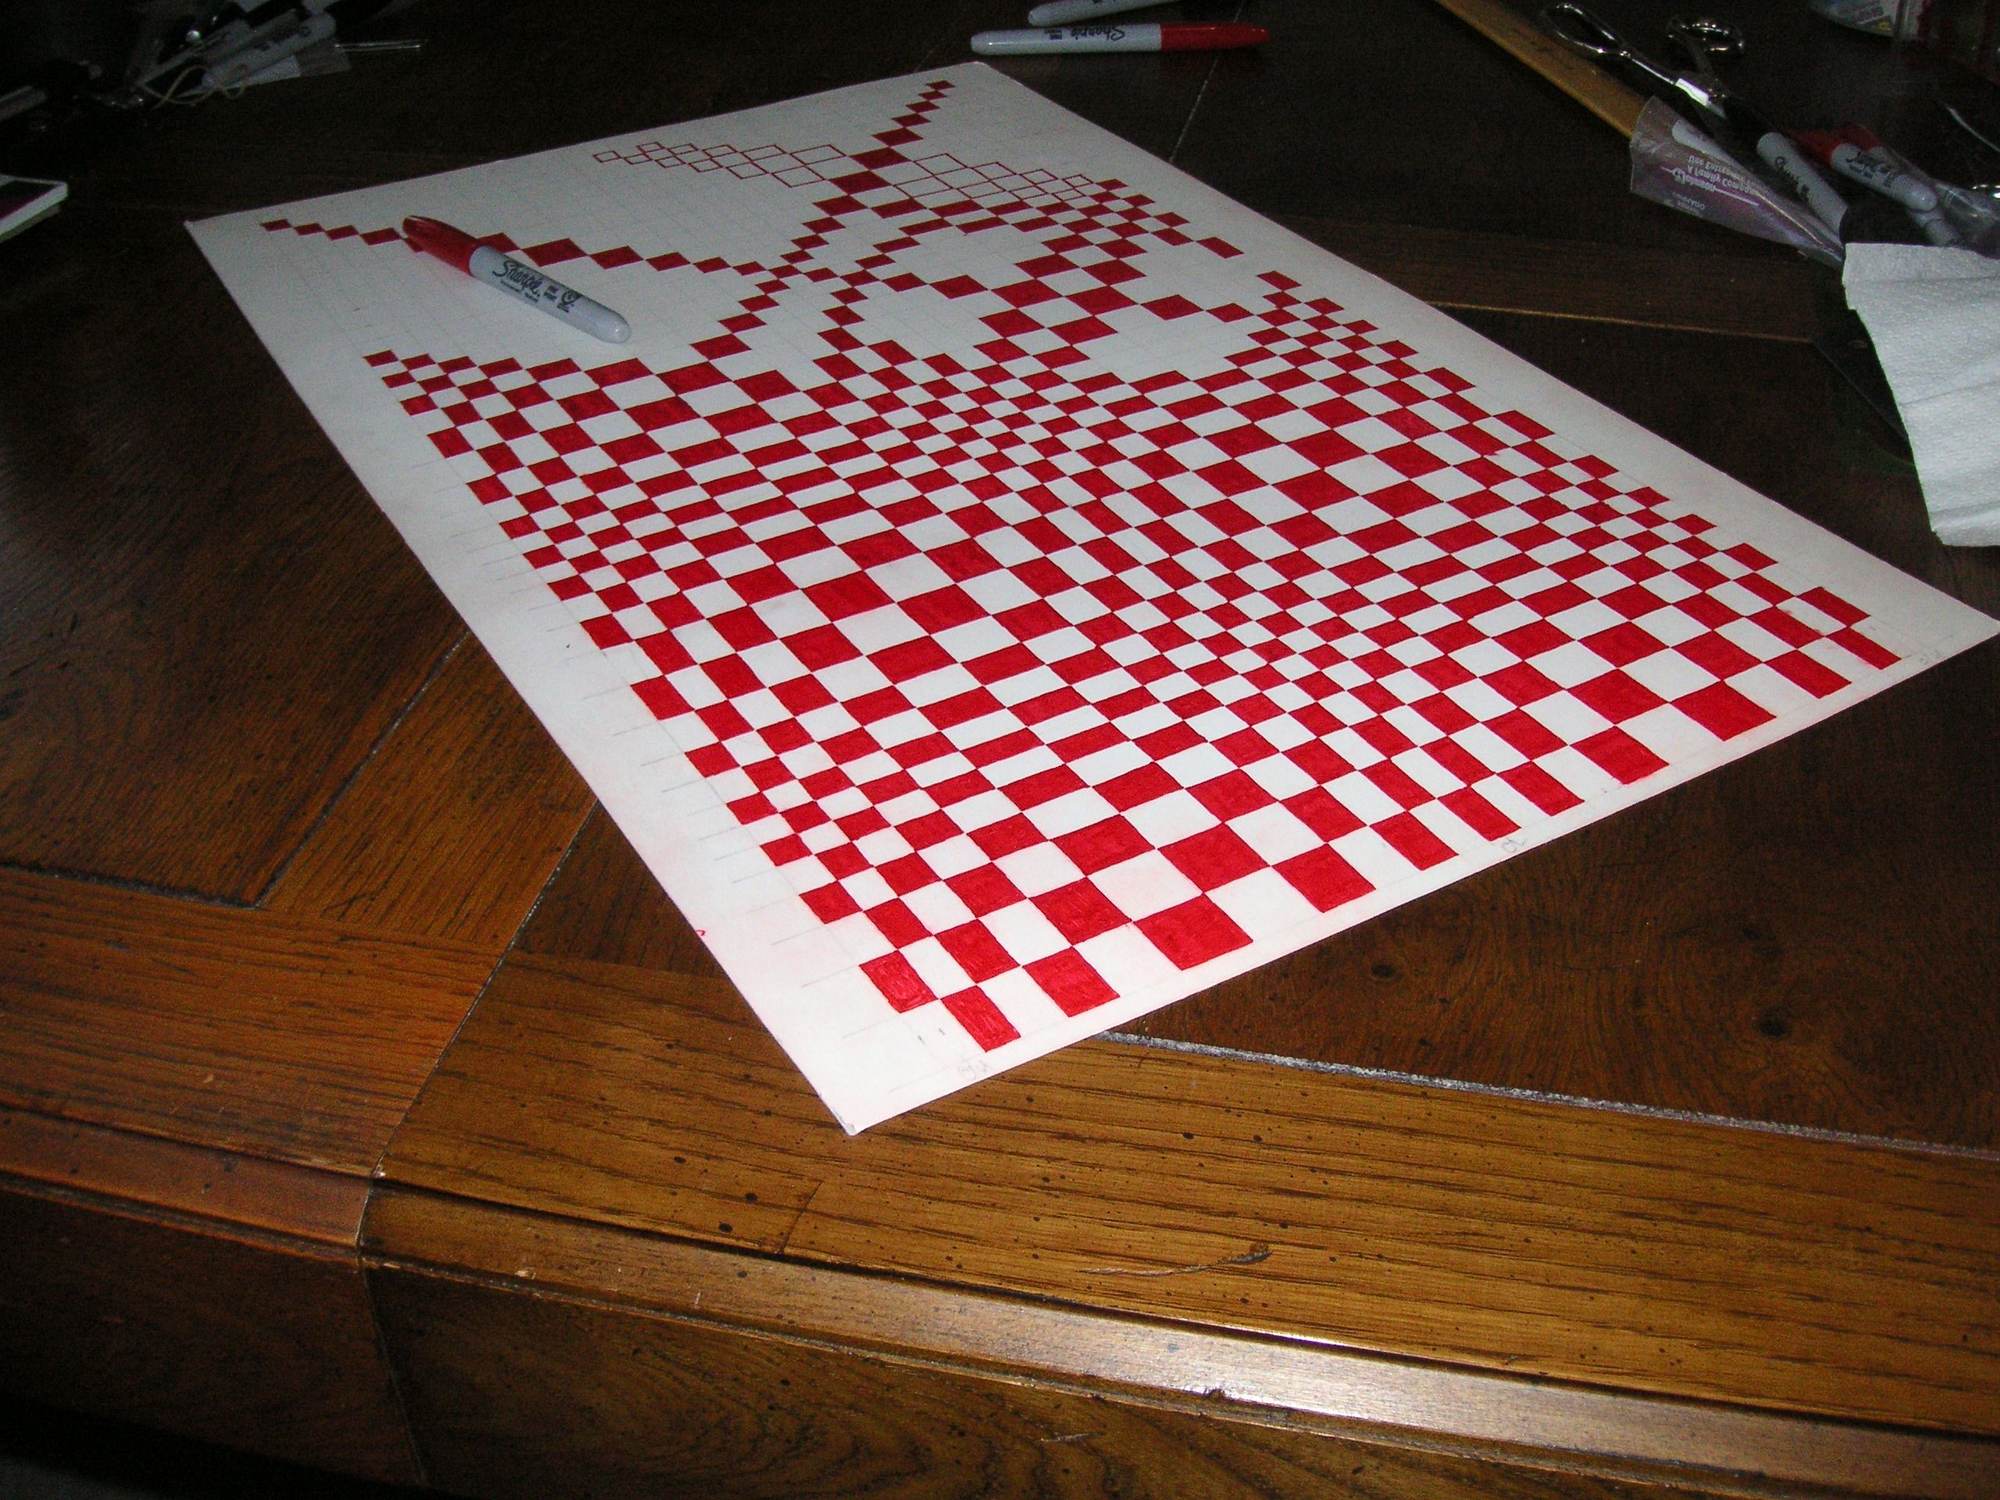
This is really an unusual pattern. I had tried to color around what I assumed was still a circle or close to it, as I had done in the other pattern, but it did not show up very well, so I colored it all in in that area. Then I finally noticed that it is still there but it is not made up of red blocks alone but rather a combination of red and white blocks. Viewed from one direction it is pretty much white and from the other angle it is pretty much red.
Last edited by Jerry Feather; 02-03-2023 at 03:48 PM.
Here is a little bit of progress with this latest pattern. I tried to show what is left of the circle around the big blocks, but it doesn't show up so well since it is half red and half white and it is not as nearly perfectly round as with the previous pattern. It is a little bit squarish.
I think this pattern is going to lend itself very well to my 5 cushion seat design. I'll center the small block cluster in each cushion and then in each alternate cushion the small cluster will be starting with a white or light center block and then the darker center in the next. I kind of doubt that the difference is going to be very obvious. With the tight pattern I have devised each cushion section will have a small block cluster in its middle and the half clusters at each outer end. I think that keeps the pattern pretty tight to help eliminate the possible deformation of the woven strips of leather that Greg and I have discussed but I think it will still have the pasha visual effect to some degree.
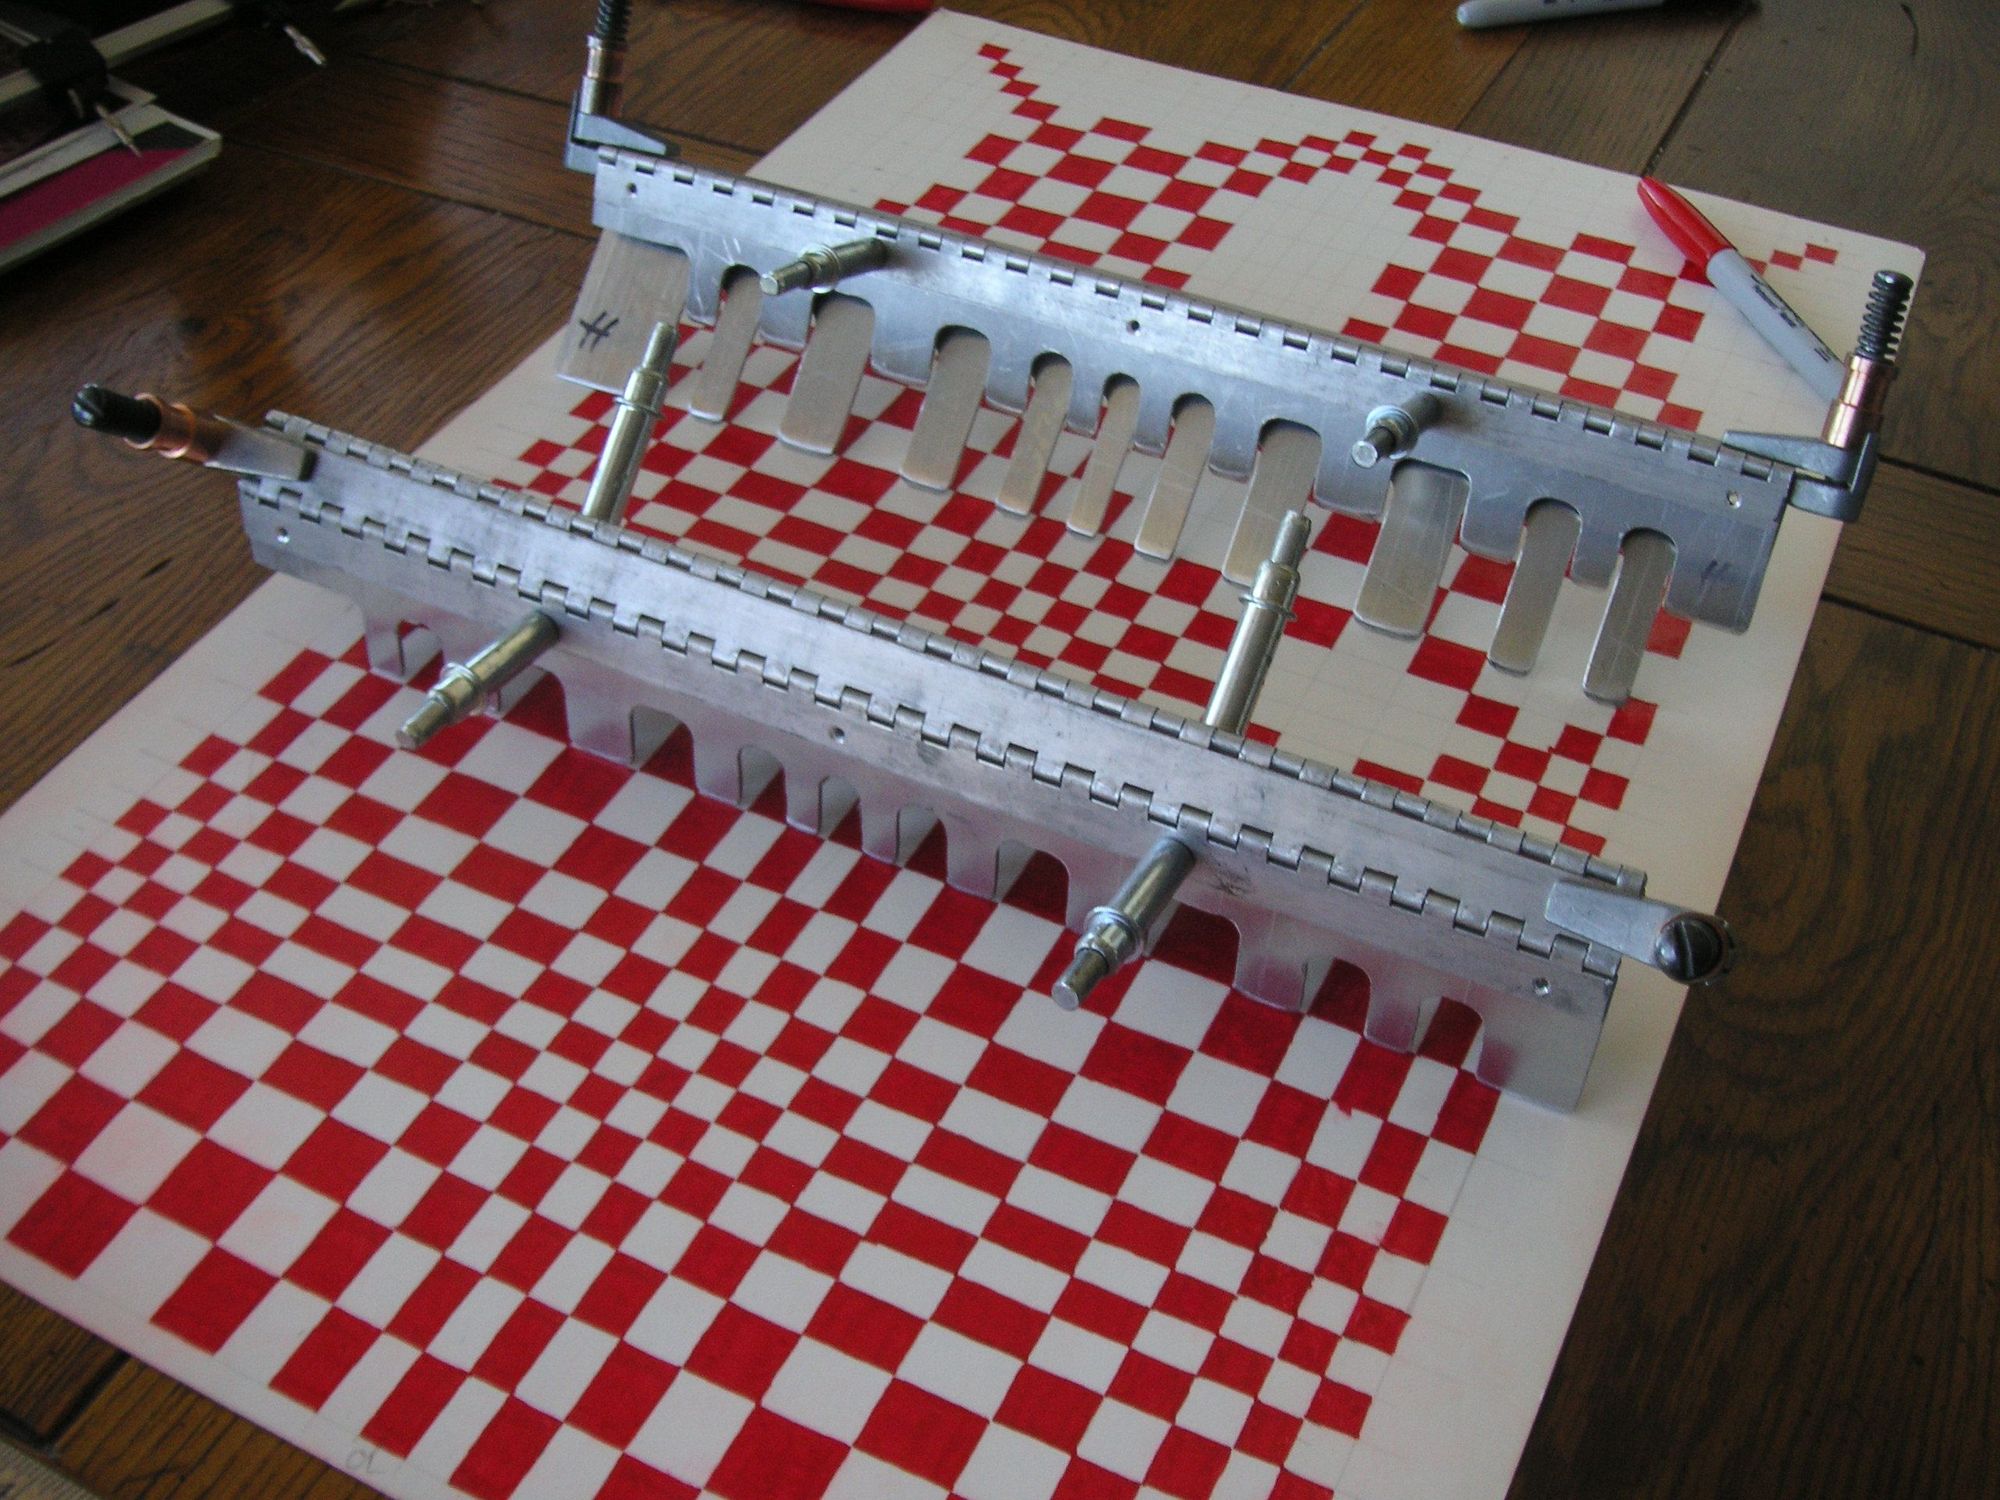
I have enough of this latest pattern drawn up in red and white to see what it is going to do, but I will probably finish out the paper drawing just because. Here is a picture of it as it sits now together with the two loom offset fingers that I am developing for it. These dang finger things take a lot of hands-on effort, and I have now made three sets of them, but these are not quite finished. I'll get to that a little later, but now I am taking a break.
Last edited by Jerry Feather; 02-06-2023 at 10:21 AM.
Jerry, it is simply amazing to watch you demonstrate what I will call "old school" craftsmanship (or perhaps it is not, but I am too far removed from such trades to know better?) and tool development in tackling a design concept!
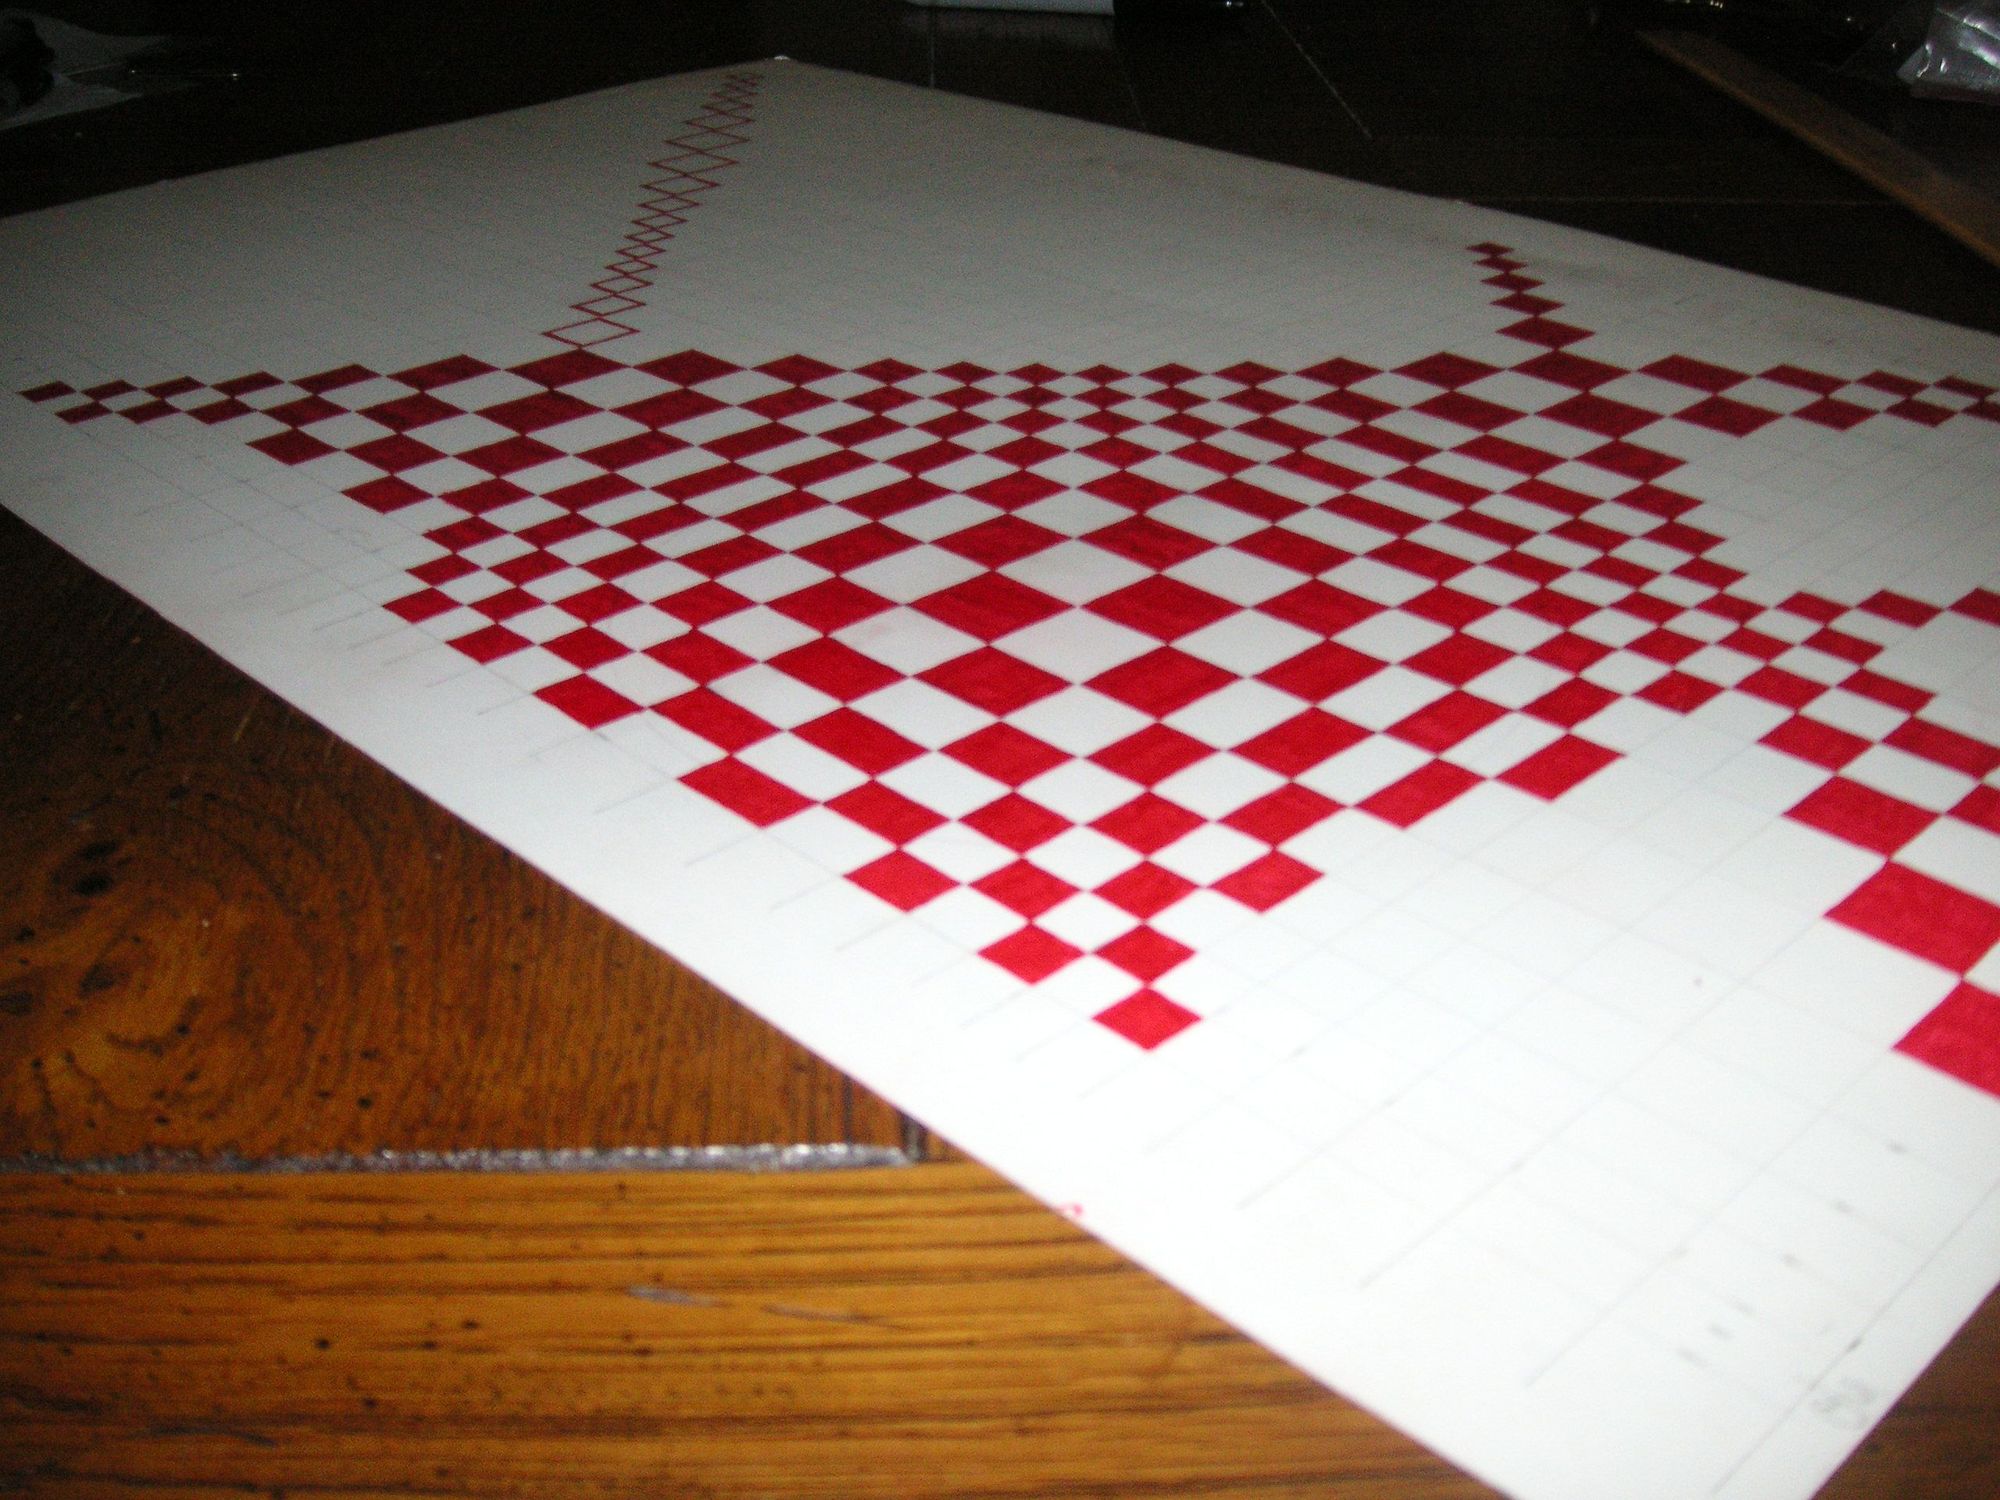
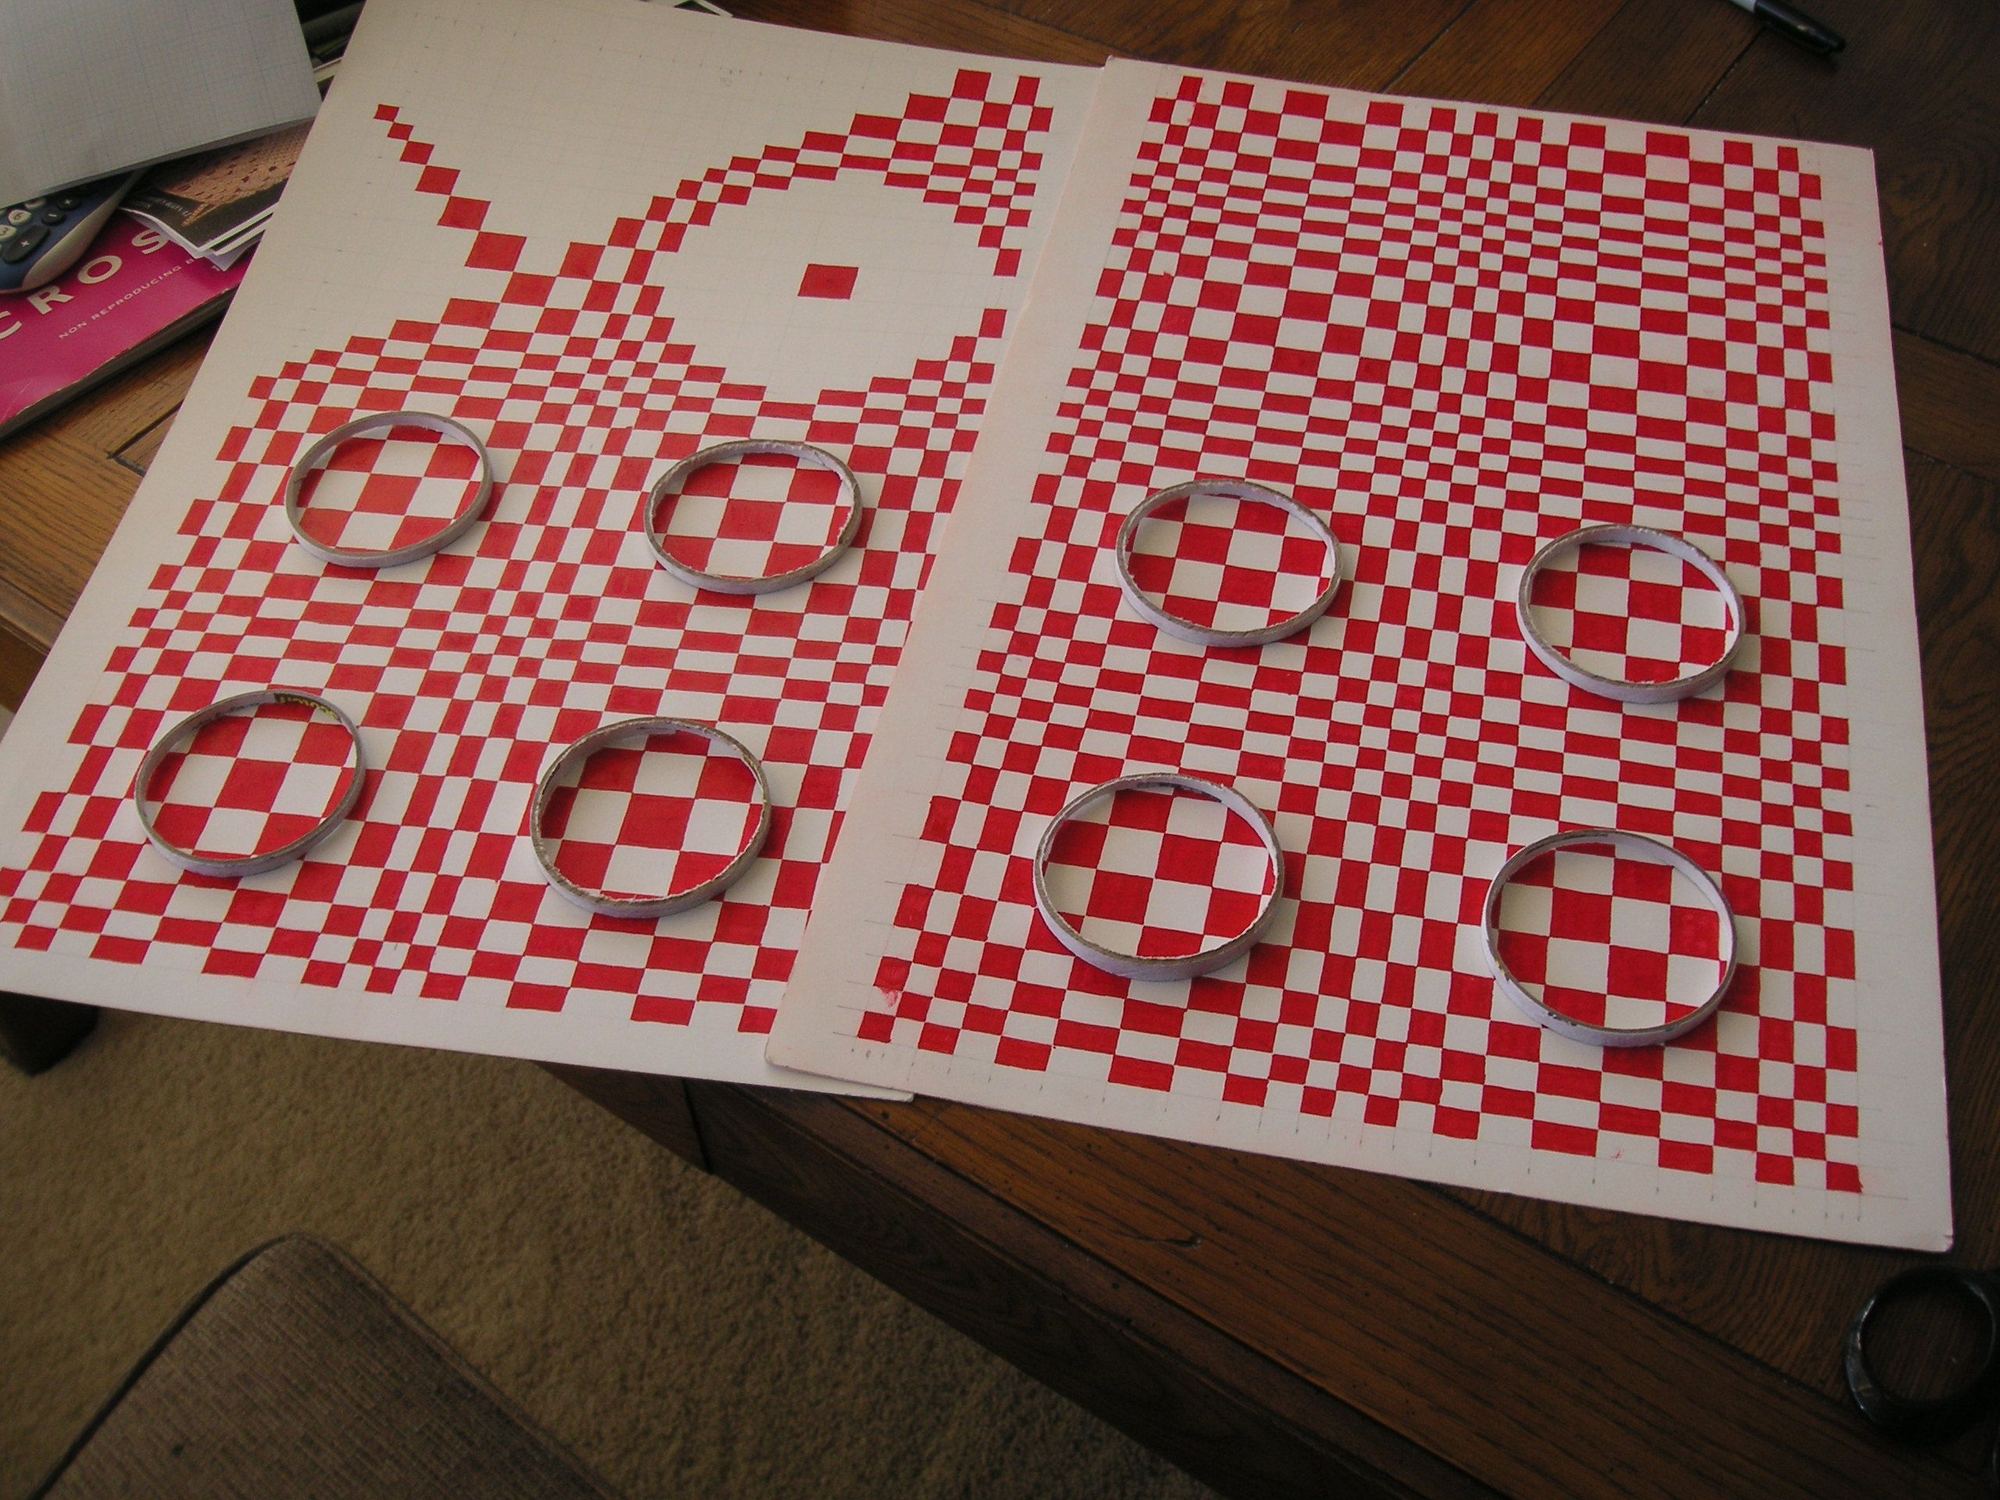
I layed these last two patterns out side by side and together with some paper rings centered over some of the large block clusters in order to show how they are basiczlly different, when in fact side by side the patterns pretty much look the same. They are in fact quite different. You will notice that the center of the earlier pattern large block clusters is in the center of the largest square block in all cases, but with the last pattern the same center is at the common corner of four large blocks, and those blocks are oriented differently in half of the clusters.
Last edited by Jerry Feather; 03-02-2023 at 10:24 AM.
I have the loom completed and the cutting board is ready to go. I have milled some more width gauge blocks to use with the cutting board, so all I need now is to experiment with the heat activated contact cement and then cut some leather.
The hides I have to cut the leather out of are very very big. Usually a cow hide is about 45 to 50 sq feet, but the lighter one I have is 64.7 sq feet. I don't actually have a very good place to roll it out and cut pieces out of it, but maybe on my living room floor. I guess I don't have to roll it all the way out to cut on it, but I might need to roll out quite a bit of it to find the right area to cut on
I think I'll cut some practice strips of leather to experiment with the glue and an iron to see how it is going to work.
When I get the leather cut into strips I'm going to put some masking tape on the face edges of the loom and then put the spacing marks on the tape for the weave pattern. Then I'll staple the stripe to the loom with some small and shallow staples then hold the ends of the long strips down at the bottom and top edges with two strlips of wood to firm up the starting and finishing weave. I have my cross tamping/schuttle bar fashioned and smoothed up at the ends, so all it is going to take now is processing the leather. After I cut that out in rectangles I'll spray the glue on the backs of it and let that dry about two or three times then cut it into strips.
Let's see how it goes.
Last edited by Jerry Feather; 02-14-2023 at 09:46 AM.
I have the loom completed and the cutting board is ready to go. I have milled some more width gauge blocks to use with the cutting board, so all I need now is to experiment with the heat activted contact cement and then cut some leather.
The hides I have to cut the leather out of are very very big. Usually a cow hide is about 45 to 50 sq feet, but the lighter one I have is 64.7 sq feet. I don't actual have a very good place to roll it out and cut pieces out of it, but maybe on my living room floor. I guess I don't have to roll it all the way out to cut on it, but I might need to roll out quite a bit of it to find the right area to cut on
I think I'll cut some practice strips of lether to experiment with the glue and an iron to see how it is going to work.
When I get the leather cut into strips I'm going to put some masking tape on the face edges of the loom and then put the spacing marks on the tape for the wleave pattern. Then I'll staple the stripe to the loom with some small and shallow staples then hold the ends of the long strips down at the bottom and top edges with two strlips of wood to firm up the starting and finishing weave. I have my cross/ schuttle bar fashioned and smoothed up at the ends, so all it is going to take now is processing the leather. After I cut that out in rectangles I'll spray the glue on the backs of it and let that dry about two or three times then cut it into strips.
Let's see how it goes.
suggestion...cut the stips with a bevel so that the topside is wider than the bottom, doesn't expose as much of the edge. there's actually a knife on leather workers supply websites that helps with a good beveled cut

 01-17-2023, 11:28 AM