When you click on links to various merchants on this site and make a purchase, this can result in this site earning a commission. Affiliate programs and affiliations include, but are not limited to, the eBay Partner Network.
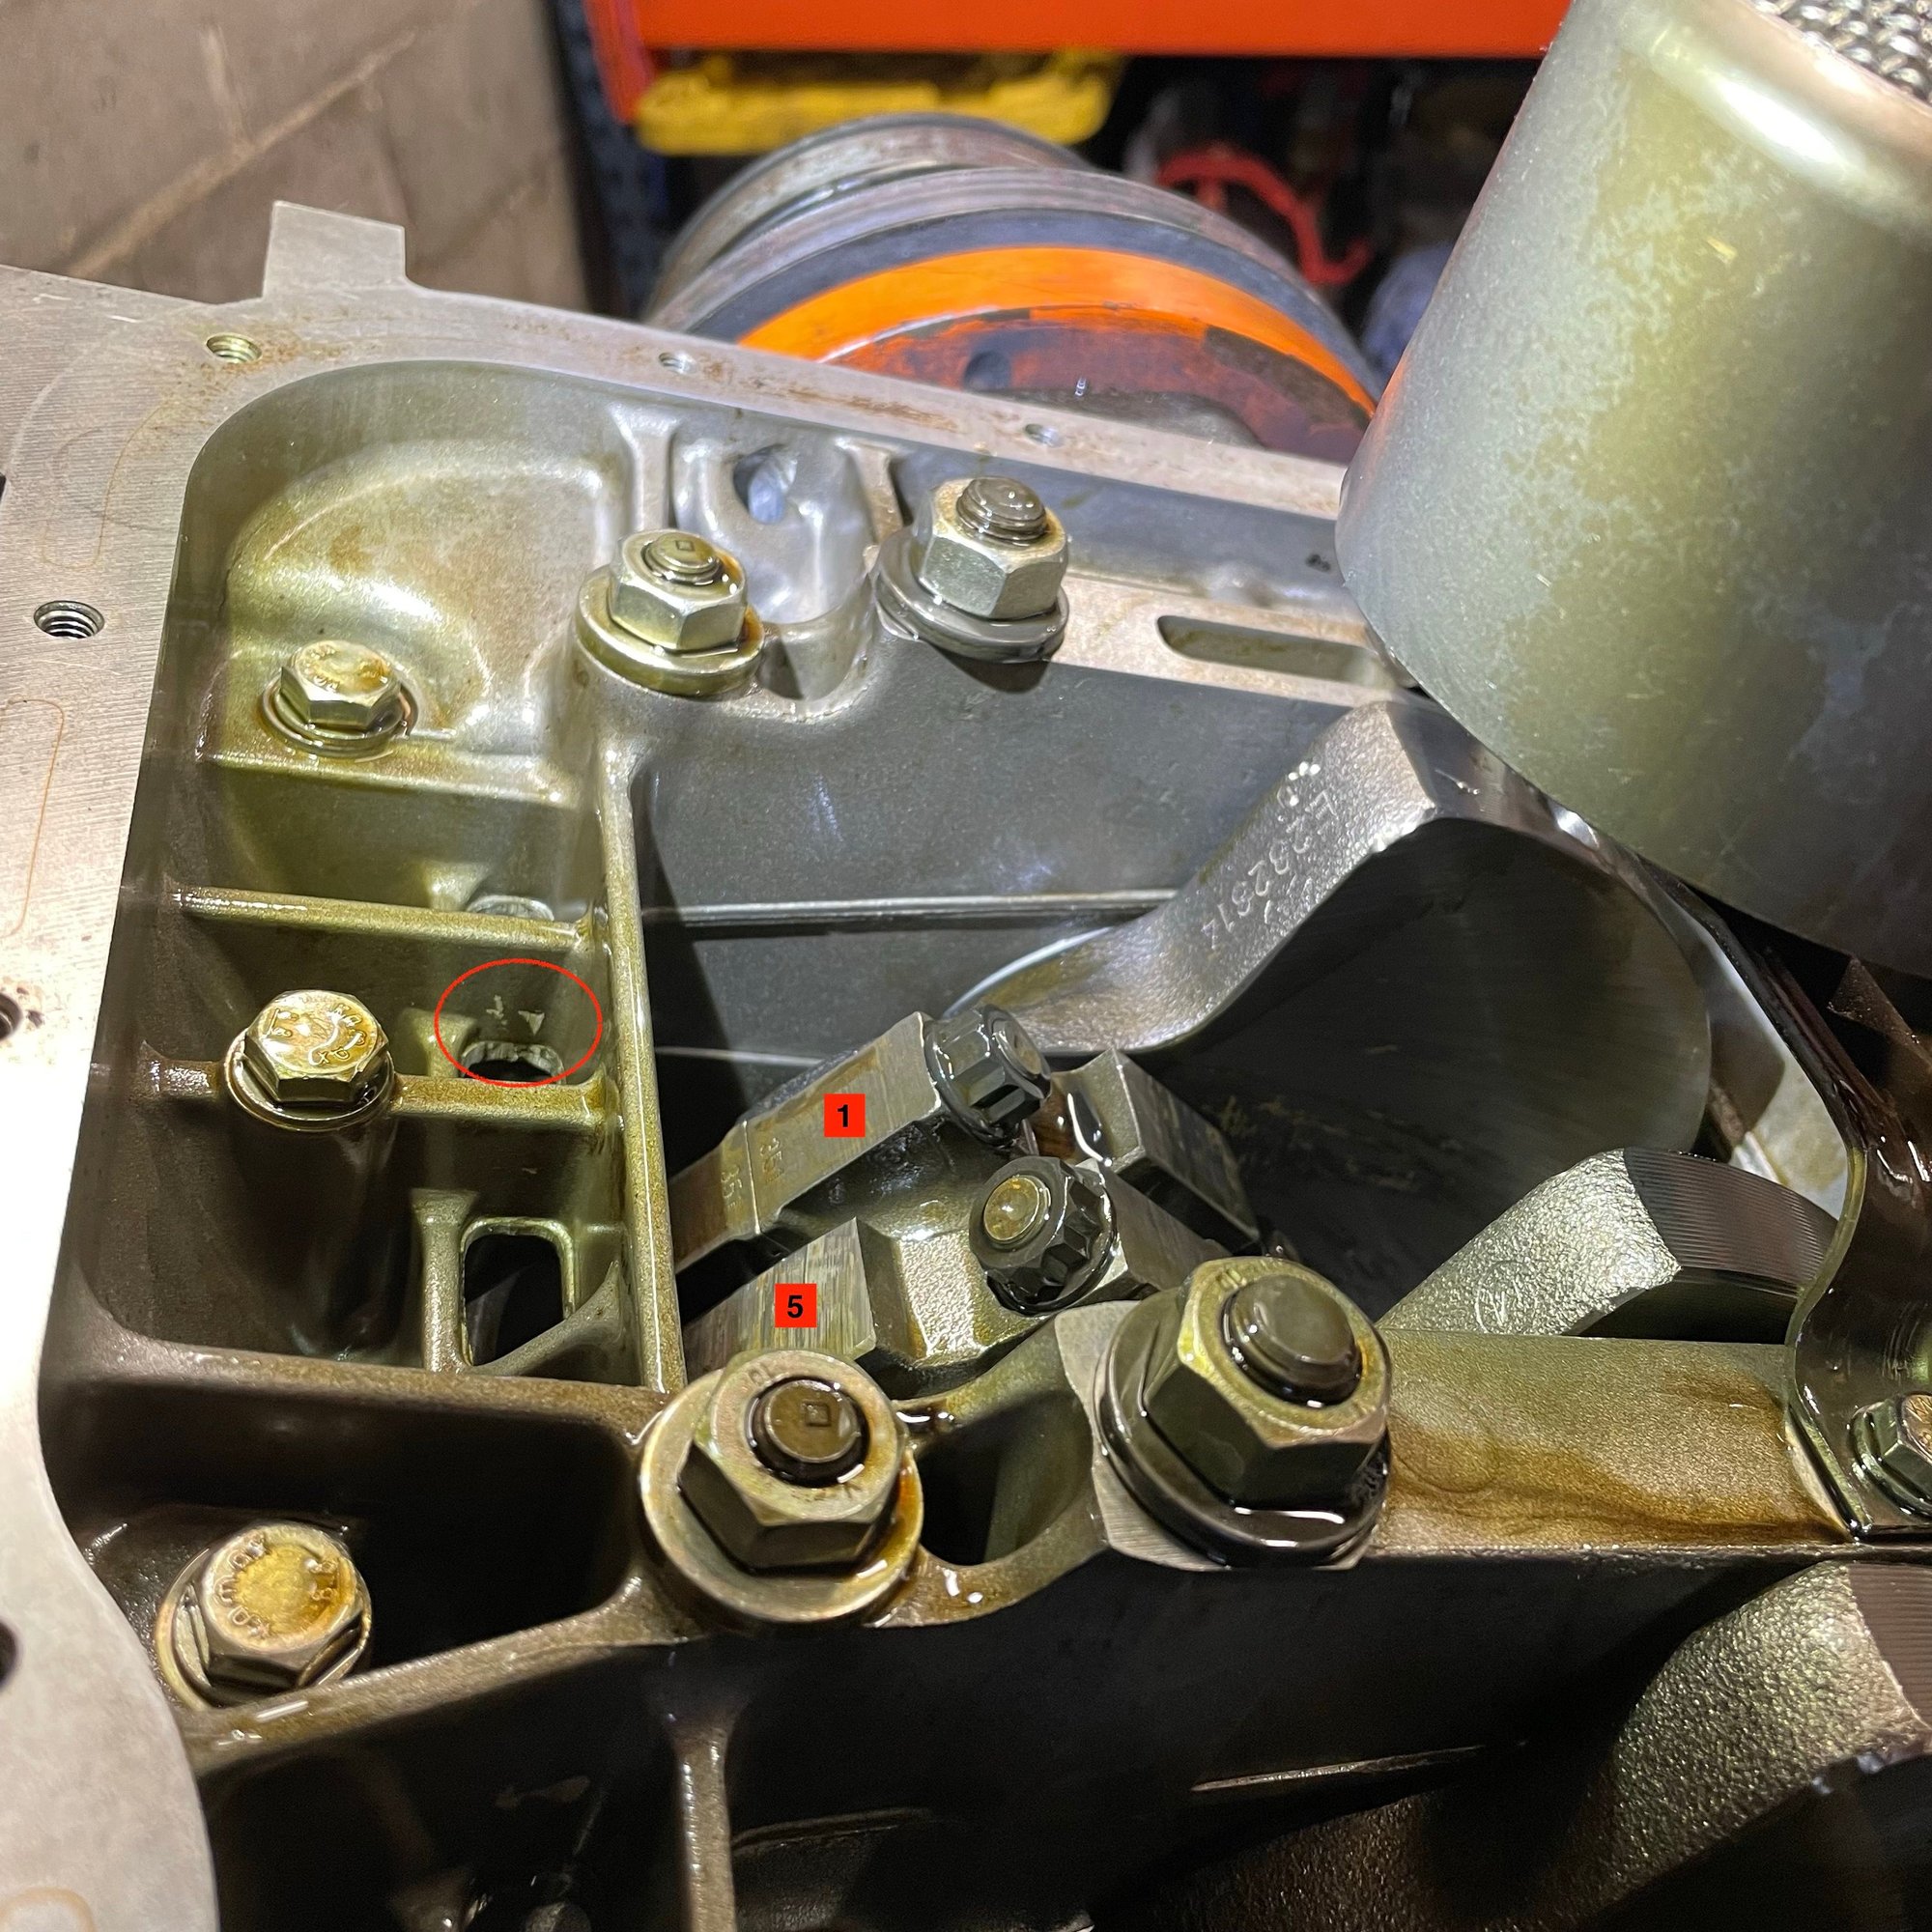
Under this aluminum part is a spring and check ball, which closes as soon as there is no oil pressure. And opens when oil pressure is present. This keeps all the oil in the head's oil galleys from returning to the bottom end of the engine, when the engine is turned off. Helps with "dry start" wear issues.
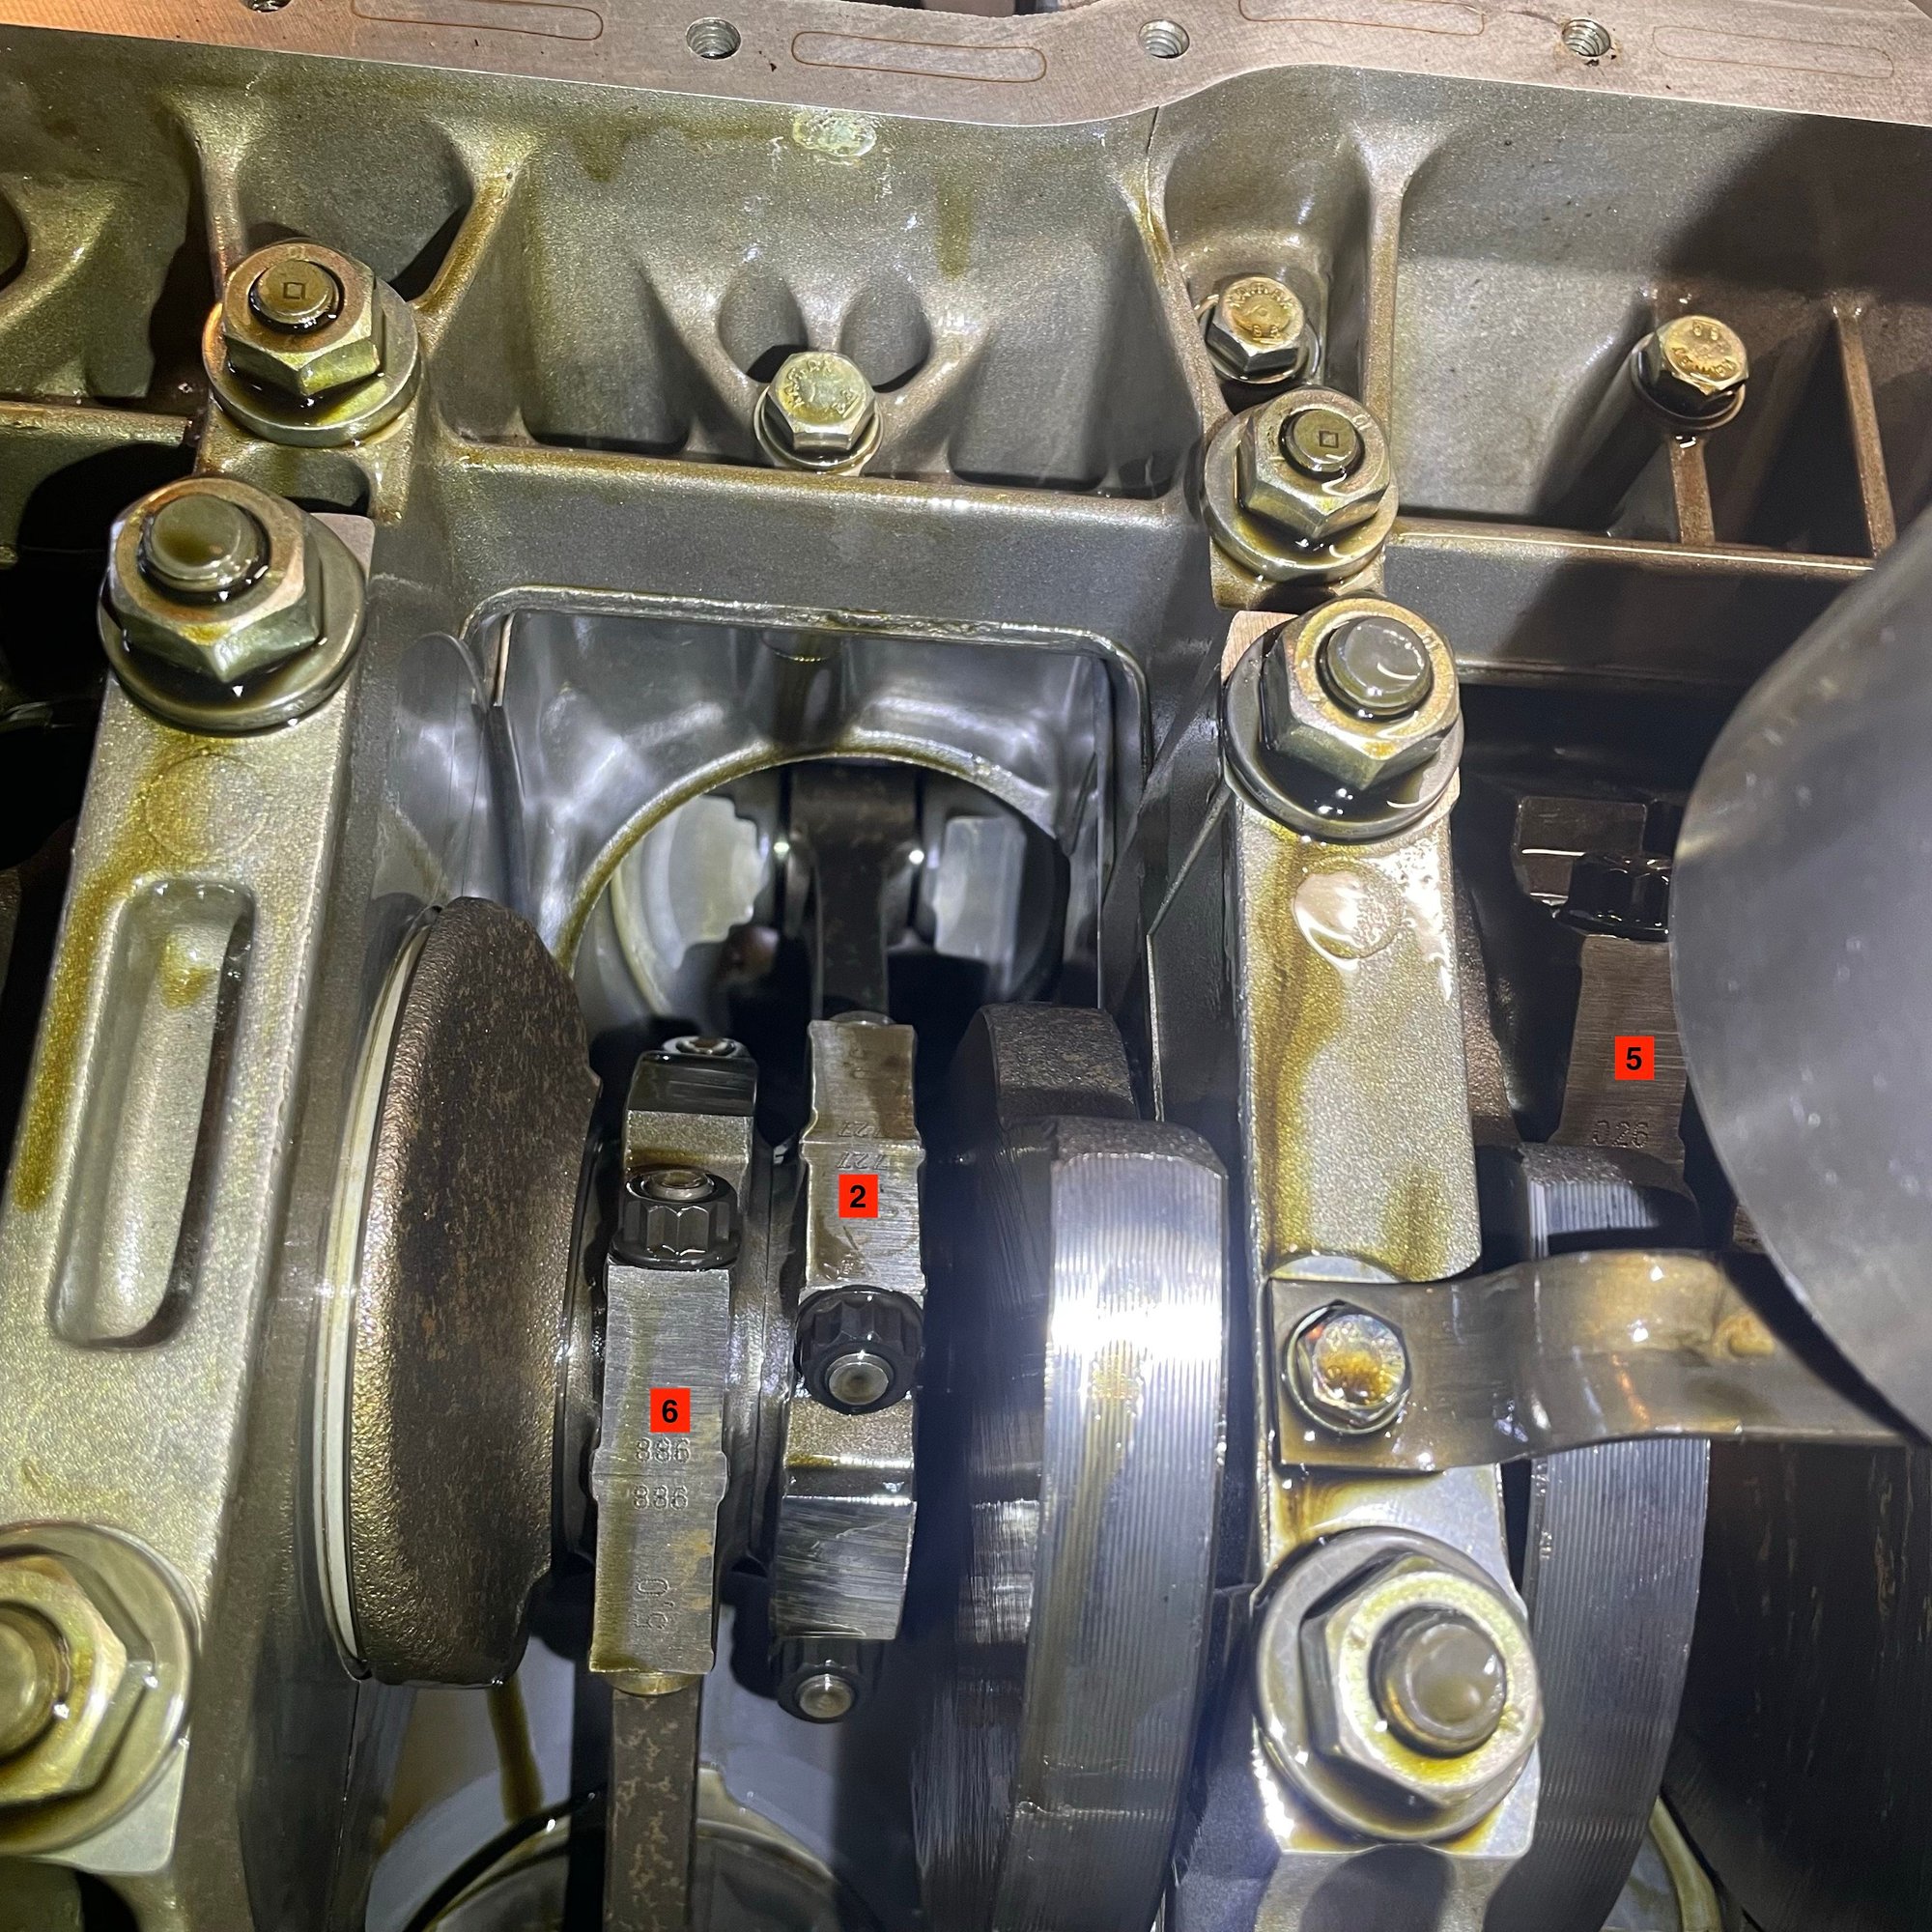
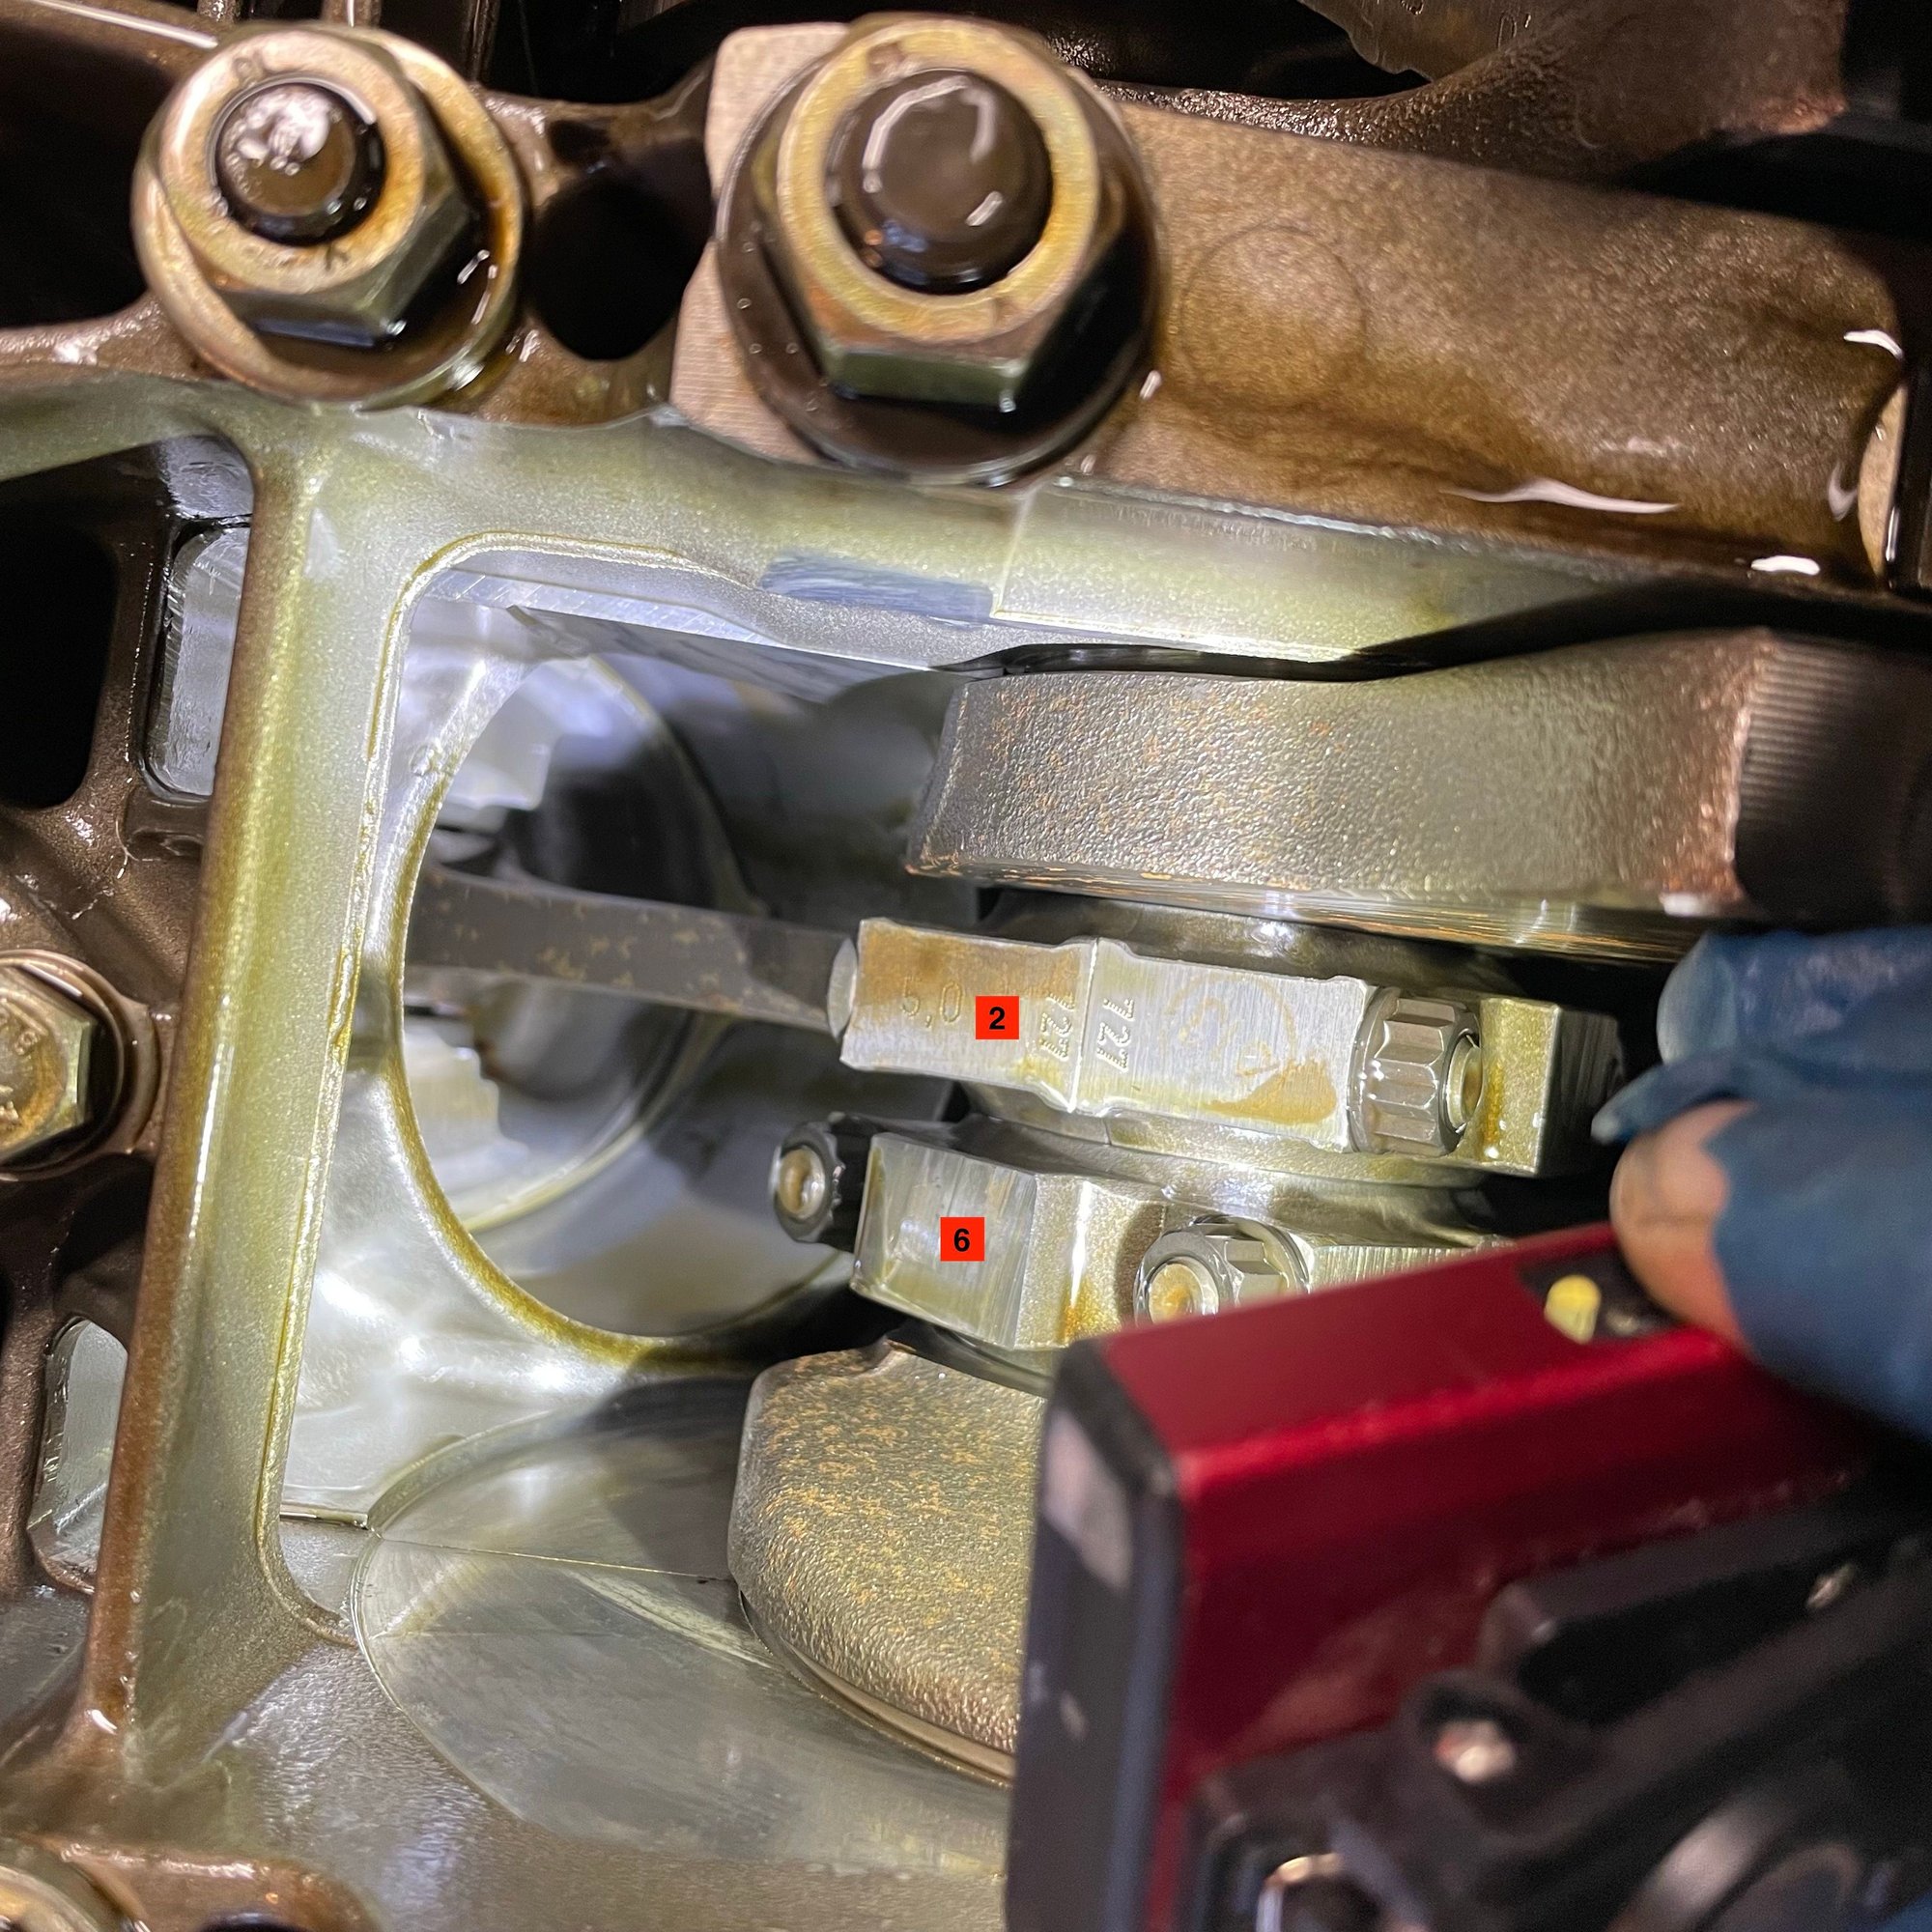
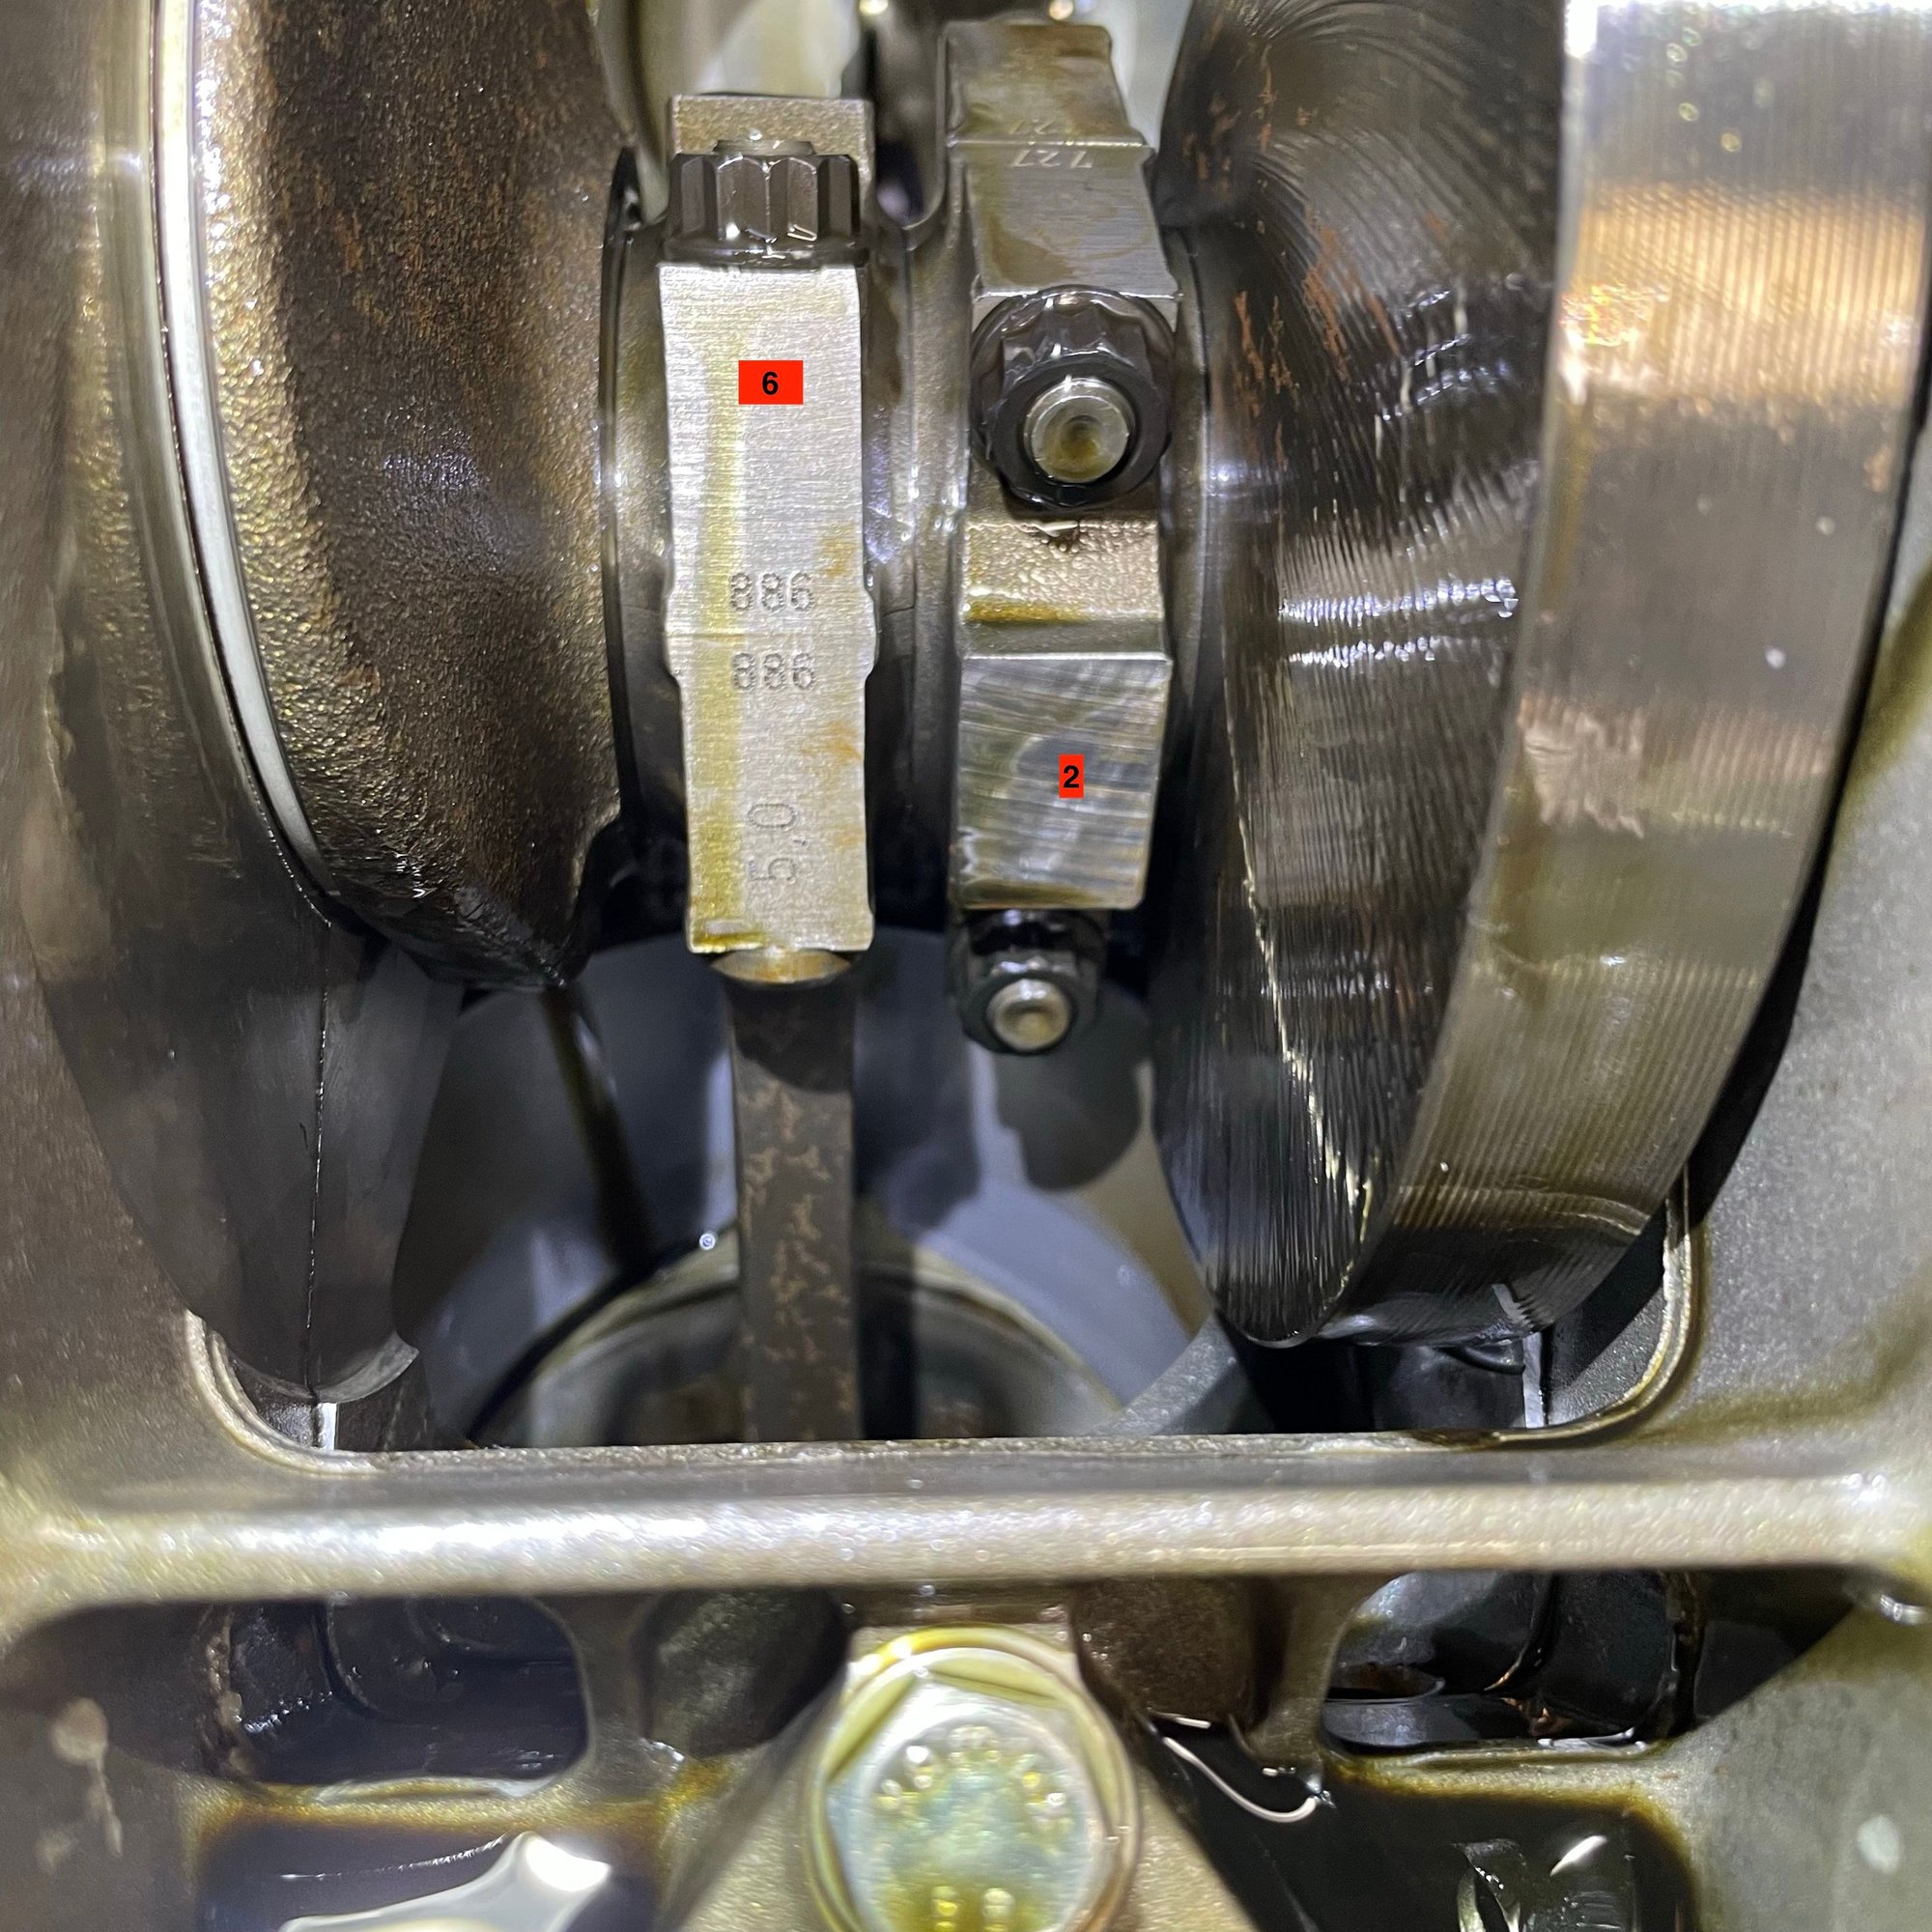
The casting part numbers mean very little, since all the various cam grinds (for each location) come from the exact same casting.The stamped numbers, on the rear end of the cams, are what identify the specific cam grind. The color of the chain guide would indicate that it is old...they start out white. The amount of wear is also consistent with the mileage. The "wear" occurs on each side of the part number....the grooves in the surface. If the part number is gone...that would be insane wear (I've never seen one that worn.) Look at the chain cross section and it all makes sense.
Greg, thank you for the guidance and explanations:
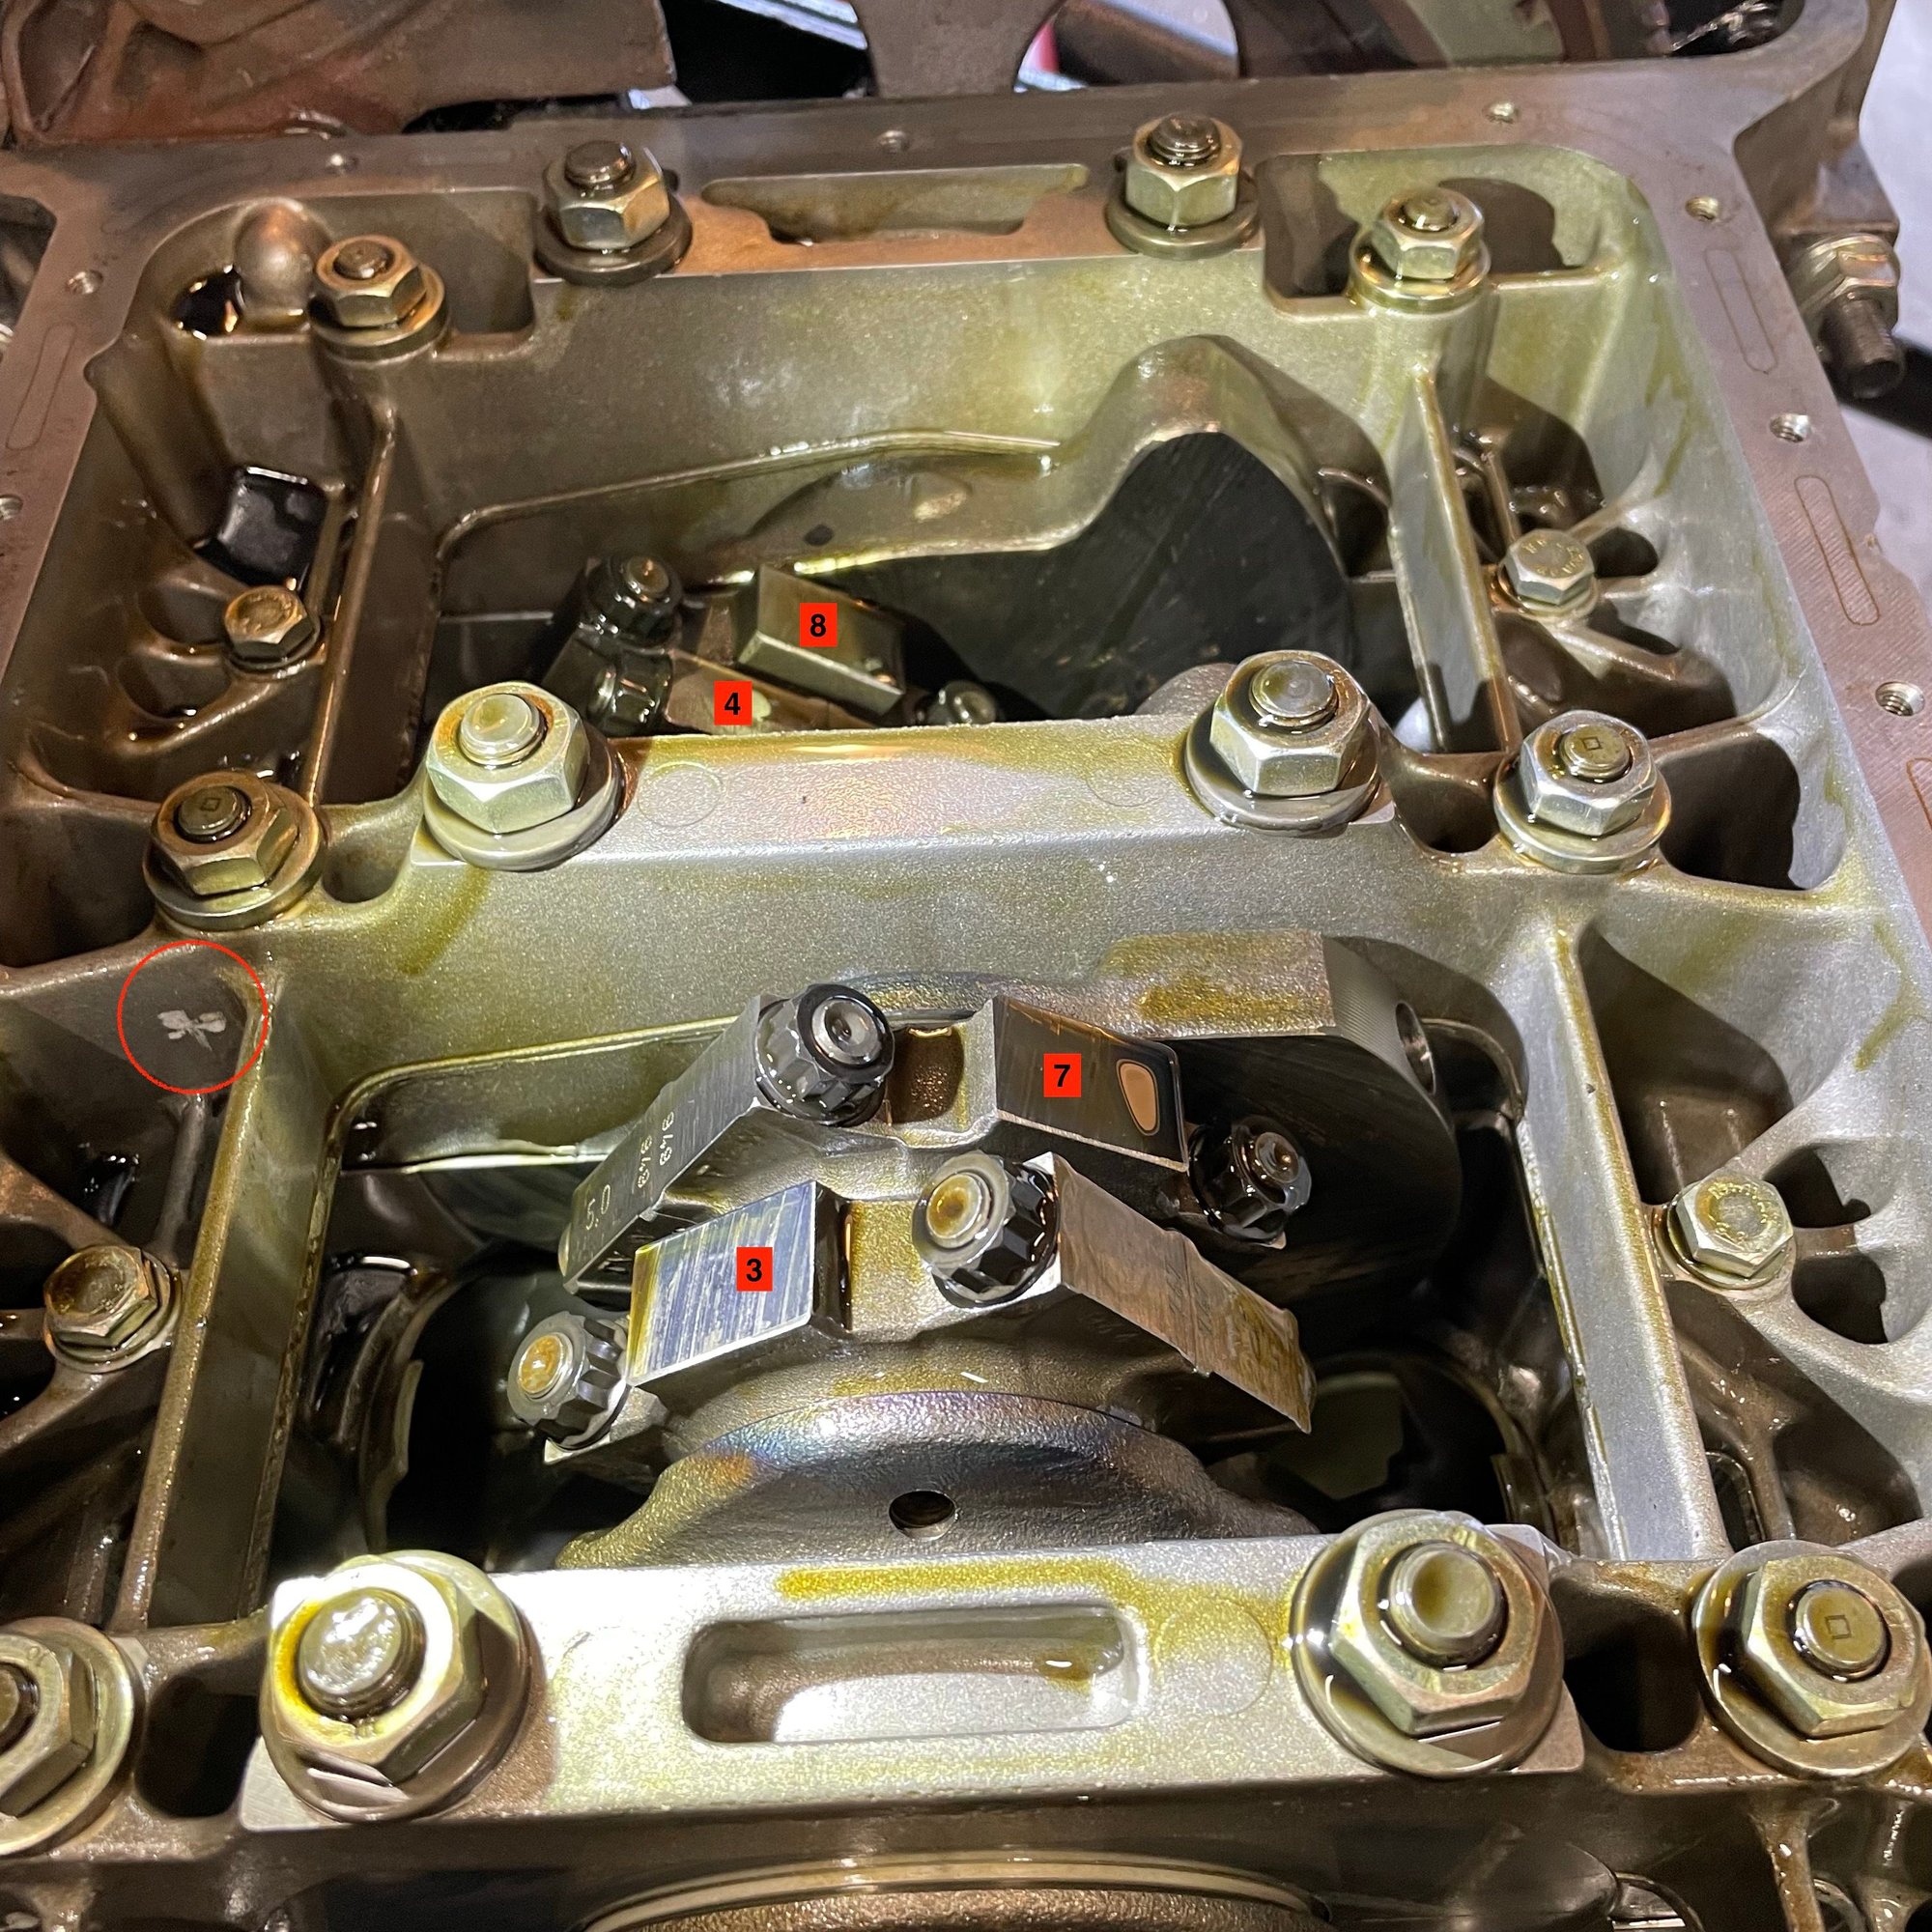
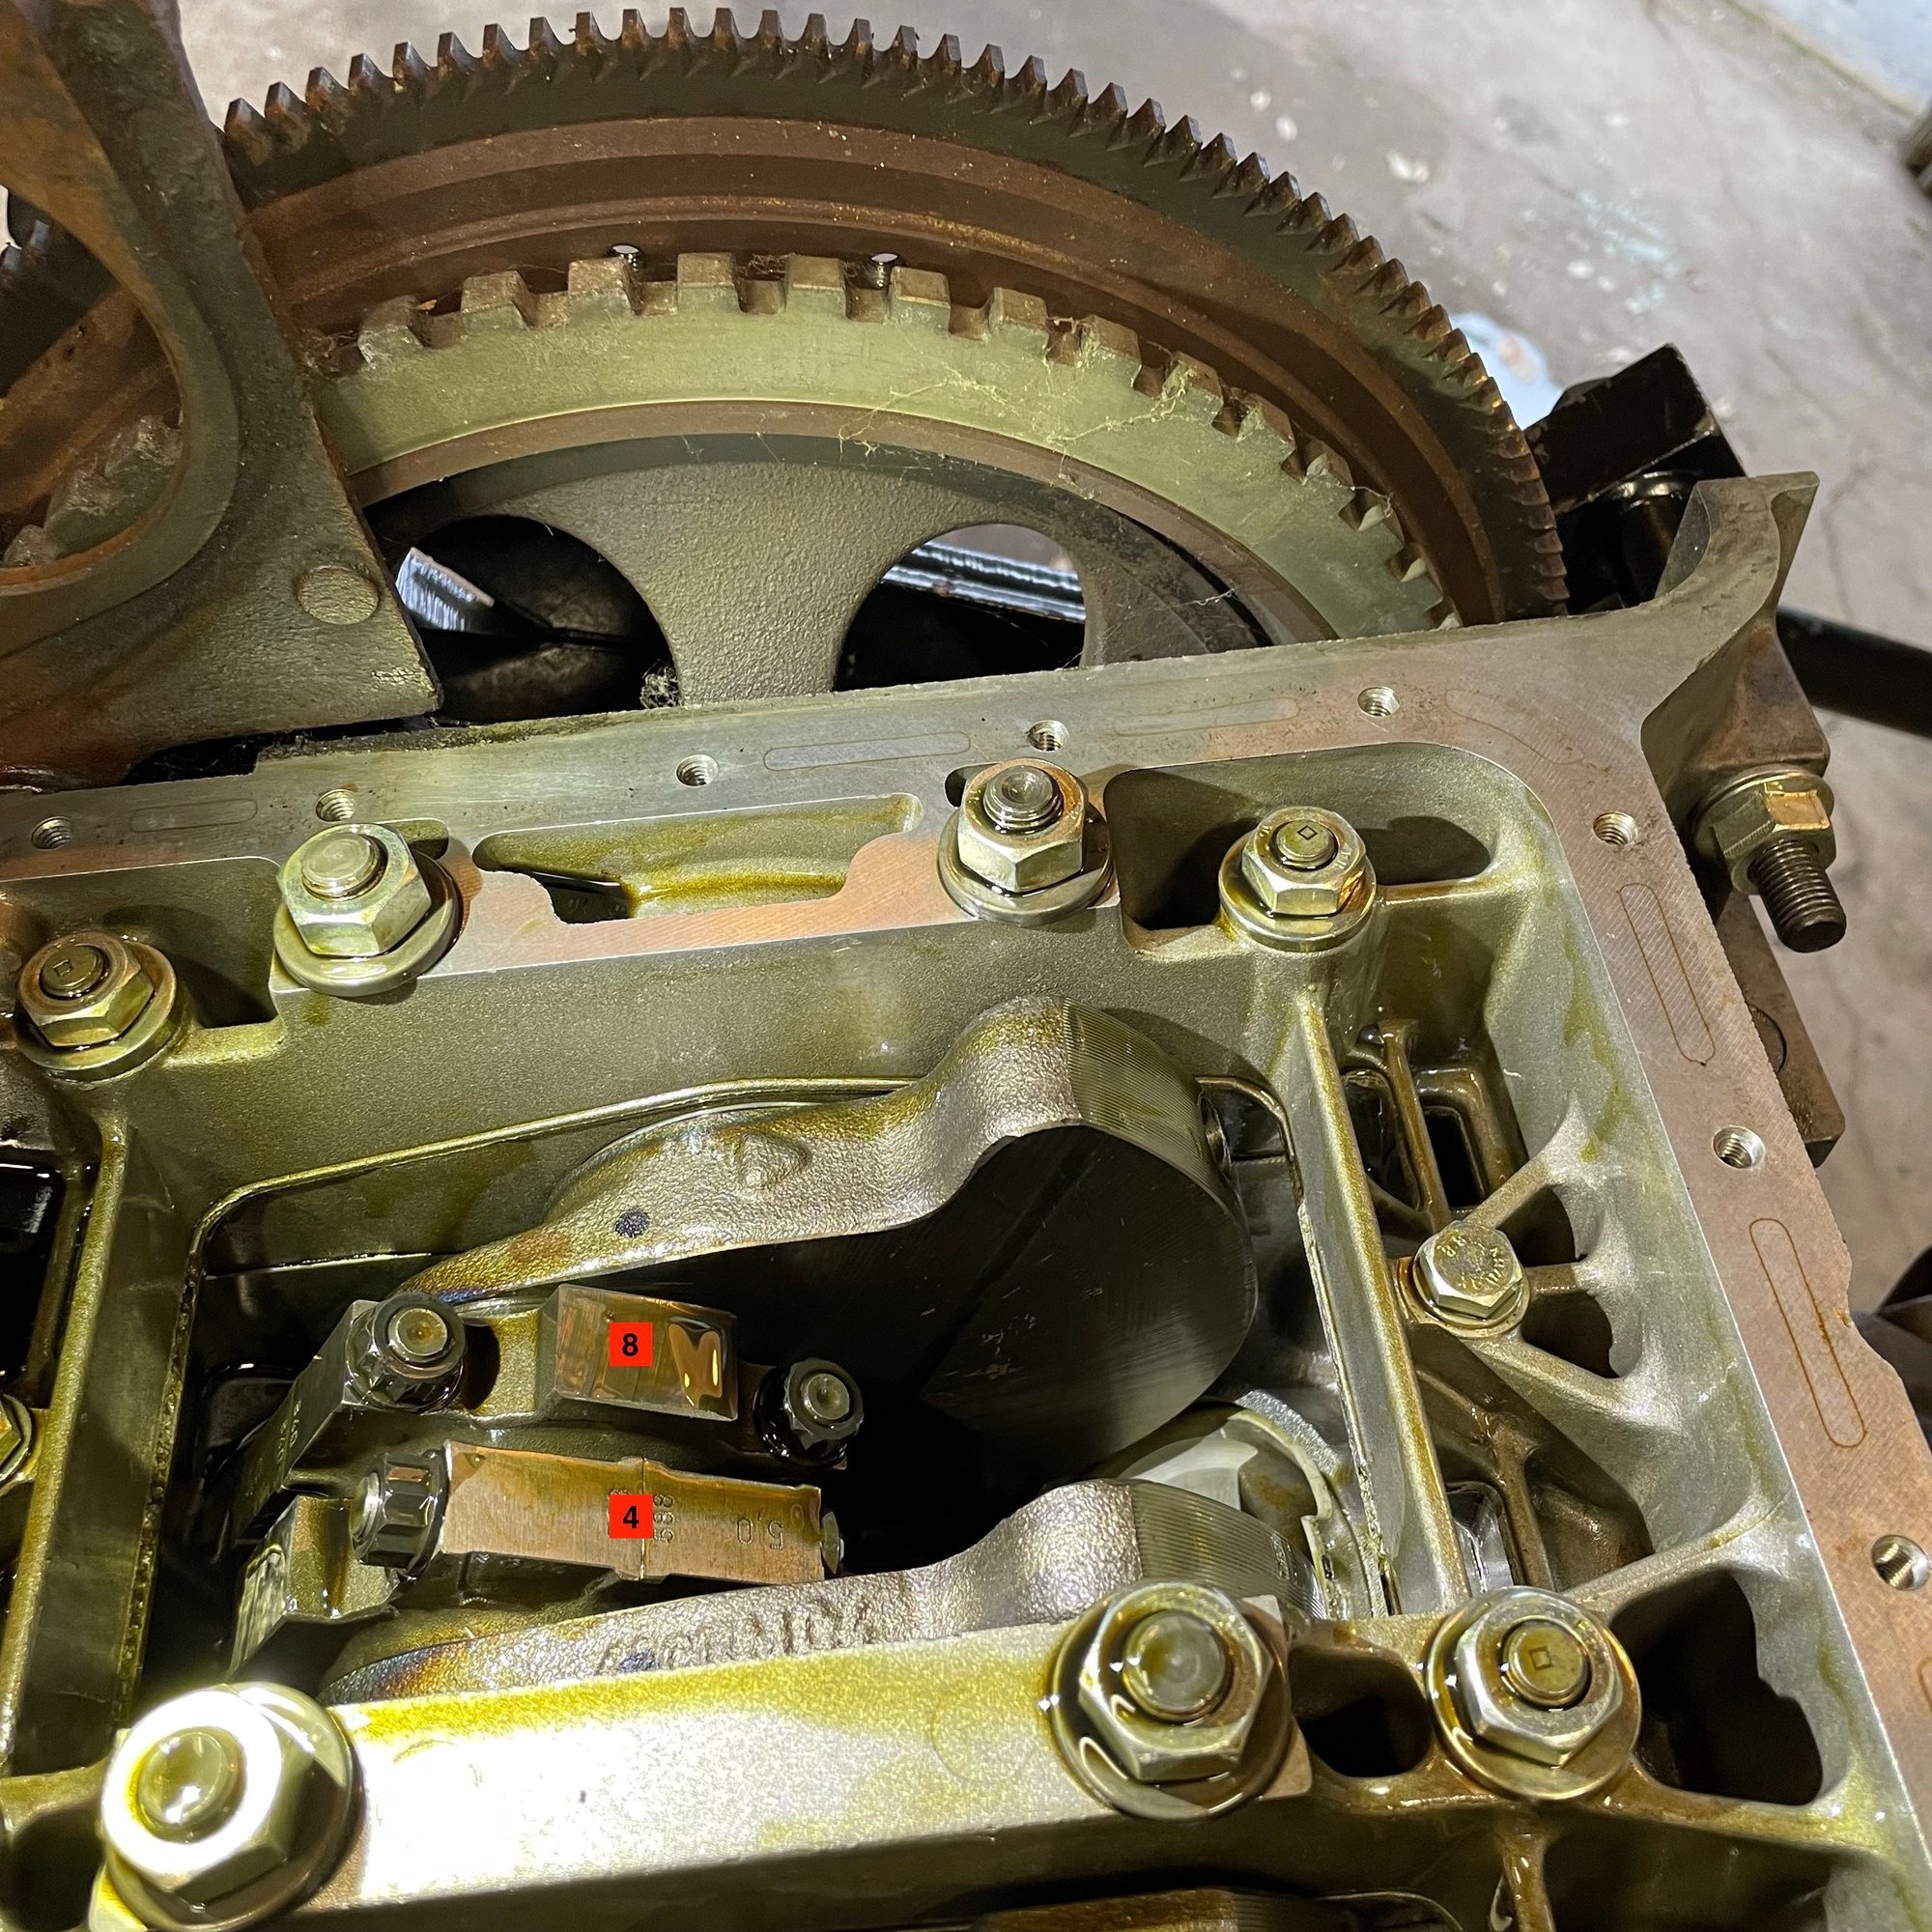
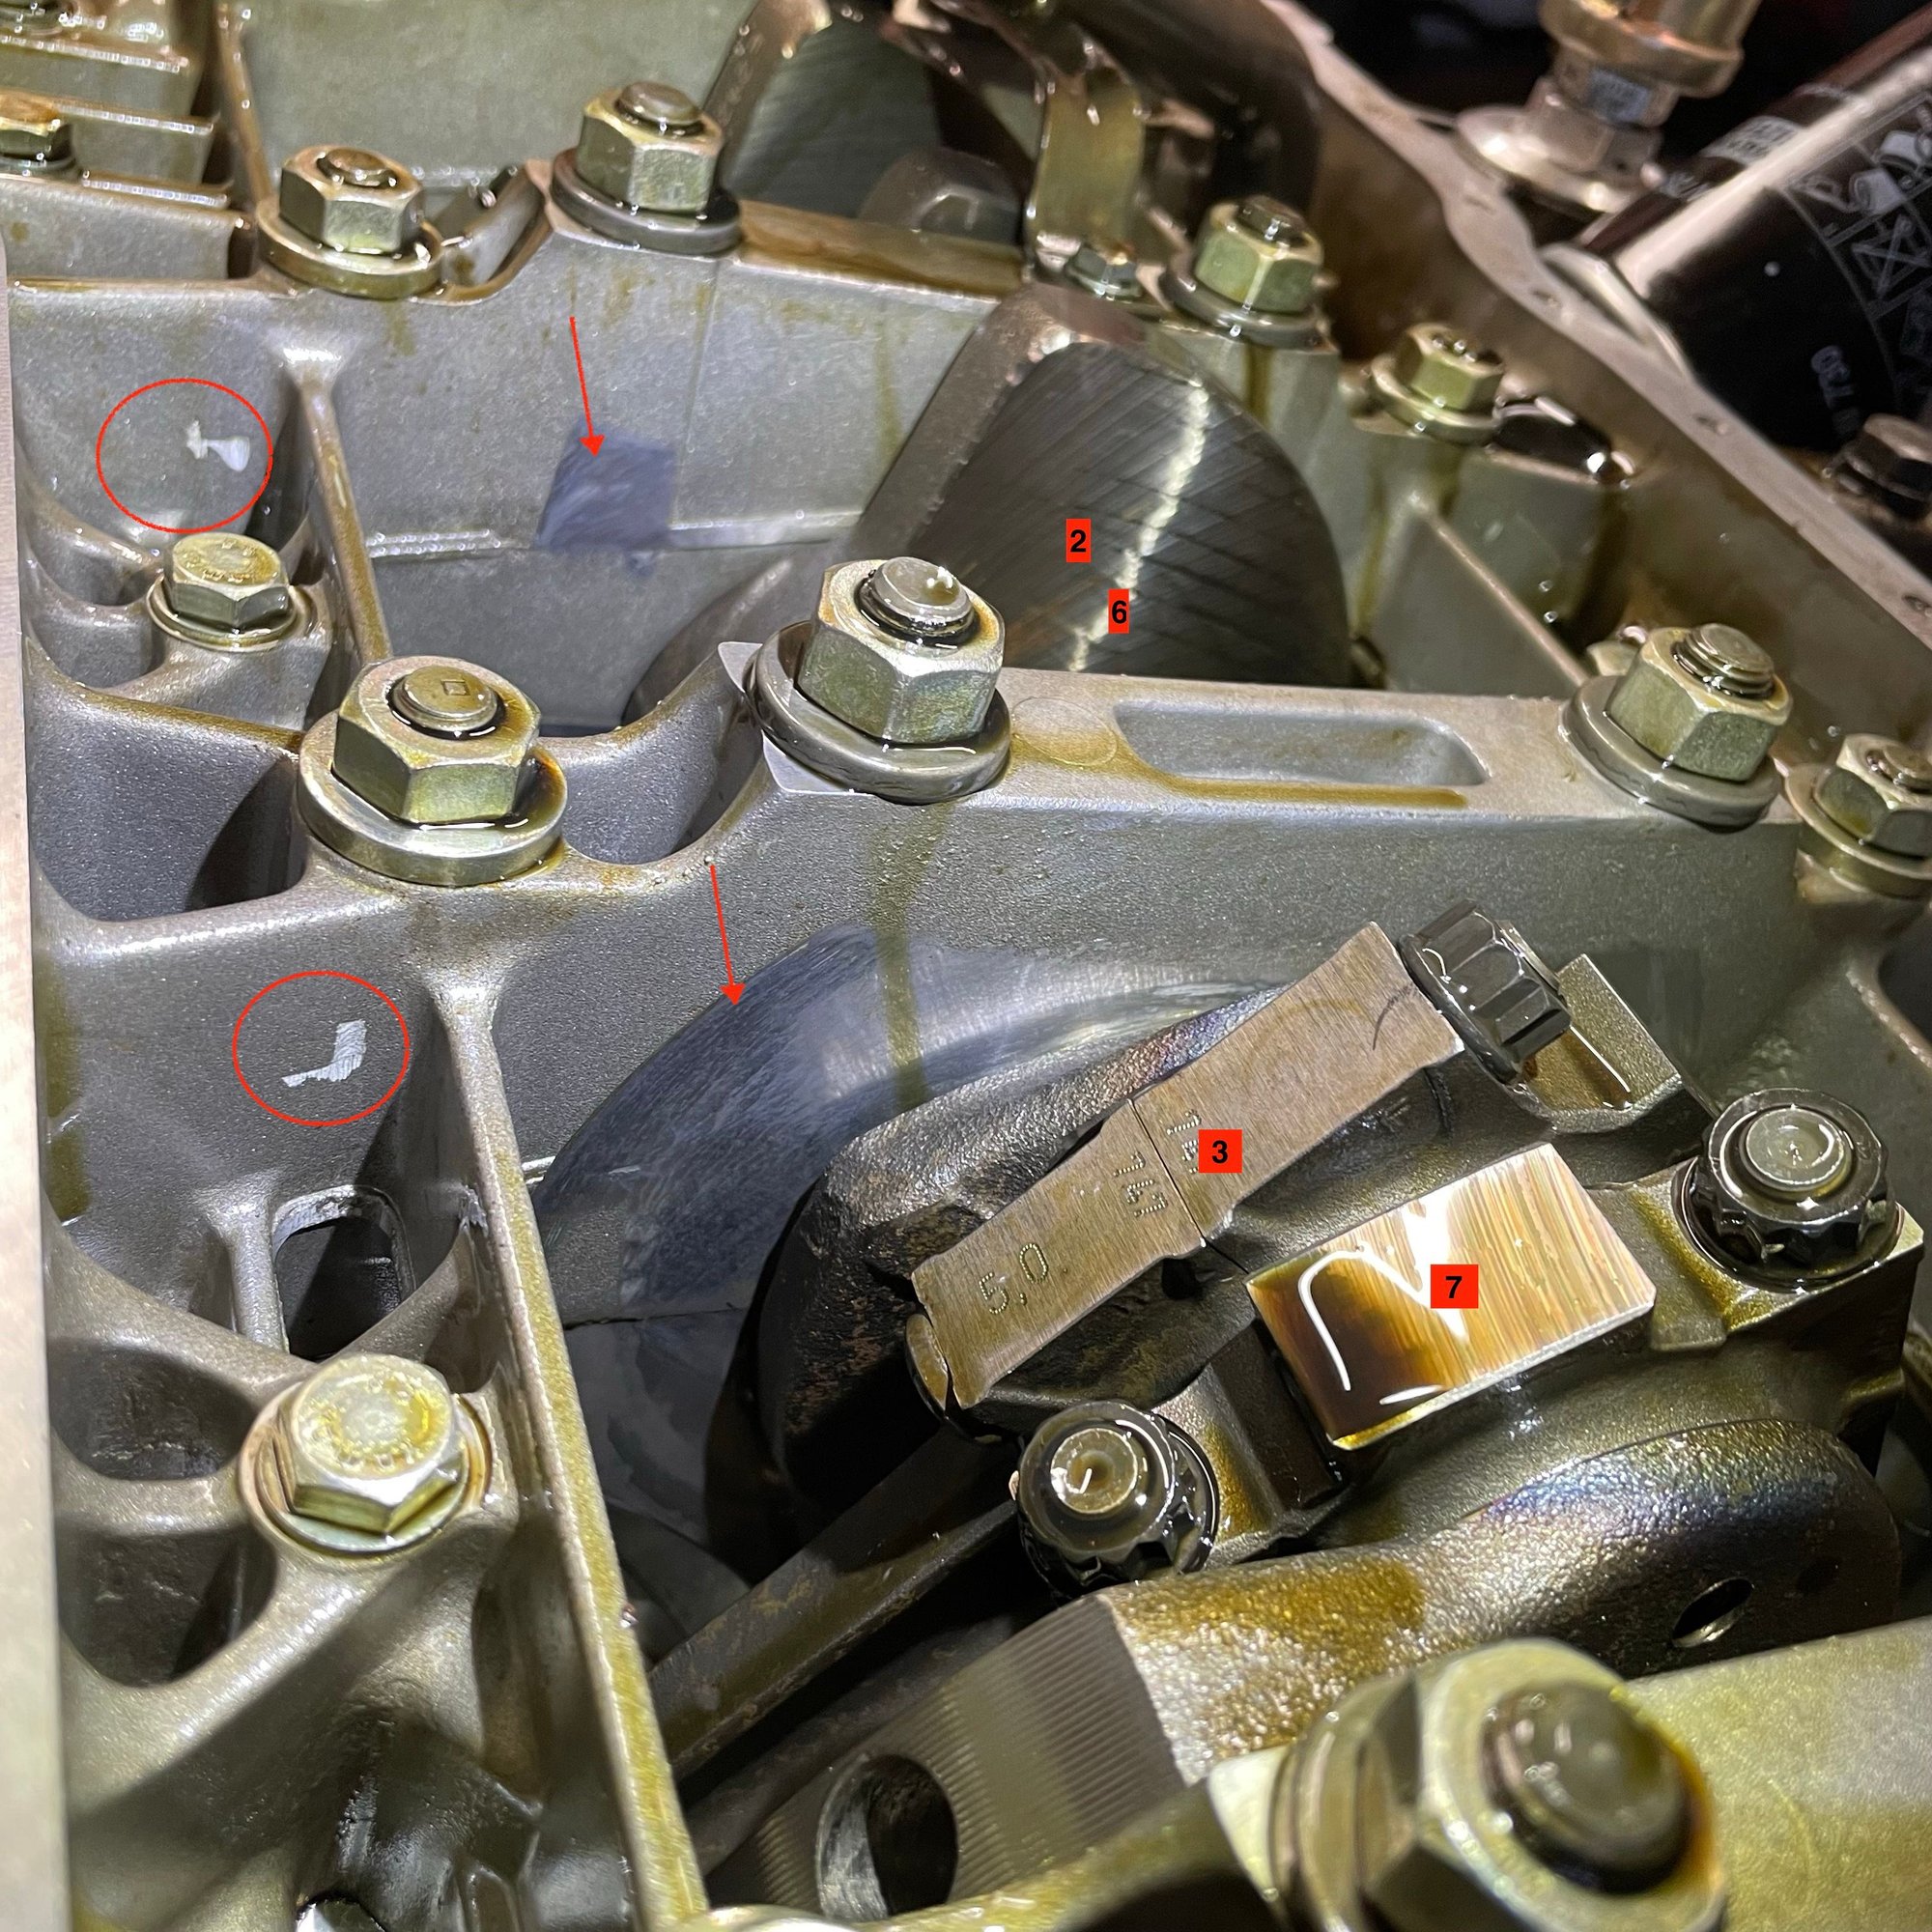
Anti drain-back valve: your explanation makes sense for me to better understand the functionality. Tensioner wear: I can see a subtle groove on each side of the part number an can feel it slightly with my fingernail Cam Identification: I was able to identify the numbers on the ends of the cams with some help from @Zirconocene. Here are the numbers which seem to align to what the WSM would lead me to believe are S3 cams for the "worldwide" market. However, in comparing the open/close specs at the bottom of the chart below, I learned the have the same specifications as S4 cams. These are just very early S4 cams with the earlier numbering series on them,
928.105.291.09 Right Intake
928.105.293.09 Right Exhaust
928.105.292.09 Left Intake
928.105.294.08 Left Exhaust
\
Last edited by Michael Benno; 12-12-2022 at 11:50 AM.
While @Zirconocene was visiting and helping out, I showed him how to check cam timing using @PorKen 's PK32V'r cam timer and PKBumpStick cam tools. We discovered the timing on this motor to be WAY out of specification. Based on previous experience (Timing belt offset a tooth or two!?)I would say it was off by 2-teeth. It's not clear if the belt jumped or was set up incorrectly. This motor has the factory tensioner and it was holding very good tension. I haven't pulled the damper off yet so it's unclear if the backlash roller is still there. We were able to reset the timing back to factory specifications and Glen was able to get hands on training on changing timing belts and adjusting timing, which is a very good thing since he has three 928 motors now.
What are the thoughts on these cogs? Are they shot or do they only need to be re-coated? I remember Louie Ott's sister works at an Automotive finishes company and he said they can re-coat timing cogs.
Last edited by Michael Benno; 12-12-2022 at 11:53 AM.
For me, the 1-4 side is too far worn to be of use.
As long as the actual aluminum part of the tooth has no damage, in theory they can be recoated. That gear has worn teeth.
I had Colin recoat some (I think 8) of really good gears (with zero wear on the actual teeth.)
I used a couple of these on an engine.
I'm waiting for a long term inspection to see how they are holding up, before I use any more of them.
I'm a "show me" kind of guy, with a large amount of patience.
If that works out, I've got probably another 20-30 that can be recoated.
I've even got several that still have the factory coating remaining, in good condition. Probably go another 20,000 to 30,000 miles.
While @Zirconocene I showed him how to check cam timing using @PorKen very cool PK32V'r cam timer and PKBumpStick cam tool. We discovered the timing on this motor to be WAY out of specification. Based on previous experience (Timing belt offset a tooth or two!?)I would say it was off by 2-teeth. It's not clear if the belt jumped or was set up incorrectly. This motor has the factory tensioner and it was holding very good tension. I haven't pulled the damper off yet so it's unclear if the backlash roller is still there. We were able to reset the timing back to factory specifications and Glen was able to get hands on training on changing timing belts and adjusting timing, which is a very good thing since he has 3 motors now.
What are the thoughts on these cogs? Are they shot or do they only need to be re-coated? I remember Louie Ott's sister works at an Automotive finishes company and he said they can re-coat timing cogs.
Unlike the aftermarket tensioner thing, the factory tensioner will not allow the factory belt to jump cam timing, unless it falls off of the front of the engine or is insanely loose.
Virtually bulletproof.
Under certain circumstances, a Continental belt can jump cam timing with a factory tensioner, due to the amount of stretch in that belt. (We refer to them as giant heavy duty rubber bands.)
If you happen to be a aftermarket belt tensioner kind of guy, I'd happily trade you one, for your stock pieces....I've got a bunch of them that I've removed.
I'm a bit **** about my engine. If it were my engine I'd reduce the CPS mount height and use a spacer Bigfoot made for my S3 block that gets the CPS to the correct height.
I'm a bit **** about my engine. If it were my engine I'd reduce the CPS mount height and use a spacer Bigfoot made for my S3 block that gets the CPS to the correct height.
Everything I need one of these, I whittle one out.
Probably takes me an hour to make one, start to finish.
And that makes this little piece fairly expensive, for the client.
Probably takes a few minutes to make (after programming), on a CNC.
Is this a piece people can buy or a one off?
(I'd take a half a dozen, just as as starter order!)
I'm a bit **** about my engine. If it were my engine I'd reduce the CPS mount height and use a spacer Bigfoot made for my S3 block that gets the CPS to the correct height.
@Kevin in Atlanta one of those spacers would be great. Can you help me get one?
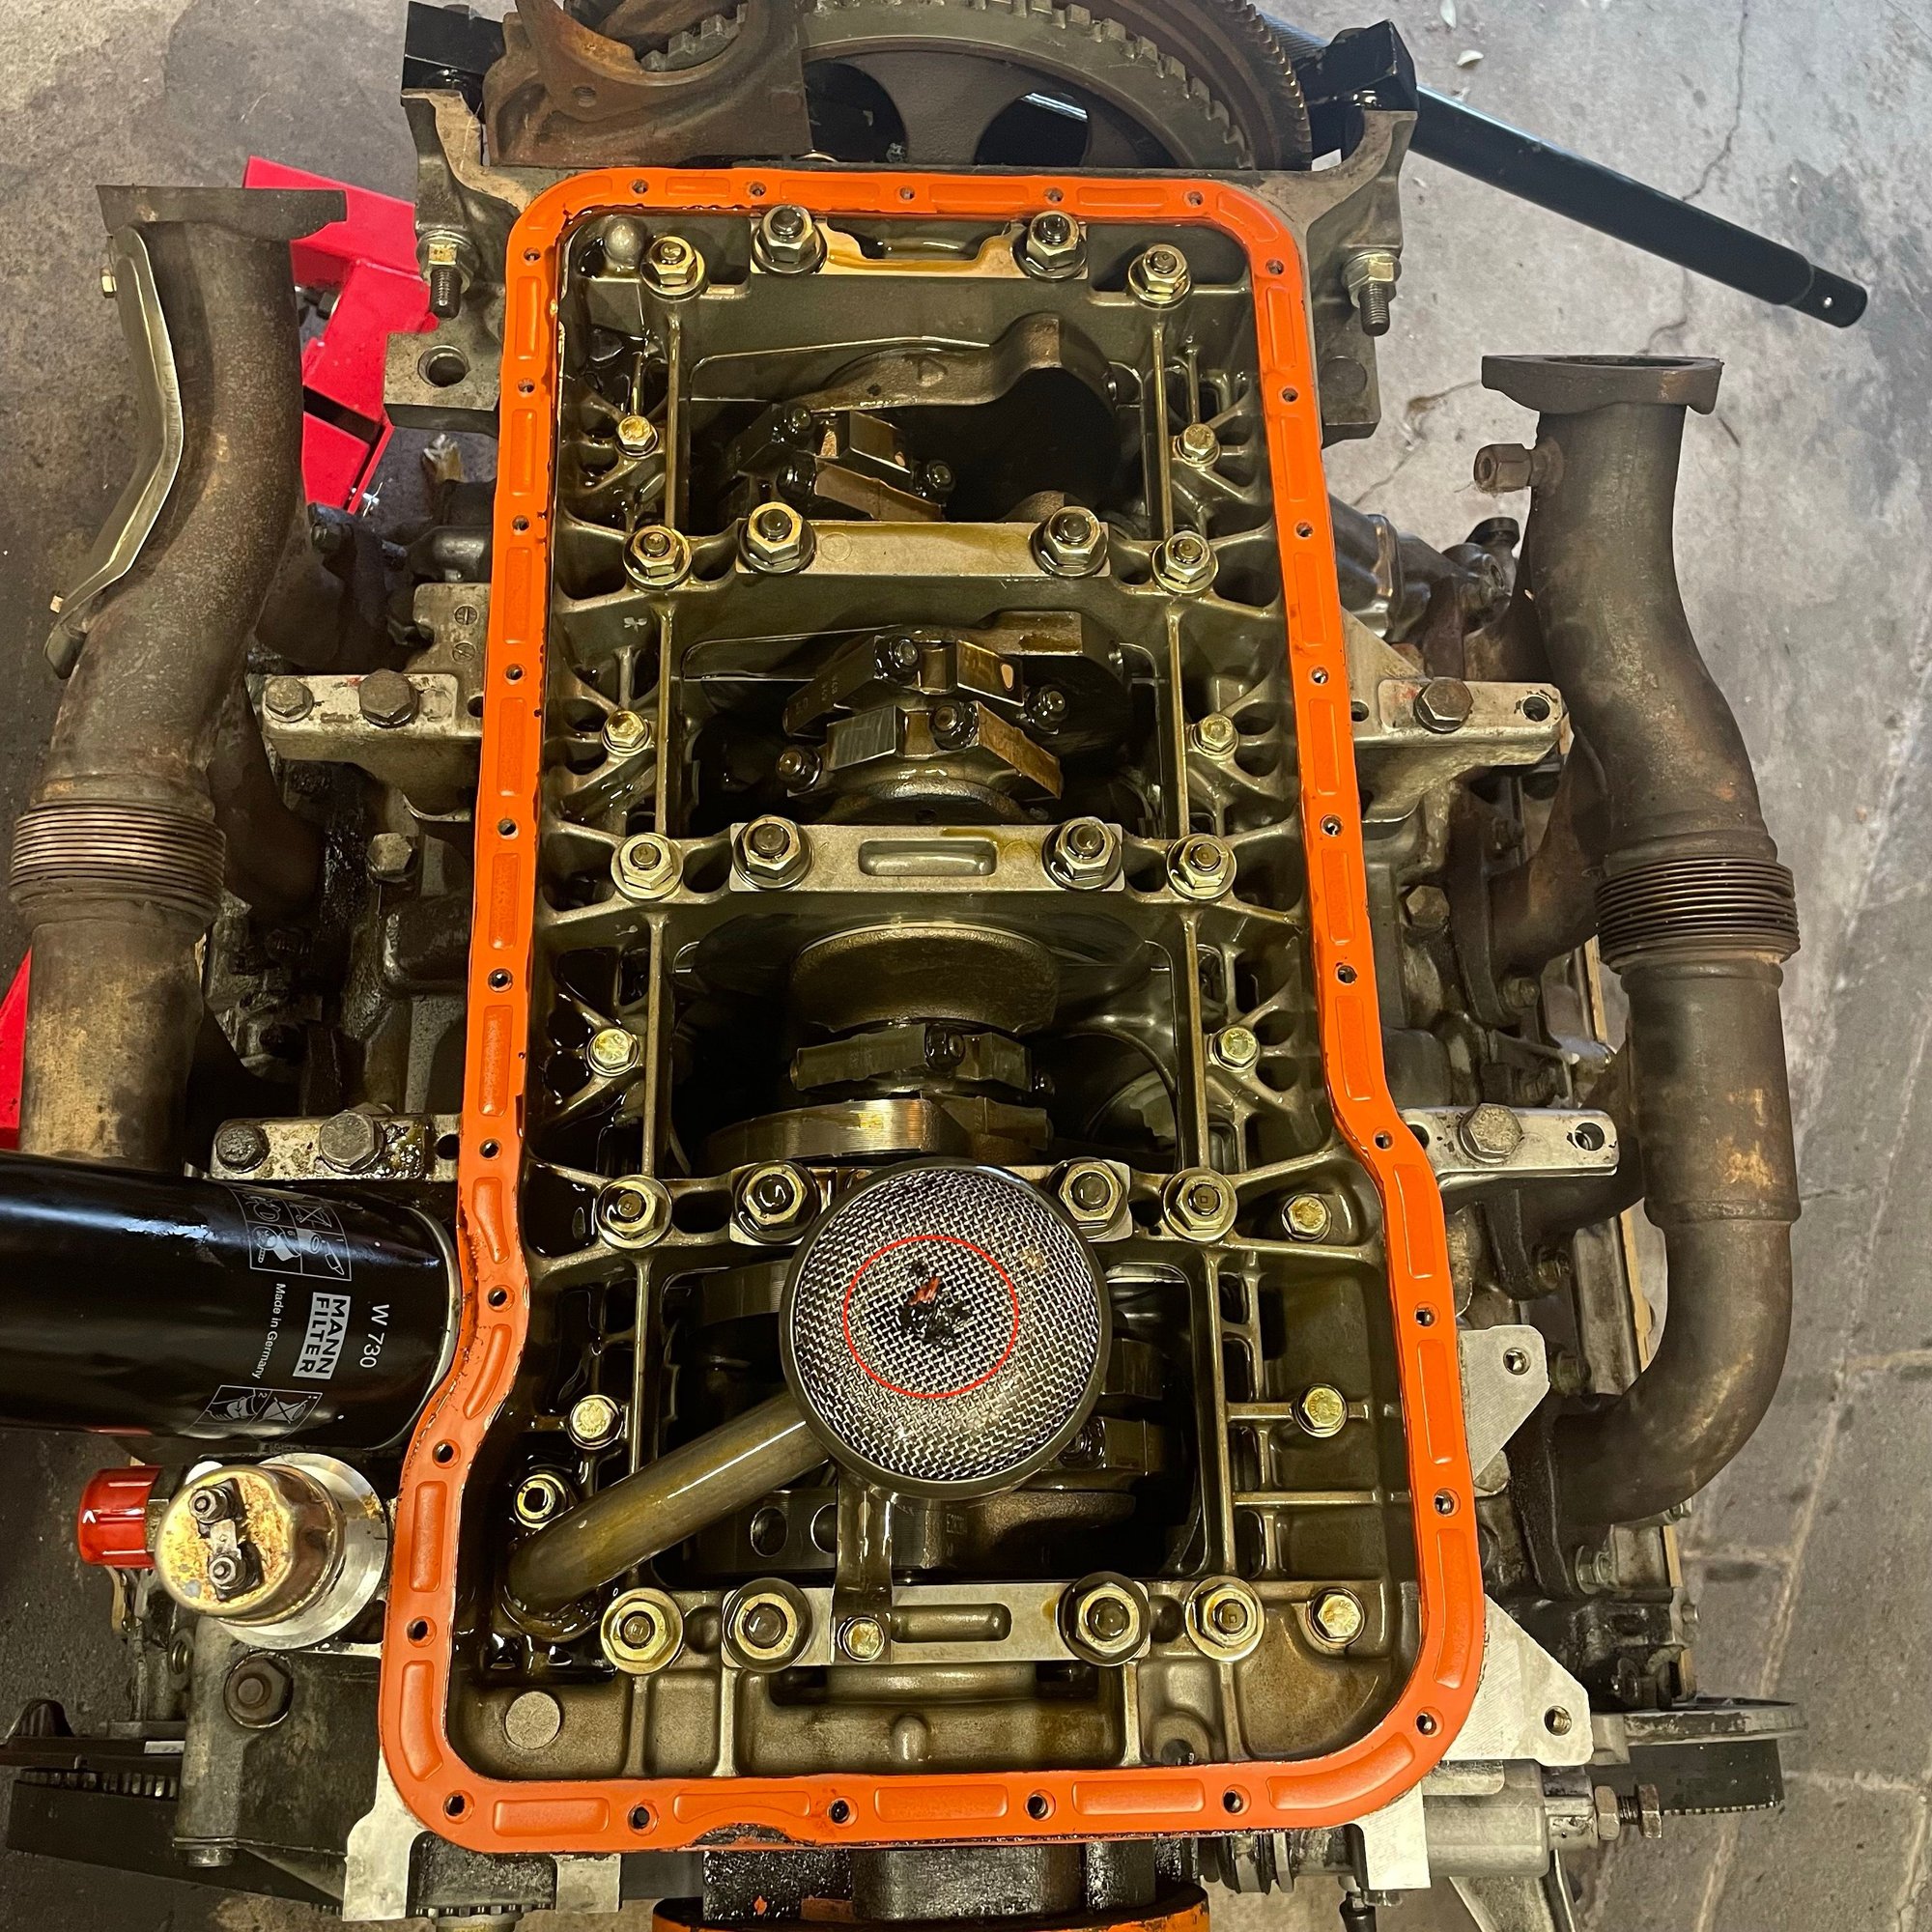
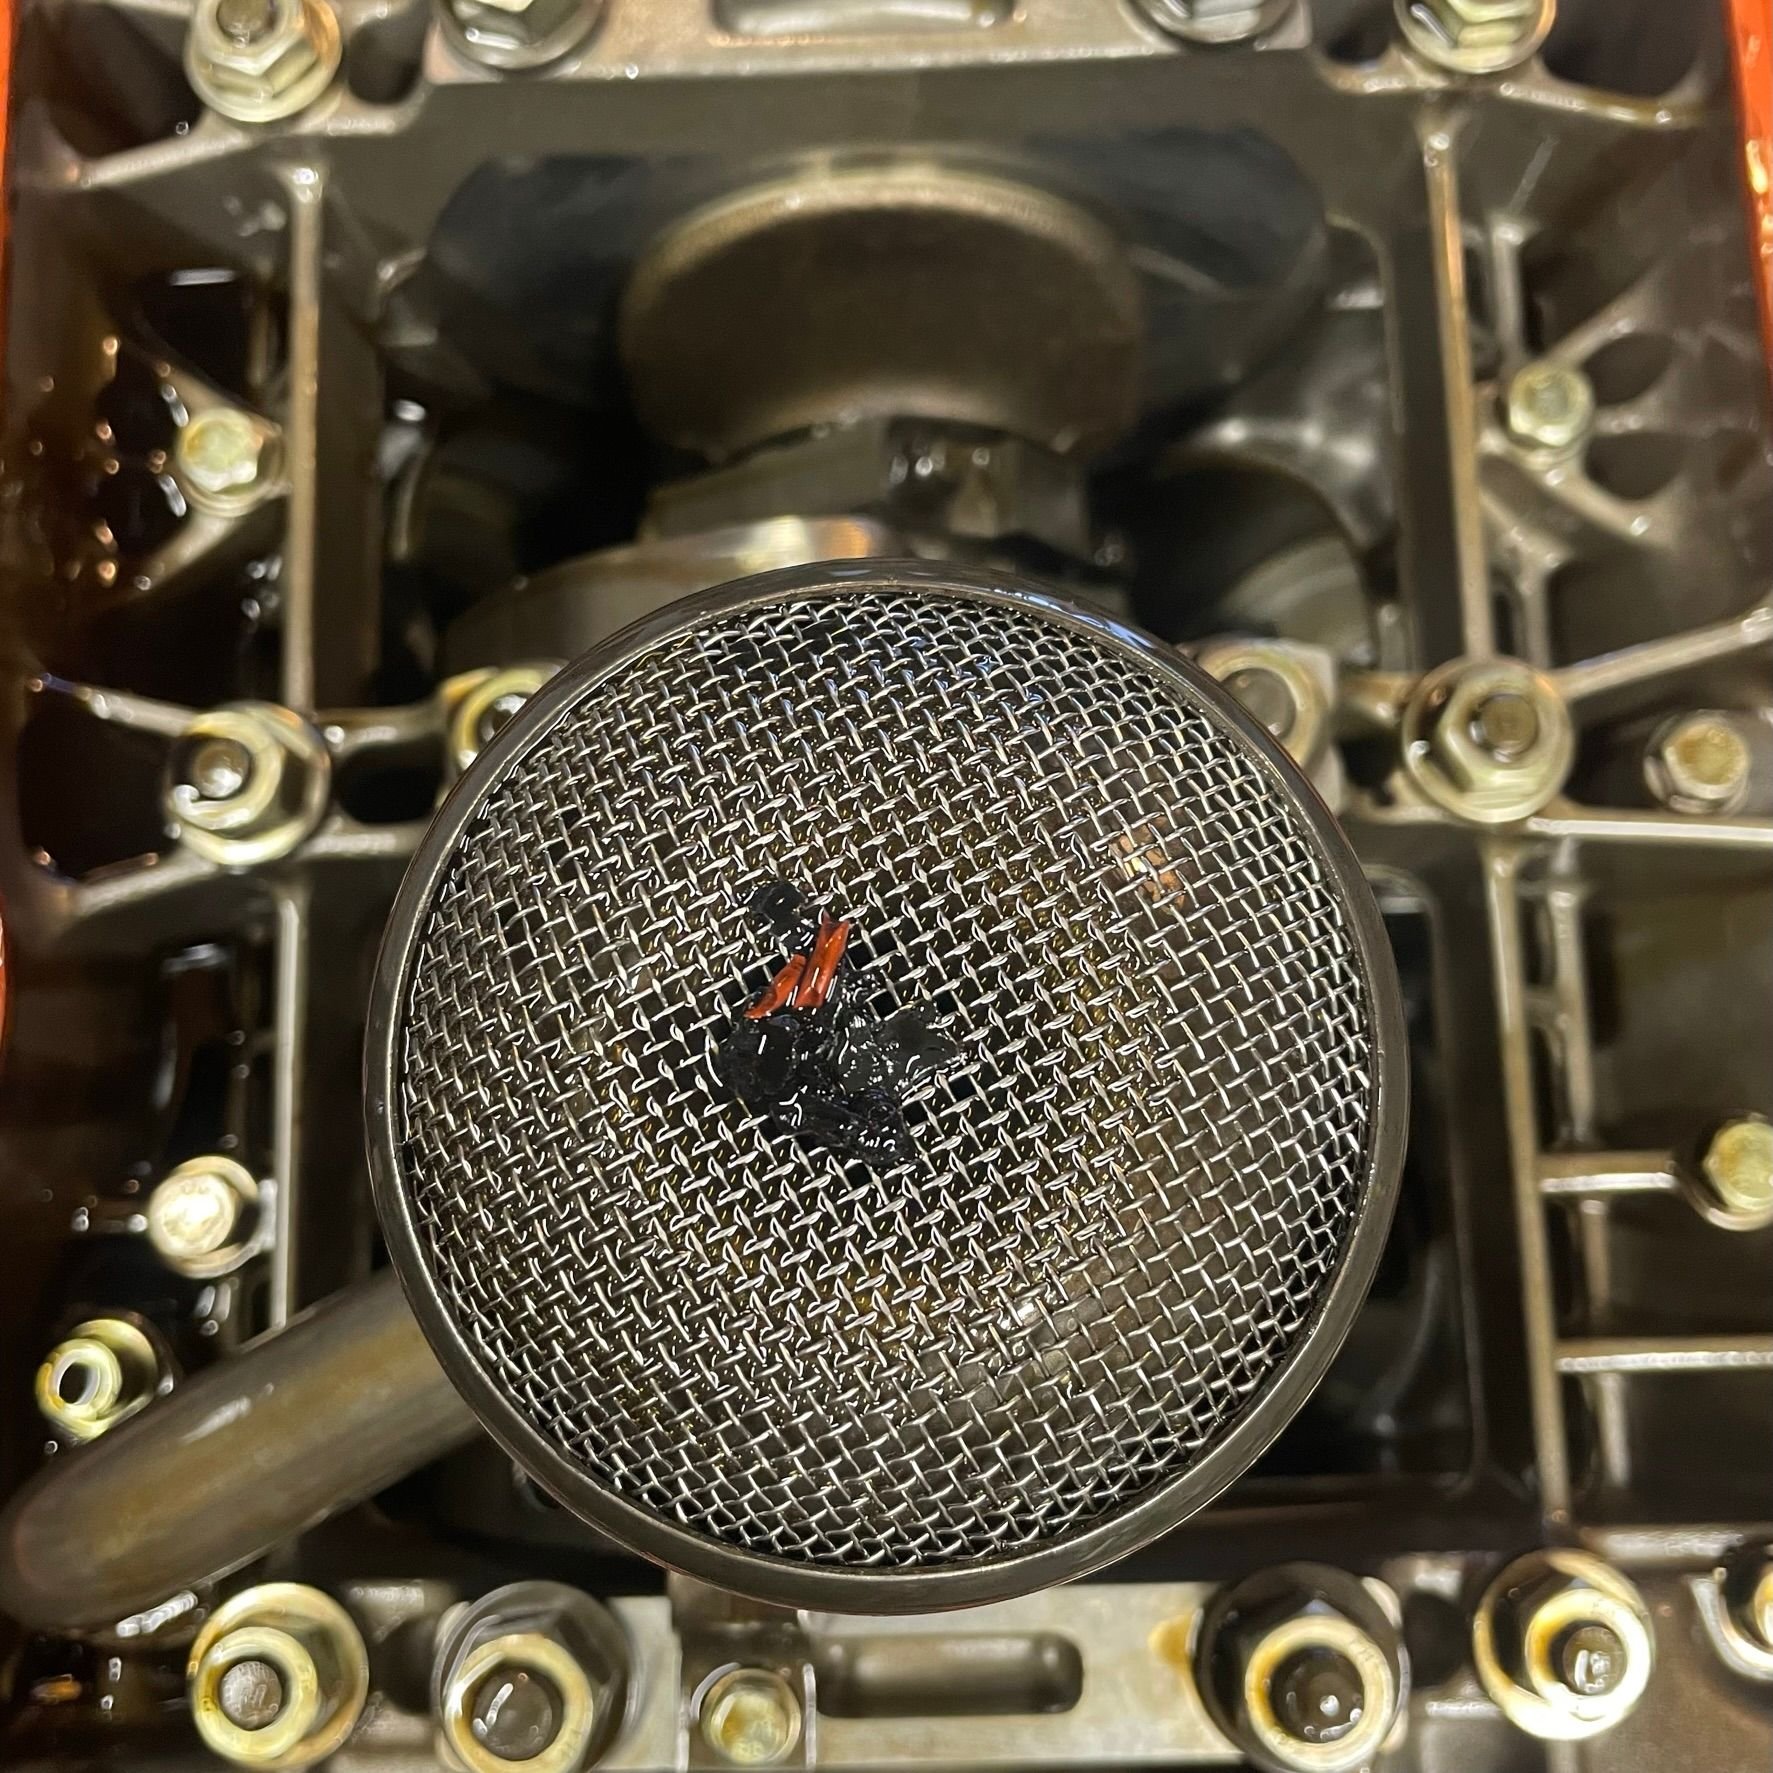
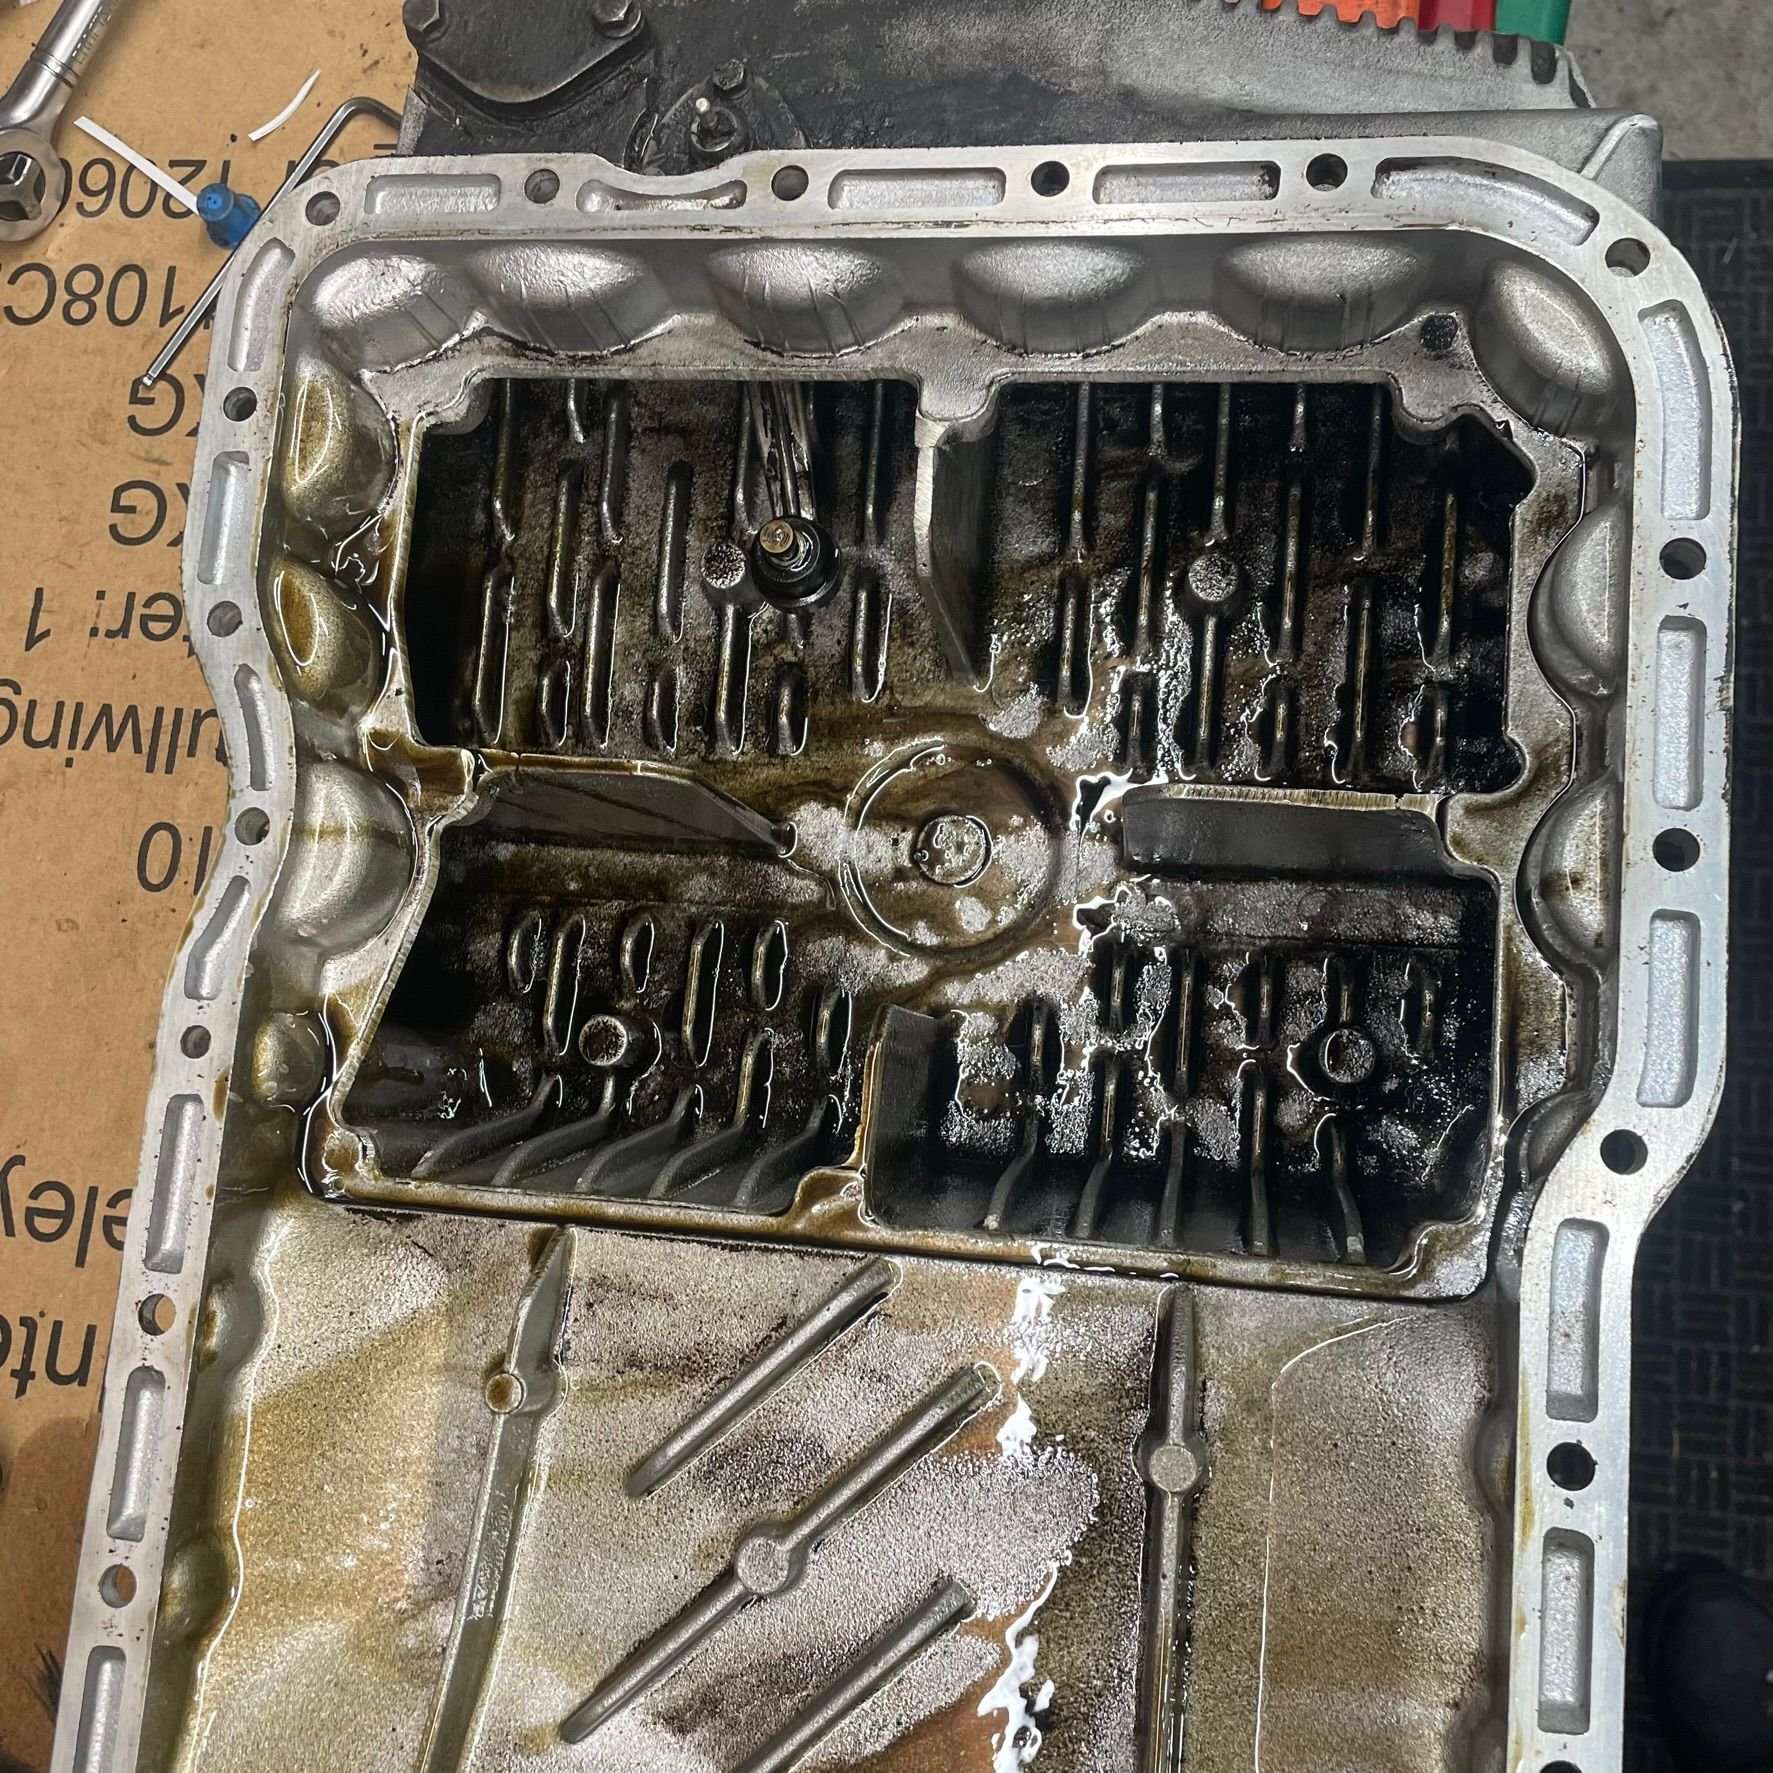
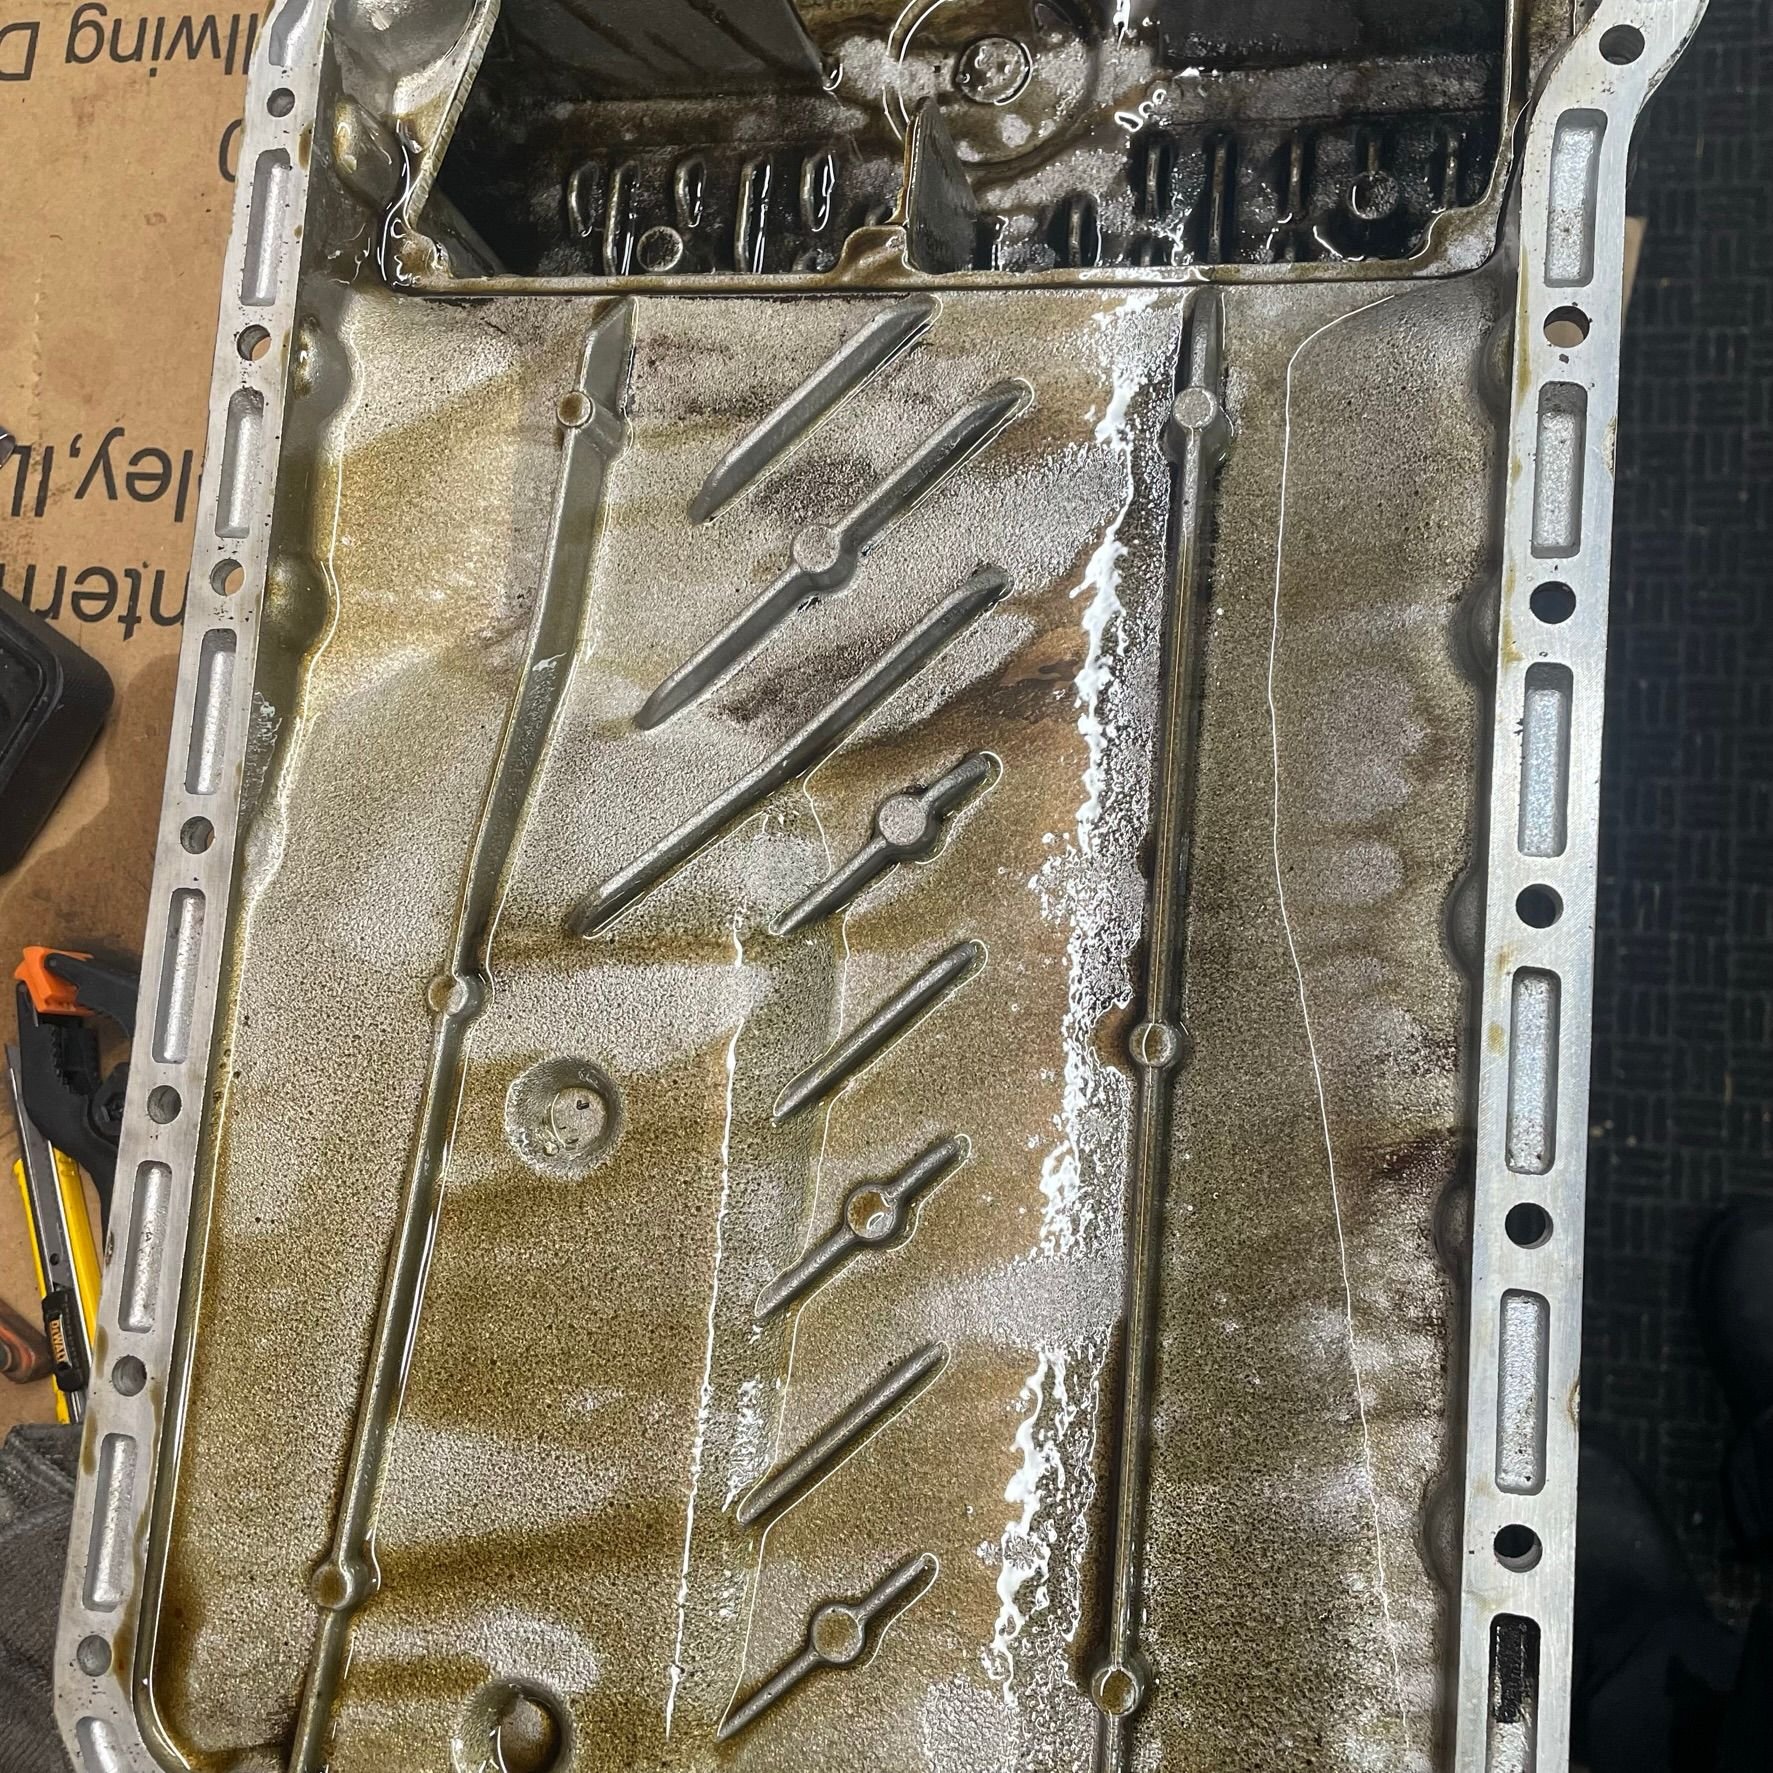
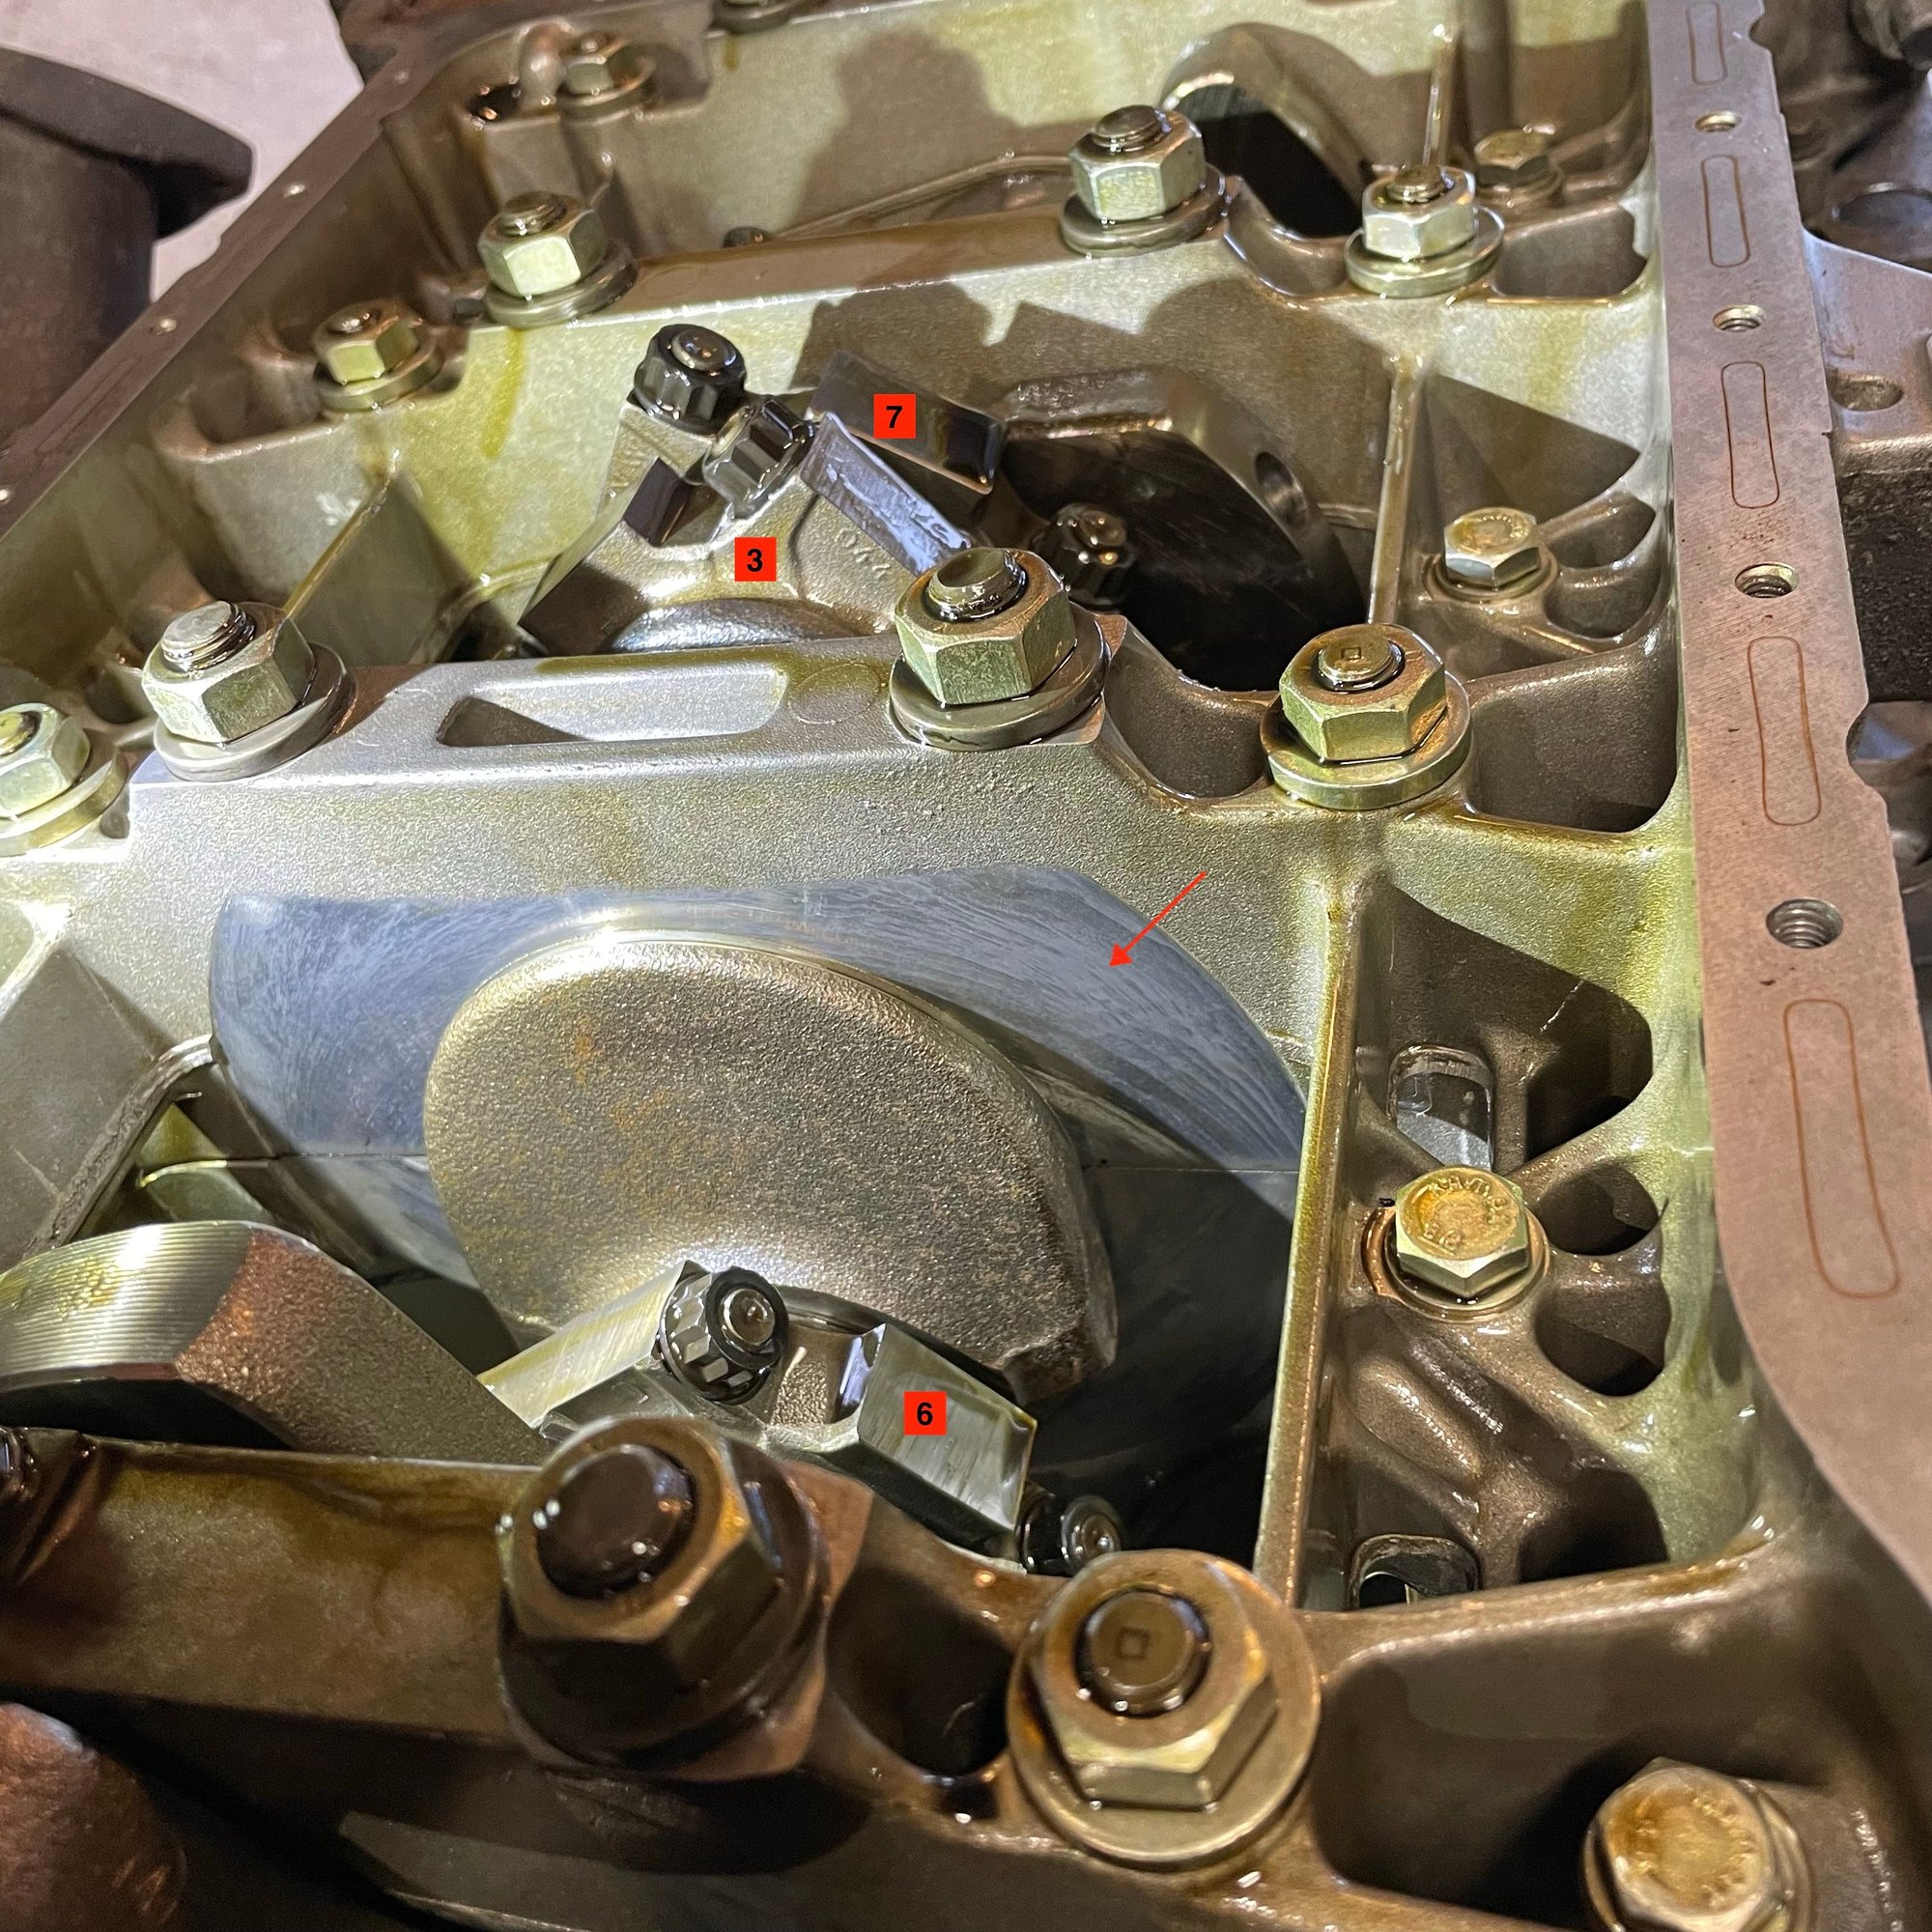
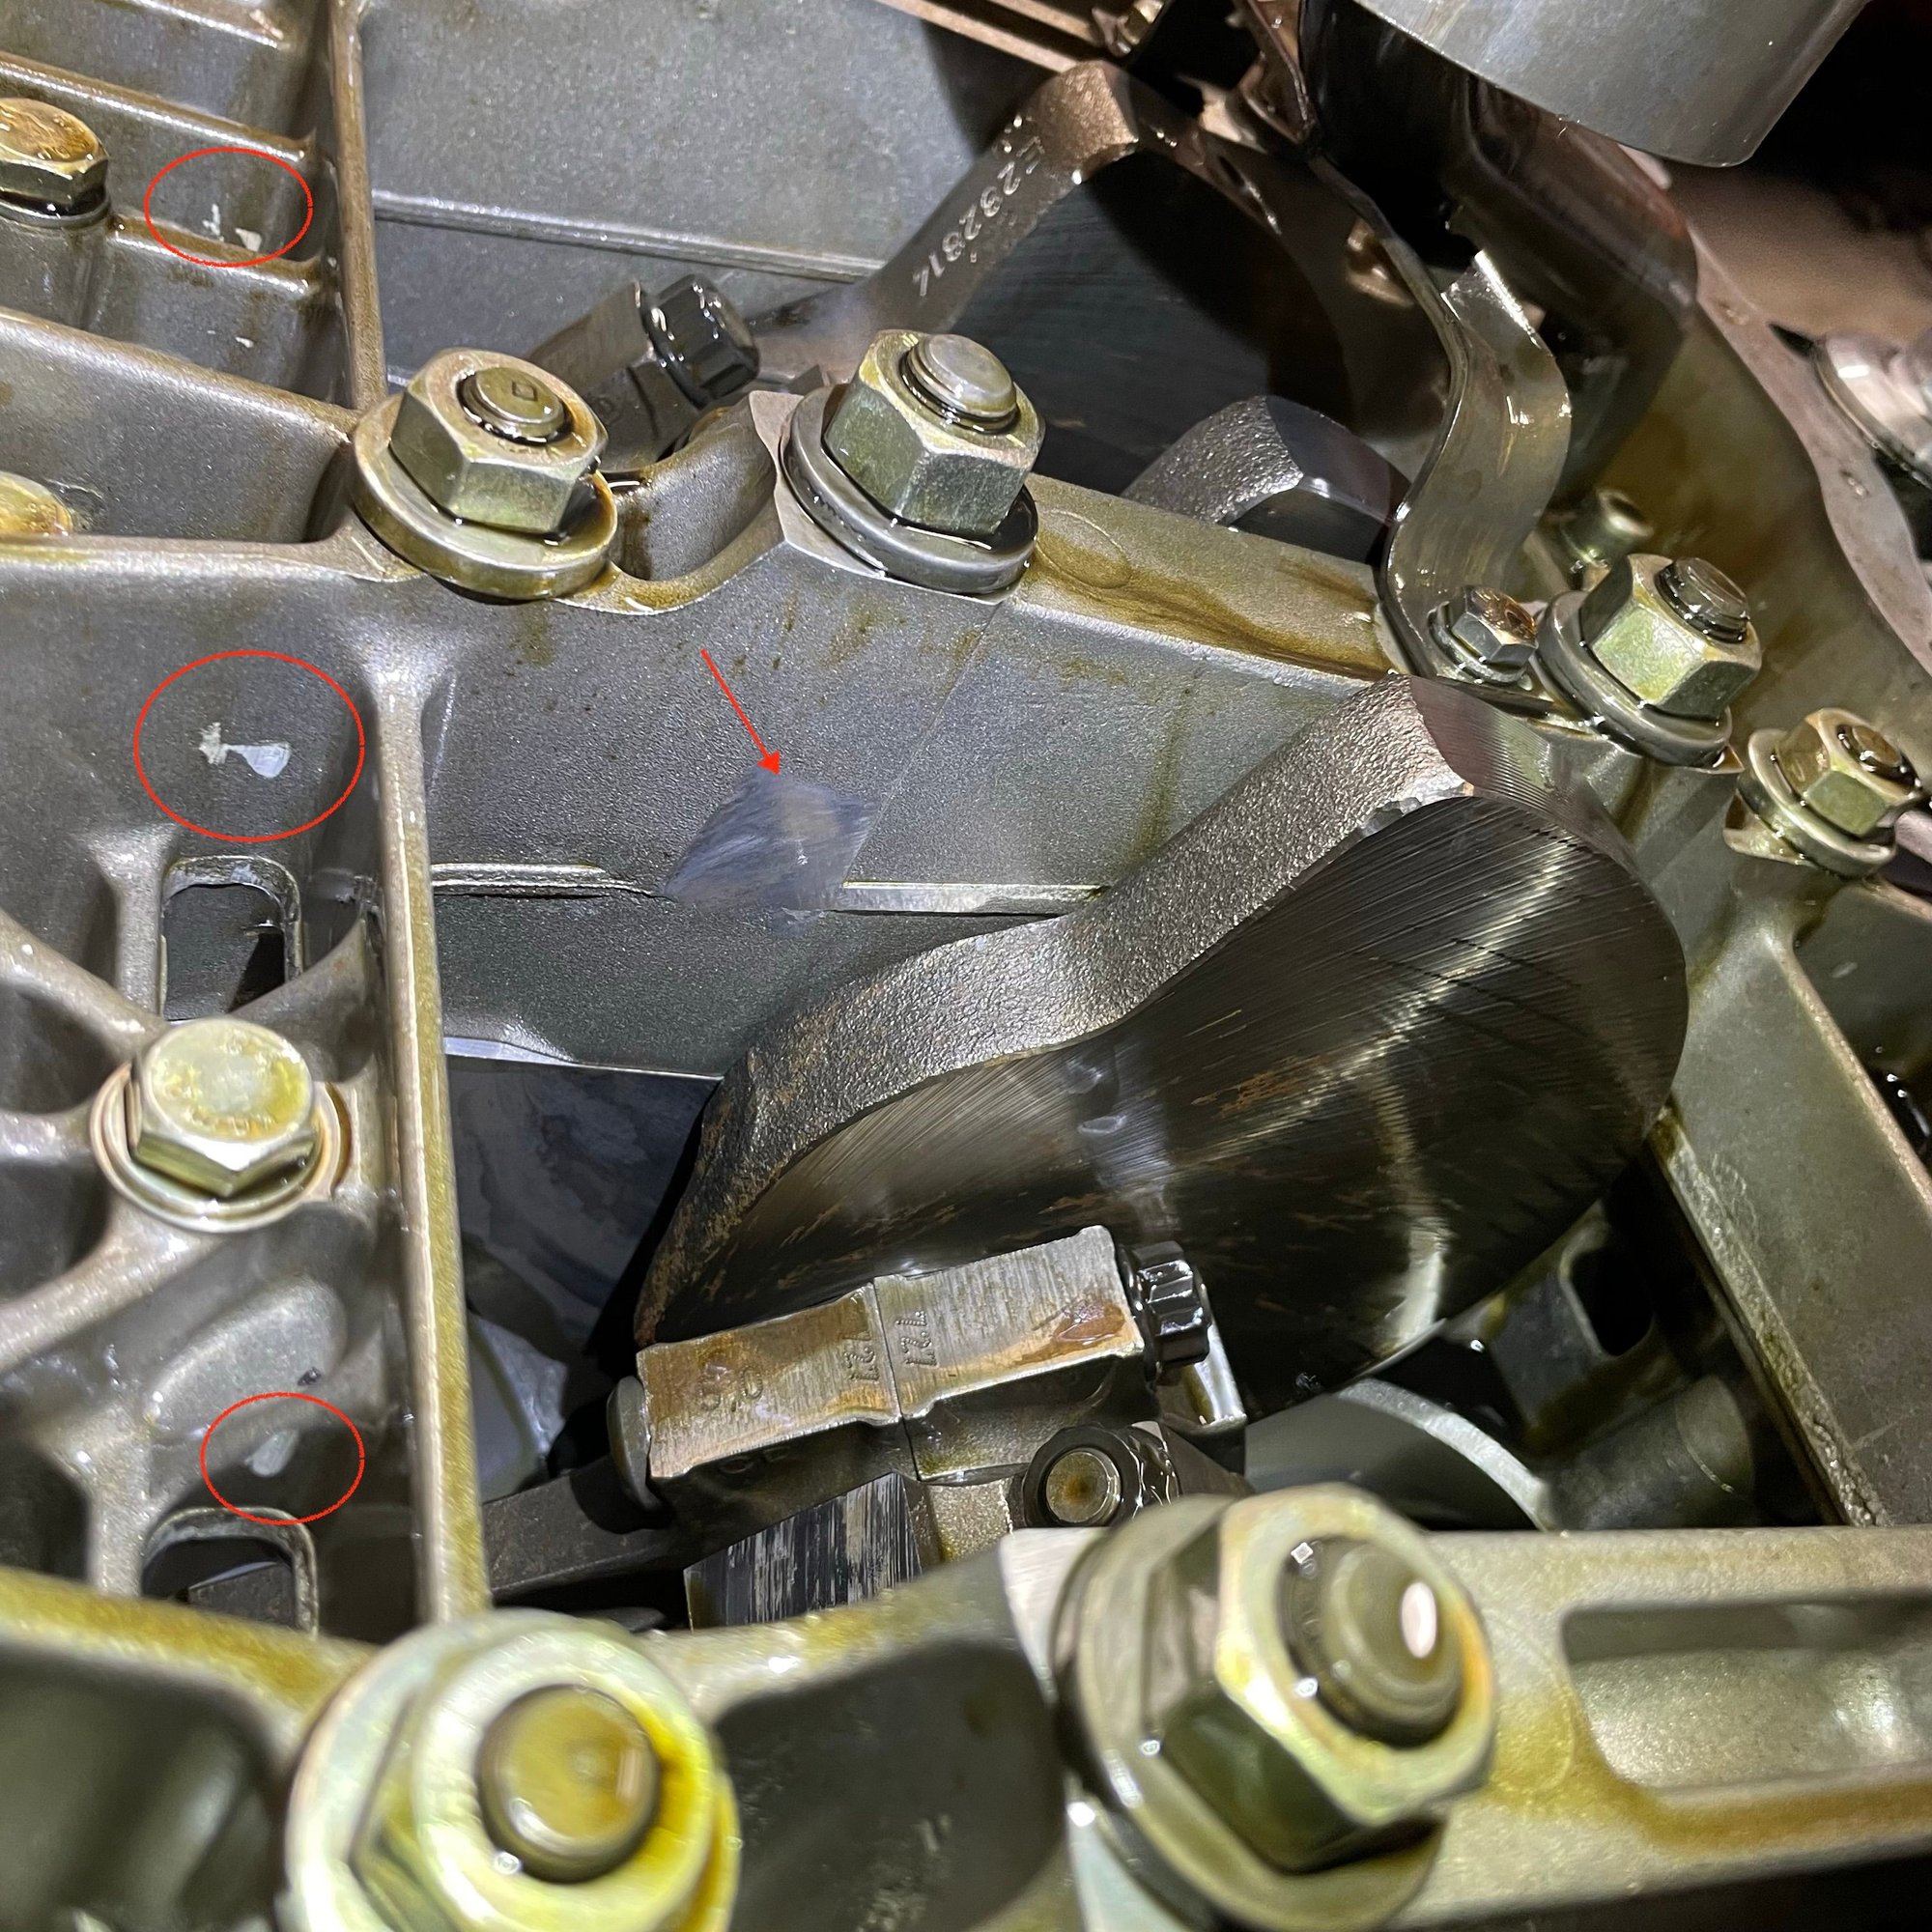
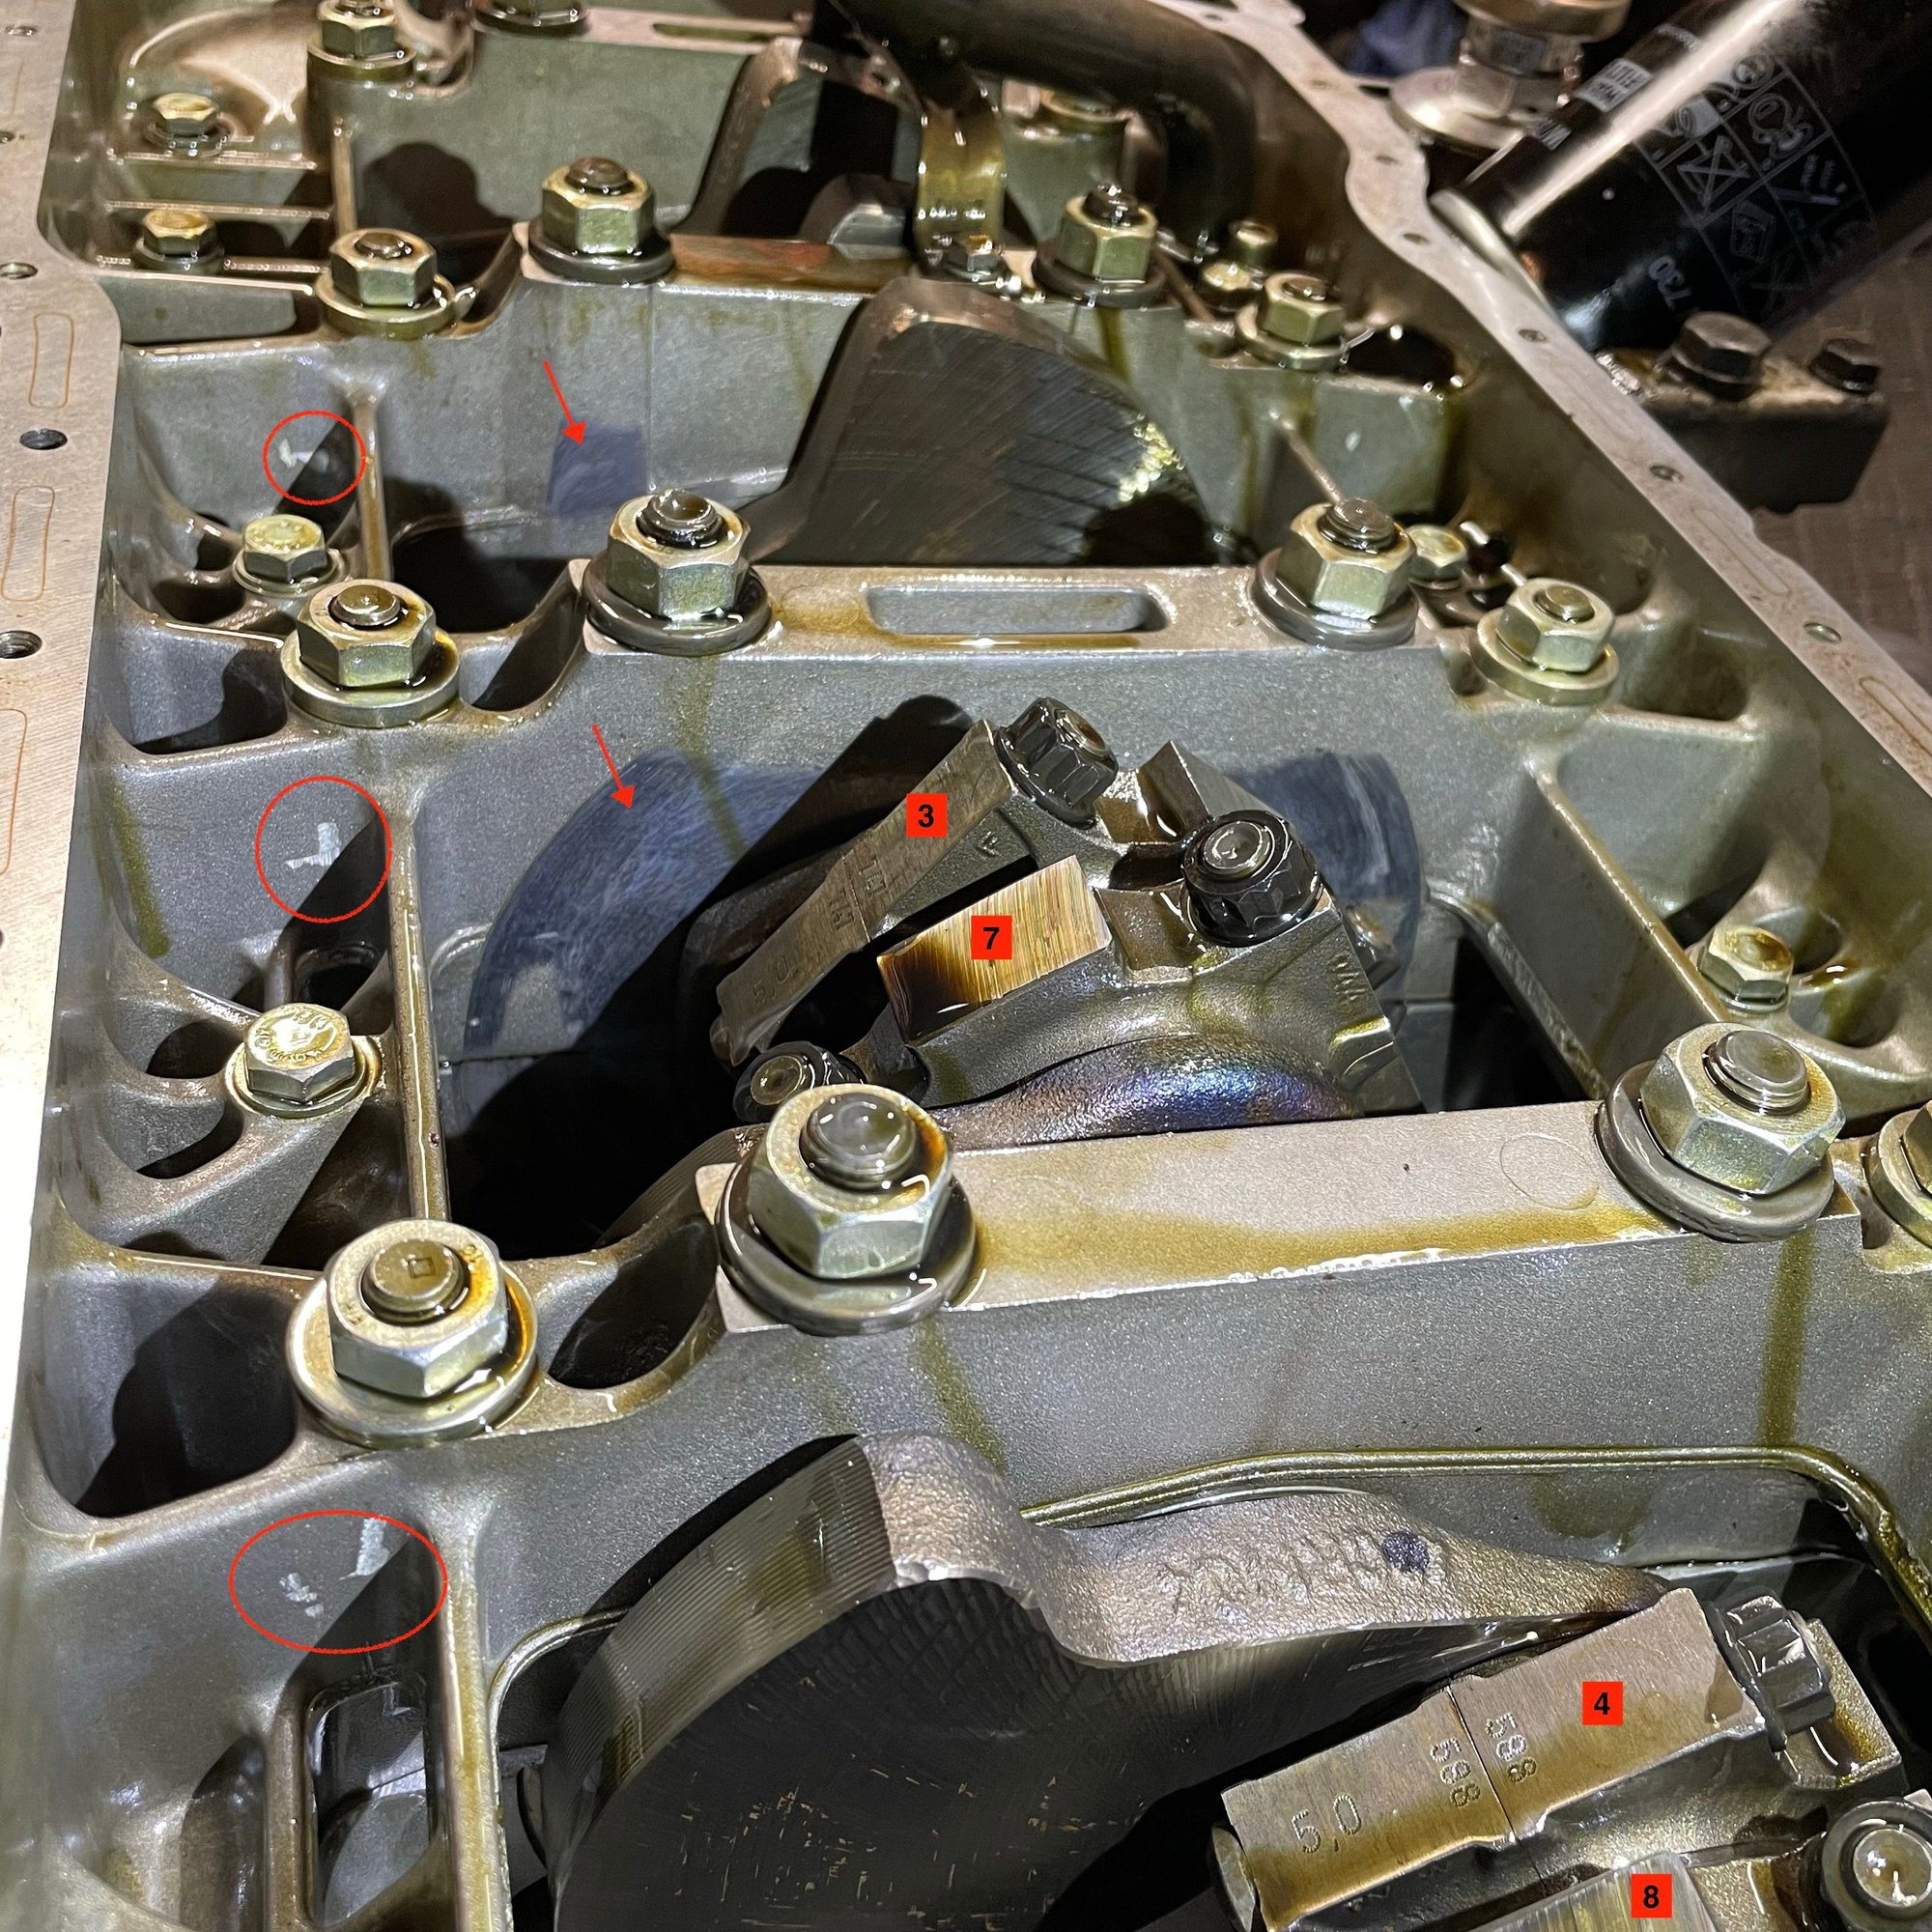
The last thing @Zirconocene and I did this weekend is open up the bottom end. We saw some gasket making material stuck on the oil sump screen but beyond that I really have now clue what to look for. So we took a bunch of photos and I highlighted stuff that looked interesting and figured I would post them here for comment. I could not get any really detailed pictures of the bores but they all looked great. I could probably get better pictures if I turned the motor such that the pistons were at the top of the bores. Is turning the engine ok in it's current state (timing belt still intact)?. Are there any specific causes for concern or inspections I should do? Do I replace the crank bearings, or at least inspect them ? Your guidance is appreciated. I'll be reading up on WSM processes in this section in the meantime.
Silicone gasket material likely from the valve covers or oil filler neck. What is the appropriate baffle here?
One thing I'll point out that I saw is the cam lobes are near perfect. That means the PO used oil with a high zinc count. This is a very good sign. Count yourself as lucky.
Thank you, kindly, sir.
Really tired of making these, by hand.
Not only that, in this tiny community, there is no need for people to make the same product for the same function...
No one wins, when that happens.
Thank you, kindly, sir.
Really tired of making these, by hand. Not only that, in this tiny community, there is no need for people to make the same product for the same function...
No one wins, when that happens.
I would inspect the crank bearings and replace in the unlikely event there is a concern. Normally only the thrust is a question, but going in this deep you will want to know that all is in good shape before you reverse the process. Most people would just replace the rod bearings. This is because 1) there is more of a history with rod bearing issues, and 2) rod bearings are less expensive. For future reference I have had good luck setting 928 motors on furniture dollies when rolling them into small spaces.
Well, no.
I could have someone flip on the CNC and make some of these, but I've been saying the same thing, for years:
"The 928 market is so tiny that multiple people making the same stuff for the same function is counterproductive for everyone involved."

 12-11-2022, 07:52 PM