When you click on links to various merchants on this site and make a purchase, this can result in this site earning a commission. Affiliate programs and affiliations include, but are not limited to, the eBay Partner Network.
That's a very late block, without the pressure relief valve.
Are there round holes though the center mains with a soft plug in the rear bell housing area?
I've seen several sets of undrilled 1st oversize pistons.
And I've seen one 1991 S4 engine with undrilled "standard" pistons. "World record" carbon for an S4 engine....
I'm really not sure what they were thinking...both Mahle and KS had to know better, after making pistons for many, many years, for many manufacturers.
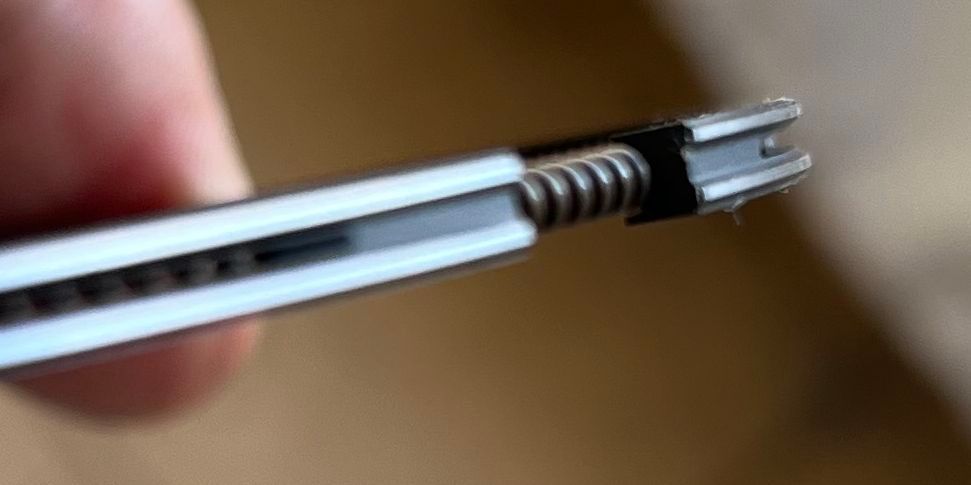
From what I can see of that one rod cap, it appears that this engine has the cast rods.
Are the rods in the other engine the same?
Greg,
My English is sometimes limited. I’m not sure I understood what area to look for on the block.
But I noticed nothing else different between both blocks.
As you tell me for the heads, I noticed some numbers in a circle… in the bell housing (clutch side). If they are dates, my block is dated may 1987 and the spare block is April 1990.
The rods looks the same. All the ones of my 1988 928 engine have 87 marked on them in the middle. For the spare engine the number is 87, 89 or 99…
I measured the bores... And I was right : they are as new : 100,51 for group 1 bores and 100,52 for the group 2 bore!
Bonjour,
After several month... finally I get my parts back!!!
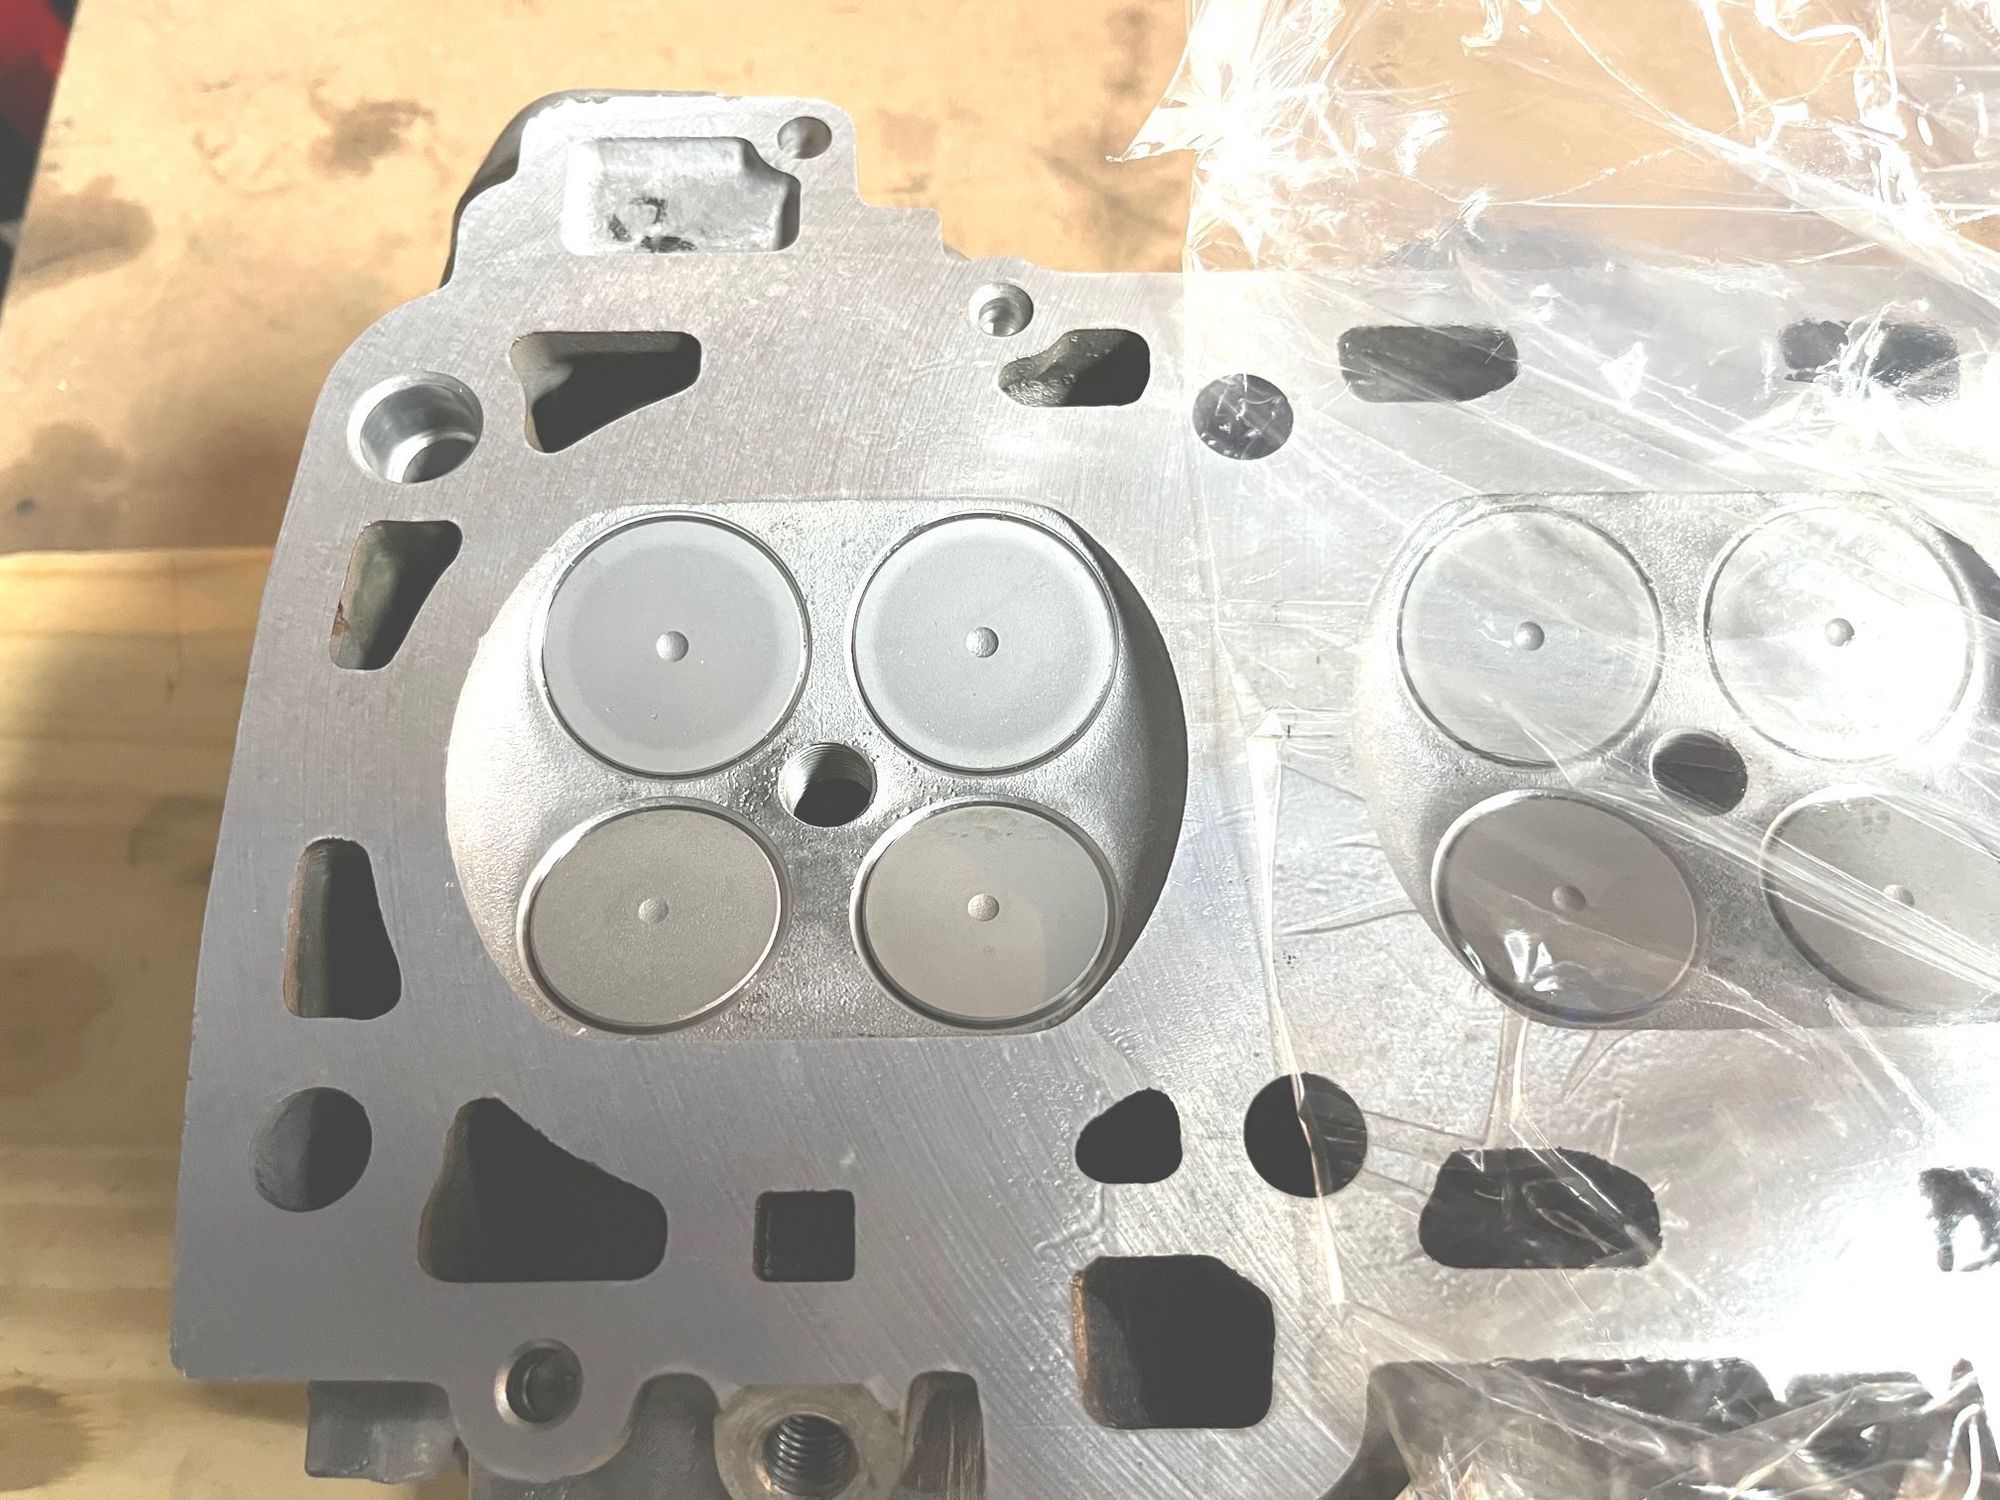
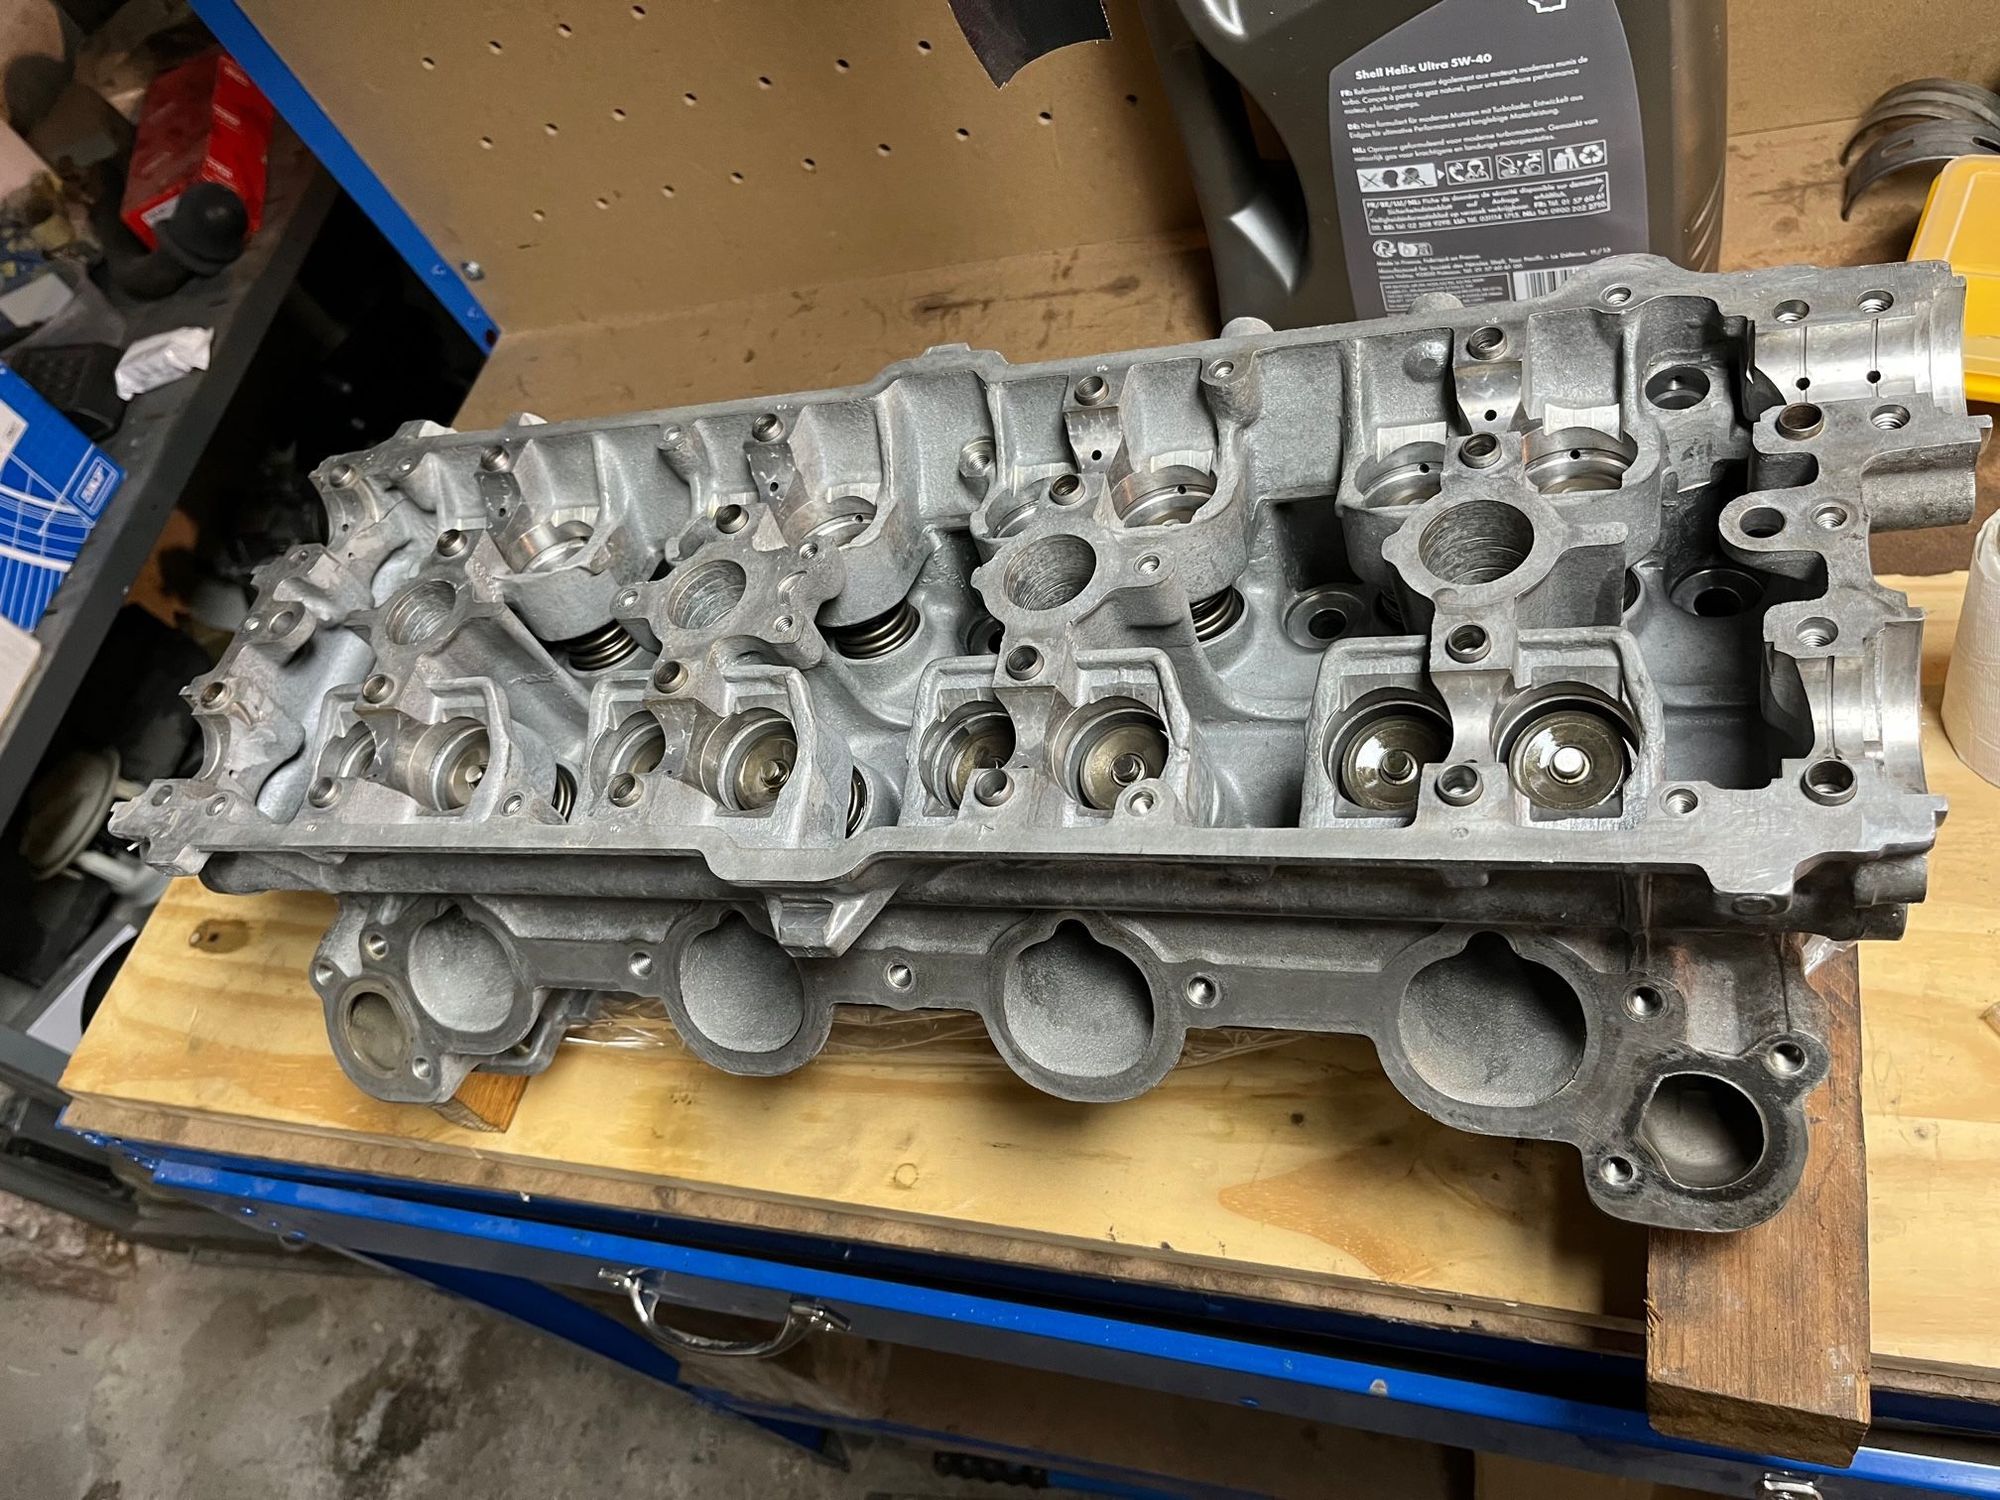
Heads are finished :
Ceramic coating on exhaust manifolds :
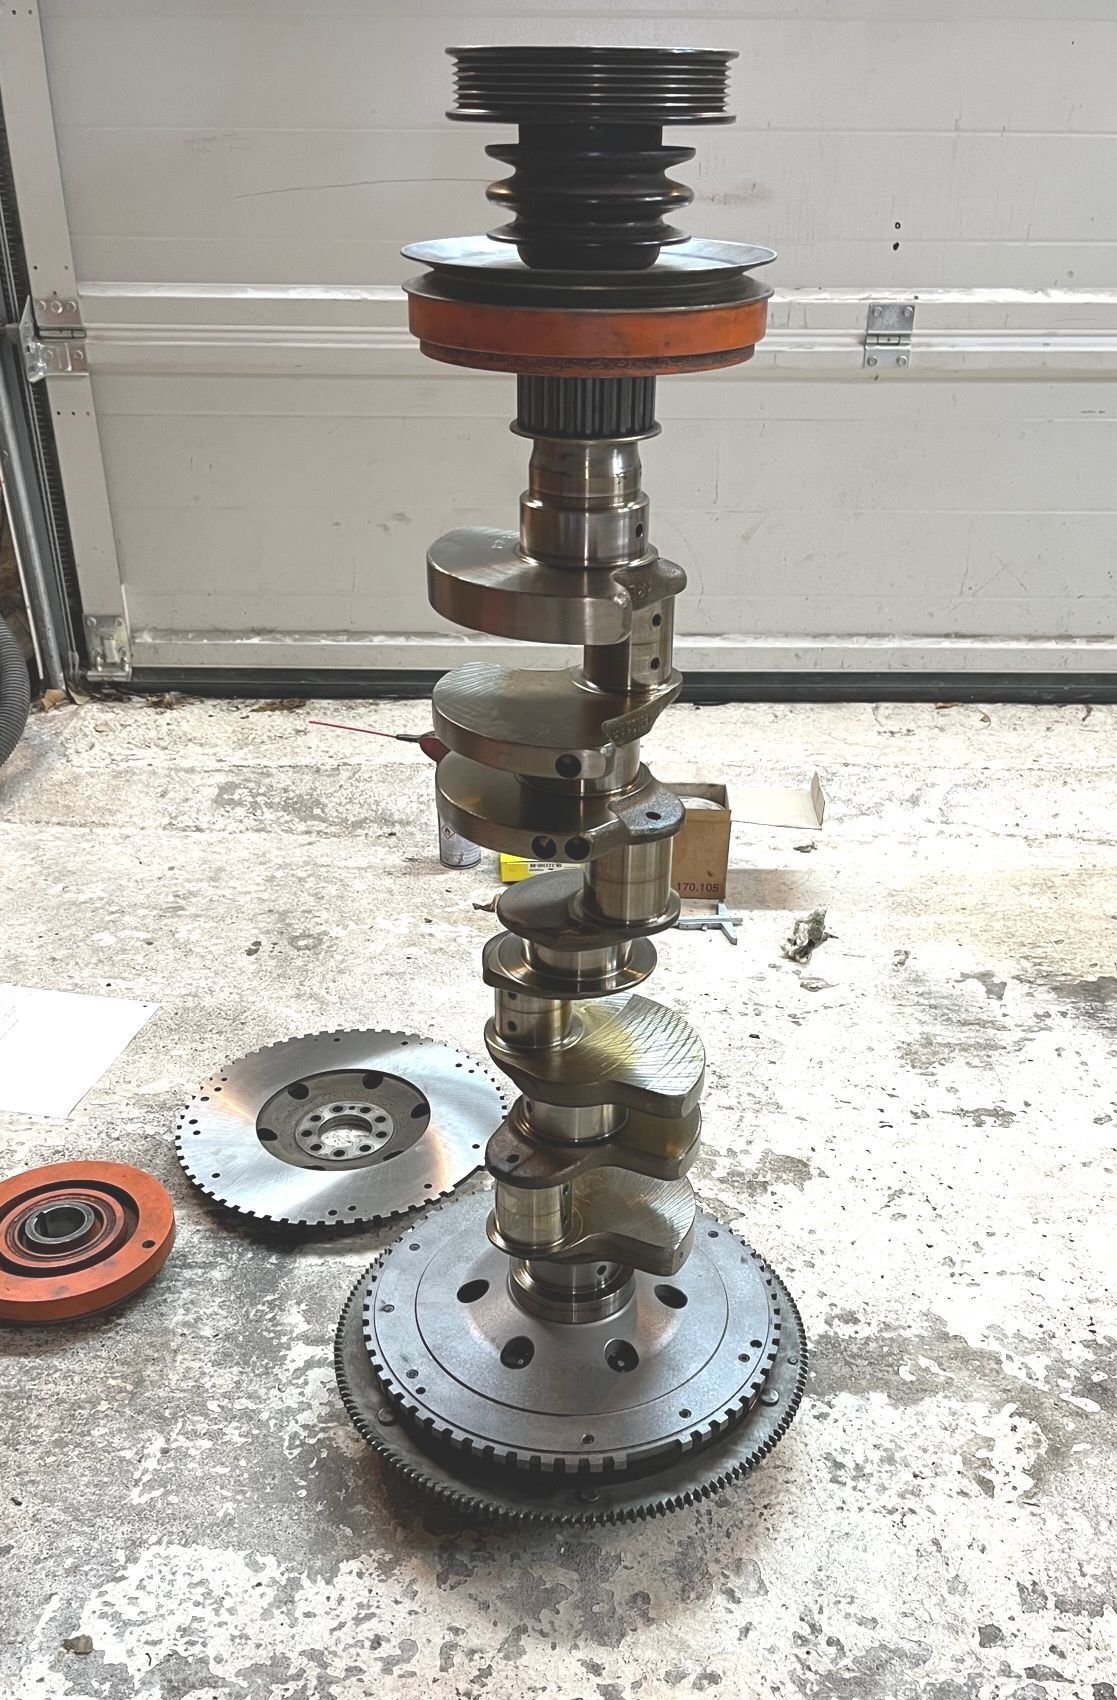
Flywheels surfaced, Crankshaft equipped balanced:
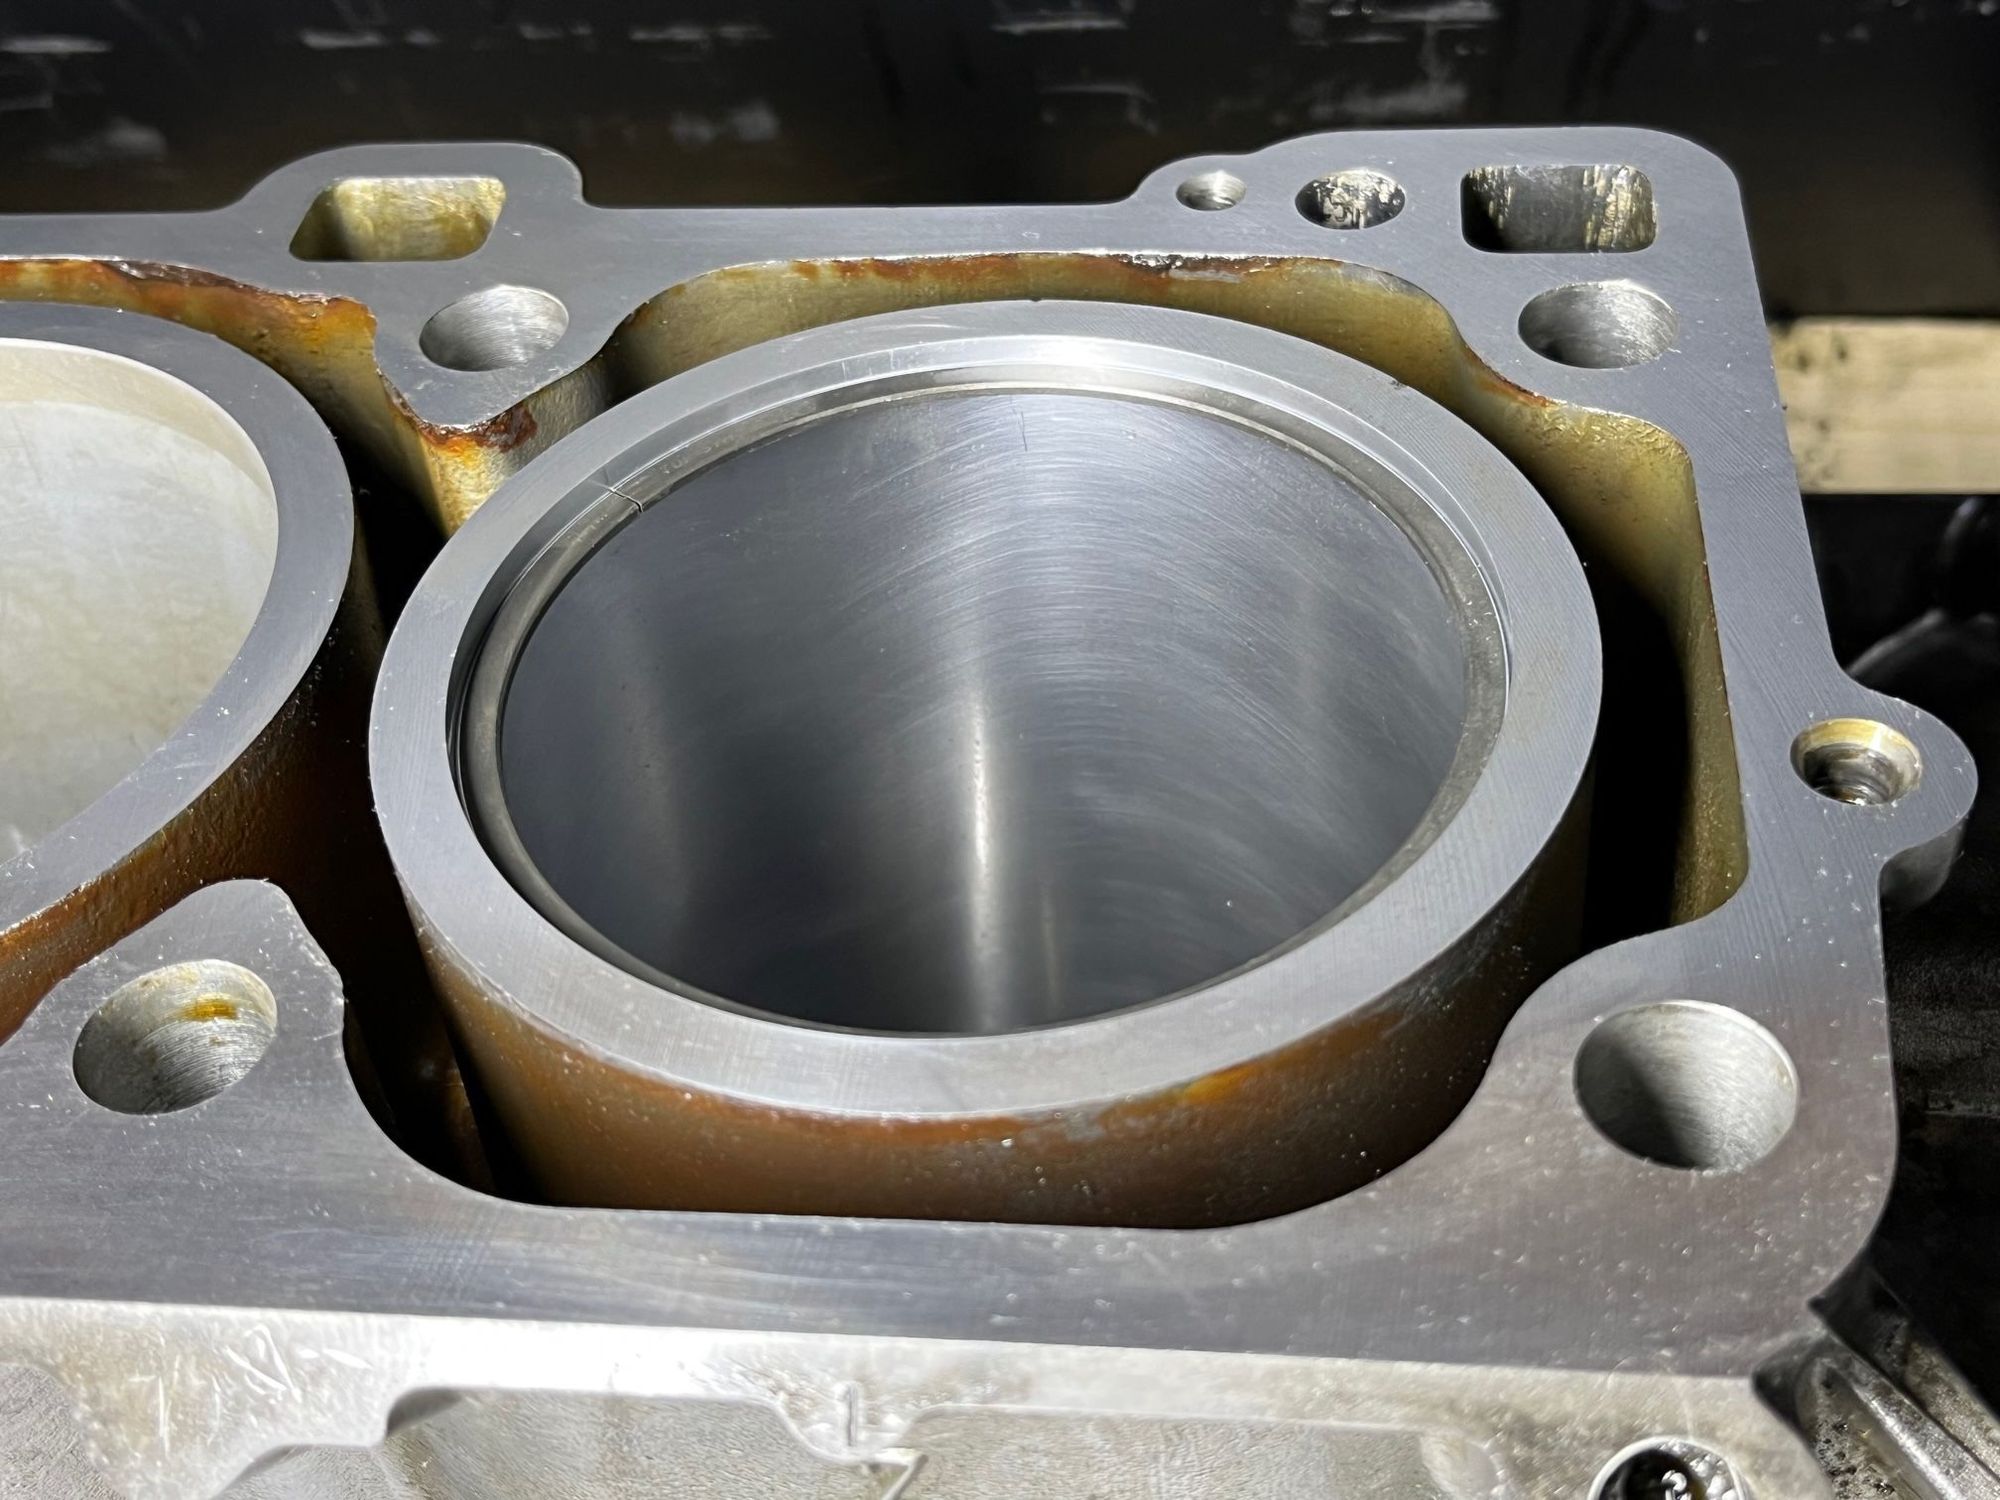
Block kissed and cylinder bore #4 machined. ring gap is between 0.25 and 0.30mm :
Oversized piston drilled :
It is moving... slow... but moving...
Have a great week-end,
Raphael
Bonjour,
Today as I had all my pistons, I tried to balance all of them with the rods in order to be within 1g tolerance for all of them.
my scale is a 1 gram tolerance scale.
And I get very surprised by rings weight differences...
My pistons had about 5 grams differences before I started to balance them.
Then I realized that I have 4 kinds of piston rings on hand :
- the rings that Porsche put on my former pistons, they are the rings with 3 pieces oil scraper ring, they weight 36 grams,
- the rings that Porches put on the oversized pistons or my spare used ATR engine, they are with 3 pieces oil scraper rings, they weight 37 grams,
- the rings that are on my new oversized piston, they are rings with 2 pieces oil scraper ring, they weight 38 grams.
So far, so good...
- BUT... the new Goetze PN 08-323300-00 ring (with 2 pieces oil scraper rings)... weight... 42 grams : they are much heavier than the other ones...
My pistons used to weight between 761g to 773g (773 g is my oversized piston)... so 11 grams dispersion...
With the new rings, they weight between 767 and 772 grams (772g is for the oversized piston with all oil holes drilled)... so heavier but only 5 grams dispersion now...
My intention was to set all the pistons within 1 gram and all pistons+rods within 1 gram also.
the new rings put most of my pistons out of tolerance (765g + or - 4 grams)... So I decided to trim all pistons to the minimum weight of the lighter one : 767g with 1 gram tolerance.
So now I have 1 piston at 767 and all the others at 768g.
All the rods are at 846g except one that is 845g.
At the end, all my (pistons + rods) weight the same : 1614 grams each! looks good!
Strange however this 6grams difference between old style rings and the Goetze ones...
Have a great evening,
Rapha�l
Bonjour,
As I get my crankshaft back, I can finalize my results about thrust bearing wear measurements.. On my 928 initial engine :
Measured crankshaft thrust bearing gap = 30,04 mm
Removed Thrust bearing width = 29,86 mm
New Trust bearing width = 29,90 mm
Last measured crankshaft axial play before removal = 0,20 mm
Calculated play before removal = 0,18 mm
=> crankshaft max wear axial play = 0,40 mm
=> crankshaft max Porsche manufacturing axial play = 0,19 mm
Calculated play with new thrust bearing = 0,13 mm
On my spare engine (1rst oversized crankshaft) :
Measured crankshaft bearing gap = 30,20 mm
Removed Thrust bearing width = 30,03 mm
Measured crankshaft axial play before removal = 0,18 mm
Calculated play before removal = 0,17 mm
=> crankshaft max wear axial play = 0,40 mm
Conclusion 1 : my measurements before and after removals are pretty consistent on my 2 engines.
Conclusion 2 : axial play with my initial engine's thrust bearing was about max axial play allowed by Porsche during manufacturing!!!! and my engine had more than 210 000km!
Conclusion 3 : On my 2 engines, I observed no wear difference between front and rear shoulder of the thrust bearings. However, on my initial engine I pressed the clutch pedal before almost all starts... So lubrication of my engine has not been bad event if I used 5W40 oil for a while.
Conclusion 4 : Lubrication issue just show up on the camshafts, see https://rennlist.com/forums/928-foru...-criteria.html
Bonjour,
After several month... finally I get my parts back!!!
Heads are finished :
Ceramic coating on exhaust manifolds :
Flywheels surfaced, Crankshaft equipped balanced:
Block kissed and cylinder bore #4 machined. ring gap is between 0.25 and 0.30mm :
Oversized piston drilled :
It is moving... slow... but moving...
Have a great week-end,
Raphael
Raphael:
As you may or may not know, because of several trolls on Rennlist, which the moderators refuse to do anything about, I've decided to not post any help or give any tips to anyone, regardless of what mistakes people make.
This, of course, will cost people thousands and thousands of dollars in ruined 928 pieces, but it is what it is....trolls trump vast knowledge and 45 years of 928 experience.
Inshallah.
However. this has left me in a quanadrum/moral dilemma about your post about your block, for over a week....not wanting to help, but feeling morally obligated to do so.
.....I had sincerely hoped that someone might know enough to tell you that you have an impending disaster on your hands, but only "likes", from people that are oblivious to what a 928 block should look like, when machined, have been posted.
My decision, since I offered you help about what to do earlier in the thread, is to break my promise to myself not to help or offer anyone any help, and give you a bit of advice.
Your #4 cylinder, as pictured, WILL NOT WORK with a Porsche (or any other) piston!
Your machine shop has left the aluminum in the block, exposed (evident by the shiney cross hatched aluminum surface.)
The piston will "gall" and try to seize in the bore...almost instantly, when you start this engine.
With Alusil blocks, there is a "special" final "honing" required to remove a fine layer of aluminum and leave a fine layer of silicon, for the piston and rings to ride on.
The required visual result will be a cylinder with no cross hatching, which is a dull grey color...exactly like the other cylinders, in the block.
There are others here, who can guide you to instructions on how to bore and home Alusil, properly....several people have links to the proper documents/instructions.
Hopefully there will still be enough material, left in this bore, to do what is required.
Bonjour Greg,
I have to admit that I was very worry about the aspect difference with the other cylinders as the machinist was supposed to have lapped the cylinder.
I never saw a cylinder new before any piston run inside... but your comment confirm my doubts.
I found someone in France that will help me. He will send me all the material required to do the job next week. I will receive that next week-end. My intention was to lap again the cylinder just in case...
The play I have with the piston is 0,015mm total (diameter). If I have only step C and D to perform from the WSM page 13.29 to get an aspect similar to other cylinders, I should be good. I will not have more play than other cylinders..
Thank you
Have a great day,
Rapha�l
Great!
Since the lapping process is only removing a microscopic layer of aluminum and leaving behind a microscopic layer of silicon, the change in the size of the bore is very minimal.
Just remember that you should end up with a dull grey cylinder, without any honing marks.
If in doubt, simply look at the bottom of the other cylinders, where the piston and rings have never touched, for a visual example.
Remember to clean out the lapping compound extremely well. Use a lint free cloth with automatic transmission fluid, as a final wipe. Don't forget that the compound will "sling" out of the bottom of the cylinder and be on the webs of the block.
I'm happy that I was able to help you, before this turned into a disaster, sadeeqi.
Great example!
There won't be any visible cross hatching
And without the super shiny pistons, it should be a dull grey color.
(This can be seen in cylinder #4, with the piston down.)
Bonjour Karsten,
Thank you for your pictures. It looks clear now and the same than my spare engine. I�m more and more convinced that my spare ATR engine run very few mile before getting the mayonnaise as the aspect of the cylinder looks more like your picture than the more white aspect of the old bore of my reworked block.
Initially I requested the material to lap the cylinder to try to refresh the old bores, hopping getting the grey fine texture as on my ATR block.
If the feld is enough to remove honing marks and to get this nice fine texture, I should be good soon!
Bonjour,
I did not get lapping material this week end so I assembled the pistons and the rods and measured the ring gaps. After lapping should be bigger but I could make sure I'm over minimum gap spec.
I have the exact same issue than in this thread : https://rennlist.com/forums/928-foru...-ring-gap.html
- Upper ring end gap is between 0,45 to 0,50mm for Goetze ones and the oversized upper ring is the only one within spec : 0,25mm,
- middle ring end gap is around 0,57mm except for the oversized ring that is within spec at 0,23mm,
- lower ring en gap are within spec at 0,55mm except for the oversized piston that is below spec : 0,35!!!!!
I will verify again the oversized piston end gaps after lapping. Maybe the lower ring will be within spec.
I'm wondering if I should fit end gaps of this piston at the same values than the other cylinders? Should be safer during hot summer track days?
Another question come to me : the lower ring has not "top" marking. On one side of the ring package there is a scheme that show a chamfer that should be up. But I noticed none on them.
So I understand that there is no specific side to put up, they looks symmetrical :
Rapha�l


 10-24-2022, 11:38 PM