When you click on links to various merchants on this site and make a purchase, this can result in this site earning a commission. Affiliate programs and affiliations include, but are not limited to, the eBay Partner Network.
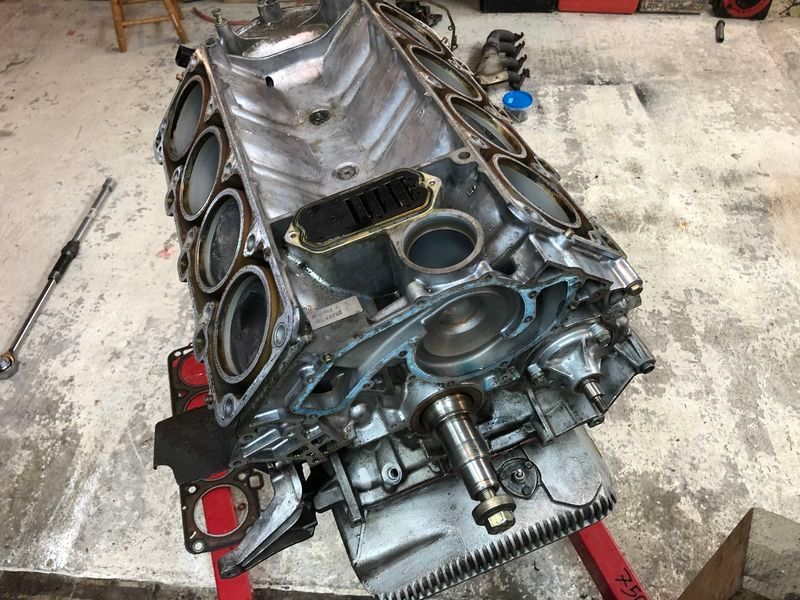
Ready to pull out... all wiring removed so no risk to forget something...
Remaing the only thing I do no know how to remove alone : the hood!!!!
have a great day!
Ador117,
to remove the hood by my self I loosened hinge bolts into the hood until they were only just holding.
Then I leaned over the engine from the front and held the hood with one hand / my back and removed bolts until only the front bolt was left on either side.
I then lowered the hood onto some cushioning (fender protectors) and then reached under and removed the final two bolts from the sides.
The hood is light so easy to lift off and move by hand.
Someone else might have a better way but this worked for me.
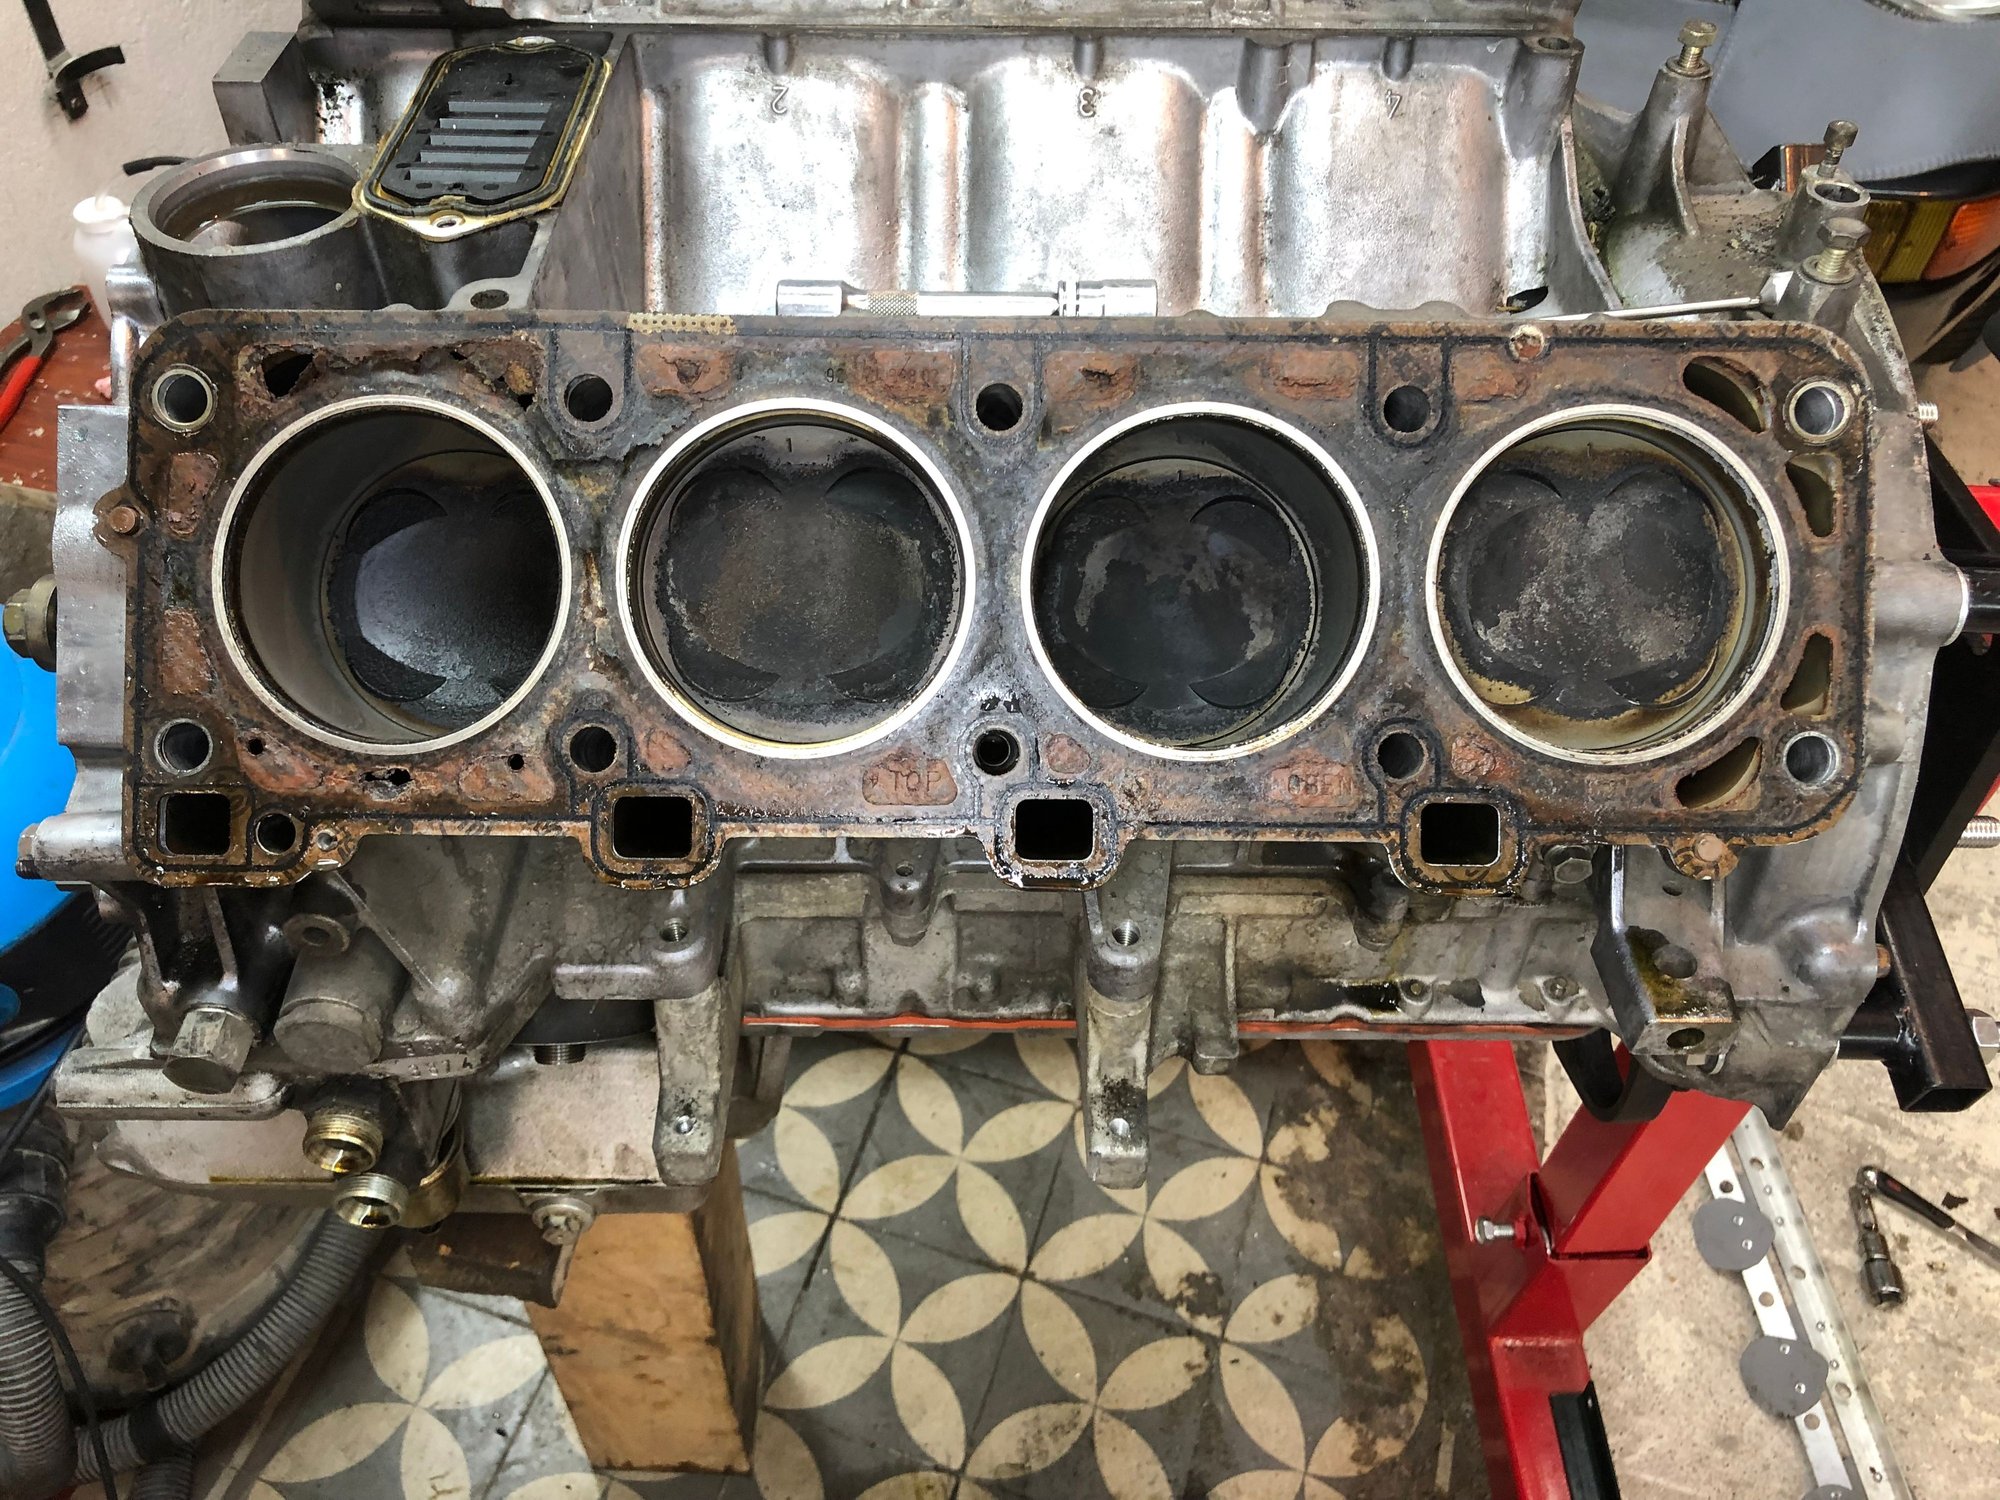
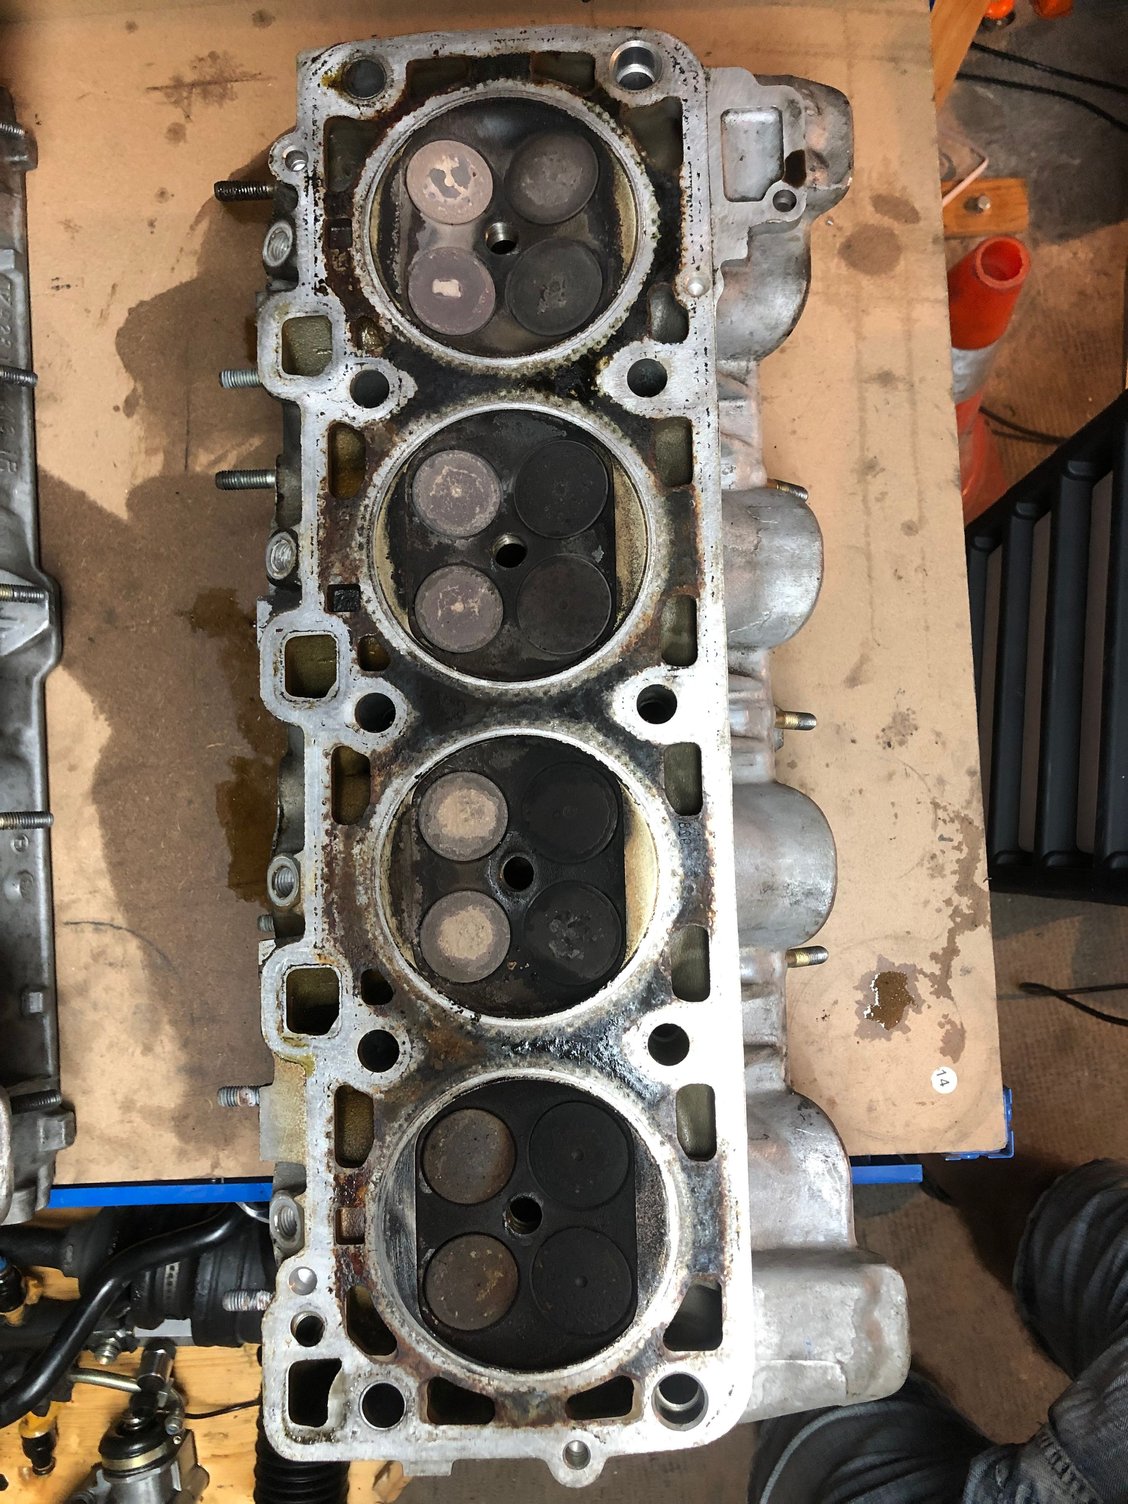
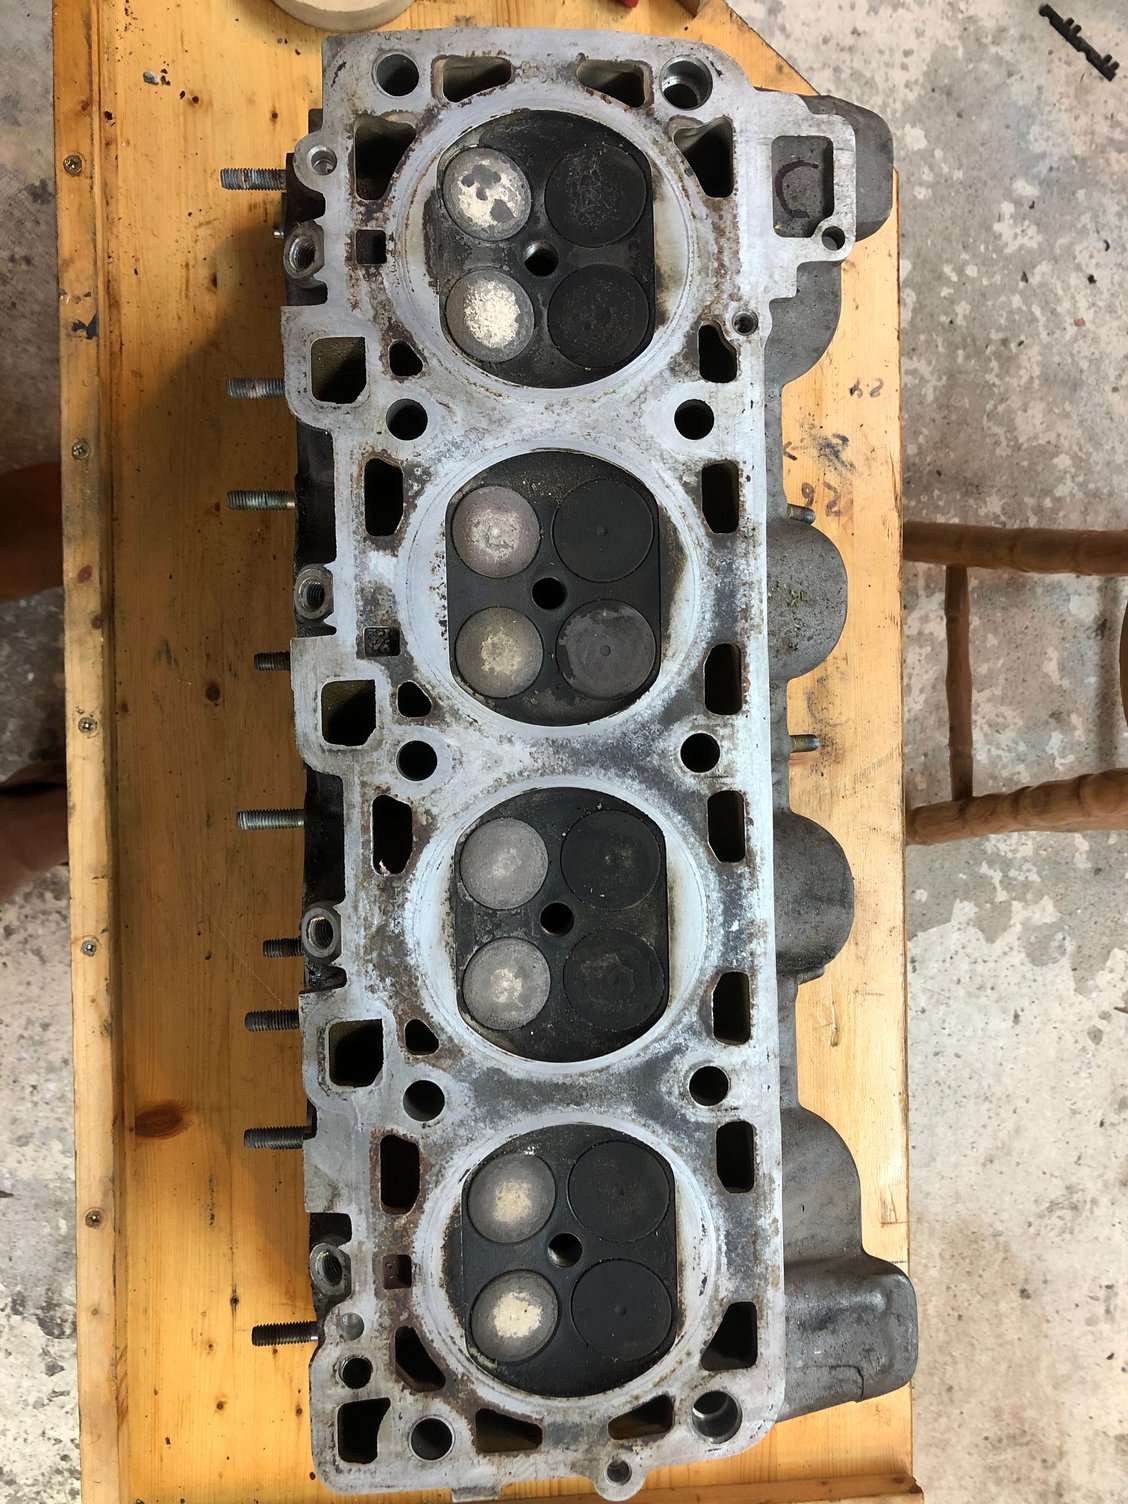
The "quite" good news is that corrosion on head from cylinders 5-8 1-4 (modified 08/20/2022) looks to be reasonable. After a fast cleaning only 3 zones looks deep (marked in black). Maybe depth could stay within 0,2mm?
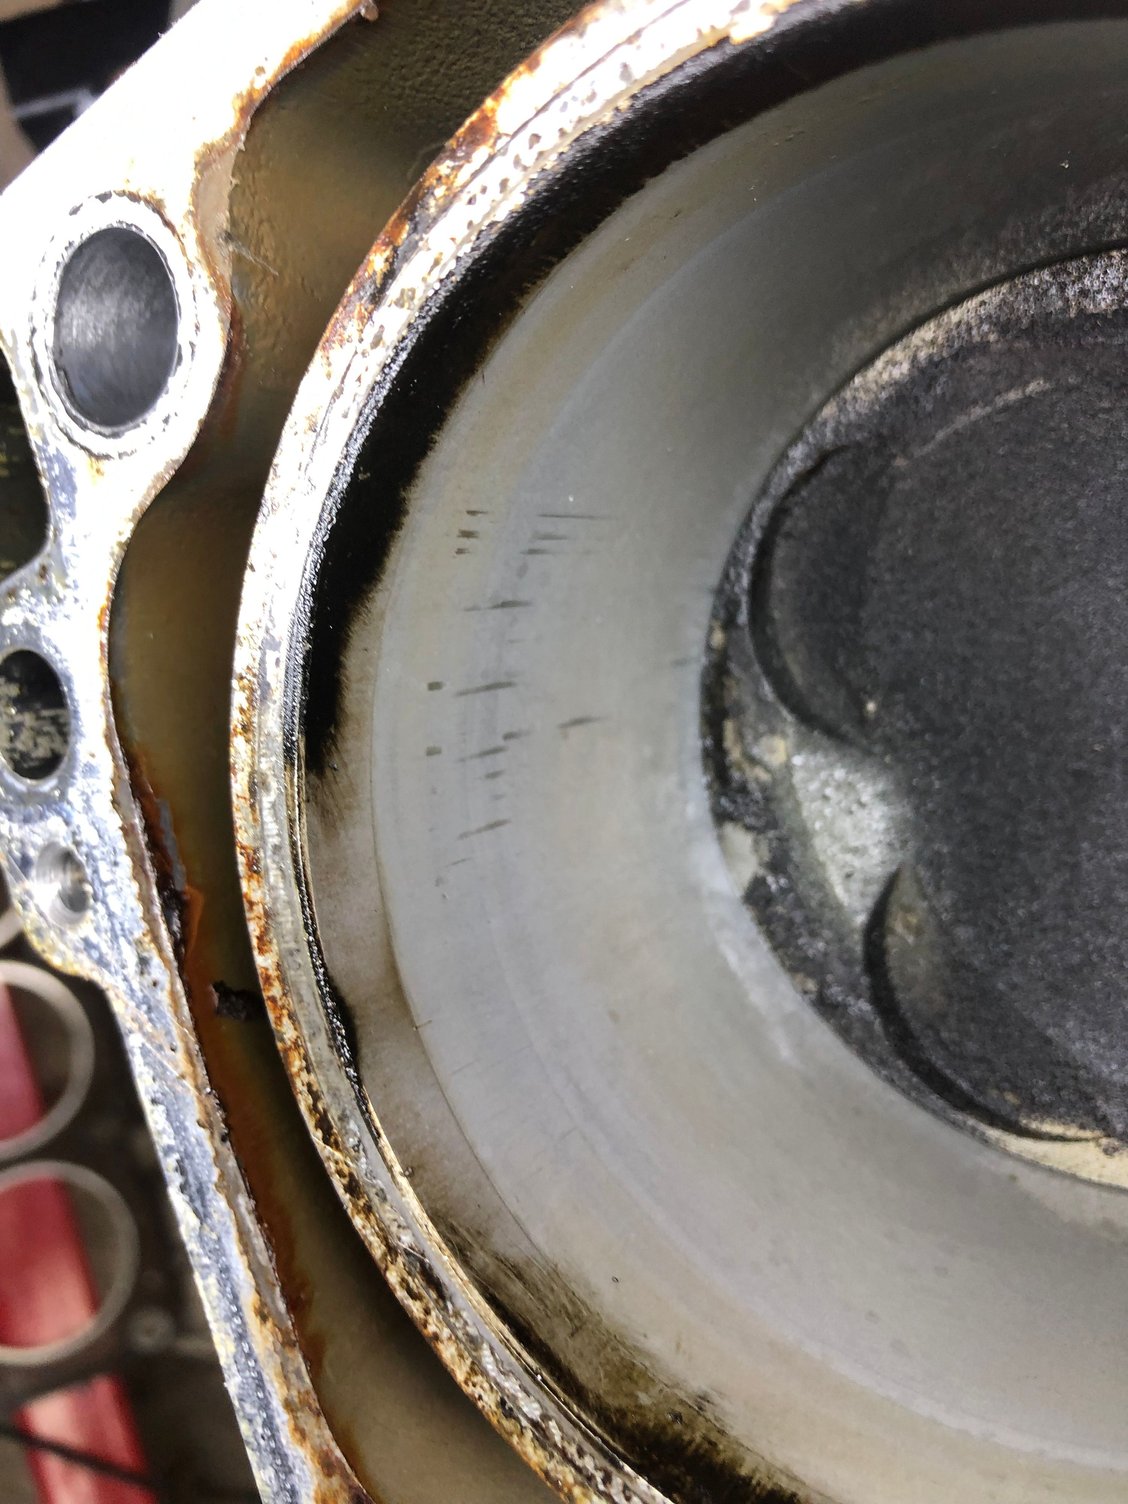
The BAD one is that I have a cylinder with deep marks...
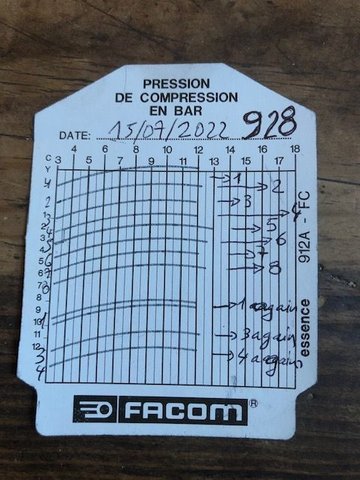
It is cylinder #4. Compression was 174PSI. On the head we could see that it is more black than the others. And on top of the piston and on the head this cylinder/piston has not a dry deposit : it is slightly oily... However there is not more carbon deposit on it then on others cylinders...
I should drink oil from here? Or the leak to cooling system was from this cylinder?
I understand that I have to find a 100.5 piston... piston that we could not find anymore... and I don't know if 100.5mm will be enough to remove these marks...
Examination does not start very well...
And I did not inspected the others cylinders because carbon deposit fall inside the cylinders so I don't want to turn the crankshaft. I will remove them from the back latter...
Comments will be appreciated...
Have a great day,
Rapha�l
Last edited by ador117; 08-30-2022 at 05:41 PM.
Reason: mistake
The "quite" good news is that corrosion on head from cylinders 5-8 looks to be reasonable. After a fast cleaning only 3 zones looks deep (marked in black). Maybe depth could stay within 0,2mm?
The BAD one is that I have a cylinder with deep marks...
It is cylinder #4. Compression was 174PSI. On the head we could see that it is more black than the others. And on top of the piston and on the head this cylinder/piston has not a dry deposit : it is slightly oily... However there is not more carbon deposit on it then on others cylinders...
I should drink oil from here? Or the leak to cooling system was from this cylinder?
I understand that I have to find a 100.5 piston... piston that we could not find anymore... and I don't know if 100.5mm will be enough to remove these marks...
Examination does not start very well...
And I did not inspected the others cylinders because carbon deposit fall inside the cylinders so I don't want to turn the crankshaft. I will remove them from the back latter...
Comments will be appreciated...
Have a great day,
Rapha�l
Id like to see the silver part of this piston in good focus.
Dont hold the camera close to zoom in, keep it about a foot away and zoom in, tap the screen on that spot to focus cleanly on it.
Bonjour ,
same cylinder, 2 different lights position. I touched the top of the cylinder with my finger at 12 and 6 o�clock . I was able to make the metal appear. You could see my finger print also in the center.
Best Regards,
Raphael
Bonjour ,
same cylinder, 2 different lights position. I touched the top of the cylinder with my finger at 12 and 6 o�clock . I was able to make the metal appear. You could see my finger print also in the center.
Best Regards,
Raphael
Awesome, thanks, was just curious if the 'dotted silver or black spots' were signs of detonation.
The "quite" good news is that corrosion on head from cylinders 5-8 looks to be reasonable. After a fast cleaning only 3 zones looks deep (marked in black). Maybe depth could stay within 0,2mm?
The BAD one is that I have a cylinder with deep marks...
It is cylinder #4. Compression was 174PSI. On the head we could see that it is more black than the others. And on top of the piston and on the head this cylinder/piston has not a dry deposit : it is slightly oily... However there is not more carbon deposit on it then on others cylinders...
I should drink oil from here? Or the leak to cooling system was from this cylinder?
I understand that I have to find a 100.5 piston... piston that we could not find anymore... and I don't know if 100.5mm will be enough to remove these marks...
Examination does not start very well...
And I did not inspected the others cylinders because carbon deposit fall inside the cylinders so I don't want to turn the crankshaft. I will remove them from the back latter...
Comments will be appreciated...
Have a great day,
Rapha�l
Raphael,
Good progress-
I have had a good look at your photos and noted the following points:
1. Your heads clearly needed pulling and you should feel you made a very good decision. At the very least the joint faces need a good clean up and quite likely a head skim- hopefully no welding needed. I suspect the optimal timing intervention for such is 20 years so likely you are a few years overdue!
2. The corrosion phenomena I have defined is clearly in play and I would classify such as 'generally mild' and in a couple of locations as 'moderate'. Your timely intervention has in my opinion prevented much more serious damage longer term.
3. I presume from your avatar you have been using the originally specified IAT coolant. As you can see from your photos there is no corrosion inside the cylinder head passage ways or in the water bath/cylinder area so no corrosion issues related to the coolant.
4. Gasket 5/8 - Gasket surfaces are darkish when new and will stay that way unless they are exposed to hot coolant in which case the printed material is bleached and that leaves a paler looking surface. Surfaces that block coolant flow between the water bath and the cylinder head are typically bleached but so too are surfaces where coolant has crept into the gap between the head and the gasket- this can be clearly seen. Your photo clearly shows significant mechanical damage to the gasket around cylinder No5 . I suspect the obvious damage occurred when the head was removed but the structural weakness was inherent and thus it is quite possible there was a significant degree of leakage through the damaged area and if so, that would cause overheating on the other three cylinders due to reduced flow- note that I understand that in a perfect system the inner two cylinders tend to run a bit hotter than the outer cylinders to start with. There is very obvious corrosion damage to the area between cylinders 5 & 6 and as I can tell from the head photos there is also damage in the corresponding areas of the head . The acids that form in the stagnant layer attack the gasket and also [by a different corrosion mechanism] also attack the alloy of the head material- a process known as crevice corrosion that is characterised by a corrosion phenomena known as pitting corrosion. I cannot see any detail in your photos so cannot say this is precisely what has happened - the primary indication is a matrix of little "Swiss cheese" holes and they create a problem because one does not know how deep they have burrowed until they are machined out.
If you look closely at the area between No5 and No6 in the 6 O'clock position you can see a dark patch and probably no damage. If you look at the quadrant bounded by the 12 O'clock position you can see clearly a damage trail spreading from the adjacent transfer port leading to the central section- a classic sign of the physical damage experienced by just about every example that is afflicted with this phenomena. There also appears to be some signs of minor damage around the fire ring. Whether this is the source of the exhaust gas you detected remains to be seen and needs further examination.
5. Gasket 1/4: This gasket shows quite clearly by virtue of the dark patches the areas where coolant has not infilitrated between the gasket and the head and thus I suspect in those areas there will be no corresponding damage to the head. The gasket has clear and obvious damage between cylinders 3/4 and the head appears to show damage in the same location. I also note two locations where the fire ring looks suspect- one with black marks [may just be residual crap] and the other around the 6 O'clock position where the fire ring seal looks suspiciously narrow. This needs more inspection.
6. On a gasket that is working as designed you shoukd see two even concentic rings- the inner one being the fire ring seal, the outer one being a gasket hydraulic seal designed to keep coolant [or whatever acids it transforms into] away from the fire ring. This is required to prevent galvanic corrosion of the cylinder head in and around the fire ring. As can be seen from your photos there are several location where it seems the outer seal has been breached. I cannnot tell from the photos whether this has caused any problems that may have compromised the fire ring to a small extent. Similarly I cannot see any clear and obvious signs where the fire ring has been compromised [soot etc] but that may need localised inspection to see if such exists..
General comments
7. I get the impression you are running too rich.
8. A cranking compression of 175 psig is perfectly OK.
9. The marks on that cylinder- you should take further expert guidance on that before you decide it is a major problem [or not]..
10. If it is not too much trouble perhaps you might be kind enough to post a pic of the other side of the gaskets and the head bolts.
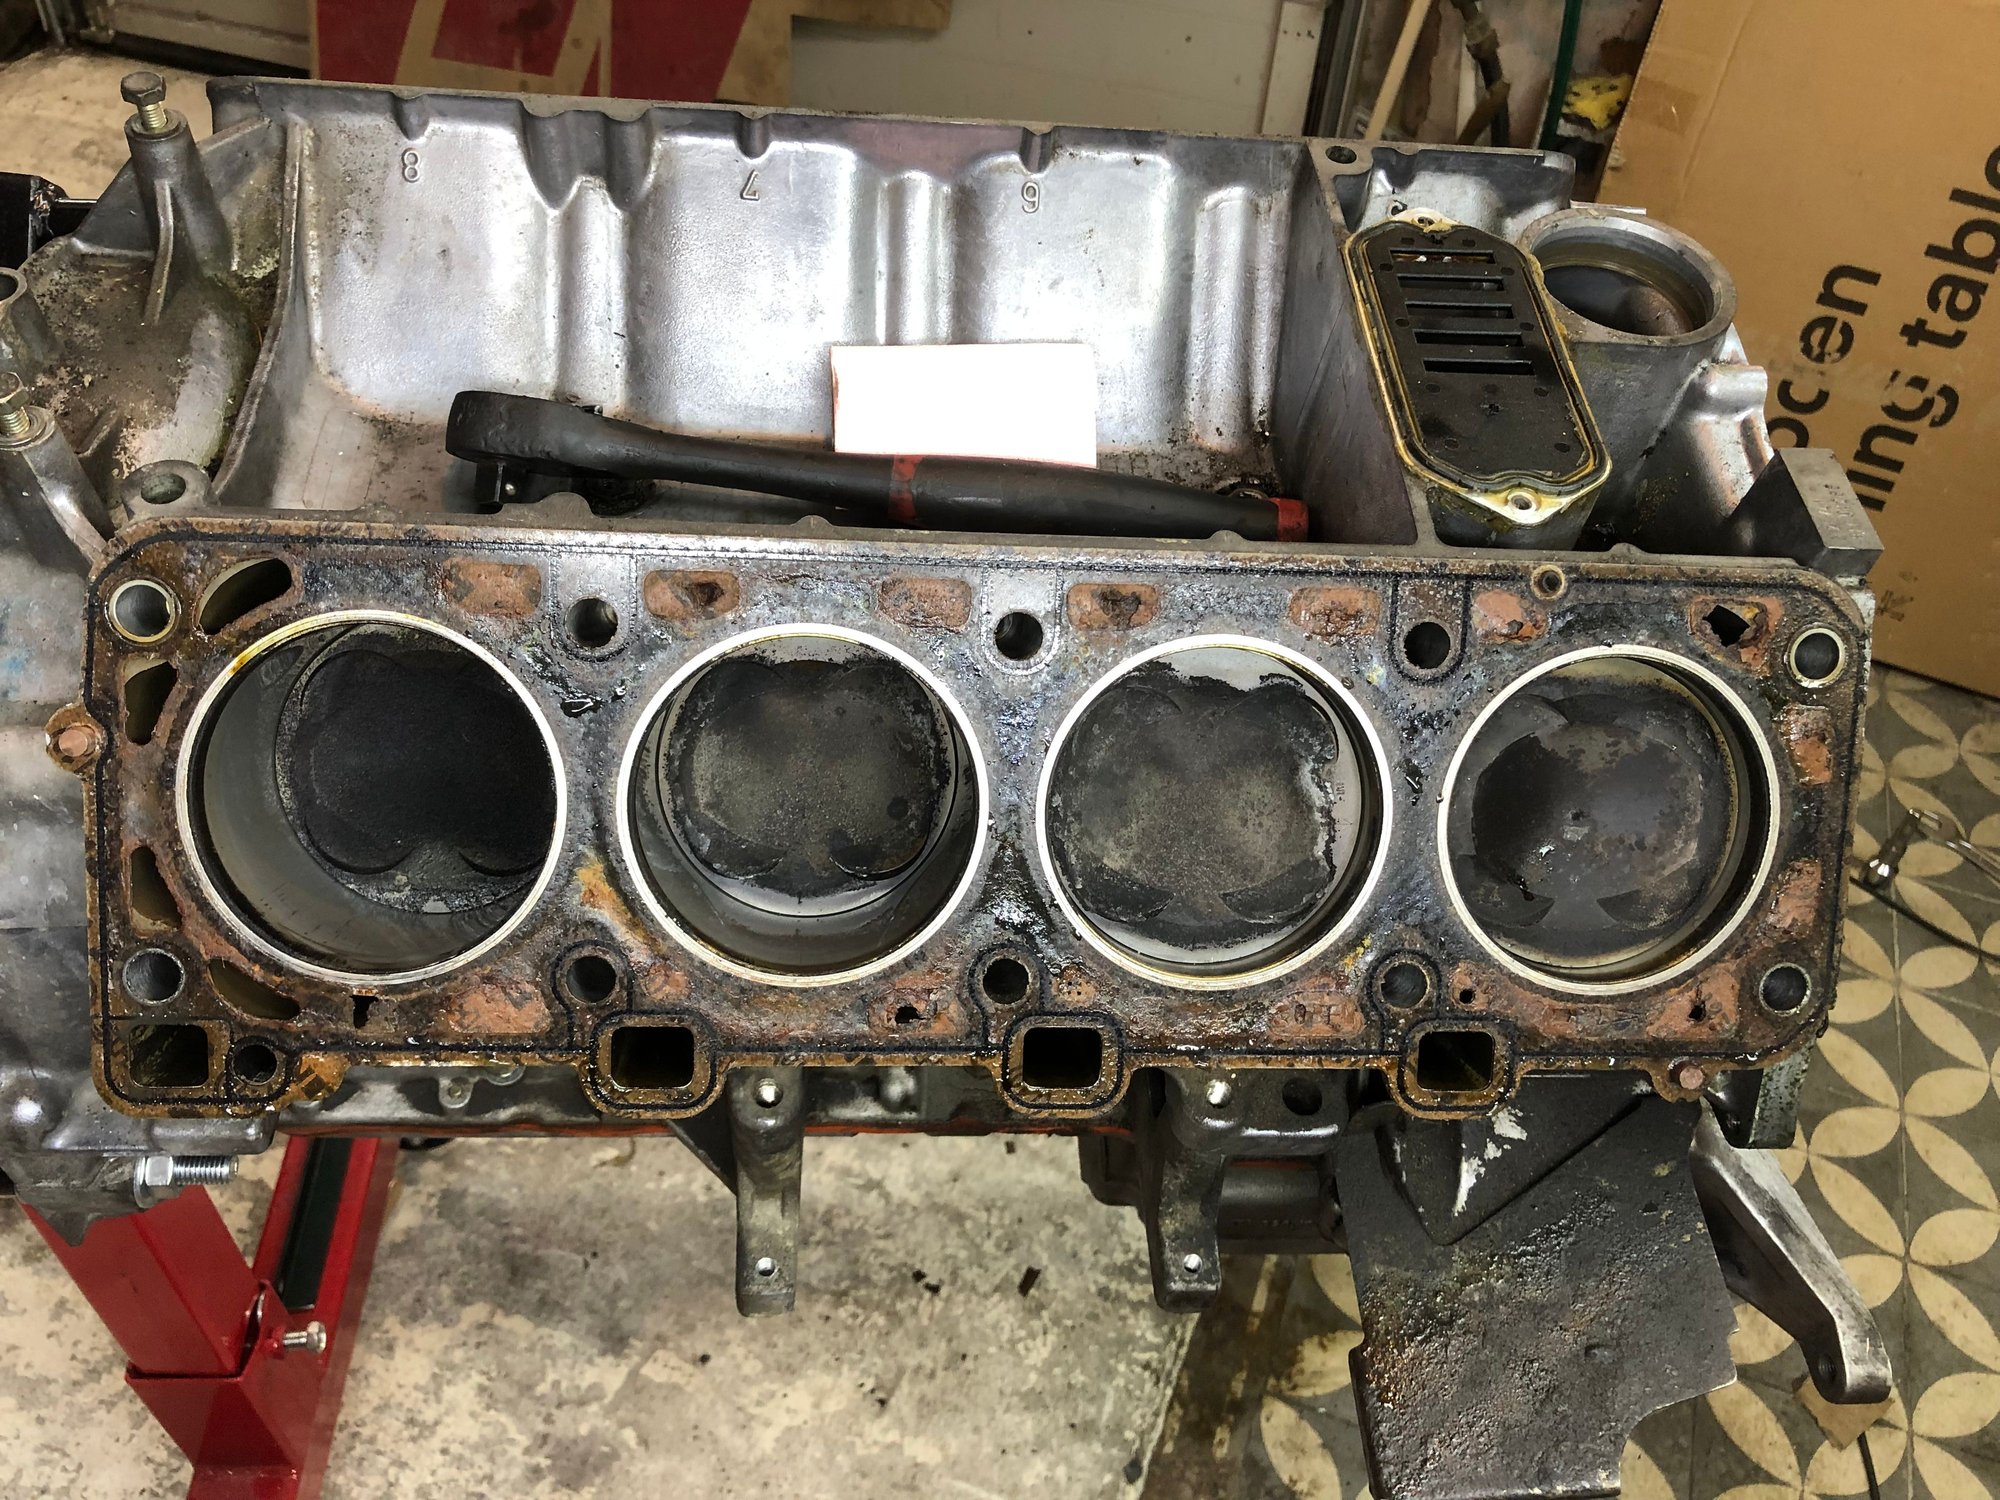
Typical head gaskets and cylinder head deterioration.
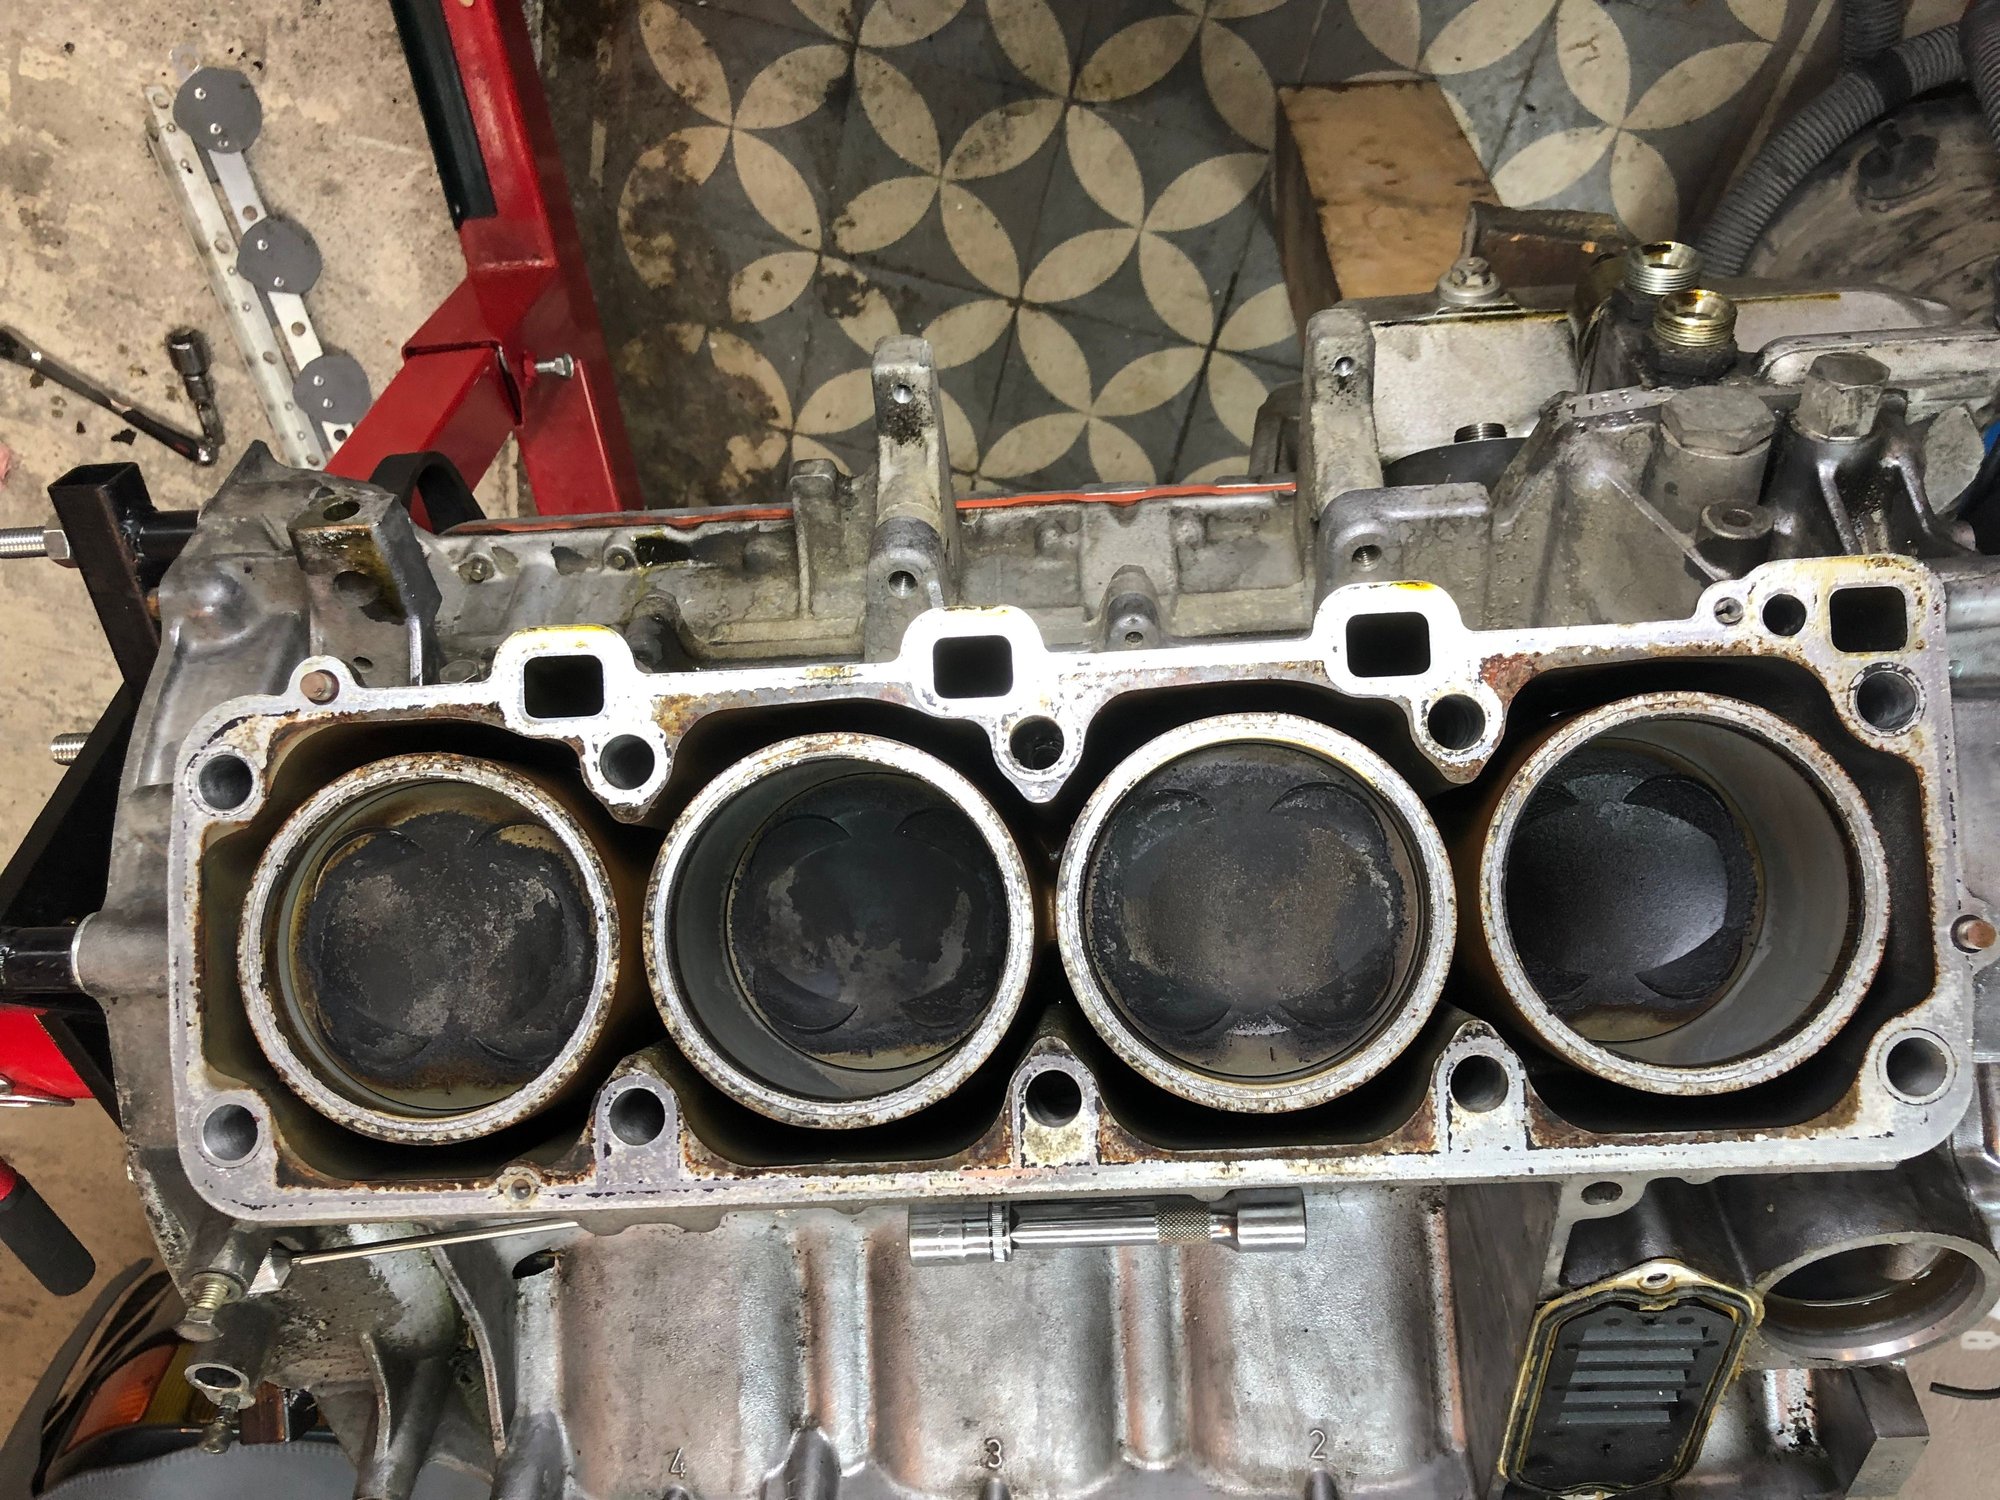
The #2 piston (and to a lessor degree #3) has been "steamed cleaned".....note the completely cleaned aluminum on the piston....no residue, whatsoever.
That's where your head gasket was leaking water into the cylinders.
The scratches that you are concerned about appear to be insignificant, to me. (Although I'm not there to feel them.)
Forget thinking about mixture or anything else....once engines quit running 100% correctly, all of that stuff is fussed up.
Besides that, you've got the whole thing apart, which allows you to inspect the function of each piece.
Blow the debris out of the cylinders with air.
Wipe (don't scrape) as much of the carbon off the cylinders as possible with a rag. (W/D 40 works pretty good to soften this carbon.)
Remove the pistons, for inspection.
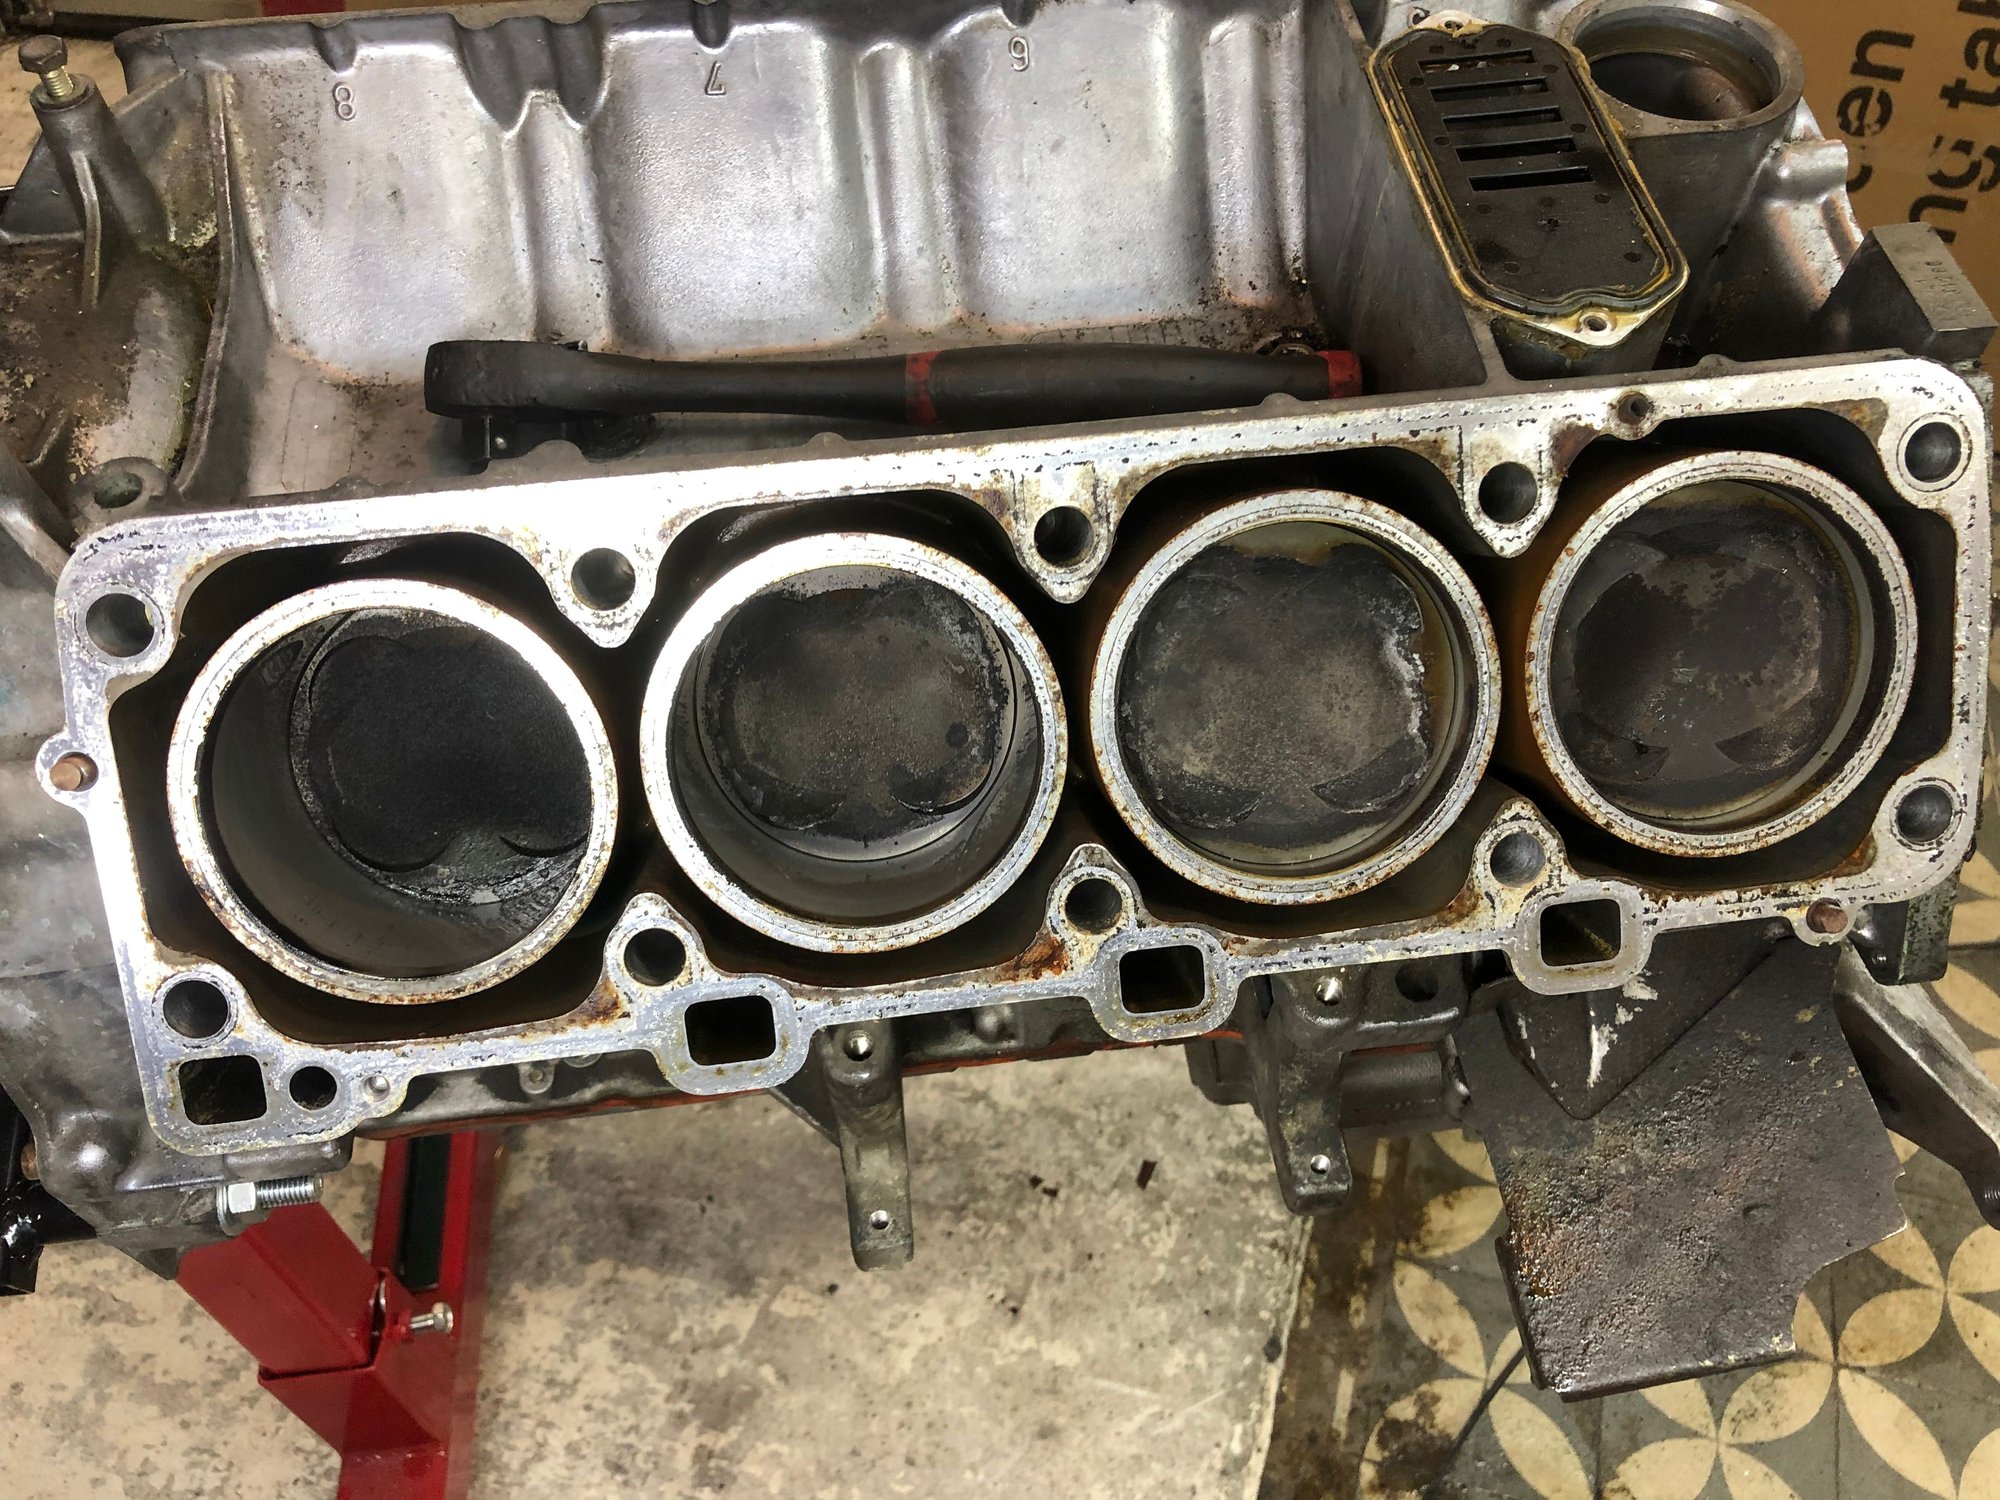
As Greg mentions here, and has stated before, 928s do fine with a somewhat alarming amount of scratches in the bore. I would put rings and rod bearings, weld up and surface the heads and try it. If you are not of the 'try and see what happens' mindframe you will have to find a local expert to evaluate your scratches.
As Greg mentions here, and has stated before, 928s do fine with a somewhat alarming amount of scratches in the bore. I would put rings and rod bearings, weld up and surface the heads and try it. If you are not of the 'try and see what happens' mindframe you will have to find a local expert to evaluate your scratches.
The scratches are also in the "who cares" part of the cylinder.
The piston should tell what caused this (and may look worse), but I'd guess this cylinder got a little bit too hot and the piston was in the beginning stages of sticking in the bore.
Have the block measured for size, honed with the felt pads and the special compound.
These scratches are likely to disappear.
Bonjour,
Thank you for your feedback.
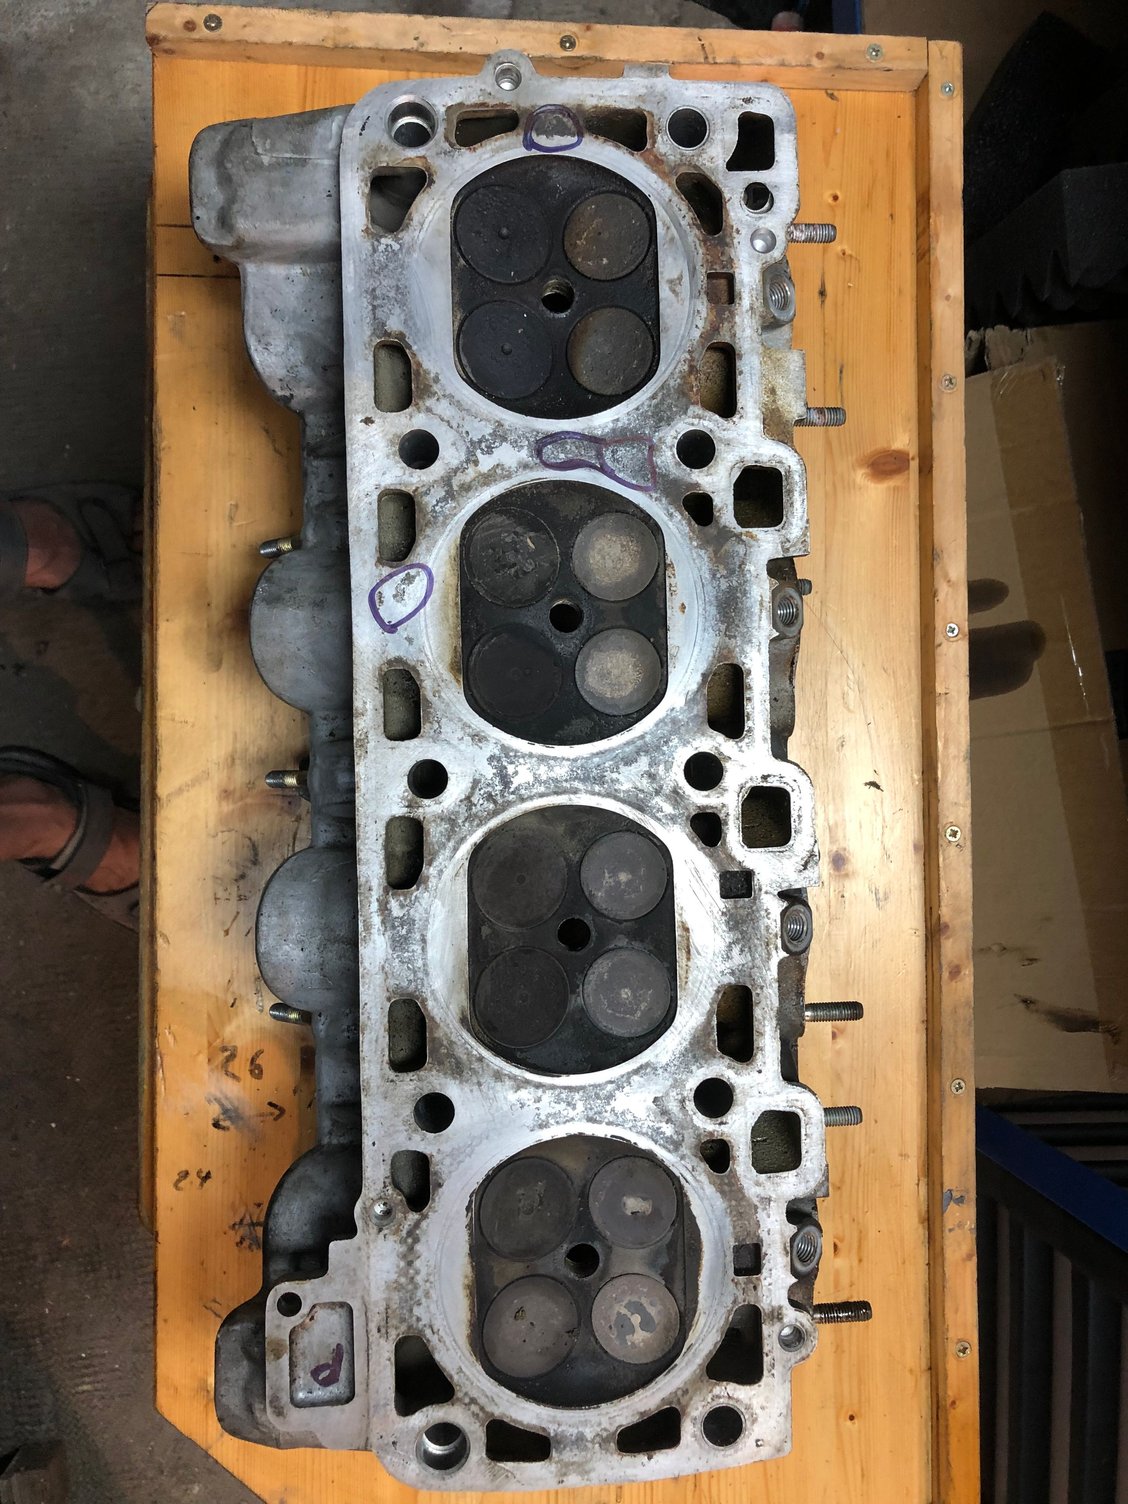
I did a mistake in my previous post : the "cleaned" head is 1-4 and not 5-8. I corrected it in the post. Sorry for that.
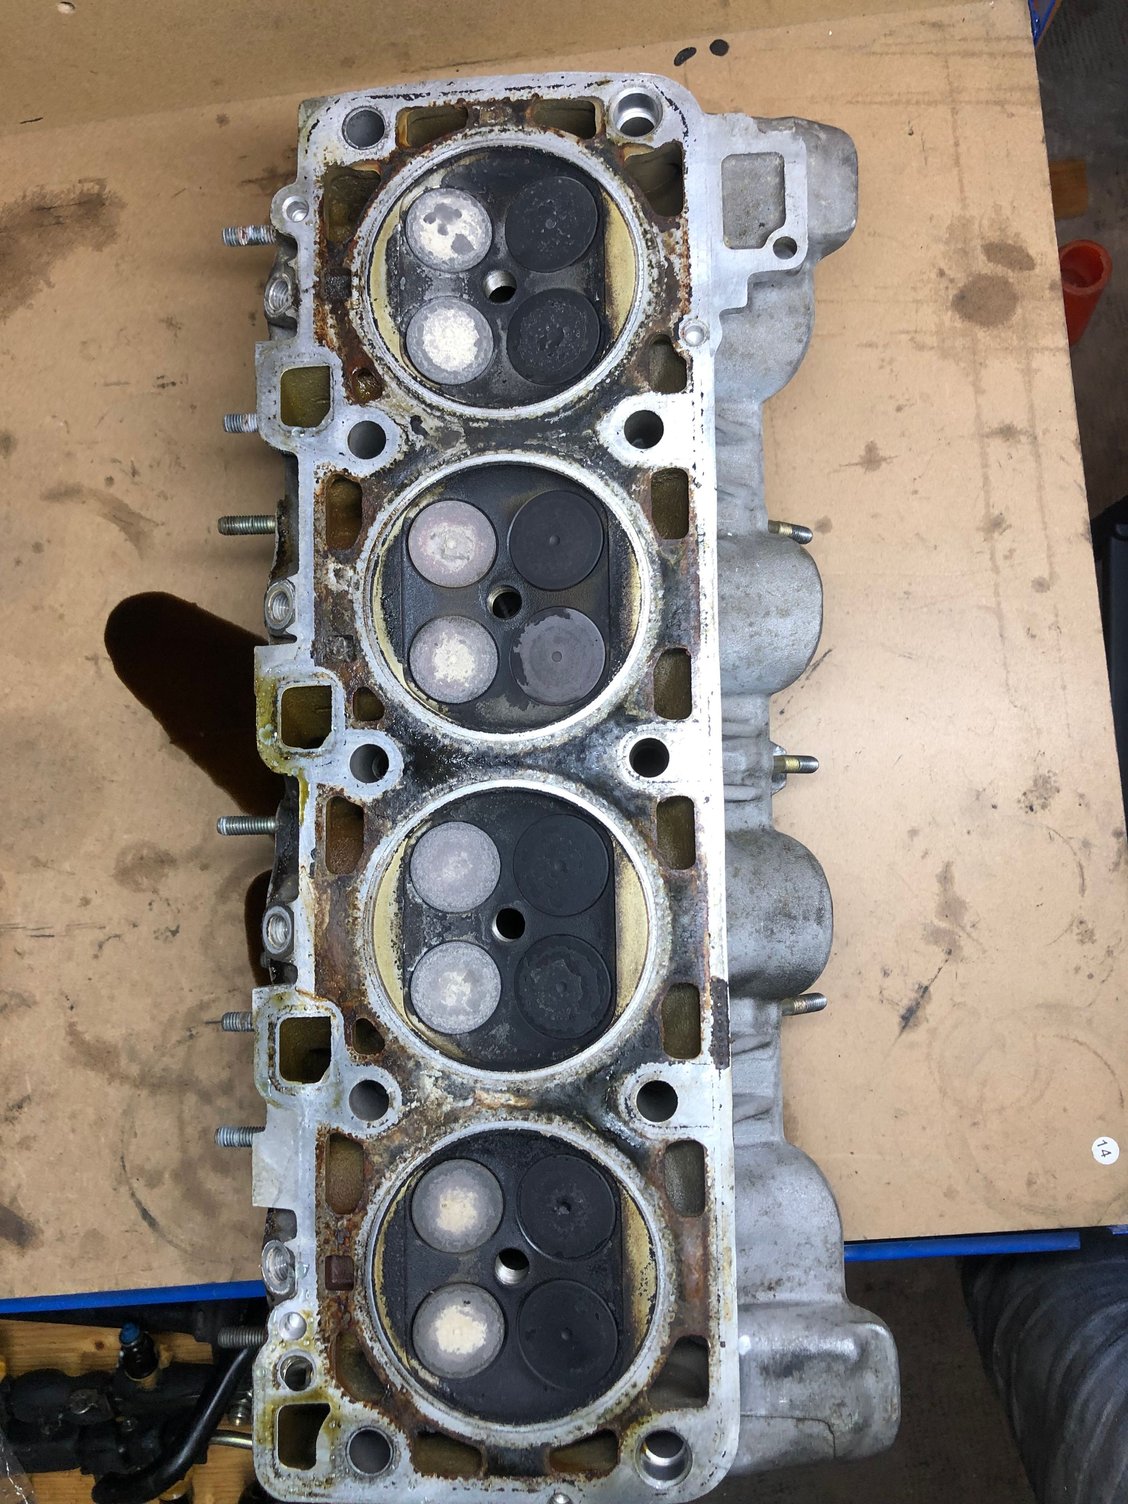
Here is the head 5-8 a little bit cleaned. Corrosion looks to be more extended but maybe not very deep.
I found someone not far away from me that could weld and machine the heads. I will visit them when I will be ready.
For cylinder 4, there is also a strange thing : a part of the top of the cylinder where the piston rings does not goes, is very clean compared to all others.. could be also where water came in?
Something that was strange during disassembly : the head 1-8 was the first I removed. I was wet after that as it was so hard to unscrew the 10 bolts... I had to use a very long extension to succeed to break bolt #1 and I remember how difficult it was to maintain the stand while trying to unscrew it... All where very tight.
For head 1-4, It was much easier... they where tight but I was not exhausted after the removal...
Maybe the 1-4 cylinder head was not tight enough and 3 of 4 of the cylinders were starting to leak? This could also explain why compression where lower than on cylinder 5-8 ;
I like doing thing the best I can but I'm not looking for perfection. I will prefer to keep my block if it is possible. So I will be more than happy if the marks could be acceptable. Looking forward removing the pistons... I don't know then I will have time to do it...
Thank you again for your help.
Have a great day,
Raphael
They will have to remove all of the valves and pieces to weld the head and resurface it. They should preheat the head, before welding, to avoid head warpage.
The exhaust valve guides, at a minimum, will be worn and will need to be replaced.
Have then do a complete valve grind and replace the stem seals on the valves. (Stem seals should come in your gasket set.)


 08-21-2022 | 09:06 PM