When you click on links to various merchants on this site and make a purchase, this can result in this site earning a commission. Affiliate programs and affiliations include, but are not limited to, the eBay Partner Network.
Thank you Jim. I am learning a lot and it's very rewarding when things work out fine. I really do enjoy doing this, but thank god it's not my day job. I would not be able to make money when considering how long I take. Hopefully, things will continue to go well and if not I know this community will help me out if I get into a pickle.
For the WP bolts I was going to use some silver never seize based GB recommendation, I am wondering if some of the PTFE sealer might be something I should consider since I already had a major problem with water getting into the bolt holes, sure don't want that to happen again. What do think about using stainless steel 8.8-grade bolts vs. 10.9-grade yellow plated bolts? I was not able to find any 10.9-grade bolts that are stainless, not sure if they even make them.
The gasket I have is from Elring and is grey. I have some Curil K2 so will definitely apply some on the WP side as you recommended. Initially, I was going to put it on both sides, but sounds like the WP side is only needed? Regarding R12, I did think a lot about it. But since I flushed the system pretty well, I am thinking I just go with 134a and use Ester oil vs. PAG. I really don't know, so many opinions on that subject. I just know it will be nice to be able to get r134a easily in case I have issues.
The problem with corrosion is moisture plus dissimilar metals: Google "galvanic corrosion scale". The farther apart the metals are, the better the battery and the worse for corrosion. Aluminum and zinc (plating) and steel aren't that far apart, while 316 stainless is towards the other end. I would stick with zinc-plated steel, and if GB likes grade 10.9 then there is a reason. The key is keeping moisture away.
Our other passion is offshore sailing (now more inshore...). In that world, standard practice is stainless fasteners installed dry into aluminum masts and then bathed for ten years in seawater. Smart folks sell the boat before the mast needs to be refurbished, but we're not smart. The ONLY thing that works is Tef-Gel, a thick PTFE paste. It is not a sealer in the sense of pipe-sealant, more like an anti-seize, but it is magic stuff for preventing corrosion. I haven't tried it on water-pump fasteners, having gone for the keep-it-dry approach, but I think it might work.
The reason that I only put sealer on the WP-side is that water pumps are usually ready to get tossed by the time belts need changing, and scraping stuck sealer off the block is tedious and fraught with hazard. Faulty logic I know, but that was also the older green gaskets. For the newer gaskets, I would use the Curil K2 on both sides as GB suggested.
First of all many congrats on the approach you have taken to get to where you currently are at. Have not read your thread previously but upon reading it today I noticed something pertaining to the following extract that caught my eye:
"Draining the coolant was probably the messiest part of the project thus far. The car had green coolant which I tested for acidity with some PH strips. Some were worried I might run into head gasket issue if it was acidic due to sitting for as long as the car id. Luckily, it was fine. I will probably replace it with Porsche pink coolant once I flush the system with some distilled water.
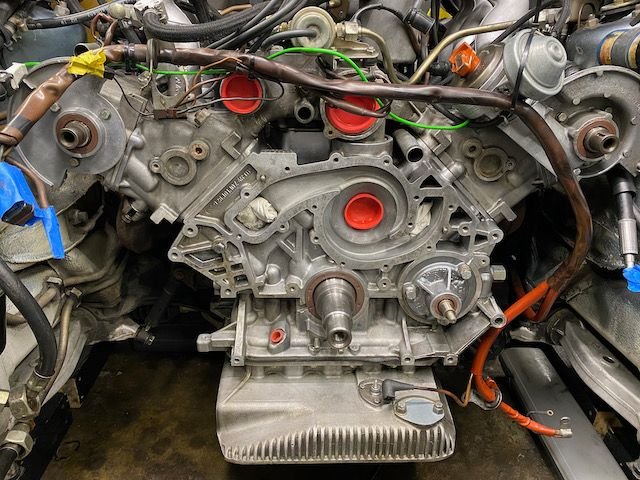
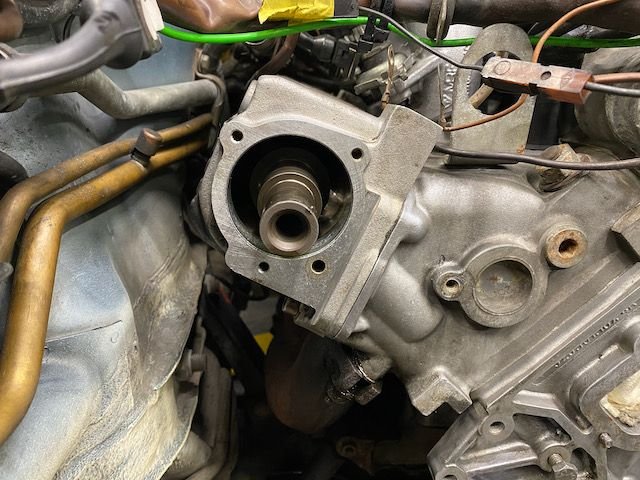
The above perception has a false logic [much as I hesitate to say]. If you take a look at the photo of the engine block where the water pump is mounted you will see that it is in perfect condition. That being the case I am pretty sure that no matter where you look at the engine you will see the same result- this tells one that there has been no general weight loss corrosion due to exposure to hot coolant as it circulates. The problem with ethylene glycol is that it is unstable at temperatures over 50C and that is basically what the additive package does- it prevents the breakdown of the glycol. To stop this breakdown the glycol needs to be alkali and in a nutshell that is what the additive package primarily does [thus the soapy feel it has]. When our engines were built there was only one coolant that was suitable and that was IAT technology [green coolant]. Now take a look at the S4 owners manual and it tells you to use Porsche approved coolants. Then take a look at the GTS maual it advises owners to use "phosphate free" coolants- why? As I can tell phosphates were used to help protect iron blocks and heads from corrosion but the downside was use anything less than distilled water to dilute such and scale forms thus when coolants like G-05 became available about the time the GTS was launched they became vogue. What does the "G" stand for? Glysantin and who owns that name- BASF and where are they based?- why of course in Germany- coincidence?
So, in summary, if you have a green coolant [or any glycol based derivative] as long as the pH is alkali there will be on general weight loss corrosion in your engine. Now the not so good bit. Cylinder head corrosion is not conditional on the quality of the coolant. I have advised the list previously about this. All that can be said with any certinty is that if the coolant is acidic then the head corrosion problem will for sure be exacerbated. However, every example of head corrosion I have seen [directly or indirectly] shows a consistent attribute and that is corrosion on the head surfaces [varying from mild to severe] that can cause a service failure and render the heads useless unless and until repaired. Simuilarly such corroded heads also showe no signs of corrosion in the flow passages exposed to flowing coolant thus the notion that the problem was caused by coolant type is nonsense. Similarly, when this type of problem strikes not only does it attack the heads it also attacks the gaskets and always from the inside surfaces. This type of corrosion attack and the giveaway patterns of the damage without any doubt is a form of corrosion known as "Crevice corrosion". Contrary to what you posted, there is no recognised performance indicator to advise that such is going on- that this attack is what it is is a fact of corrosion engineering- no need for debate about this. The difficult bit is not "what is it" rather it is "what caused it". This is where theory kicks in. The best reason I can theorise is it is caused by user profile. Engines can sit year upon year and show no signs of corrosion and the best explanation for this is that a crevice attack has not initiated so it will not progress. Engines that are used regularly do not appear to exhibit this type of corrosion. What I saw in my part of the world some 16 years ago in short succession were three engines with severe head/gasket corrosion revealed by in-service failure. What had these examples in common?- all three we used sporadically and typically sat for months on end during the hot summer season without being used. What do enthusiast owners in colder climates typically do with these cars?- why of course they let them sit for 3 or 4 months over the winter season.
So, regrettably, the notion that your coolant pH was good whereas it is a valuable performance indicator, in terms of potential head corrosion/gasket attrition it means absolutely nothing sad to say and the only way to determine such is to remove the heads and inspect. Good time to check the valve and replace the stem seals as I did 16 years ago.
Time for an update. It's been slow progress, but things have been going well. Since my last post, I have accomplished a few more items and most importantly addressed the broken water pump bolts. Those were giving me the biggest headache, but I am glad to report I have overcome the challenge. Here are some of the items addressed since my last check-in.
Cleaned the heck out of the engine
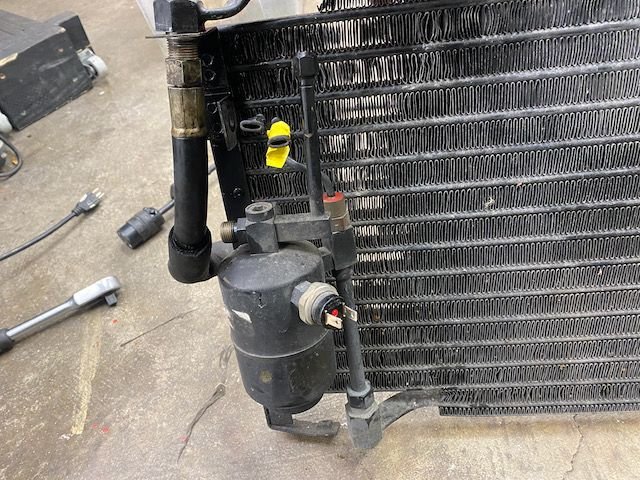
Removed radiator and condenser and flushed them.
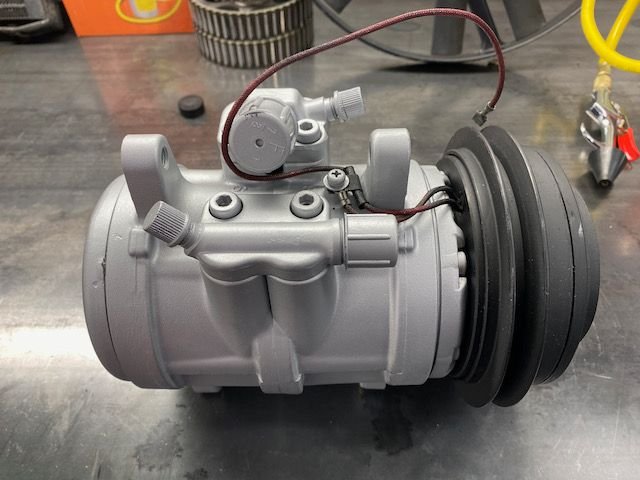
Removed AC compressor and sent it out to get refurbished.
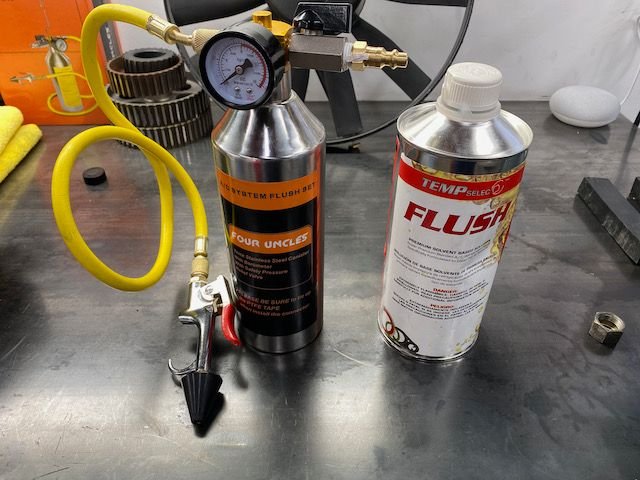
Removed expansion valve and flushed all the AC lines, condenser, evaporate to prep for R134a conversion
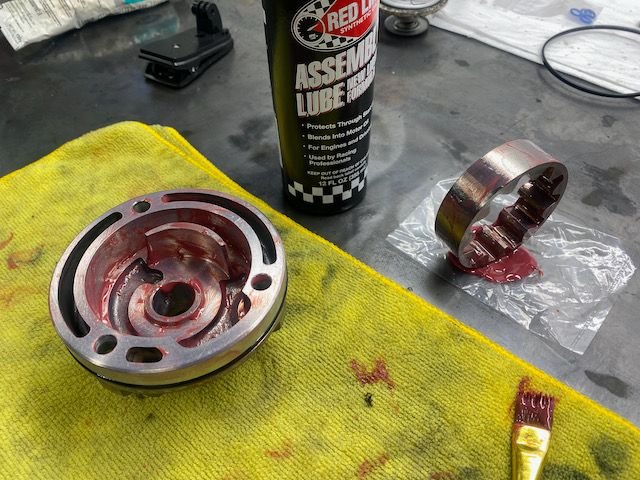
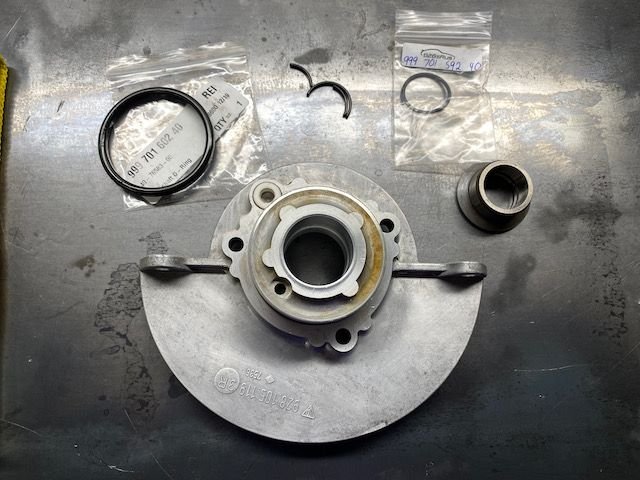
Removed oil pump and replaced seals and o-rings
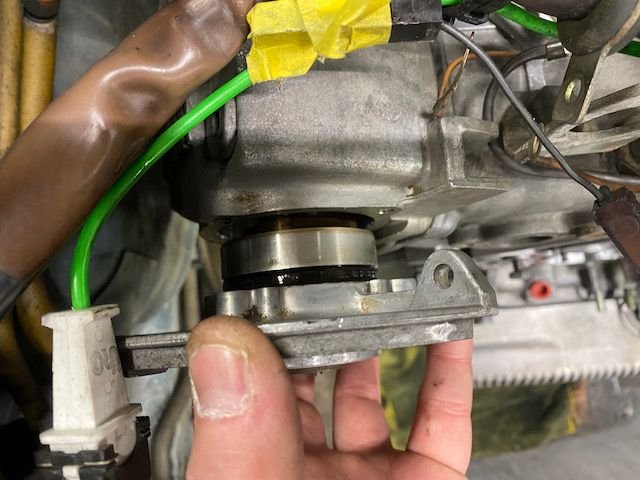
Replaced sealing ring on the distributor shaft
Replaced o-rings/seal behind cam tower total of 3
Replaced crank and camshaft seals.
Replaced oil level sender gasket
Replaced high-pressure power steering hose from the reservoir to rack
Did I mentioned I cleaned the heck out of everything
Drilled out broken water pump bolts and addressed with Time Sert kit. The biggest win and success thus far, my anxiety is over
Here are a bunch of pictures of the progress. Thanks again for everything that has helped me thus far.
Before cleaning
After some cleaning
Removed the condenser and flushed the system with an amazon flush kit I purchased.
Refurbished compressor, cleaned and tested and ready for 134a conversion
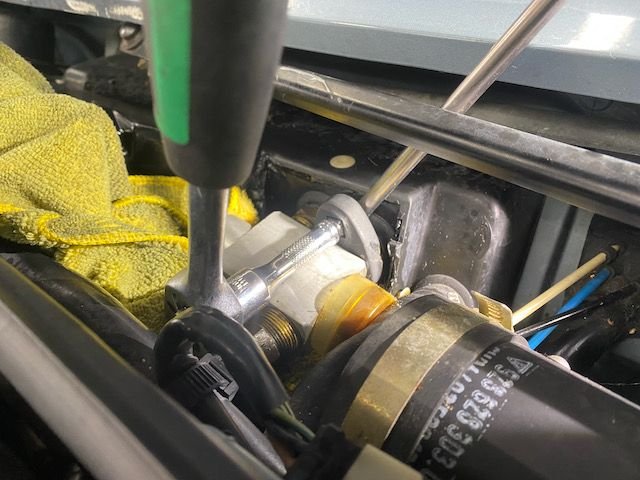
Here I am removign the expansion value. I found that using a flare nut crowfoot worked well without messing up the nut.
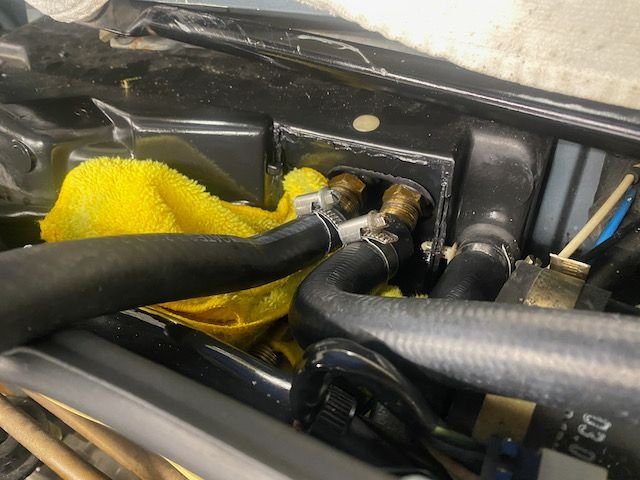
Connected hose to properly flush out the old oil
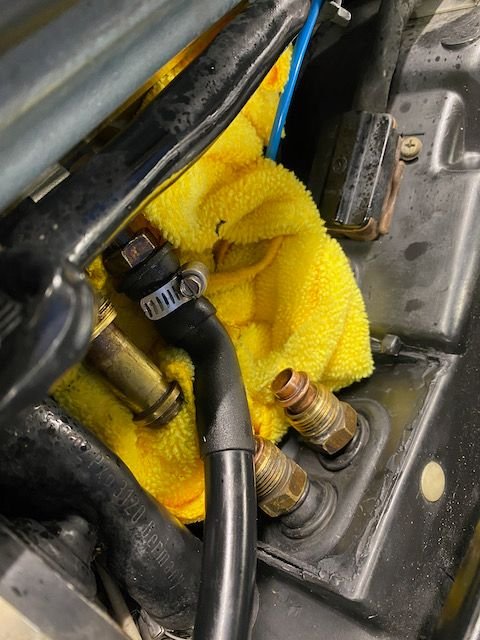
Same for the lines going to the evaporator. I used a 5/8 hose and slighly tightened them with some hose claims.
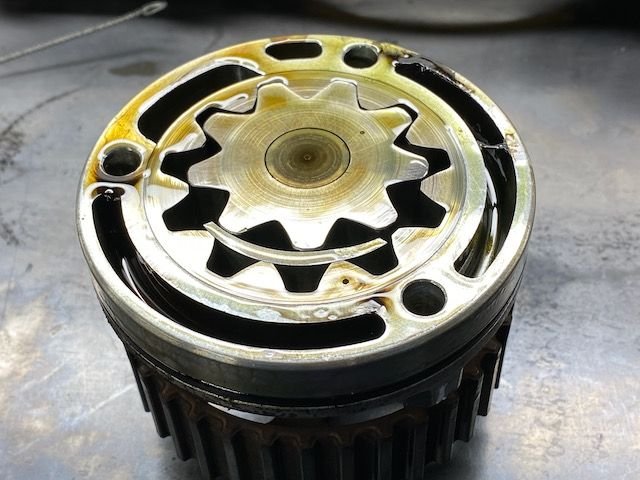
Oil pump removed, ready for new seals and o-rings
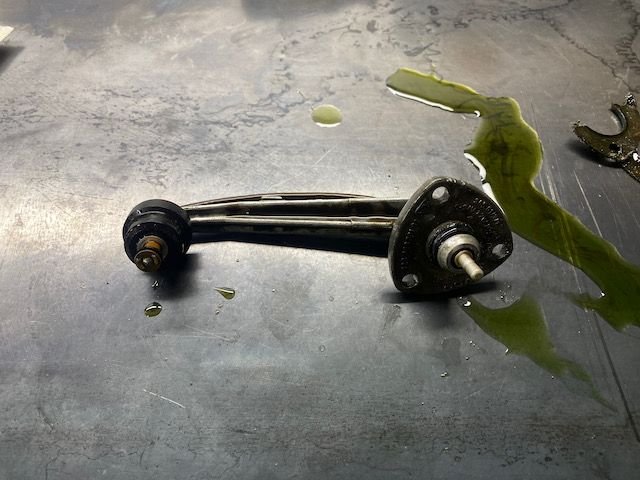
Here is the dsitributor shaft, as you can see, i had some leaks. Hopefully the new sealing ring will address this problem.
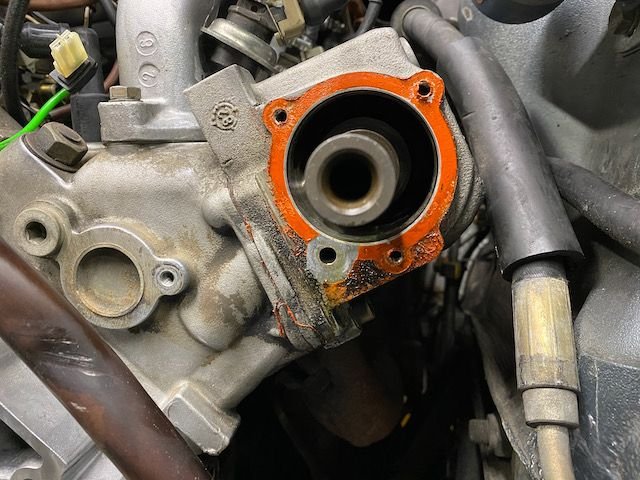
Cam tower flange removed to address the leak i had from behind. Their were a total of 3 seals to replace.
Here is shot of the driver side camshaft flange/tower whatever you call it. Looks like someone tried to use some sealant to prevent it from leaking. I put mine back on dry after I replaced the 3 seals/o-rings
All cleaned up
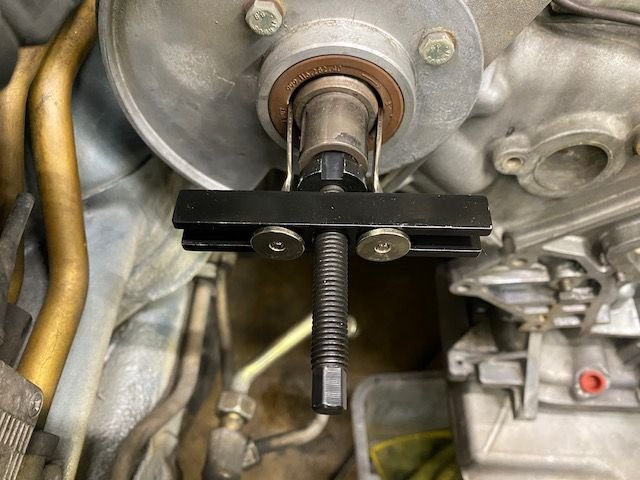
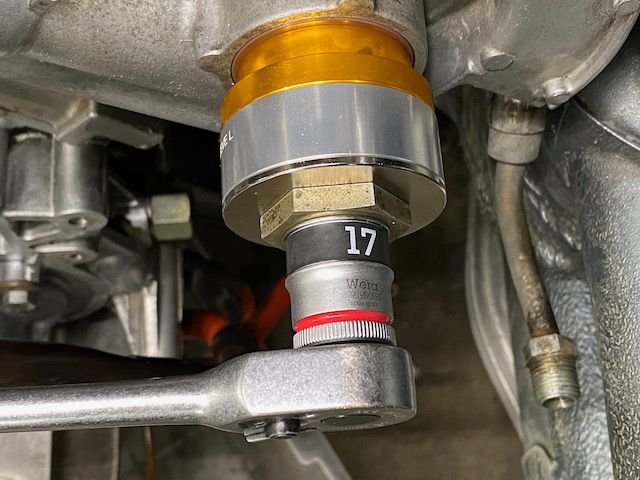
Bought myself a new tool to remove and replace the cam seals. Unfortunately, it was not big enough to remove the crankshaft seal. I had to improvise there.
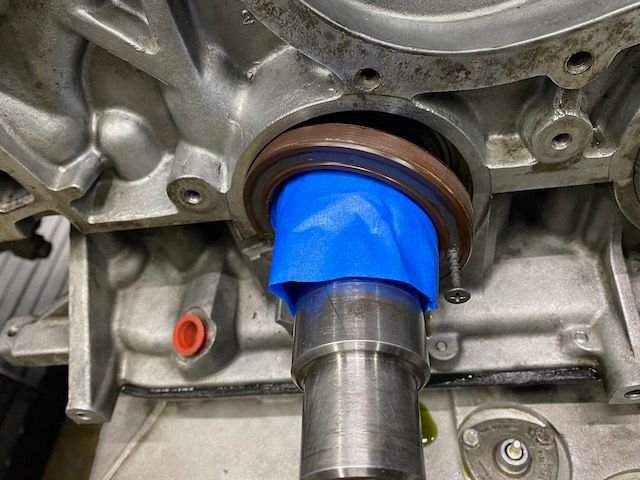
Wasn't having any luck removing the crank seal from the slot on the left. It was in there pretty good. So I just decided to carefully drill a hole and used a drywall screw to pry it out.
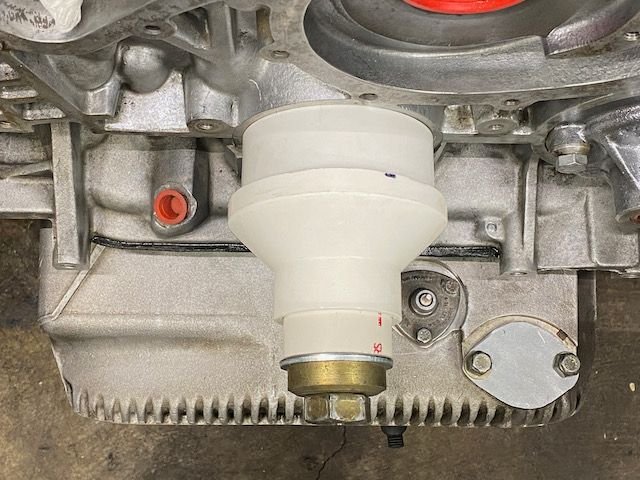
Here is how in made sure I pushed the crankseal back in straight. Got the idea from someone else here on the forum. Don't recall of the top of my head who it was but thanks for the idea.
Oil lever sender, replaced the sealer underneath it
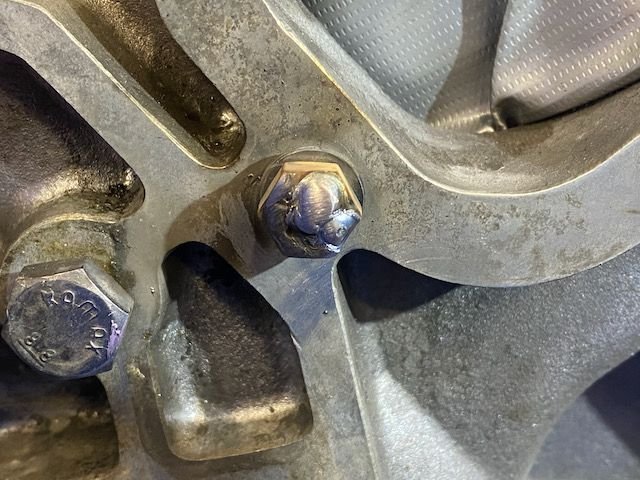
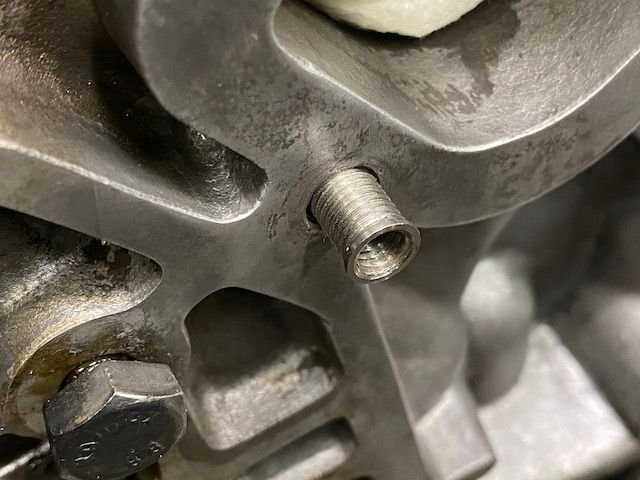
So here was one of my attempts to remvoe the broken water pump bolt. After I PB blasted the heck out of the studs for several days I first tried to heat up the block and use a pair of plier to manually extract the bolt. Unfornately, that did not work. I then thought I would just weld a nut to it, give it some heat and extract it that way. Again, that did not work. The weld held up good, but ended up just breaking the remaing stud off. Go figure.
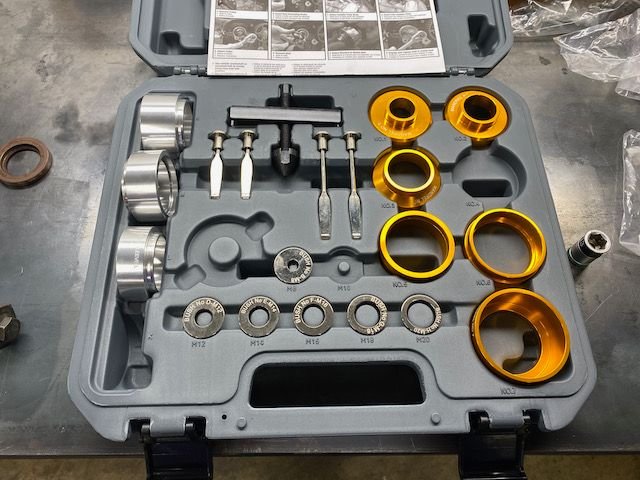
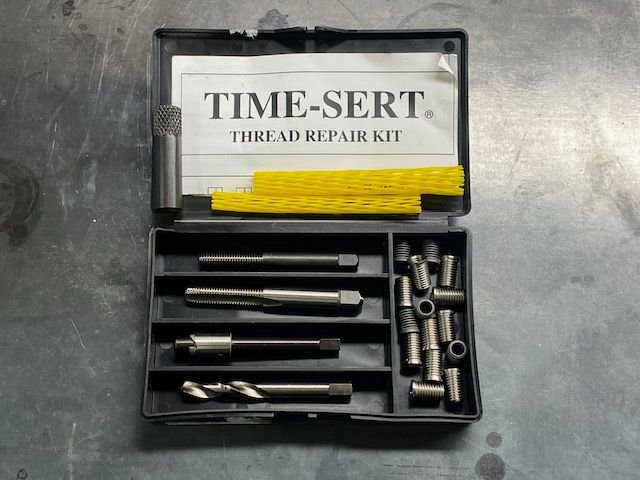
This was the tool that came to the rescue. I had not heard of Time Sert before I did a bunch or research. I was familiar with Heli Coil but quickly realized this would be the better way to go. Anyway, patience was the key and it all ended up working out just fine.
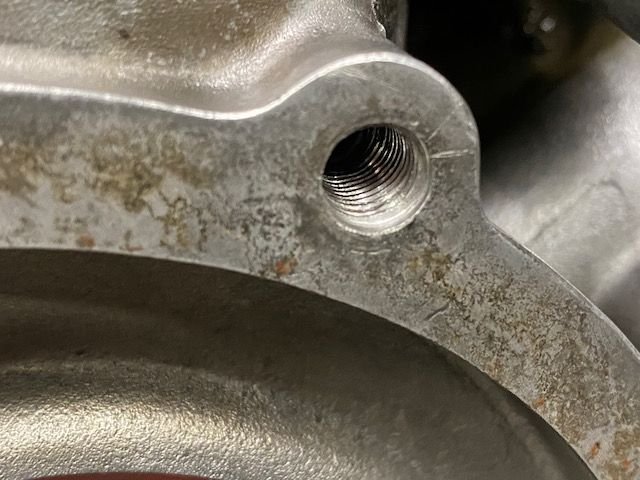
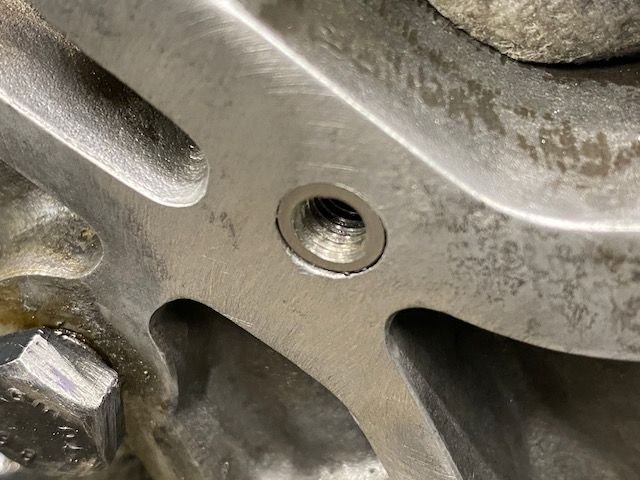
All drilled out and tapped for Time Sert insert
I pre-drilled a hole before I went in with the correct size. Glad I got it centered pretty well.
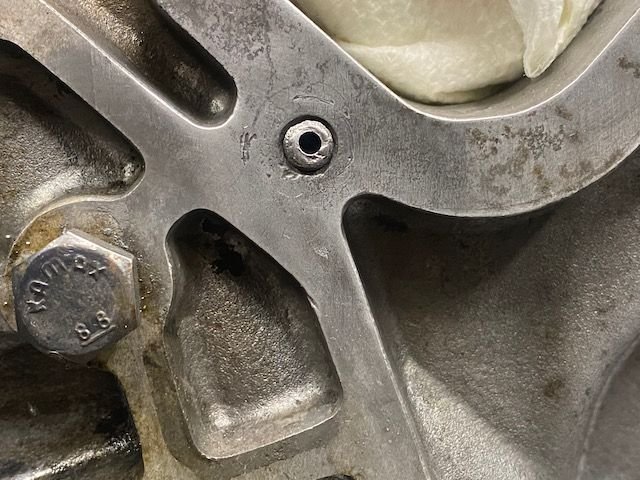
Time sert insert
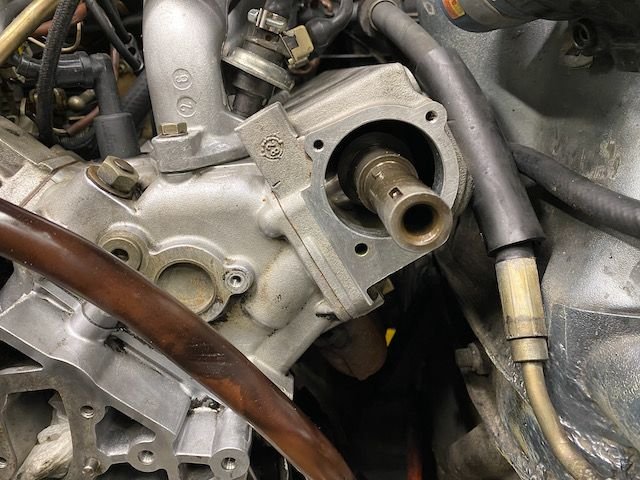
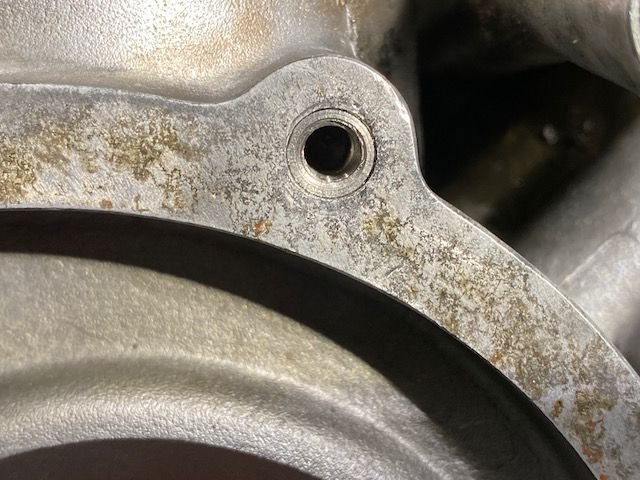
Looks pretty good to me. This was the lower bolt hole
here is the one on the top of the water pump. I am so happy this worked out well.
Next on the list is starting to put everhing back together. Wish me luck. I will provide more updates later and if you like you can follow me on youtube. Having a little fund documenting this process.
The problem with corrosion is moisture plus dissimilar metals: Google "galvanic corrosion scale". ,
Thanks Jim for the additional insight and info. I will have to google galvanic corrosion scale.
Originally Posted by FredR
Robert,
First of all many congrats on the approach you have taken to get to where you currently are at. Have not read your thread previously but upon reading it today I noticed something pertaining to the following extract that caught my eye:
.
Thank you Fred, I really appreciate you taking the time to write up your thought and educating me on coolant, You learn something new every day. So thank you, I really value that. Head gasket failure is a huge concern for me. I did notice a bit of smoke when I first started the car and a few times afterwards that caused me to worry a little bit. It could just be old oil burning off, so the car might just need an Italian tune-up. I will keep my fingers crossed until I can really take the car for a good drive, hopefully, head gaskets are good.
Originally Posted by buccicone
What is the size of the Time Sert kit? 6m X 1.0 or 1.25?
This is the kit I used. I also bought stainless steel insert vs. the ones that came with it. Plus I bought a guide.
I somehow missed this thread until now. Good job, Robert! These L-jet cars are some of the best of the 928 series -- they're lighter and more tossable than the later cars, the L-jet systems last forever and are nearly bulletproof, they have a lot of low-end torque and great fuel economy, and are overall simpler (thus more reliable) in many respects than both what came before and went after. I drove my trusty '83 for decades, spent the last couple of years doing a restoration including a lot of the same work as you're doing now, and the car is ready for years more operation. Here's my thread: https://rennlist.com/forums/928-foru...oses-83-a.html
Before you button everything up on the front of the engine, consider replacing that still-looks-to-be-original wiring harness that drapes across the front of the engine and goes to the starter. That harness gets baked from the heat of the engine and tends to break down earlier than the other harnesses from some combination of heat, oil, and corrosion. The original is NLA for many model years, but consider obtaining a replacement harness available through Roger at 928sRUs. I have one on my car and think it's better in almost every respect than the original.
Three more WYAIT: I may have missed it, but you should also replace the rear cam tower seals (that go at the rear edge of the heads). Roger has silicon seals which are far superior to the original paper gaskets. Definitely consider having your injectors cleaned and flow-tested at a place like Witch Hunter (and while you're there replace the seals and the eight short tubes, all available as a kit from Roger again). And finally, if your underhood fuel hoses are still original, those should definitely be replaced. Roger sells both the small sections of hose clamped on at the regulators as well as the NLA fuel hoses that connect at the firewall. On those, you send him your old hoses with fittings and he puts on modern hose on your fittings, so it ends up looking completely original (and, especially for a car like yours which is unmolested and still appears totally original, that's something worth putting in an effort to keep).
Keep at it step by step -- you're nearly there! Looking great!
Thanks Jim for the additional insight and info. I will have to google galvanic corrosion scale.
Thank you Fred, I really appreciate you taking the time to write up your thought and educating me on coolant, You learn something new every day. So thank you, I really value that. Head gasket failure is a huge concern for me. I did notice a bit of smoke when I first started the car and a few times afterwards that caused me to worry a little bit. It could just be old oil burning off, so the car might just need an Italian tune-up. I will keep my fingers crossed until I can really take the car for a good drive, hopefully, head gaskets are good.
This is the kit I used. I also bought stainless steel insert vs. the ones that came with it. Plus I bought a guide.
I got those 3 pieces for the Time Sert today. Did the broken bolt. Took my time following the directions and an online video. Used the stainless steel 12mm. Took a little over an hour.
I got those 3 pieces for the Time Sert today. Did the broken bolt. Took my time following the directions and an online video. Used the stainless steel 12mm. Took a little over an hour.
Well done, I know how happy you are right now. Feels good, doesn't it? One less headache.
Well done, I know how happy you are right now. Feels good, doesn't it? One less headache.
Exactly right. The last couple W/P jobs have been miserable with rusted crusty bolts. I was determined to get these fixed right and for future including my own 3.
When you repaired the broken studs one presumes you had to drill out the stud given you had to use the timesert approach but as a matter of interest did you have any damaged bolts such that you were able to remove the shaft intact by any chance once the pump was removed?
One presumes that the bolts sheared because corrosion had in effect locked them in place and to corrode, the coolant presumably must have got past the gasket. Different approaches to stop this problem have been covered already
I had 2 bolts the broke off. Before I went the time sert way I tried the following to remove the remaining stud that was still sticking out. Nothing worked, they were corroded so bad, drilling and time sert seemed the only way to go.
PB plastered the remaining stud for a few days
After that, I tried to heat the block around the bolts and use a pair of pliers to try to remove it by hand. That didn't work. To be honest, I could get the block or even the bolt hot enough. It seems the heat was dissipating into the block so fast that it never really got hot.
Next, I welded a nut to the remaining stud in hopes that I could just unscrew it. Again that did not work and I snapped the remaining stud sticking out right off. The weld held up good, but maybe the heat from the welder softener the bolt too much that even trying really carefully to rock the bolt back and forth just broke it.
I played around trying to use an extracting tool next but figured since I had little luck with the above steps, it would probably not be a good idea. The last thing I wanted to do is break the extraction tool in the block. Those are made out of hard steel and if I needed to drill those out, I would be really screwed. Ask me how I know?
That being said, I went ahead and drilled out the bolt and use the time sert.

 03-03-2021, 01:27 AM
 Hopefully, things will continue to go well and if not I know this community will help me out if I get into a pickle.