When you click on links to various merchants on this site and make a purchase, this can result in this site earning a commission. Affiliate programs and affiliations include, but are not limited to, the eBay Partner Network.
I finally found the time to continue working on my 928. I posted a few months back and introduce myself/car and shared my experience of buying my first 928. Check out my post here if you want to get caught up on my journey. I have not had a chance to work on the car in a few months due to life and other maintenance items on some of the other cars I own. During my downtime I did some research and mentally prepared myself for the timing belt job and the rest of the while you are in there stuff. Although I got the car running, I did not drive it as I did not feel comfortable not knowing the condition of the timing belt. I am glad I made that decision, more to come on that later.
I also own a 944 and have done the timing belt on that car so I figured it can�t be that much more difficult, we shall see. These jobs scare me a bit but on the other hand, but it also gives me the opportunity to get intimate and learn more about these cars. I guess that is part of my passion and good therapy for me. In addition, I get the let my OCD kick in and clean everything which otherwise probably wouldn�t get done.
After some research here and there the following write-ups/posts gave me the courage to attempt this job myself. So thank you Douglas, Dwayne, Theo, Fred, and all you guys that are chiming in on RL. Also a big shout out to the Guys with Rides YouTube channel. Great timing for your videos. Without this community, I would NEVER try this stuff on my own.
Here is some of the information I used to get going. My car is a 16 valve no interference engine so I used bits and pieces from some of the information out there on the 32V engine which are better document on the net.
I am going to try to share my progress, experience, and ask questions on this forum as I work my thought this project. Would love for you guys to chime in and provide suggestion and advise whenever you can. This will be a several weeks project which is fine since I am not in a hurry. So let�s get started
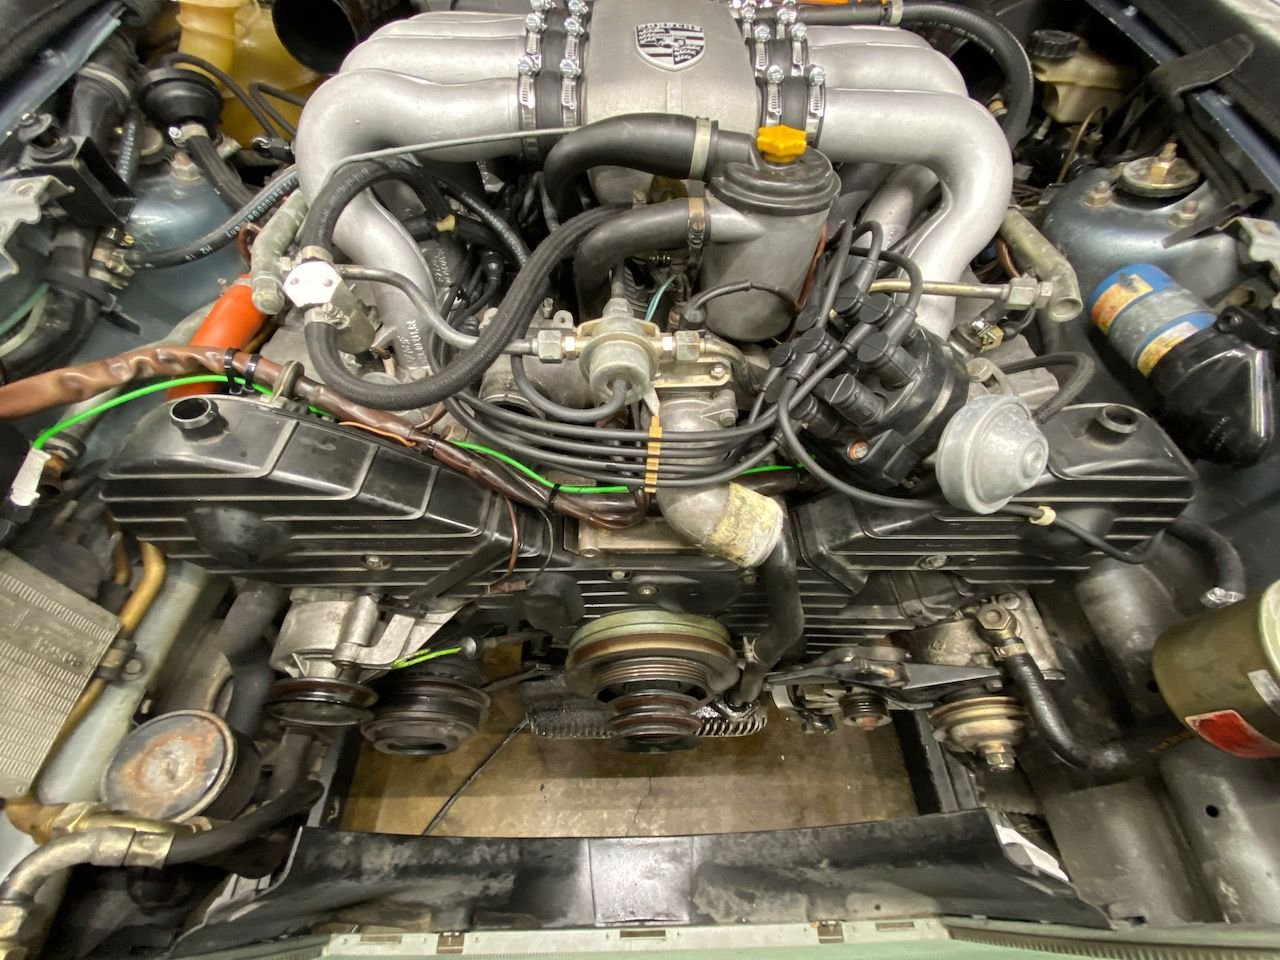
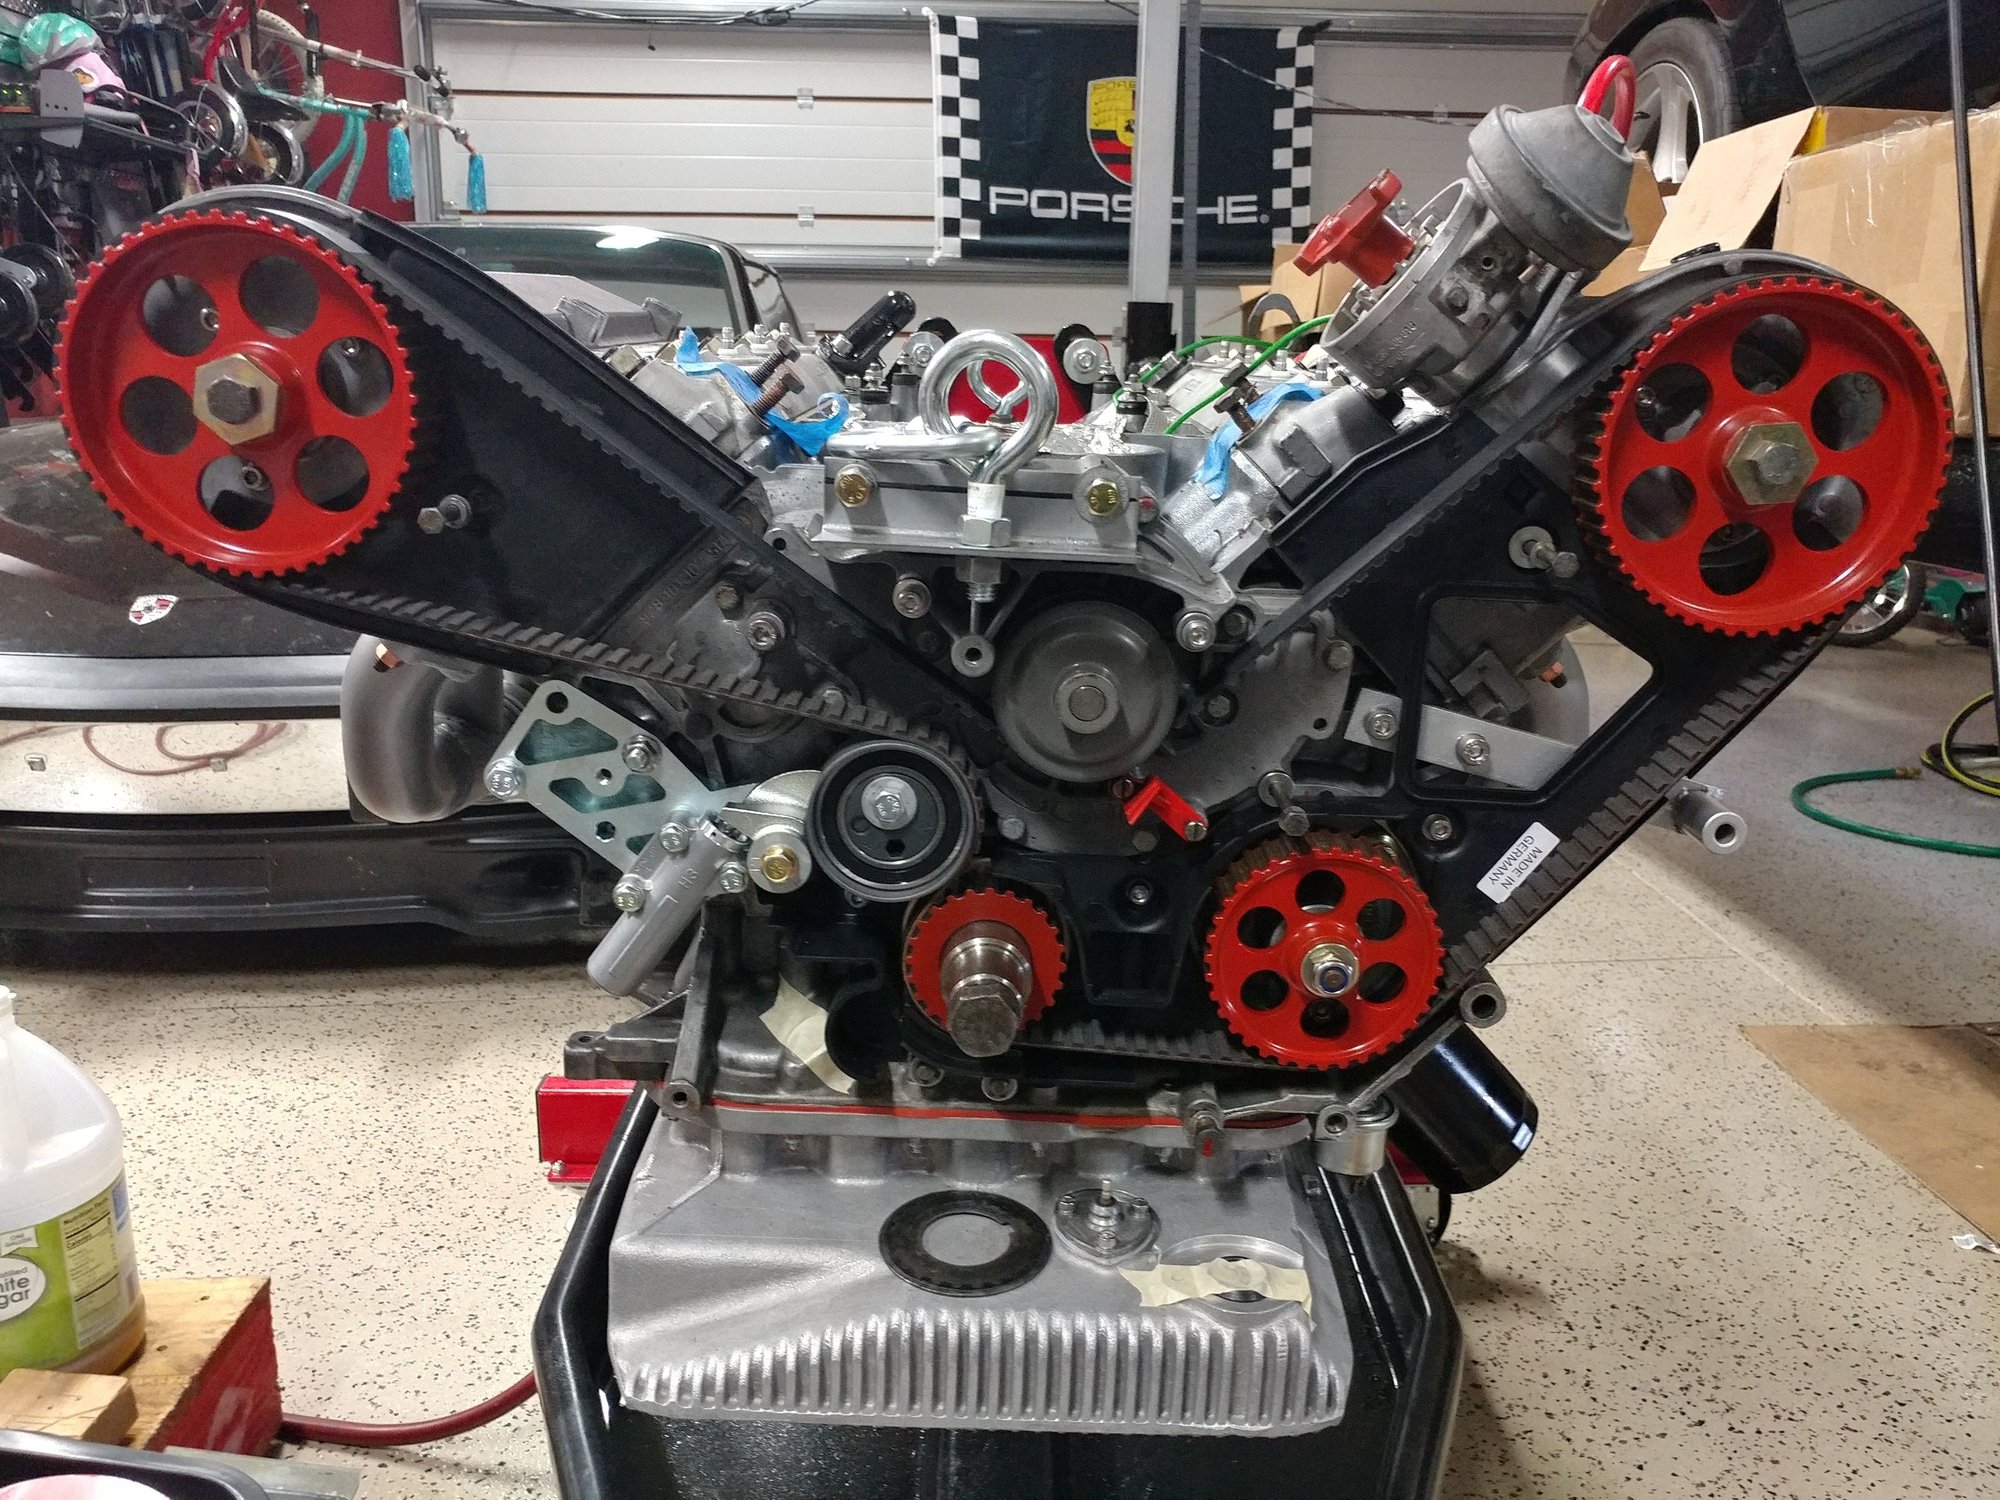
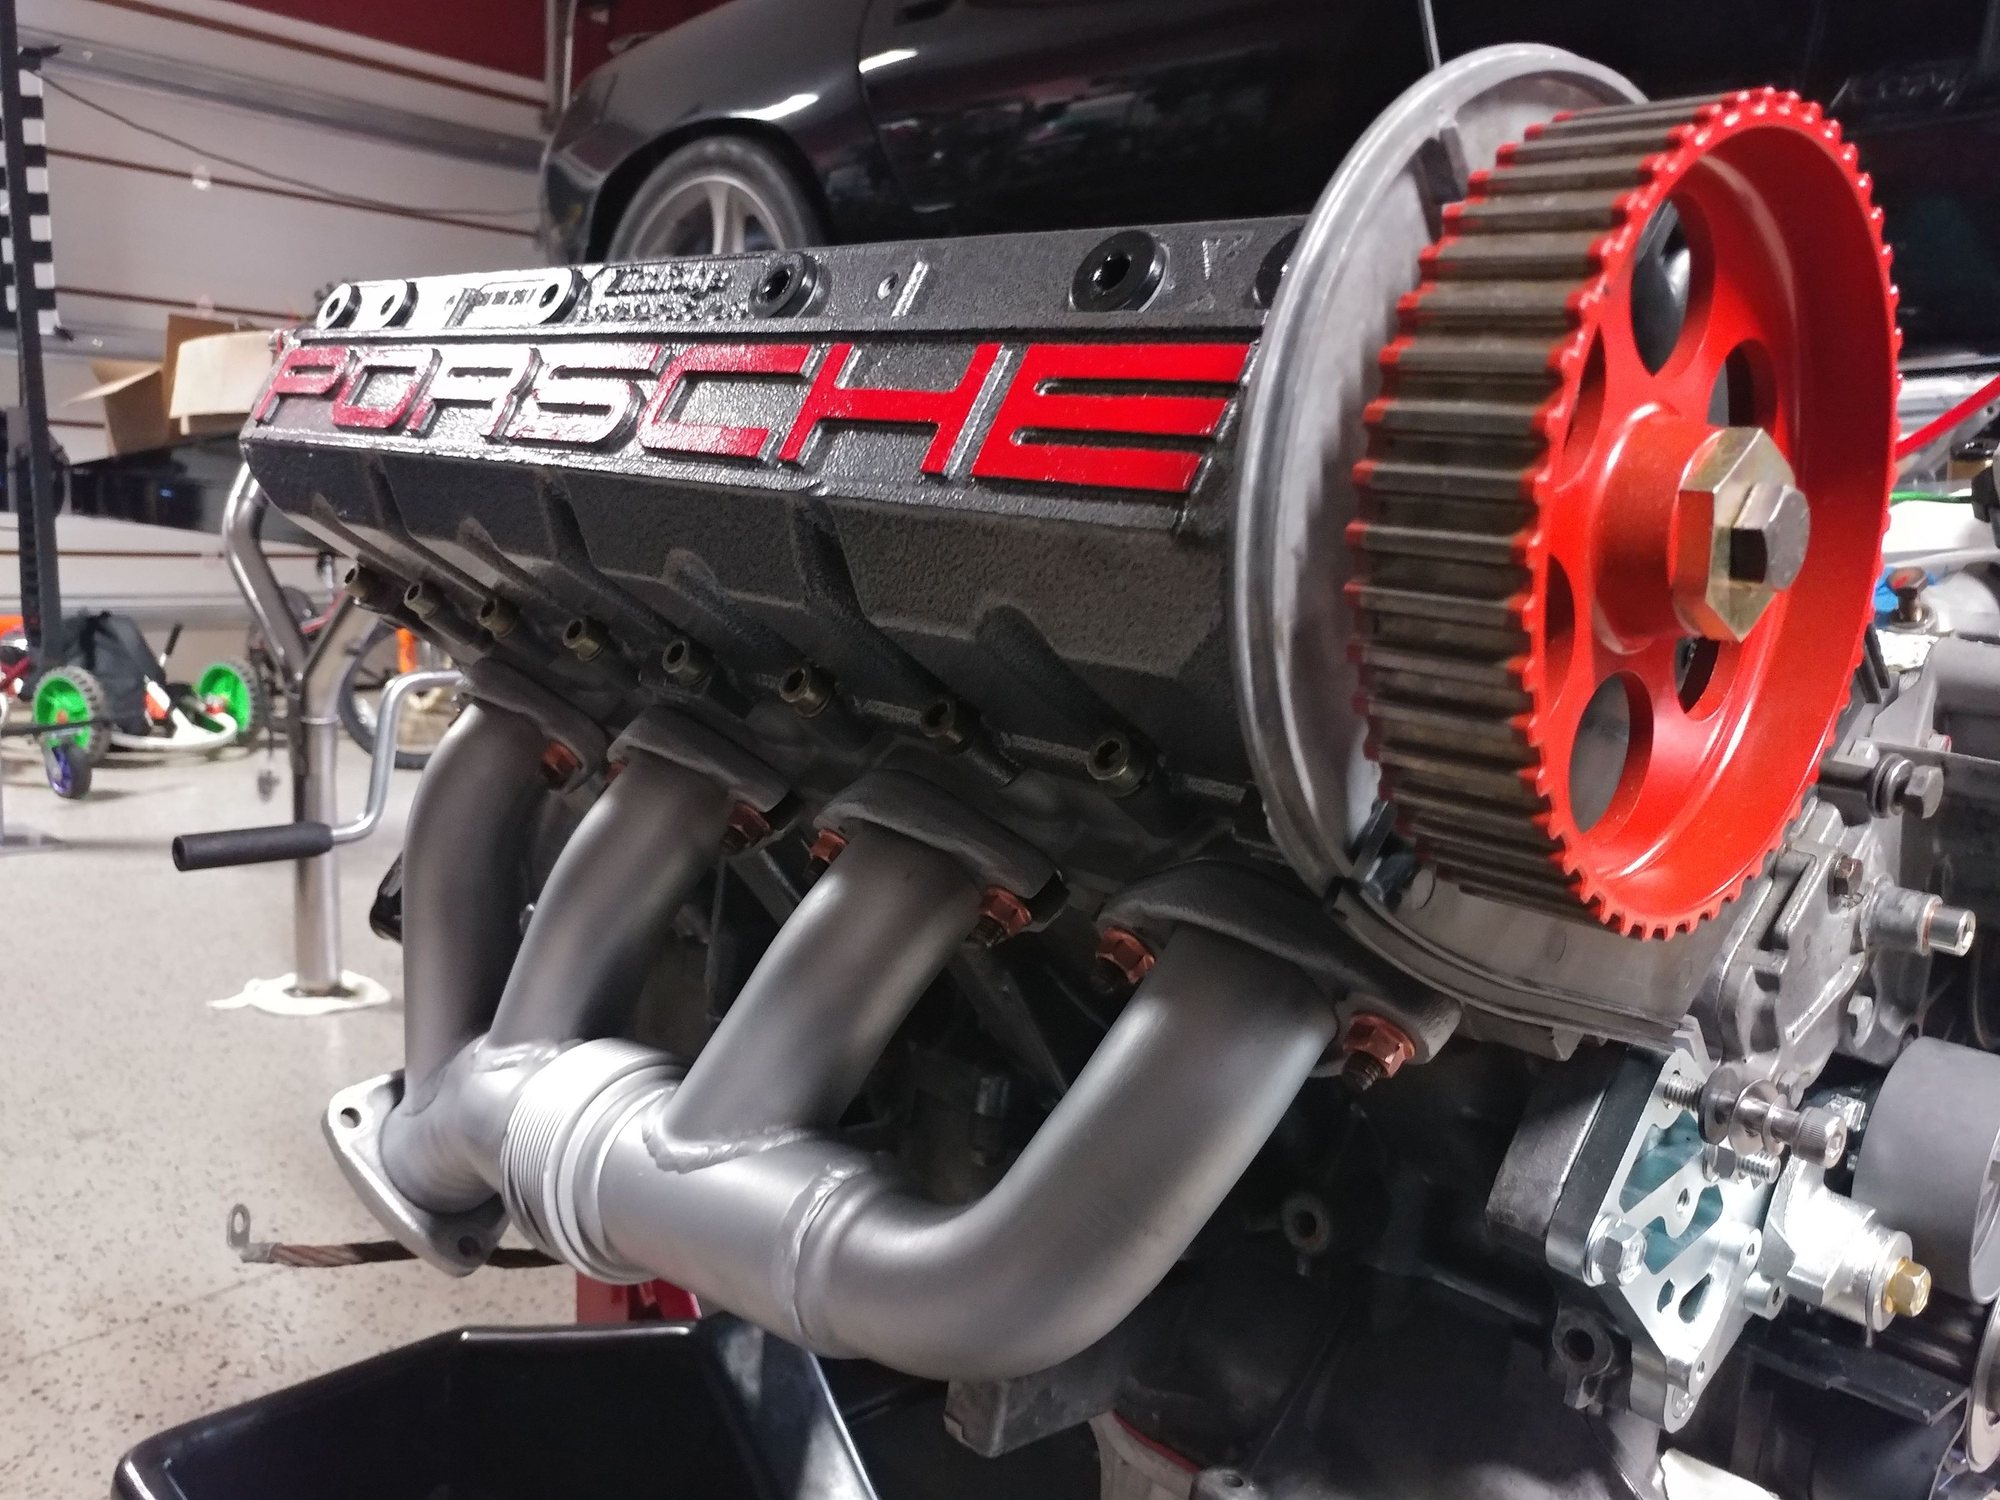
What she looked like before I got started.
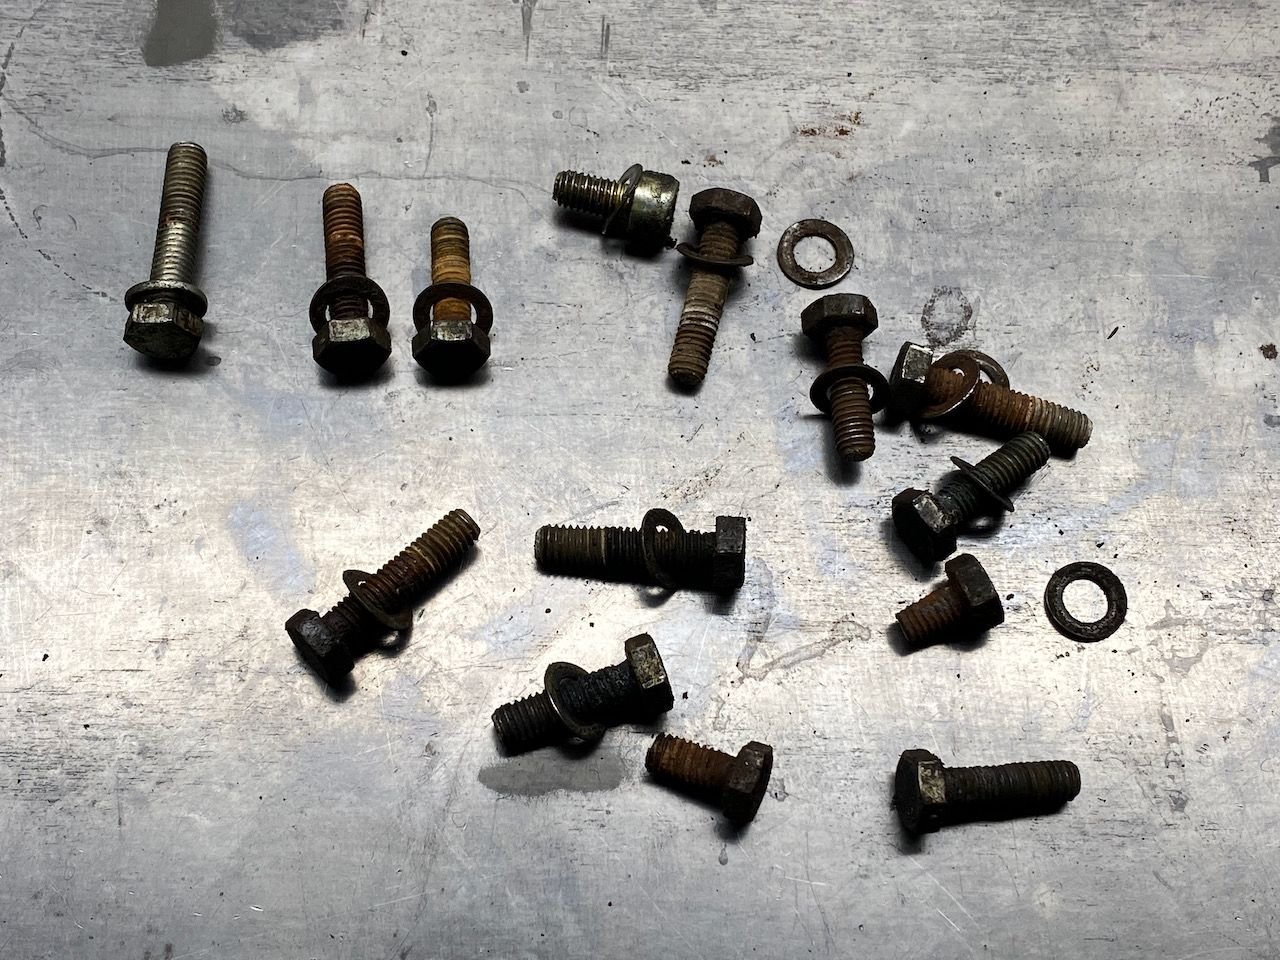
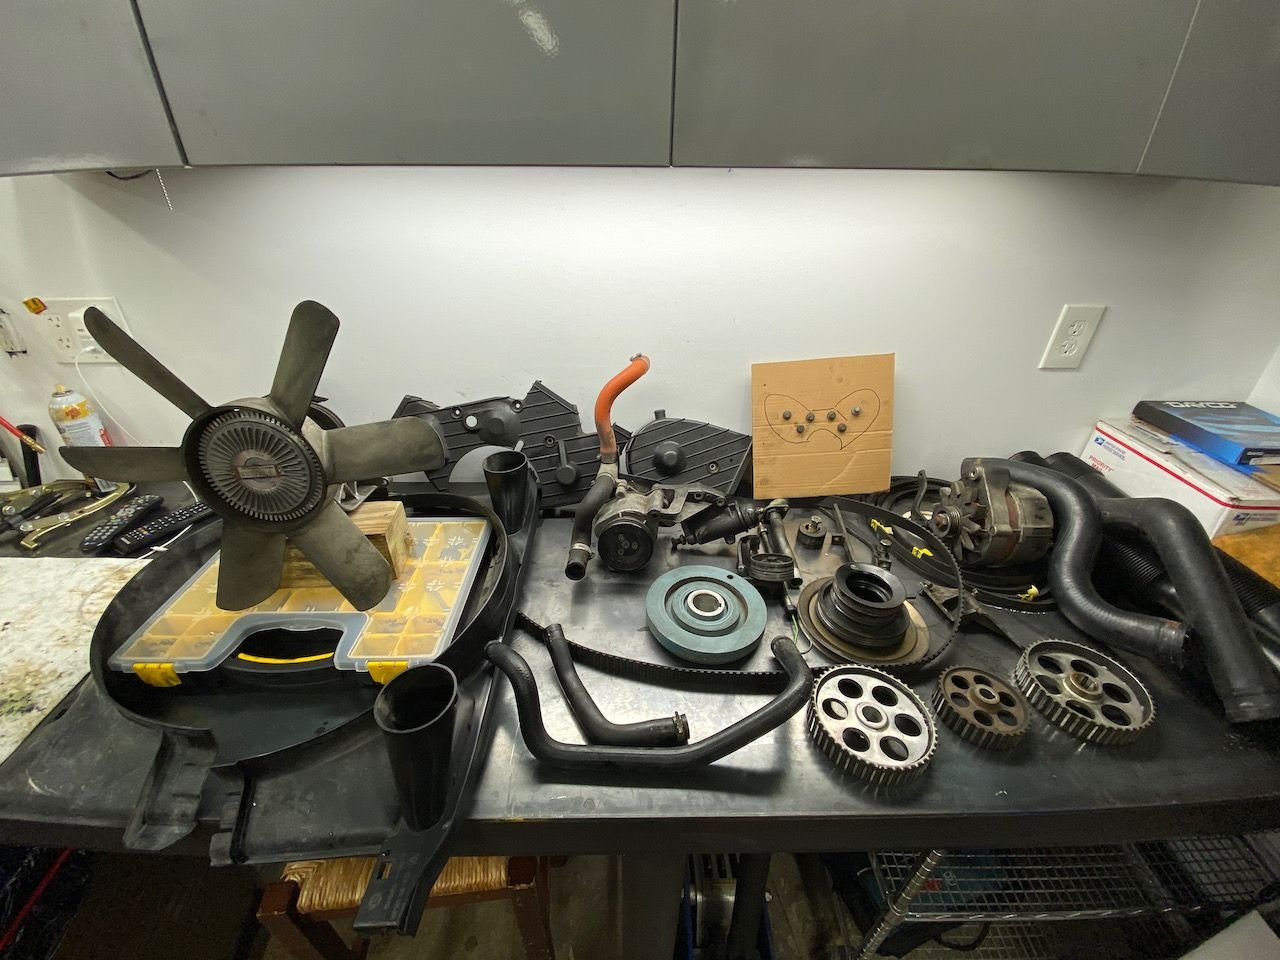
What I have removed thus far. I did not run into any major issues with taking it apart, knock on wood. The car definitely has some major oil leaks. Where all the leaks are coming from is yet to be determined, one thing is for sure, the OEM tensioner was leaking and the oil pan gasket. The oil pump and camshaft seals seem to be fine. But will replace them anyway.
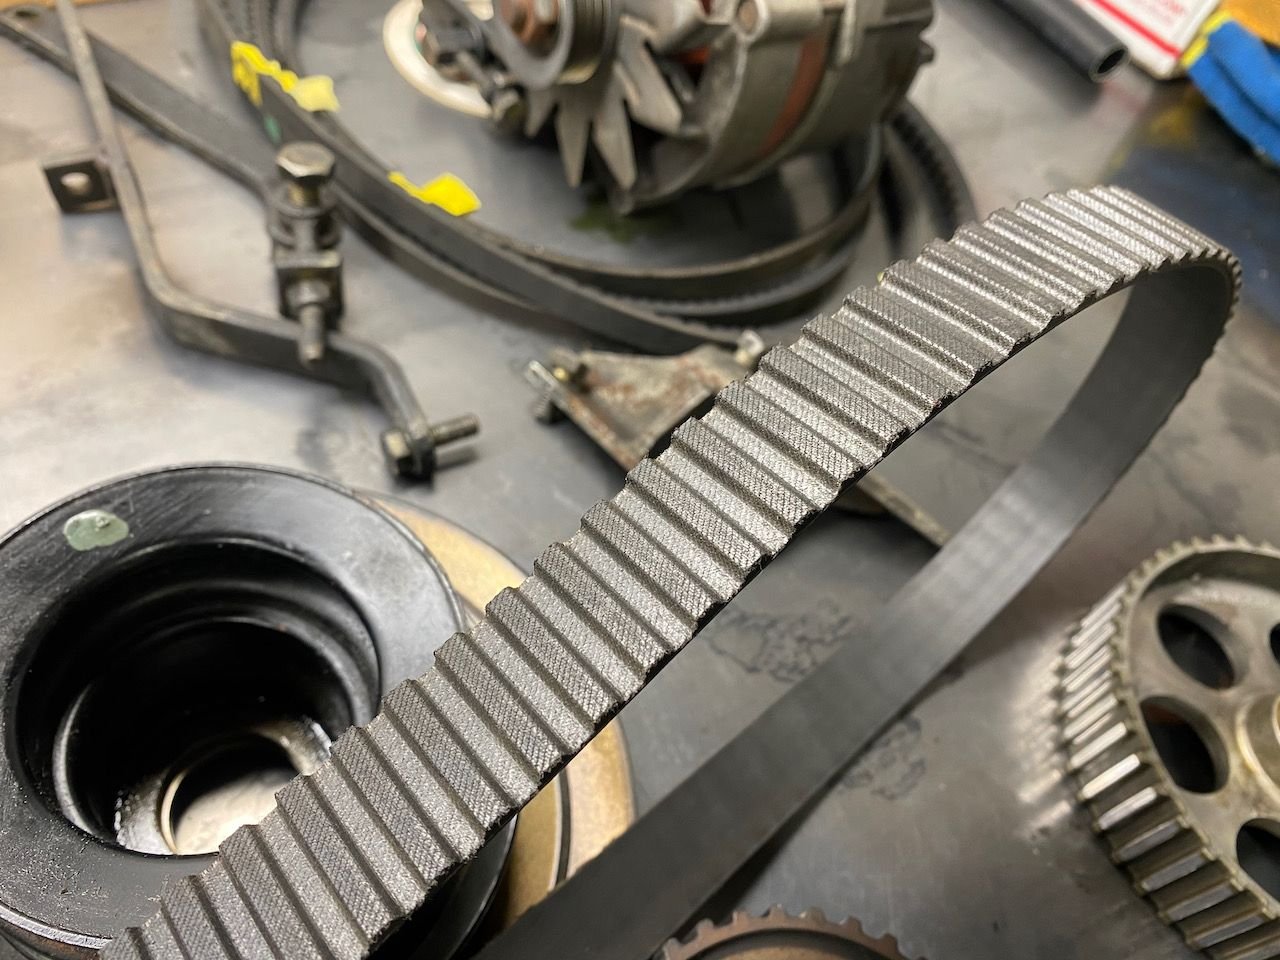
Let�s get the bad news out of the way first. Once I took the Cam gear cover off I noticed that the belt was very loose, even worse once I had a chance to set the crank to OT, I noticed that the belt skipped by one notch. I know�. ouch, not what I was hoping to see. I know my car is a non-interference motor so the I don�t think the valves can bent, regardless this concerns me. I have no idea how much the previous owner drove the car this way and the more I think about it, the whole timing belt and all the other leaks were probably the reason the car was retired 12 years ago. My guess, the previous owner didn�t have the cash to address this and just retired the car. Looks like it only skipped by one notch. The belt looked fine, no cracks or anything.
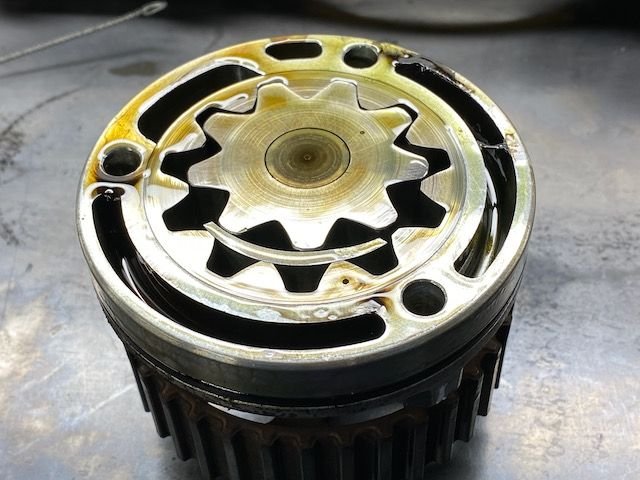
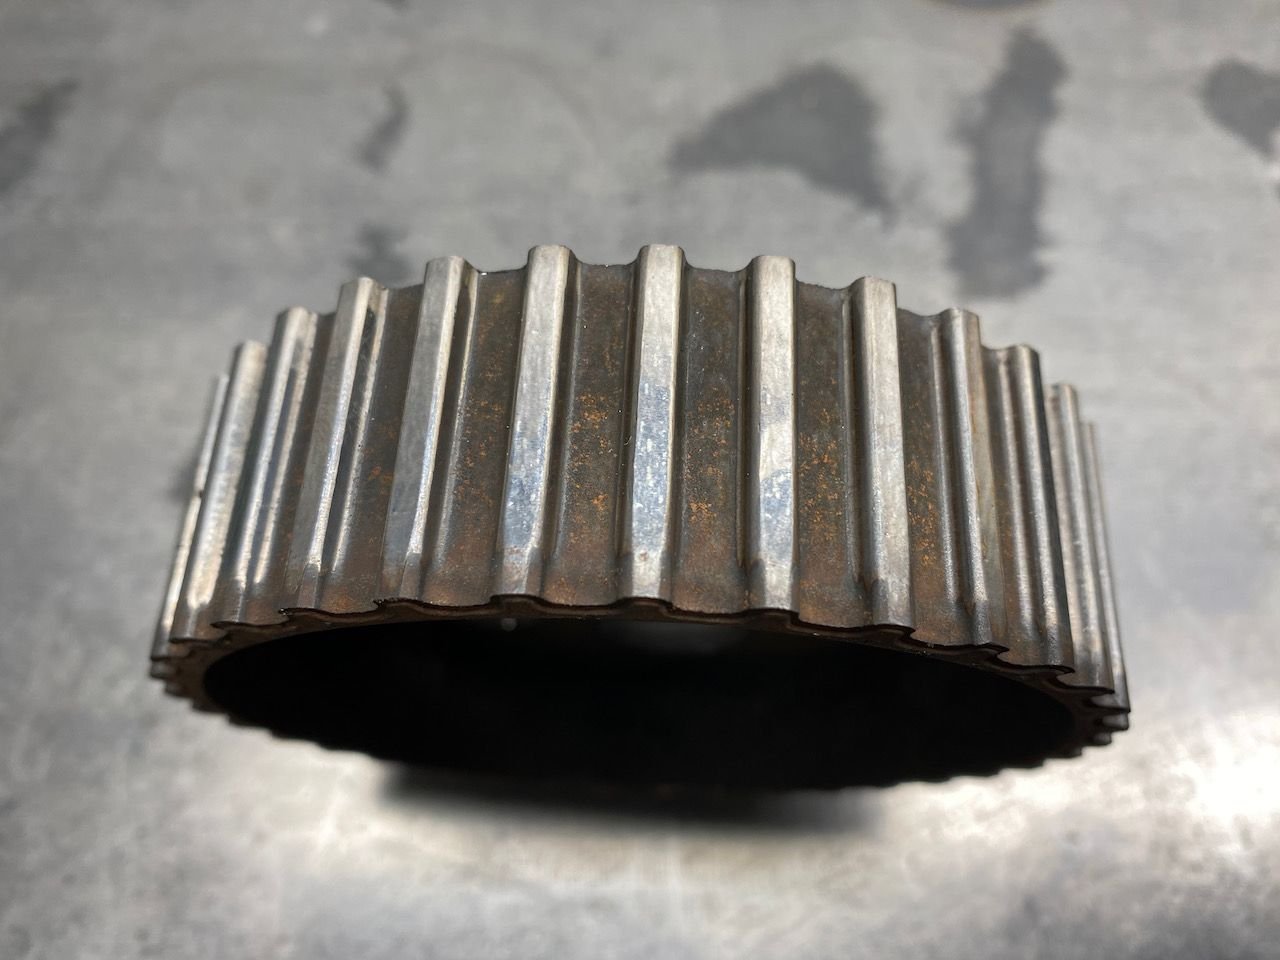
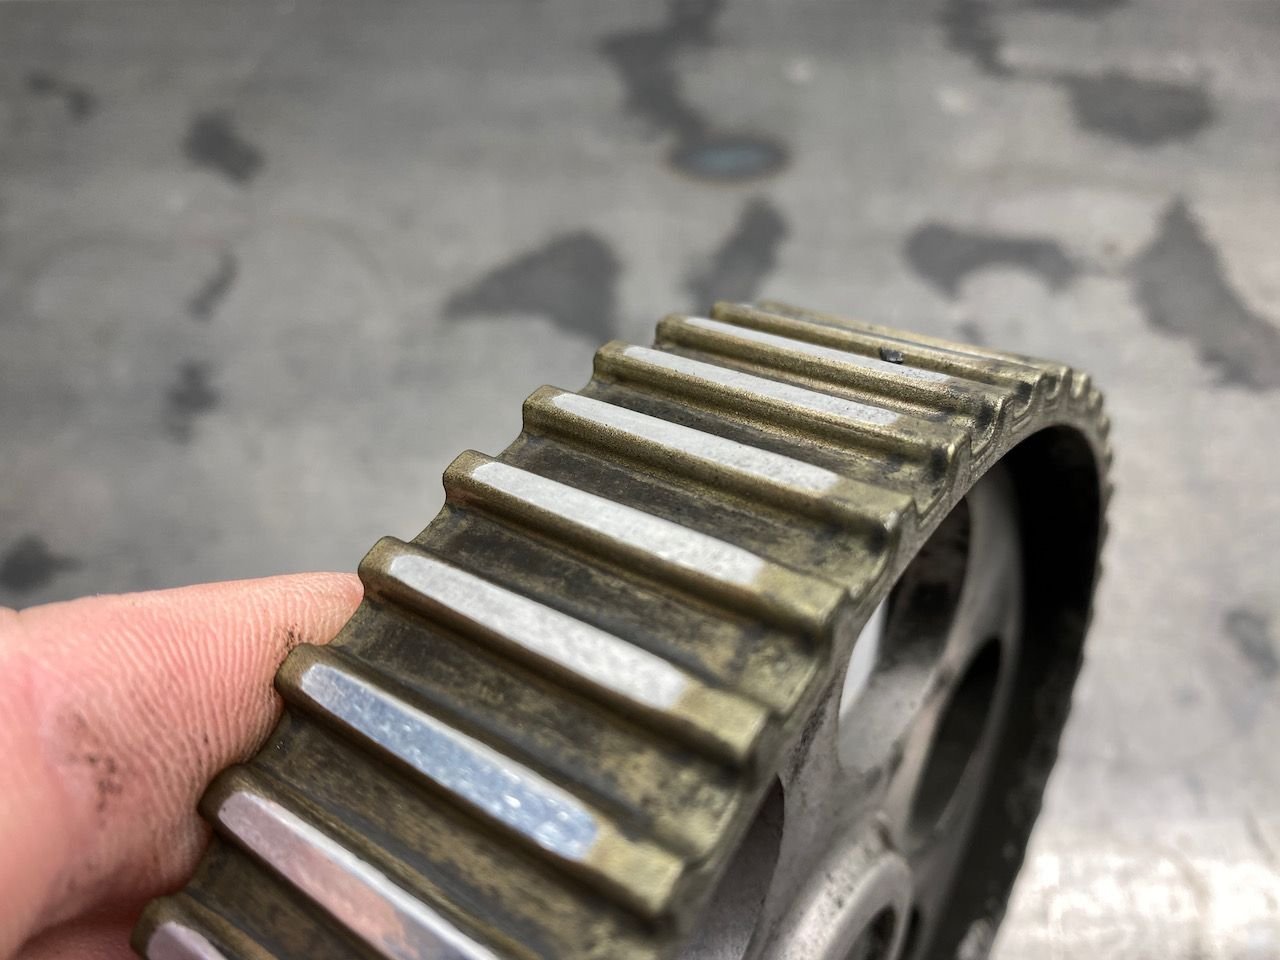
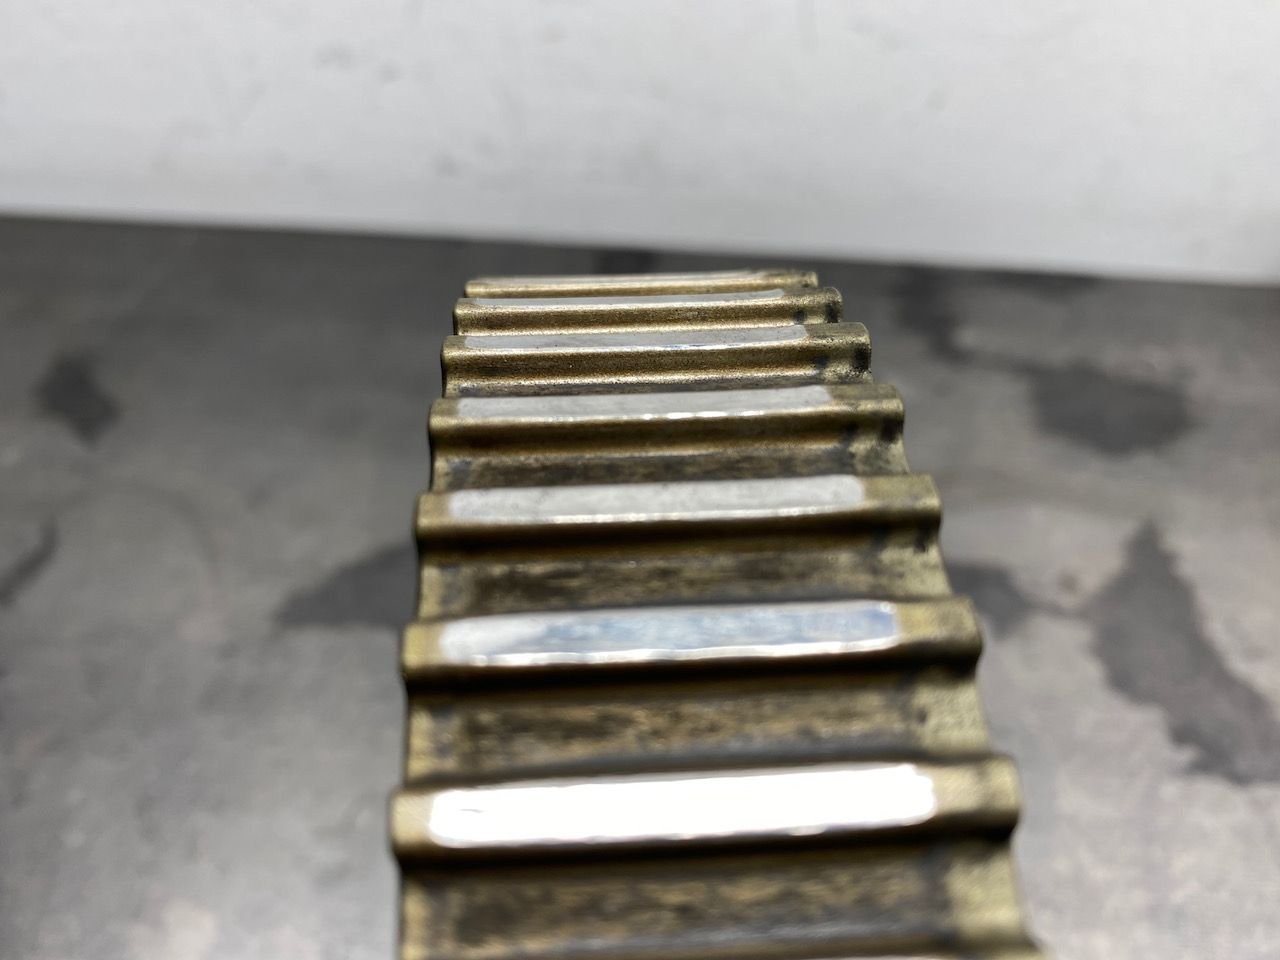
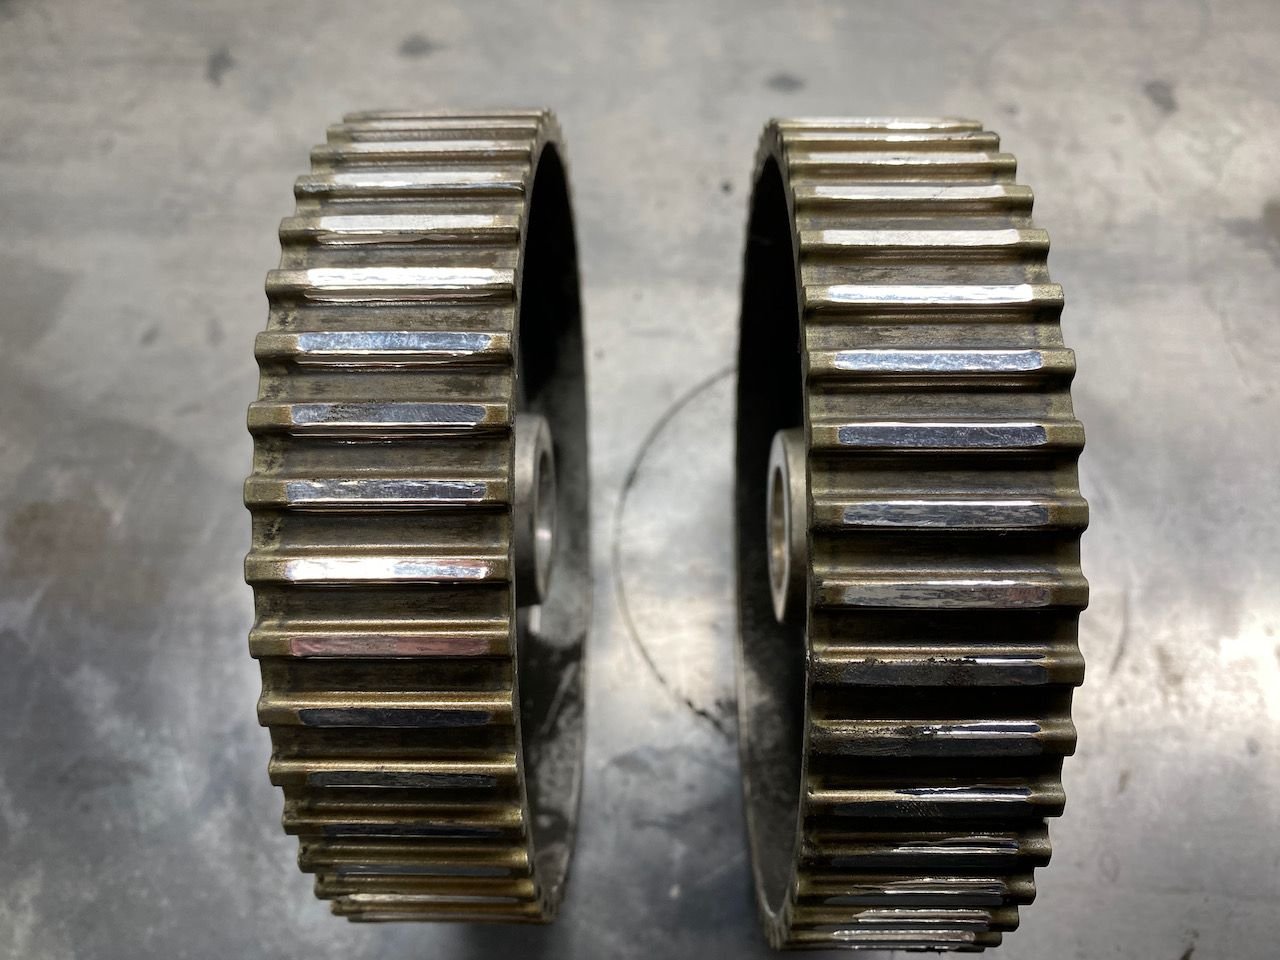
Also, the gears are pretty worn. Are they salvageable or do I need to replace them? I heard you could re-coat them but not sure if it still makes sense with these. If I can save them, do I power coat them? Would ceramic coating work? Anyone, in particular, the group uses for that service? These things aren't cheap, appreciate any feedback on this.
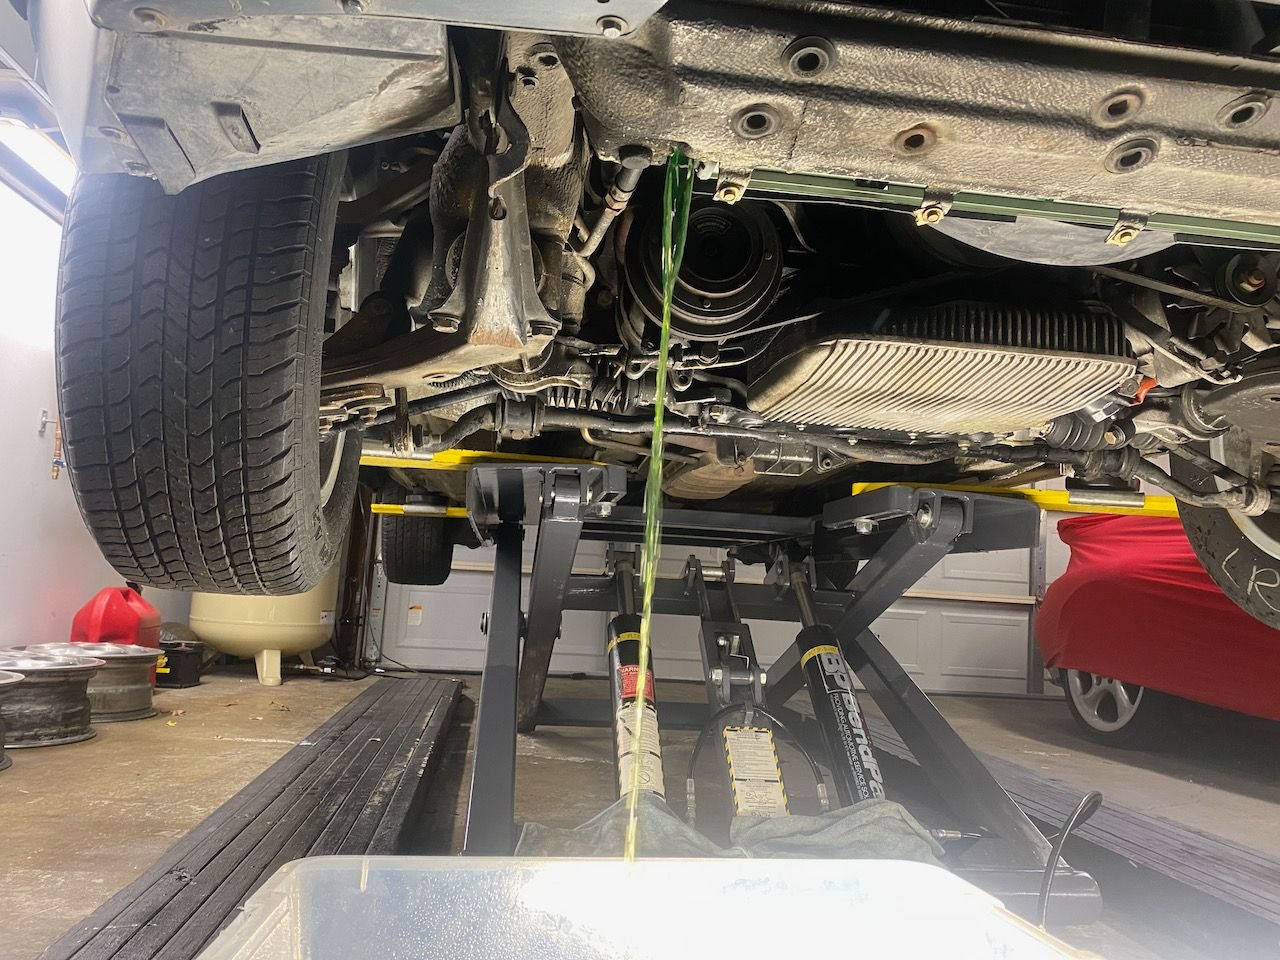
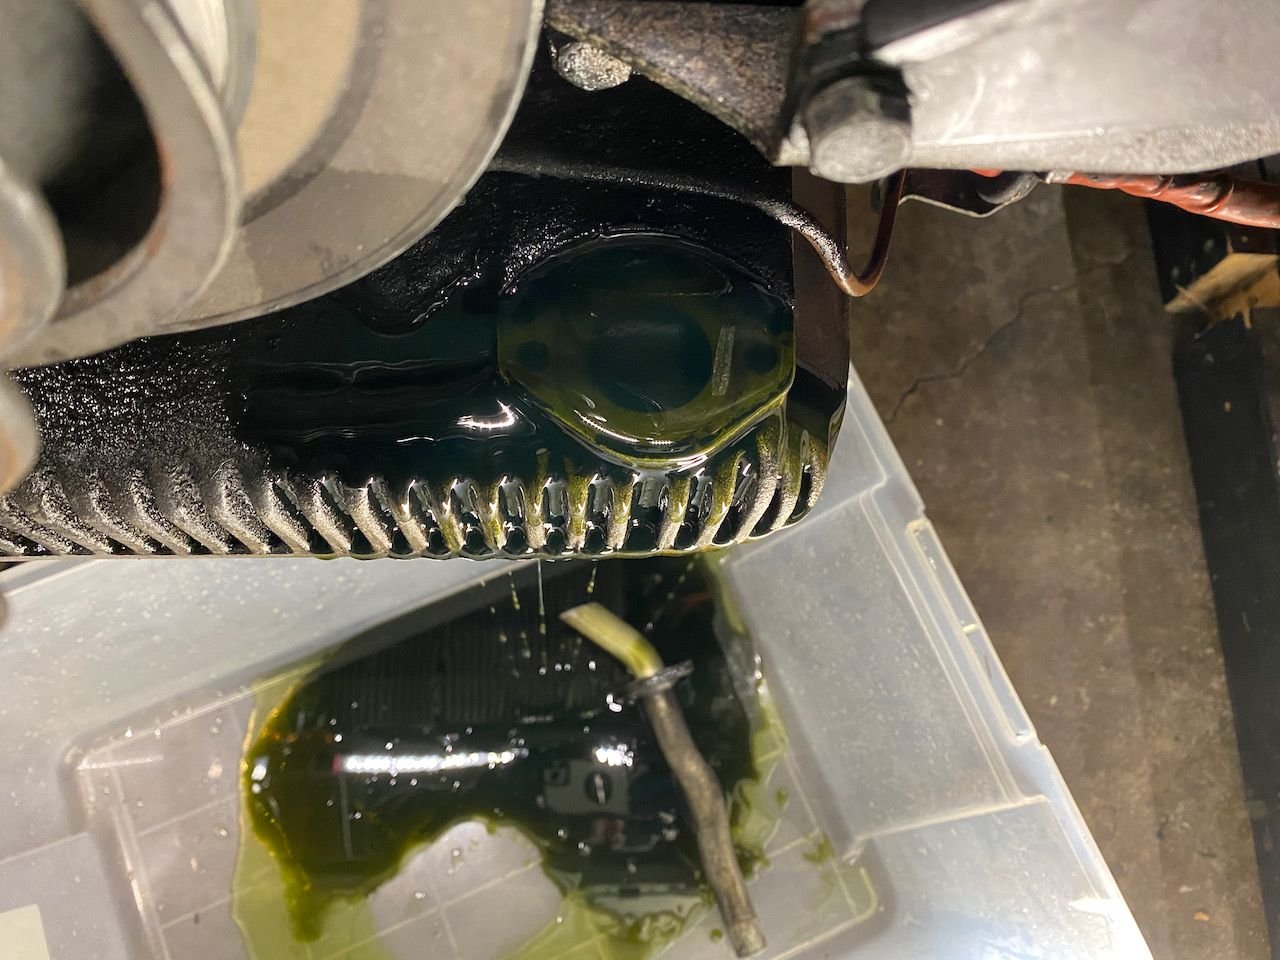
Draining the coolant was probably the messiest part of the project thus far. The car had green coolant which I tested for acidity with some PH strips. Some were worried I might run into head gasket issue if it was acidic due to sitting for as long as the car id. Luckily, it was fine. I will probably replace it with Porsche pink coolant once I flush the system with some distilled water.
All the belts came off easily as I worked from the front of the car to the block. Power steering belt first, then Fan/air pump, alternator, and then AC took lots of pictures for these steps to make sure they all go back the right way. I am thinking about deleting the air pump. I live in KY so emissions testing won�t be an issue. If I do remove the air pump, do just plug or leave open the top pipe that runs alongside of the passenger fuel rail? Sorry I didn�t take any pictures. Also, since the air pump belt drives the fan, what replacement belt is everyone going with, it will have to be shorter.
All the belts off. On to the next steps.
Removing the oil return lines made a bit of a mess again. You can clearly see my use of Brad Penn oil. I love this green stuff.. I use the 20w50 weight for my 993 so going to start using the same for my 928, that makes it easy.
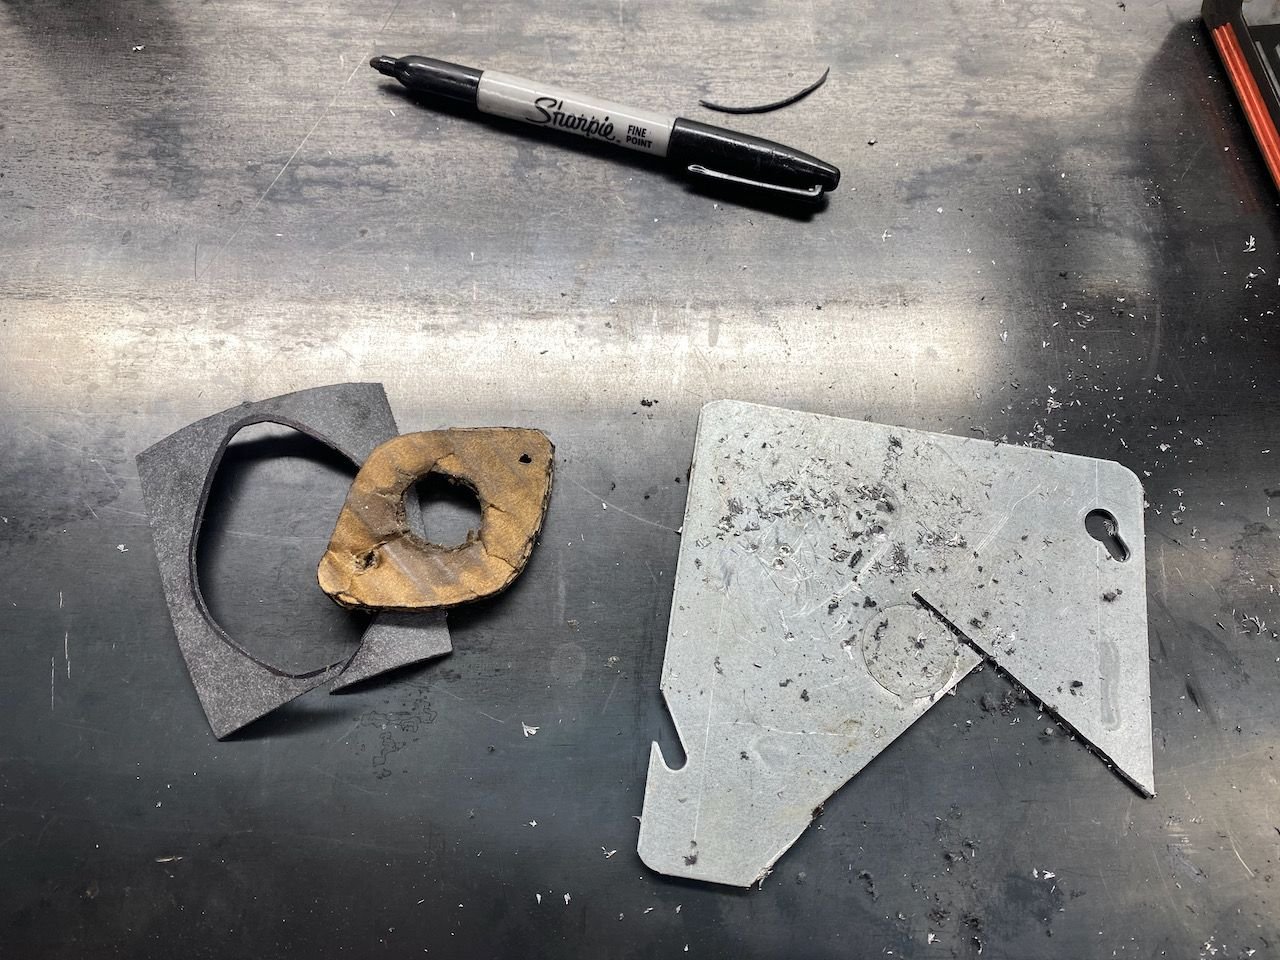
I made myself a cover for the top so when I start cleaning I don�t have to worry. I ended up just cutting a metal electrical junction box to size and put some rubber fiber sheet under it for a better seal.
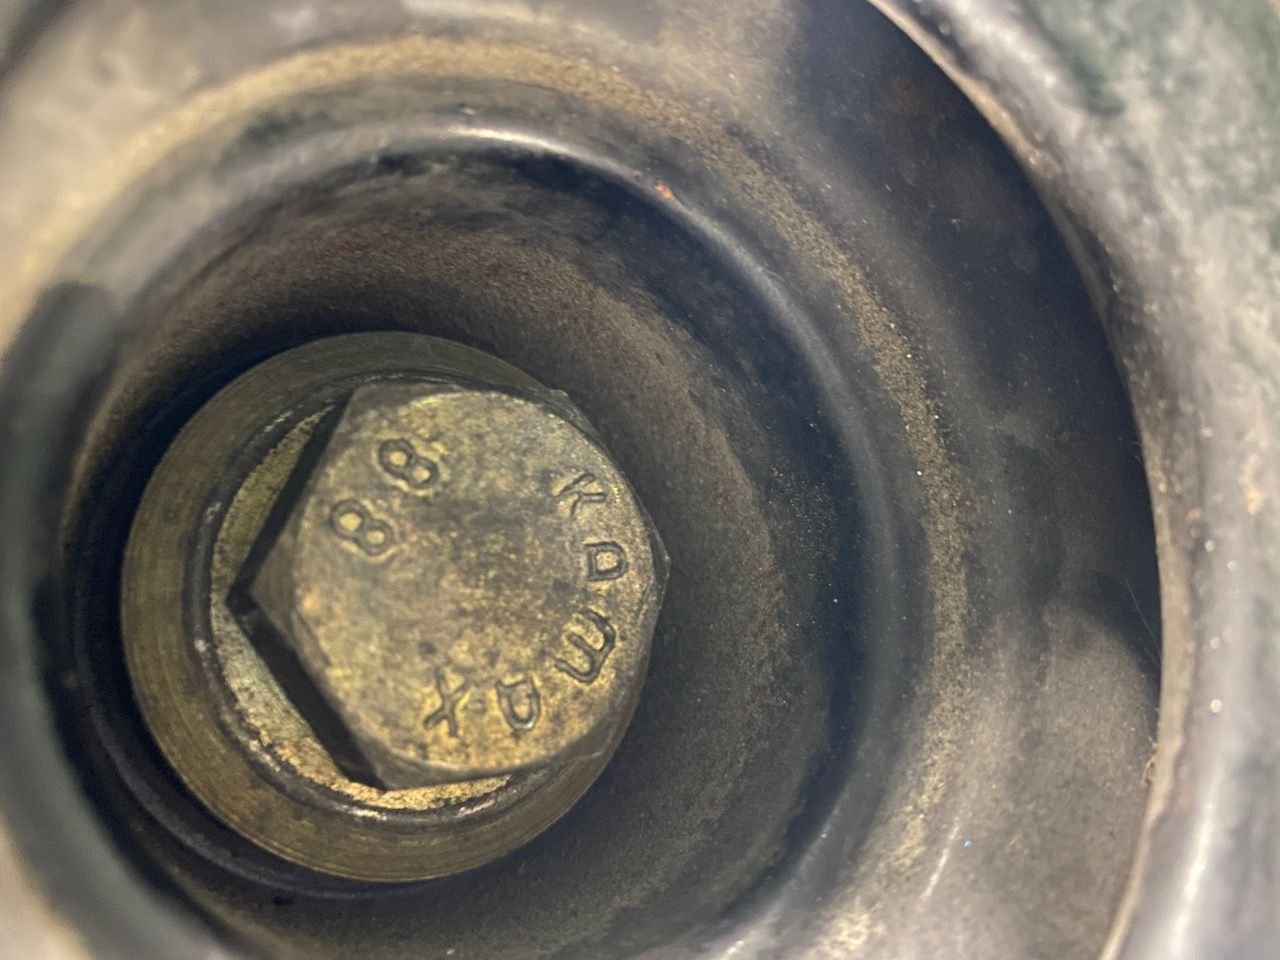
The crank bolt was a bit of a bitch, but I got it off with a longer breaker bar.
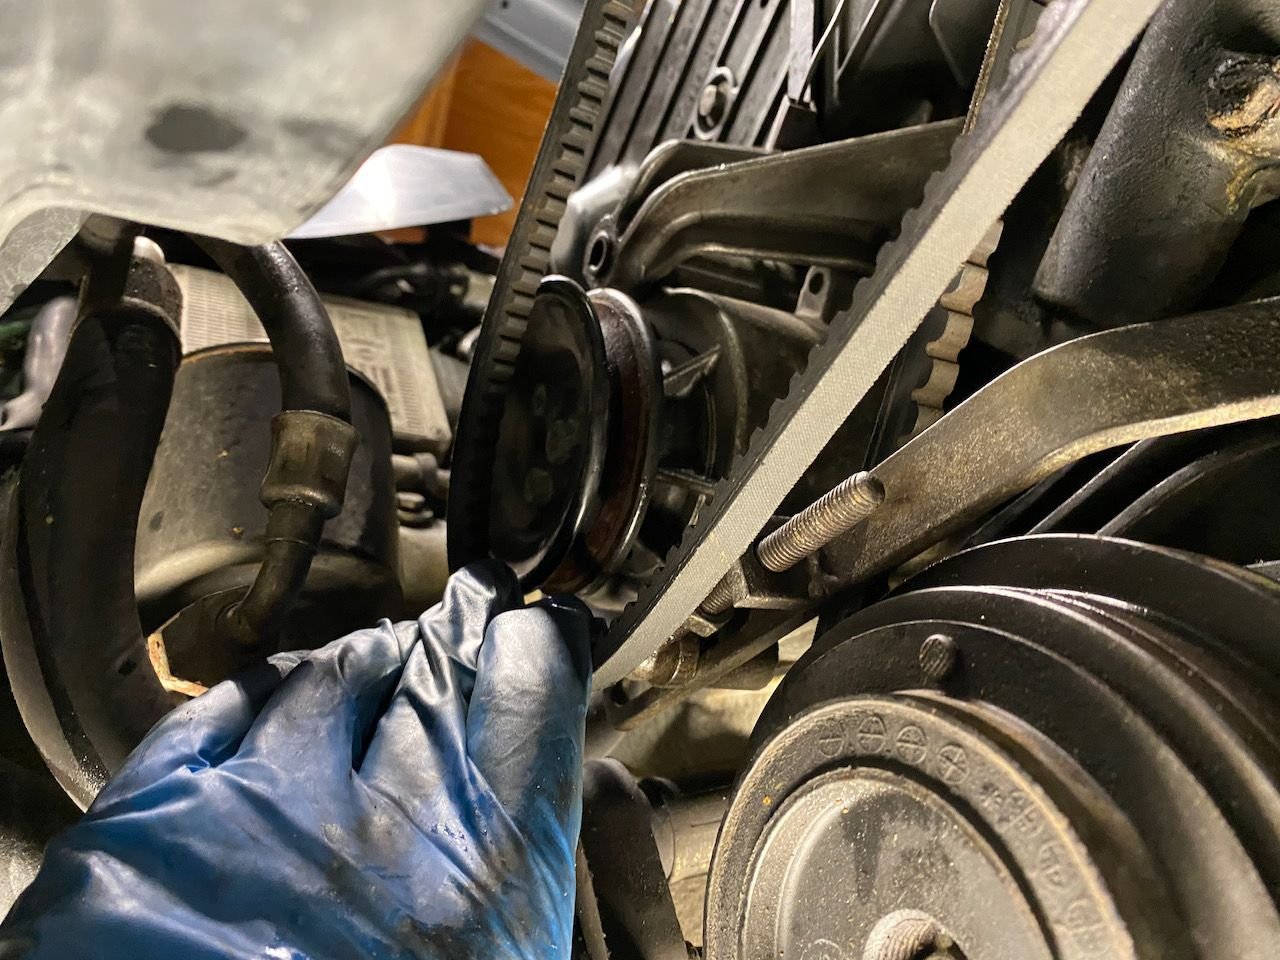
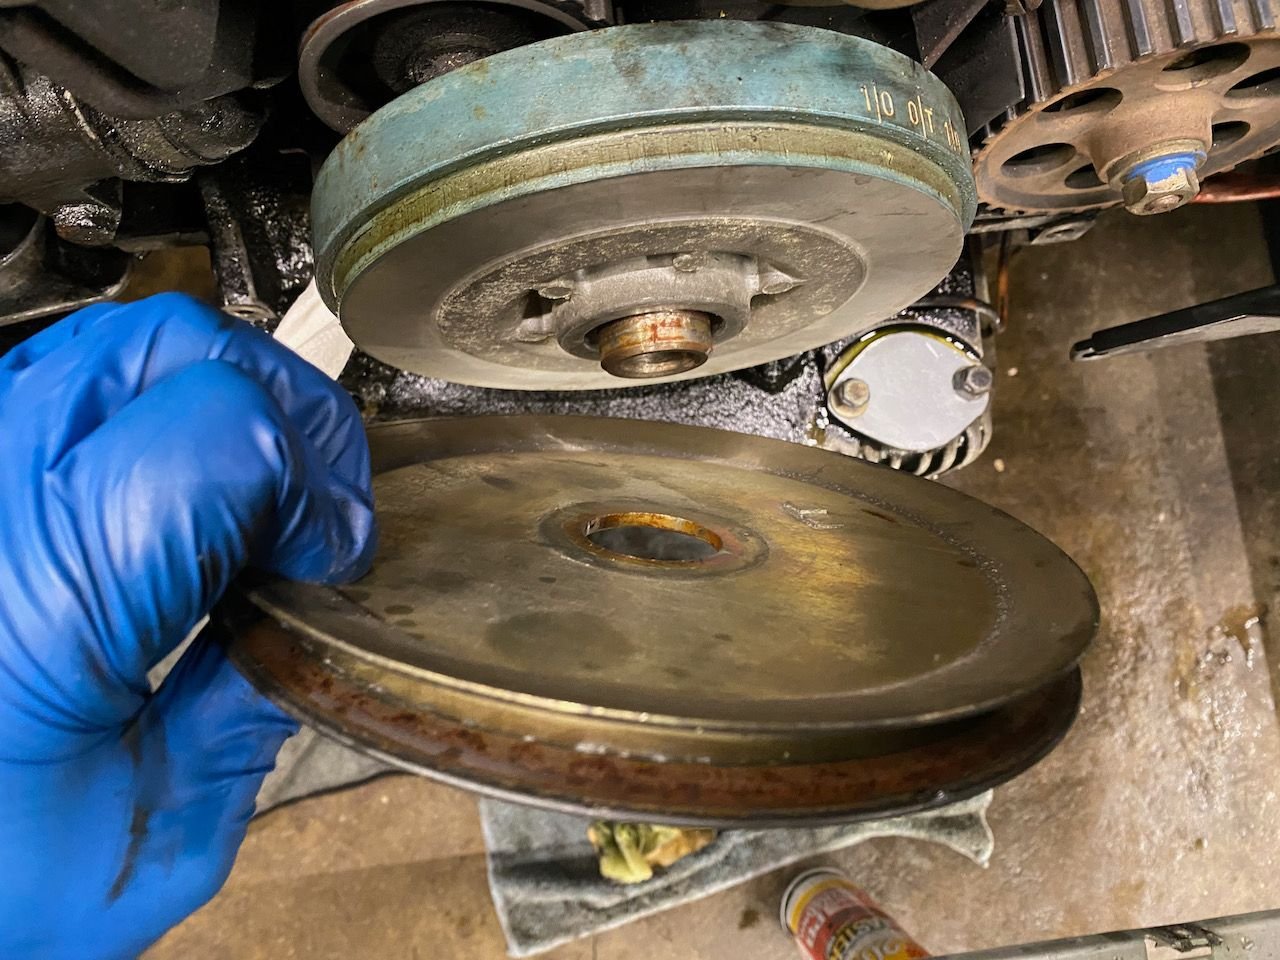
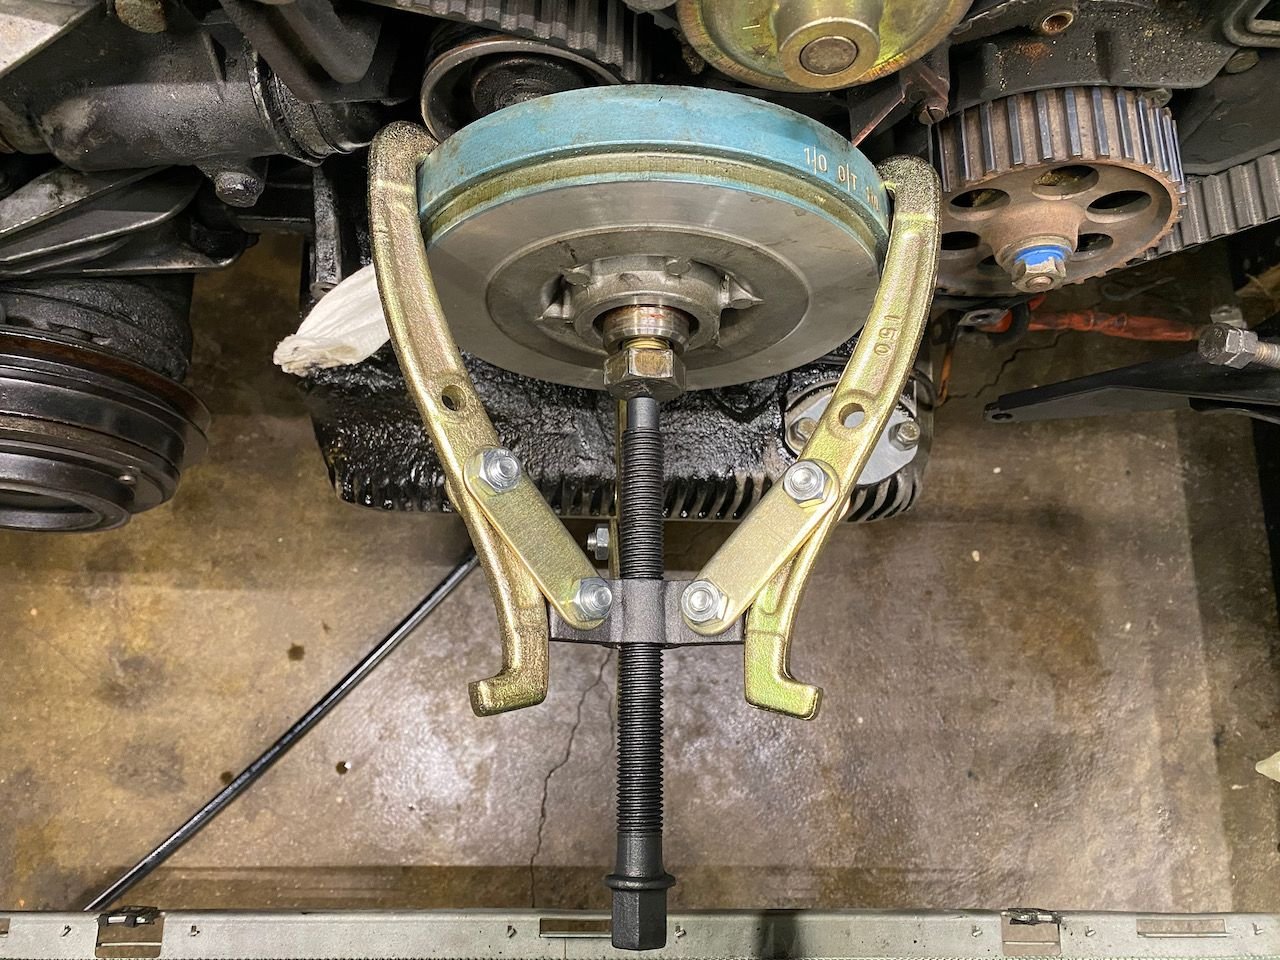
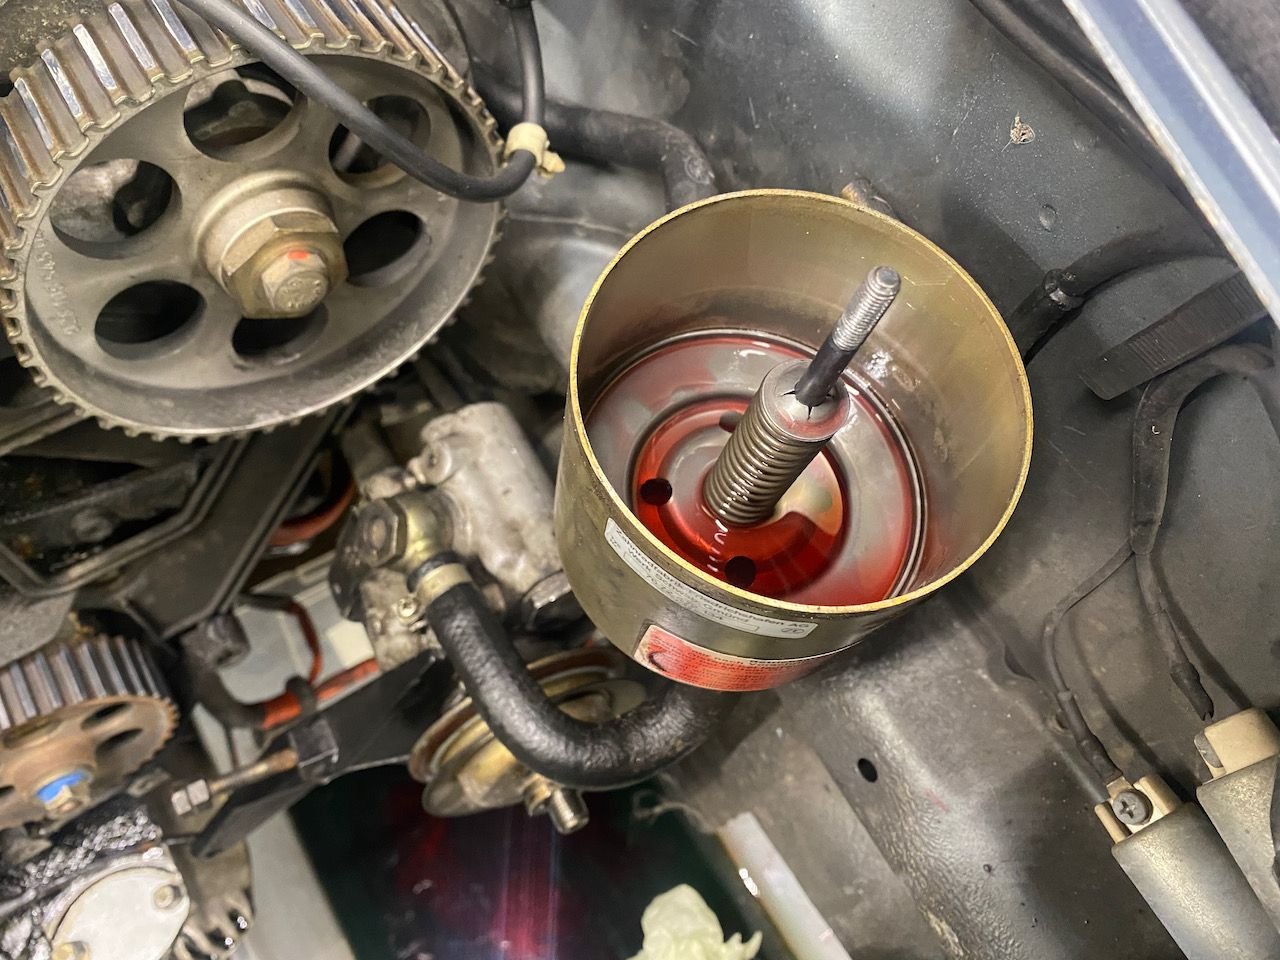
All the pulleys came off easily from the crankshaft. The harmonic balancer on the other hand would not budge. I soaked several times over a 24 hour period with PB blaster but still could not wiggle it off. I ended up having to use a 3 jaw puller it popped and then wiggled it off.
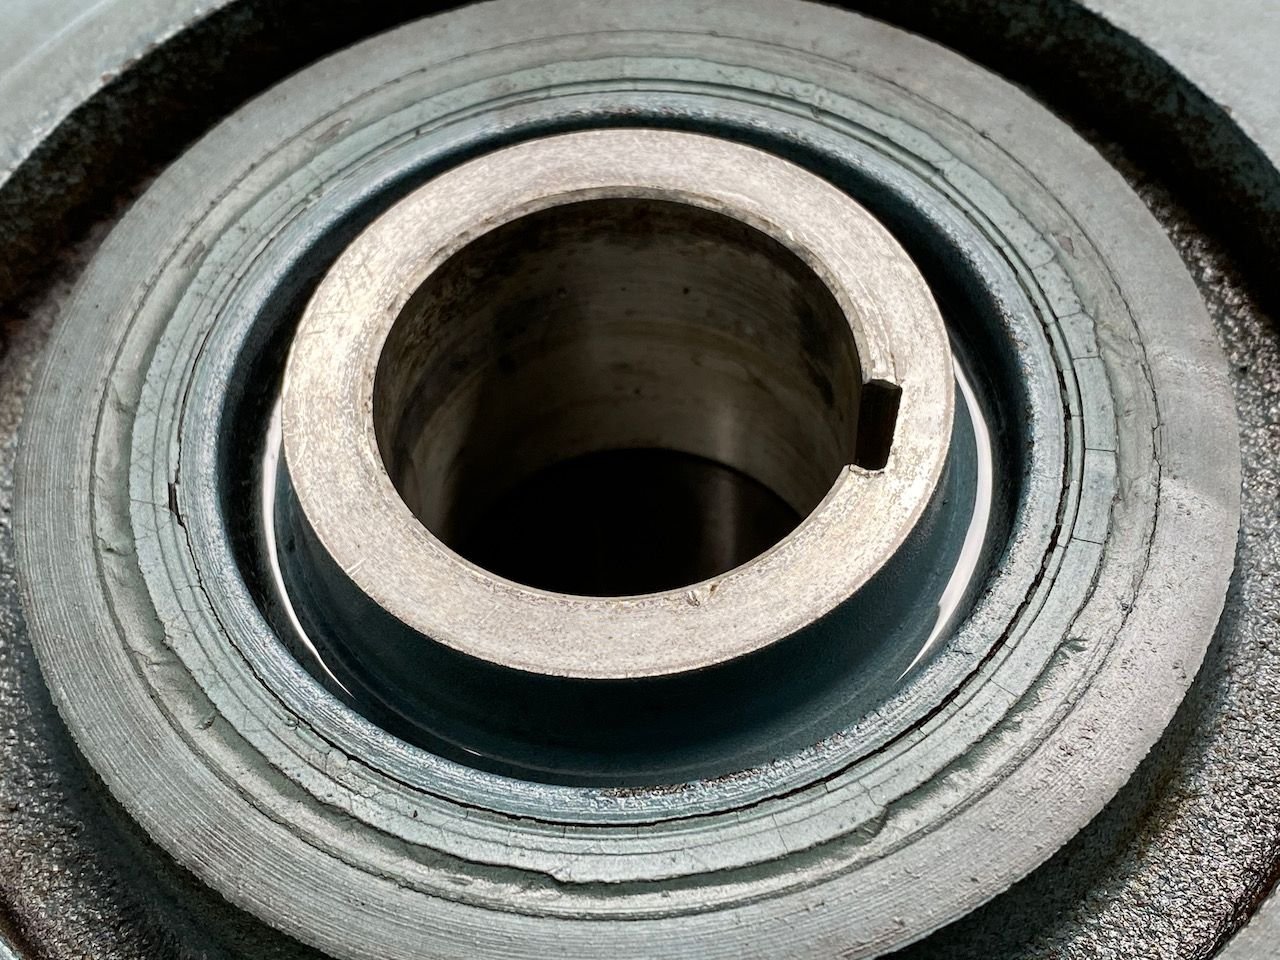
I know some people suggest not to use a jaw puller, but there was no way that sucker was going to come off by hand. Take look at the rubber damper on the back of the harmonic balancer, there seem to be some cracks but they mainly look like it�s only the paint that is cracking. Would you agree?
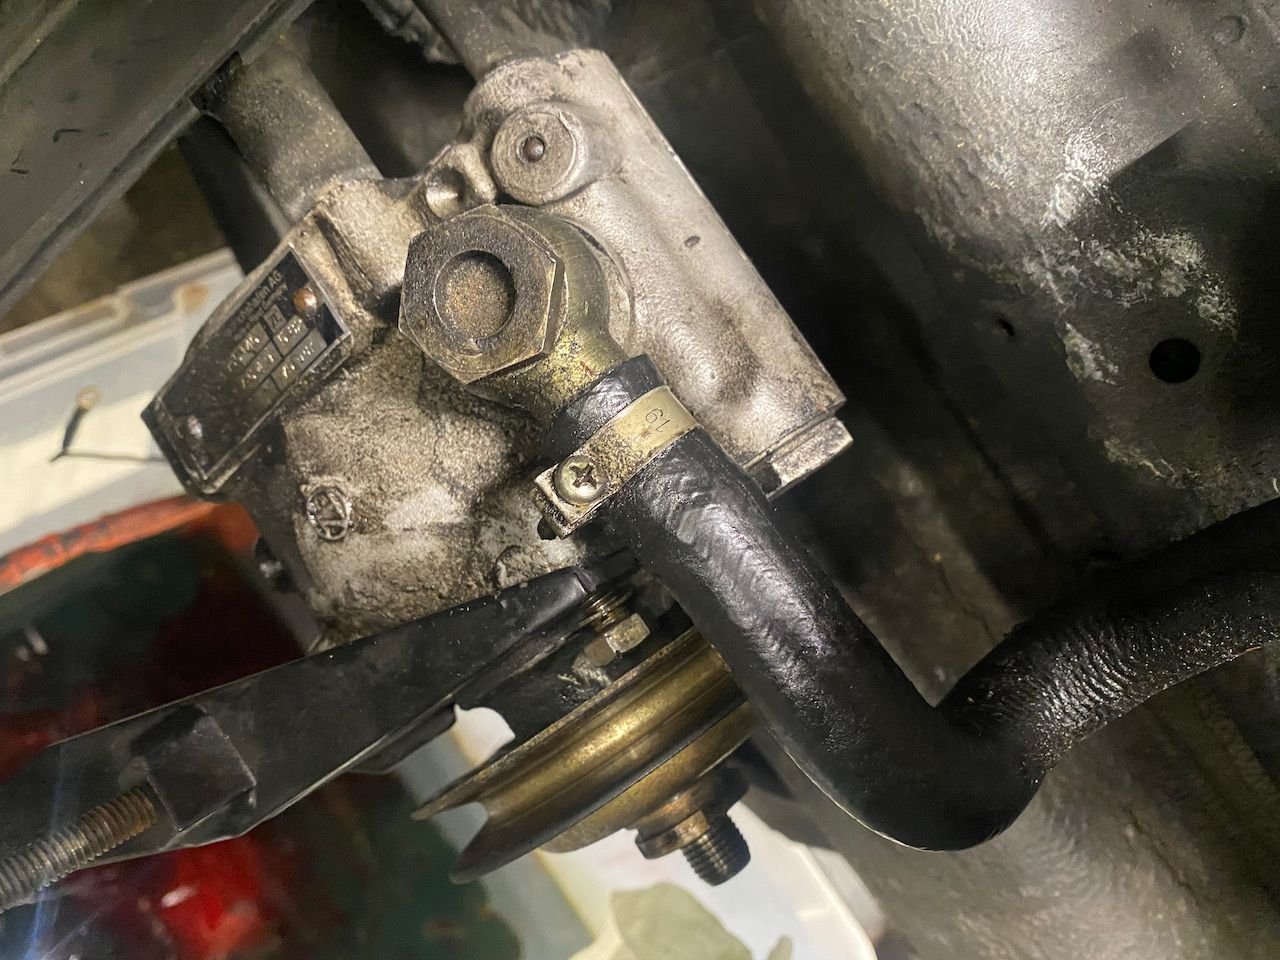
I removed the air pump and tension as one unit. I will be installing the Porken tensioner and probably will be deleting the air pump. Any suggestions, that would be great?
I also removed the PS reservoir as the lower hose coming from the reservoir was had a hole and was leaking. I going to do a PS flush anyway. BTW, does anyone have any picture of where I can train the system from on the steering rack?
My cam seal and oil pump seal look fine, but since I am this deep, I will replace them as well.
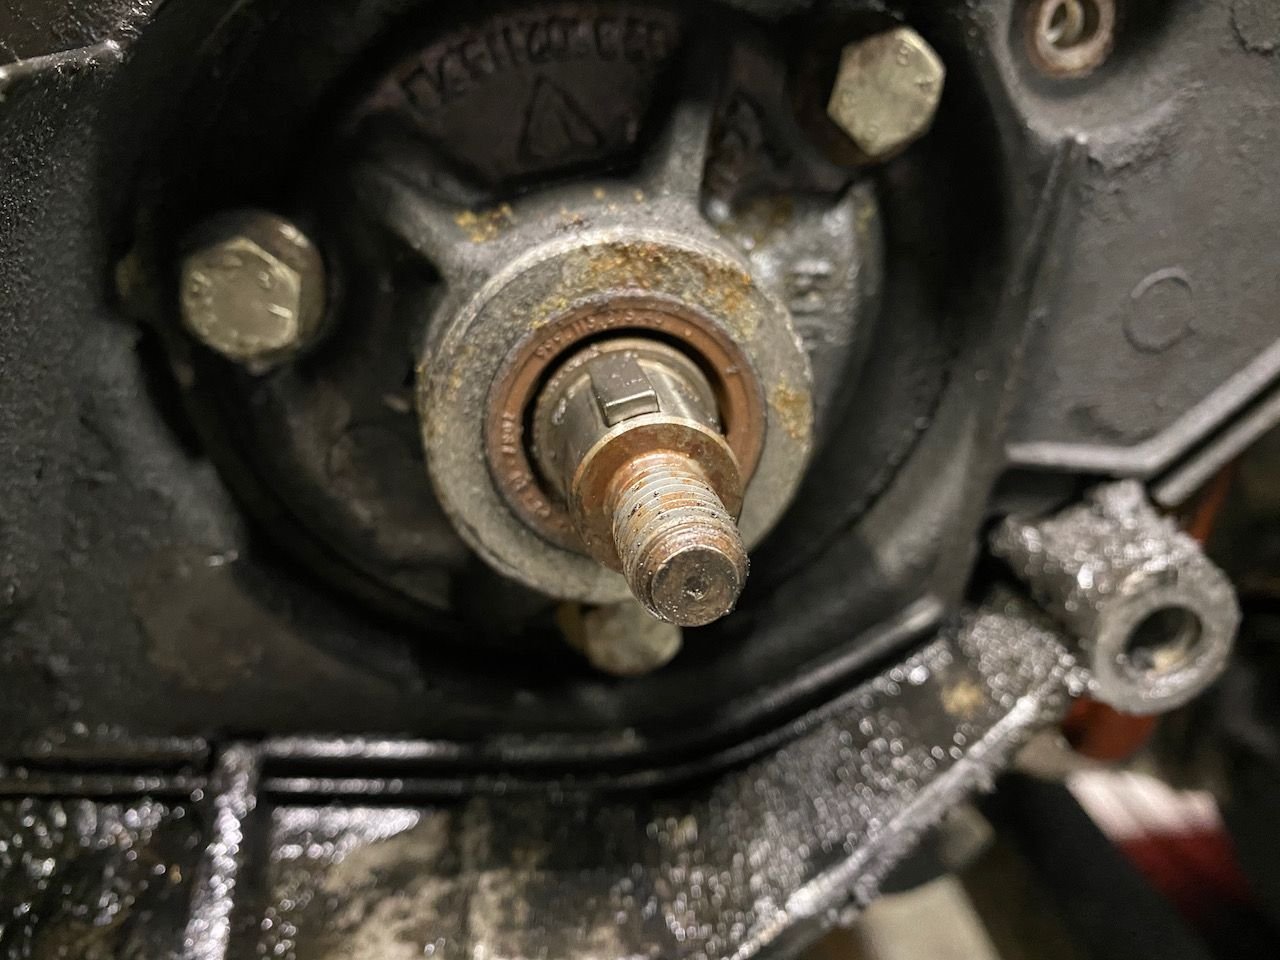
I have not been able to get the crankshaft gear off yet that�s where I am currently at. I will need to get a 2 jaw puller for that and then will have an idea whether the crank seal is causing some of the leaks.
Crank gear and water pump are next. Any last-minute words of wisdom? I have been PB blasting the water pump bolts so hopefully, none of them will break off. Also, here some questions I have compiled in my head thus far. I am sure there will be many more to come. Thanks in advance to those that will chime in.
What are your thoughts on my timing gears, do I need to replace them or just re-coat?
When I remove the gears, they moved slightly forward. Do I have to turn the cams a whole rotation clockwise to line them up again, or would it be OK to move them counter-clockwise a few notches?
Since my Power Steering reservoir is still original, should I upgrade to the plastic new one, or just keep the original? Also, where can I find the drain plug on the steering rack to drain the fluid completely? Any suggestions on the flush are much appreciated.
What do I need to know about deleting the air pump and what new belt should I get for the fan since it won�t need to be as long anymore?
Does it make sense to the oil pan gasket now, or ok to do it later? Any advantage doing it now besides better access the bolts in front of pan?
Anyone have a crank seal insert tool they would want to let me borrow? I could create my own with some PVC pipes but thought I would ask.
Which bolts should I use any kind of Loctite on when reassembling everything. Water pump? Oil Pump?
That�s if for now. My head is spinning from writing this all up. Thanks in advance for those that will chime in and oh BTW, check out the little video I made to bring you guys along, I will make more soon and provide additional updates. Wish me luck.
I finally found the time to continue working on my 928. I posted a few months back and introduce myself/car and shared my experience of buying my first 928. Check out my post here if you want to get caught up on my journey. I have not had a chance to work on the car in a few months due to life and other maintenance items on some of the other cars I own. During my downtime I did some research and mentally prepared myself for the timing belt job and the rest of the while you are in there stuff. Although I got the car running, I did not drive it as I did not feel comfortable not knowing the condition of the timing belt. I am glad I made that decision, more to come on that later.
I also own a 944 and have done the timing belt on that car so I figured it can�t be that much more difficult, we shall see. These jobs scare me a bit but on the other hand, but it also gives me the opportunity to get intimate and learn more about these cars. I guess that is part of my passion and good therapy for me. In addition, I get the let my OCD kick in and clean everything which otherwise probably wouldn�t get done.
After some research here and there the following write-ups/posts gave me the courage to attempt this job myself. So thank you Douglas, Dwayne, Theo, Fred, and all you guys that are chiming in on RL. Also a big shout out to the Guys with Rides YouTube channel. Great timing for your videos. Without this community, I would NEVER try this stuff on my own.
Here is some of the information I used to get going. My car is a 16 valve no interference engine so I used bits and pieces from some of the information out there on the 32V engine which are better document on the net.
I am going to try to share my progress, experience, and ask questions on this forum as I work my thought this project. Would love for you guys to chime in and provide suggestion and advise whenever you can. This will be a several weeks project which is fine since I am not in a hurry. So let�s get started
What she looked like before I got started.
What I have removed thus far. I did not run into any major issues with taking it apart, knock on wood. The car definitely has some major oil leaks. Where all the leaks are coming from is yet to be determined, one thing is for sure, the OEM tensioner was leaking and the oil pan gasket. The oil pump and camshaft seals seem to be fine. But will replace them anyway.
Let�s get the bad news out of the way first. Once I took the Cam gear cover off I noticed that the belt was very loose, even worse once I had a chance to set the crank to OT, I noticed that the belt skipped by one notch. I know�. ouch, not what I was hoping to see. I know my car is a non-interference motor so the I don�t think the valves can bent, regardless this concerns me. I have no idea how much the previous owner drove the car this way and the more I think about it, the whole timing belt and all the other leaks were probably the reason the car was retired 12 years ago. My guess, the previous owner didn�t have the cash to address this and just retired the car. Looks like it only skipped by one notch. The belt looked fine, no cracks or anything.
Also, the gears are pretty worn. Are they salvageable or do I need to replace them? I heard you could re-coat them but not sure if it still makes sense with these. If I can save them, do I power coat them? Would ceramic coating work? Anyone, in particular, the group uses for that service? These things aren't cheap, appreciate any feedback on this.
Draining the coolant was probably the messiest part of the project thus far. The car had green coolant which I tested for acidity with some PH strips. Some were worried I might run into head gasket issue if it was acidic due to sitting for as long as the car id. Luckily, it was fine. I will probably replace it with Porsche pink coolant once I flush the system with some distilled water.
All the belts came off easily as I worked from the front of the car to the block. Power steering belt first, then Fan/air pump, alternator, and then AC took lots of pictures for these steps to make sure they all go back the right way. I am thinking about deleting the air pump. I live in KY so emissions testing won�t be an issue. If I do remove the air pump, do just plug or leave open the top pipe that runs alongside of the passenger fuel rail? Sorry I didn�t take any pictures. Also, since the air pump belt drives the fan, what replacement belt is everyone going with, it will have to be shorter.
All the belts off. On to the next steps.
Removing the oil return lines made a bit of a mess again. You can clearly see my use of Brad Penn oil. I love this green stuff.. I use the 20w50 weight for my 993 so going to start using the same for my 928, that makes it easy.
I made myself a cover for the top so when I start cleaning I don�t have to worry. I ended up just cutting a metal electrical junction box to size and put some rubber fiber sheet under it for a better seal.
The crank bolt was a bit of a bitch, but I got it off with a longer breaker bar.
All the pulleys came off easily from the crankshaft. The harmonic balancer on the other hand would not budge. I soaked several times over a 24 hour period with PB blaster but still could not wiggle it off. I ended up having to use a 3 jaw puller it popped and then wiggled it off.
I know some people suggest not to use a jaw puller, but there was no way that sucker was going to come off by hand. Take look at the rubber damper on the back of the harmonic balancer, there seem to be some cracks but they mainly look like it�s only the paint that is cracking. Would you agree?
I removed the air pump and tension as one unit. I will be installing the Porken tensioner and probably will be deleting the air pump. Any suggestions, that would be great?
I also removed the PS reservoir as the lower hose coming from the reservoir was had a hole and was leaking. I going to do a PS flush anyway. BTW, does anyone have any picture of where I can train the system from on the steering rack?
My cam seal and oil pump seal look fine, but since I am this deep, I will replace them as well.
I have not been able to get the crankshaft gear off yet that�s where I am currently at. I will need to get a 2 jaw puller for that and then will have an idea whether the crank seal is causing some of the leaks.
Crank gear and water pump are next. Any last-minute words of wisdom? I have been PB blasting the water pump bolts so hopefully, none of them will break off. Also, here some questions I have compiled in my head thus far. I am sure there will be many more to come. Thanks in advance to those that will chime in.
What are your thoughts on my timing gears, do I need to replace them or just re-coat? Since all 4 of your gears are worn, I'd suggest updating to the newer style "round tooth" gears and using the later version cam belt. (We've got a great price on these gears....actually on all the parts.)
When I remove the gears, they moved slightly forward. Do I have to turn the cams a whole rotation clockwise to line them up again, or would it be OK to move them counter-clockwise a few notches? Once you re-torque the gears, you can move them in either direction by using the 32mm hex washer.. Do not use the 17mm bolt to rotate the gears.
Since my Power Steering reservoir is still original, should I upgrade to the plastic new one, or just keep the original? Also, where can I find the drain plug on the steering rack to drain the fluid completely? Any suggestions on the flush are much appreciated. I prefer the look of the original steel reservoirs. They don't seem to seep as badly as the plastic ones and the clamps stay tight better. There is no drain plug at the rack. You can remove the feed and return lines at the rack (you will probably want to replace the copper washers) and drain the lines. Moving the rack from side to side, with the lines disconnected will force most of the fluid out of the rack
What do I need to know about deleting the air pump and what new belt should I get for the fan since it won�t need to be as long anymore? If you just delete the air pump, there is no way to tension the fan belt. You can buy the pulley and bracket from a Euro car to fit where the air pump goes, in order to tension the belt. Some people have ran the "perfect size" belt from the crankshaft to the fan (no adjustment), but I'm not sure what one does when the belt stretches. My recommendation, since I believe the feds are going to tighten all the different state emission laws into "California" type laws, would be to retain the air pump....or if you decide to remove it now....don't "loose it". If the pump has noisy bearings, they are pretty simple to change.
Does it make sense to the oil pan gasket now, or ok to do it later? Any advantage doing it now besides better access the bolts in front of pan? No advantage. However, be sure and buy our new material pan gasket to replace the cork gasket...a fantastic upgrade!
Anyone have a crank seal insert tool they would want to let me borrow? I could create my own with some PVC pipes but thought I would ask. I've never had that "tool" and have installed a few hundred seals. Rob Edwards has one, if you really think you need it.You will probably remove the oil pump and replace the "o"ring around the pump. At that point, you can clean everything and replace the shaft seal. As you re-install the drive gear through the new seal, simply lube the seal and rotate the gear as it passes through the seal. A quick visual inspection of the outside of the seal will tell you if the seal lifted and inverted (almost never, if you rotate the gear.)
Which bolts should I use any kind of Loctite on when reassembling everything. Water pump? Oil Pump? I use blue Loctite on the oil pump nut....simply because it makes me "feel" better.. No Loctite anywhere else. I do replace all of the water pump hardware and I use 10.9 grade bolts. I use factory silver never seize on the water pump bolts...applying it with a "Q-tip" inside the threaded holes in the block (if you put it on the bolt, most of the never seize simply wipes off.as the bolt threads in.) If you don't want to by an entire tube (kinda expensive), I can send you a small vial with your other pieces. The newest water pump gaskets have a tendency to seep, so I use Curil K2 on the gasket (most home guys probably use Permatex.) There's one tensioner bolt that requires sealant....I use Loctite 574, because I know it will work every time, but probably any silicone based sealant will work....or even the Permatex. (If you get your parts from us, I can also send you a vial of Loctite 574, so you don't have to buy an entire tube.)
That�s if for now. My head is spinning from writing this all up. Thanks in advance for those that will chime in and oh BTW, check out the little video I made to bring you guys along, I will make more soon and provide additional updates. Wish me luck.
Greg, thank you so much for taking the time to answer my questions, so awesome of you. I take it you are the famous Greg Brown I got my supply and return fuel line from via Roger? What are your thoughts on the belt jumping one tooth. Since my car is a non-interference motor should I have nothing to worry about? The car ran pretty smooth, but when it was cold outside recently it had a little ticking noise. It didn't do that in the summer after I started it the first time. My guess the ticking came from the lifters. Once the car got warm it went away. Anyway, much appreciate the detailed response. I will PM you on the gears. Cheers
Regarding your gears, I believe I have a complete set of 4 of the steel square tooth gears for the 2 cams, the oil pump, and the crankshaft. The steel gears don't need a coating as they don't wear like the aluminum ones and they're getting difficult to find. I'd sell all 4 for $520 shipped as I'm now down to 1 928 motor and won't likely need them in the future. If interested, I can pull them out of the parts box and send photos.
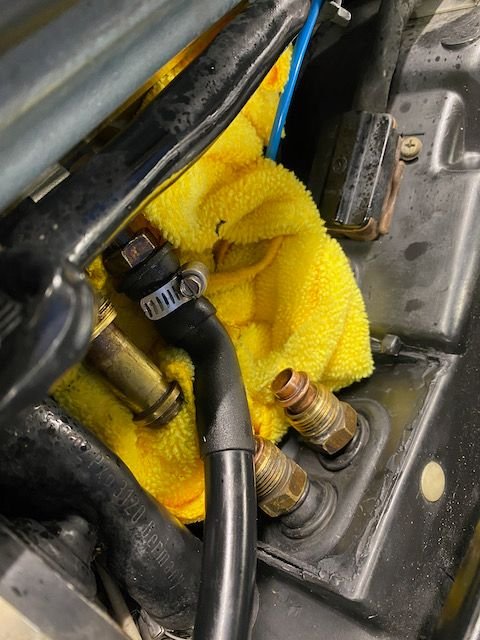
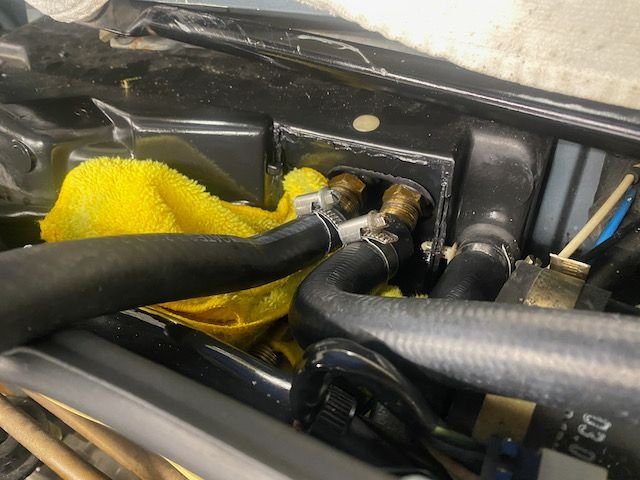
I would replace the high pressure power steering line while you're in there. Also a good idea to firesleeve it. If you're not familiar, the Firesleeving is a protective sleeve that you put around the new hose (I used a DEI product from Amazon). It protects it from the header heat in the area where it runs and you secure the top side with self-sealing tape and leave the bottom side open down near the rack. In the event of a line failure, the fluid escapes out the bottom of the car away from heat sources preventing a fire, as a power steering hose failures is a common cause of 928 Car-B-Ques you see.
Firesleeving open at bottom visible on rear high pressure PS hose Rest of hose visible on drivers side of the engine (with the rubber isolator around it) where it runs across the top before it was tucked away and covered up
Also, I'd recommend getting Greg's flexible clutch slave hose. Makes installation and removal of the slave much easier and if you need to remove the lower bell housing for clutch work, no longer hare to open the hydraulic system to remove it.
It's the grey line in this photo. Also shown is my hi-torque starter, which is fantastic. This one came from 928MS, but believe Greg sells one of those too.
The Porkentensioner is also excellent. Went with that during my build as well. Gears were painted but not on the belt run area (cut up the old belt and used it mask the run track when painting). Thought about powdercoat but didn't want to add too much thickness. Can't really see them, but I know under those covers they're pretty.
Greg, thank you so much for taking the time to answer my questions, so awesome of you. I take it you are the famous Greg Brown I got my supply and return fuel line from via Roger? What are your thoughts on the belt jumping one tooth. Since my car is a non-interference motor should I have nothing to worry about? The car ran pretty smooth, but when it was cold outside recently it had a little ticking noise. It didn't do that in the summer after I started it the first time. My guess the ticking came from the lifters. Once the car got warm it went away. Anyway, much appreciate the detailed response. I will PM you on the gears. Cheers
I am the "928" Greg Brown.
Not sure about being famous...closer to infamous.
I speak my mind and do not "sugar coat" anything. This sometimes offends people. People do not like to hear what they are doing/did wrong/the truth.
The engine jumping one tooth will not hurt a thing. Just line everything up, when you re-assemble.
Cold "ticking" noises are quite common in 928's, especially if one has started the car, moved it, and shut it off, several times. The lifters don't get enough time, oil, to "pump up. If lifter noise persists, you can run a bottle of Swebco 502 in with the oil for a few hundred miles. This is a fantastic additive for removing varnish from the hydraulic lifter check valve seats (and everywhere else).....and probably a very good thing to do, on these older engines.
BTW: While everything is apart, it's a good idea to replace all the cam seals, as they are prone to leakage with age...and it would be a shame to go all this way, only to have a leak in a year or two.
Be especially careful, when removing the old cam gears to not "flex" the camshafts from side to side....make sure everything comes straight off....even if you need to use a puller. No prying on the gear allowed! These engines are also famous for "snapping" the nose of the camshafts off, immediately following (with-in a few thousand miles) someone removing the cam gears. This failure is always "mechanic induced"....people always assume that the cam bolts did not get torqued properly, but this is generally not the case. The camshafts are cast iron (brittle) and "shank down" quite a bit from the nose to the main camshaft. Flexing causes cracks at the base of the radius. Cracks will result in breakage. The driver's side cam has an exceptionally long "nose" is a very prone to this failure!
Great work - If you want to get rid of the smog pump or just cut the belt to it, you can replace it with a shorter belt that runs from the crank pully to the fan pully.
If you measure the outside diameter of the pully directly behind the fan you can define the size of the belt that goes directly between the crank pully and the fan pully.
If the OD of the fan pully measures circa 3" you need a 20" belt. Circa 4" you need a 21" belt.
Unbolt the fan bracket from the block and install the new belt. Bolting the bracket back to the block sets the right tension on the belt.
We stock the belts for $10.
I agree about the PKT video - "Guys with Rides" are good customers of mine and they had a lot of fun doing the video. The video is also on my web site.
__________________
Does it have the "Do It Yourself" manual transmission, or the superior "Fully Equipped by Porsche" Automatic Transmission? George Layton March 2014
928 Owners are ".....a secret sect of quietly assured Porsche pragmatists who in near anonymity appreciate the prodigious, easy going prowess of the 928."
Regarding your gears, I believe I have a complete set of 4 of the steel square tooth gears for the 2 cams, the oil pump, and the crankshaft. The steel gears don't need a coating as they don't wear like the aluminum ones and they're getting difficult to find. I'd sell all 4 for $520 shipped as I'm now down to 1 928 motor and won't likely need them in the future. If interested, I can pull them out of the parts box and send photos.
I would replace the high pressure power steering line while you're in there. Also a good idea to firesleeve it. If you're not familiar, the Firesleeving is a protective sleeve that you put around the new hose (I used a DEI product from Amazon). It protects it from the header heat in the area where it runs and you secure the top side with self-sealing tape and leave the bottom side open down near the rack. In the event of a line failure, the fluid escapes out the bottom of the car away from heat sources preventing a fire, as a power steering hose failures is a common cause of 928 Car-B-Ques you see.
Also, I'd recommend getting Greg's flexible clutch slave hose. Makes installation and removal of the slave much easier and if you need to remove the lower bell housing for clutch work, no longer hare to open the hydraulic system to remove it.
The Porkentensioner is also excellent. Went with that during my build as well. Gears were painted but not on the belt run area (cut up the old belt and used it mask the run track when painting). Thought about powdercoat but didn't want to add too much thickness. Can't really see them, but I know under those covers they're pretty.
Thank you Peza914, really appreciate your offer on the gears. I will keep you in mind when I make a decision. Also good advice on the PS hoses, I will definitely do what you suggested. My car is automatic, so I don't have the clutch slave cylinder to deal with, but appreciate you point it out.
Originally Posted by GregBBRD
The engine jumping one tooth will not hurt a thing. Just line everything up, when you re-assemble.
Cold "ticking" noises are quite common in 928's, especially if one has started the car, moved it, and shut it off, several times. The lifters don't get enough time, oil, to "pump up. If lifter noise persists, you can run a bottle of Swebco 502 in with the oil for a few hundred miles. This is a fantastic additive for removing varnish from the hydraulic lifter check valve seats (and everywhere else).....and probably a very good thing to do, on these older engines.
BTW: While everything is apart, it's a good idea to replace all the cam seals, as they are prone to leakage with age...and it would be a shame to go all this way, only to have a leak in a year or two.
Be especially careful, when removing the old cam gears to not "flex" the camshafts from side to side....make sure everything comes straight off....even if you need to use a puller. No prying on the gear allowed! These engines are also famous for "snapping" the nose of the camshafts off, immediately following (with-in a few thousand miles) someone removing the cam gears. This failure is always "mechanic induced"....people always assume that the cam bolts did not get torqued properly, but this is generally not the case. The camshafts are cast iron (brittle) and "shank down" quite a bit from the nose to the main camshaft. Flexing causes cracks at the base of the radius. Cracks will result in breakage. The driver's side cam has an exceptionally long "nose" is a very prone to this failure!
Hoping all this information helps!
Greg, this information definitely helps. And great chatting with you earlier and taking the time to answer some of the gear questions I had. The drive side cam gear came of really easy by hand, the passenger side i got of with a jaw puller, once I heard the pop, I gently wiggled it off by hand. I already have all of the seals in my parts box so it's on the to-do list. The more I think about your comment about the airpump, you probaly right, I will just keep it. My goal is to retire one day in Palm Springs, better start thinking ahead Not that I am close to that, but this car is a keeper.
Originally Posted by ROG100
Great work - If you want to get rid of the smog pump or just cut the belt to it, you can replace it with a shorter belt that runs from the crank pully to the fan pully.
If you measure the outside diameter of the pully directly behind the fan you can define the size of the belt that goes directly between the crank pully and the fan pully.
If the OD of the fan pully measures circa 3" you need a 20" belt. Circa 4" you need a 21" belt.
Unbolt the fan bracket from the block and install the new belt. Bolting the bracket back to the block sets the right tension on the belt.
We stock the belts for $10.
I agree about the PKT video - "Guys with Rides" are good customers of mine and they had a lot of fun doing the video. The video is also on my web site.
Hey Roger, good to hear from you. As you can see I am back at it. Took a little time to get back going, but I am looking forward to buttoning this thing up again. As always, thank you for all the great advice you provide me so far. All you guys rock and I owe you so much. And the guys with Rides are fun to watch, keep it up and make more videos, you are making my life easier.
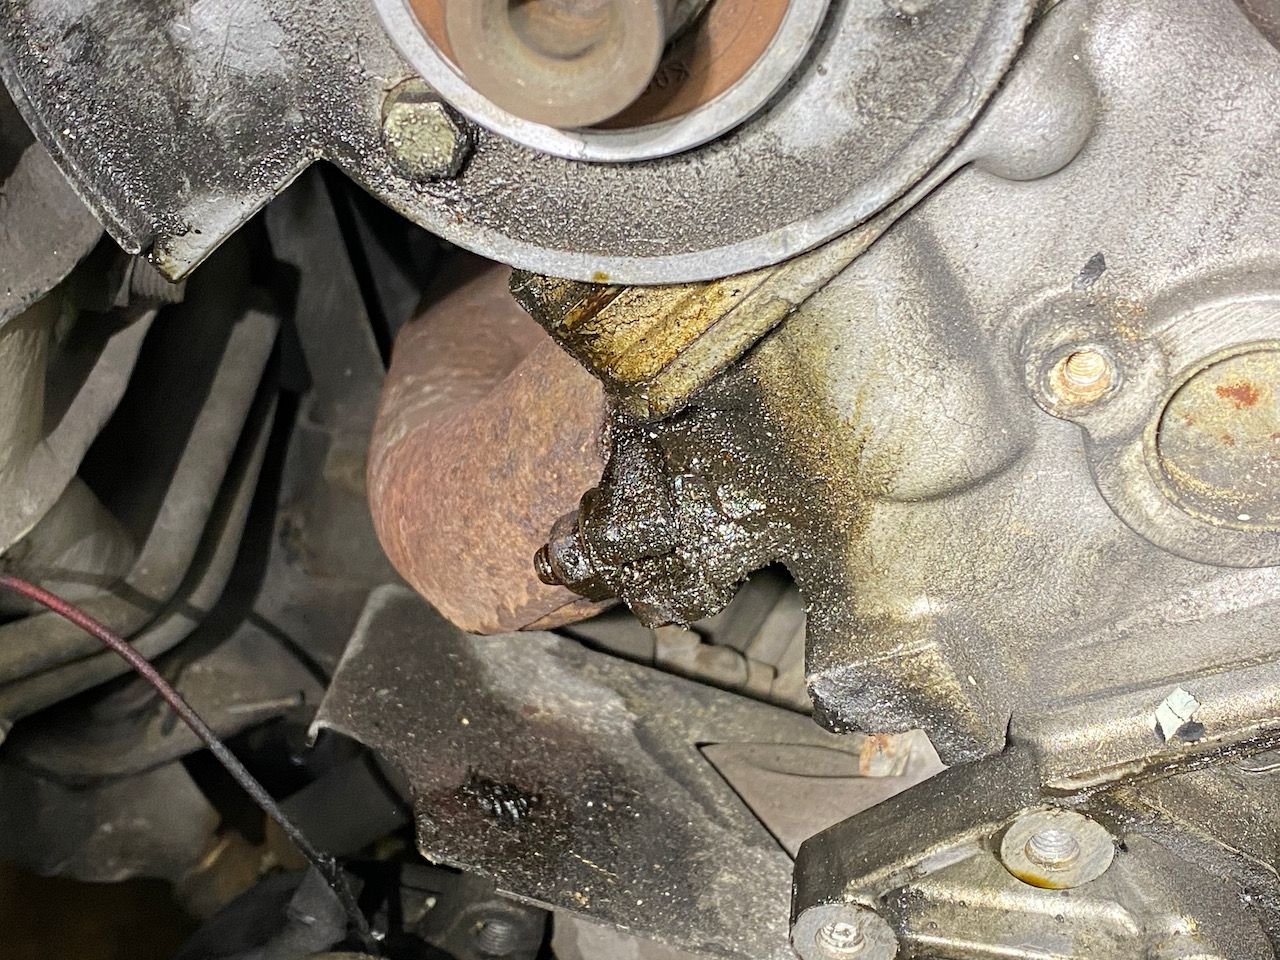
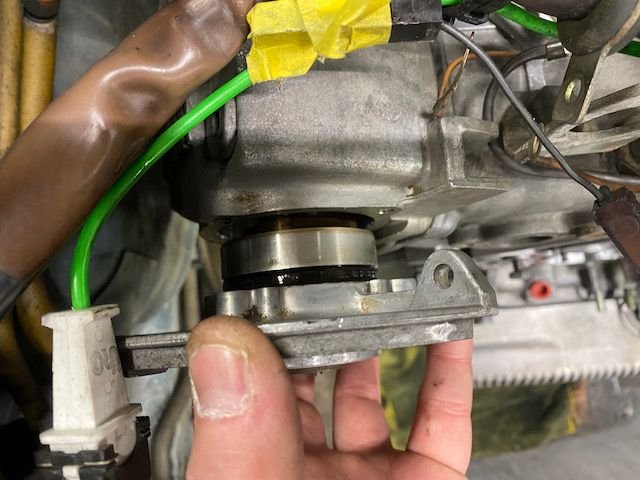
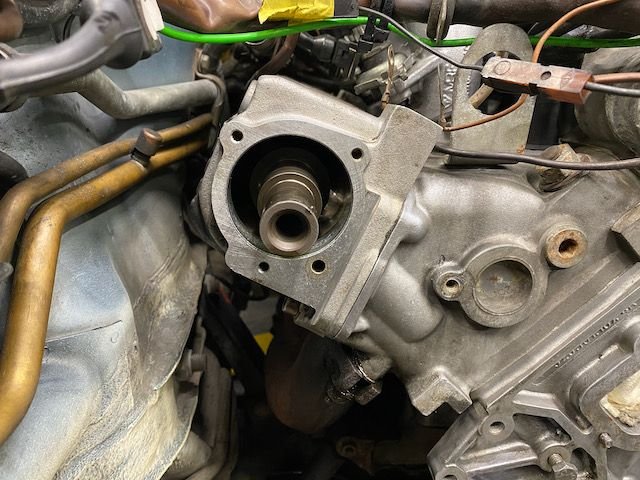
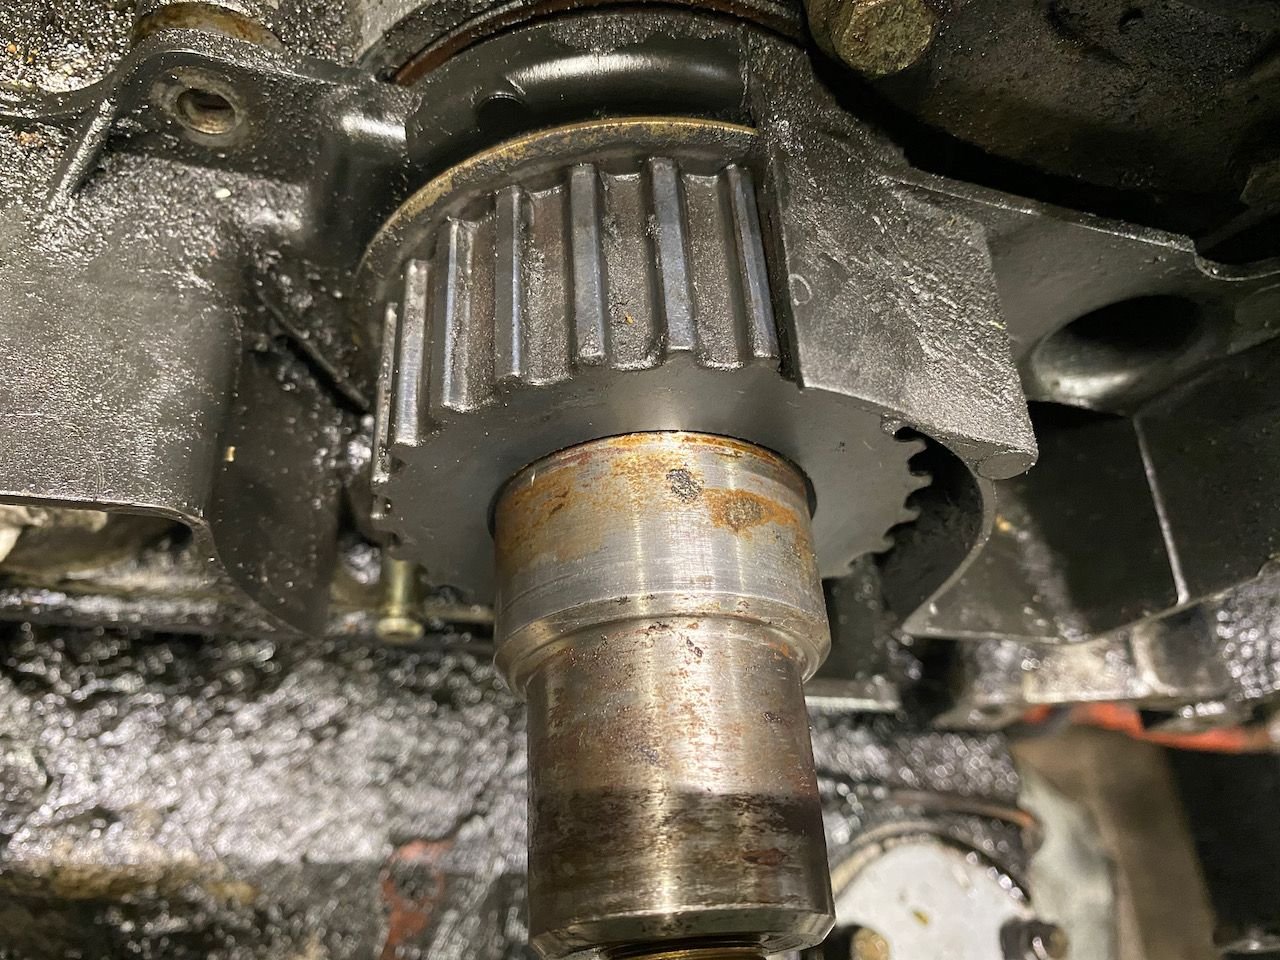
I did a little bit more work today and got the crank gear off, Not without jacking up the rear flange washer with the puller. I also had the grind the puller down a bit to make it fit behind the gear and between the cover. It sure is filthy behind there and the crank seal seems to be leaking pretty bad.
Leaking pretty bad, I bet it has never been replaced.
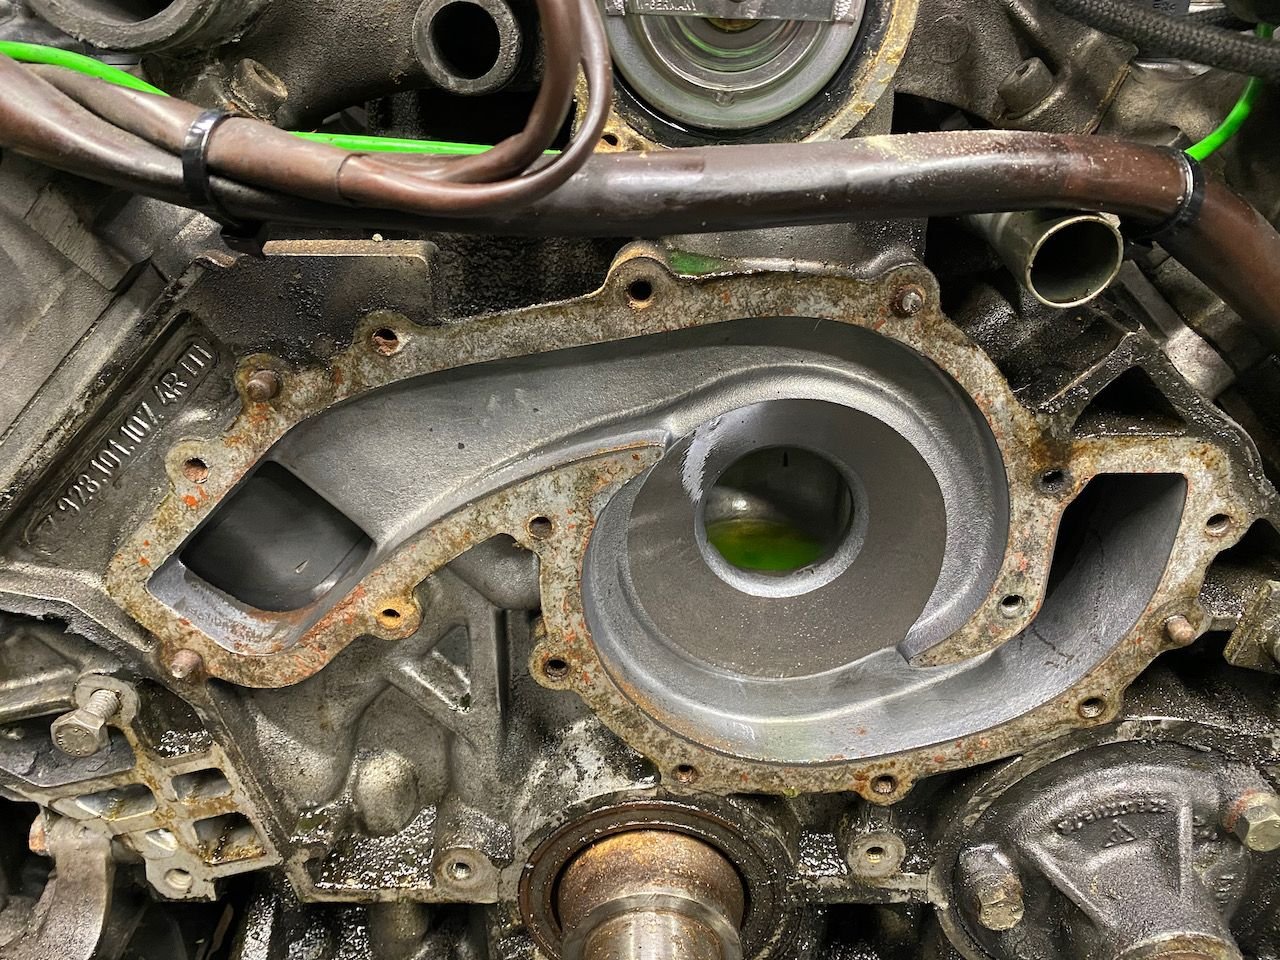
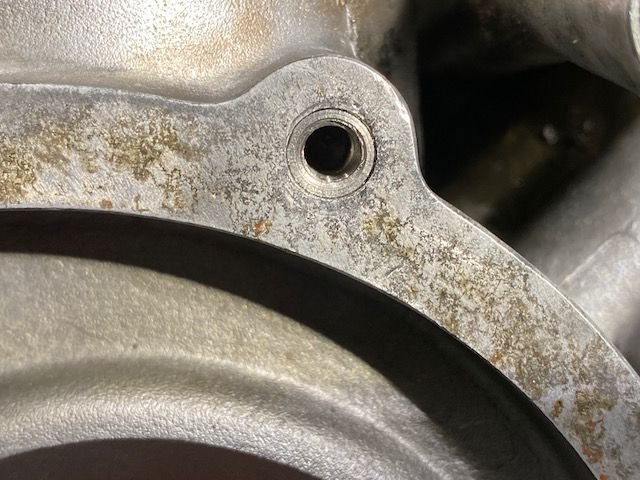
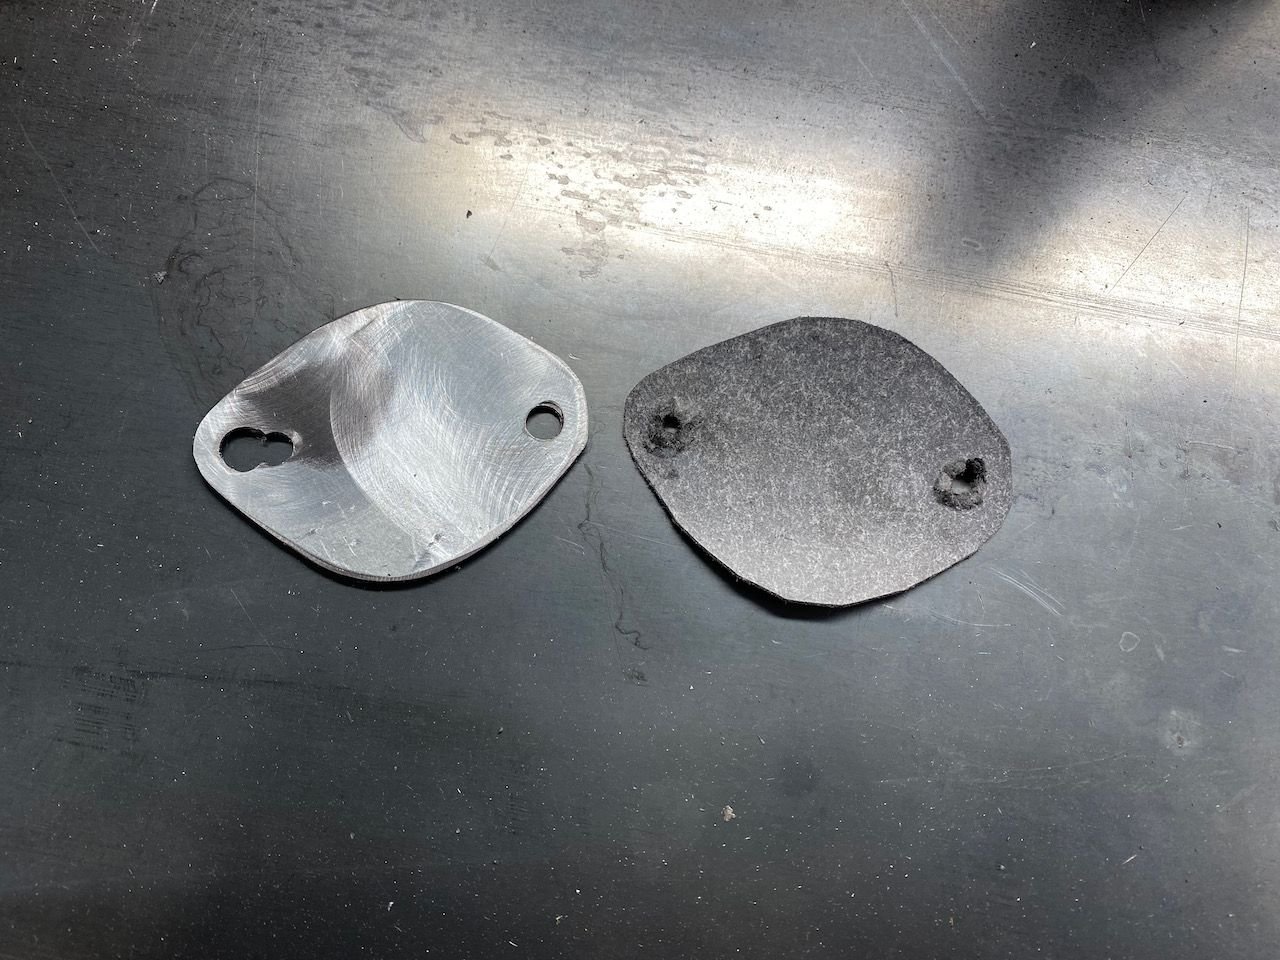
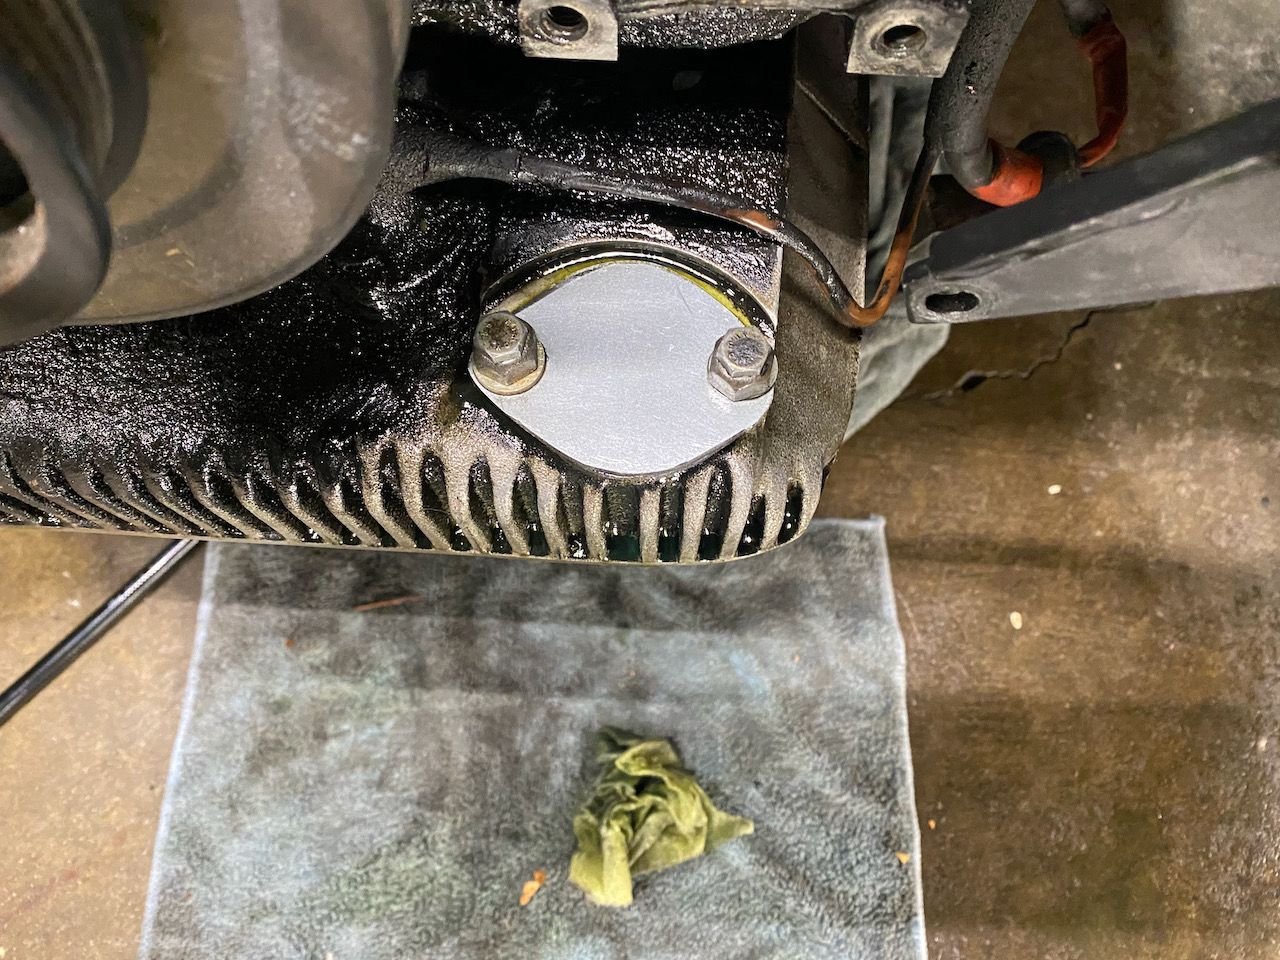
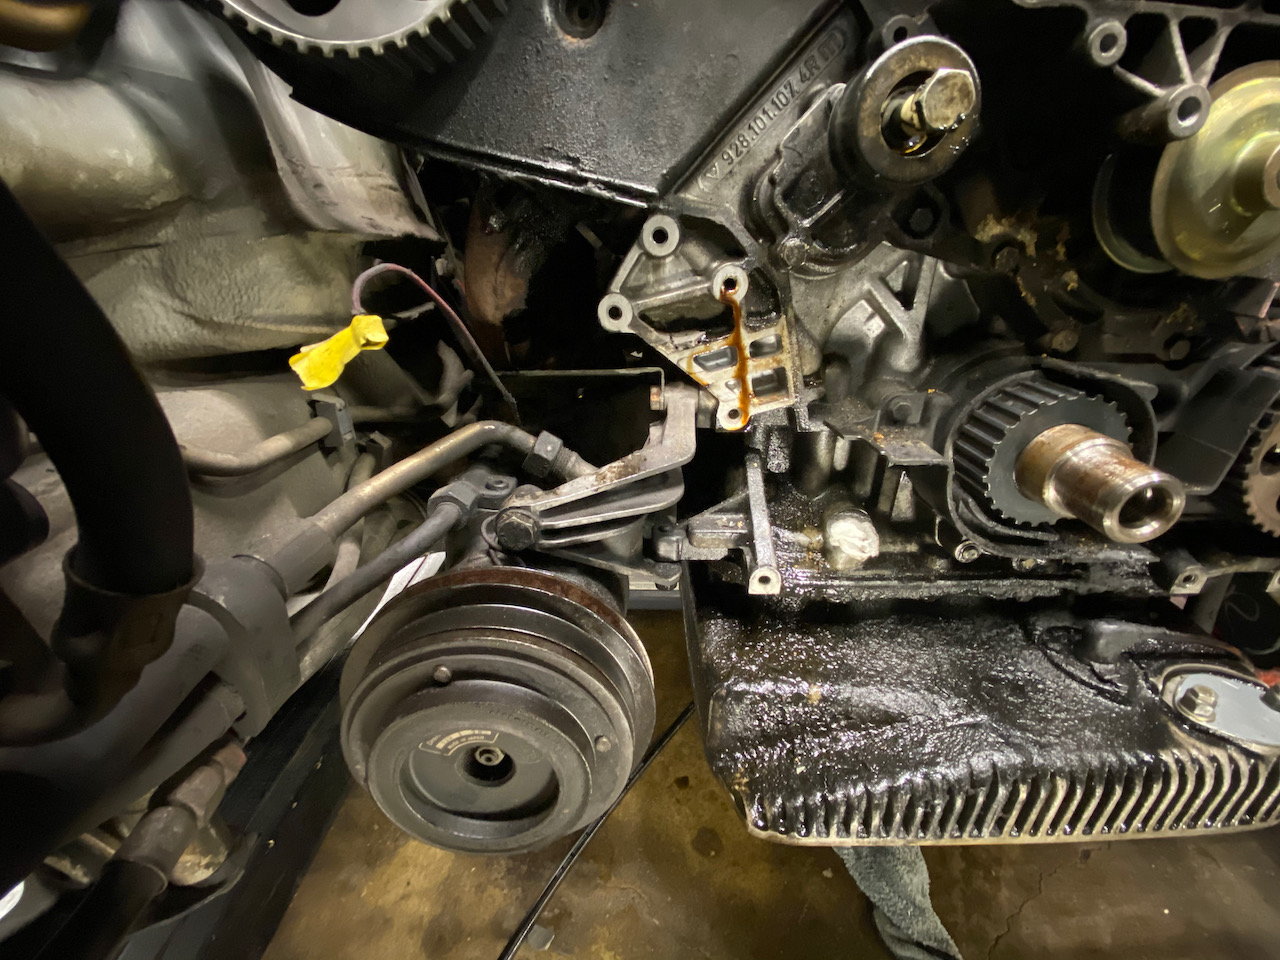
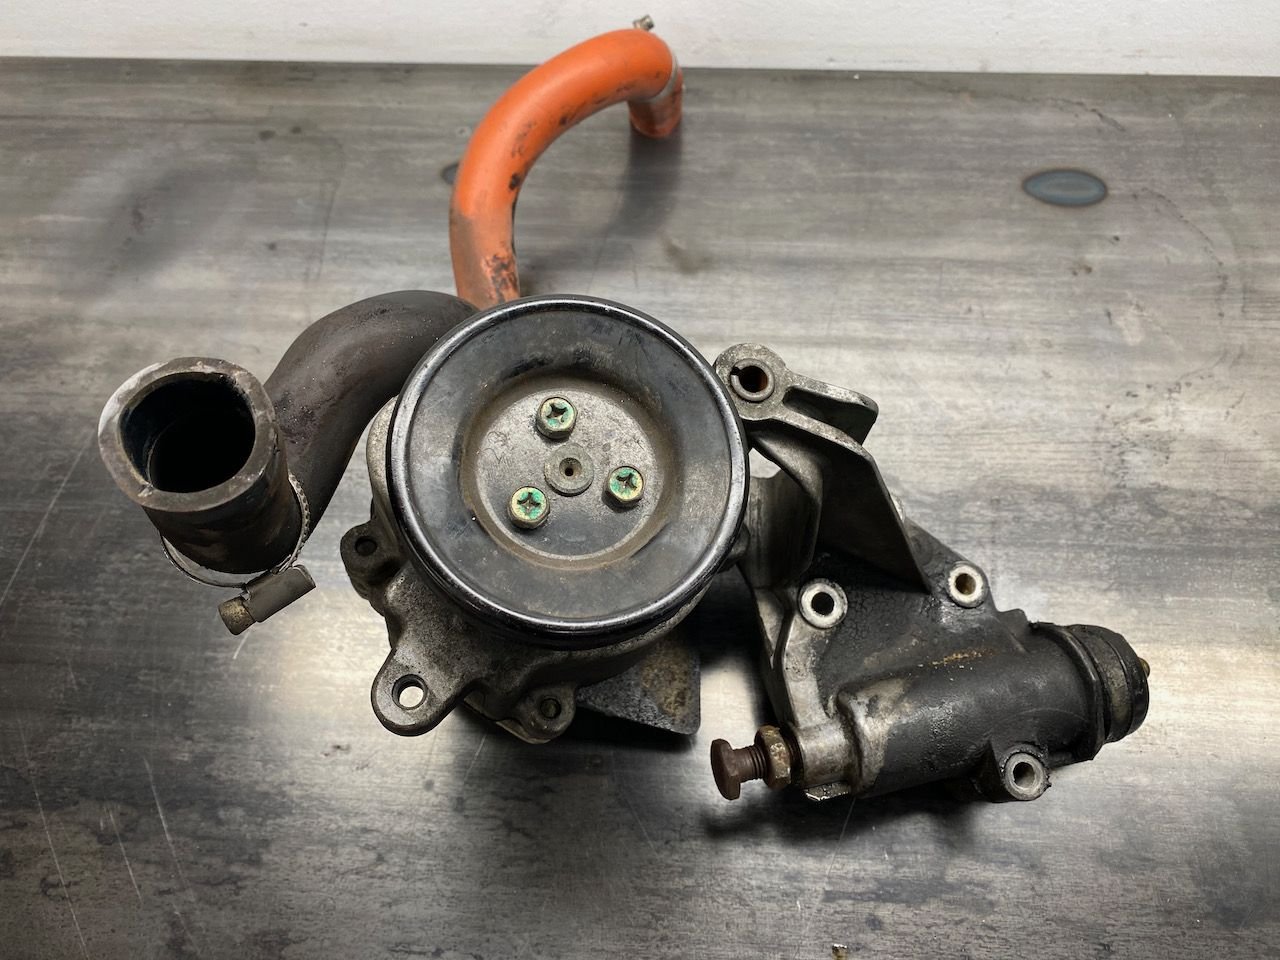
I also notice a significant leak from the distributor. To fix that leak do I just replace this part 928 602 103 00. Looks like there is a sealing ring based on the PET.
Now on to the water pump. Keep your finger crossed I don't break any bolts.
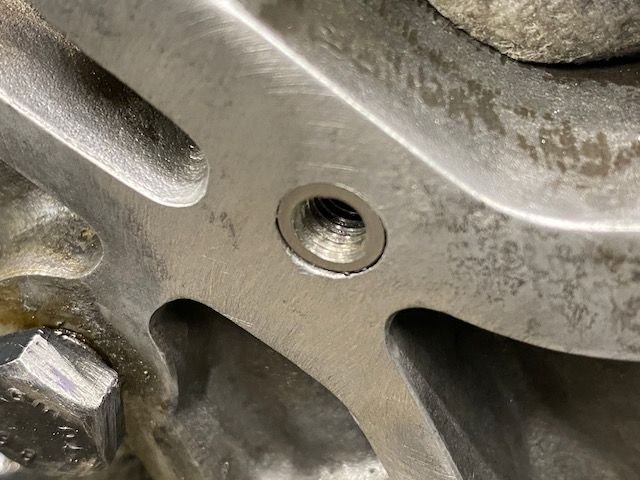
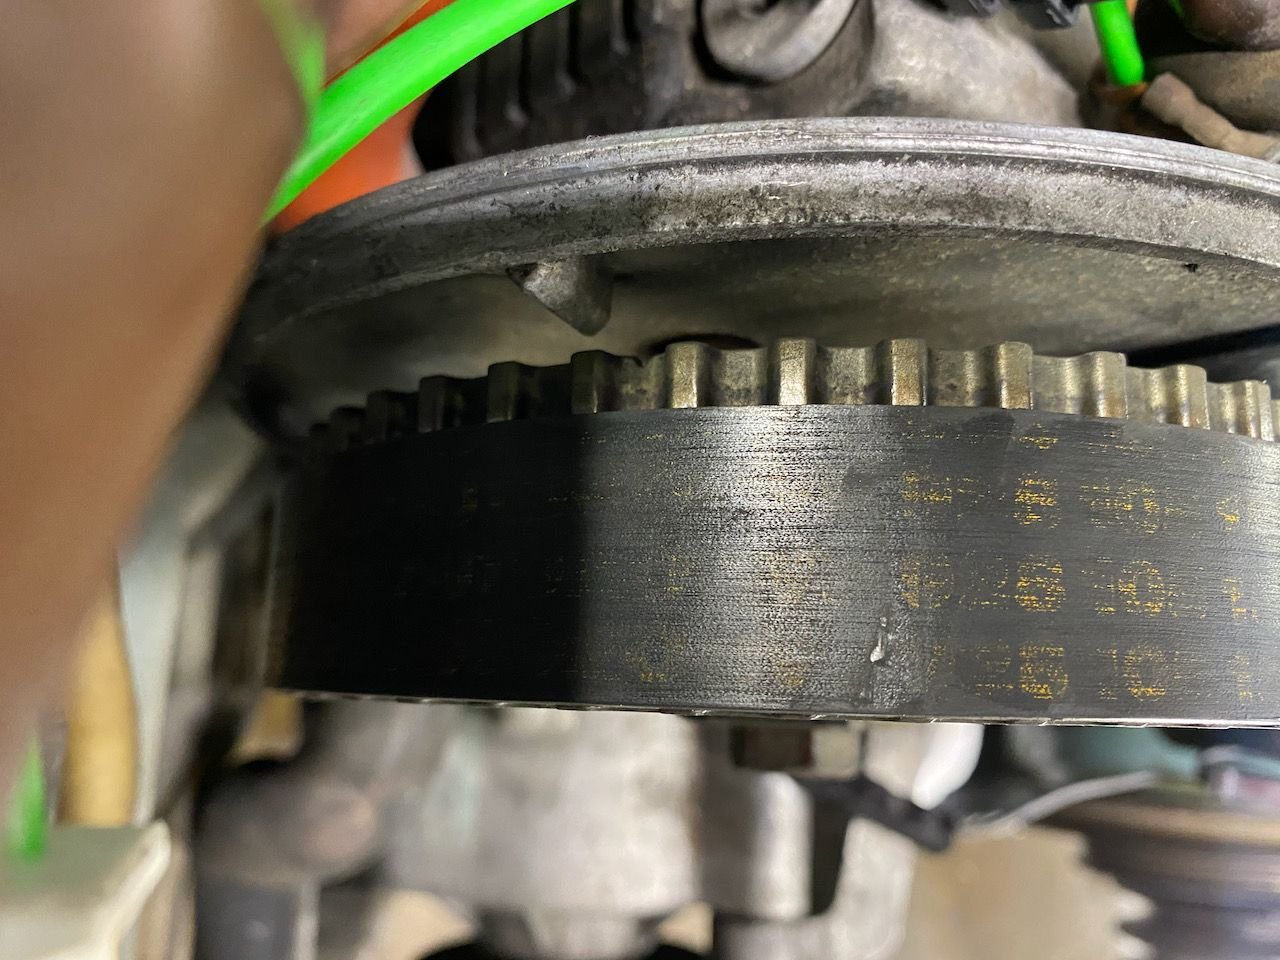
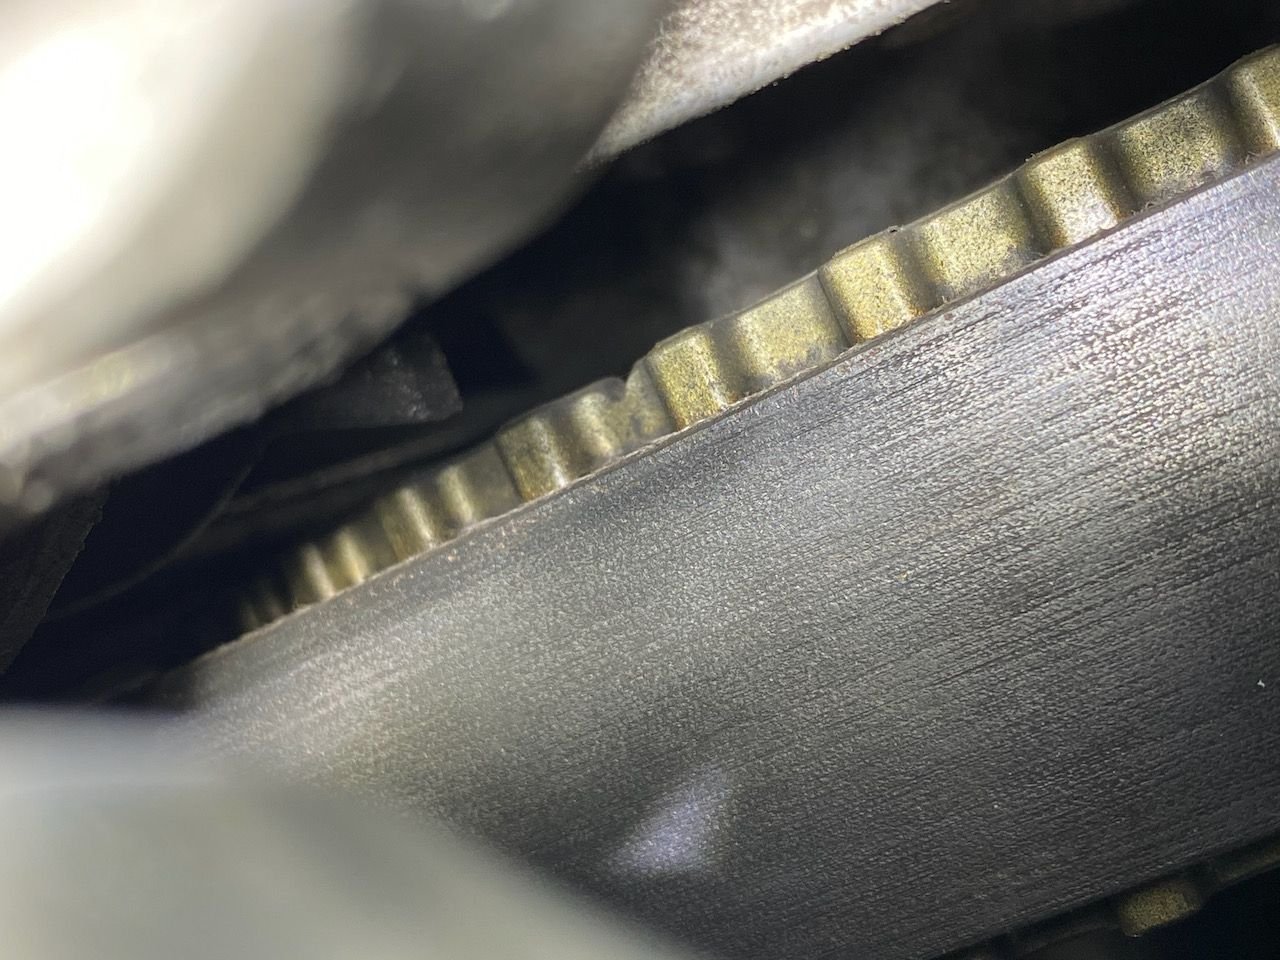
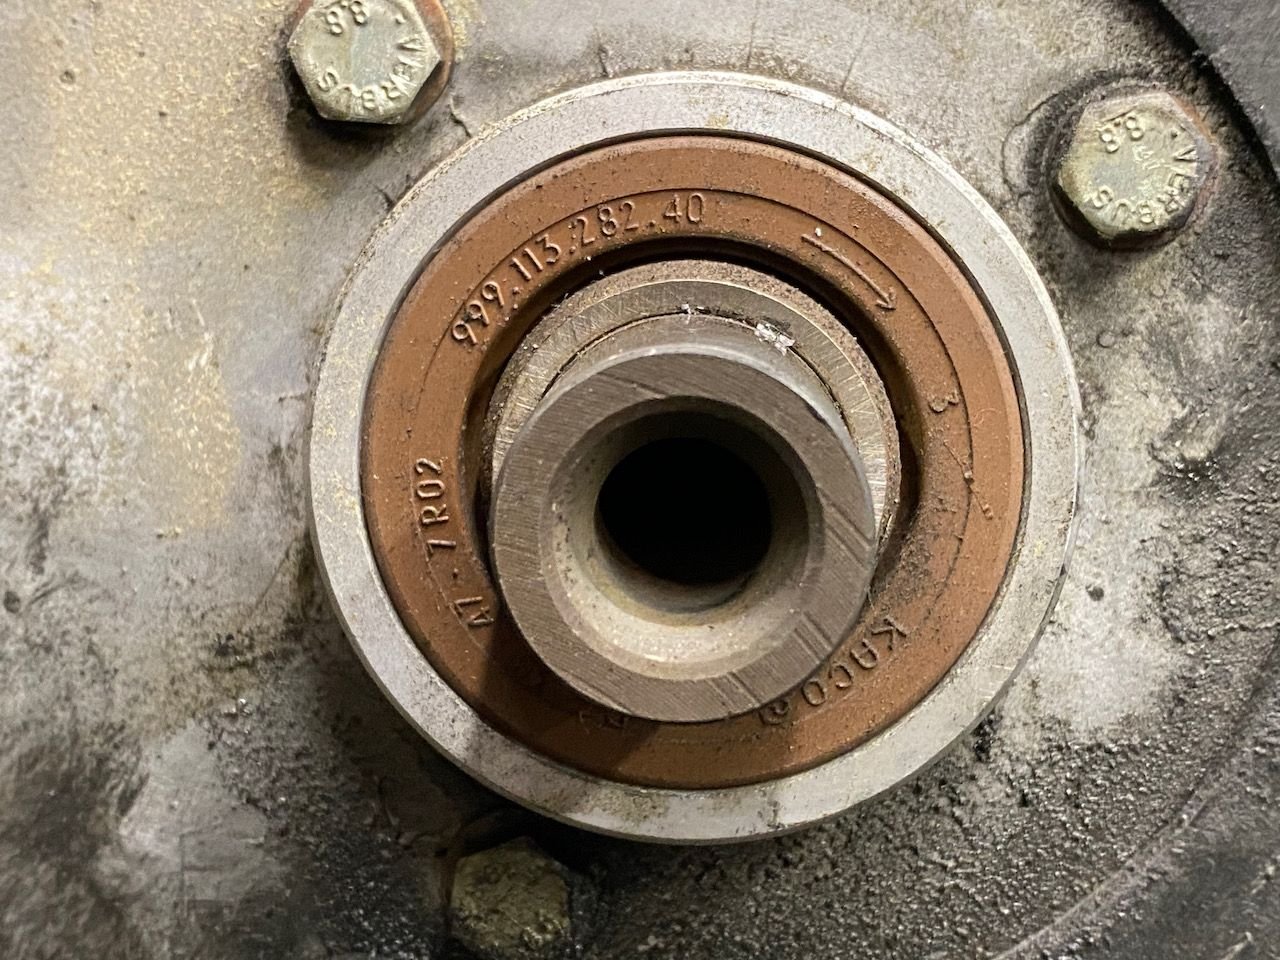
Those cam gears look to be done.
It looks from the pics, that you are through the coating and into the metal.
You can find out for sure with a straight edge. If you lay it across the tooth and can see light under it, you are into the metal and recoating isn't an option.
If the crank gear doesn't come off easily, you almost have to destroy the flange washer. They're dirt cheap.
There's a sort of O-ring kind of seal that goes around the outside of the distributor shaft housing. Replacing it is part of doing the cam seals. There are the seals for the cams themselves, the little 'squash' seals that go between the cam fronts and the cam tower and the seal for the distributor (maybe one more?) When I did mine, I just told Roger to send me all the seals I'd need to replace.
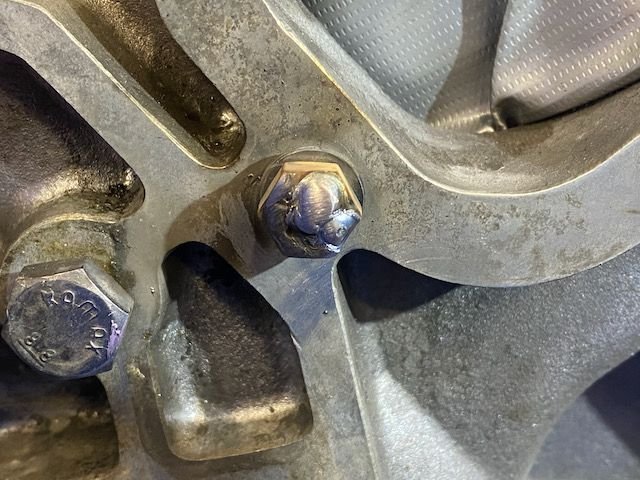
Yep, just tried the straight edge across the gear and definitely concave and showing light, they are toast. I also had to destroy the crank gear flange but no biggie, like you said they are cheap. I will look into those distributor seal/o-rings as well. I also just now got the water pump off, it wasn't stuck to bad,looks like it was put on without any additional gasket sealer, so probably original. UNFORTUNATELY, 2 bolts snapped off........son of bitch. I knew it, my luck I had a feeling this was going to happen. Good thing, there is still some part of the bots sticking out. I guess I will have to soak them for a few days with PB blaster or anything else you guys recommend and try to either grab them with pliers or something. I Will definitely need to do more research on the best way, I really don't want to screw that up. Soooo bummed about that. Appreciate everyone's thoughts on that.
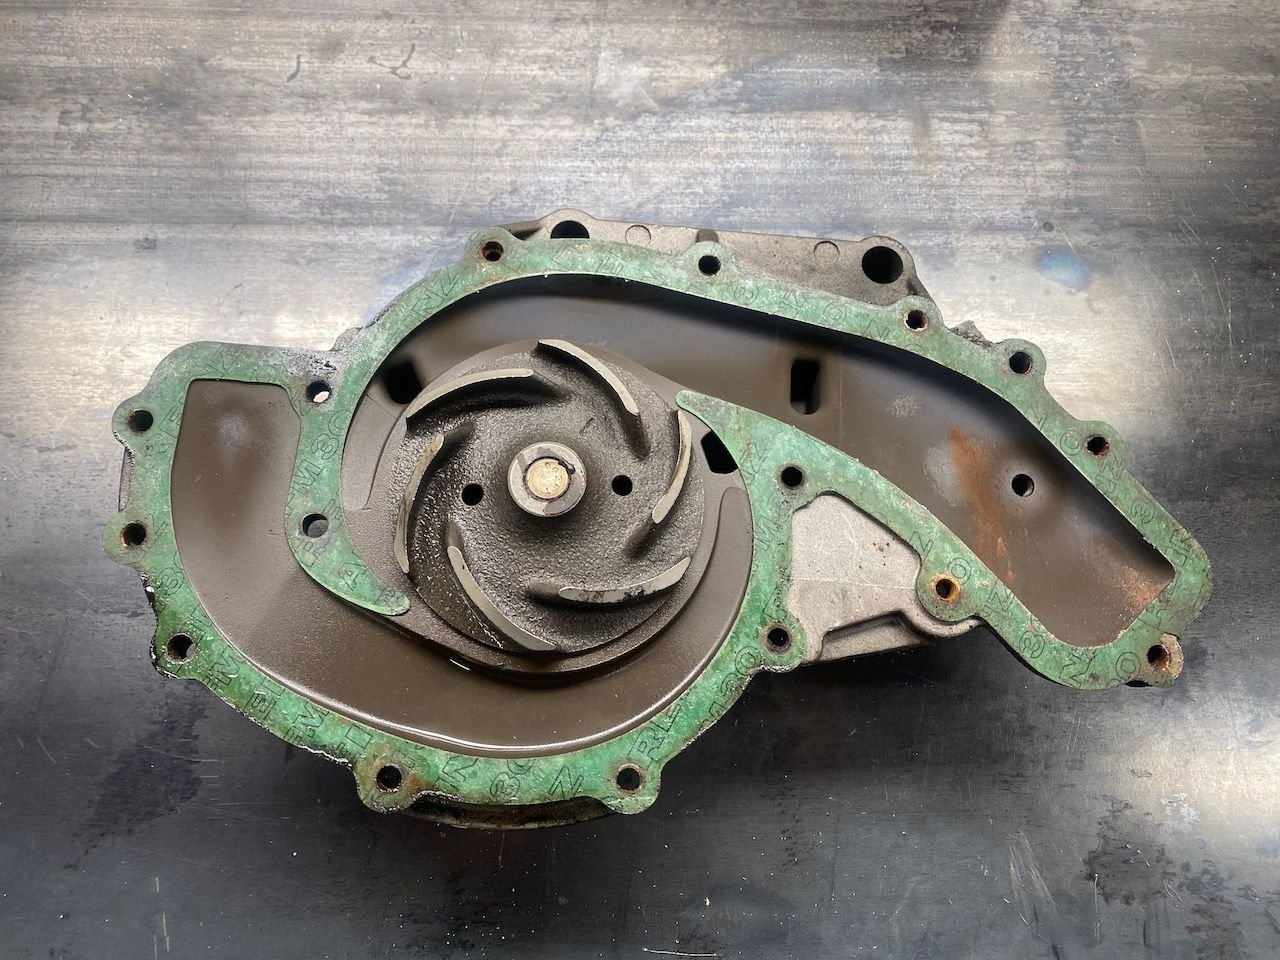
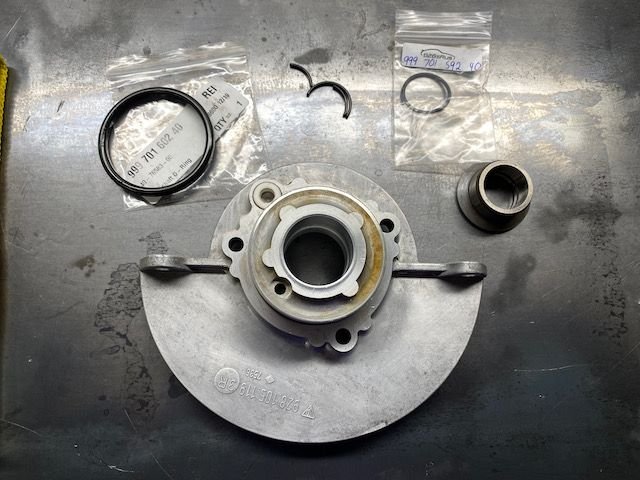
Is this gasket original?
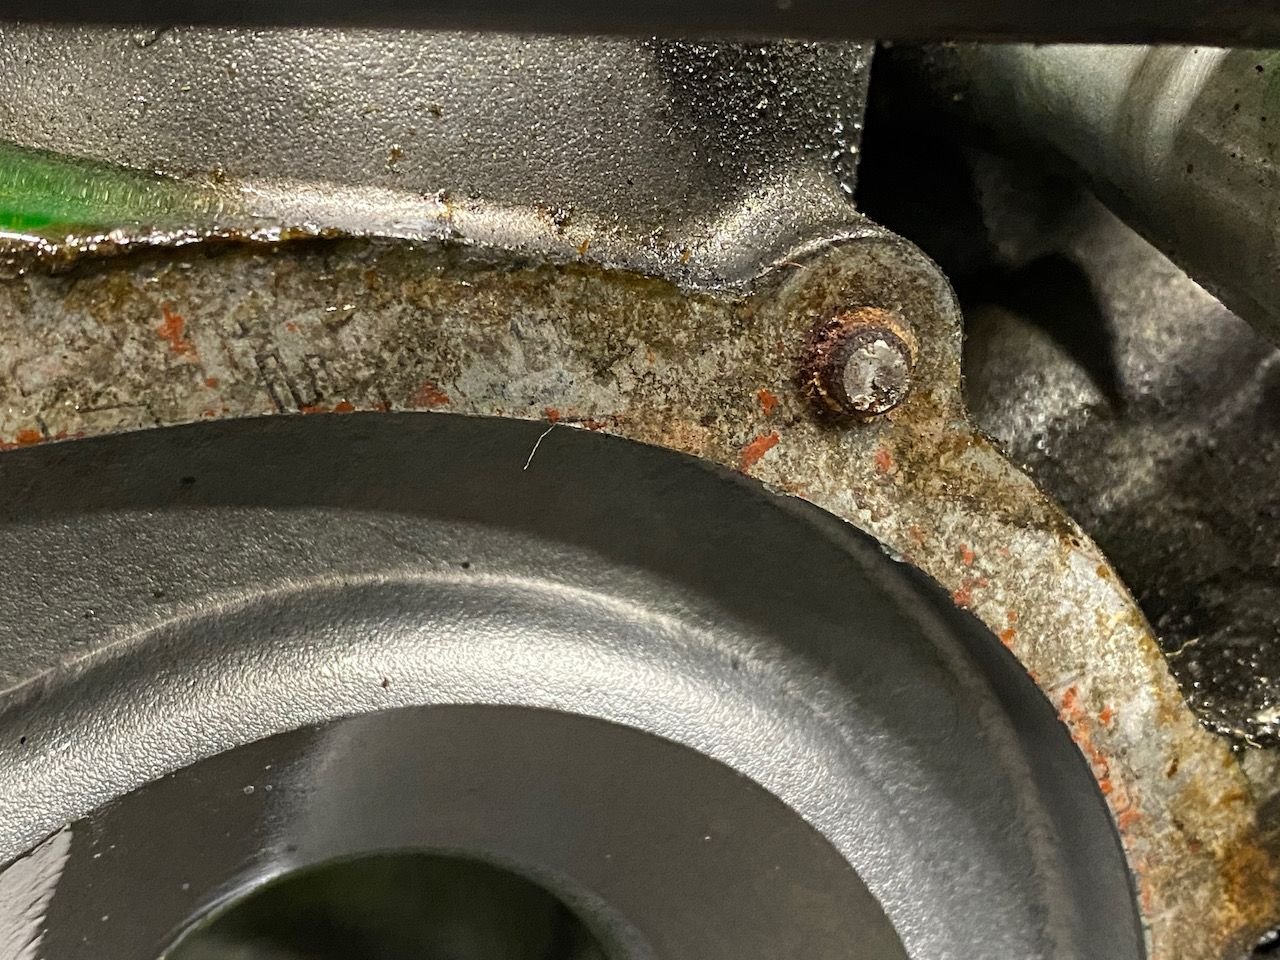
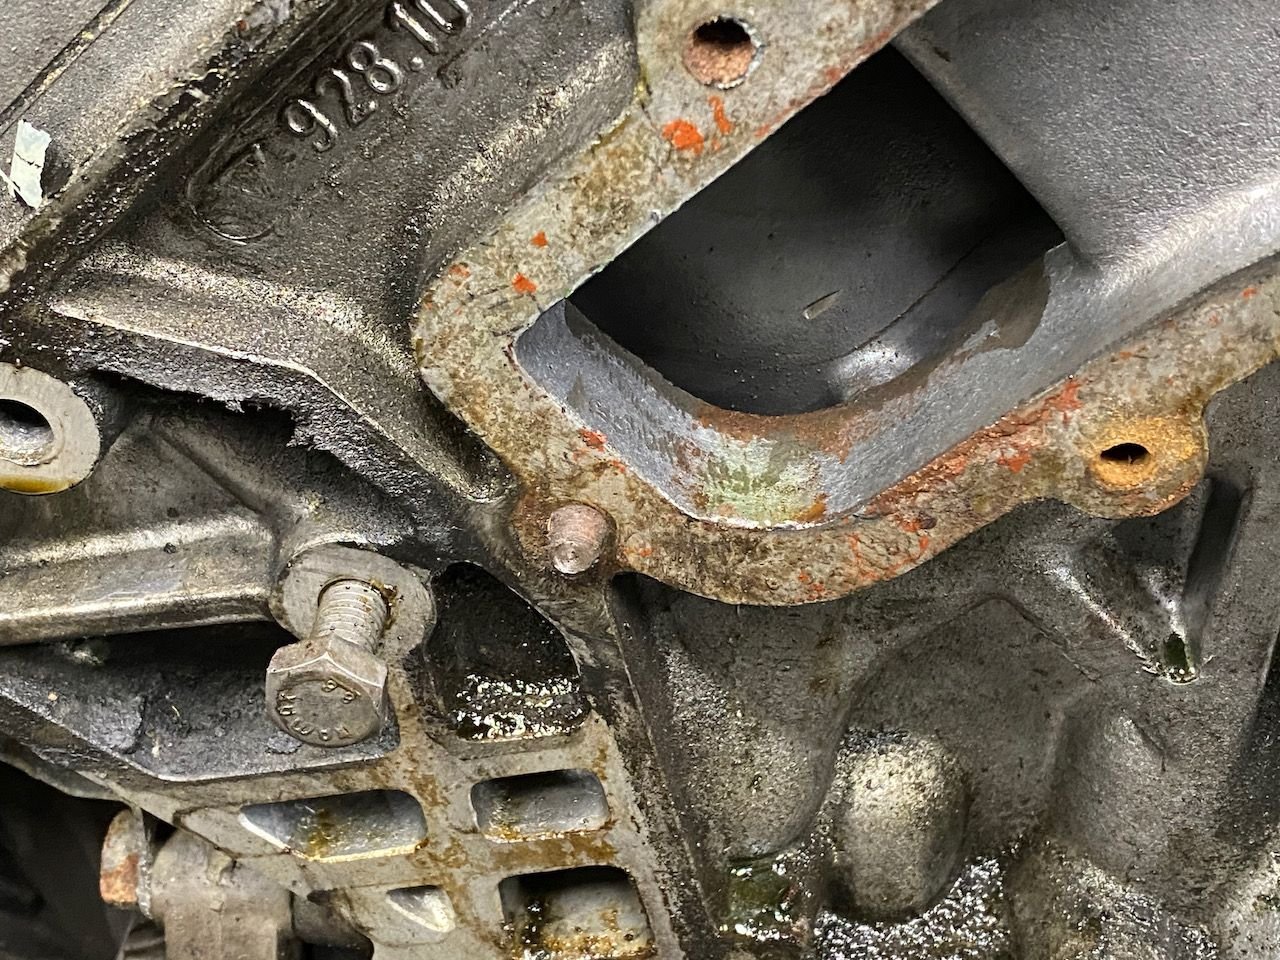
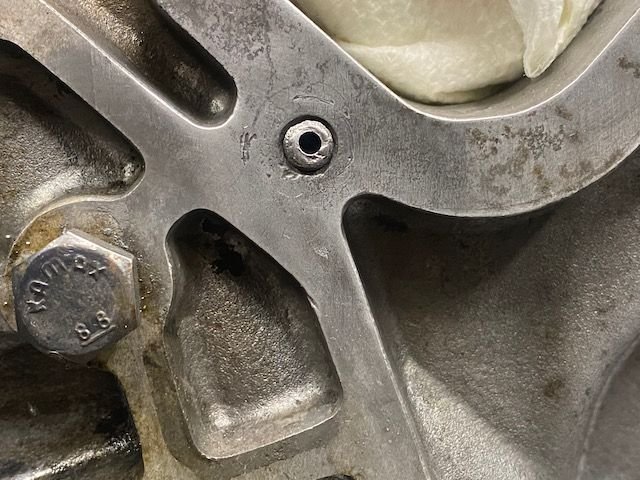
One of the broken bolts far top right
Here is the other broken bolt
What struck me as strange is that one of the bolts for the water pump was actually longer than then the other 2. I know the pump is supposed to have 2 sizes but the top center bolt to the left of the one on the right top broke was longer than the other long bolts. Is that normal? See picture below, top left bolt.
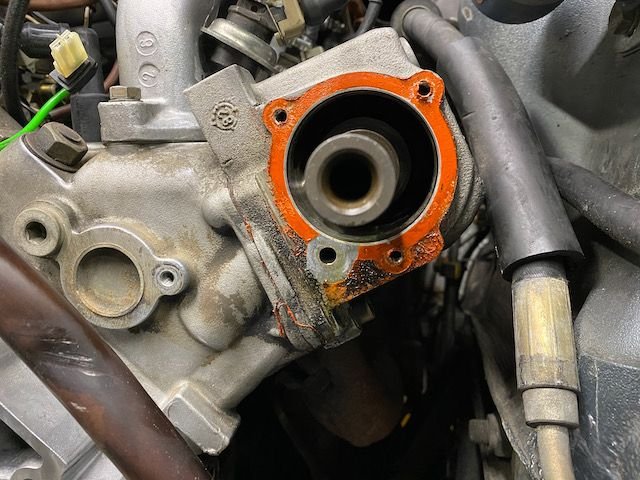
Also, where do you think this leak on the headers is from. Is that from my valve covers? I didn't see any seals behind the cam seal in PET.
The other side also looks like it has a leak in the same spot. Valve cover gaskets?
Anyway, time to call it day and time for a beer. Next step cleaning the crap out of it before I take the oil pump out and focus on the seals. Thanks again for everyone's support while I navigate through this adventure.
I see that you mentioned Porsche�s pink coolant in your first post....
Someone correct me if I�m wrong but if you�re using Porsche coolant then the blue stuff (Pentofrost NF is the OEM equivalent) is the only acceptable fluid. There are obviously other coolants out there that folks like but I believe that only blue is allowed if you�re dealing with the Porsche stuff.
So I was thinking. Would mig welding a nut to the broken water pump bolts to extract it be a BAD IDEA? Will I fry my electrical components? Just thinking out loud.
Time for an update. It's been slow progress, but things have been going well. Since my last post, I have accomplished a few more items and most importantly addressed the broken water pump bolts. Those were giving me the biggest headache, but I am glad to report I have overcome the challenge. Here are some of the items addressed since my last check-in.
Cleaned the heck out of the engine
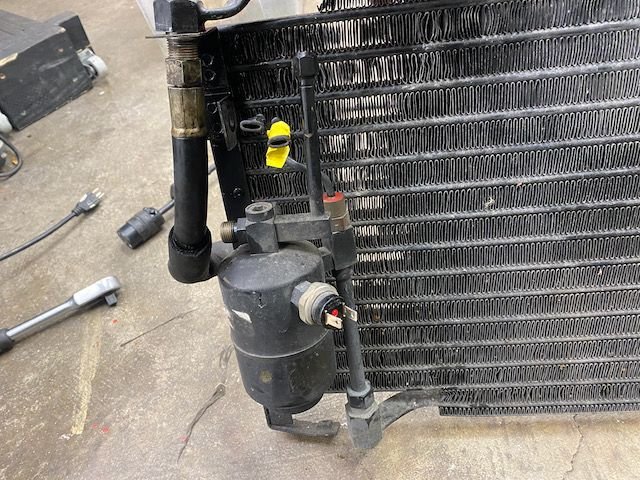
Removed radiator and condenser and flushed them.
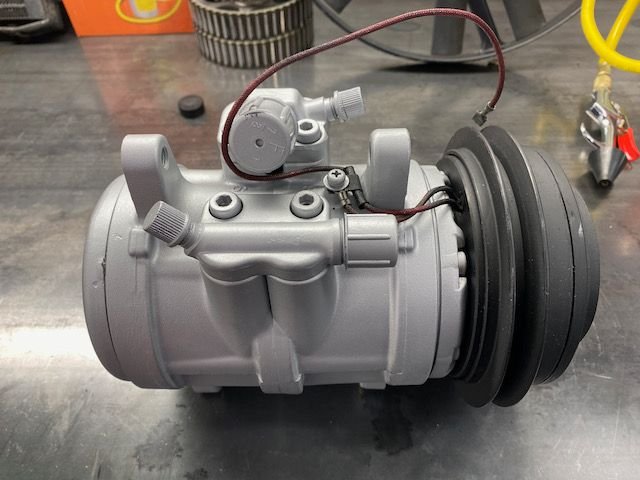
Removed AC compressor and sent it out to get refurbished.
Removed expansion valve and flushed all the AC lines, condenser, evaporate to prep for R134a conversion
Removed oil pump and replaced seals and o-rings
Replaced sealing ring on the distributor shaft
Replaced o-rings/seal behind cam tower total of 3
Replaced crank and camshaft seals.
Replaced oil level sender gasket
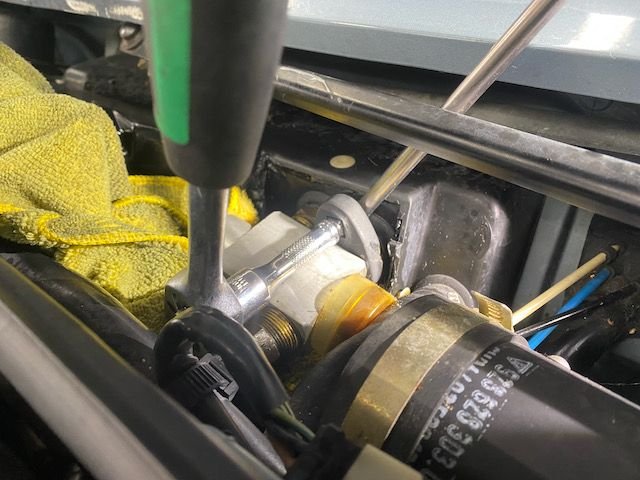
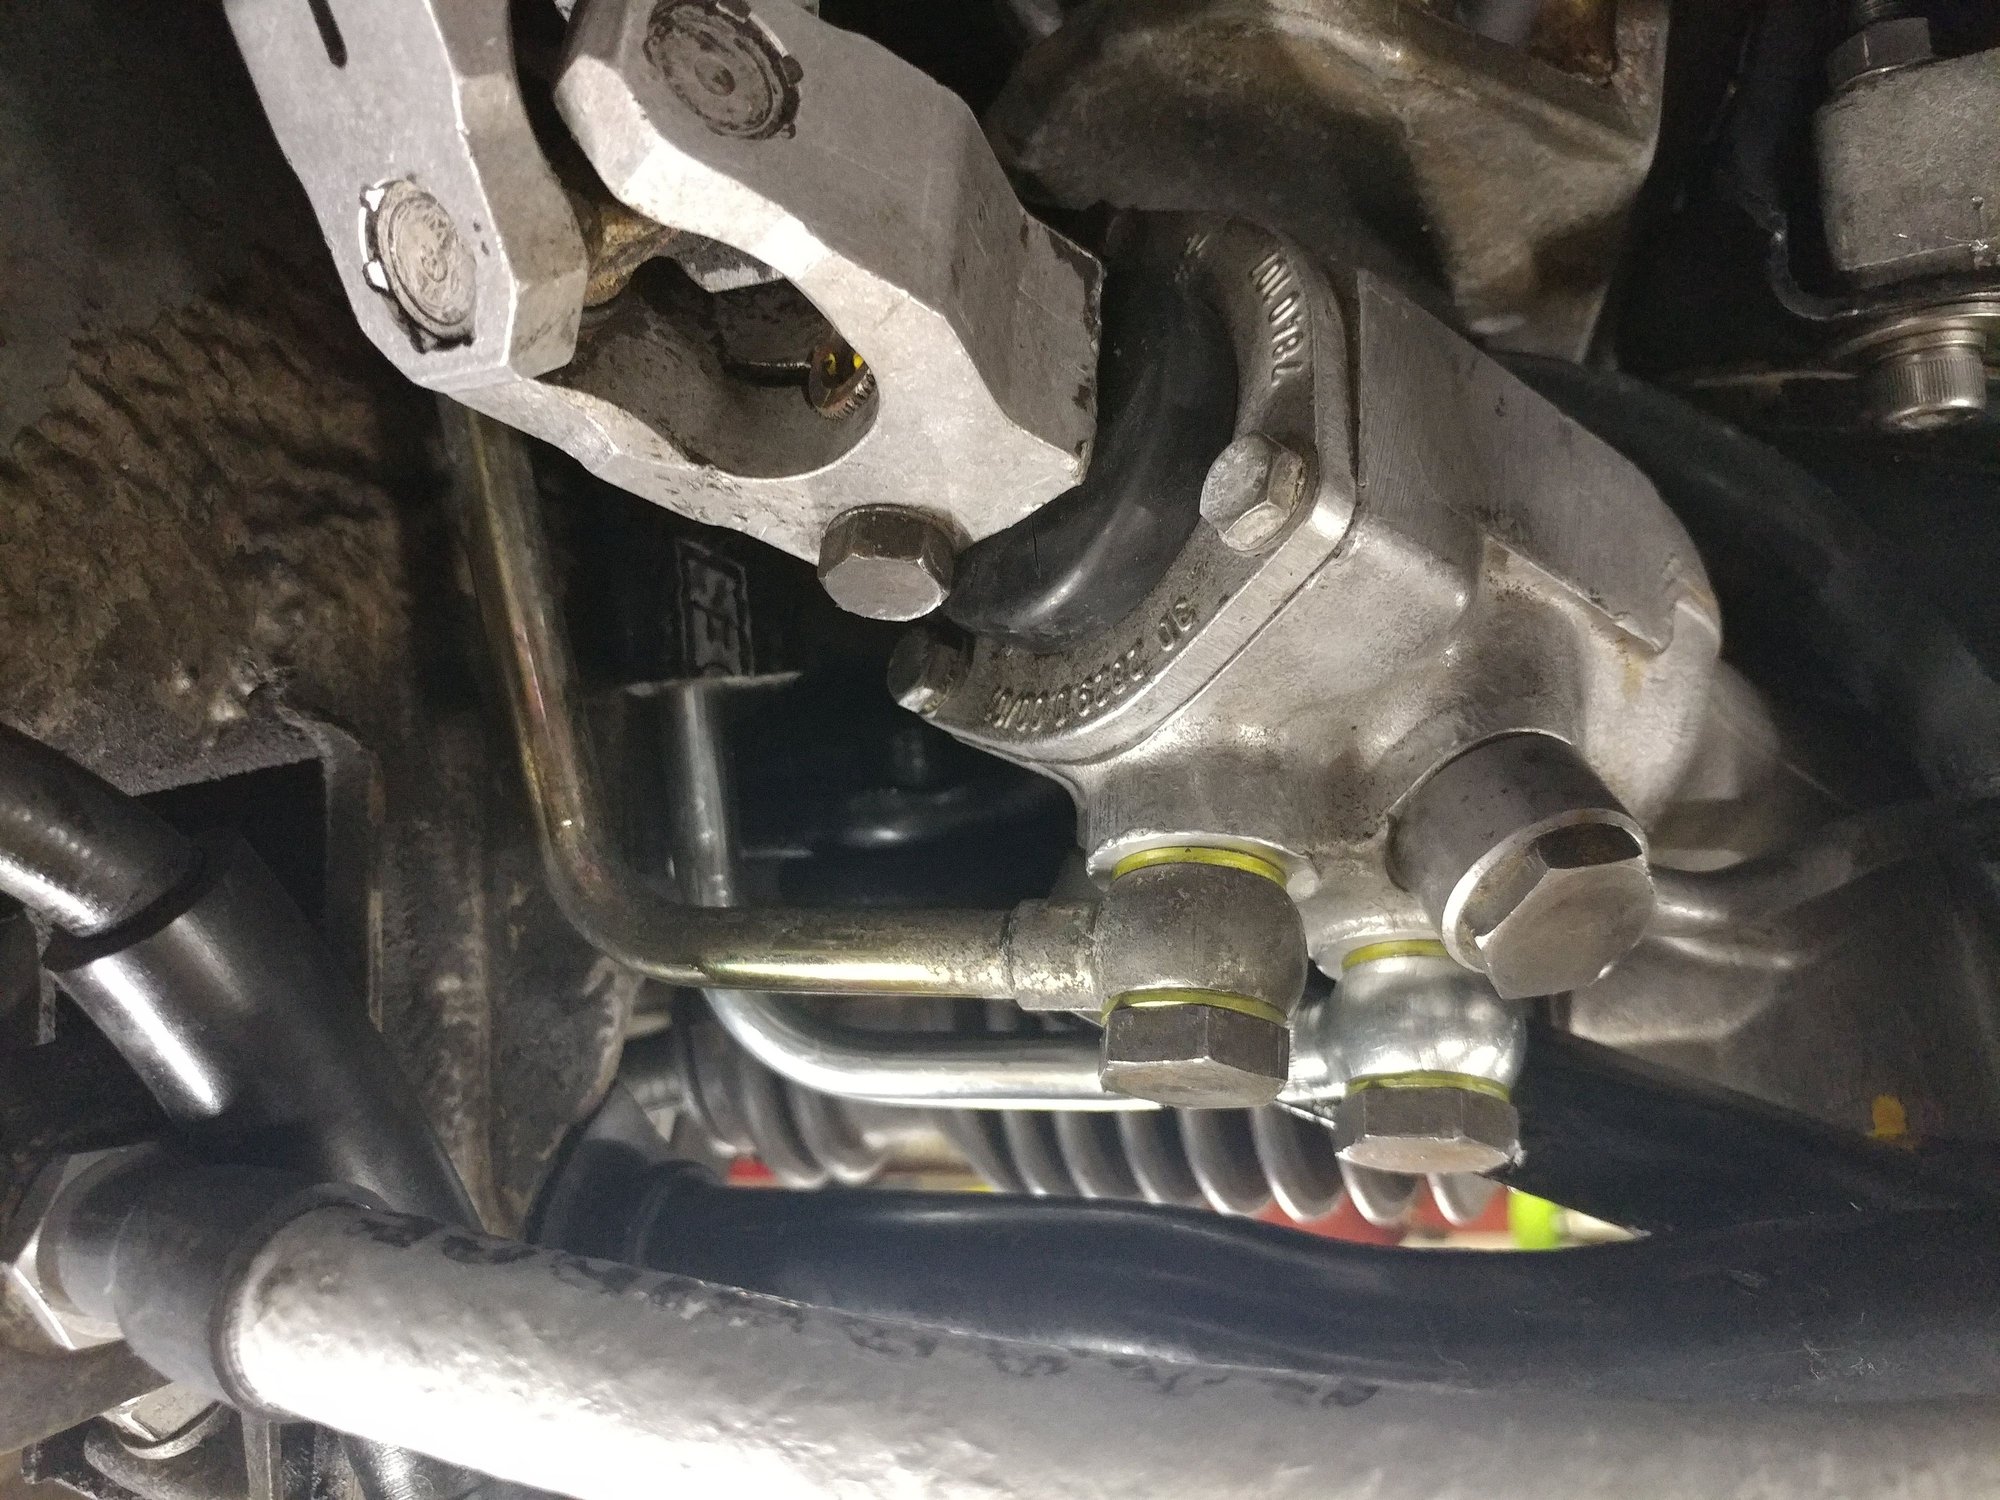
Replaced high-pressure power steering hose from the reservoir to rack
Did I mentioned I cleaned the heck out of everything
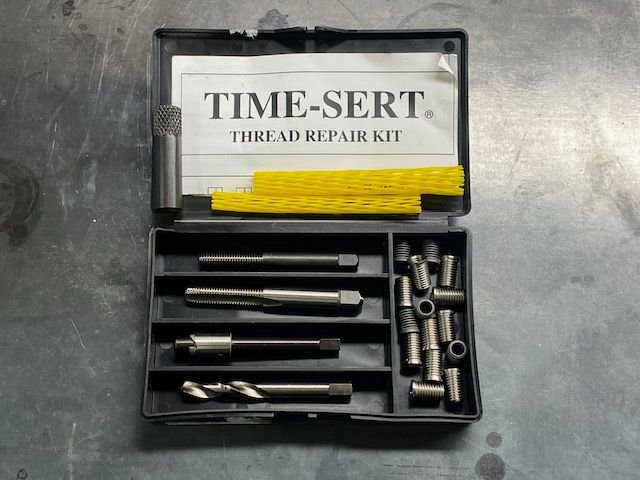
Drilled out broken water pump bolts and addressed with Time Sert kit. The biggest win and success thus far, my anxiety is over
Here are a bunch of pictures of the progress. Thanks again for everything that has helped me thus far.
Before cleaning
After some cleaning
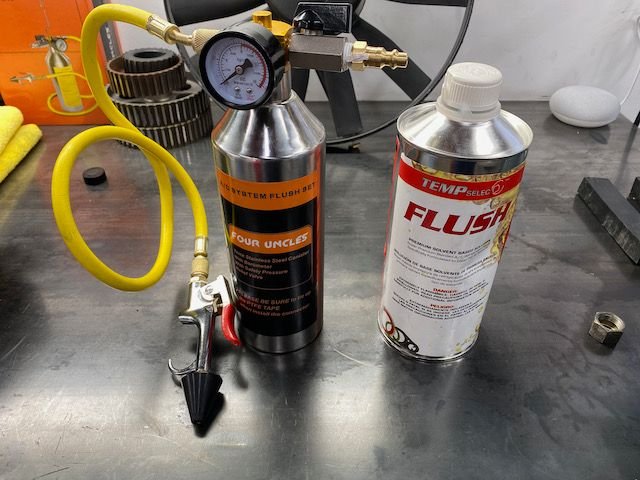
Removed the condenser and flushed the system with an amazon flush kit I purchased.
Refurbished compressor, cleaned and tested and ready for 134a conversion
Here I am removign the expansion value. I found that using a flare nut crowfoot worked well without messing up the nut.
Connected hose to properly flush out the old oil
Same for the lines going to the evaporator. I used a 5/8 hose and slighly tightened them with some hose claims.
Oil pump removed, ready for new seals and o-rings
Here is the dsitributor shaft, as you can see, i had some leaks. Hopefully the new sealing ring will address this problem.
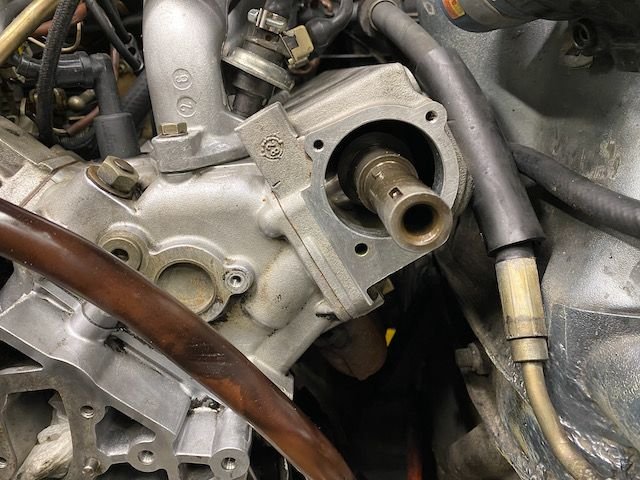
Cam tower flange removed to address the leak i had from behind. Their were a total of 3 seals to replace.
Here is shot of the driver side camshaft flange/tower whatever you call it. Looks like someone tried to use some sealant to prevent it from leaking. I put mine back on dry after I replaced the 3 seals/o-rings
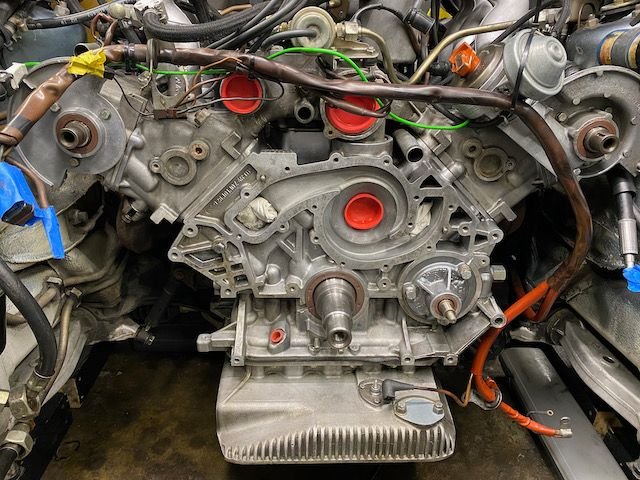
All cleaned up
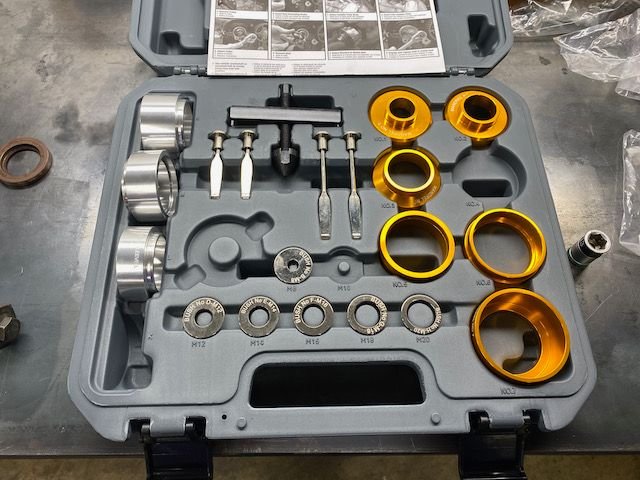
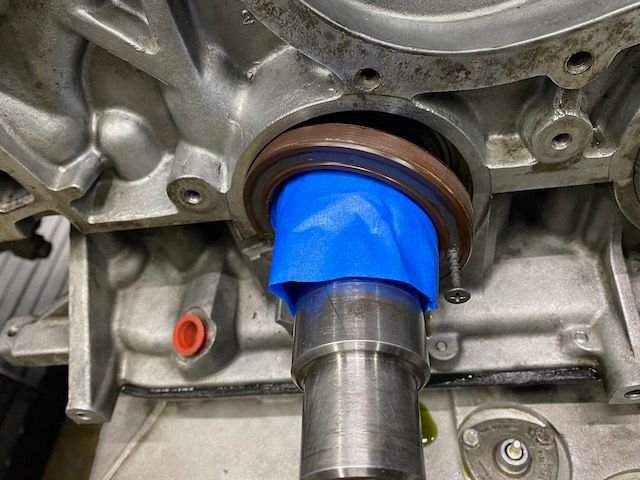
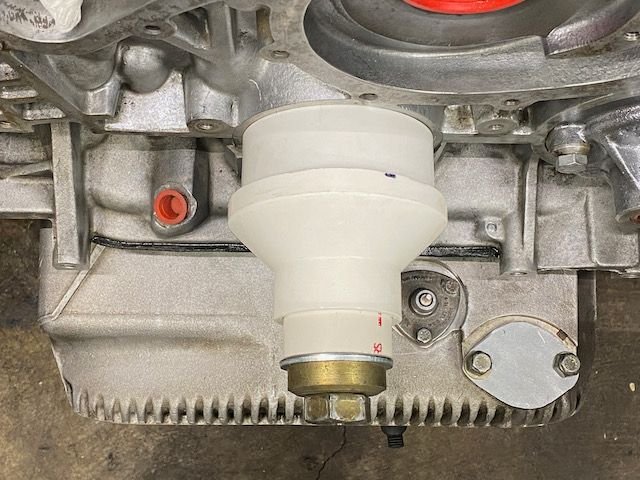
Bought myself a new tool to remove and replace the cam seals. Unfortunately, it was not big enough to remove the crankshaft seal. I had to improvise there.
Wasn't having any luck removing the crank seal from the slot on the left. It was in there pretty good. So I just decided to carefully drill a hole and used a drywall screw to pry it out.
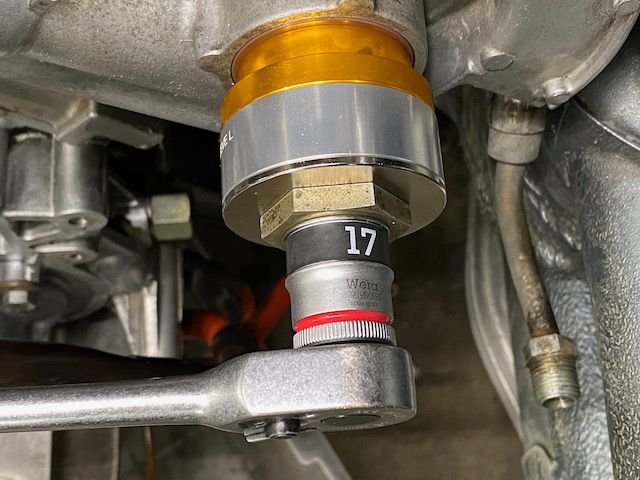
Here is how in made sure I pushed the crankseal back in straight. Got the idea from someone else here on the forum. Don't recall of the top of my head who it was but thanks for the idea.
Oil lever sender, replaced the sealer underneath it
So here was one of my attempts to remvoe the broken water pump bolt. After I PB blasted the heck out of the studs for several days I first tried to heat up the block and use a pair of plier to manually extract the bolt. Unfornately, that did not work. I then thought I would just weld a nut to it, give it some heat and extract it that way. Again, that did not work. The weld held up good, but ended up just breaking the remaing stud off. Go figure.
This was the tool that came to the rescue. I had not heard of Time Sert before I did a bunch or research. I was familiar with Heli Coil but quickly realized this would be the better way to go. Anyway, patience was the key and it all ended up working out just fine.
All drilled out and tapped for Time Sert insert
I pre-drilled a hole before I went in with the correct size. Glad I got it centered pretty well.
Time sert insert
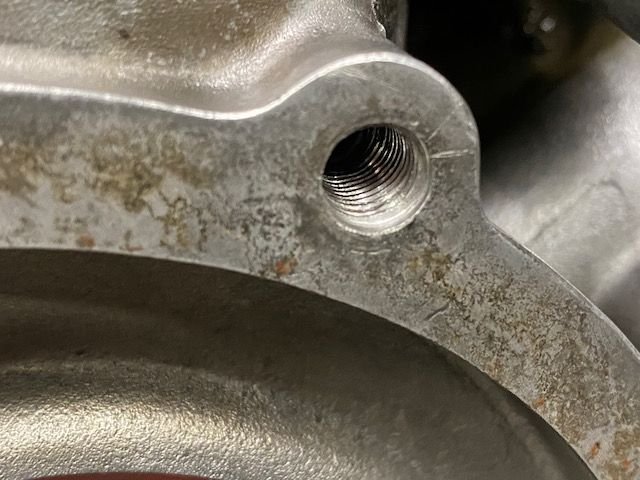
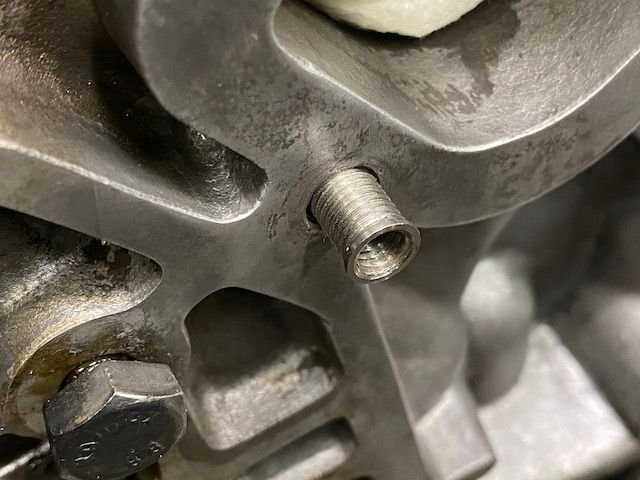
Looks pretty good to me. This was the lower bolt hole
here is the one on the top of the water pump. I am so happy this worked out well.
Next on the list is starting to put everhing back together. Wish me luck. I will provide more updates later and if you like you can follow me on youtube. Having a little fund documenting this process.
Nicely done! Bravo!! The care that you have taken is impressive, and the results show it. The cleaning efforts are terrific and will pay big dividends!
The Timesert was exactly the right choice, and GB's advice is always good-- especially a bit of sealant on the WP gasket.
Keeping those steel M6 screws dry in the aluminum block is important (as you know). Stan (MrMerlin) recommends PTFE pipe sealer, certainly can't hurt.
I've always done them dry, with sealant on the WP side of the (green) gasket, so far OK. Many answers, what you don't want is wet steel fasteners into the aluminum block.
I was going to ask about the R134, whether you were sure about that choice. But I just checked the market price for R12 on eBay... Never mind. Yikes!
Nicely done! Bravo!! The care that you have taken is impressive, and the results show it.
Thank you Jim. I am learning a lot and it's very rewarding when things work out fine. I really do enjoy doing this, but thank god it's not my day job. I would not be able to make money when considering how long I take. Hopefully, things will continue to go well and if not I know this community will help me out if I get into a pickle.
For the WP bolts I was going to use some silver never seize based GB recommendation, I am wondering if some of the PTFE sealer might be something I should consider since I already had a major problem with water getting into the bolt holes, sure don't want that to happen again. What do think about using stainless steel 8.8-grade bolts vs. 10.9-grade yellow plated bolts? I was not able to find any 10.9-grade bolts that are stainless, not sure if they even make them.
The gasket I have is from Elring and is grey. I have some Curil K2 so will definitely apply some on the WP side as you recommended. Initially, I was going to put it on both sides, but sounds like the WP side is only needed? Regarding R12, I did think a lot about it. But since I flushed the system pretty well, I am thinking I just go with 134a and use Ester oil vs. PAG. I really don't know, so many opinions on that subject. I just know it will be nice to be able to get r134a easily in case I have issues.

 01-07-2021, 06:40 PM


 George Layton March 2014
 Not that I am close to that, but this car is a keeper.