When you click on links to various merchants on this site and make a purchase, this can result in this site earning a commission. Affiliate programs and affiliations include, but are not limited to, the eBay Partner Network.
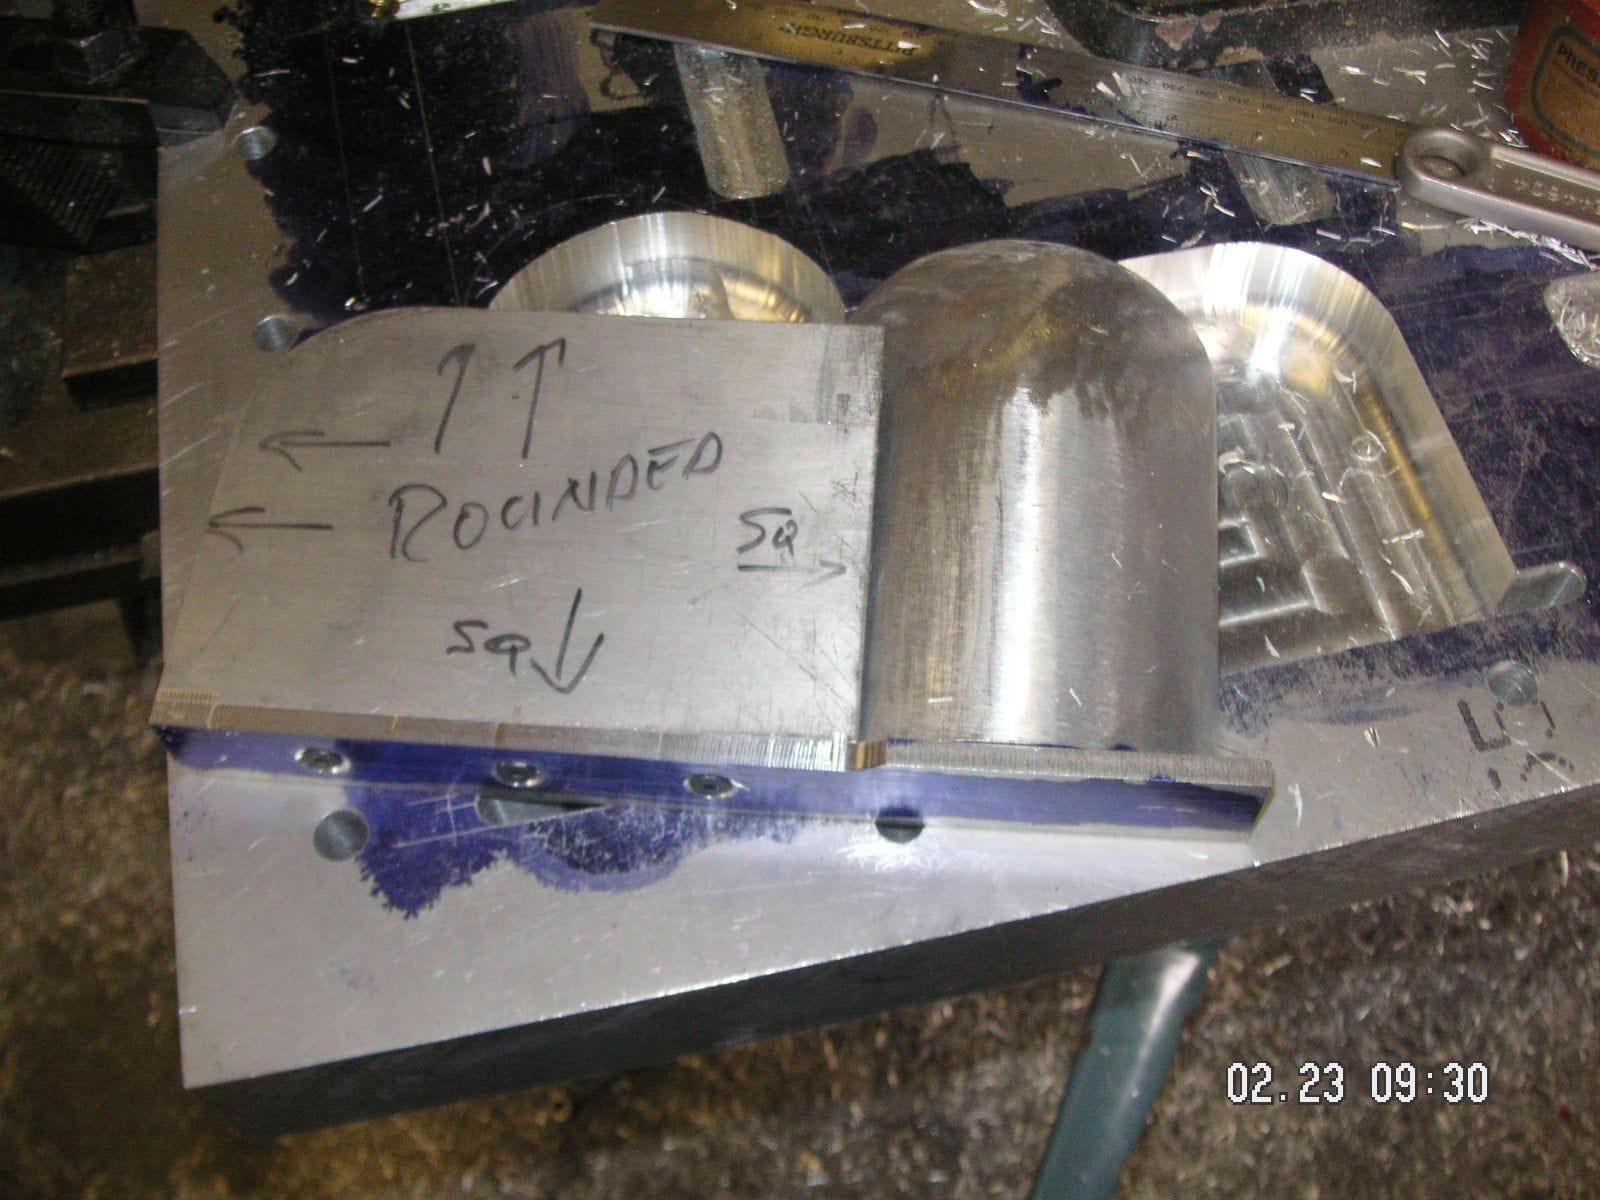
I came home a bit early and did the mill faceting of the duct form. Next I'll subject it to my belt sander and try to finish it out smooth. You can see the facets here together with the booboos I put in it when it rotated against the mill bit in the vise. I think the booboos will mostly sand out and what is left of them will not likely show up in the formed pans since they are negative and the metal will simply form over them.
That turns out to have been a fun exercise. I just noticed that I milled all the facets on the wrong side, since it is not symetrical. It has a slight angle to it to match the side of the bottom of the Pan which is angled a half inch in 12 inches. Now I get to correct the mistakes, all of them.
As I think I mentioned before, my Father taught me to be a perfectionist. The result is that I kind of work in my fabricating on a three strikes and you are out basis. That is not strict, but generally if I end up with three errors, even ones that might be accomodated for, I will start over. With this Duct Form I made three errors, but the last one was major and I would have done it over even with that error if it was the only one. It used to be that in many of my projects it turned out to be the third or fourth itteration of the object being made that ended up the final product with the prior ones turning themselves into patterns for the next. Over the years I have gotten a little better at it and often the first one is successful or, as in this case, I hope, the second one.
Last edited by Jerry Feather; 02-14-2020 at 11:00 PM.
I got a good start on the facets for this second try at the vent duct form and it is going very well. I had to ship some items this morning so I got a late start. I Hope to make much more progress tomorrow on it.
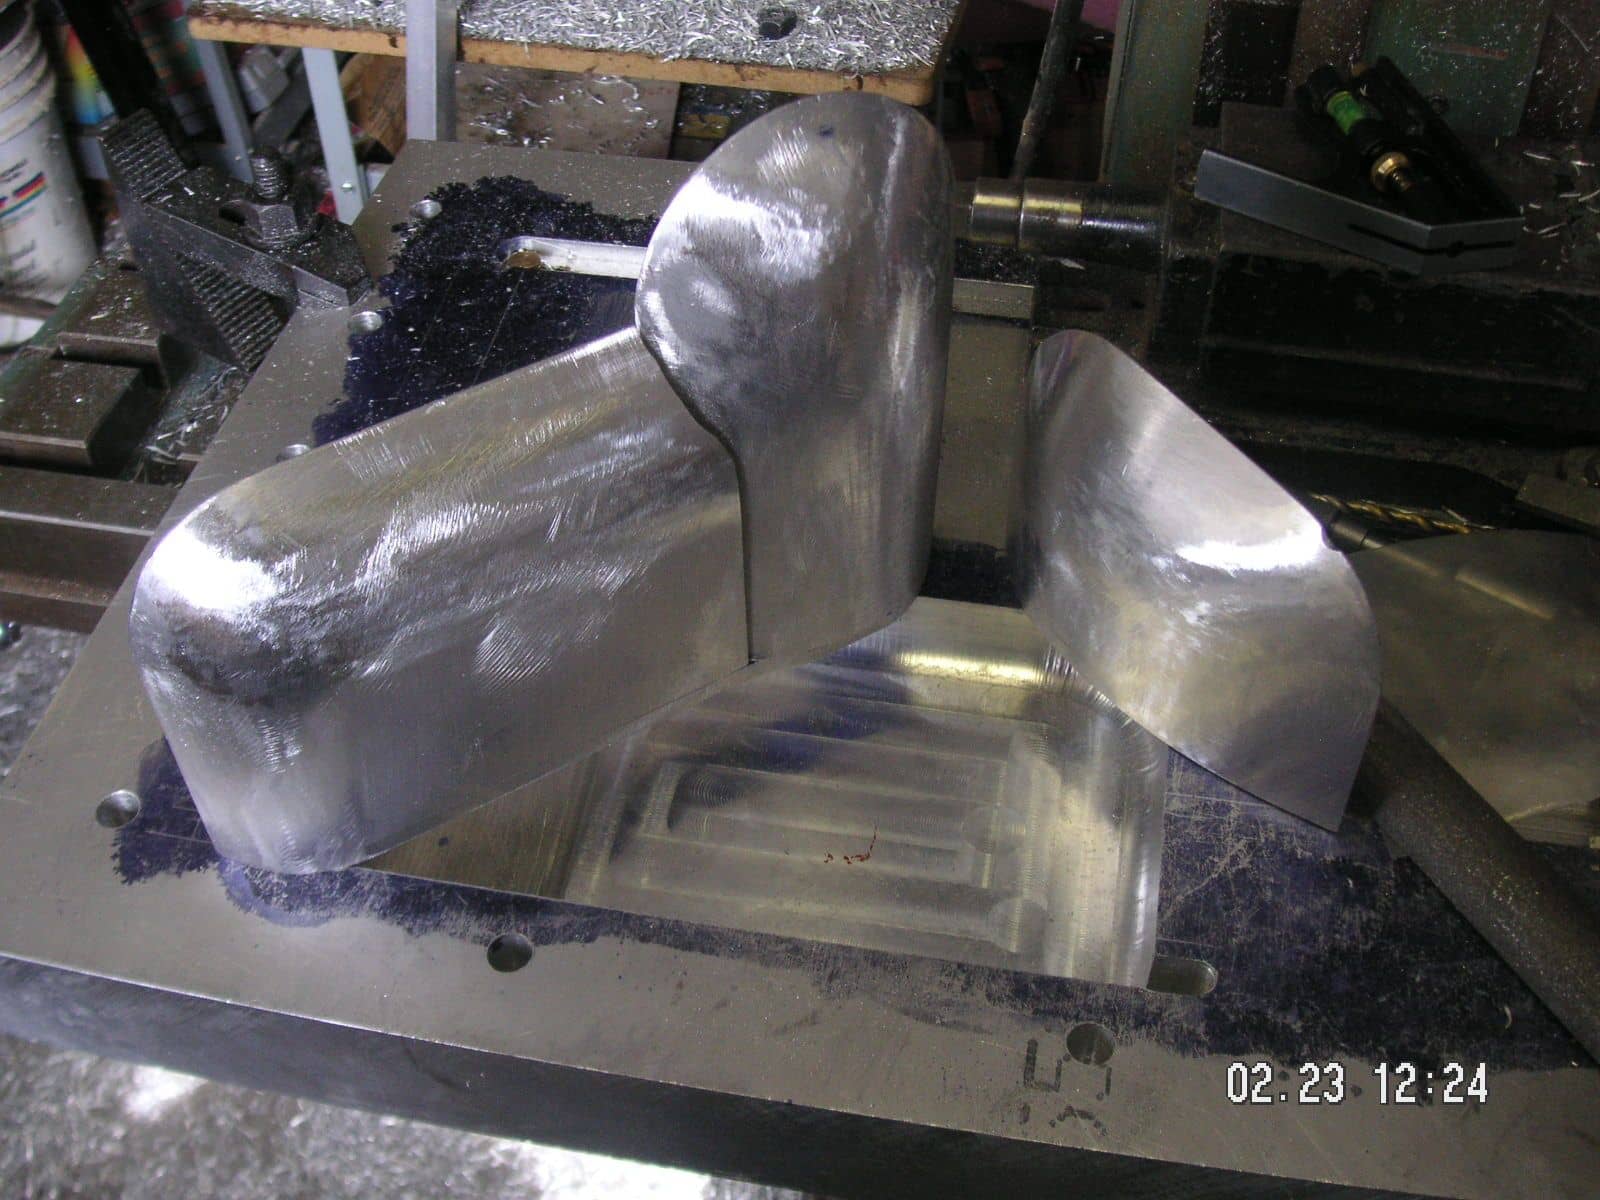
I have the Vent Duct Form nearly complete and nearly correct this time. I'll grind it out some more to its final shape and live with the result. I also got a little start on the mate form for the alternator. I had a piece of one inch plate that I think I bought with the basic material, but I can't find it; so I picked up a piece of water jet drop plate that had a corner that is just barely large enough for this piece so I'm gong to go with it.
Thanks, M., for that little comment, although I do not consider myself very artistic. However, I do think that much of what I do in my various fabricating efforts is like or similar to what many artists do, except I think I do most of it about twice as well as most or any of them. The difference is that if this were merely art I think I would have just finished out the mistakes I have made and put them in the final piece and simply call them "artistic nuances." Even at that I tend to do that in respect to any very small blemish in any of my finished products, rather than admit that they are a blemish, they are artistic nuances, and the benefit is that there is no extra charge for one of them.
Actually I am pretty good at finishing out my products and you will be hard pressed to even find an artistic nuance in one of them.
Last edited by Jerry Feather; 01-01-2021 at 11:48 AM.
Yesterday I milled out the recess for the alternator bulge and did some work on the form for it. I took some pictures as I was going along yeaterday
, but they would not upload to this site. Then I discovered that my little camera had slipped into video mode and I was taking some short videos. Anyway, here are a couple of pictures of where I am now. I'm trying to decide on the slope of the two rounded edges for this last piece and then I'll go out and work it up the rest of the way. I have put the quarter inch aluminum piece along its rear face which will be modified later to help form the correct rear adge of the pan.
Well that really went smoothly. I have the last bulge piece pretty much finished and sort of conneccted to the other piece and both are rounded in my belt sander to a pretty good shape. I have a little more machine work to do on the base plate and then I'll be able to get back on some of the smaller detail form pieces. I have most of them pretty well figured out, but some of that will just sort of happen as they progress.
It occured to me later yesterday that I wasn;t quite finished with the last piece of the alternator form I had just worked up. I remembered that it needs to have a chunk cut out of the rear inboard end of it to help fashion the trailing edge of the pan that kind of fits around the oil pan. It took me a couple of hours to desigh and cut the chunk out and then fashion the quarter inch aluminum edge for it that will later be further modified to help correctly finish the trailing edge of the pan.
Next I have to decide how to cut of the ends of the two pieces of quarter inch bar stock to meet at the corner. It probably doesn't make any difference which way they overlap. These form pieces I have been working up are the male parts of the form at their locations and the recesses in the base plate are the female forms. With the corner cut out of the last piece I made now requires a small but pretty complicated piece of aluminum to be but back into the recess to complete the female part of the form for that rounded corner.
Then I need to open up the female slot along the back of the die so it opens up into the female recess last completed. After that I need some 3/8 in bar stock to work up the female piece of the form that forms the trailing edge of the pan at the bulges. With that I'll be taking the quarter inch stock off the these forms and trimming their forming edges by a tenth of an inch which is the depth of the jog I plan to finisht the trailing edge with.
Then, I think the final piece of the base plate will be a flat piece of aluminum sheet that will also complete the trailing edge at the base plate. After that I can start working on the top plate and placing these various items in their correct positions, and bolting them in. That is going to be a real trick since they will all be out of sight. It is going to take a lot of very careful measurements.
I love the idea of this, so I am following along, or, at least, trying to!
If I followed the first part of that last post correctly, my thought is to make choices so that if there is any error, the error is in a favorable direction. For example, a dimple on the road-facing side as opposed to a bulge on the road facing side (or vice versa if that dimple would cause interference with the protected components side).

 02-09-2020, 09:34 PM